
by Liz Kettle
Make a Marvelous Memory Book to celebrate that
special occasion or person in your life.
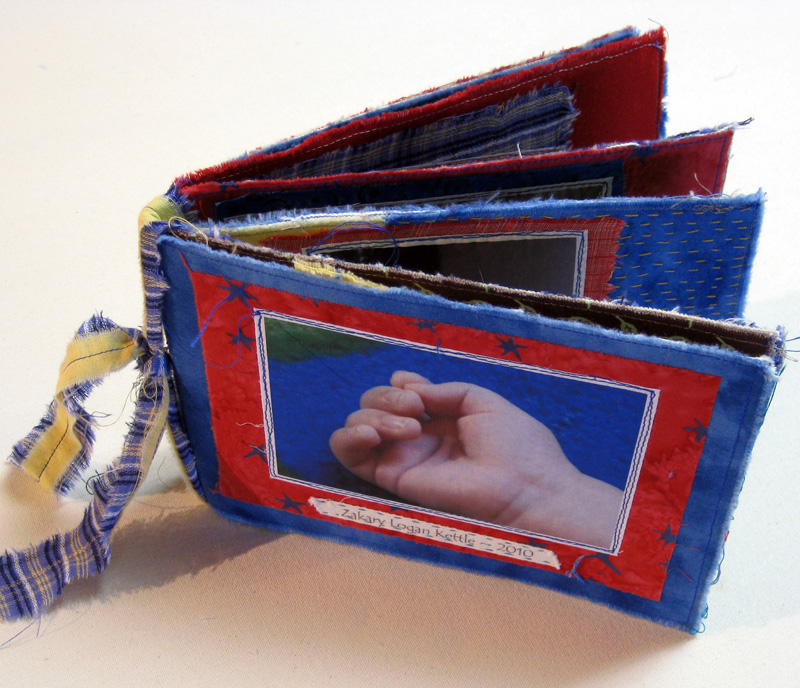
For those people for whom we would like to create something special rather than grab another gift card from the sea of choices, a fabric memory book is my favorite gift. Fabric memory books are a cross between a photo album and a scrapbook. But because they are made with fabric, they are soft, tactile, and ask to be handled and loved in a way that paper books do not.
I have made these little books to commemorate a special trip, event, or a special person in my life. Memory books can be made in any style and they can be embellished as much as you like. They are always a hit with the recipient and each one is a unique gift. Best of all, they can be made in a day!
Supplies:
- Photos to print on fabric using your inkjet printer*
- Inkjet fabric sheets prepared for printing (The Electric Quilt Company)
- Assorted fabrics (canvas, denim or duck cloth for the page base and others to go with your theme)
- Thread to coordinate with your fabrics
- Fusible web (Misty Fuse) and Teflon craft sheet or parchment paper
- Rotary cutter, fabric ruler and cutting mat
- Scissors – Havel’s 8″ Quilting/Sewing Fabric Scissors
- Embroidery floss or other embellishment items
*if you aren’t able to print photos on your printer you can use traditional photos printed on paper but they won’t be quite as durable. Attach them with double stick tape before stitching around the edge.
Steps:
1. Decide on the size of your finished book. Mine is 6” high by 8” wide. Using your rotary cutter, ruler and mat, cut your canvas to the height of the page you want and double the final width. My canvas is 6” high by 16” long. I cut 3 pieces of canvas to give me 10 inside pages and a front and back cover.
2. Print your photos on your inkjet printer using a prepared for printing fabric. I prefer Premium Cotton Lawn by The Electric Quilt Company because it has a very fine weave and the photos print clear and crisp but other prepared for printing fabrics work well in this sort of project. Refer to manufacturer’s directions for rinsing and heat setting. I printed my photos at 3 ½” x 5”. If you are making a smaller or larger book you can scale your photos accordingly. At the 3 ½” x 5” size 4 photos will print on one sheet of prepared for printing fabric.

3. Cut Misty Fuse or other fusible web 8 ½” x 11” and adhere to the back of your photo printed fabric. One of the reasons I prefer Misty Fuse is that it is very lightweight and doesn’t change the hand of the fabric as much as other fusible webs. It does present a challenge in photos though. If you look closely you can see the light web on the back of the photos. Use a Teflon craft sheet or parchment paper to protect the iron from the fusible web. Iron on top of the craft sheet. This step is called pre-fusing. The fusible is attached to the fabric back and will reactivate when you are ready to fuse it to another fabric.

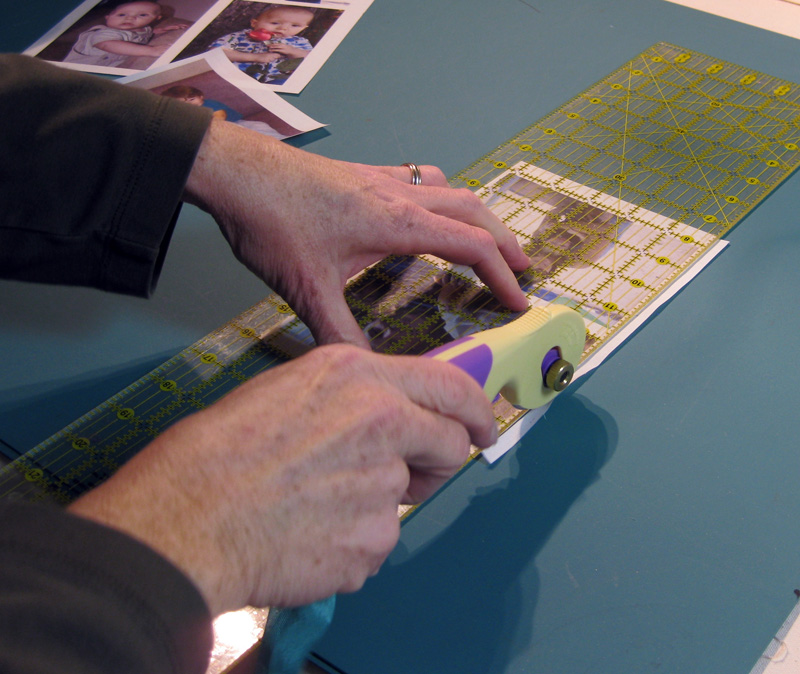
4. Using your rotary cutter trim the photos as desired. I wanted to keep the snapshot feel of my photos so I left a 1/8” white border around each photo. You could trim the photos to the edge or cut out around figures and images.
5. Now, gather fabrics which relate to your theme. There are no rules here. You can use a wide variety of fabrics including quilting, home décor, clothing scraps, fancy fabrics etc. My theme is my grandson Zakary. I chose boy type fabrics in bright colors. I ended up not using a wide variety of colors in my book but you can have every page different in your book if you chose. I often choose fabrics that relate to the photo. Don’t get too caught up in finding the perfect fabric…sometimes matching is not as effective as slightly miss-matched.

6. Decide the order your photos will appear in the book and begin designing pages. I start with a background fabric and then choose a fabric to go directly under the photo. Often, I will add more than 2 or 3 fabrics to a page but it depends on the theme and how complex I want the final book to be.

7. Use your rotary cutter to cut your background fabric to size or you can take the more casual route and rip your fabrics. I chose to rip my fabrics because frayed edges seemed appropriate for a little boy theme. For a no math approach to design I simply layer my fabrics and images and eyeball how big I want my pieces of fabric to be. Then, I use my 8” sewing scissors to just snip a tiny bite into the fabric where I want to rip it. You don’t want to make a big cut into the fabric or you will have a section of fabric that is cut straight and not ripped. I love how sharp these scissors are all the way to the tip. I rip fabric a lot because I love the frayed edge and it is frustrating when your scissors don’t cut at the very tip.
 8. You can work on one page at a time but I usually do all of my designing at once. I lay out all the pages, in the order they will go in the book and cut or rip all of the fabrics to size. When you are happy with the page designs cut pieces of Misty Fuse for the layer of fabric that is under the photo and any other layers you have added. Build your design from the bottom page base up to your photo on top and iron to fuse both layers to the base fabric at the same time. For these additional layers of Misty Fuse and fabric I simply place the Misty Fuse between the layers of fabric. You could pre-fuse each one if you prefer. To clarify this layer approach: I have my base layer of fabric, a piece of Misty Fuse cut to the size of the second layer of fabric, the second fabric, the photo which is pre-fused goes on top and I iron them all at the same time.
9. Next, I add some machine stitching. I chose to simply machine stitch around each of the photos. I used a free motion foot with the feed dogs lowered because I wanted to have a more casual feel to the stitching. You could stitch with the feed dogs up and use a straight or decorative stitch for different effects. You could stitch around each layer of fabric as well as the photo.

10. Now we are at the fun embellishment stage. I wanted to keep my book simple this time so I opted for some hand embroidery. I love how much texture you add with simple running and cross stitches. There are many ways to embellish your book. I will often print quotes or descriptions on fabric to add to my pages. You can add beads, found objects, lace, trims and so much more. At this point keep any hard embellishments clear from the edges.


11. After you have added your embellishments we simply need to add our pages to the book base. Lay out your pages in order so you don’t get confused. Cut Misty Fuse to the size of your canvas page bases; 6” x 16” for my book. You need one piece of Misty Fuse for each side. Begin with the front/back cover piece. Layer the canvas with the Misty Fuse and layer your photo collages on top.

12. Iron to fuse the layers together.

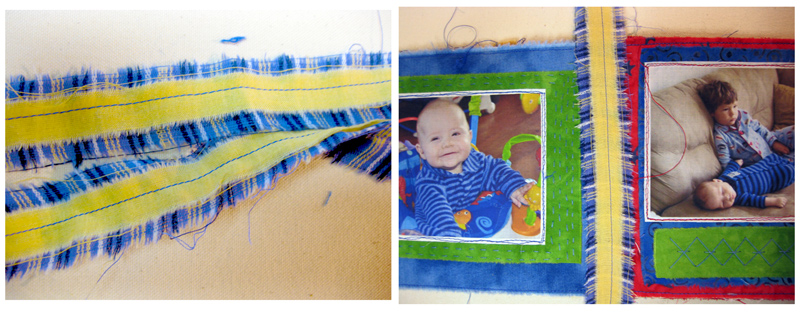
13. Turn the canvas over and layer another piece of Misty Fuse and your 1st inside page collage and your last inside page collage side by side. Iron to fuse the layers together. Repeat with all the remaining canvas page bases taking care to keep your pages in order. When all the pages are finished they will be stacked on top of each other so you may want to make a note of the page order in relation to which side of the canvas they go on. It can be a little confusing your first time as you can see in the photo above the second set of pages should be flipped over before I sew them.

14. After all your pages are fused together you will stitch around the edge of the pages. I used a straight stitch but you could use a decorative stitch that goes with your theme. Don’t forget that your bobbin thread will be the thread that shows on the other side of the page.

15. The last step is to assemble your book. Layer the pages together in order with the cover first, then the second set of pages and finally the middle pages. Double check to make sure they are in the proper order. I confess in my excitement to finish, I stitched one page upside down…I should have looked closer at my photo in step 13! That gave me an excuse to use my awesome sharp Havel’s seam ripper. Fold the book in half and press to mark your stitch line. Stitch a straight stitch down the fold line through all 3 page sets of your book. Close the book and press again.
16. As a last little optional embellishment I like to add a strip of fabric, ribbon or trim to tie around the book. This covers any exposed canvas. I stitched a piece of yellow fabric to a piece of plaid. Lay the fabric or ribbon along the middle page. Turn the book over and tie in a square knot or bow. The perfect gift!


Liz Kettle is a textile and mixed-media artist who loves sewing and creating and sharing that joy with others. She is co-author of two best selling books: Fabric Embellishing: The Basics and Beyond and Threads: The Basics and Beyond. Share Liz’s stitch journey on her website and blog www.TextileEvolution.com

4 Responses to Free Project: How to Make a Memory Book