The Professionals Share Their Secrets- Part 3

Sewing and Quilting Basics- Q & A with Professional Artists

The past few weeks we have been asking professional artists in the sewing and quilting world to give us their tips and tricks/advice on a list of questions that will help to benefit all of the beginning and intermediate quilt artists out there.  Our goal is to post one question per week, so all artists reading can join in on the conversation and feel free to leave a comment.

Thread

We are now on Part 3 of our series on quilting basics, so let’s get right to it-

Part 3 of 10:

Question:

What is your opinion on the best type of thread to use if you are a beginner?

Leslie Tucker JenisonLeslie Tucker Jenison: Oh, I have a LOT of opinions about thread! Thread is the unsung hero of quilt making. More problems are related to using cheap, nasty thread than just about everything else combined. I use three types of thread and I purchase them from two companies- I have thrown everything else away.

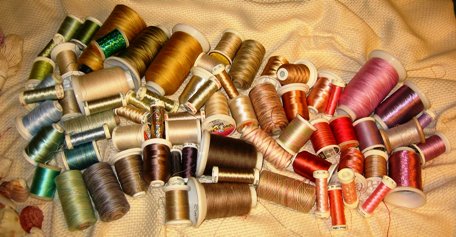
I use mercerized cotton thread from Superior or Aurofil. Both companies make absolutely wonderful thread. Mercerized thread will not “shed” like cheaper thread. Forget all that stuff about long strand Egyptian cotton: the important thing is whether or not it has been mercerized. I also use trilobal polyester thread, all from Superior. I adore it. Finally, I use a huge amount of polyester monofilament thread, called Monopoly, which is sold by Superior. This is the only thread of its kind that behaves, does not stretch and tolerates heat from the iron. I use this in the bobbin and it works with every thread type.

Another important secret- I use a Topstitch needle for everything. Everything is better with a topstitch needle. Superior threads sells titanium-coated Topstitch needles, and they last about 8x longer than a non-coated needle. My old pre-coated rule was to change my sewing machine needle after about 8 hours of sewing, but the coated needles last much longer.

Ruth Chandler

Ruth Chandler:  Beginners will want to use cotton and blends. I think they are the easiest to start with. They have great colors and don’t ravel and break as easy. I think too much is made of what threads are best. I use just about anything to quilt with, but I do use cotton to piece. I would not recommend starting with a metallic thread, they can be frustrating without the right needle.

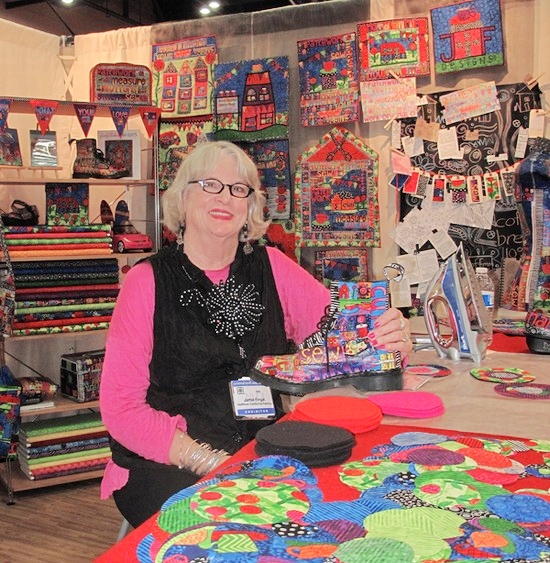
Jamie Fingal

Jamie Fingal: I started my journey as an art quilter using cotton thread, but found that I really liked polyester/rayon threads, so that is what I used exclusively.

Liz Kettle


Liz Kettle: Cotton or poly cotton blends are the best thread for beginners. Be sure to use the same thread top and bottom until you understand changing your tension settings. Learn about needles too! (To read Liz’s blog on deciphering needles click here.)

Terry white


Terry White: Specifically for beginners, natural fiber threads are the best because they work so easily with the machine and cotton fabric. Use regular sewing thread and 100% cotton thread for piecing, cotton and rayons for surface design work, and cotton for quilting.


We hope that this helps making the decision process a little bit easier for all of the beginners out there. Do you have an opinion on which thread you think is best? Let us know below! Check back next week for the next topic the professionals will spill their secrets on!

***

Read Part 1 and Part 2 of Professional Secrets here.

[hs_action id=”5636″]

Posted in Uncategorized | 16 Comments

The Professionals Share Their Secrets – Part 2

Sewing and Quilting Basics- Q & A Professional Artists

We wanted to ask some professional artists in the sewing and quilting world to give us their tips and tricks/advice on a list of questions that will help to benefit all of the beginning and intermediate quilt artists out there.  Our goal is to post one question per week, so all artists reading can join in on the conversation and feel free to leave a comment.

Fabric Pre-Washing

We are now on Part 2 of our series on quilting basics. You won’t want to miss any parts of this series- it’s going to be stuffed with great advice from some of our favorite professional artists and will help anyone wanting to improve their artwork.

Part 2 of 10:

Question:

Now that you have read Part 1 and know which fabric you want to use the question is:  To Wash or Not to Wash? Will the reds, blues and other colors bleed? What is your take on pre-washing your fabrics?

Terry white

Terry White: I pre-wash EVERYTHING! If the reds and purples, blues, blacks or browns bleed you want them doing it before you put them into a quilt. My reasons:
1. Fabrics have chemicals including sizing, finishing and dyes which can result in skin allergies appearing over time.
2.The finishing can mask a poor quality fabric. If after washing your fabric it comes out without having much body or color left then it might not have been as nicely woven as you had originally thought. Also, it may shrink a little and you want this to happen before you put your lovely work into it. 3. Various weights and thread counts of different fabrics will stitch better together.

Leslie Tucker JenisonLeslie Tucker Jenison: When I began quilting a million years ago I always pre-washed my fabric. I was warned against colors running, shrinkage and more.
These days, I use both commercial and hand-dyed (by me) cloth. By the time I have finished the process on my hand-dyed cloth it has been pre-washed multiple times to remove the excess dye and/or print paste. I know beyond a that my cloth is not going to bleed or shrink because my final wash is always in hot water!
I do not make many bed quilts so I rarely pre-wash my fabrics. However, if I plan to make a quilt that I know will be laundered, such as a baby quilt, and I am concerned about the dye stability in the cloth, I pre-wash.

Ruth Chandler Ruth Chandler: I always wash my fabrics. I wash them in detergent with no color or scent and I always use Synthrapol. This keeps the dyes from attaching to the fabrics being washed, plus it can be found in many fabric stores for a reasonable cost. Since reds and blues are especially bad for bleeding, even after pre-washing, so I’ve made it my practice when washing my quilts to use the Synthrapol every time. Lastly, I prefer cutting the edges of my fabric with a wave blade rotary cutter or a pair of pinking shears to help lessen raveling in the washer.

Jamie Fingal

Jamie Fingal: I almost had to laugh as I was reading this question- I don’t pre-wash anything!

This is because my quilts, which are mainly made for hanging up on a wall, are never going to be washed.

On the back label, I typically will ass the words, “DO NOT WASH.”

Liz KettleLiz Kettle: I used to pre-wash everything. Now since my work has changed my need to pre-wash has also changed. Besides that, who can stand waiting to have to wash, dry and iron that fabric? I always want to get right to it.
The majority of my work is for the wall and will never be washed, so I don’t worry about pre-washing. Even for the quilts I make that will be washed I still don’t pre-wash.
I am willing to take the risk rather than take the time to pre-wash.

 ***

For more information on our featured artists click here.

Now that the pros have spilled their best advice on fabric selection, we want to know what you think! What’s your opinion? They seem to be almost split down the middle on their preferences. Do you have any helpful advice or tips that we could all benefit from? Check back next Thursday for the next part in our series with the pros!

[hs_action id=”5636″]

Posted in Fabric, For Beginners in Sewing, Fun Stuff, Guest Writers, How To, Interviews, Jamie Fingal, Liz Kettle, Quilting, Terry White, Tutorials, Uncategorized | Tagged , , | Comments Off on The Professionals Share Their Secrets – Part 2

The Professionals Share Their Secrets

Quilting Basics Q & A with the Professionals

We decided to ask the professionals some questions that are being regularly asked by beginning and intermediate quilt artists.  We will be trying to post one question per week, so all artists reading can join in on the conversation and feel free to leave a comment.

Here’s part 1 of 10:

Fabric Selection for Beginners

Question: Fabric-
How do you choose what type to use?
Is cotton the best choice for beginners?

Answers From the Professionals:

Liz Kettle
Liz Kettle:
I choose fabric based on the call of the fabric sirens. Yes, these are the same sirens who used enchanting music to lure sailors close to their islands so they would crash their ships onto their shores. They eventually must have gotten bored with sailors and took up luring quilters like myself into fabric stores.

When I make quilts that will be used to cuddle under I stick with cotton fabric. But, when I am making art quilts anything goes! I do mean anything.

One mistake I made early in my quilting days was to economize and use a bed sheet for the backing of a quilt. Bad idea! Especially bad idea if you are using high thread count sheets. They are really difficult to quilt through. Muslin makes a great back as long as it is a reasonable thread count. Muslin comes in all varieties of quality. You don’t want to see right through it. I like to piece my quilt backs so they are interesting to look at.

Terry WhiteTerry White: 
Cotton fabric is definitely the best choice of fabric for beginners for four reasons-
1. It’s readily available and inexpensive.
2. It cuts and stitches more easily than any other fabric.
3. It is totally washable with minimum shrinkage.
4. It is a good basic fabric with which to learn many techniques…later when other types of fabrics are desired, one can learn the special qualities of each fabric and fine tune the technique for that fabric.

Leslie Tucker JennisonLeslie Tucker Jenison:
When it comes to cloth, I love it all!  I use a wide variety of cloth in my work, and even use some truly weird things, such as my used, over-dyed Oil of Olay facial cloths (yes, I have been told before that I am a bit weird).

For beginners, you just can’t go wrong with a good quality cotton broadcloth.  It has a fairly high threadcount (this refers to how many threads per square inch), it is not slippery, and it is easy to stitch either by hand or machine.  The higher the thread count the more resistance there will be for a needle, so keep this in mind when looking at cloth.

Silk is lovely and adds wonderful sparkle to a quilt.  It can be a real “diva”:  hard to handle and fussy, unless stabilized in some way for stitching.  I know this because I learn everything the hard way.  I came very close to wadding up a gorgeous silk charmeuse project and throwing it in the trash before (duh) it occurred to me that some stabilizer might be in order.  I’m glad I persisted because this quilt won a best of show!

Ruth ChandlerRuth Chandler: 
Cotton is a good choice for beginners. It is easy to sew and does not have much stretch. It is best to try and pick fabric with the same density in weave for the first quilt. Batiks have a tighter weave and have less ravel. Batiks will be harder to hand quilt through because of the tighter weave. Once they are comfortable with cotton and have built up some skills they can move on to other fabrics. This does not mean they can’t but I think they will be happier with the end product if they do.  This is only true for quilts, garments are a different story I choose fabrics for their color and texture so I have a tendency to mix all types.

Jamie FingalJamie Fingal: 
Cotton is pretty easy to use, but you want to look at good cotton, with a tight weave.  The creases come out better, when ironing them flat.  They fuse better, and when fussy cutting objects, the tighter weave makes it easier to cut.  It is probably easier to start with cotton, so you can get a feel for how everything works, before you jump to Duponi silk.

 Get the same tools these professionals use here. 

Now that the pros have spilled their best advice on fabric selection, we want to know what you think! What’s your opinion on which fabric is the best choice for those who are new to the fabric arts?


Posted in Fabric, Fabric Selection, For Beginners in Sewing, Guest Writers, How To, Interviews, Jamie Fingal, Liz Kettle, Quilting, Select Fabric, Terry White, Uncategorized | Tagged , , | 2 Comments

How To Create A Deconstructed Nine Patch

by Leslie Tucker Jenison

Leslie here..I love manipulating traditional block patterns into something different. This tutorial will show you how to “deconstruct” the 9-patch block and make it into something modern.

Keep in mind as you are doing this that any pieced blocks will work for this, such as larger blocks, just as long as the number is “squared” (9 x 9, 12 x 12… etc.)

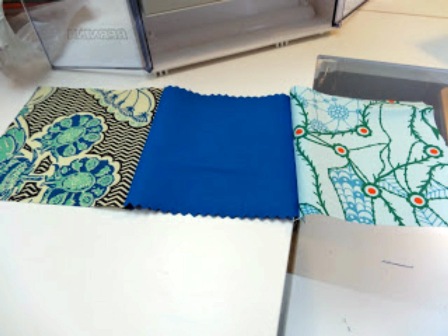
Select a set of fabrics to cut into blocks.  This step-out will show a range of solids and prints.  After creating this block I have to admit that I like tone-on-tone a bit better.   This set of fabrics will show you how the pieces look, so I think it is a good “demo model”.   Try to select your colors and patterns knowing that they are going to be mixed together a lot!


First, select your fabrics.

01 select your fabric 448x336

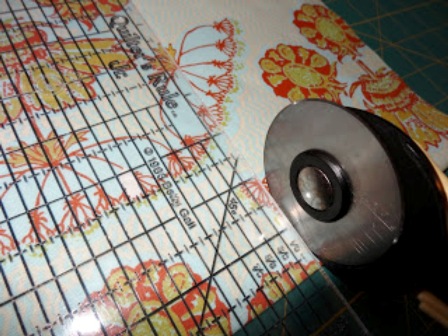
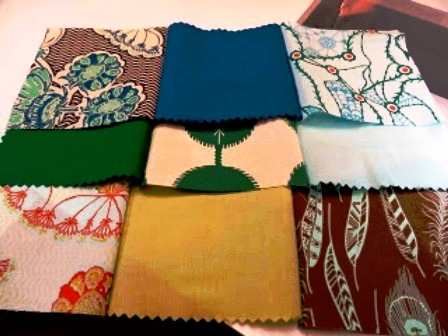
With your rotary cutter, cut squares of 9 different fabrics. These blocks are 5 x 5 inches square. Keep that in mind, because you will be cutting and re-piecing these blocks many times, the end-result will be much smaller than a traditionally pieced 9-patch!

02 cut 9-5x5 inch squares 448x336Decide on how to position the fabrics.
To begin, it is good to have a nice balance of color and print scale.

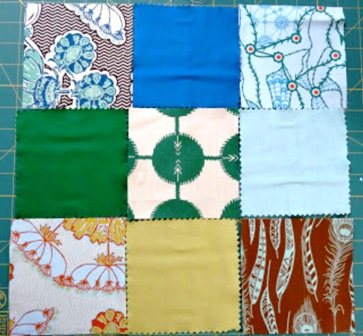
03 position fabrics 363x336 Once the blocks are cut and positioned, stack your “rows” of blocks in an orderly fashion to take to the sewing machine. My habit is to stack from the left to right, then top to bottom (for ease in transporting).

04 stack your rows of blocks 448x336

Use a ¼ inch seam allowance to stitch fabrics together.

05 use quarter inch seam allowance 448x336Set aside rows, top to bottom.

06 set aside rows top to bottom 448x336 07 set aside rows top to bottom  448x336

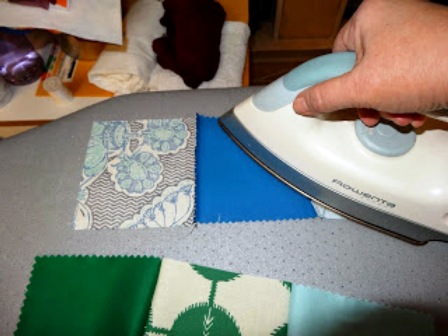
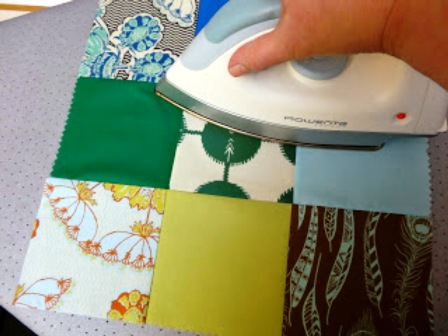
Take them to the ironing board and press. Press seams to one side in alternating directions for ease in piecing rows to each other.

08 press seams in alternating directions 448x336 See how the top and bottom rows are pressed to the left and the center row to the right?

09 top and bottom pressed left_center pressed right 448x336Stitch rows together and press.

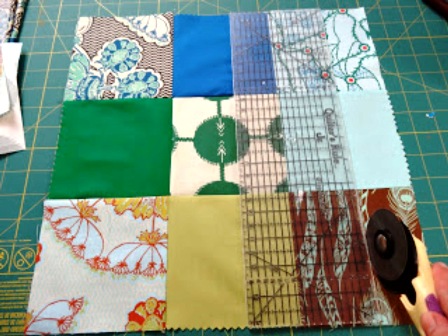
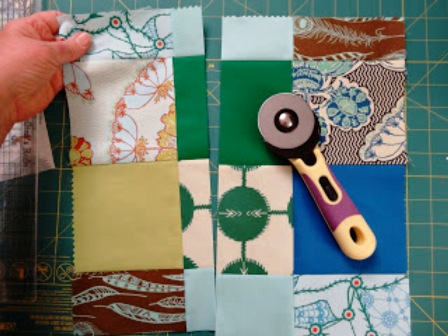
10 stitch rows together and press 448x336 Position the pieced block on the cutting mat and choose a place to cut through the block using your rotary cutter. 

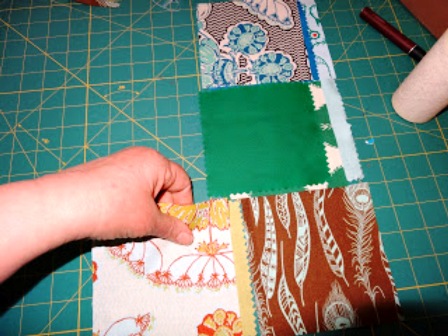
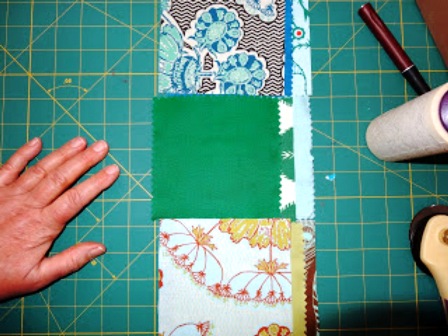
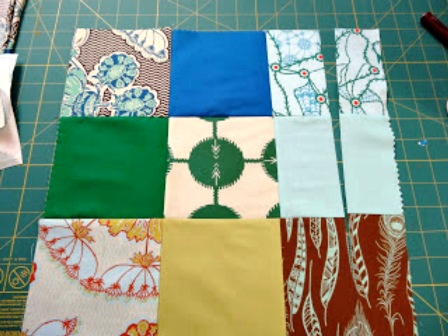
11 position block on mat and cut 448x336 12 position block on mat and cut 448x336Take the cut strip, turn it upside down and move it to the other edge of the block.

13 turn strip upside down and move to other side 448x336 Stitch the newly cut strip in place.

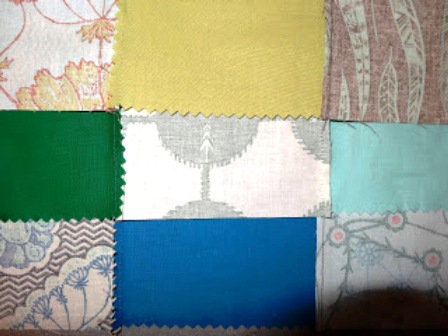
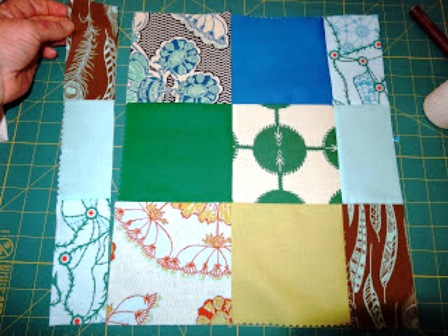
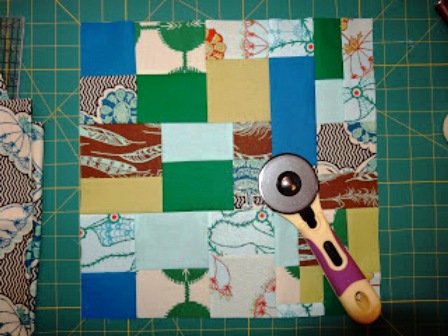
 Now, turn the block 90 degrees. Cut through a different area of the block. Turn one of the cut portions and piece it together.

14 turn block 90 degress and cut through different area of block 448x336 Continue this process until you have successfully deconstructed your 9-patch block. How many times you choose to cut and re-piece your block is a matter of personal choice.

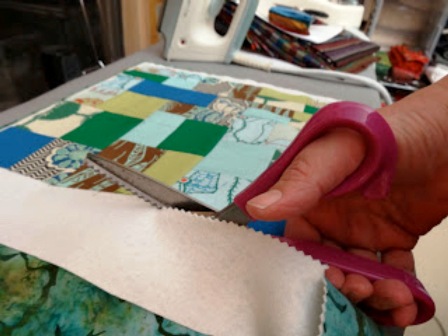
15 continue process as many times as you like 448x336 Position the pieced block over batting and fabric back. I like to trim most of my excess batting/backing with Havel’s pinking shears to avoid bulk and raveling.

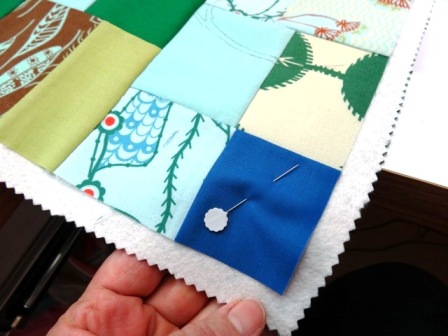
16 position piece over batting and fabric back 448x336Corners are pinned for stability during quilting.

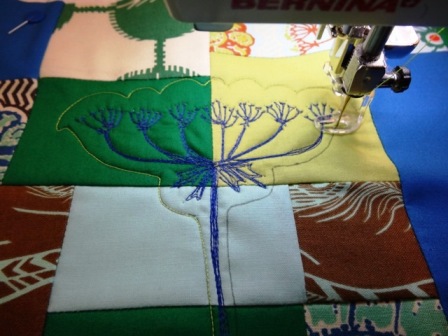
17 corners are pinned for stability 448x336Free motion quilting outlines an area of free motion embroidery.

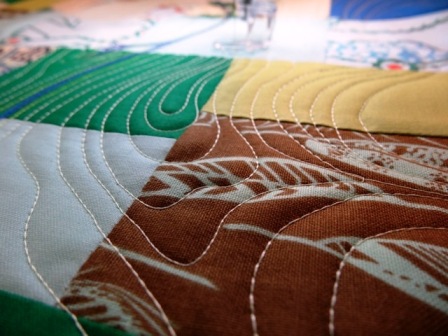
18 free motion quilting outlining free motion embroidery 448x336Close up of the quilting.

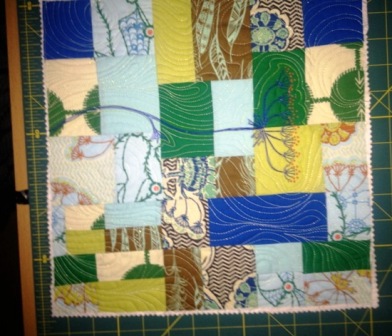
19 close up of the quilting 448x336The quilting is done. Now, for the finishing, but that is another blog post…!

20 quilting is complete 392x336

Thanks for stopping by and checking out my deconstructed nine-patch, all made easier by using all my awesome Havel’s Sewing tools!

For a printable download, just click here.

***

About Leslie Tucker Jenison

leslie tucker jenisonLeslie has been a quilter for over 30 years, and has been dabbling in mixed media for about ten years, and more intensively in the last 3-5.  She loves combining cloth and paper, and it seems that unconventional objects and materials frequently find their way into her work. Be sure to check out Leslie’s blog www.leslietuckerjenison.blogspot.com.

[hs_action id=”6875″]

Posted in Deconstructed Nine-Patch, For Beginners in Sewing, Guest Writers, How To, Make a Nine-Patch, Quilting, Tutorials, Uncategorized | Tagged , , , | Comments Off on How To Create A Deconstructed Nine Patch

Free Craft Project: A Plethora of Pinked Hearts

By Liz Kettle

A Plethora of Pinked Hearts - Conversation Hearts

I never used to be a “heart” person. When I was in my formative years, hearts were passé, trite and oh so unsophisticated. I was forced into using hearts because it is a great shape for teaching techniques; simple, recognizable, everyone can draw one, perfect for appliqué with curves with both inside and outside points and most people like them. Somewhere along the way I realized that even if they were trite in the “serious” art world I had fallen in love with them! I make my art to please myself these days so even if the sophisticated shock artists of the world roll their eyes and dismiss me as trite…I am happy with my hearts.

Just like we often dismiss simple shapes we dismiss utilitarian tools or stitches. Take the lowly pinking shear…designed to help prevent fraying at the edge of fabric, very utilitarian…of course, most seamstresses found the little zigzag edge appealing but didn’t often call upon that cuteness for decorative effects. I have always loved rickrack and pinked edges so when I wanted to make a woven fabric base with just a little more pizzazz than normal I grabbed those pinking shears and well…I fell in love yet again! How could I resist that little zigzag edge?
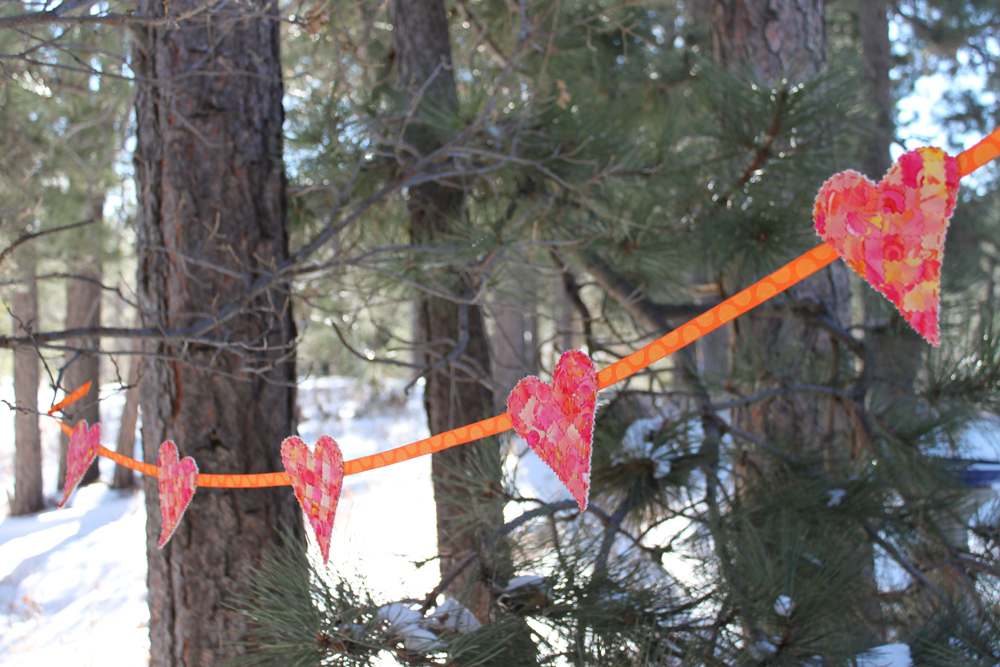
Hanging Garland of Pinked Hearts

Weaving fabric is another often overlooked technique that is simple and low tech but gives you a wonderful intricate look. Using the pinking shears for the woven fabric strips gave me the bonus texture I was looking for and also made it easier to weave my strips together. I thought for a moment that it might be going over the top but I went for it anyway and pinked the edges of my hearts for an easy finish that doubles the cuteness factor. I got a little carried away with possibilities for this plethora of precious pinked hearts. For most of these you don’t even need a sewing machine so they would make great group projects. I hope one or two of them inspire a little woven and pinked love in your creative life.
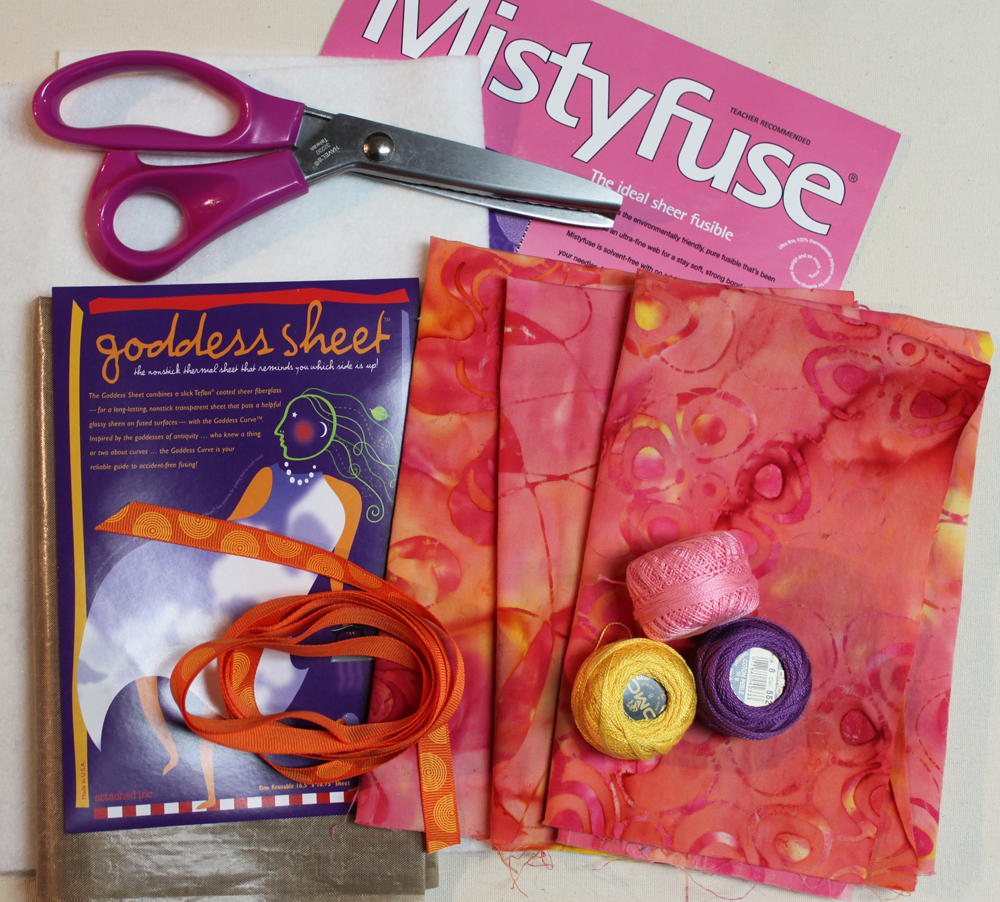
Pinked Heart Supplies

Supplies:

  • Fabrics: 2-4 fabrics that blend or contrast. Fat quarters work well or you could even use scraps. I used  pink, yellow and orange batiks.
  • Havel’s Pinking shears
  • Misty Fuse or other fusible web and a Teflon pressing sheet
  • Craft felt-I used white cut 12”x17” Yours can be smaller or larger depending on how many hearts you desire
  • Pearl Cotton or embroidery floss and embroidery needles
  • Marking pencil and ruler
  • Ribbon for the heart banner and poly fiberfill for stuffing puffy hearts

Steps for making your woven fabric base:

1. Use the ruler and marking pencil to draw parallel lines on your fabric ½” apart. I drew 12-15 lines on each of 3 different but blending fabrics. You can get a different look by using contrasting fabrics
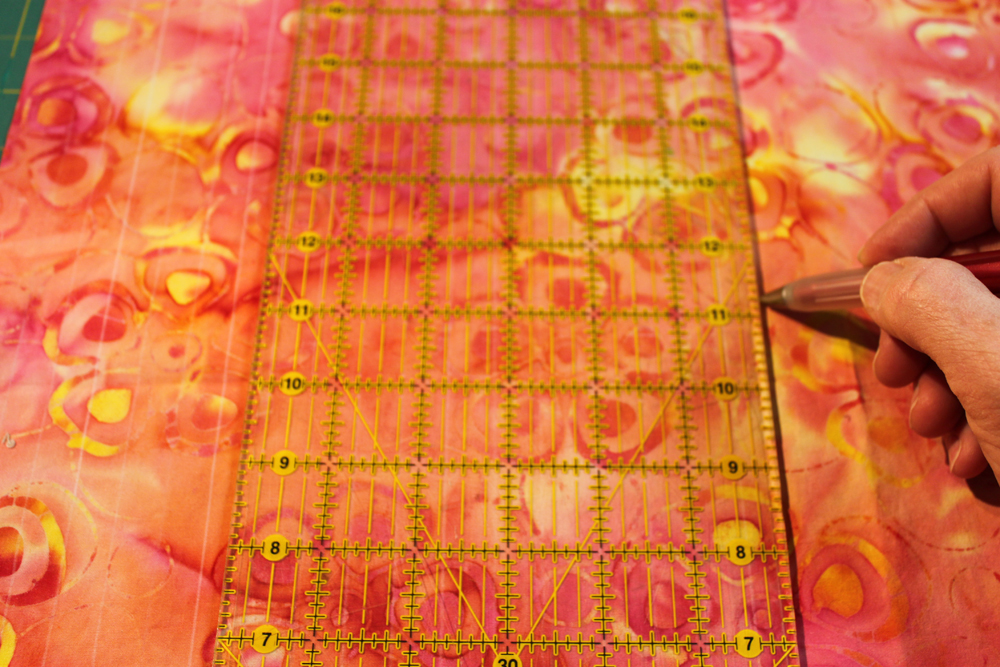
Use the ruler and marking pencil to draw parallel lines on your fabric ½” apart.

2. Use pinking shears to cut along each drawn line. With this project you don’t have to stress about getting perfectly even strips so don’t worry if you don’t cut exactly on the line every time.
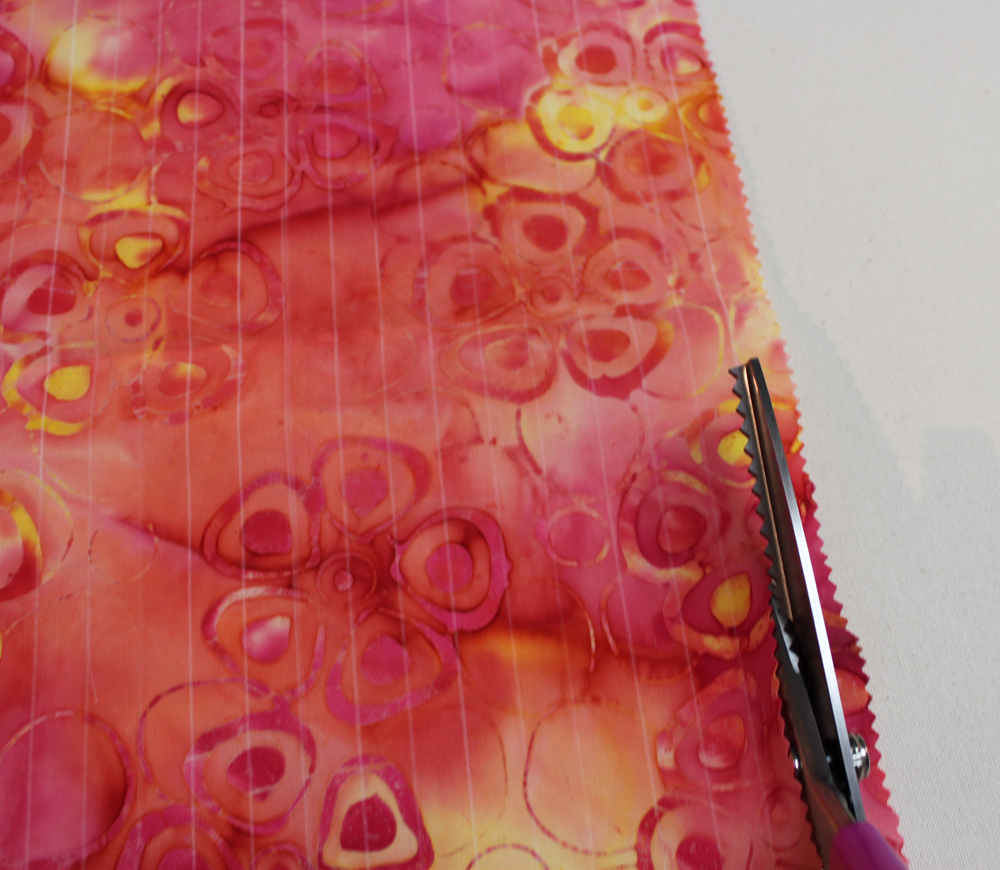
Use pinking shears to cut along each drawn line.

3. Make a big pile of pinked strips…isn’t it yummy???
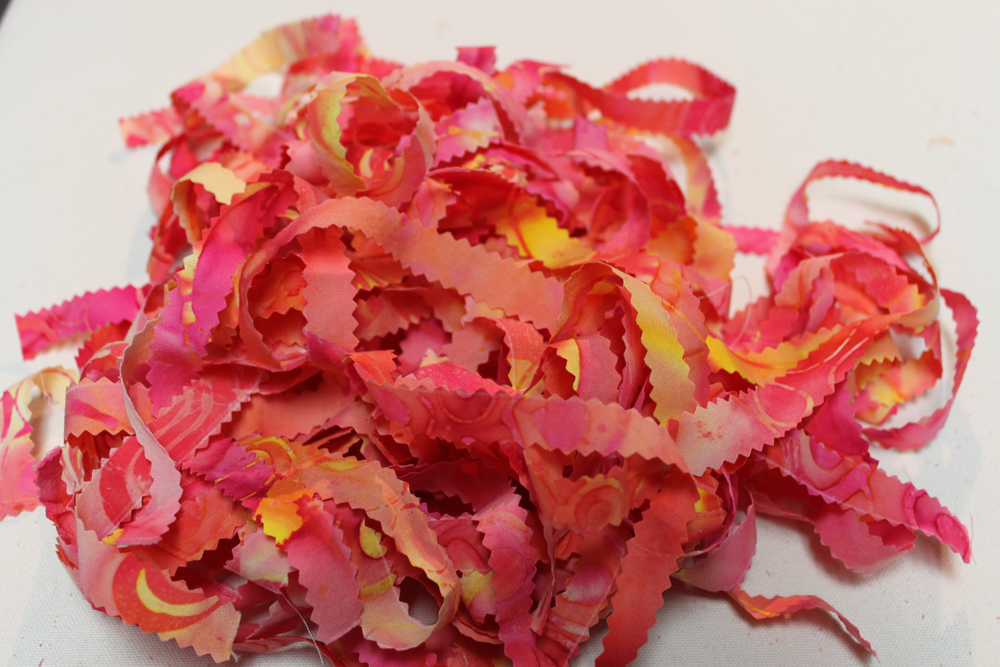
Make a big pile of pinked strips

4. Cut Misty Fuse to the same size as your felt base. Place on the felt and cover with a Teflon pressing sheet. Iron to fuse the web to the felt.
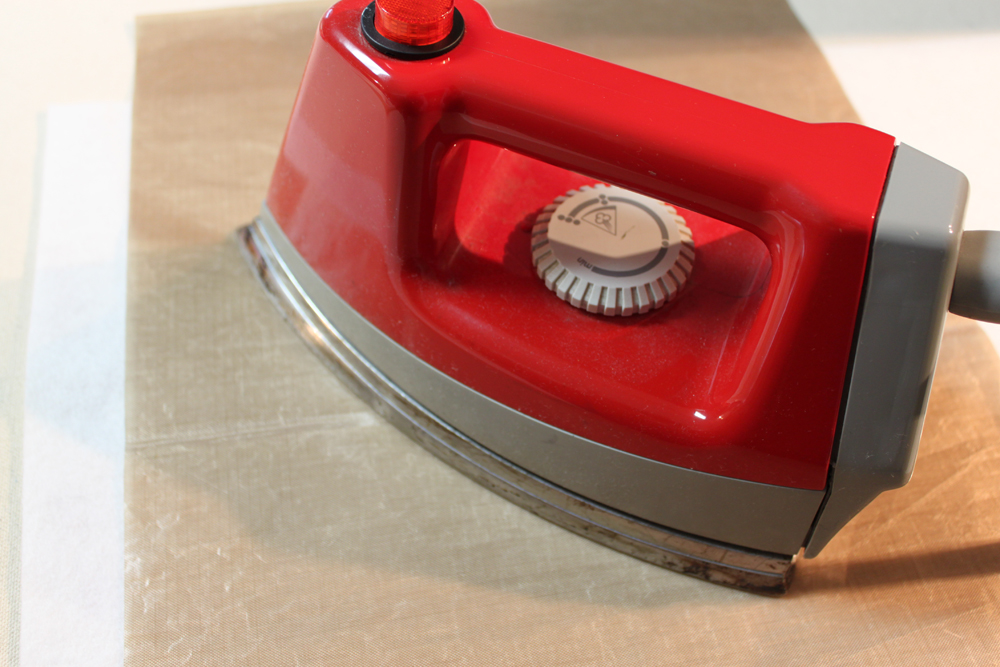
Cut Misty Fuse to the same size as your felt base.

5. Place pinked strips of pink fabric directly on top of the misty fuse/felt in parallel rows. Place them closely together but a little bit of white space is OK.
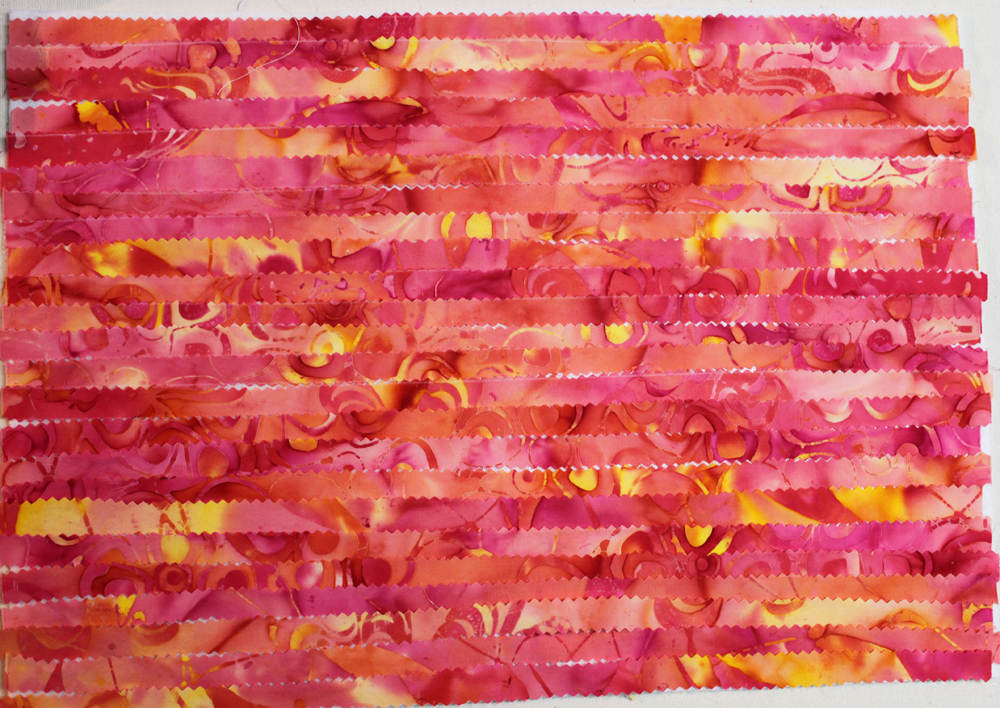
Place pinked strips of pink fabric directly on top of the misty fuse/felt in parallel rows.

6. Use the iron to fuse about a ½” edge of strips on one side only. Be careful not to fuse more than about a 1/2”.
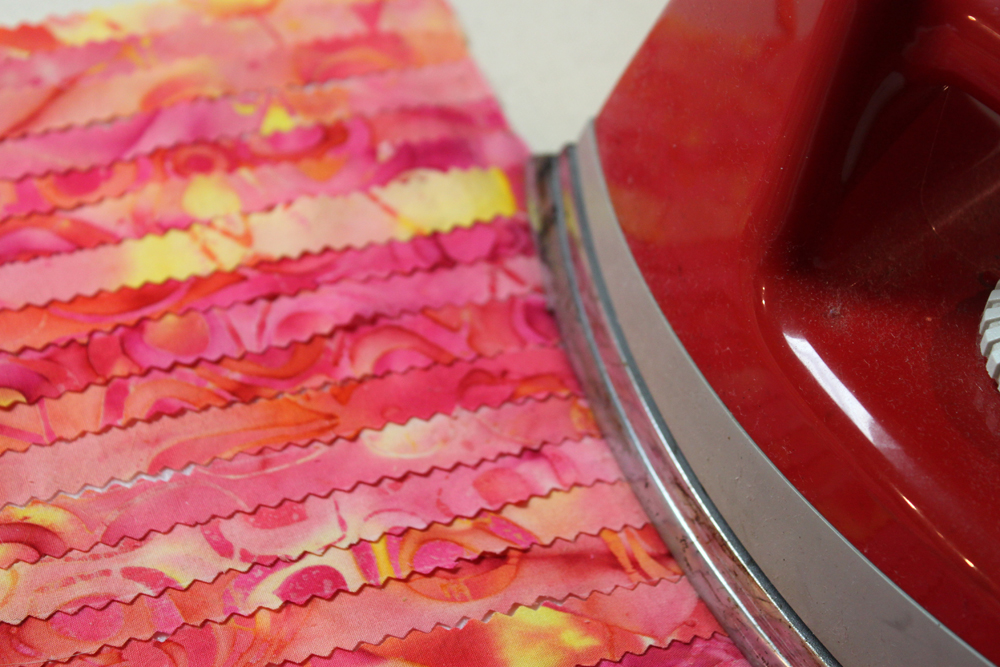
Use the iron to fuse about a ½” edge of strips on one side only.

7. Peel back every other strip of pinked pink fabric to the right. We will call this the warp row
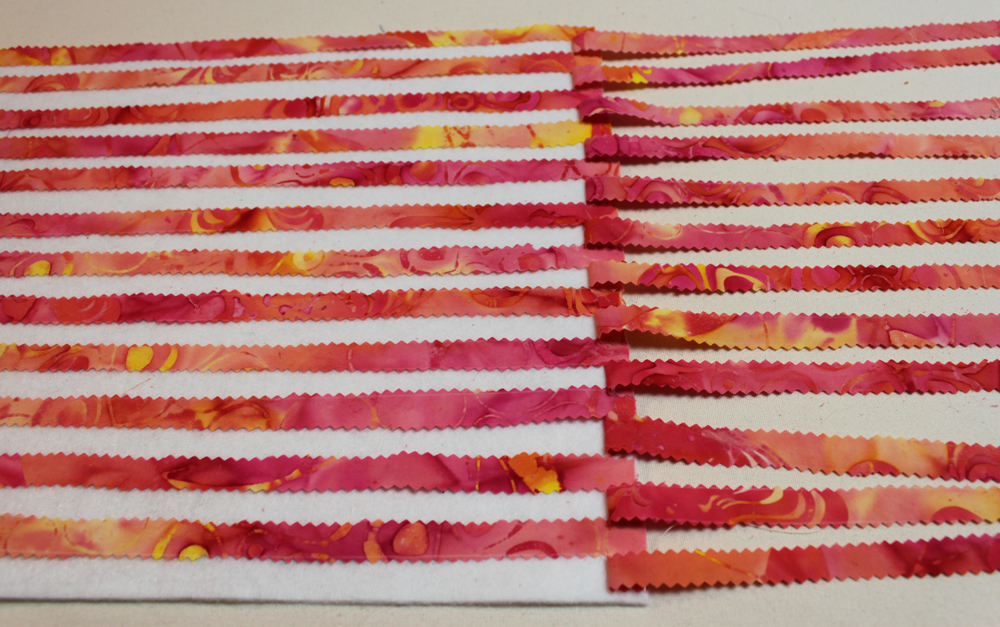
Peel back every other strip of pinked pink fabric to the right.

8. Place a strip of pinked pink fabric vertically on top of the remaining rows. This is the weft row.
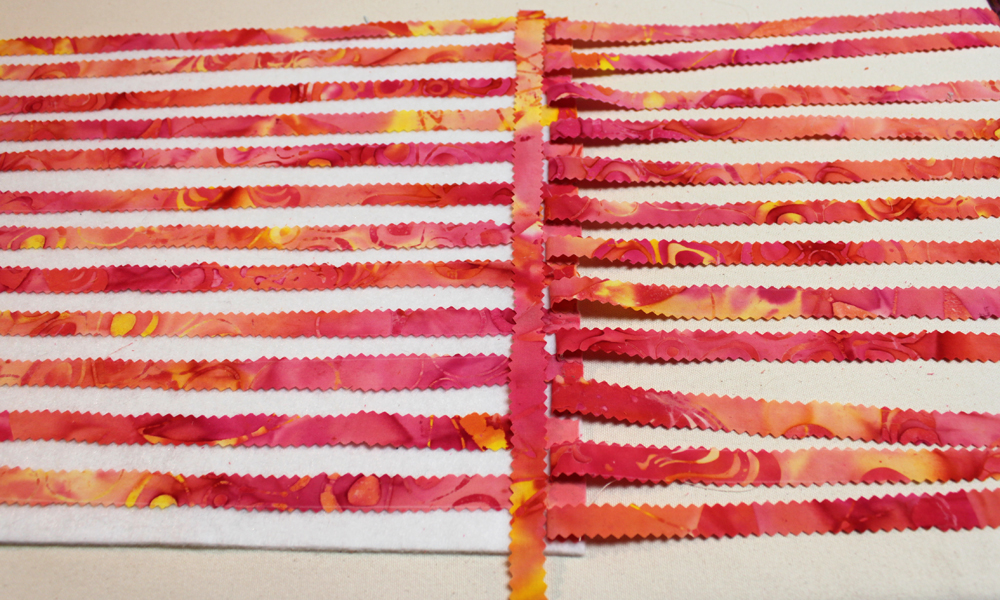
8. Place a strip of pinked pink fabric vertically on top of the remaining rows.

9. Replace the strips of warp fabric that you moved to the right. Now peel back the other rows of warp strips.
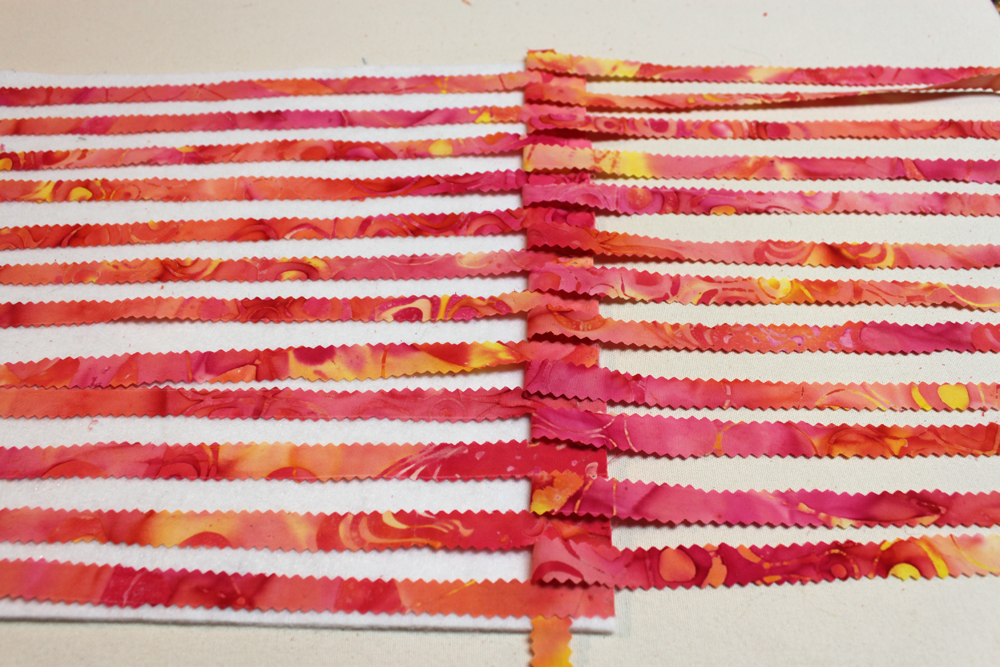
Replace the strips of warp fabric that you moved to the right.

10. Place another weft strip vertically. Replace the warp strips. Alternate the warp strips that you peel to the right. Use a pin or your fingernail to scoot the fabric strips together snuggly if needed.
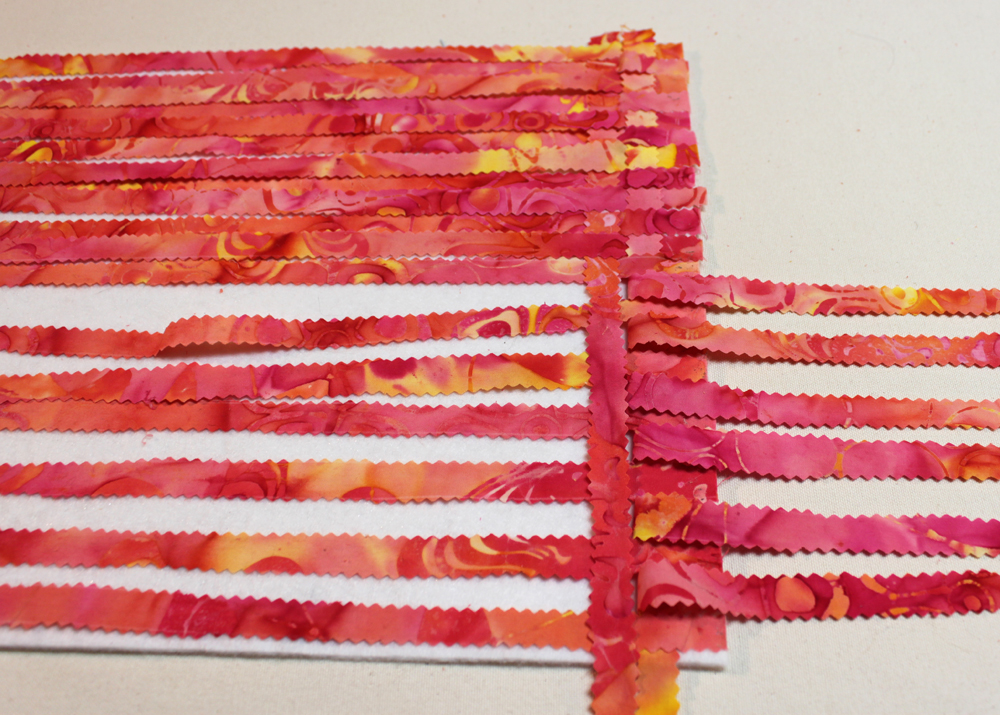
Place another weft strip vertically. Replace the warp strips. Alternate the warp strips that you peel to the right.

11. Use a hot iron to fuse the woven fabric to the felt.
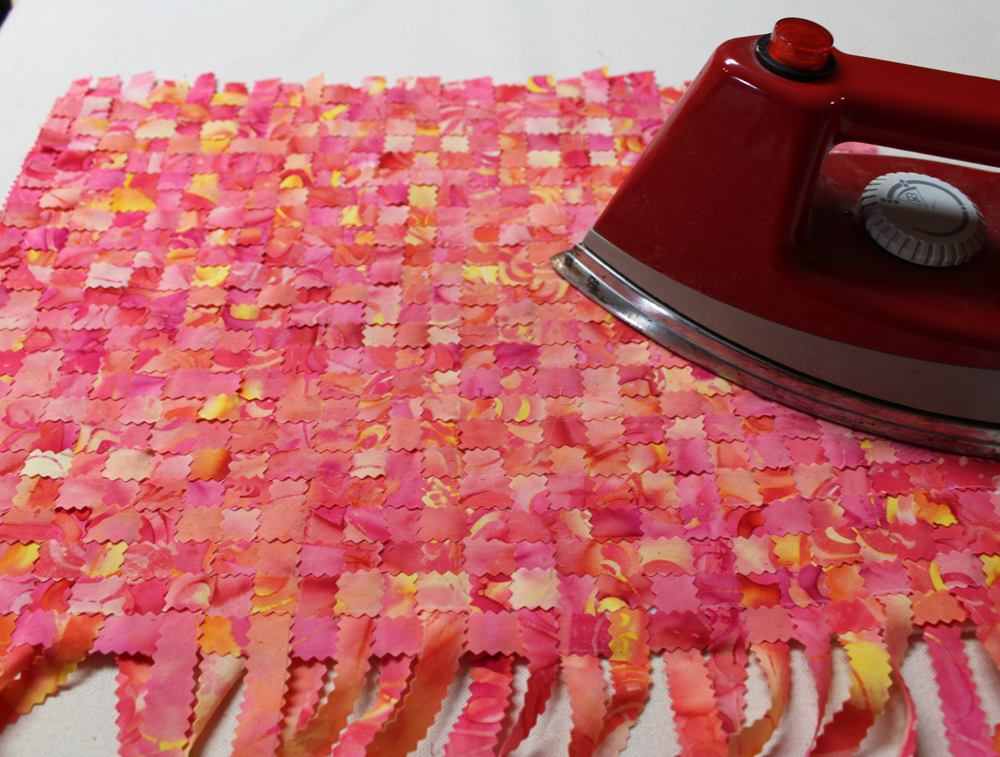
Use a hot iron to fuse the woven fabric to the felt.

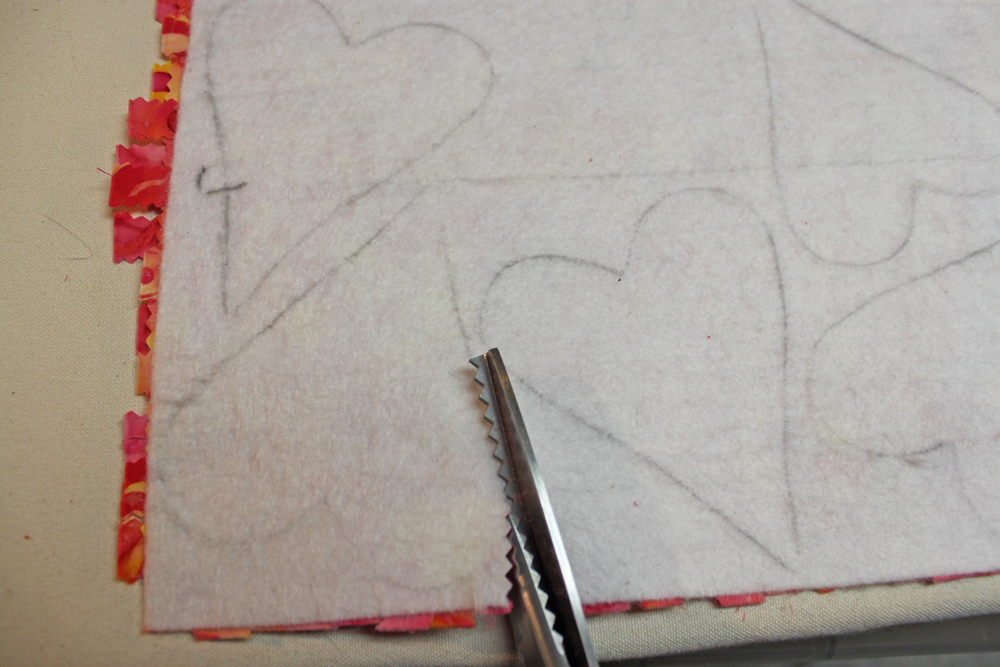
12. Make a heart template out of paper or plastic. Draw the template shape on the back of the felt. I like my woven fabric to be off kilter a bit so I drew my hearts at an angle. Cut out hearts with your pinking shears. This is where you will really appreciate Havels’ pinking shears! They are lighter weight than most and cut through layers so easily you would think it was only one layer.
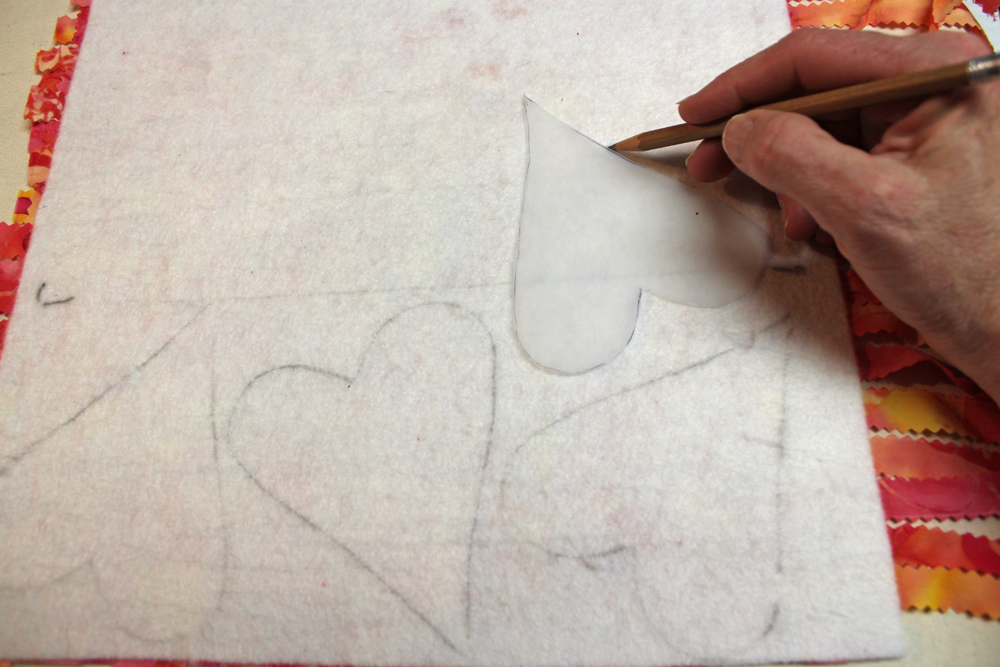
Make a heart template out of paper or plastic. Draw the template shape on the back of the felt.

Cut out hearts with your pinking shears. This is where you will really appreciate Havels’ pinking shears!

Now you can use your hearts in a plethora of ways! Don’t you love the word plethora? I use it as often as possible…
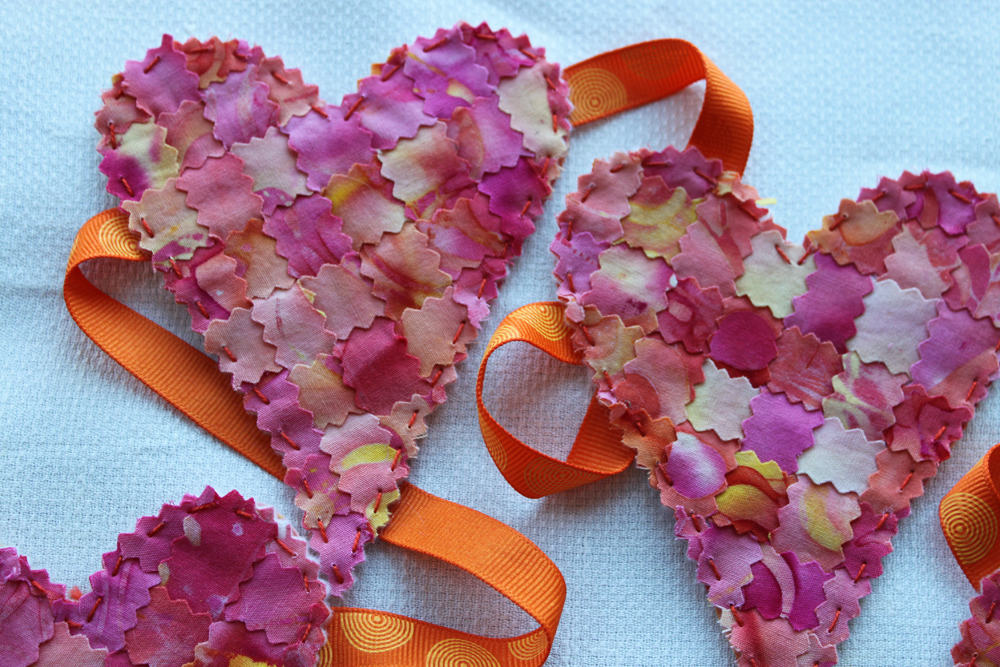
Now you can use your hearts in a plethora of ways!


Pinked Heart Garland

1. Adhere Misty Fuse to the back of one of your plain fabrics using a Teflon sheet to protect your ironing surface. Draw the heart template on top and cut out as many hearts as you need for your banner. My banner has 5 hearts that are 4 1/2″ tall.
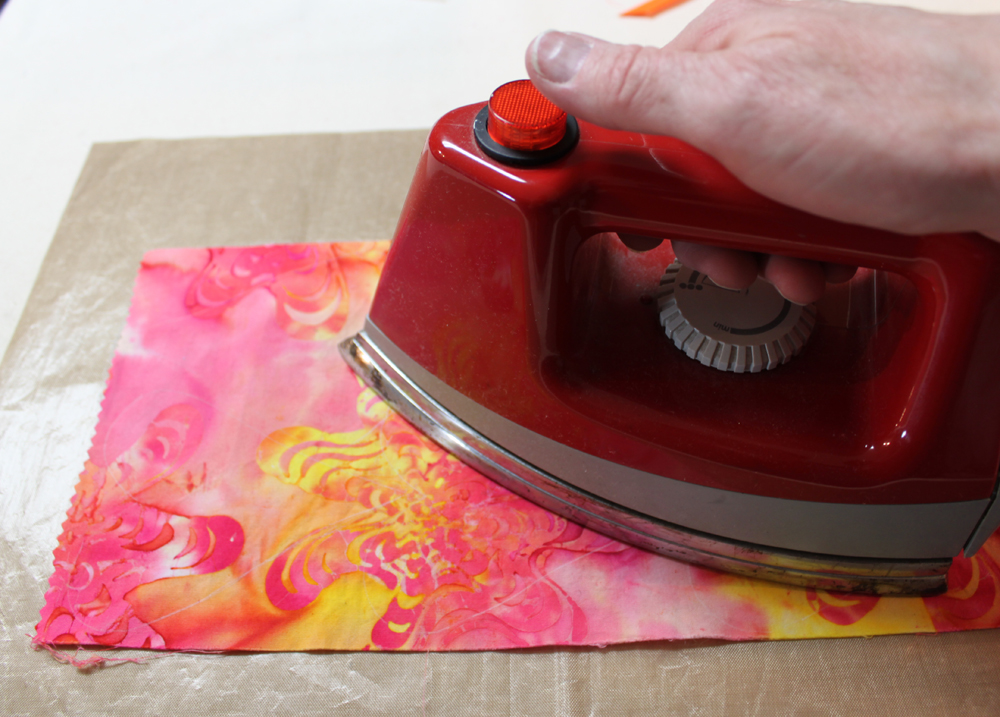
Adhere Misty Fuse to the back of one of your plain fabrics using a Teflon sheet to protect your ironing surface.

2. Place a heart on your ironing surface, fused side up. Place the ribbon across the heart leaving enough ribbon for tying in place.
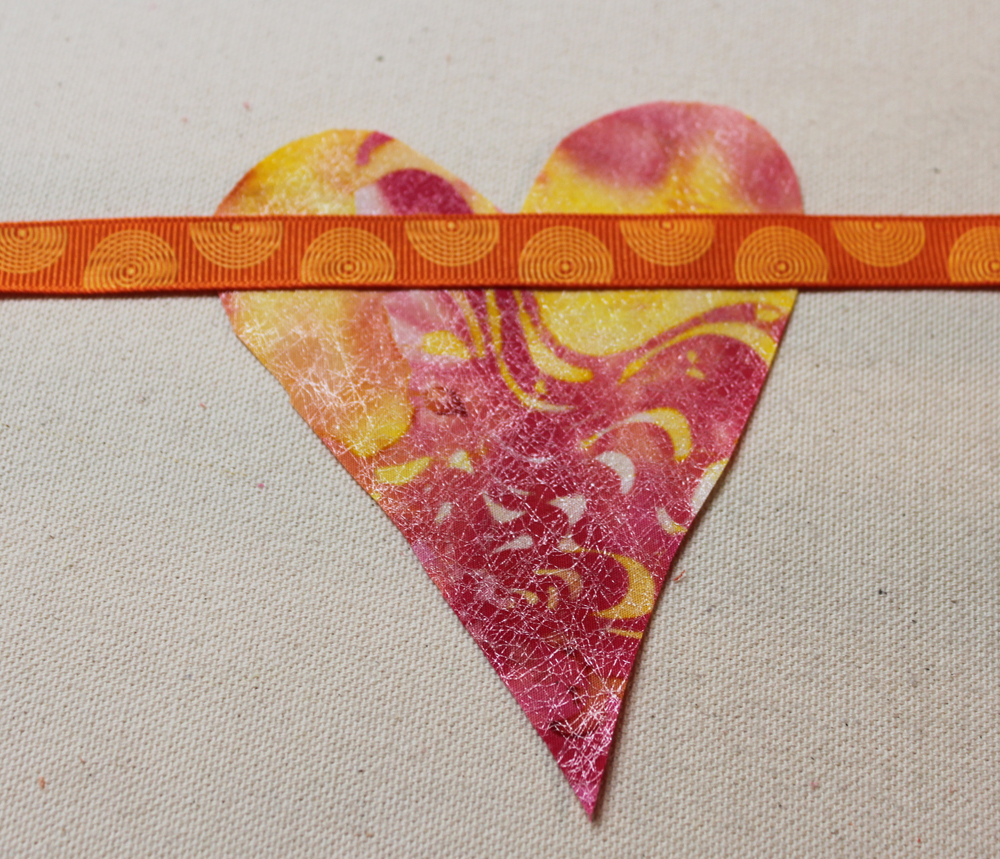
Place a heart on your ironing surface, fused side up. Place the ribbon across the heart leaving enough ribbon for tying in place.

3. Place the pinked woven heart on top of the heart/ribbon layer and fuse in place. Repeat for all your hearts. I spaced my hearts about 6″ apart.

4. Stitch around the edge with a running stitch by hand or you can machine stitch. Hang in a prominent place and delight everyone who sees it…they are going to smile just because it is so happy.
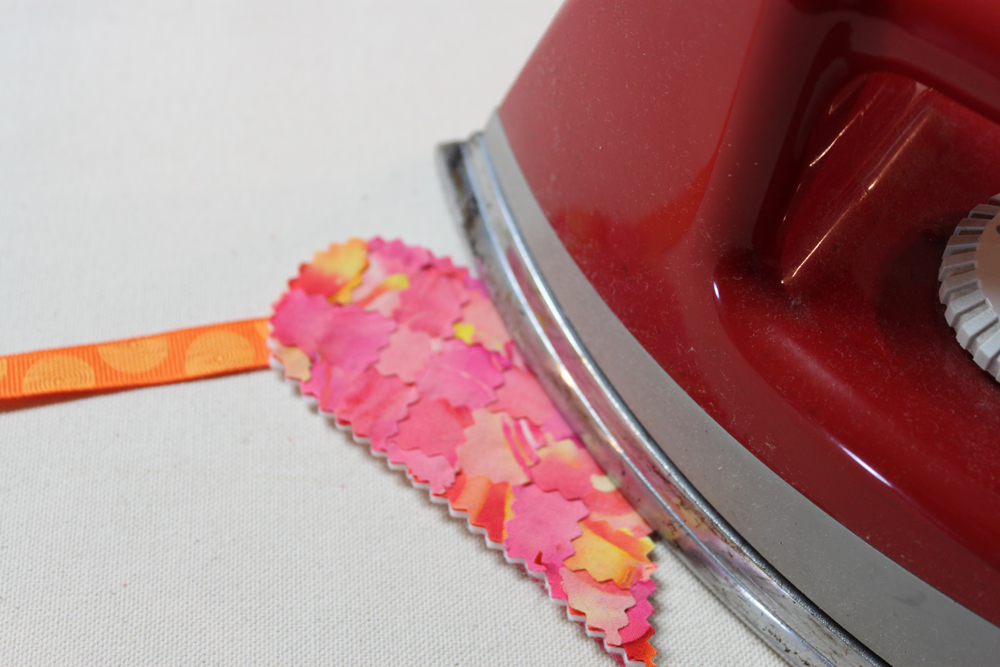
Place the pinked woven heart on top of the heart/ribbon layer and fuse in place.


Puffy Pinked Heart

Puffy Pinked Heart

1. Cut a scrap of fabric for the backing slightly larger than your pinked heart. Pin in place.
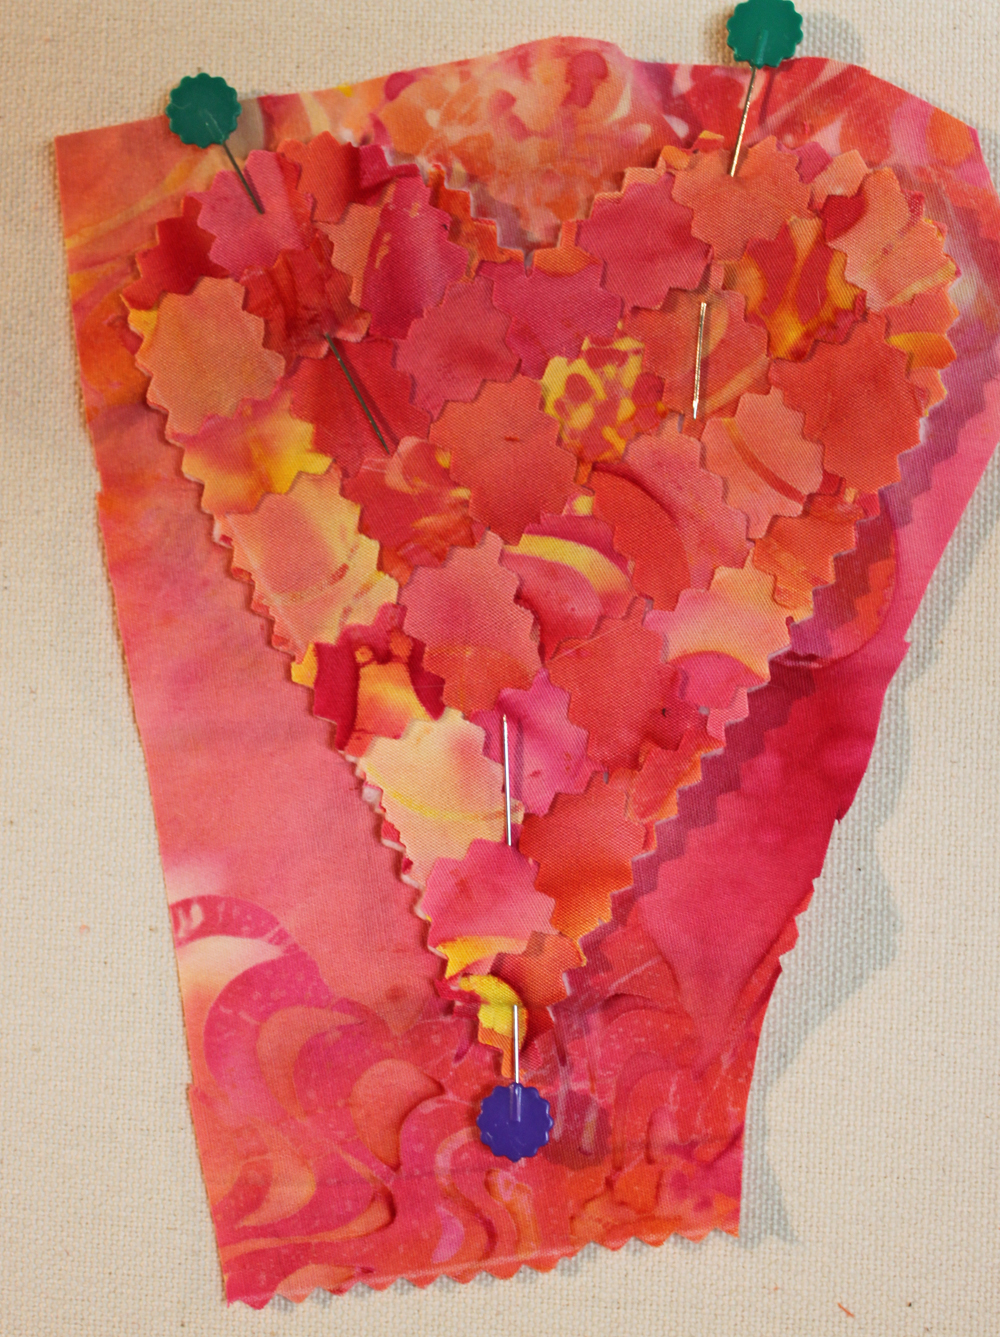
Cut a scrap of fabric for the backing slightly larger than your pinked heart.

2. Stitch around the perimeter of the heart leaving a gap at the very middle of the heart for stuffing. I use a shorter stitch length when I make something that will be stuffed.

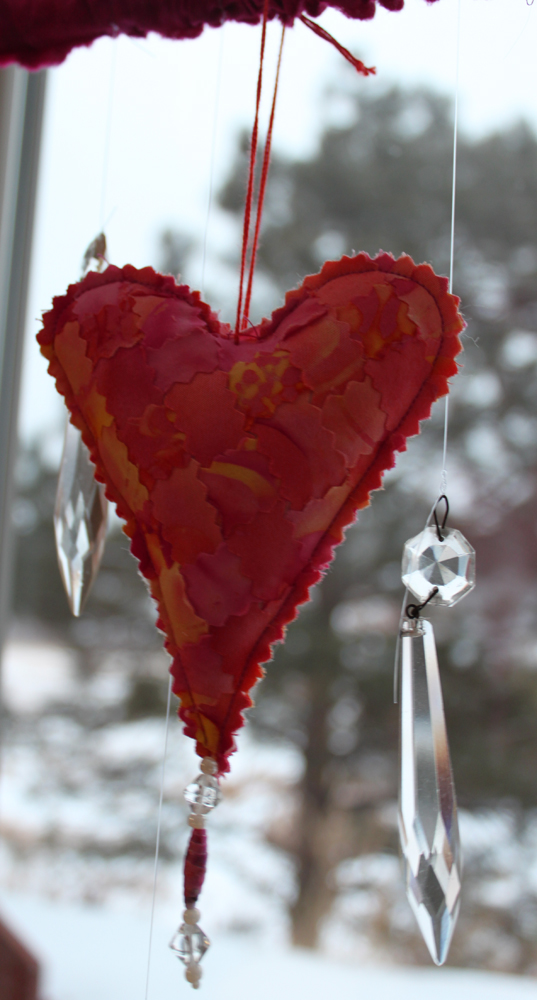
3. Stuff the heart with polyester fiberfill. Stitch the opening closed by hand or machine. Add a hanging cord or give it to a stitch friend for a pincushion. Some sand or plastic beads added at the stuffing phase will make a sturdier pincushion. I added some beads at the bottom and hung it up with my vintage chandelier crystals in the studio window.
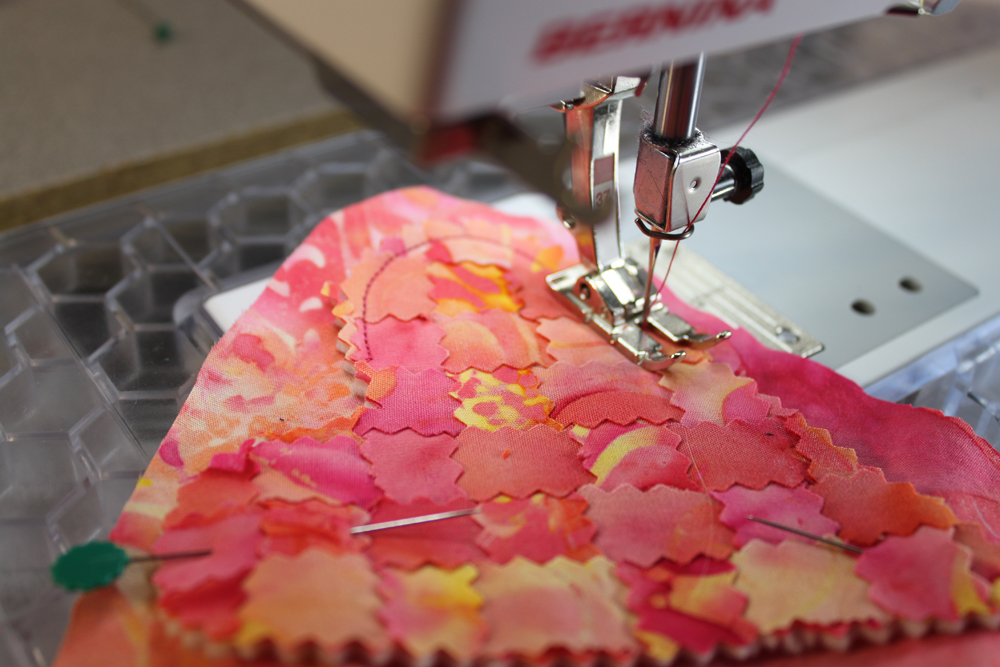
Stitch around the perimeter of the heart leaving a gap at the very middle of the heart for stuffing.


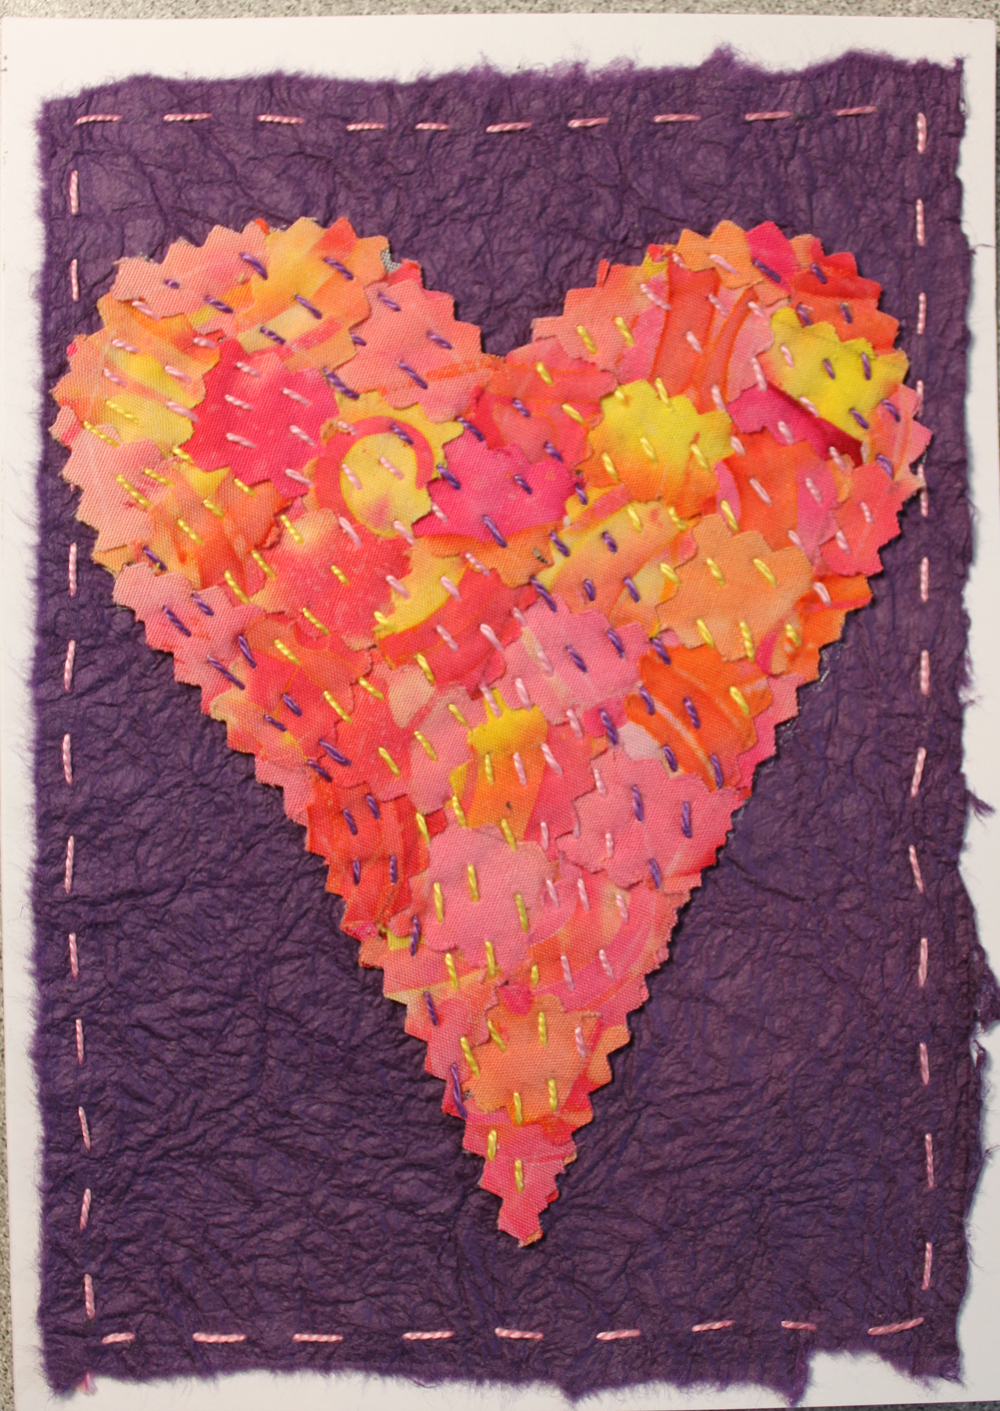
Stitched Pinked Heart Card

Stitched Pinked Heart Card

1. I used a re-made card base for this special greeting card. Cut or tear a piece of art paper slightly smaller than the card size. Stitch a running stitch around the edge with pearl cotton or embroidery floss.

2. Stitch a curved running stitch on your pinked heart with pearl cotton or embroidery floss. You could also stitch flowers or other designs.

3. Use Misty Fuse to adhere the paper to the card base and then the heart to the paper.


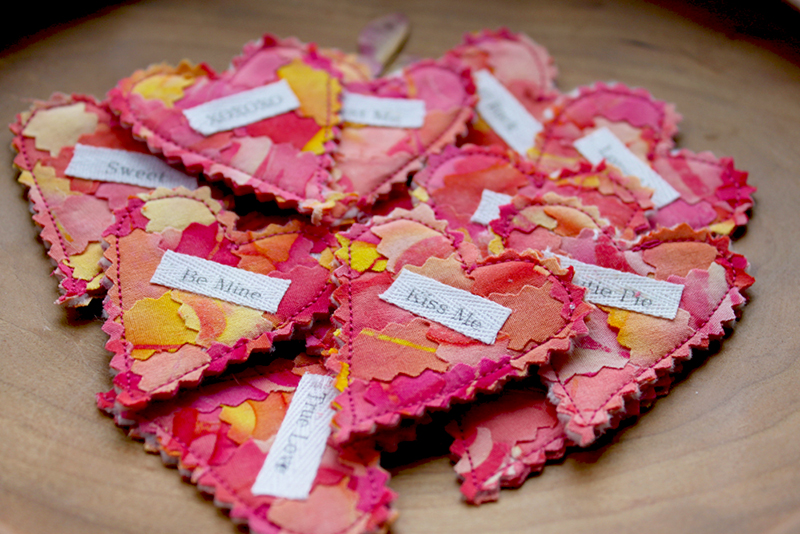
Pinked Conversation Hearts
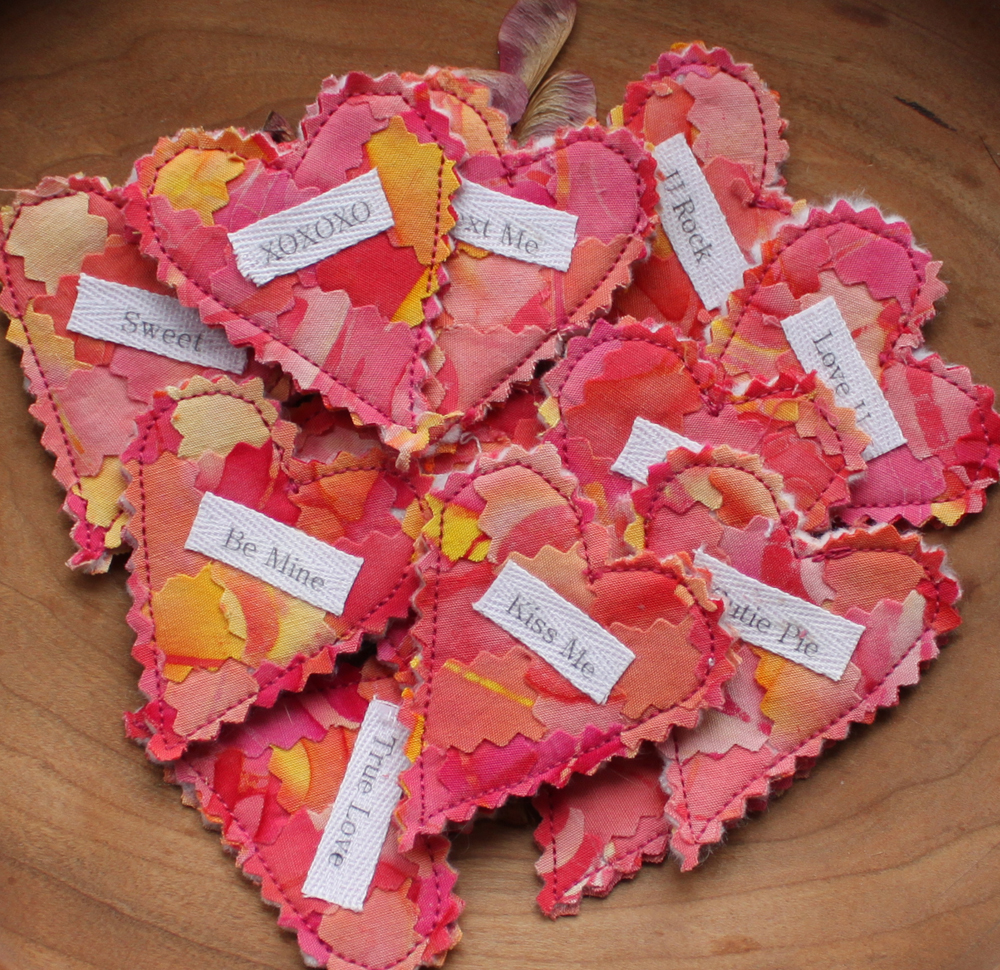
A Plethora of Pinked Hearts - Conversation Hearts

1. Fuse a backing fabric to the back of your woven heart fabric. Trace 2 inch hearts and cut out with pinking shears. Stitch around the outside edge.
2. Print conversation heart sayings on ribbon or twill tape. Directions are available on my web site in the forum or in both of my books. Cut Misty Fuse in thin strips the width of your ribbon and fuse the sayings to your hearts.


Liz Kettle, Fabric ArtistLiz Kettle is a textile and mixed-media artist who loves sewing and creating with fabric and thread. Sharing sewing joy and thread addiction with others makes her deliriously happy. Liz is co-author of two best selling books: “Fabric Embellishing: The Basics and Beyond” and “Threads: The Basics and Beyond.” Share Liz’s stitch journey on her website and blog at www.TextileEvolution.com.


Shop Havel's Now

Posted in For Beginners in Sewing, Fun Stuff, Holiday Projects, Liz Kettle, Quilting & Embroidery, Valentine's Day, Wall Hangings | Tagged , , , , , , , | 9 Comments