5 Must Know Tips for Sewing Patchwork

3patches8blog

If you’ve finally decided to pick up the art of quilting, chances are you might feel a bit lost when it comes to doing things the right way. Quilting, like anything else, has its own set of dos and don’ts that more experienced quilters have had to learn over time. Through trial and error (perhaps a little more error …), veteran quilters have come up with a set of rules to always remember, especially if this is your first go-around. Of course, one thing you could do is sign up for a beginner’s quilting class, but why search around for a class near you and pay for every session when you’ve got someone like Terry White to steer you in the right direction?

Terry White, a fabric artist and quilting expert from Indiana, has been perfecting her craft for a number of years. In her eBook Quilt Instructions for the Beginner – Part 3, White outlines a number of important details and general rules for all your quilting and patchwork needs. Here are the 5 must-know tips before beginning your next project:

  1. Seam allowance is ¼ inch. This helps to control the shapes of patchwork. More than ¼ inch is unnecessary and less is not wide enough to keep the seams from fraying.
  2. Use the same thread in the bobbin as the top thread. You can choose a neutral color that blends with the colors of your patchwork, instead of changing the thread colors all the time. Here are examples of threads that work for these color combinations.
  3. Try to cut and stitch each fabric piece as perfectly as possible … knowing full well that it is hard to make perfect happen. Each cut and each seam that is just “a little bit off” will eventually add up to “a lot off.”
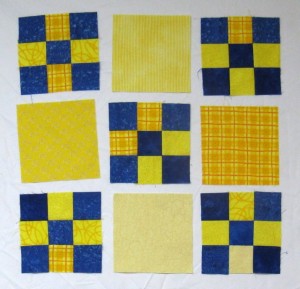
  4. Press, press, press … This is different than ironing fabric into submission and distorting the pieces. Gently pressing your seams as you piece will go a long way towards beautiful patchwork. I like to press every set of seams as I piece. The patchwork fabric is easier to manipulate when you press as you go. It is very hard to press an entire quilt if you haven’t been pressing it section by section. The seams are pressed open to distribute the seam bulk in the corners. This block will stay flat and be easy to quilt.
  5. Use the correct needle size and type for the thread and the fabric. Generally, I like a 75/11 machine embroidery needle. It has a nice sharp point and, most importantly, it lasts a long time. Embroidery needles are built to last for a long time. Have you ever seen an embroidery machine go? The needle works very hard! Batik fabrics are very tightly woven and have wax residue from the printing process, so for batiks I switch to a Microtex needle.

Click Here For More Quilting Tips by Terry White

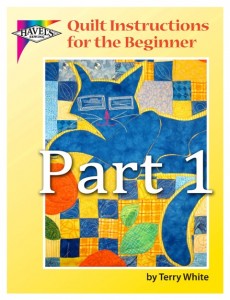
quilt instructions for the beginner part 1 cover 480x625

Posted in Quilting, Terry White | Tagged , , , | Comments Off on 5 Must Know Tips for Sewing Patchwork

Blocks of Inspiration – Meet Joann Lang

An amazing woman with an amazing spirit

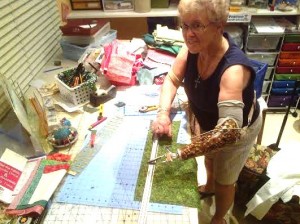
Joann creating in her studio.

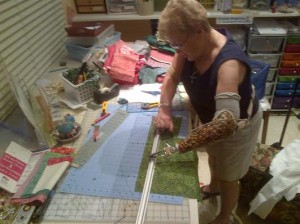
Joann creating in her studio.

Meet Joann – artist, teacher, wife, mother and avid quilter.  She began sewing as a child with her mother, repairing clothes and simple hemming.  In 2000, she fell in love with the art of quilting. After attending an Eleanor Burns workshop, she bought her first machine and later joined the Arizona Quilters Guild.  From then on, she was hooked!

That same year she joined the Night Owls, a sub-chapter of the Arizona Quilters Guild. Joann became an esteemed member of the group and was named Program Chairman in 2013 for all of her dedicated work.  She was co-coordinator of Charity Quilts for community service, which made 183 quilts for a variety of charity organizations. And, if that wasn’t enough, she was involved in Bundles for Babies, which provided supplies to military families.  The Mesa Child Crisis Center also received supplies and quilts from the Night Owls during the Arizona Quilters Guild show where she was in charge of the Sit-n-Sew while on board and enjoyed making kits for the event.  These organizations are very dear to her heart, and she enjoyed every minute of it.

On November 13, 2013 Joann’s life was changed forever. A car accident causedher to lose her arm.

Joann Using Fabric CutterDespite the setback, that didn’t stop her! She continued quilting any way she could.  She put fabric on the floor and cut it while standing on it, using any creative way she could to keep her dream alive.

She attended a class with Patrick Lose, who introduced her to Havel’s Sewing Fabric Cutter.  This tool makes it possible for Joann to continue her two passions in life: helping others and having fun with quilting.


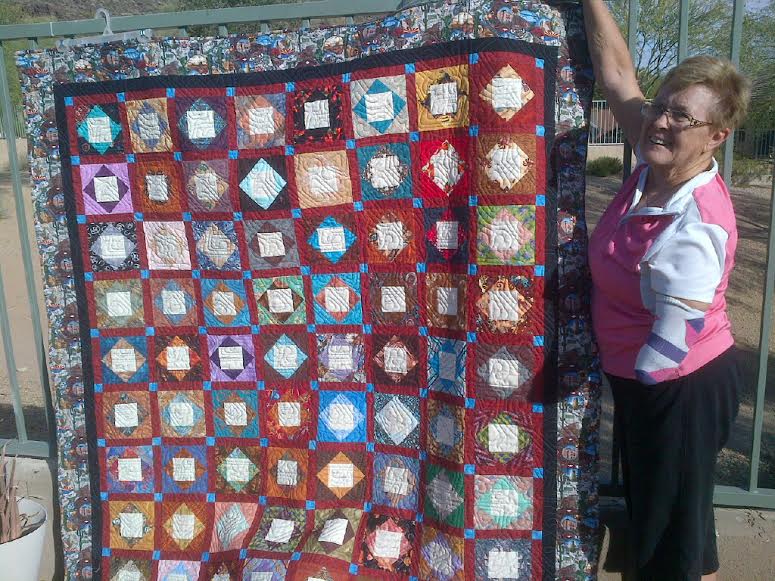
Inspirational Quilt made by the Night Owls for Joann

Inspirational Quilt made by the Night Owls chapter fo the Arizona Quilter Guild for Joann. Each block has a message of hope and concern as well as words of encouragement!


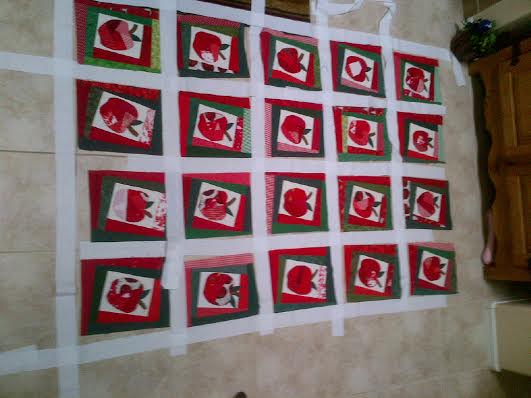
The Apple Quilt

The Apple Quilt Joann is making with the Fabric Cutter

Posted in Fabric Cutter, Interviews, Quilting, Quilting Tools, Uncategorized | Tagged , , | 2 Comments

Adorable and Easy Baby Quilts to Make in a Day

Bouncy Baby Buggies 
By: Terry White  


Pic 1 336x354

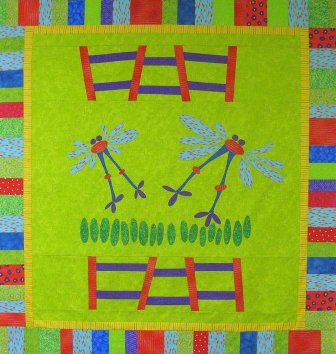
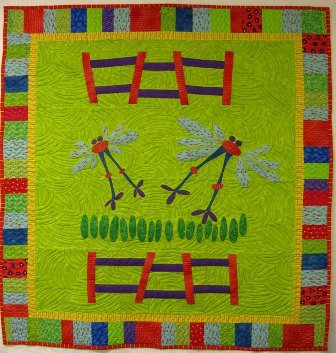
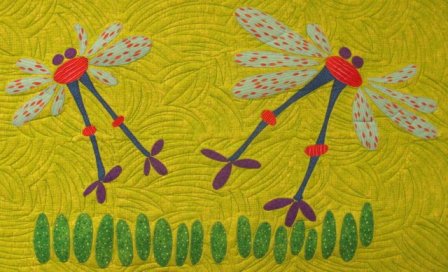
Little buggies bouncing in the grass for baby is the subject of this colorful and modern baby quilt.

The techniques include fused appliqué, machine buttonhole stitch and strip piecing.

Complete instructions for all the techniques used in this quilt can easily be found in Terry’s Guide to Quilting.

Supplies:

● 100% Cotton fabric:

● 1 yd. Grass Green for the Bouncy Grass

● 1/8 yd Purple for Eyes and Feet

● 1/8 yd Red for Body and Knees

● ½ yd Aqua for Wings

● 1/8 yd Blue for Legs

● 1 ½ inch Strips of yellow for inside border

● Fabric for binding – Use strips of scraps in same colors for Fencing and Border. I chose mostly light colors for the border.

● Fusible interfacing cut same size as center panel

●1 yd. Wonder Under fusible web

● Cotton fabric for the backing

● Quilt batting

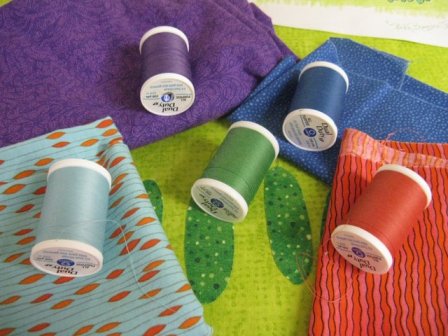
● Coats&Clark Dual Duty XP sewing thread in colors matching the appliqués for the buttonhole stitching and to sew everything on this quilt

● Star Cotton threads for quilting:

* 831 Spring Meadows (green variegated) for center panel

* T38 Multi Color (all the colors variegated) for border


Pic 2 448x336

Coats&Clark Dual Duty XP Sewing Threads.

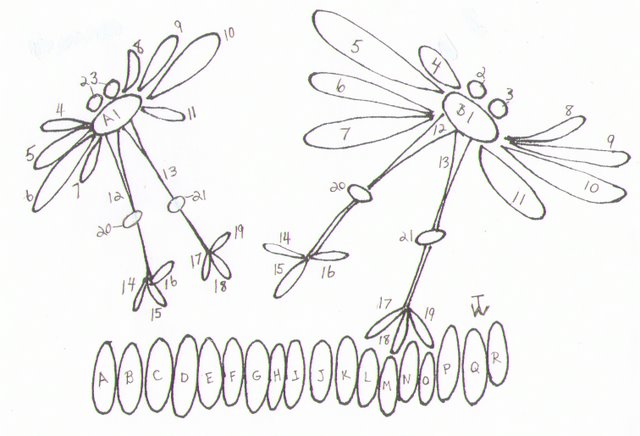
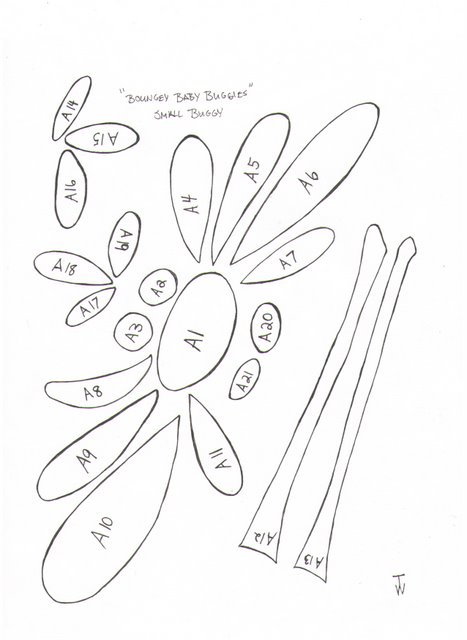
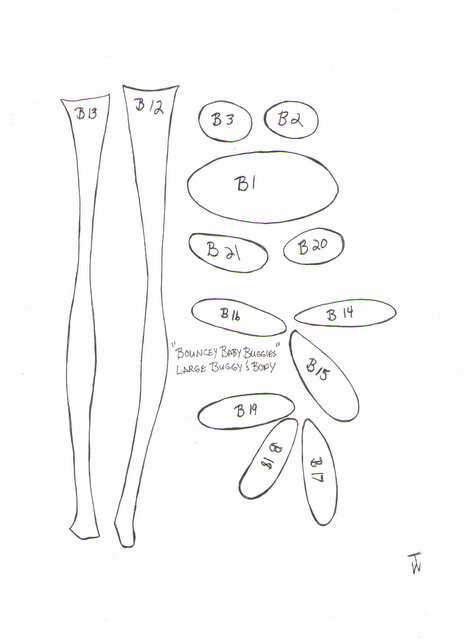
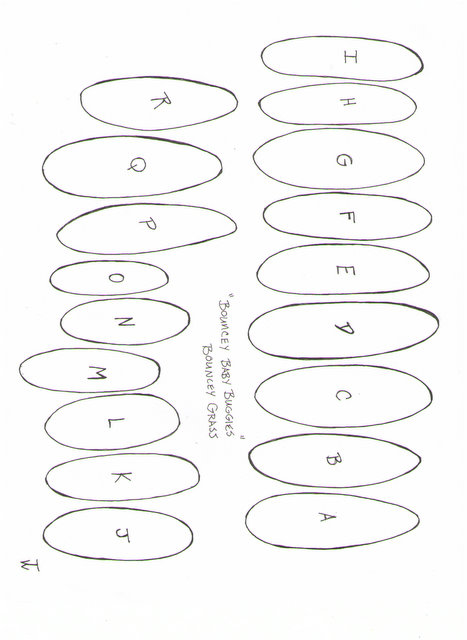
Each appliqué piece is numbered and/or lettered so that it corresponds to the numbered drawing of the quilt design.

There are four pages of pattern pieces. When you copy them, enlarge the designs by 10%.

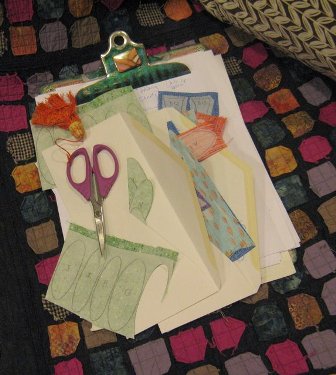
The appliqué patterns are full size and reversed for you. I suggest that you trace each pattern page on the wonder under. As you trace each piece, number it before you cut out anything. You can keep each page of appliqué pieces separated in envelopes until you are ready to apply them to your quilt top.


Pic 3 336x375

I like to cut out the appliques with my Havel’s 6″ serrated with large finger loops while sitting on my couch in front of evening TV.


1. Cut the center panel 20 inches by 35 inches from using a light green fabric.

2. Iron the fusible interfacing to the back of the light green center panel fabric.

3. Start making the grass applique pieces. Next, you will position and iron them onto the center panel.

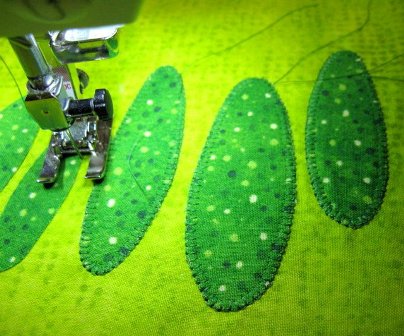
4. Stitch with buttonhole stitch.


Pic 4 404x336

Sewing on the “Grass” Appliques.

4. Make one “buggie” at a time by fusing and stitching them in place on the center panel.

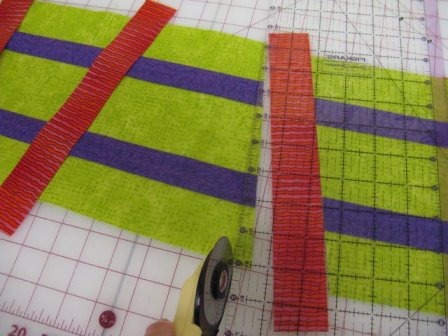
5. The fences are strip pieced. Follow the cutting diagram and photos in order to create the fences. (The fence pattern diagram shows the cut measurement in inches for each strip.) Use a ¼ inch seam so the green and purple strip set finishes at 8” wide and 42 inches long. Cut the strip set in half. One half will be used for the top fence and one half will be used for the bottom fence. You will have extra.

Pic 5 448x336

Strip Piecing to Create the ‘Fence.’

6. Cut the strip set at an angle and stitch the red strip in between. Offset the next section of fencing and sew to the red strip. Do this again and sew a red strip to the end of the fence design.

7. Trim the fence panel 8”x 19”. Add green fabric pieces on each side of fence to finish at 8”x 35”. Sew to the center panel.

8. Cut and sew green strips 2”x35” to the top and bottom of the panel.

9. Stitch the yellow strips to the edge of center panel for an inner border.

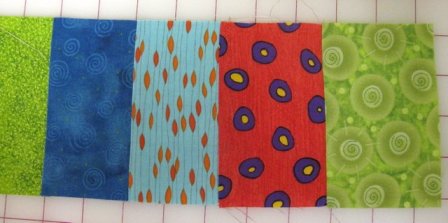
10. The scrap pieced outside border finishes at 3 inches wide. Stitch it to the outside of the quilt.

11. Layer with batting and backing and quilt your baby quilt!

Pic 6 448x223

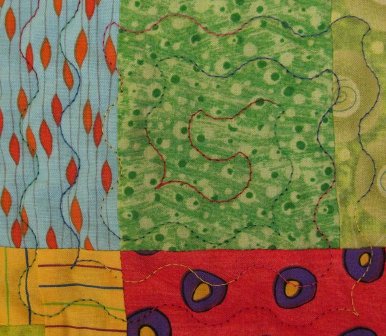
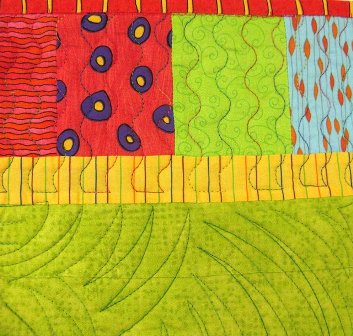
* Pam Mayo, who quilted this baby quilt, used Star cottons for the quilting. She is my friend and an excellent professional long arm quilter. (Pam’s Facebook page: Fabric Creation & Design @ Facebook)  The patterns she chose can be imitated with free-motion machine quilting on a domestic machine. She used a grassy pattern for the center of the quilt and wonderful wavy strips for the border. *

Pic 7.BouncyBabyBuggiesQuilt 336x353

Finished Results of the Bouncing Baby Buggies Quilt!

Pic 8.grassquilting 448x272

The Grass Quilting.

Pic 9.corner quilting 386x336

Example of the Corner Quilting.

Pic 10.borderquilting 353x336

Border Quilting with Red and Yellow Striped Binding.


12. Bind your quilt. I chose this bright red with yellow stripe for my binding.

13. As always, be sure to enjoy the process!

Printable Pattern Below

BBB

BBB1pg

BBB2pg

BBB4pg

 For more free and fun tutorials by Terry White click here.

[hs_action id=”5636″]


Posted in For Baby, Free Quilt Patterns, Free Sewing Project, How to Quilt, Patterns, Terry White | Tagged , , , , | Comments Off on Adorable and Easy Baby Quilts to Make in a Day

Free Craft Project: Personalized Yoga Mat Carrier

Easy Craft Project to Use Up Your Fabric Leftovers!

By Leslie Jenison

For a long time I have been in the habit of saving my quilted “trimmings” – those hunks that are cut off a quilt construction for one reason or another.

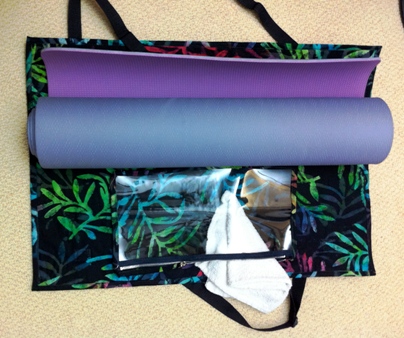
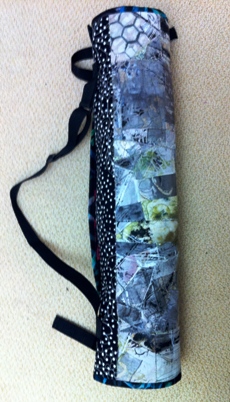
I decided to make a new construction from these leftovers in the form of a yoga mat carrier. To make the carrier, I rolled up my yoga mat and measured the width of the mat as well as the circumference of the rolled mat. I decided I wanted the carrier to be 26″ long by 18″ wide, which will allow for the rolled mat plus a bit of room for something else to be rolled in with the mat, if desired.

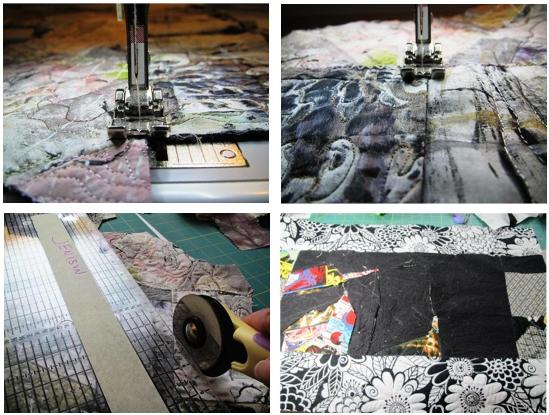
I went digging through my scraps and began to randomly piece sections together with a zigzag stitch.

Yoga Mat Carrier by Leslie Jenison - Images 1-4
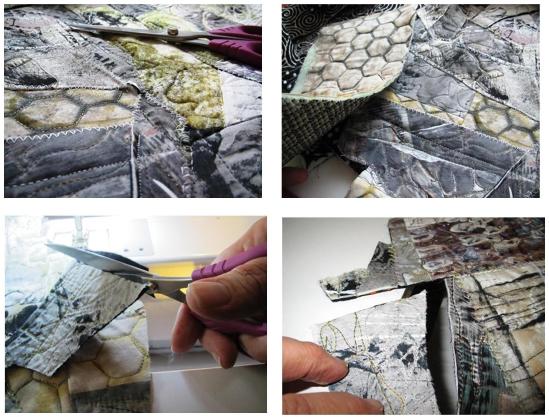
Once a large section of the pieces was joined together, I stopped to trim them. I eventually achieved the size I desired for the carrier.

Yoga Mat Carrier by Leslie Jenison - Images 5-8

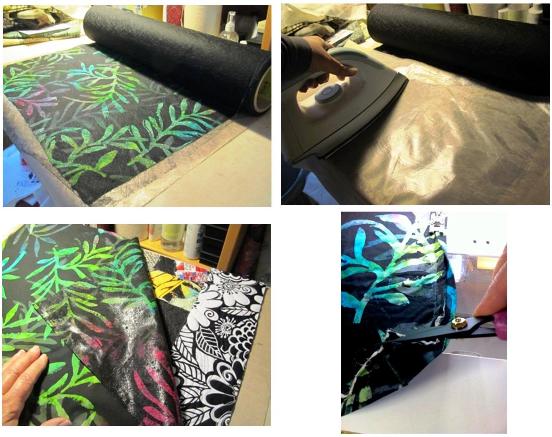
To improve the inside appearance of the carrier, I fused a piece of cut to size Hoffman fabric to the inside of the carrier and trimmed the edges. This also helped increase the overall strength of the construction.

Yoga Mat Carrier by Leslie Jenison - Images 9-12

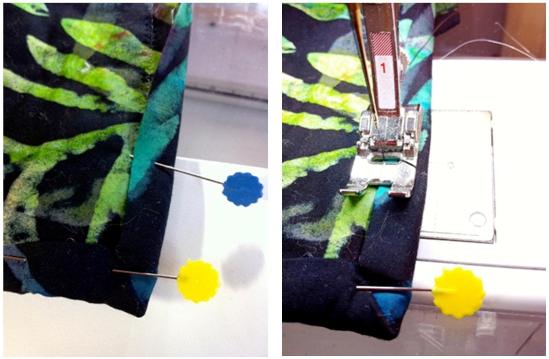
Cutting strips of the same cloth 1 /12″ wide, I joined them end-to-end, to create a binding for the carrier. I pressed both edges of the long strip toward the center. 

Beginning on the “right”, or outer side of the carrier, I stitched the binding down 1/2″ from the edge using a dark top thread and Superior Monopoly thread in the bobbin.

Once the binding was stitched all the way around the edges, I flipped the carrier – taking care to fold the binding over tightly. I then stitched the inside of the binding in place very close to the edge.

The clear monofilament thread is now what is showing on the outside of the carrier. Since the stitch line is so close to the edge of the binding, it is now virtually invisible. The result is a nicely finished edge that is sturdy!

Note: trimming the corner- both cloth & batting- at a 45 degree angle makes turning the corner binding  much easier!

Yoga Mat Carrier by Leslie Jenison - Images 13-14

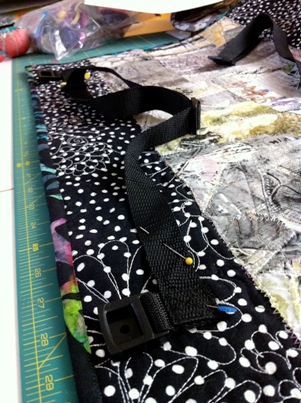
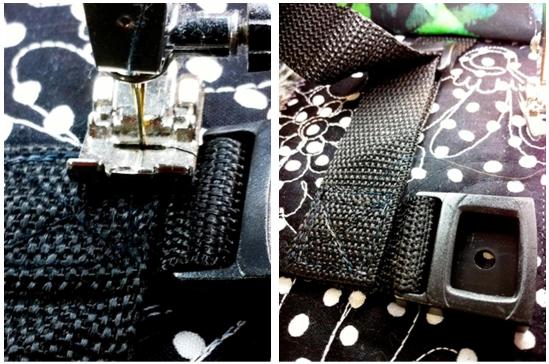
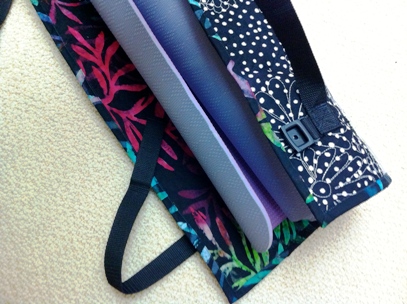
I had already purchased a set of strapping designed to fit around a yoga mat. (This one has a handle between two sets of adjustable clips.) I positioned the handle along one side of my mat and pinned it into place. 

Yoga Mat Carrier by Leslie Jenison - Image 15

I then cut the male portion from the handle. Next I folded the cut end and stitched the strapping to ensure it wouldn’t fray.

I  positioned the clasps 4″ from the edges on the opposite side of the carrier, pinned into place, and carefully machine stitched them to the carrier.

Even though the strapping is thick, the sewing machine had no difficulty stitching them in place. 

Yoga Mat Carrier by Leslie Jenison - Images 16-17

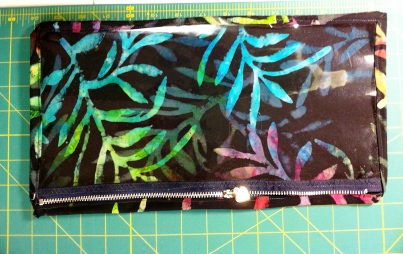
Last, I created a pouch with a clear front that will be positioned inside the carrier with two large snaps, one on each end. This adds to the functionality of the mat carrier for me, as I do not wish to carry my purse into my yoga class, yet I often need a pocket for a few small items, such as my towel and cell phone (ringer off, of course!).

Yoga Mat Carrier by Leslie Jenison - Image 18

To create this zipper bag (the finished size for mine is 7″ by 14″), I cut a piece of thick clear plastic, sold by the yard in stores with home dec materials.

I stitched to the “right” side of a zipper. Using the same type of fabric that lines the inside of my yoga carrier, I cut a length of cloth one inch wider than the width of my plastic “window”, and 1 1/2″ longer. With the right side of the cloth facing the right side of the zipper, I stitched the cloth to the zipper. Turning the plastic and zipper so it was inside-out, I stitched the sides together, taking care to stitch closely to the zipper ends. The zipper ends were carefully trimmed, along with the plastic (and I trimmed the corners to a 45 degree edge to minimize the plastic poking a hole in the cloth.

Yoga Mat Carrier by Leslie Jenison - Image 19

The bag was turned right side out. Large snaps were positioned on each top end of the bag. The male portion was attached to the bag, and the female portion positioned on the inside of the carrier and stitched in place.

Yoga Mat Carrier by Leslie Jenison - Image 20


Yoga Mat Carrier by Leslie Jenison - Image 21


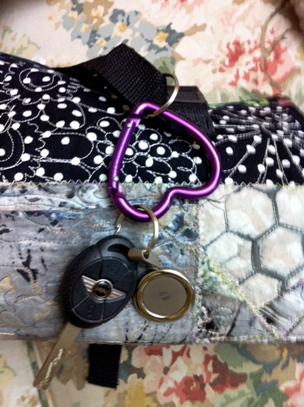
I added a whimsical but functional clip to the handle strap as a quick way to clip my car keys to the carrier. I found this clip at a home improvement center.


Yoga Mat Carrier by Leslie Jenison - Image 22


The finished carrier from the inside out is not only functional, but it’s also absolutely unique!


 This carrier is absolutely perfect for carrying a quilt to and from a show, guild meeting, or anywhere else.

 This carrier isn’t just for yoga mats- Get Creative!

Click Here For Additional Tutorials From Our Sew Creative Blog

Posted in Free Craft Projects, Quilting, Uncategorized | Tagged , , | 6 Comments

Sewing Supplies: The Professionals Share their Secrets

Rotary Cutters – Which way do you roll?

There are so many sewing supplies available to us and it can be overwhelming to decide which is best and why.   Rotary Cutters are no exception, and they are even more difficult becasue they are available in two different sizes.  What size is best for you and for which projects or fabrics.   We asked the professionals to answer these questions for you, and here’s what they had to say.

Jamie FingalJamie Fingal

I use the 45mm size, because it is what I am used to, and it’s easy to use and it fits my hand.  I use my rotary cutter as much as possible, and then I use the 7″ precision cutting sewing scissors for everything else.  I can cut a large and very small polka dots and hands with these scissors, because they hug the fabric.

Leslie Tucker JenisonLeslie Tucker Jenison

I use both sizes, 45mm and the 60mm.  I really can’t tell you why I use one over the other. I like them both and it is nice to have a choice.  Obviously, the smaller one makes more sense when working with a smaller size project.  Other than that, they are both wonderful and get the job done!  I believe the 45mm rotary cutter is my preferred one, probably because it is easier to hold.


Liz KettleLiz Kettle

I love my 60mm Havel’s Rotary Cutter.  I like the 45mm too, but I always grab the 60mm first.  I like to cut through as many layers as I can at one time and am often cutting non-traditional fabrics.  The 60mm never hesitates and rolls right through whatever challenge I give it.

Ruth ChandlerRuth Chandler

It’s very simple when it comes to my sewing supply list for the rotary cutters.  I prefer to use the 45mm for thinner fabrics and the 60mm for thicker layers.


Terry WhiteTerry white

I love the 60mm because it feels good in my hand.  It’s one of my favorite sewing supplies.


  We hope this helps you to decide which rotary cutter size will be best for you.  Click below to view the artist’s favorites.

shop-havels-sewing_60mm-rotary-405x336

Posted in Fabric Rotary Cutters, Jamie Fingal, Liz Kettle, Sewing Supplies, Terry White, Uncategorized | Tagged , , , , | Comments Off on Sewing Supplies: The Professionals Share their Secrets