
Bouncy Baby Buggies
By: Terry White
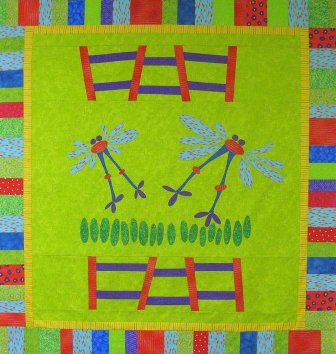
Little buggies bouncing in the grass for baby is the subject of this colorful and modern baby quilt.
The techniques include fused appliqué, machine buttonhole stitch and strip piecing.
Complete instructions for all the techniques used in this quilt can easily be found in Terry’s Guide to Quilting.
Supplies:
● 100% Cotton fabric:
● 1 yd. Grass Green for the Bouncy Grass
● 1/8 yd Purple for Eyes and Feet
● 1/8 yd Red for Body and Knees
● ½ yd Aqua for Wings
● 1/8 yd Blue for Legs
● 1 ½ inch Strips of yellow for inside border
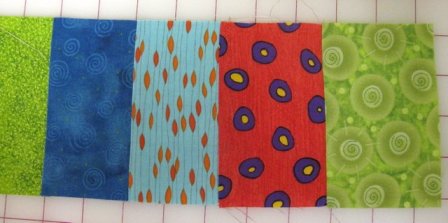
● Fabric for binding – Use strips of scraps in same colors for Fencing and Border. I chose mostly light colors for the border.
● Fusible interfacing cut same size as center panel
●1 yd. Wonder Under fusible web
● Cotton fabric for the backing
● Quilt batting
● Coats&Clark Dual Duty XP sewing thread in colors matching the appliqués for the buttonhole stitching and to sew everything on this quilt
● Star Cotton threads for quilting:
* 831 Spring Meadows (green variegated) for center panel
* T38 Multi Color (all the colors variegated) for border
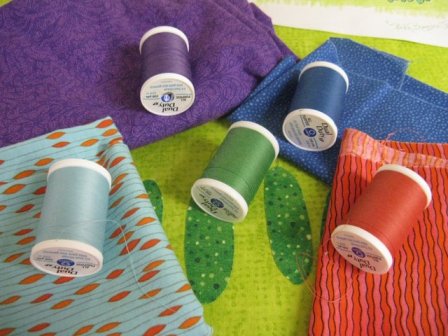
Coats&Clark Dual Duty XP Sewing Threads.
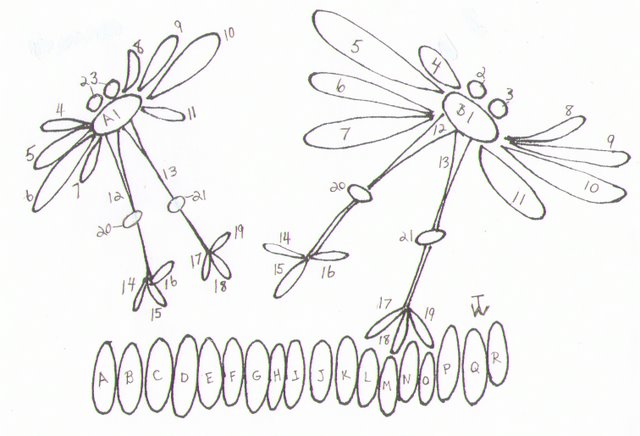
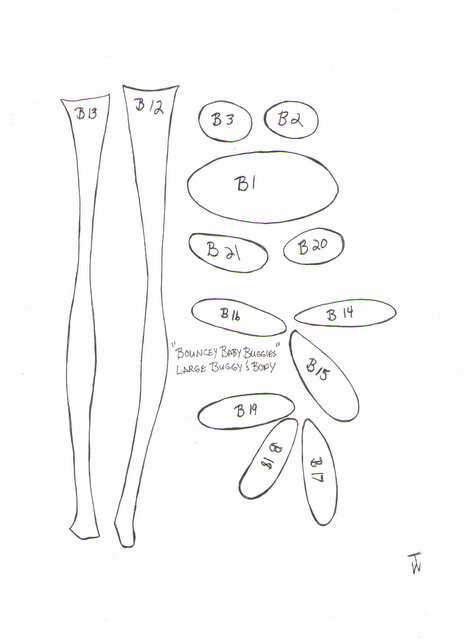
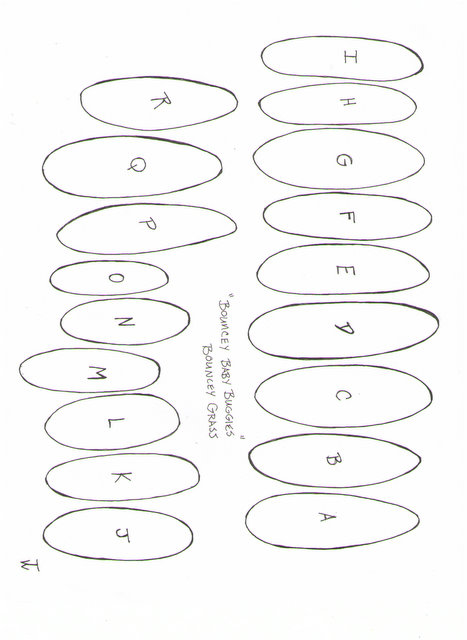
Each appliqué piece is numbered and/or lettered so that it corresponds to the numbered drawing of the quilt design.
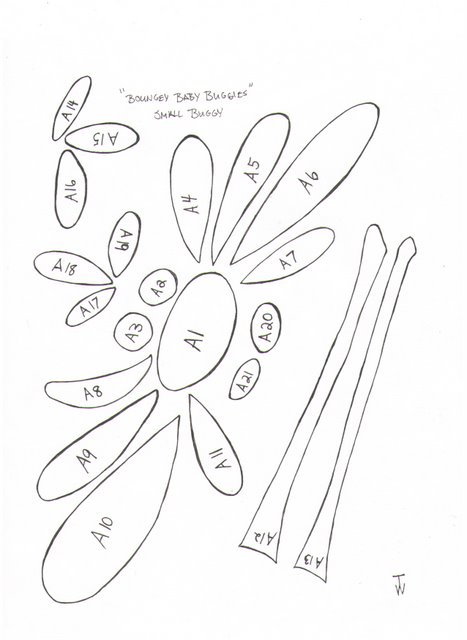
There are four pages of pattern pieces. When you copy them, enlarge the designs by 10%.
The appliqué patterns are full size and reversed for you. I suggest that you trace each pattern page on the wonder under. As you trace each piece, number it before you cut out anything. You can keep each page of appliqué pieces separated in envelopes until you are ready to apply them to your quilt top.
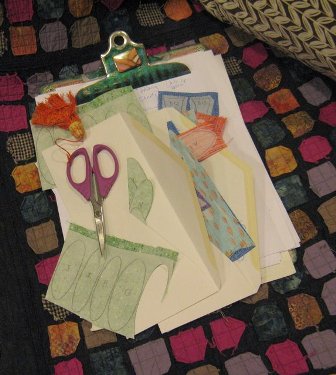
I like to cut out the appliques with my Havel’s 6″ serrated with large finger loops while sitting on my couch in front of evening TV.
1. Cut the center panel 20 inches by 35 inches from using a light green fabric.
2. Iron the fusible interfacing to the back of the light green center panel fabric.
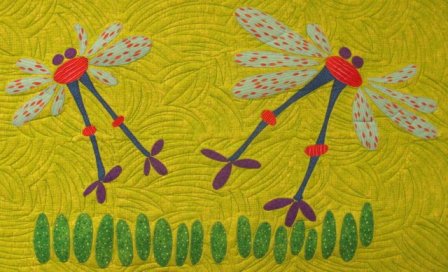
3. Start making the grass applique pieces. Next, you will position and iron them onto the center panel.
4. Stitch with buttonhole stitch.
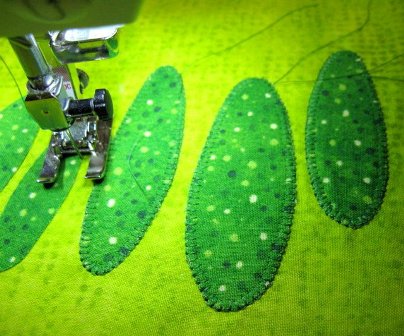
Sewing on the “Grass” Appliques.
4. Make one “buggie” at a time by fusing and stitching them in place on the center panel.
5. The fences are strip pieced. Follow the cutting diagram and photos in order to create the fences. (The fence pattern diagram shows the cut measurement in inches for each strip.) Use a ¼ inch seam so the green and purple strip set finishes at 8” wide and 42 inches long. Cut the strip set in half. One half will be used for the top fence and one half will be used for the bottom fence. You will have extra.
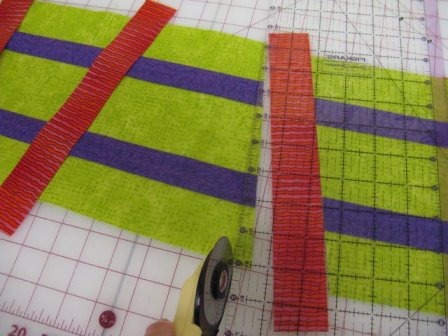
Strip Piecing to Create the ‘Fence.’
6. Cut the strip set at an angle and stitch the red strip in between. Offset the next section of fencing and sew to the red strip. Do this again and sew a red strip to the end of the fence design.
7. Trim the fence panel 8”x 19”. Add green fabric pieces on each side of fence to finish at 8”x 35”. Sew to the center panel.
8. Cut and sew green strips 2”x35” to the top and bottom of the panel.
9. Stitch the yellow strips to the edge of center panel for an inner border.
10. The scrap pieced outside border finishes at 3 inches wide. Stitch it to the outside of the quilt.
11. Layer with batting and backing and quilt your baby quilt!
* Pam Mayo, who quilted this baby quilt, used Star cottons for the quilting. She is my friend and an excellent professional long arm quilter. (Pam’s Facebook page: Fabric Creation & Design @ Facebook) The patterns she chose can be imitated with free-motion machine quilting on a domestic machine. She used a grassy pattern for the center of the quilt and wonderful wavy strips for the border. *
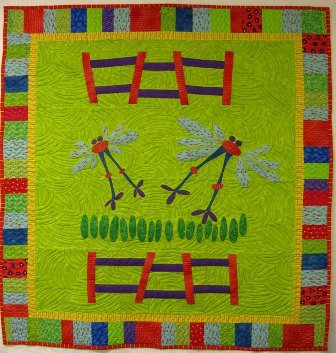
Finished Results of the Bouncing Baby Buggies Quilt!
The Grass Quilting.
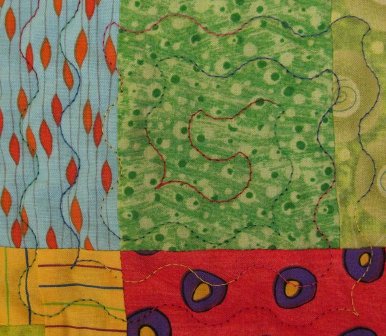
Example of the Corner Quilting.
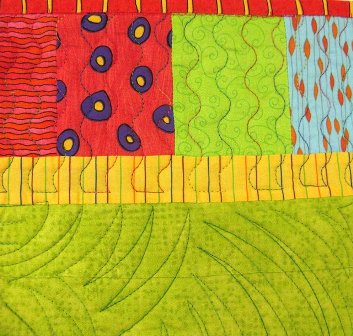
Border Quilting with Red and Yellow Striped Binding.
12. Bind your quilt. I chose this bright red with yellow stripe for my binding.
13. As always, be sure to enjoy the process!
Printable Pattern Below
For more free and fun tutorials by Terry White click here.
[hs_action id=”5636″]