 Pumpkin Softie Sewing Pattern
by Natalie Santini of SewHungryhippie
A step-by-step tutorial and pattern download so you can make these adorable pumpkin softies in small, medium, and large.
Materials:
1. Fabrics in various colors and patterns, at least three fat quarters to make a pumpkin family. I like to use six different fabrics, but it’s up to you to decide. Maybe just orange does it for you, and that’s great too.
2. Felt: I highly recommend 100% or at least 70% wool felt. It has a lovely hand to it and feels so
much nicer on your finished softie. Easier to stitch too!
3. Floss: I use DMC floss which is widely available online and in most craft or sewing shops. Also
a nice, large needle helps tremendously.
4. Polyfill for stuffing (or use an old pillow-cut it open and use that).
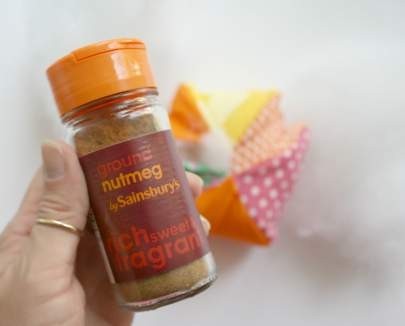
5. Rice and spices for making the bottom heavier so the softie will stand up appropriately. A funnel is helpful. I use cheap white rice and add cinnamon & cloves to it.
6. Optional: Glue gun with glue sticks, and Spanish Moss.
*My friend Zoe of Scented Sweetpeas said the Spanish Moss in Majorca is the best! Book a flight now! LOL
All seams are sewn with a 1/4” seam allowance. Whatever you usually sew with, stick with that and carry on throughout the entire pattern. 😉
Let’s begin.
1. Cut out six sides for your first pumpkin. Start with the medium size first, as it’s good to get the hang of it the first time around. I will show both small and medium sizes in these photos. Above is a size “small”.
These are the medium pumpkin cut outs.
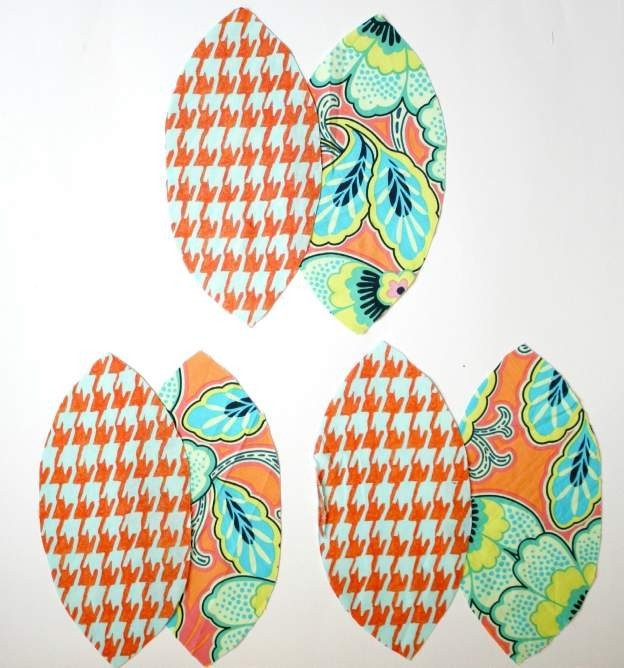
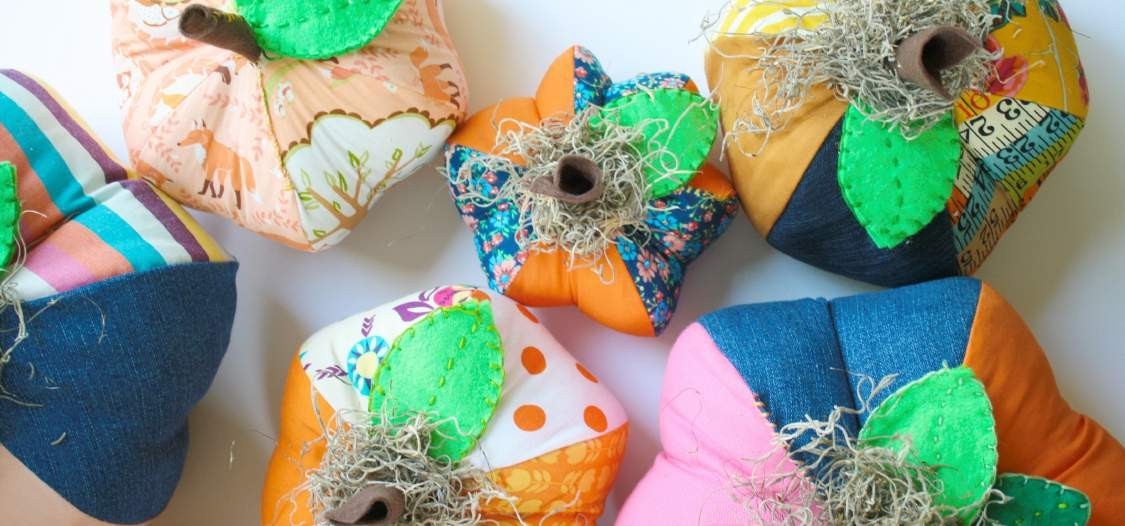
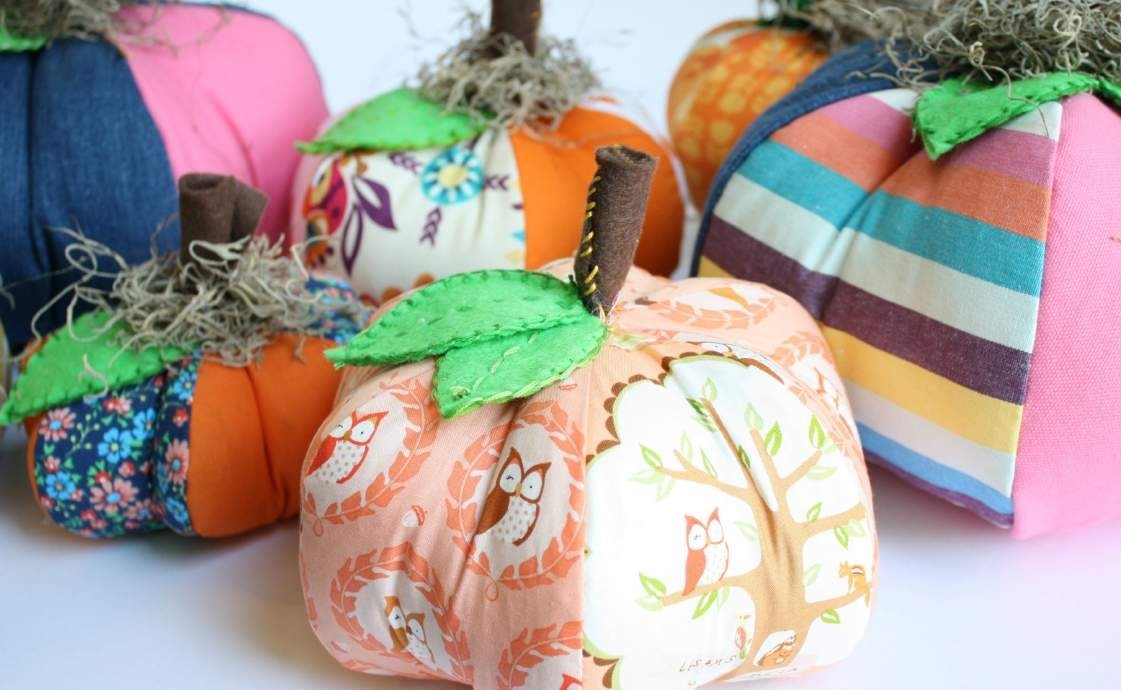
You can mix up the fabrics to have each one different, or alternate fabrics like I’ve done here, or do them all in one fabric. It’s up to you and your aesthetic.
Match two pieces together and sew down one side. Do this for all three sets.
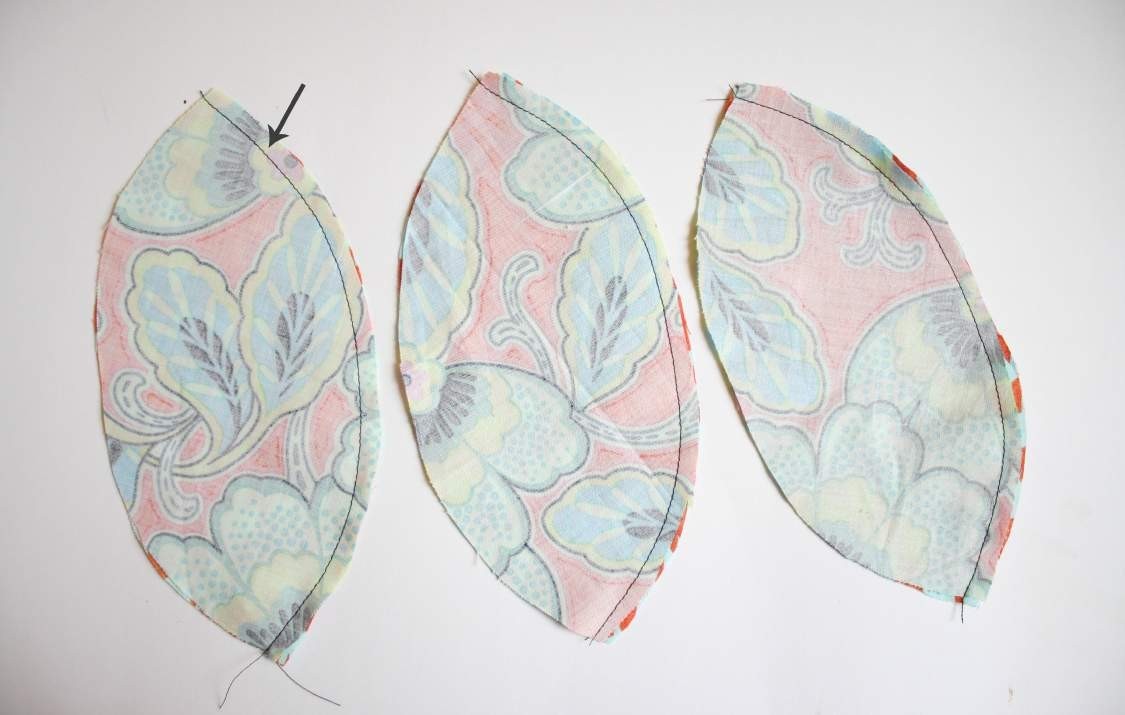
Match one pair of pumpkin sides to another pair, pin and sew down one side again just like before. Now you will have 4 cutouts sewn together.
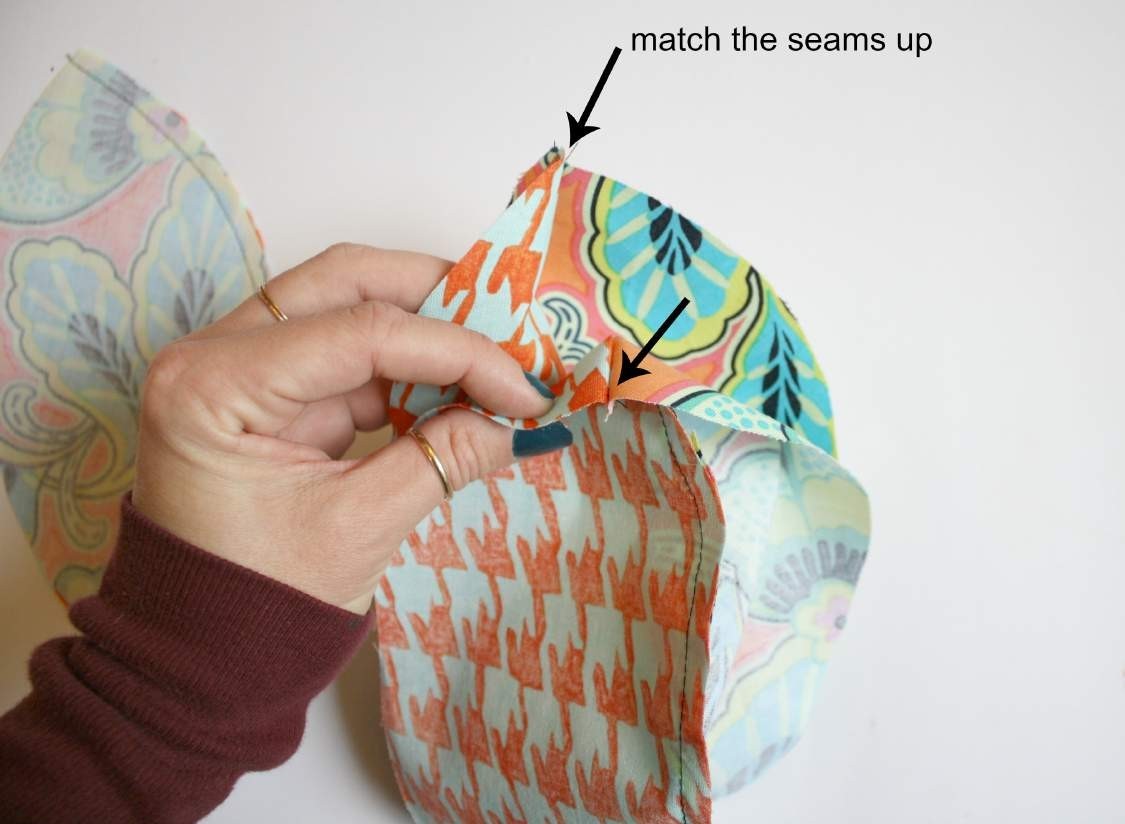
Repeat this for the last set. Matching up the seams again and sewing down one edge, leaving a gap at the top for turning.
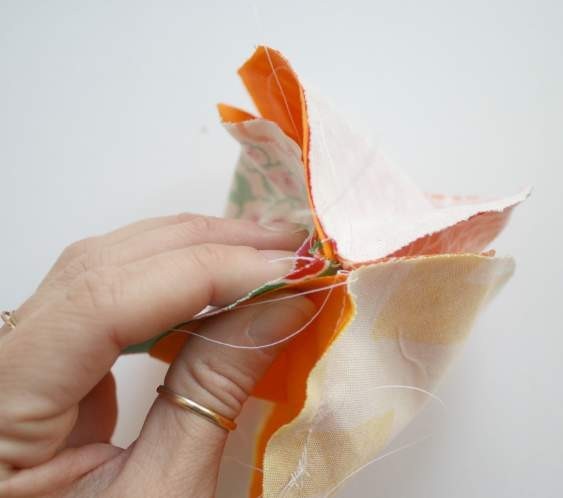
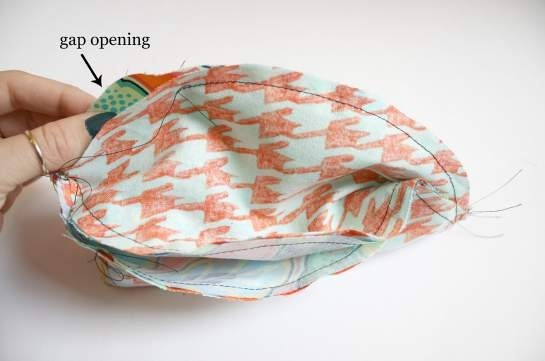
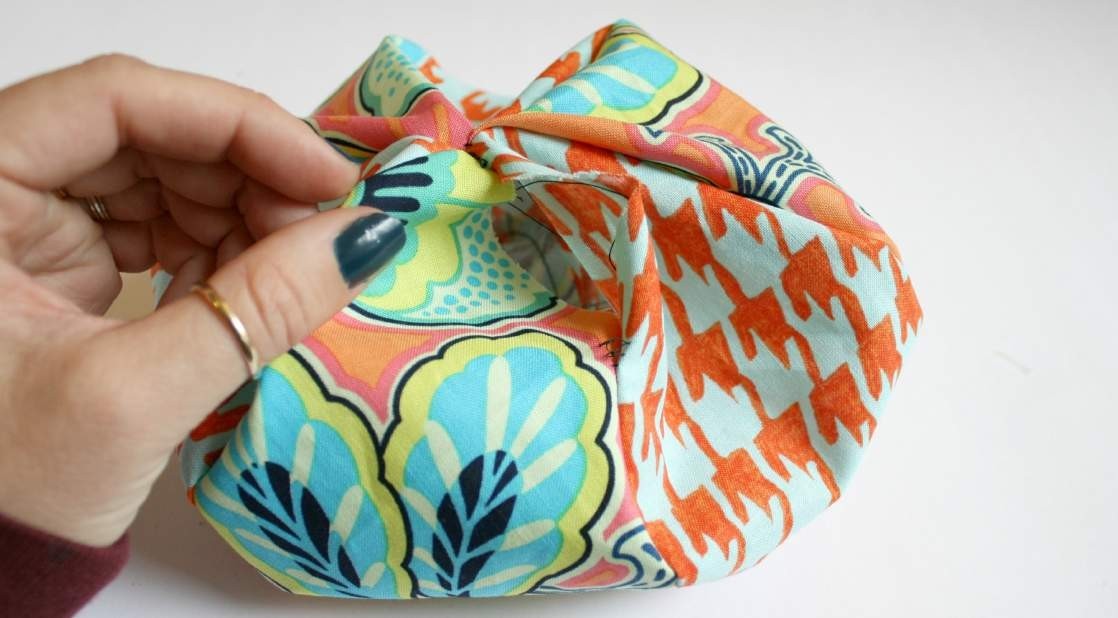
Now you will have an inside out pumpkin shape ball. Carefully turn right side out pushing the seams out with your fingers.
Grab the rice or kitty litter and a funnel. If you have access to kids that are so inclined, get them to help with this next part.
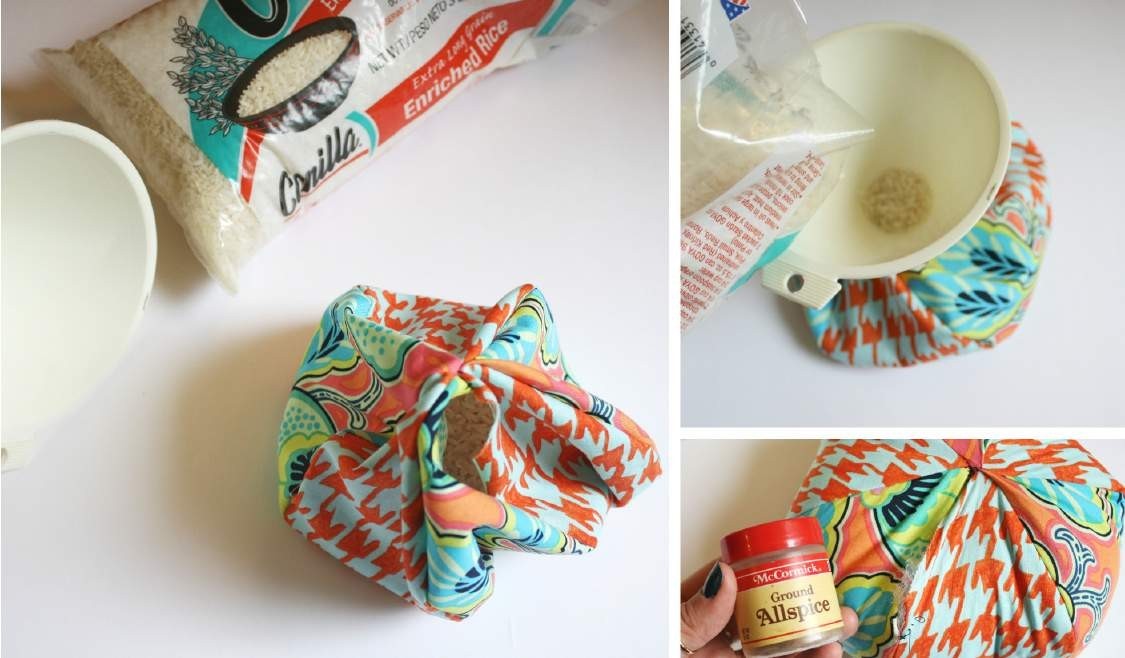
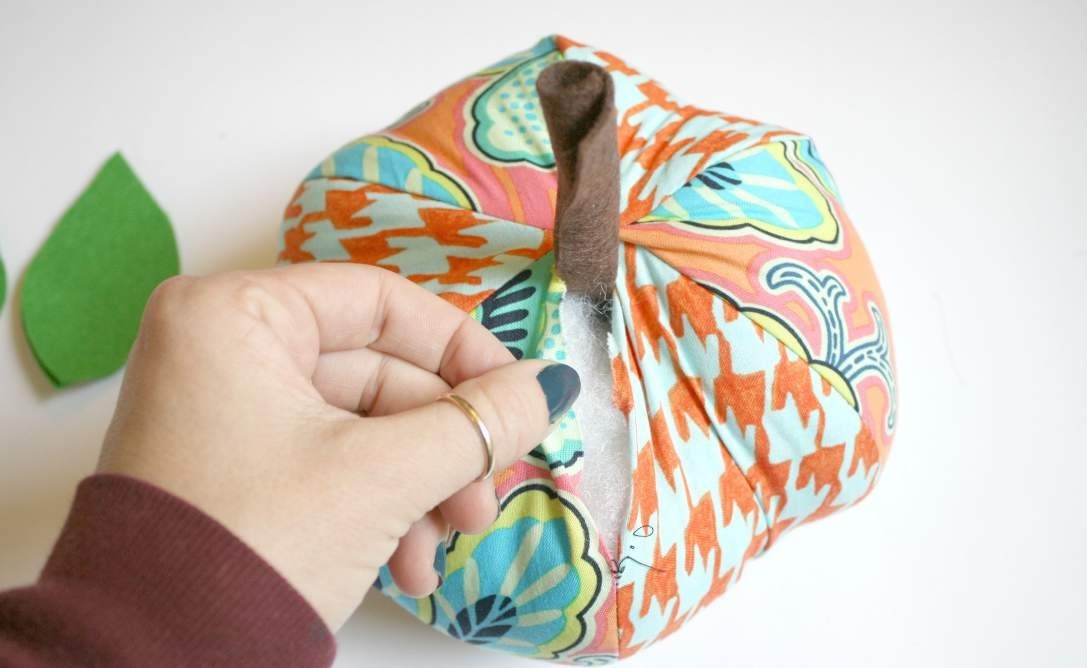
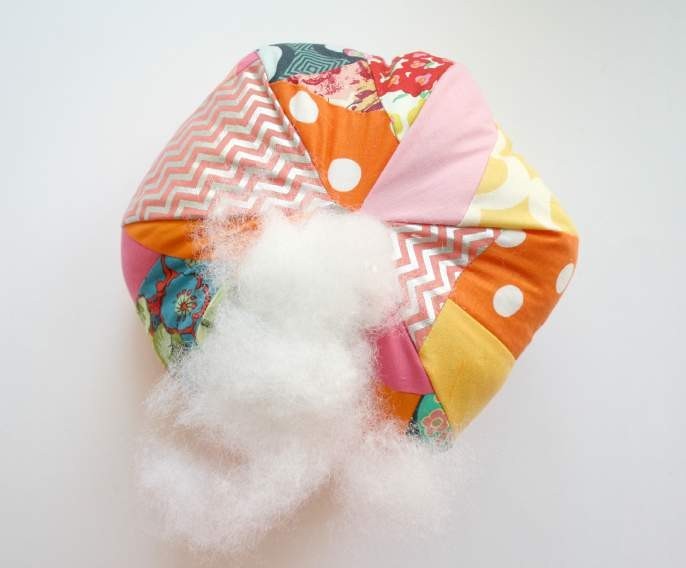
Pour the cup or so of rice (or kitty litter) into the pumpkin and arrange it level and even across the bottom. It’s now you will find out if your seams are sewn properly (LOL)–if any leaks out, dump it out and re-sew those seams. This is also when I put in my spice mix. Cinnamon is lovely, All Spice, and or Nutmeg all smell Autumnal.
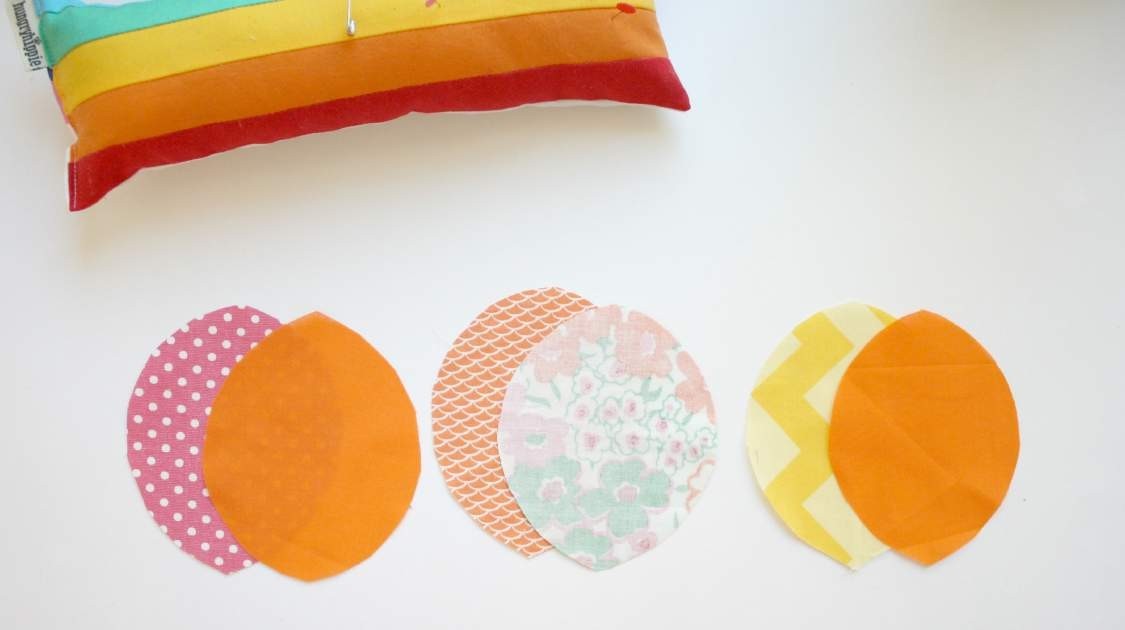
Proceed to stuff the pumpkin, pushing the stuffing into the seams especially, to bulge those bits out. I usually have to manipulate it a bit so it takes on that classic pumpkin shape. Once it is sufficiently stuffed, get your felt to make the stem and leaves.
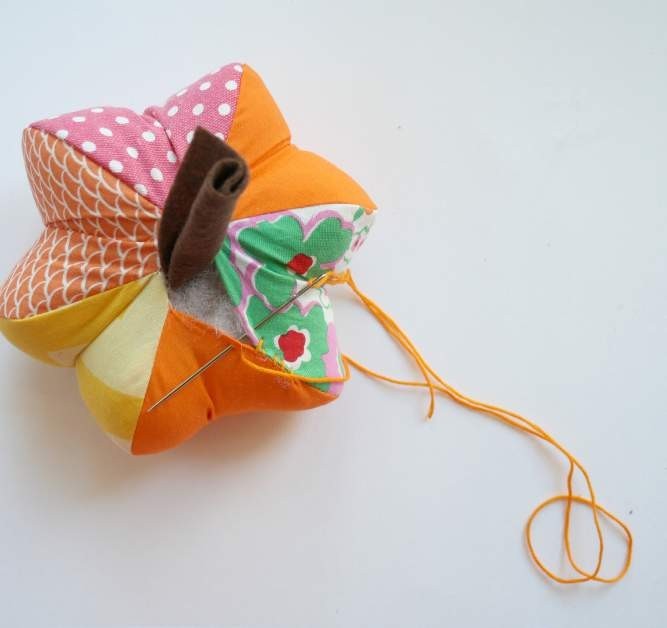
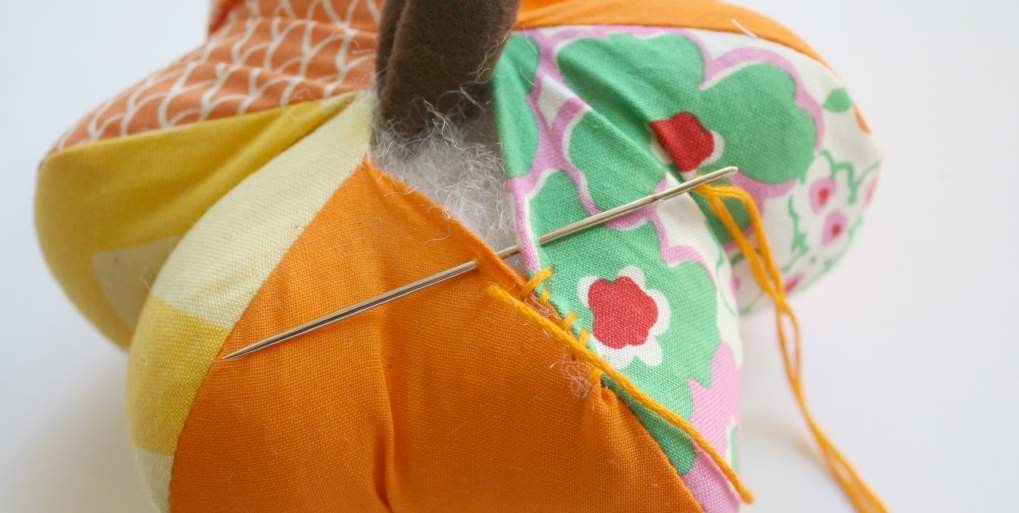
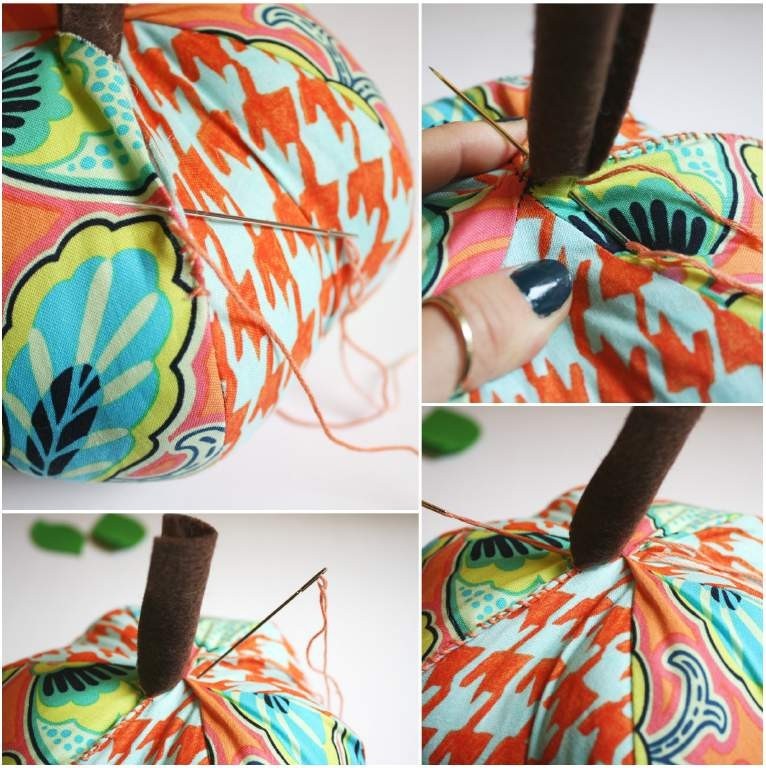
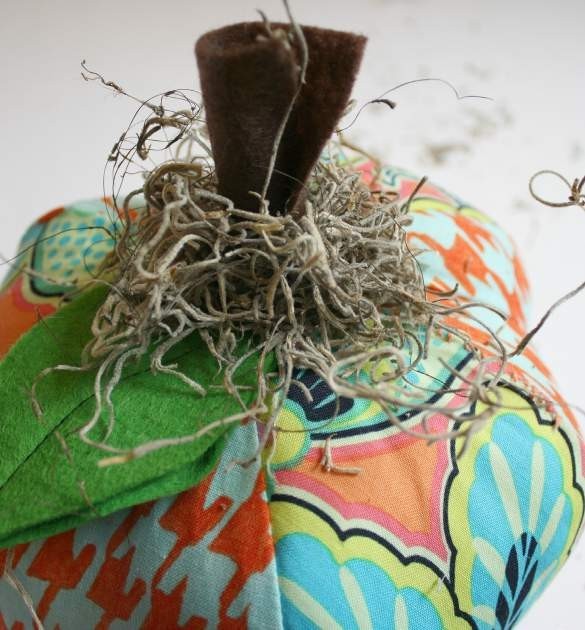
Cut out the stem and roll it up like a sausage. You have the option of stitching it into a closed sausage shape or just leaving it like I do. Stick it half way into the pumpkin, check to make sure the place- ment is pleasing to you, then stitch it into place as you sew the pumpkin sides closed.
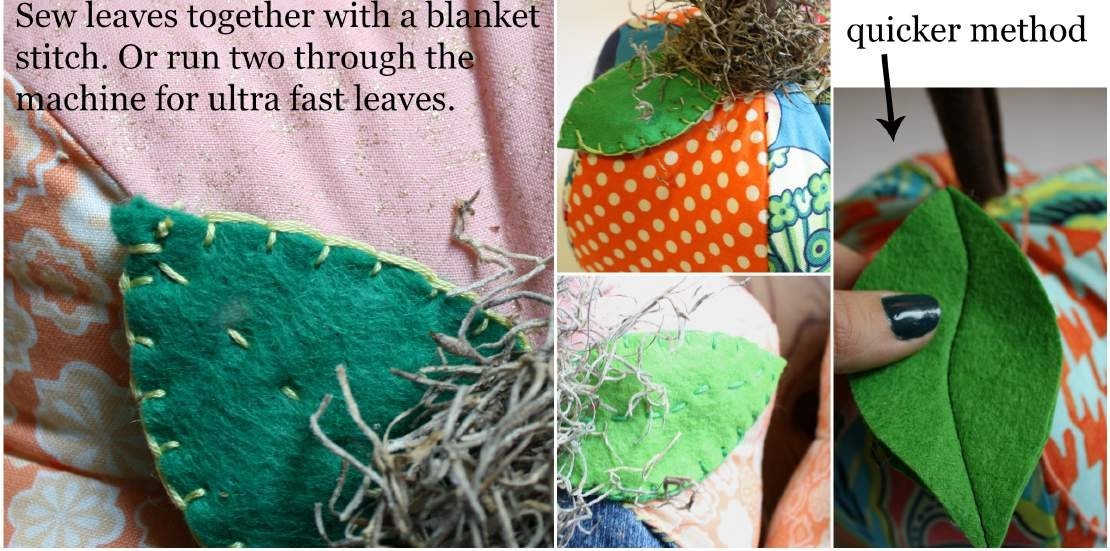
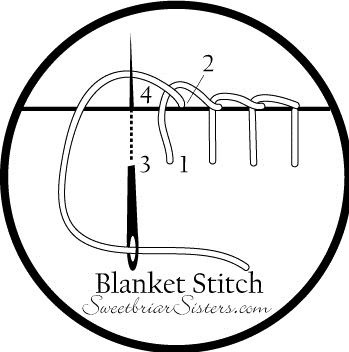
There is an easy to follow tutorial online for learning how to do a blanket stitch, search for a video on YouTube or look at this diagram by Sweetbriar Sisters.
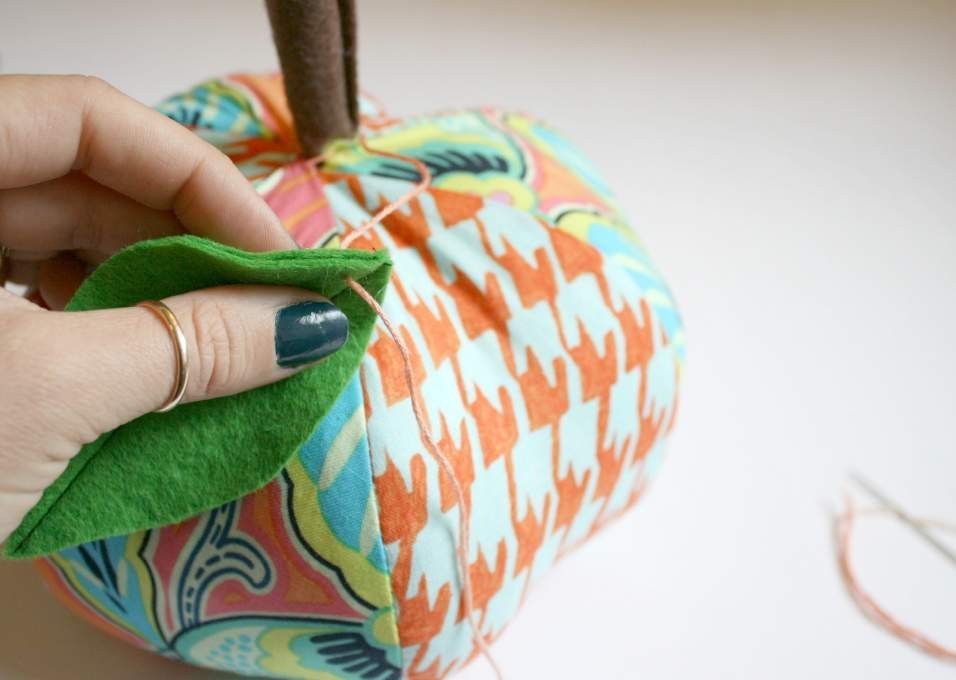
Feel free to experiment with your leaf construction! There is no wrong way. 😉
More up close pictures of closing and attaching stem & leaves.
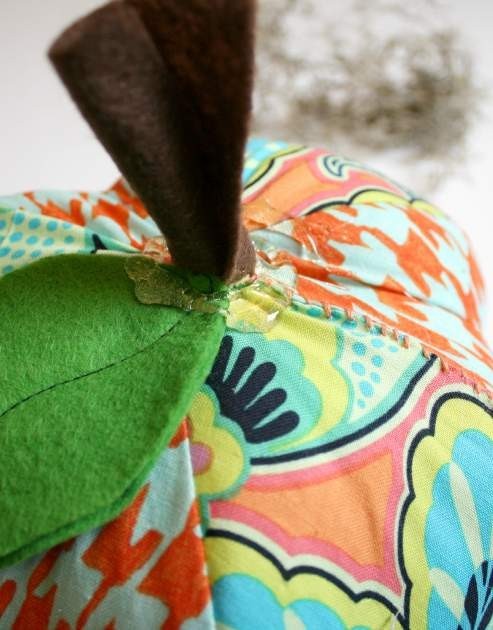
Sew your leaves on now as well. We will hot glue them for extra staying power next.
Dab some hot glue from the glue gun under the leaves and near the insertion point of the stem. This is for extra strength, if you don’t have a glue gun handy, it’s not the end of the world. At this time, add some Spanish Moss if you fancy the look.
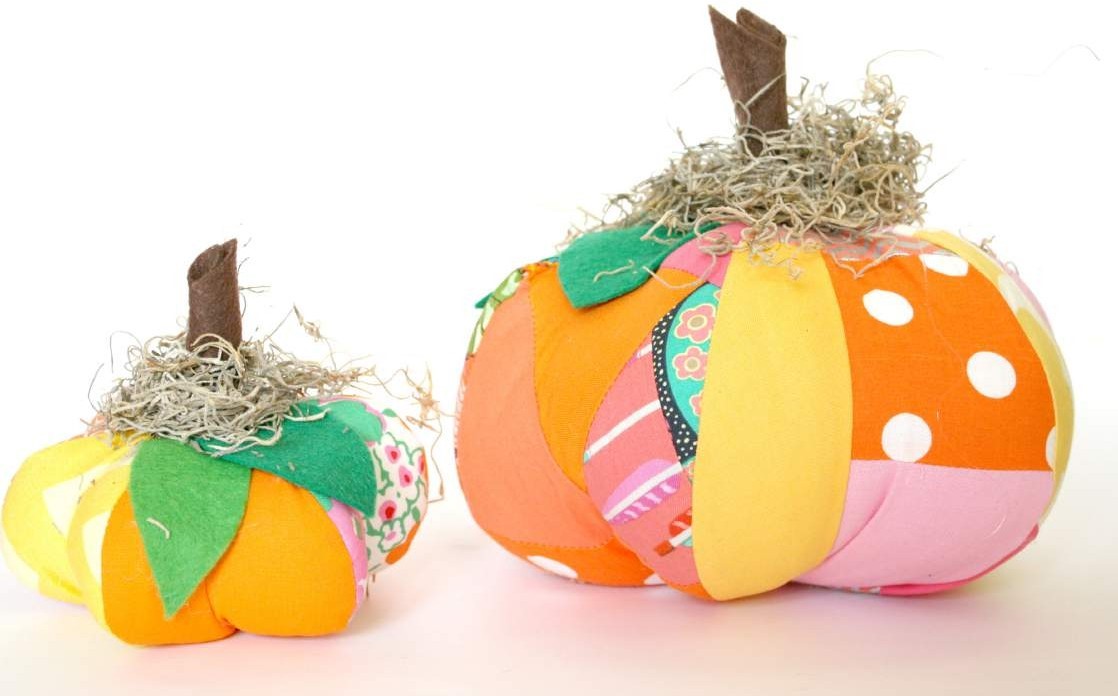
Well done! You’re finished making a pumpkin softie! Now make an entire family and watch others ohhh and ahhh over your cute softies.
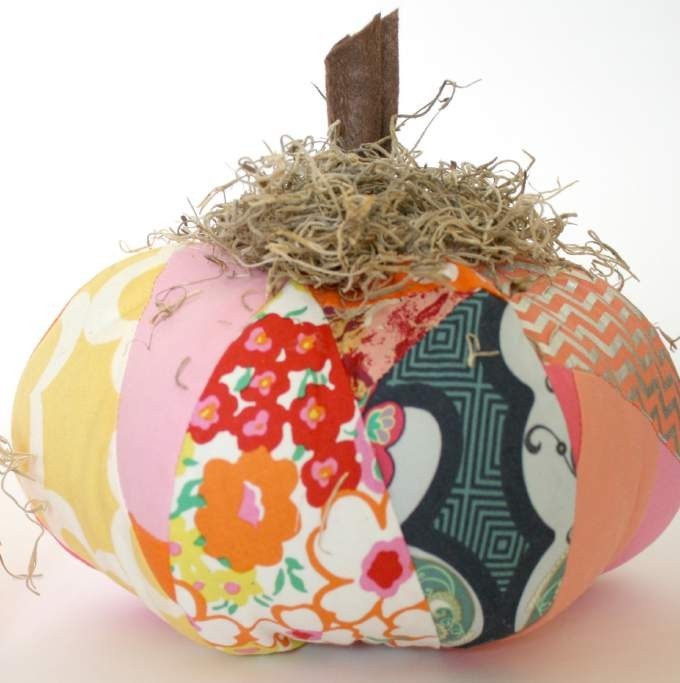
Make a CRAZY Patchwork Pumpkin
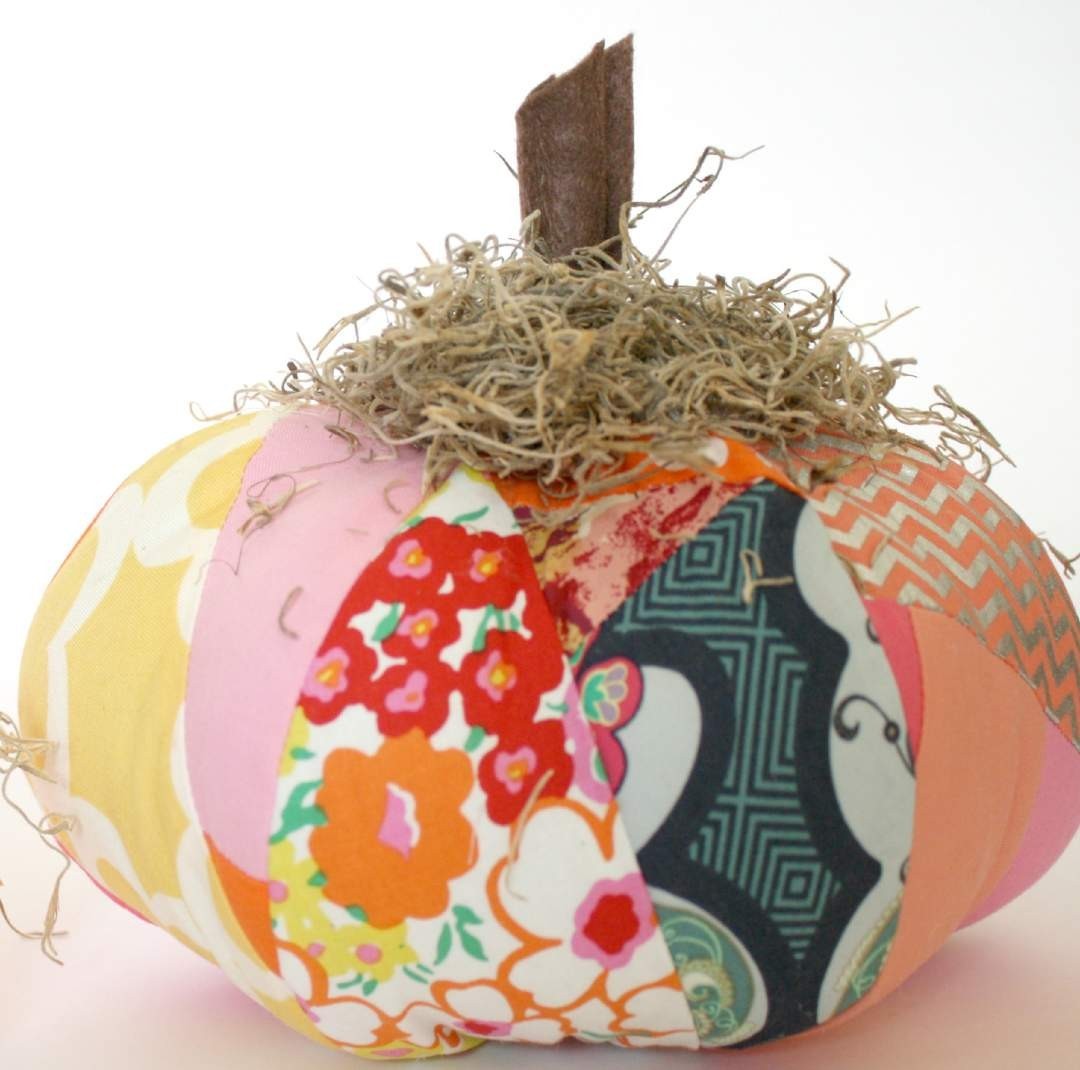 These patchwork pumpkins are made with scraps of fabric.
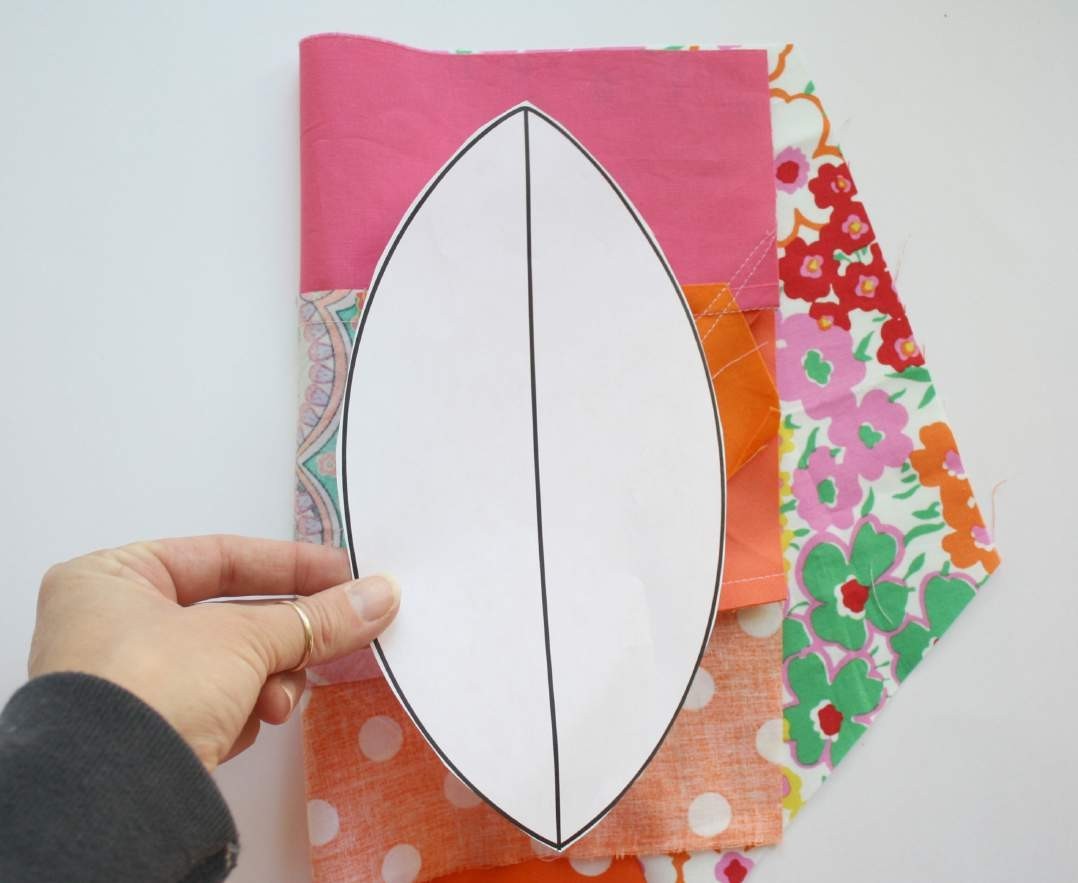
“Build” your own fabric pieces, then cut out the pattern shapes and pro- ceed as normal.
This is a great way to use up scraps and make ultra unique softies.
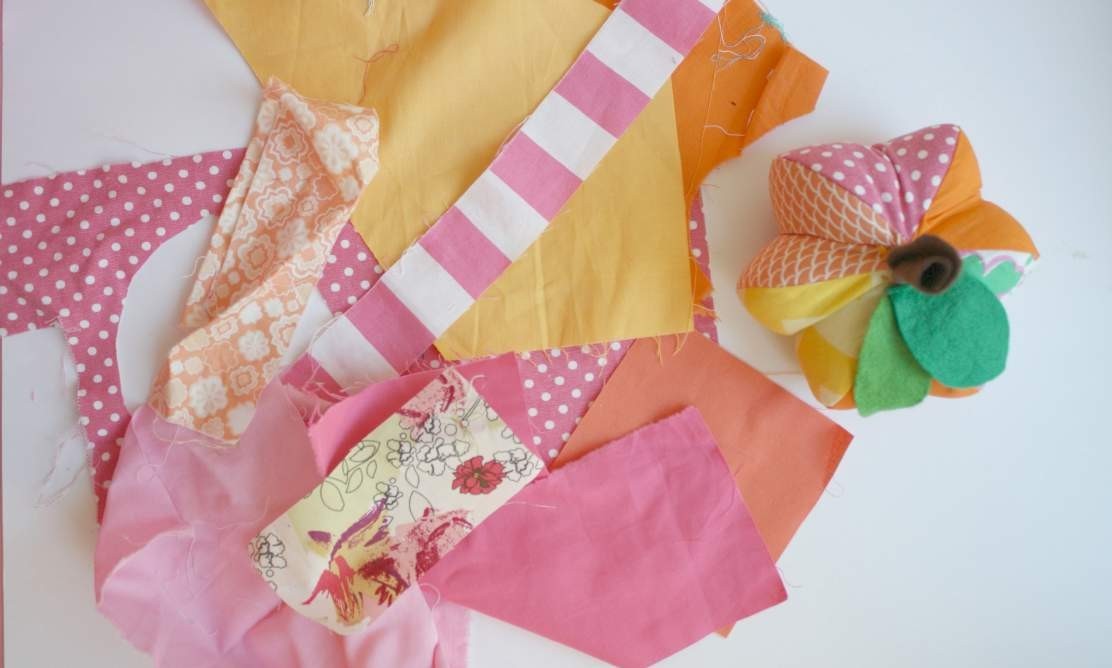
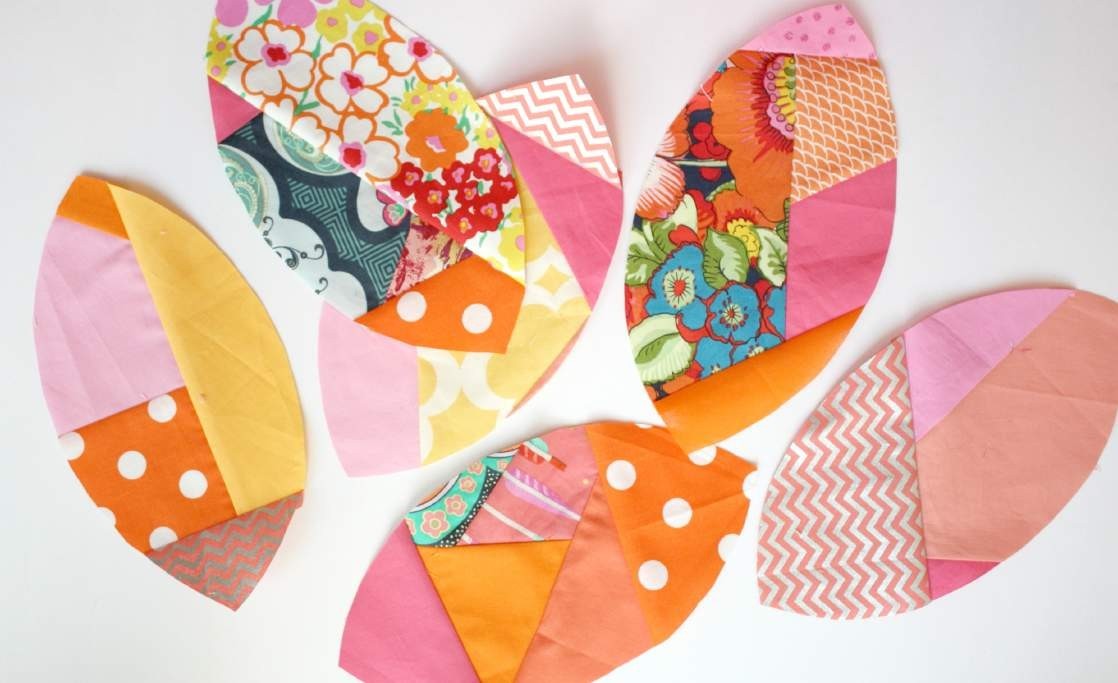
Gather a bunch of scraps, color coordinating or not, it’s your choice.
Build a “fabric sheet” by sewing the scraps together at straight angles and straight edges, always pressing the stitches before folding back over to the right side. Then press again to set the seam. You may need to trim the seam allowance as well, see the following photos.
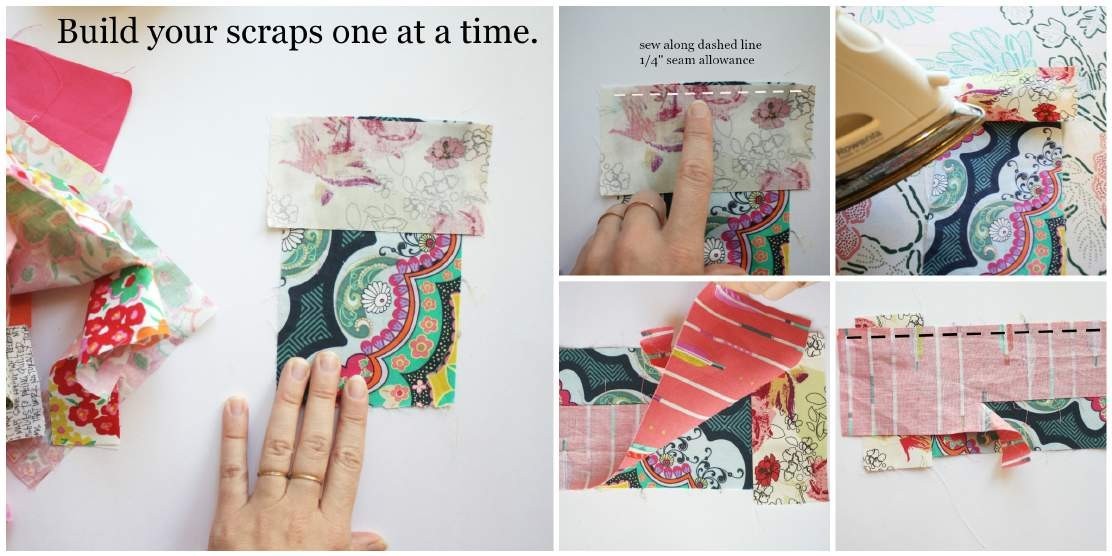
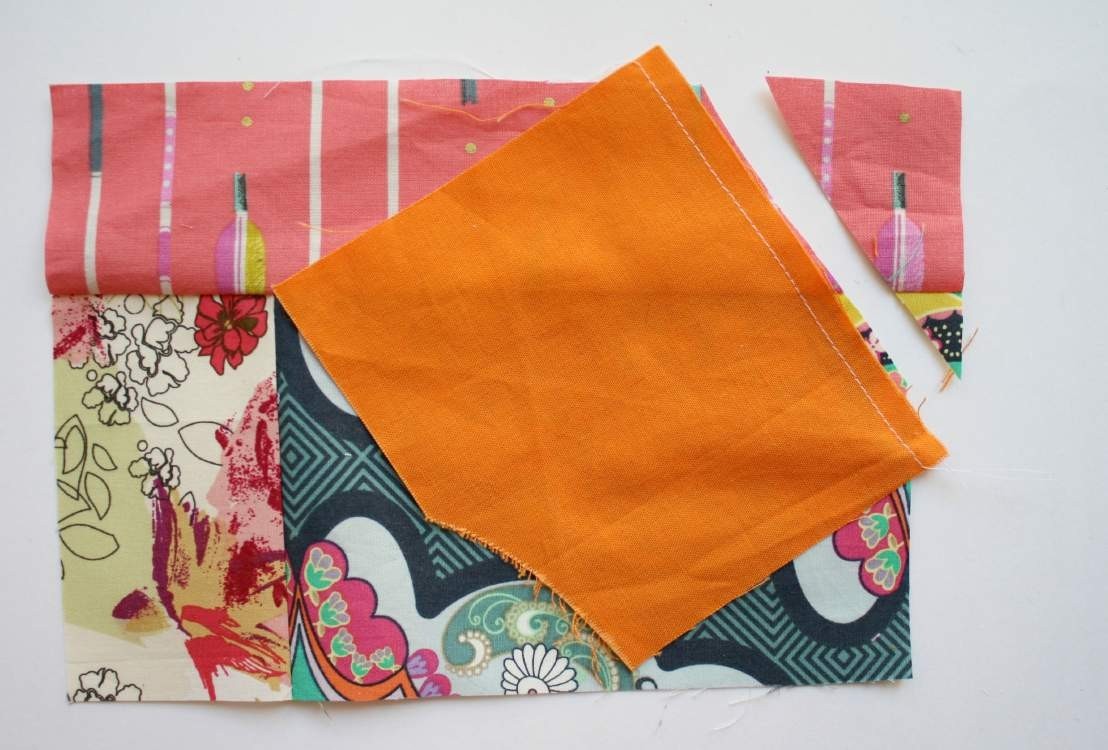
Keep adding bits of fabric at straight angles-remembering to trim the seam allowance and keep edges straight.
The scrap piece must cover the entire edge of where it’s added. Here is a fabric “sheet” ready for cutting into a pumpkin shape:
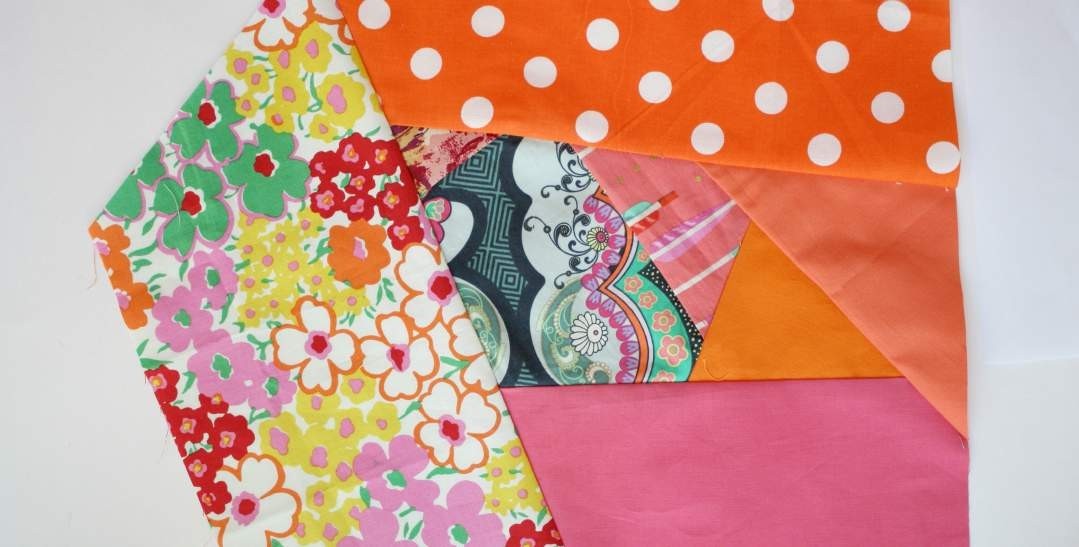
I had a large enough sheet to fold it over -so I was able to cut two pumpkin shapes at once. 🙂
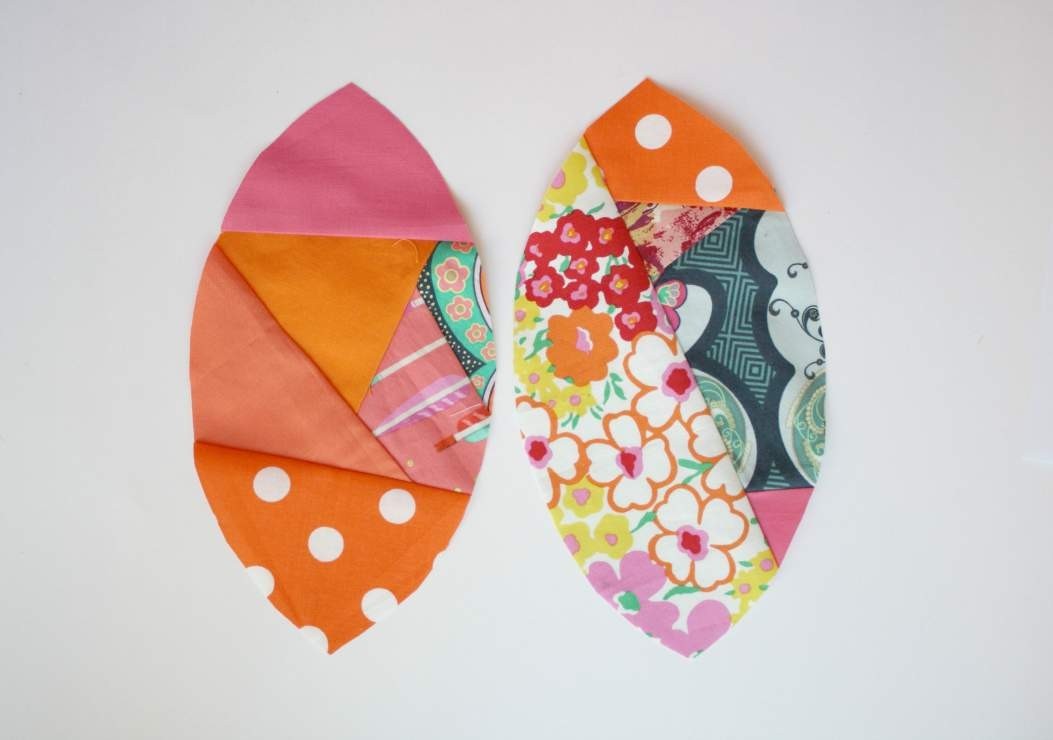
Keep going until you have six pieces. Then construct the pumpkin softie the same way we did the first one.
There you go! All finished, wasn’t that easy & fun?!