
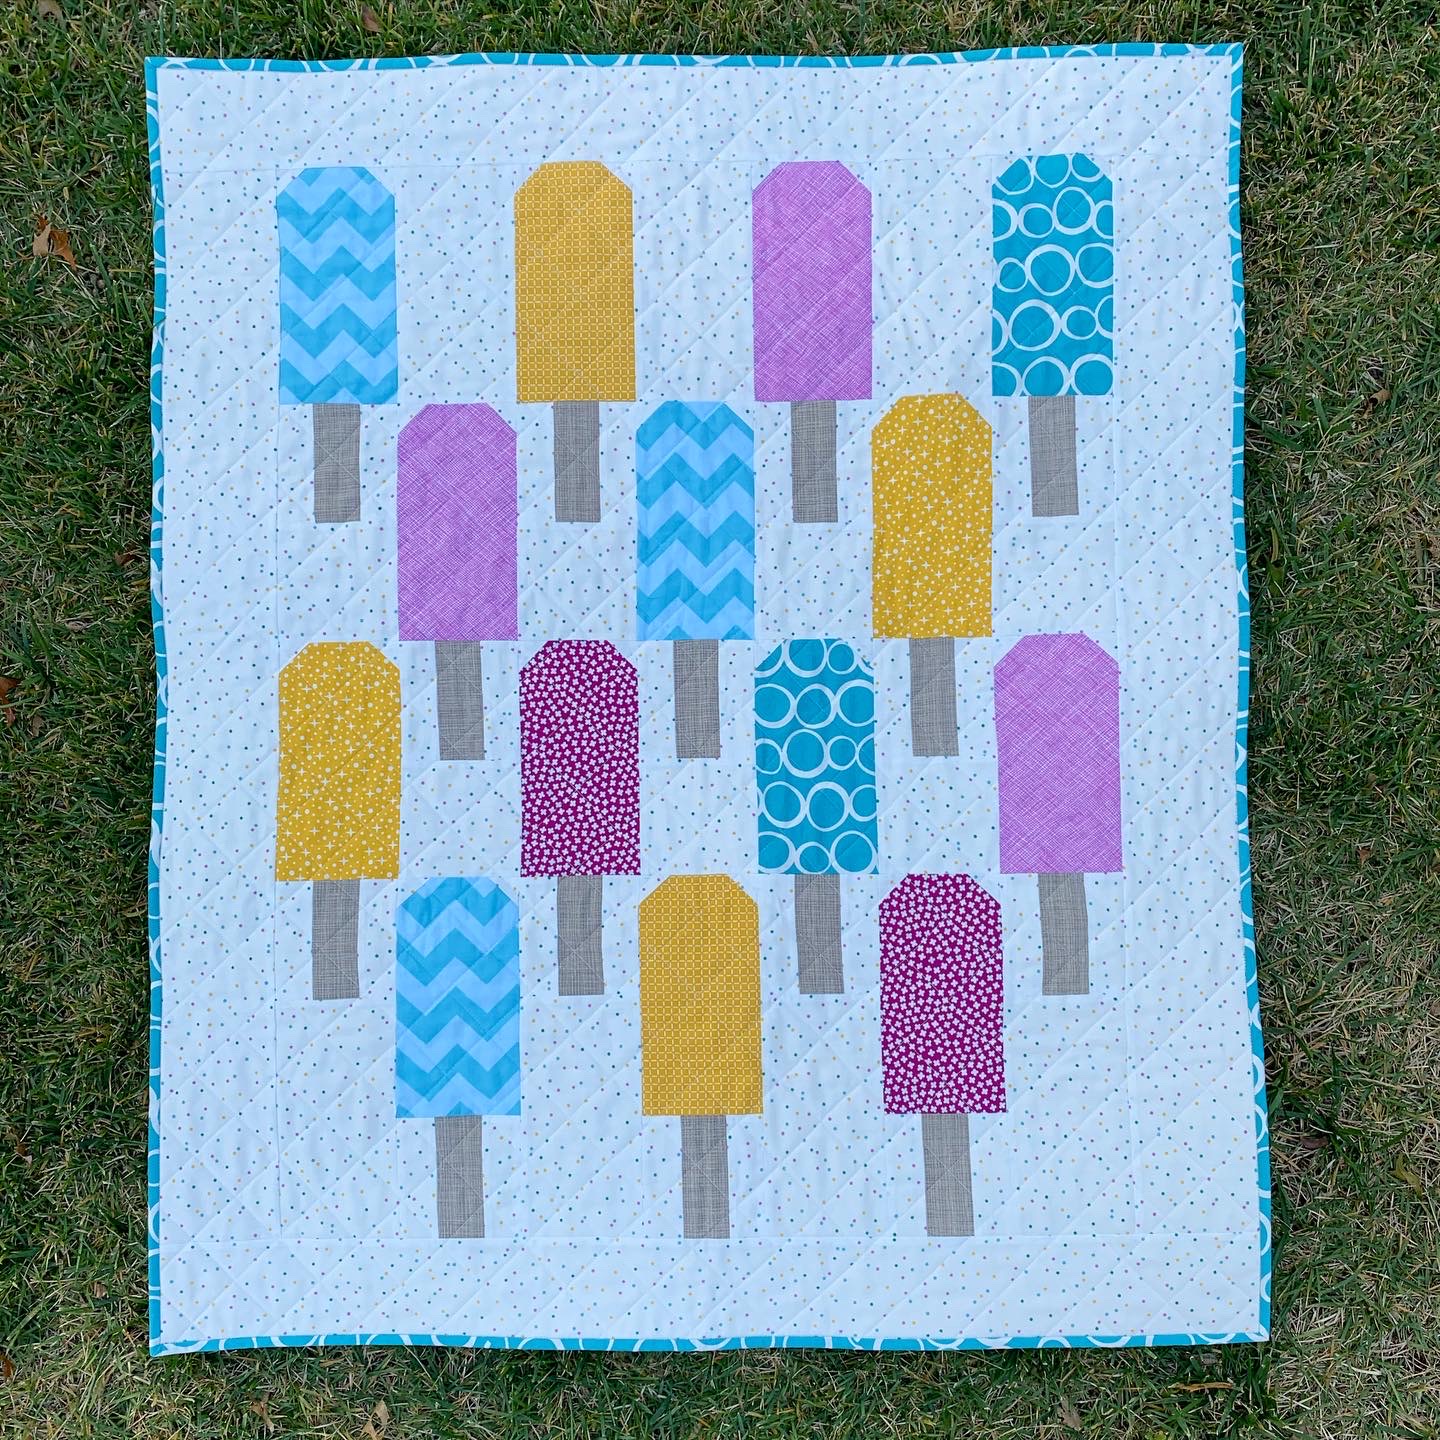
Little Pops Baby Quilt Tutorial
Finished size: 36” x 40”
by Jessica Schunke of A Blue Sky Kind of Life
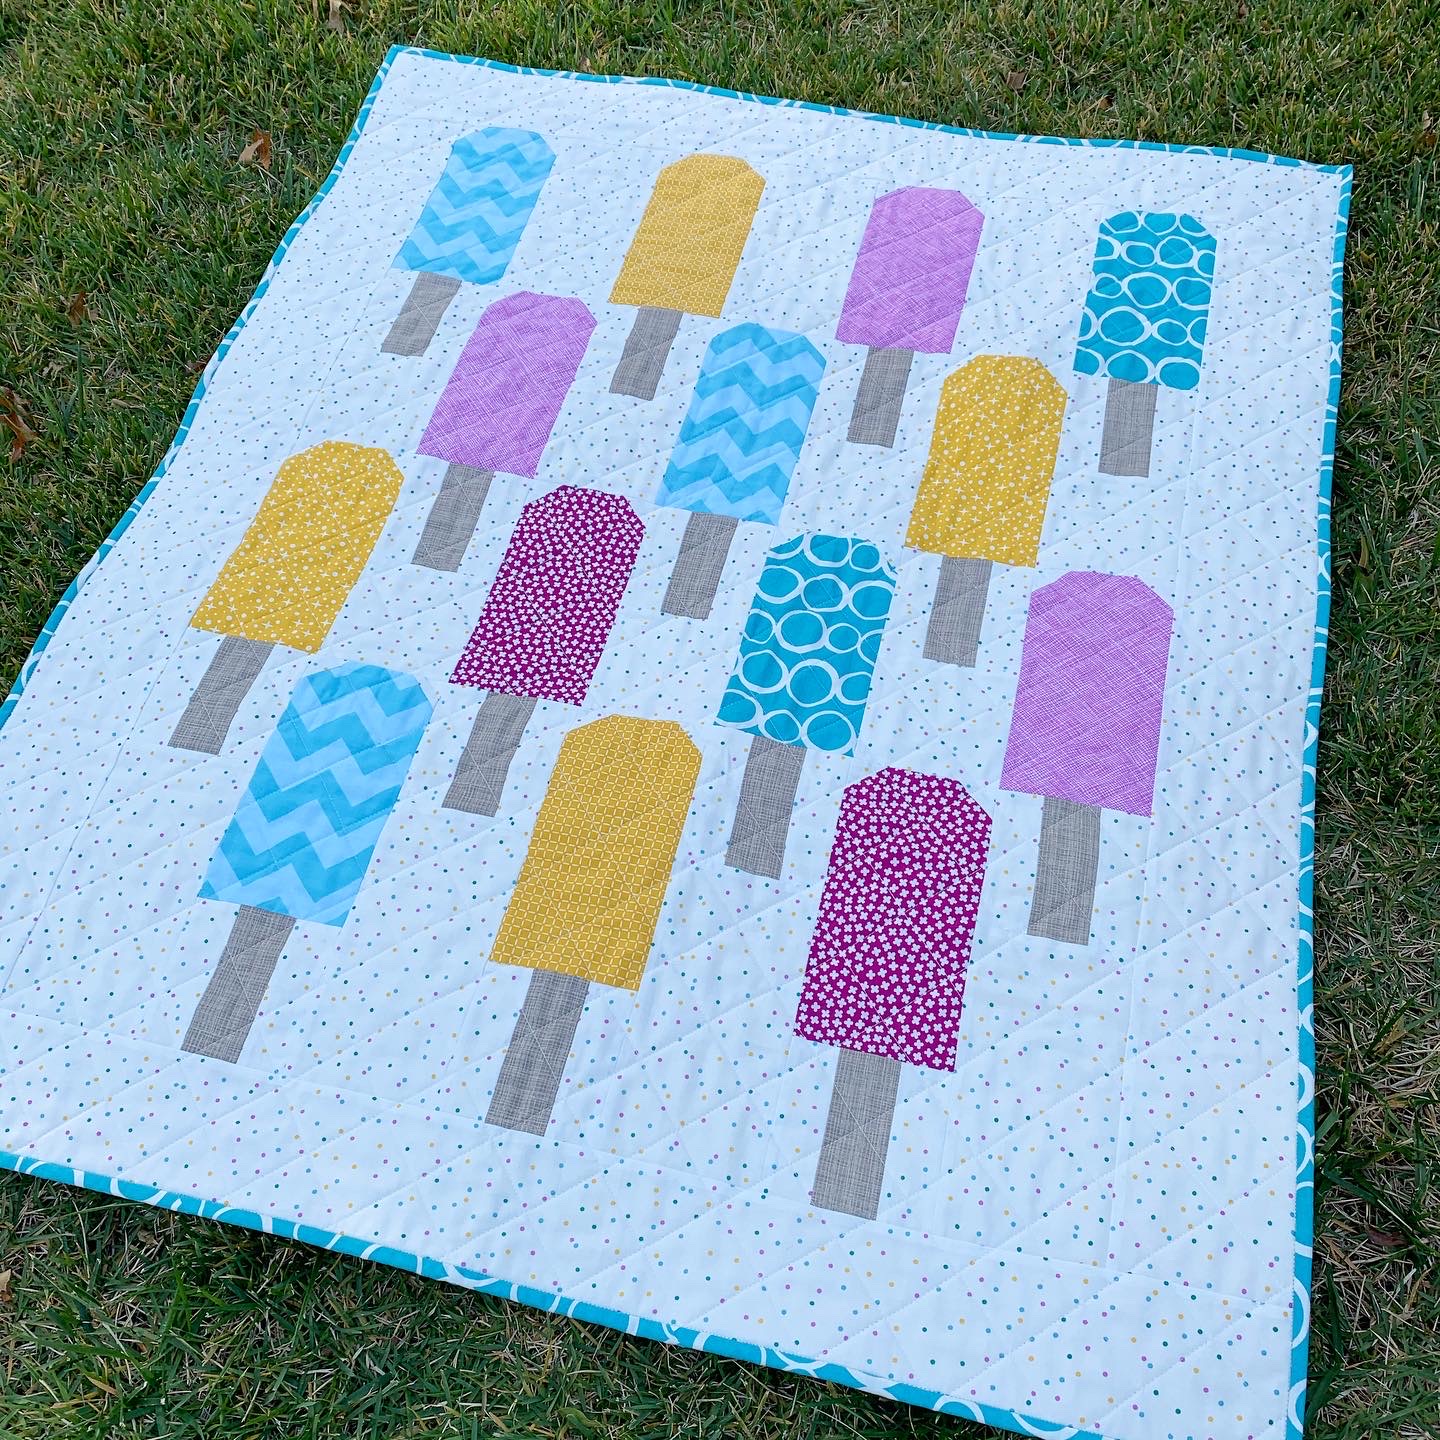
If the hot summer days have you longing for a quick quilt to whip up, I’ve got just the thing for you today. The Little Pops quilt is a simplified version of my Ombré Popsicle quilt. The instructions below are for a baby-size quilt, but it could easily be sized up to a crib or throw size by just increasing the number of blocks and enlarging the borders. Wouldn’t it make the cutest summer picnic quilt? If you’ve got a little one in your life who could use a little extra sweetness right about now, get started on this one, and they’ll be cuddling up in no time.
Supplies:
–Popsicles
• Cut (14) 4.5” x 8.5” rectangles from a variety of fabrics — make your popsicles as scrappy or streamlined as you like. I used six fabrics in mine. The 14 rectangles could be cut from as little as two fat quarters (you can get eight rectangles from one fat quarter).
• (1) tan fabric: 1/8 yd.
o From (2) 1.5” x WOF strips, subcut (14) 1.5” x 4.5” rectangles
–Background: 1-1/8 yd.
Subcut as follows:
• (7) 4.5” x WOF strips
o From (1) WOF strip, subcut (7) 4.5” squares and (1) 4.5” x 8.5” rectangles
o From (1) WOF strip, subcut (4) 2” x 4.5” rectangles and (4) 4.5” x 8.5” rectangles
o From (1) WOF strip, subcut (21) 2” x 4.5” rectangles
o From (2) WOF strips, cut (1) 4.5” x 8.5” rectangle off of one end; the remainder of these two strips (roughly 33”) will be your side borders.
o Leave the remaining (2) strips alone; they will be your top and bottom borders.
• (1) 1.5” x WOF strip: sub-cut (28) 1.5” squares
• (1) 4.5” x 6.5” rectangle: subcut (3) 2” x 4.5” rectangles
–Binding: 3/8 yd.
• Subcut (5) 2.25” x WOF strips
–Backing: 1.25 yd.
–Rotary cutter (I adore my Havel’s 60mm cutter)
—Havel’s cutting mat
**A ¼” seam allowance is assumed throughout.
Instructions:
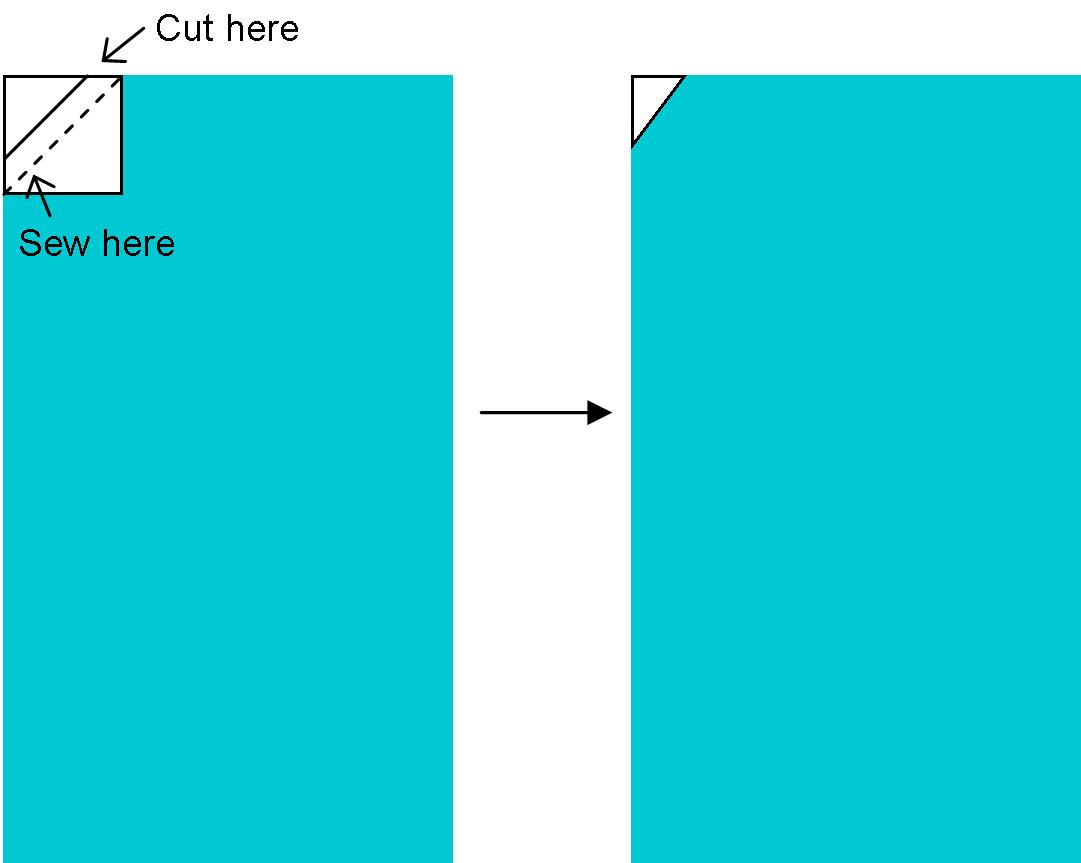
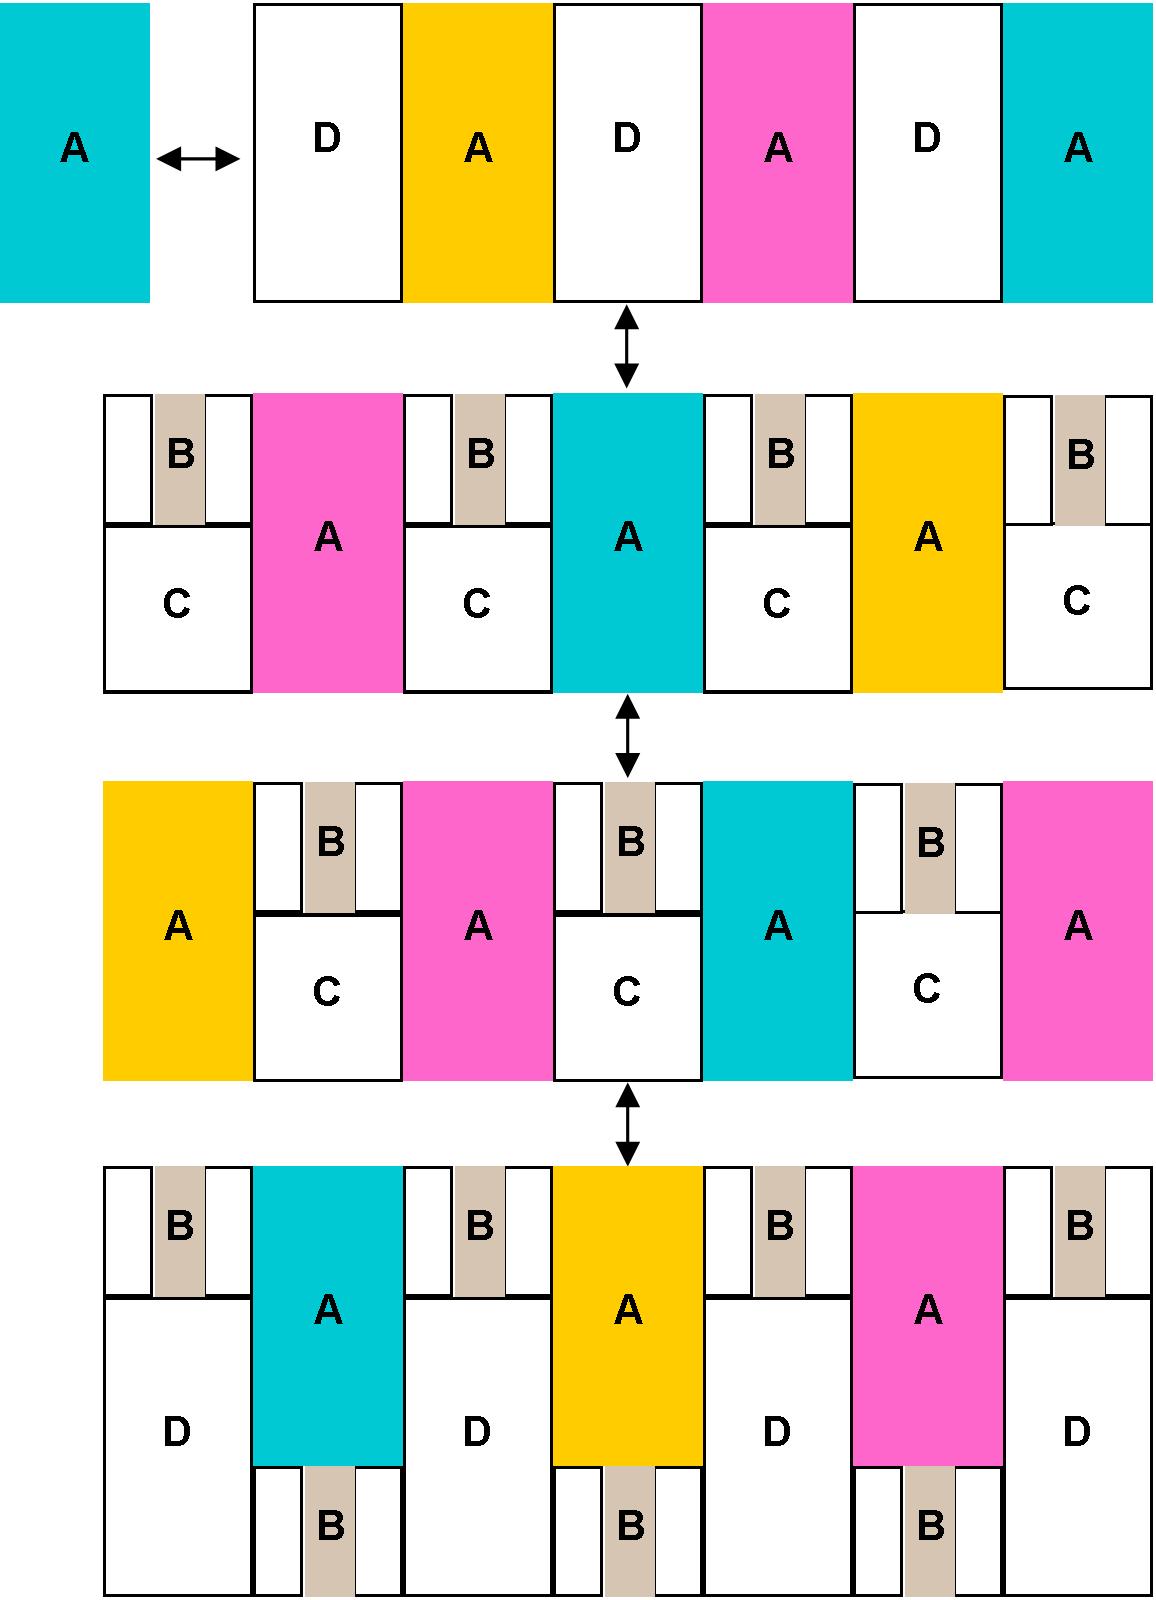
(1) Draw a diagonal line on the wrong side of each 1.5” background square. Place one 1.5” square right sides together in the top left corner of each 4.5” x 8.5” popsicle rectangle with the marked line oriented in the direction shown below. Sew along the line, then trim ¼” away from the line as shown. Press the triangle open.
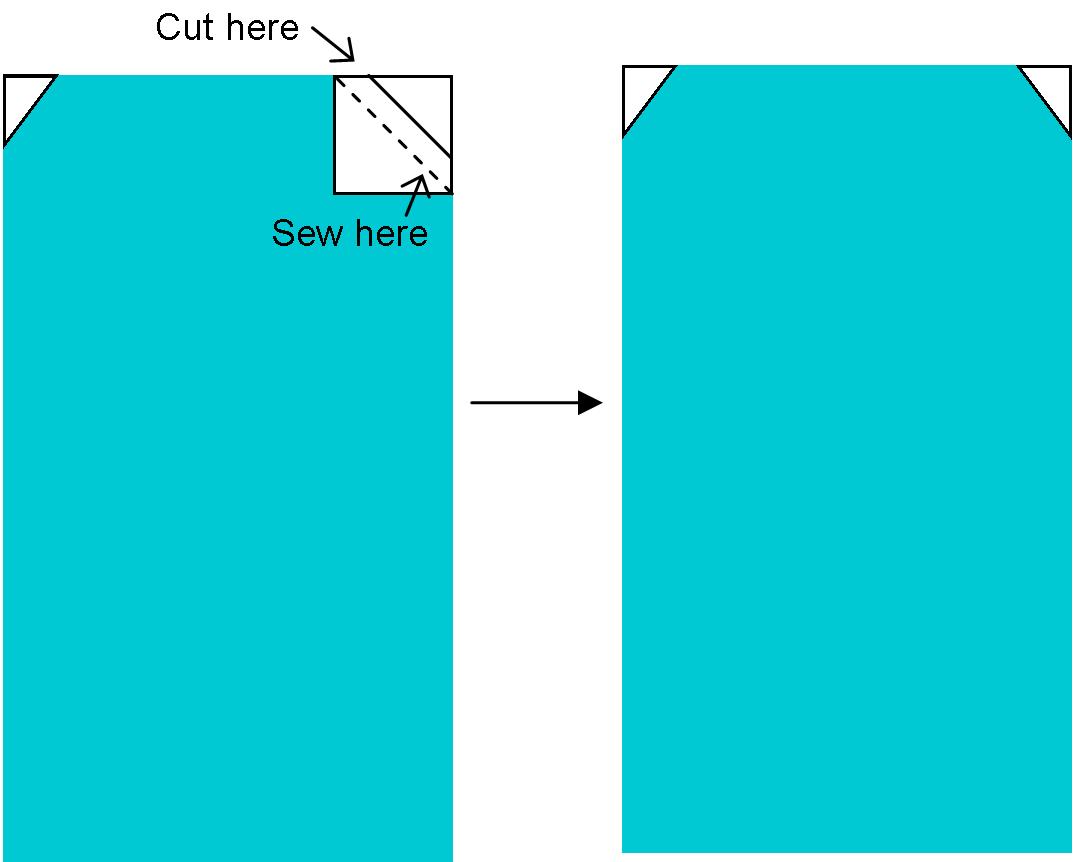
(2) Repeat Step 1, placing one of the remaining 1.5” background squares in the top right corner of each 4.5” x 8.5” popsicle rectangle. Make sure the marked line is oriented as shown below. This is Unit A.
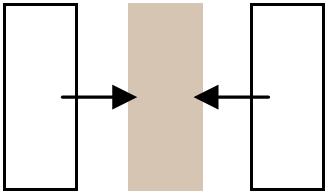
(3) Placing right sides together, sew (1) 2” x 4.5” background piece to each side of the tan 1.5” x 4.5” pieces. Press seams. This is Unit B.
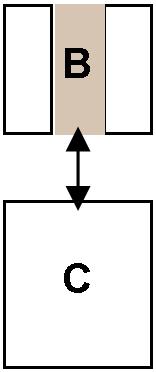
(4) Sew (1) 4.5” background square (Unit C) to the bottom of (7) of the B units. Press seams.
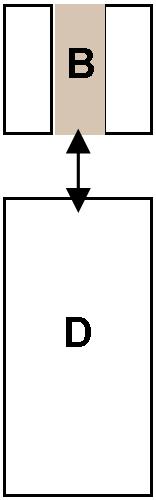
(5) Sew (1) 4.5” x 8.5” background piece (Unit D) to the bottom of (4) of the B units. Press seams. (Note: Three B units won’t have anything added to them.)
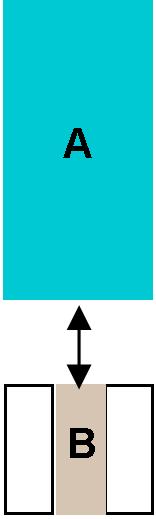
(6) Sew the (3) remaining B units to the bottom of (3) of the A popsicle units. Note: These will be the popsicles on the bottom row of your quilt, so consider your layout before sewing these units. Press seams.
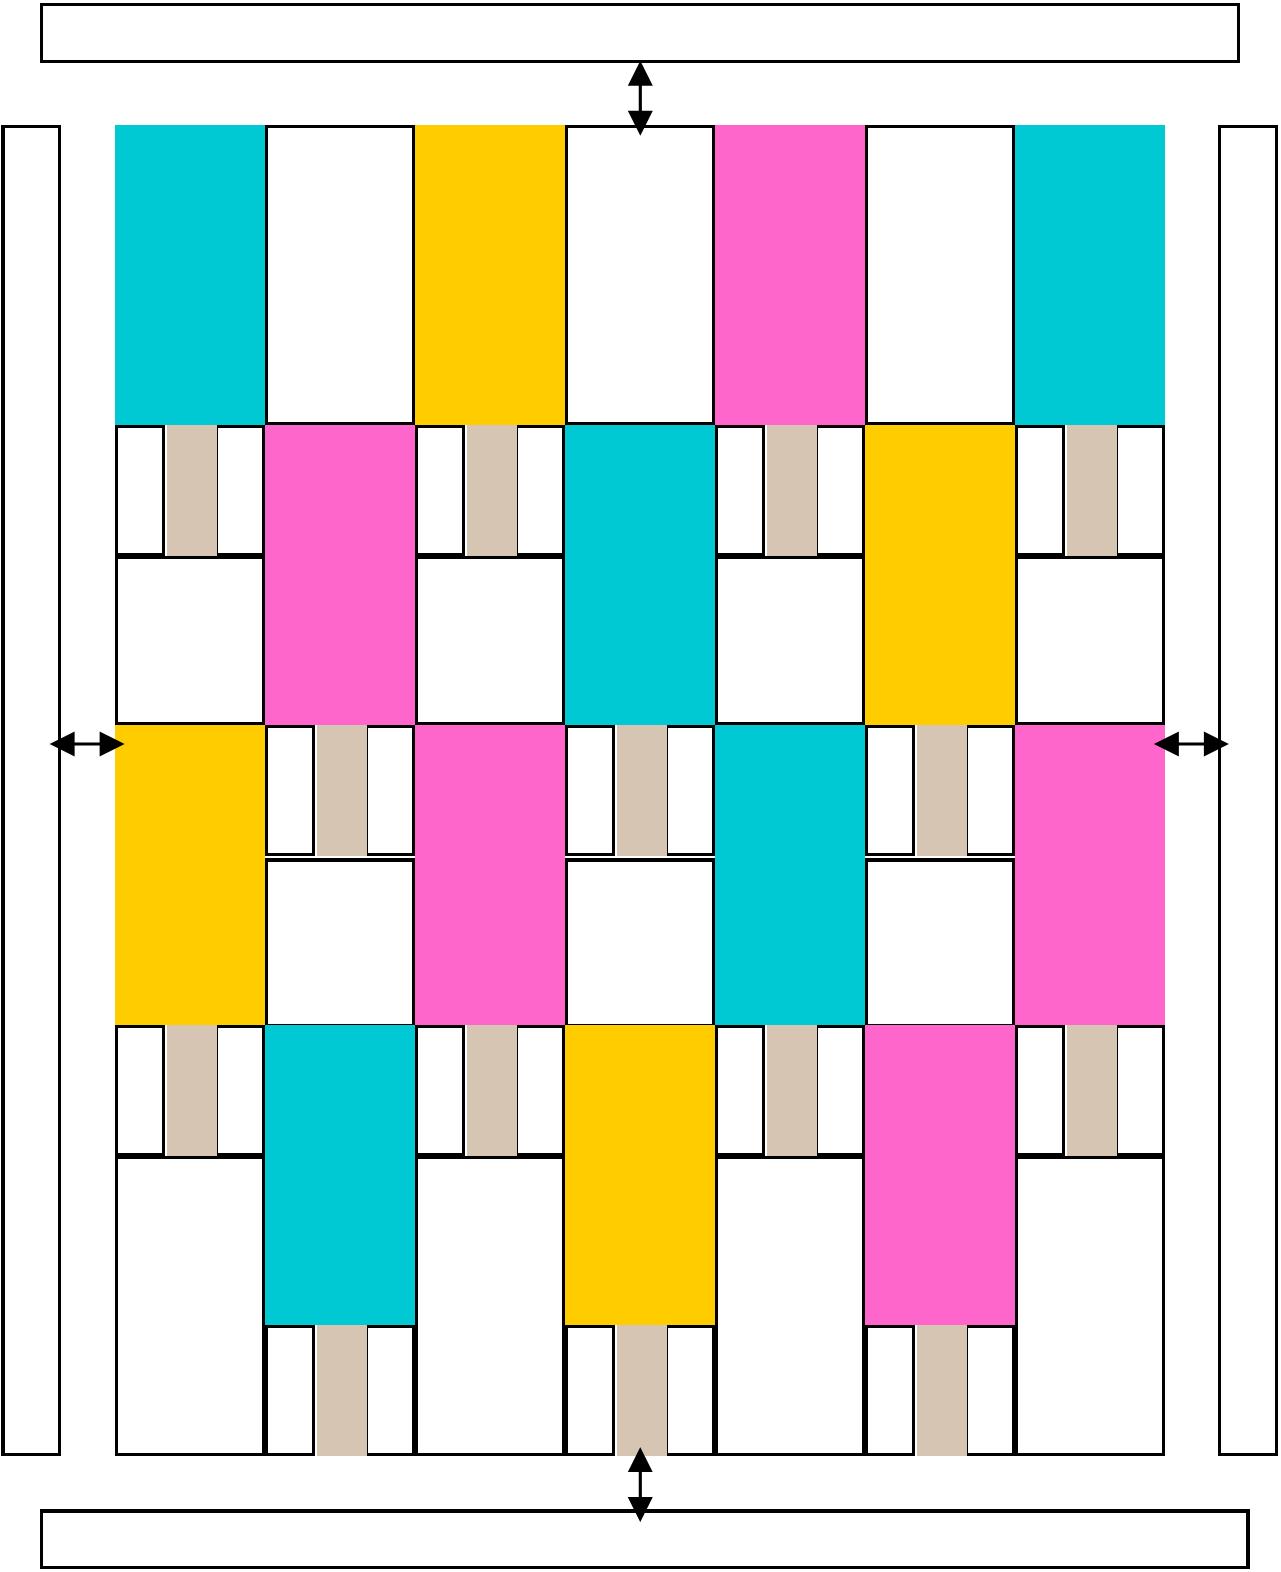
(7) Arrange units in rows as shown below. Sew units into rows and then sew rows together. Press seams.
(8) Sew (1) 4.5” x 33” border strip to each side of the quilt top. Press the seams toward the border strips and trim as needed. Sew the remaining border strips to the top and bottom of the quilt top. Press the seams toward the border strips and trim as needed.
(9) Baste, quilt, and bind as desired.
(10) Enjoy your beautiful new quilt! Be sure to post on Instagram using #littlepopsquilt and #havelssewing so we can see what you made! Happy sewing!

Hi! I’m Jessica, a sewing, baking, editing, mommying Texan transplanted to the Midwest. I’m a proud Havel’s brand ambassador and member (and former president) of the St. Louis Modern Quilt Guild. I’m most active on Instagram, where you can find me as @blueskycrafter.