by Jamie Fingal
Learn how to make three flags, using scrap fabrics, fusing, wool blended felt backing and free motion machine quilting.
Each flag measures 6″ x 8″ vertical format. I used wool blended felt for the foundation and backing. If you so desire one layer of felt is okay. I prefer the firmness of 2 layers. I would not recommend polyester felt, because noxious fumes will release when ironed or fused to other materials. Choose three background colors, that fit on a 6×8 foundation.
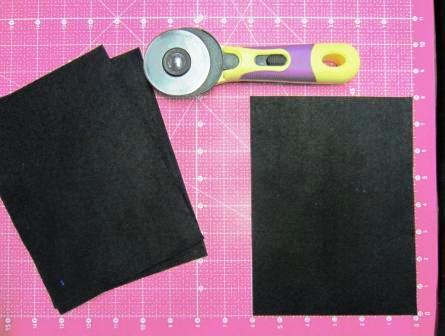
So, let’s get started. Cut out the felt 6” x 8” using a rotary cutter, ruler and cutting mat.

A Fusing Lesson
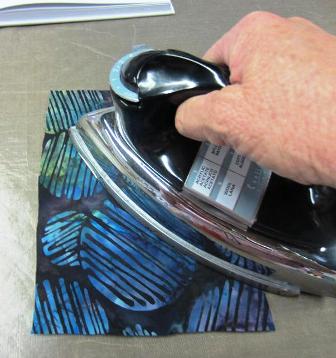
Picture 1: I use Mistyfuse, a fusible web, that doesn’t change the hand of the cloth. It is very easy to sew though on the machine, as well as, hand sewing. I buy it by the bolt. So, I have rolled it out onto the wrong side of the fabric.
Picture 2: Using a pressing sheet (Goddess Fat Sheet by Mistyfuse), I run my dry iron on the cotton setting over the entire area, making sure that the edges are all melted into the fabric. You can lift up an edge of the sheet to see how it is working.
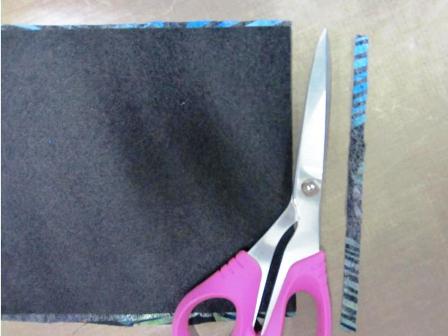
Picture 3: On the left is the fabric without Mistyfuse, and on the right, is the fused fabric. You see it has a sheen to it, so you will know what side has the fusible on it. Trim off the edges that are not fused, and set aside. You will need 3 different pieces of fabric for the backgrounds. Fuse all of your fabrics for this project.
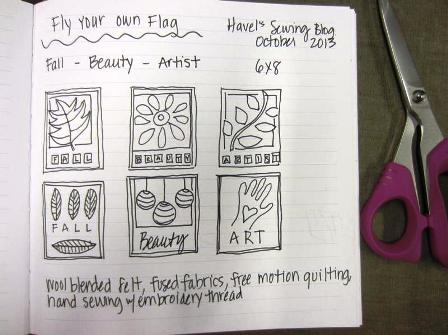
Here is a page from my journal/sketchbook on brainstorming ideas for this project.
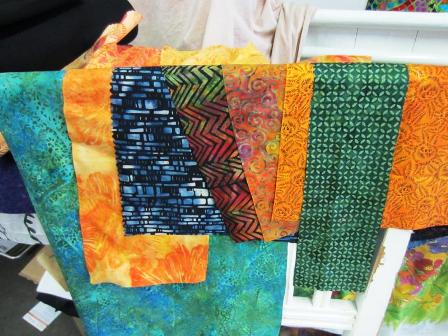
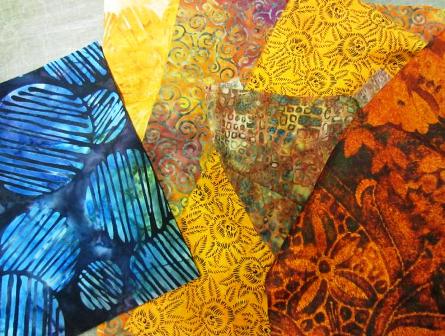
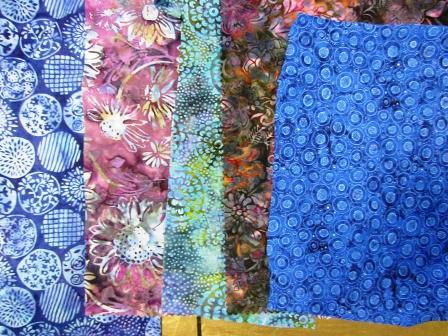
These are fused fabrics that I am auditioning for this project. This is the way that I normally work when I am making an art quilt. I am looking for colors that compliment each other, good contrasts, texture, and to make sure they are the same value. I am seeing that the blue/black geometric is too strong for this group. The batik with the chevrons is also too strong, but could be used, if cut for an accent.
This is the background for the FALL flag, and I am fusing it into place on the wool blended felt. All of the flags will use the same method.
Turn it over and cut from the back, to trim the sides.
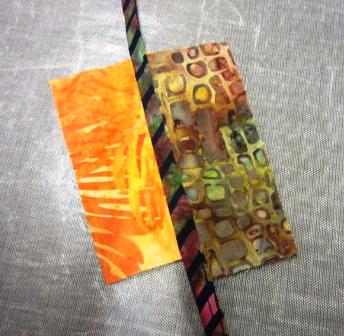
I am now auditioning fabrics that will work well with this background.
Making Interesting Leaves: For this I am using 3 fabrics. 2 for the leaf sides and one for the center. I am fusing them together on a Goddess Sheet, but you can use Parchment Paper too. The fabric won’t stick to either, and it is a great way to build objects before fusing them to your actual project.
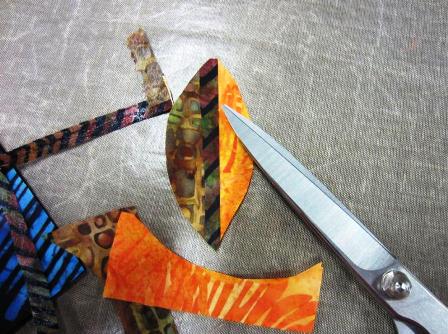
Fussy cut your leaves out – one by one. You will need three of the same size, and one larger size. I would say that the smaller ones are 2” long and 1- 1-1/2” wide. I used 5 pieces of different fabric for the small leaves, and 3 pieces for the large leaf. The large leaf is about 4” long by 2” wide.
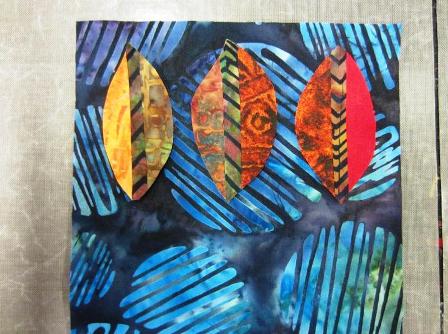
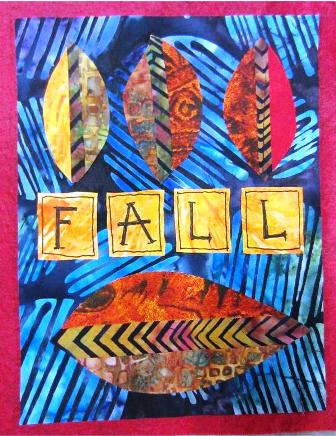
Fuse them onto the background, leaving room for the text in the middle. Note: the fabric that I used for the leaves, is echoed onto the next leaf, sort of like a natural progression into fall.
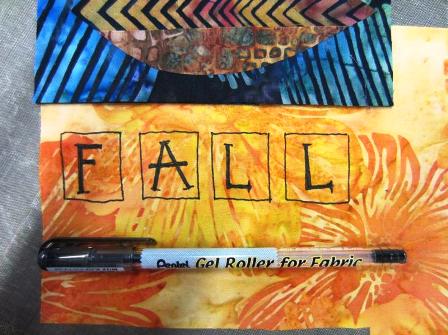
Place the lower portion of your flag on the piece of fabric that you have selected for your text. Draw squares onto the fabric with a Pentel Gel Roller for Fabric. The flag will be your guide to making sure that you don’t run out of room. You can write each letter into the square, but out with your scissors and fuse them on the flag, making sure there is some space between each letter. If you don’t trust your own writing, you could print the text out on your computer, and copy it onto your fabric by using the light coming through a window as your light box.
The flag is backed with another piece of felt. You can choose not to do this step. This is the way that I make all of my quilts. This piece is ready to be free motion machine quilted.
Now on to the next flag – I begin by auditioning the background fabrics for the 3 lanterns.
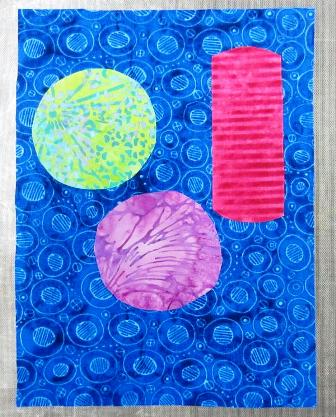
The royal blue makes a great background, and the colors that I chose for the lanterns are all complimentary colors, so they POP out. Cut 2 round and 1 rectangle.

Add the lantern tops and rope, by using black fabric. You could use another color for these, but I think the black really sets it off.
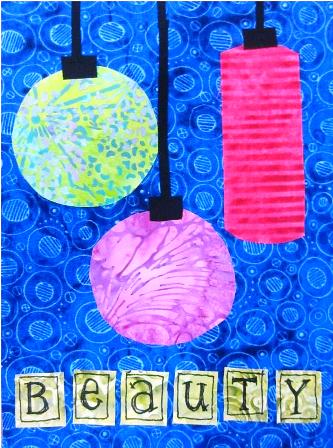
The text using the same method as the FALL flag. It doesn’t have to be perfect. Use a color that goes with everything else that you have chosen, but is set off by the background. Back the flag with another piece of wool blended felt, or not, and set aside for the sewing machine.
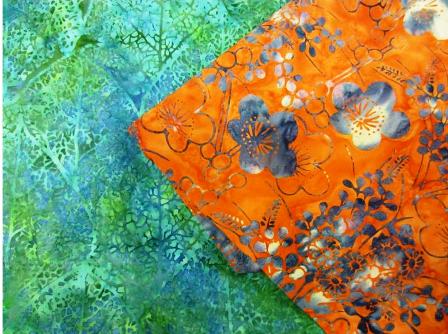
Creating the Third Flag – Artist: You only need 3 pieces of fabric. One for the background, the hand, and the text. I used the green for the background and the orange for the hand. Lavender for the text.
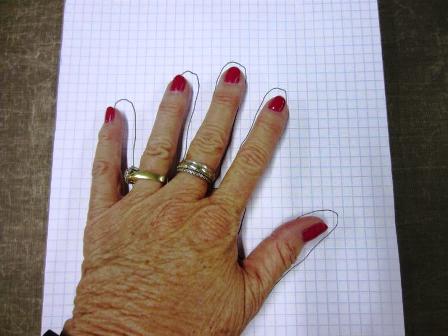
Trace your hand on a piece of paper, using a black pen. It doesn’t have to be perfect.
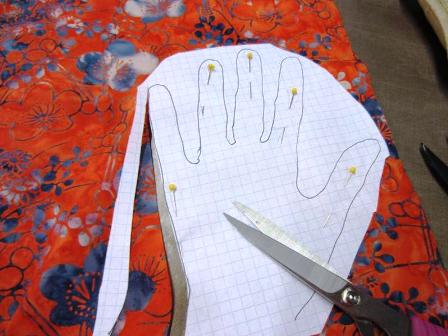
Lay it on the piece of fabric that you have chosen for the hand. Pin it into place. I find it easier to pin where the fingers are. Cut it out.
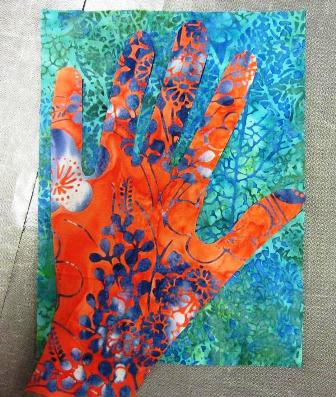
Fuse it into place and cut the excess from the back, like how we did it on the first flag.
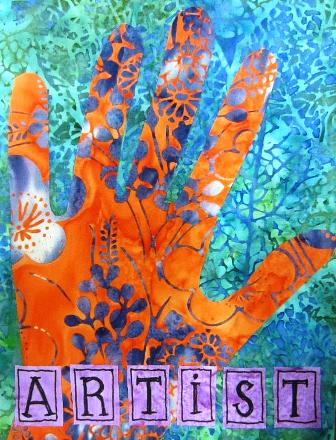
Line up the bottom portion of the flag to make sure that the boxes fit. Draw, cut, and fuse into place.
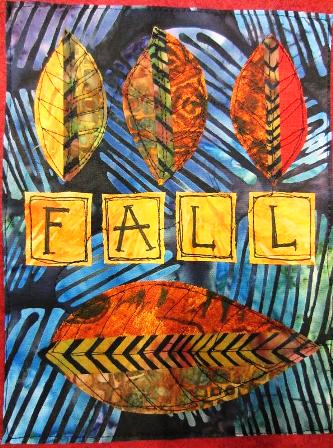
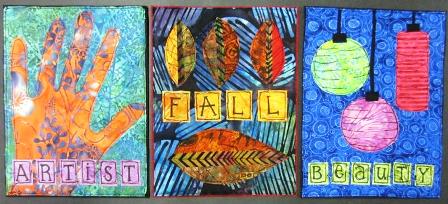
FALL
Free motion machine quilting. This is a great way to practice this skill. Simply outline the leaves and do as little or as much as you want in the veins of the leaves. Follow the lines of the text boxes. I did not stop and start these separately, but chose a dark line to sew over to the next block. I simply sewed the sides to the felt backing.
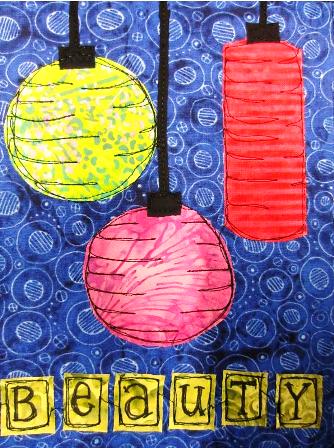
BEAUTY
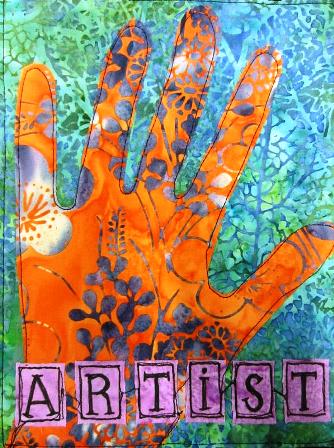
ARTIST
The Finished Flags: I have all of my flags hung using a laundry line and clothes pins. You can also sew pop tops on the back of the flags and hang on the wall with a small nail. I hope you have enjoyed this project. Happy FALL!