
“Spare Change for the Better” Quilt
by Terry White copyright 2016
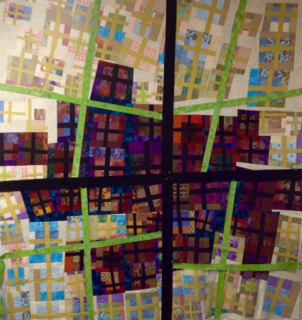
“Spare Change for the Better” Quilt “60×75”
My quilt, “Spare Change for the Better” began with a clean up day in my Stitch Studio. Once in a while, I need to clean up my Stitch Studio. Recently, I had worked on several projects, one after another, with no clean up time in between. So, there was no “going forward” on the next project until this room was straightened out!
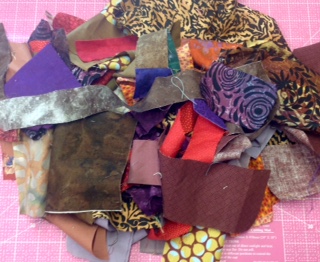
I had been thread painting and making small embellished quilts, fabric books and purses, so there were lots of little stacks of things and random baskets of scraps all over the place that needed to be dealt with. As I began to order and bag the scraps, I began to gather some autumn shades together and got the idea for a scrap quilt. I went on a tangent! I started to think about this fabric as spare change…the kind of money that you put into a big glass jar until you have enough to really do something with it. Well, there was enough of it to make an interesting quilt.
It was time for a little change in the Stitch Studio. I had been doing tiny intricate things and, now, I wanted to stitch straight lines and make something big and simple. It was a change of season and I needed a change!
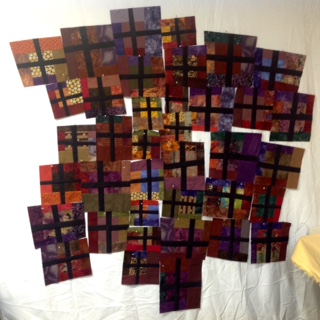
I began with a simple log cabin structure. I made a stack of four sided pieces. I then stitched strips of all sizes and angles to each one. I considered each block as I chose the fabric strips because I wanted to make each block good looking. I like to press and trim at each step. I think this makes stitching easier and it keeps things nice and neat.
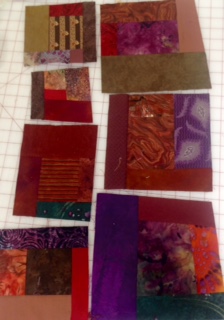
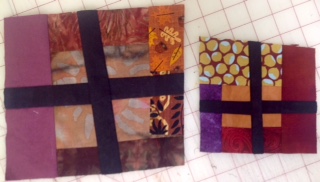
As I was stitching along, I decided that I would cut into the log cabin blocks and insert a black cross. This suggested crossroads to me….a choosing place, a place to change. It also made each block more interesting and added a continuity to the blocks.
I cut black strips 1 1/2 inch wide, 1 1/4 inch wide and 1 inch wide. I stitched the 1 1/2 inch wide strips into the largest blocks, the 1 1/4 inch wide strips into the medium blocks and the 1 inch wide strips into the smallest blocks. I found that working with Havel’s Fabric Cutter made my work go very smoothly…and fun…so, guess what?…I ended up making a lot more blocks!….this quilt was growing!
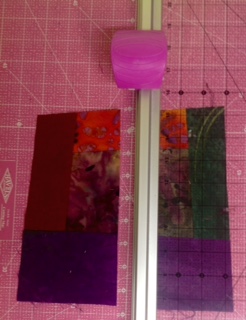
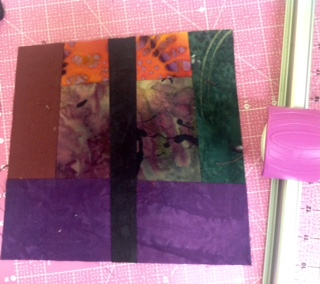
I very simply cut a block in two pieces and stitched a black strip in between the pieces. When adding the black strips, press the seam allowance toward the black strips. This makes the black strip stand out like a column. It gives the whole quilt a nice continuity.
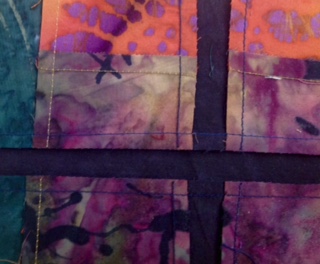
I like to offset the crosses, you know, make them “wonky”. I think this adds to the liveliness of the work.
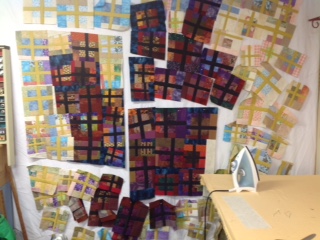
When I began to finish some of the blocks, I put them up on my design wall.
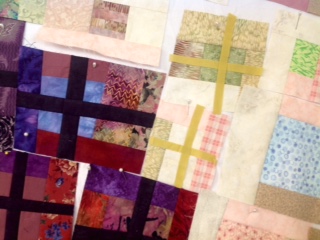
I liked how things were going…..I didn’t want to change my layout. So, of course, I had to come up with an idea to join the blocks together. This is not my first time around the block (Oh, wow, that is a decent pun), so I wanted to choose a color of fabric that could be used to join things….a “bridge”. The fabric would have to add to the quilt, not detract; it should add some brightness; it should also recede into the background. My choice was a deep blue with black in it with thundercloud imagery.
I really liked this addition. Using just the one fabric in the background would help to maintain the design. This blue fabric was something that I received in a big batch of fabrics….someone else’s scraps. Here, you can see, I placed some pieces of the blue between the blocks to try it out.

After making more blocks and looking at it on the wall…it needed a “background”. I began to look at another group of scraps.
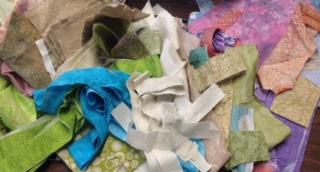
This lighter group of fabrics evoke the light, sky, arial debris and browning grasses which I see in the early fall. I continued to use the same block for the light fabrics…starting with a log cabin structure and then adding the cross. The solid cotton I used for the crosses in the light blocks is a shade of gold. I chose a cream and grey textured print (leftovers from a quilt backing) for the “bridge” pieces for the light blocks.
Then this scrap quilt decided to take over…..it got big!
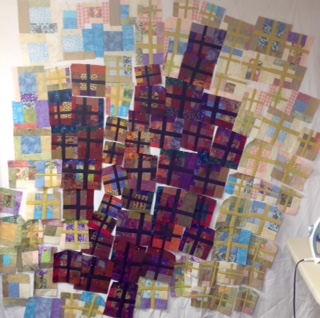
Keb’ Mo’s song,”Time for a Change” kept playing in my mind, so I put his music on in my studio. I like to listen to my music when I’m working in the Studio….it helps me to focus on my work….I feel immersed in the moment. To stitch the quilt blocks together, I separated the quilt into sections. To identify the first section to stitch together, I took a photo of the quilt, then cropped it and chose a section with which to work.

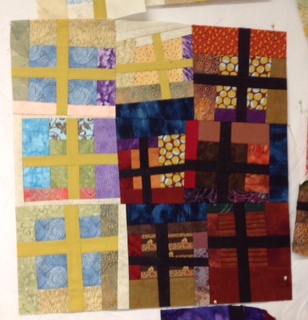
The next three photos show my sequence of stitching and trimming and stitching. I stitched strips of blue or cream fabrics to each block so that they would fit together into a stitched set.
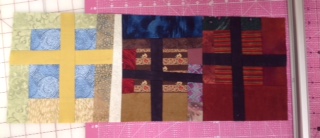
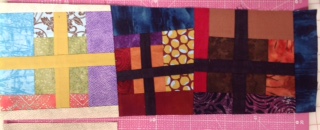
Then, I stitched the 3 block sets together.
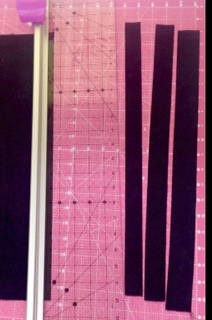
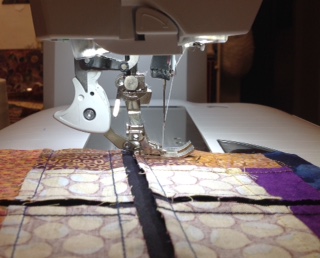
I would like to note here that it is really helpful to use a walking foot on your sewing machine or a differential feed foot as pictured here. This type of sewing aid helps to keep the fabrics together while stitching and prevents puckering.
Then I stitched each section together, then stitched the large sections together…..all the time using the “bridge” strips to achieve sort of square sections that will fit together.

After stitching the quilt top together, I wasn’t happy with it. It needed something. So, first, I turned it on its side……much better. It still needed something more. So, I took a picture of it, put it into a drawing program on my computer, then added these lines.
 Terry White is a studio fiber artist. She has been doing this work since 1996, and she discovered the techniques she uses: threadpaint, machine appliqué, piece, quilt, embellish with beads, fibers and minutiae with sewing machine techniques, through experimentation and self-study. Terry teaches these techniques through classes and videos. Over the years Terry has been published in over 50 articles in magazines and books, including: McCall’s Needlework; Quilter’s Newsletter; Machine Embroidery and Textile Arts; CMA trade magazine; Stitch n Sew Quilts; Quick n Easy Quilts; Quilt World magazine and Calendar; Quilting Arts Calendar 2003; America from the Heart; America’s Best; America Sews. She is a wife, stitcher, artist, sister, mother, friend, nana, gardener, baker, writer, student, teacher and American. See more of Terry’s work at www.threadpaint.com.
One Response to Spare Change for the Better