EASY PATCHWORK QUILT

EASY PATCHWORK QUILT VIDEO TUTORIAL

by Natalie Santini of Sewhungryhippie


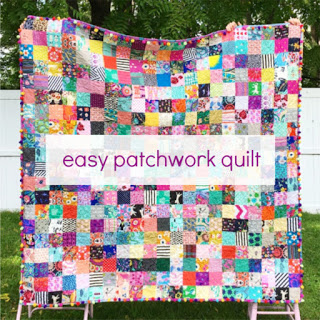
EASY Patchwork Quilts. As in “get this done in a day” quilt.

Yes you could make ten before Christmas or Hannukah or the New Year, but do you want to?

Maybe not.

Or maybe YES to demolish Scrap Mountain.

OH YOU KNOW it’s true.

I finally got around to making this short video tutorial like I said I would, many many Moons ago – YAY!!!! This is my favoritest make in the entire Universe because it’s fool proof!

I can be dreaming of chocolate fountains and Gerard Butler serving me Cuban coffee and STILL make these quilts.

Even when I miss a perfect seam join, you cannot tell once the quilt is together! It’s BEYOND FUN!

HERE is the Video if it won’t play for you here on the blog.

I had a lot of issues with audio syncing with my mouth (that sounds awful) so please forgive me if there are bits where it looks like I’m speaking Finnish. I totally am.

THANKS SO MUCH for subscribing to my channel! I aim to load up a video every other week for you. Most are 10 minutes or less because honestly- AIN’T NOBODY GOT TIME…

You’ll want to cut your squares out before beginning to sew, because then you can chain piece like a BOSS.
ANY SIZE WILL WORK for the squares, just make them all the same. I prefer 4″ squares if I want a really piece-y looking quilt and 6.5″ squares if I like piece-y but want it done faster. BOTH are amazing.

I’ve made 8, 10, and 12″ inch square blocks too for quilts, and sold them right away. It all works!! Just keep your cuts square, straight, and press press press.

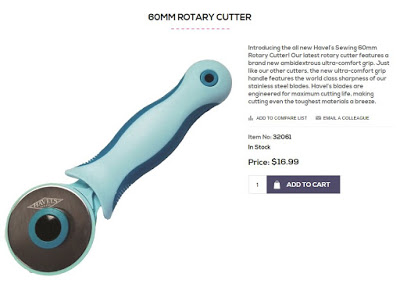
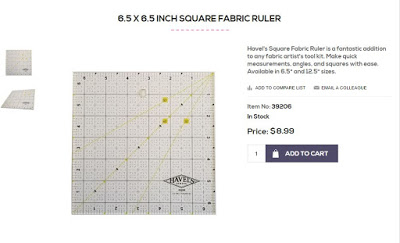
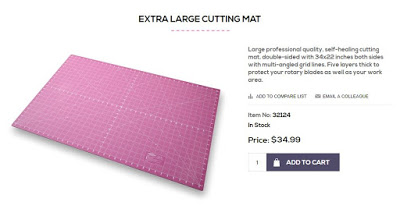
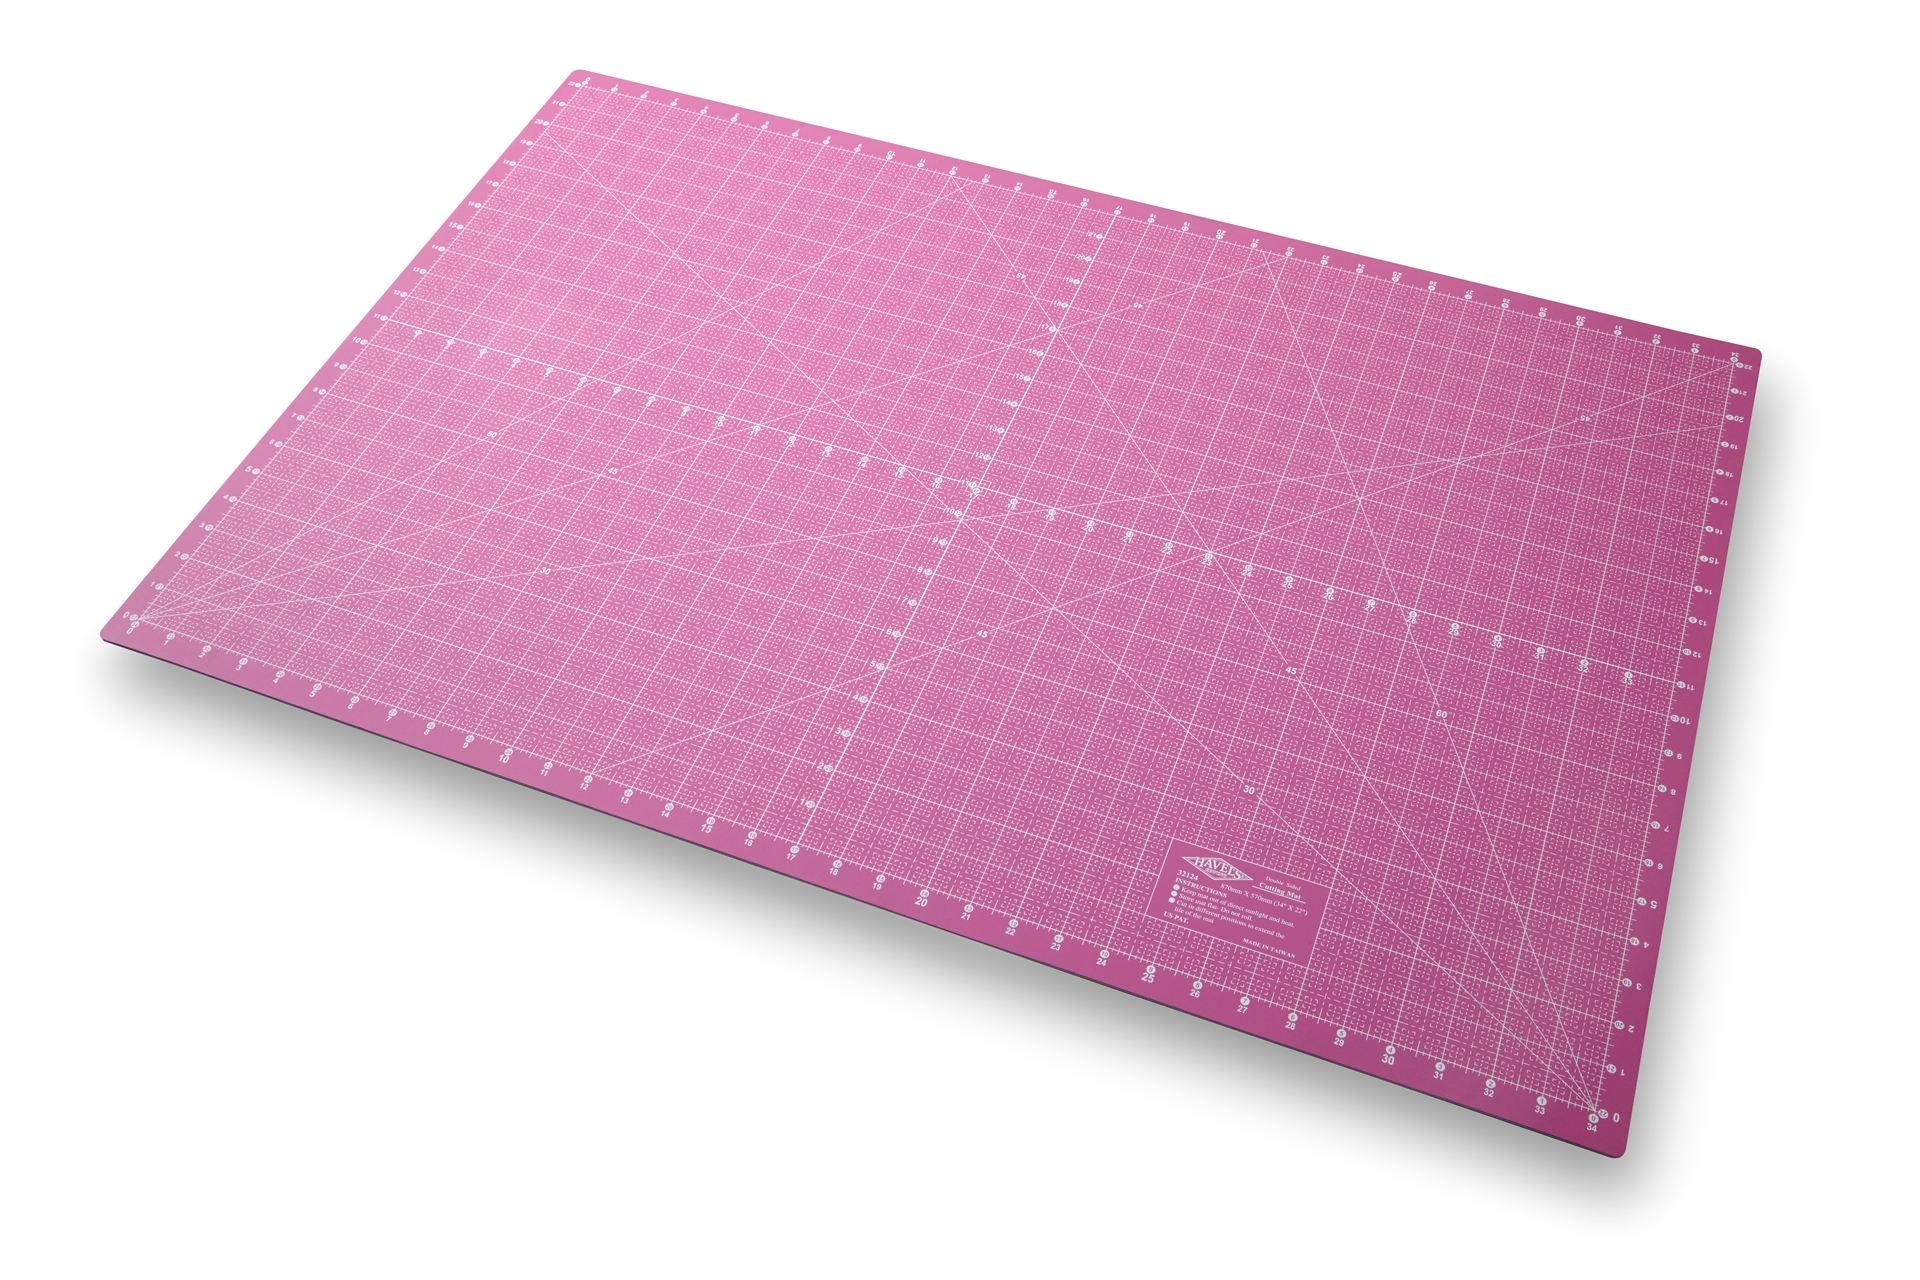
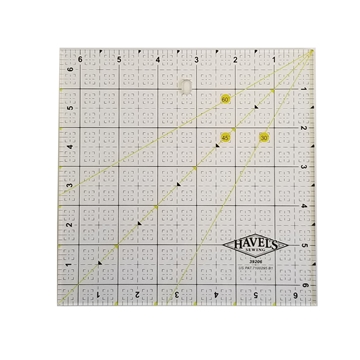
Acrylic Ruler + Rotary Cutter = most efficient way to cut squares.

Get the tools here at Havels Sewing.

I don’t personally use starch, but you absolutely can if you like it!

Gosh dang it Ger, get outa my head already!


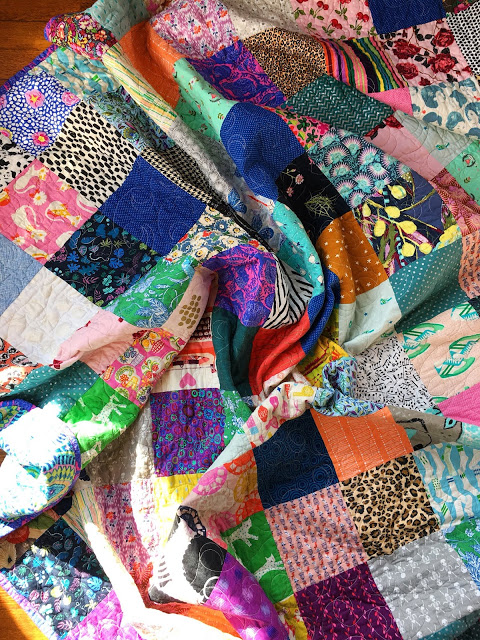
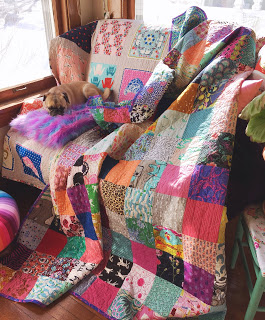
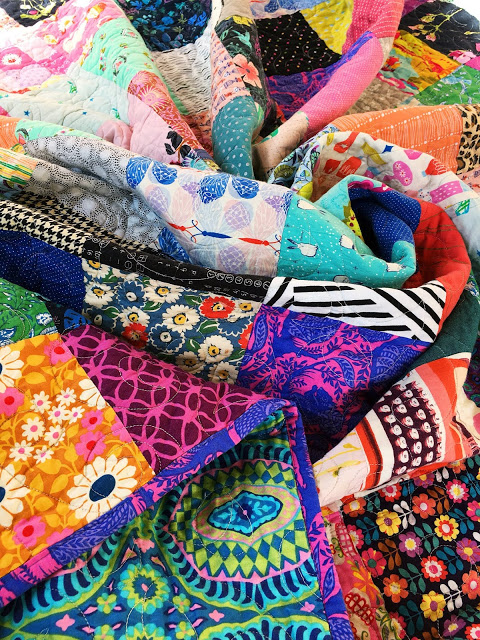
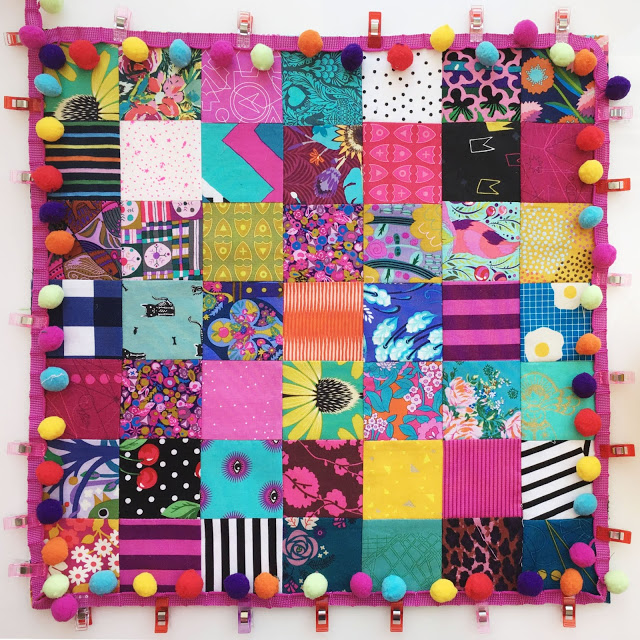
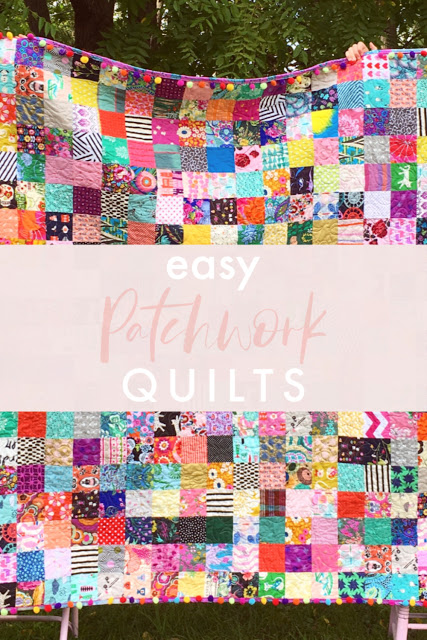
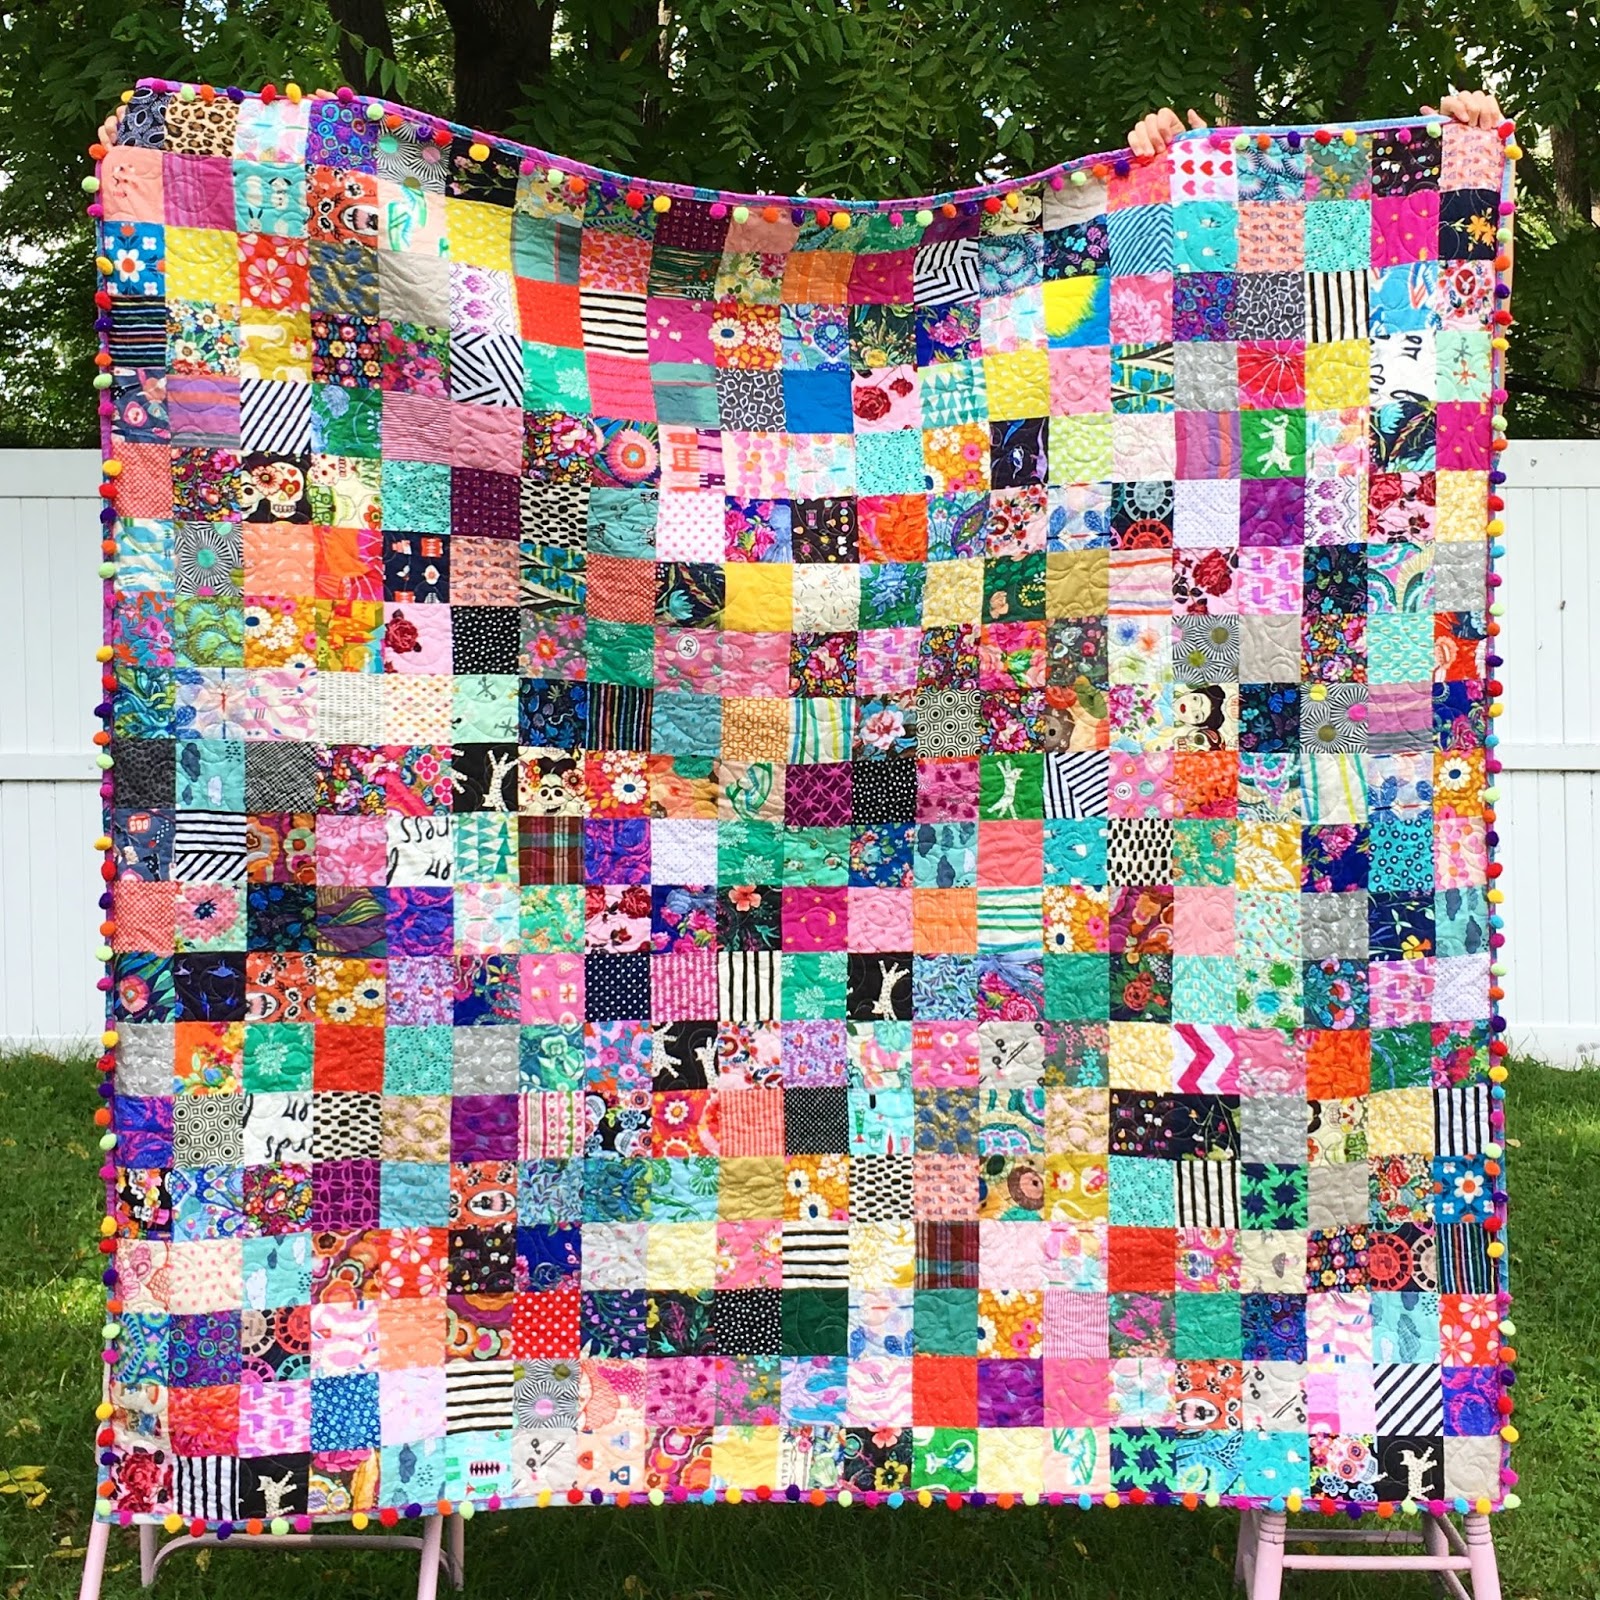
My video shows 4″ squares since I had a pile cut already. I use 400 squares to make this kind of quilt photographed here:

When I use 6.5″ squares I usually do ten rows of ten- 100 squares to make a 60″ x 60″ quilt. That’s a wonderful lap quilt for reading and sipping coffee.

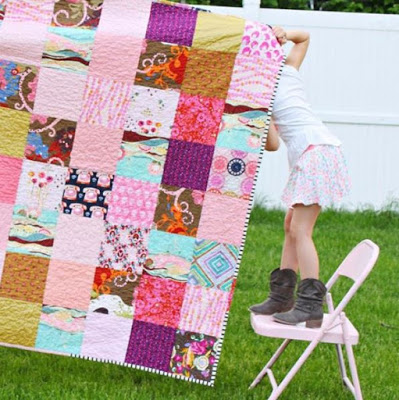
This one is 120 squares:

This is one I made with 10″ squares:

The point is, cut whatever size you like.

Then — keep all the seams at 1/4″ with a patchwork foot.
Also called quarter inch foot.

Sew all your seams straight.

Sew square to square, then sew sets to sets to make rows.

My rows are 20 across if using 4″ squares.
If using 6.5″ squares my rows are ten across.
It’s up to you! No wrong answers here.

Then sew rows together, two at a time to make sets.

Then sew sets together to make sets of four.

Then sew sets of four together to make a few sets of eight.

Then sew sets of eight together to make sets of 16.

You get the idea.

PRESS PRESS AND PRESS AGAIN.

I talk about nesting seams in the video, but sometimes due to fabric color I cheat a little. Do what works. There is no “correct” way – what works for you IS correct.

Don’t worry about the Quilt Police. They don’t matter.

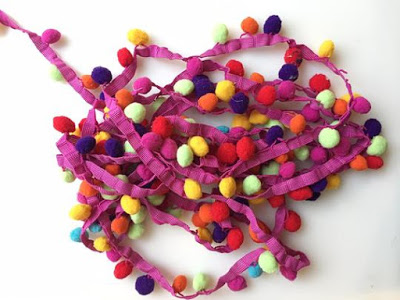
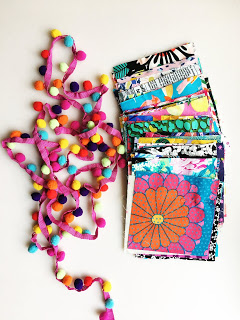
My pom pom trim tutorial is here if you want to add it to your quilt perimeter.

It’s the same technique whether you’re making a quilt or a pillow.

YES I have pom trim for sale here.


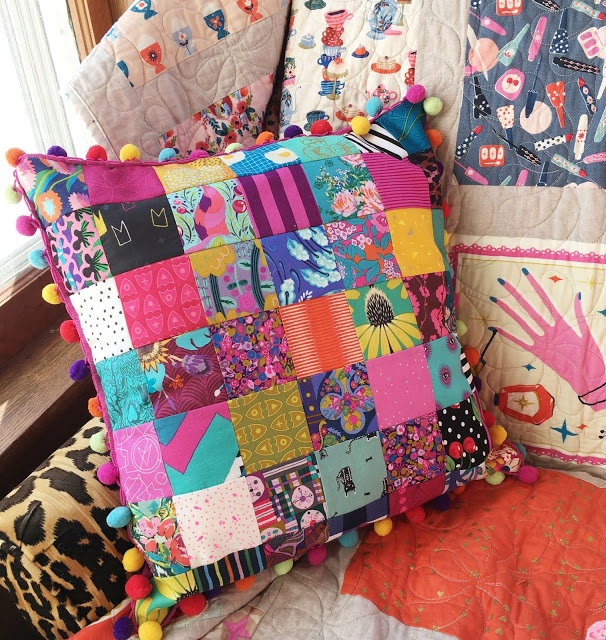
The Patchwork Pillow tutorial is here.
Same concept, just smaller.

Let us know if you make a quilt or pillow here in the Facebook Group or tag me here on Instagram by typing @sewhungryhippie.

I LOVE re-posting your work and giving you shout outs!
You all are amazing!

Stay warm!


I’m Natalie, aka the Hungry Hippie.I wear flowers in my hair, obsess about recycling, and I am always eating cheese. I’m a former Army Nurse Corps Officer turned tree hugging, granola eating “hippie” as my 20 yr Vet Husband likes to call me. I create patterns for sewing and quilting projects that are modern and fresh, with the aim of helping everyone through – no matter your skill level.Sew HungryHippie is all about sewing projects for the adventurous beginner or intermediate sewer. Nothing too intense. No focus on absolute perfection. (Gross.) JUST CREATE.My patterns are here in my shop and also in local stores- ask your local shop to carry them if they don’t yet.  :)YES I do occasionally teach or give trunk shows and workshops. Find that info here: https://www.hungryhippiesews.com/p/teaching-workshops.htmlI love to collaborate! Drop me an email anytime.I SUPPORT MAKERS- yes you can sell what you make with my patterns on a home based scale.  YES you can do a video on my patterns please just TELL ME first so I’m on board.  Ya dig?If you make stuff with my products or patterns please link or tag me so I can share your work!  😀


Posted in Craft to make, Cutting Mat, Fabric Cutter, For Beginners in Sewing, Free Craft Projects, Free Quilt Patterns, Free Quilt Projects, Free Sewing Project, How To, How to Make a Quilt, How to Quilt, Machine Quilt, Natalie Santini, Pillows, Quilt Binding, Quilt Throw, Quilting, Quilting, Quilting & Embroidery, Quilting Tools, Tutorials, Uncategorized | Comments Off on EASY PATCHWORK QUILT

Little Miss Sawtooth Quilt Along – #5 – Isla and Olivia

This post is a part of the Little Miss Sawtooth quilt along that starts September 6, 2019 and ends January 10, 2020.

If this is the first time you are learning about this quilt along then please read this post to find out the intentions behind the quilt along and more details.

To view all the posts concerning this quilt along on my own blog, click here.

To view all of the posts that includes the patterns here at Havel’s Sewing, click here.

If you prefer a paper pattern, you’ll find it here.


I’m so enjoying the participation of this quilt along!  So much fun and kindness being spread around!  I’m hearing from some of you telling me that the pace is perfect, no massive pressures.  And then others are telling me that they aren’t coming out fast enough and you’ve “cheated” and guessed at measurements.  Ha!  I’m loving all of it.  I’m so happy to know that you are happy and having a good time.  And thanks for all of your sweet messages.  They brighten up my day everytime.  🙂


Product Spotlight


This Week’s Task

This fortnight we are making Isla and Olivia, two gals from the original pattern and two of my faves!


Isla

Now that I’ve got my hands on that diagonal tape, making HSTs is no prob at all!  The no drawing lines is a dream come true!  If you haven’t used it before, do click and have a look.  It’s impressive.  But back to Isla….

She’s a very traditional block called a friendship star.  Friendship stars are the very first star block I ever made way back when I first began quilt making.  I’m a bit partial to them.  So many ways to give them a different look, although I stuck with a bold color for mine, you might consider fussy cutting the center or using multiple fabrics.  Ideas are endless.

I’ve used:  Aerial Clay, Jumpsie Daisy in Gumball and Passionate Spirit Salmon.

Tips + Thoughts

  • Choose two contrasting colors for Isla’s center friendship star.  You want that beautiful star to pop!
  • Oh, and as always, starch like a mad woman for better results.  🙂
Click here for the Isla pattern.


If you prefer to foundation paper piece Isla instead of the way I’ve written the pattern, Nicole Buckley has generously provided us with a paper piecing pattern (you will need to already know how to paper piece).  Find the paper piecing pattern for Isla here.


Olivia

Sweet, sweet, Olivia.  She’s no fuss, just a simple 9-patch.  I’ve chosen to make her a bit more traditional than I wrote the pattern for by using just two fabrics instead of nine, but as always you be you and do as you please.  I just had to show off those sweet little fussy cuts!

My fabrics are:  Roadside Wildflowers, Discovered Warmth and Rooted Warmth.

Tips + Thoughts

  • Don’t forget to nest your seams.
  • Have fun!
Click here for the Olivia pattern.


If you prefer to foundation paper piece Olivia instead of the way I’ve written the pattern, Nicole Buckley has generously provided us with a paper piecing pattern (you will need to already know how to paper piece).  Find the paper piecing pattern for Olivia here.


Tools In Videos


Giveaway Details

Just a reminder, you can enter the giveaway by posting your progress on Instagram using the #littlemisssawtoothQAL.  Havel’s will be giving away random prizes to one winner each week.  Winners will be chosen and announced on Instagram @Havels_Sewing every second Thursday after a pattern releases.  You don’t have to be completed with each pattern release to win, you only have to post progress.


Get a personalized Little Miss Sawtooth quilt along label for your quilt.

Get the label here.


Nine blocks completed after you are done with these!!  I get so excited watching the quilt take shape or having one project done and being ready to jump into the next.  I’m constantly remind myself to slow down and take your time.  And most importantly, breathe.  After all, we are doing this because we love it, what’s the rush?  Now if only I can follow this zen attitude and make my quickening heart chill out.

Hugs and happy sewing!


Let’s Connect

Blog / Email / Instagram / Newsletter / Fabrics


Posted in Melanie Traylor, Melanie Traylor | Tagged | 2 Comments

Little Miss Sawtooth Quilt Along – #4 – Brianna and Luciana

This post is a part of the Little Miss Sawtooth quilt along that starts September 6, 2019 and ends January 10, 2020.

If this is the first time you are learning about this quilt along then please read this post to find out the intentions behind the quilt along and more details.

To view all the posts concerning this quilt along on my own blog, click here.

To view all of the posts that includes the patterns here at Havel’s Sewing, click here.

If you prefer a paper pattern, you’ll find it here.


Each time I scroll through Instagram using the #littlemisssawtoothqal I’m struck by how many of you are doing such an amazing job with the fussy cutting.  I’m in awe.

I have had a few of you ask though about fussy cutting.  I like to use fussy cut rulers, but you don’t have to have them to get the job done.  We are working on Brianna today and she has a 1.5″ center square.  I just used Havel’s 6.5″ square ruler to fussy cut that.  And I’m so happy with the result!


Product Spotlight


This Week’s Task

Once again we are working on two blocks:  Brianna and Luciana.  Let’s get to it!


Brianna

Don’t look too closely at my Brianna.  You’ll notice a tiny flaw.  Eek!  I’ve decided it’s a flaw I can live with.  Ha!  I got so excited about fussy cutting that wee little center square that I got going a little too quickly.

Brianna uses the snowball technique to make her itty bitty star points.  I always call this a snowball star.  It’s pretty similar to our Josephine block.

For my center I used one of the sweet little bits of Roadside Wildflowers from Bonnie Christine.


Tips + Thoughts

  • Starch, starch, starch.
  • I found something that helps me avoid drawing all the lines on the squares, you can see it here (there’s a video tutorial too).
Click here for the Brianna pattern.


If you prefer to foundation paper piece Brianna instead of the way I’ve written the pattern, Nicole Buckley has generously provided us with a paper piecing pattern (you will need to already know how to paper piece).  Find the paper piecing pattern for Brianna here.


Luciana

My darling, Luciana.   She’s pretty simple, but there’s room for some creativity, I think.  It’s more snowballing with this one too.

Tips + Thoughts

  • Starch!  Again.  I should probably quit saying that and consider it an obvious.  I make my own starch and use peppermint oil in it, so when I spray it I feel all the feels.  Here’s the recipe.
  • If you are fussy cutting the four larger squares, lay out your pieces the correct way and then pin your smaller squares on to sew.  This way you won’t accidentally get something turned the wrong way.
Click here for the Luciana pattern.


If you prefer to foundation paper piece Luciana instead of the way I’ve written the pattern, Nicole Buckley has generously provided us with a paper piecing pattern (you will need to already know how to paper piece).  Find the paper piecing pattern for Luciana here.


Tools In Videos


Giveaway Details

Just a reminder, you can enter the giveaway by posting your progress on Instagram using the #littlemisssawtoothQAL.  Havel’s will be giving away random prizes to one winner each week.  Winners will be chosen and announced on Instagram @Havels_Sewing every second Thursday after a pattern releases.  You don’t have to be completed with each pattern release to win, you only have to post progress.


Get a personalized Little Miss Sawtooth quilt along label for your quilt.

Get the label here.


I love having my completed blocks laid out somewhere when choosing fabrics for the next block.  I feel like this helps me make sure I’m not using one fabric too much or using one fabric only once.  I like balance….usually.

So that’s seven blocks down now.  Whoa!  We are moving right along.  Half our star blocks are complete.

Hugs and happy sewing!


Let’s Connect

Blog / Email / Instagram / Newsletter / Fabrics


Posted in Melanie Traylor | Tagged | 6 Comments

PUMPKIN SOFTIE SEWING PATTERN

 Pumpkin Softie Sewing Pattern

by Natalie Santini of SewHungryhippie

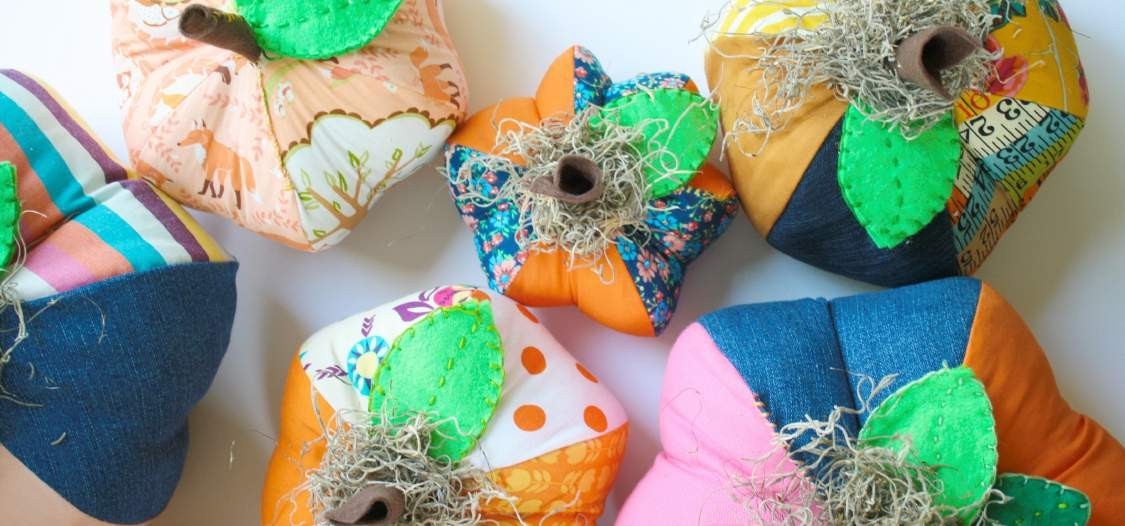
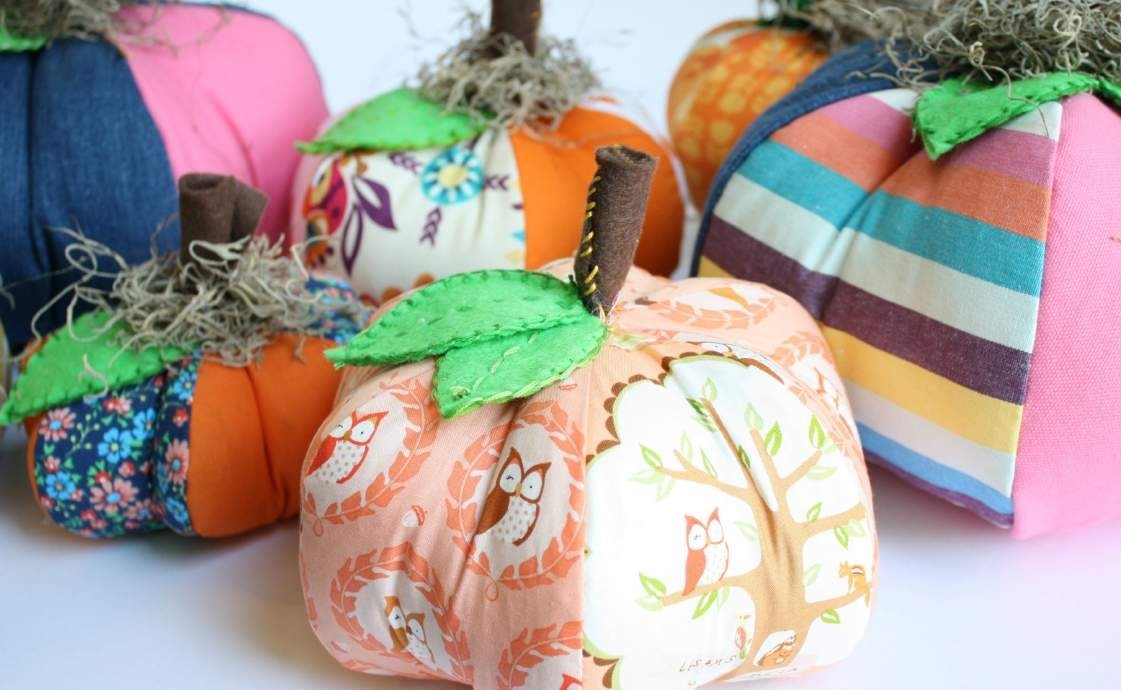
A step-by-step tutorial and pattern download so you can make these adorable pumpkin softies in small, medium, and large.

Materials:
1. Fabrics in various colors and patterns, at least three fat quarters to make a pumpkin family. I like to use six different fabrics, but it’s up to you to decide. Maybe just orange does it for you, and that’s great too.
2. Felt: I highly recommend 100% or at least 70% wool felt. It has a lovely hand to it and feels so
much nicer on your finished softie. Easier to stitch too!
3. Floss: I use DMC floss which is widely available online and in most craft or sewing shops. Also
a nice, large needle helps tremendously.
4. Polyfill for stuffing (or use an old pillow-cut it open and use that).
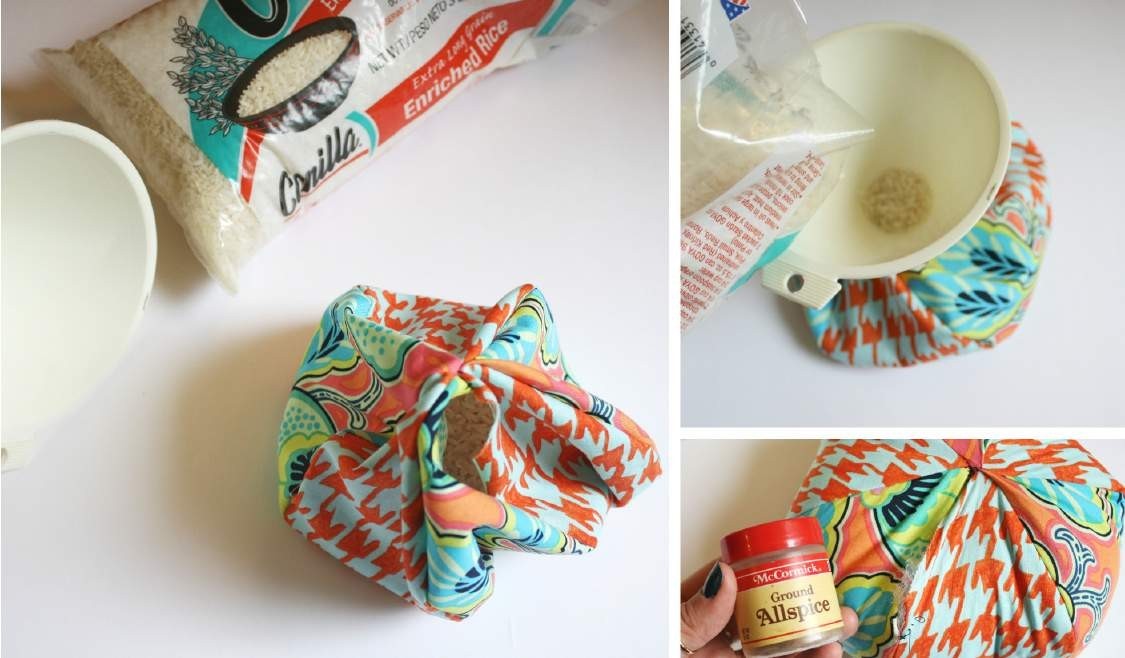
5. Rice and spices for making the bottom heavier so the softie will stand up appropriately. A funnel is helpful. I use cheap white rice and add cinnamon & cloves to it.
6. Optional: Glue gun with glue sticks, and Spanish Moss.
*My friend Zoe of Scented Sweetpeas said the Spanish Moss in Majorca is the best! Book a flight now! LOL

All seams are sewn with a 1/4” seam allowance. Whatever you usually sew with, stick with that and carry on throughout the entire pattern. 😉
Let’s begin.

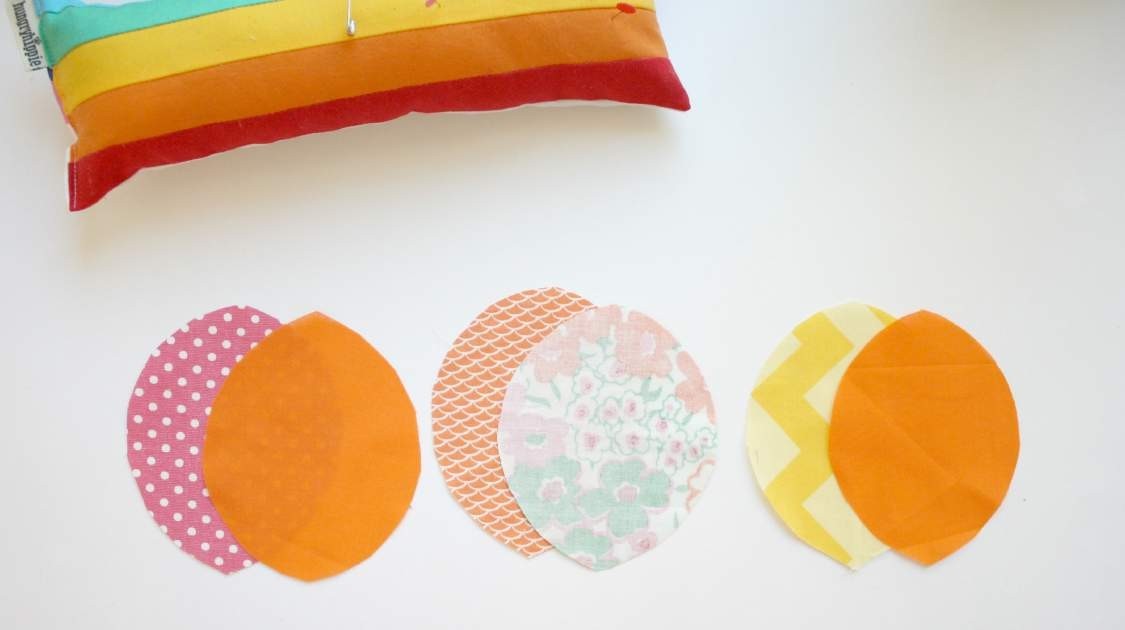
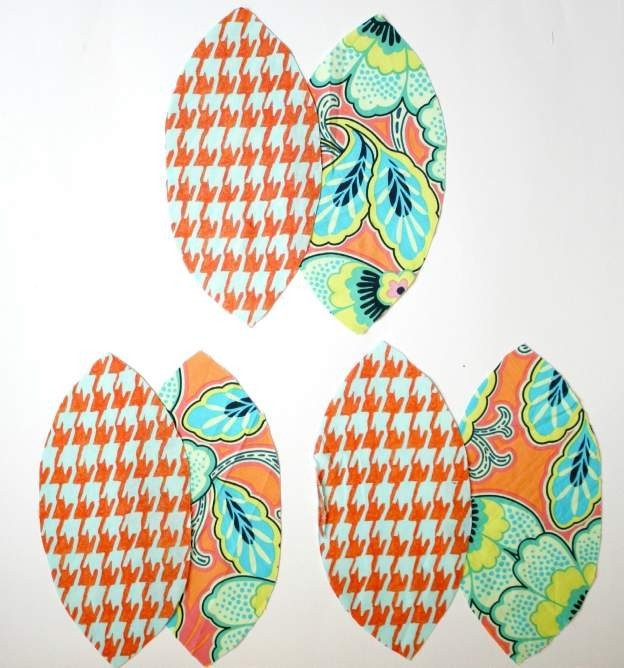
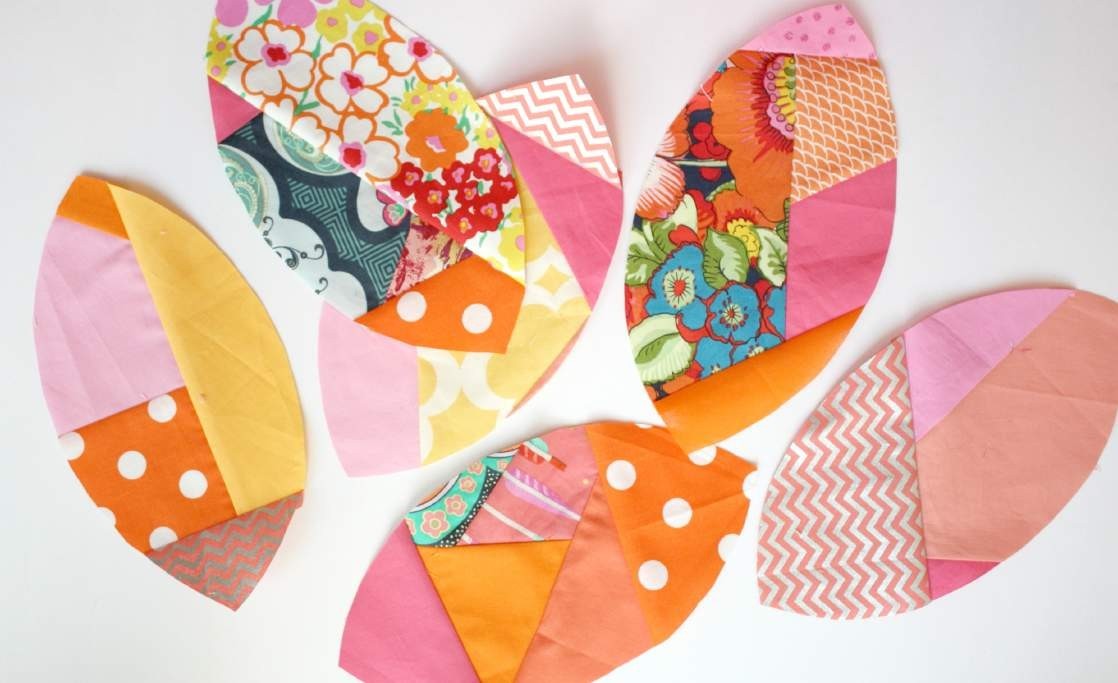
1. Cut out six sides for your first pumpkin. Start with the medium size first, as it’s good to get the hang of it the first time around. I will show both small and medium sizes in these photos. Above is a size “small”.

These are the medium pumpkin cut outs.

You can mix up the fabrics to have each one different, or alternate fabrics like I’ve done here, or do them all in one fabric. It’s up to you and your aesthetic.


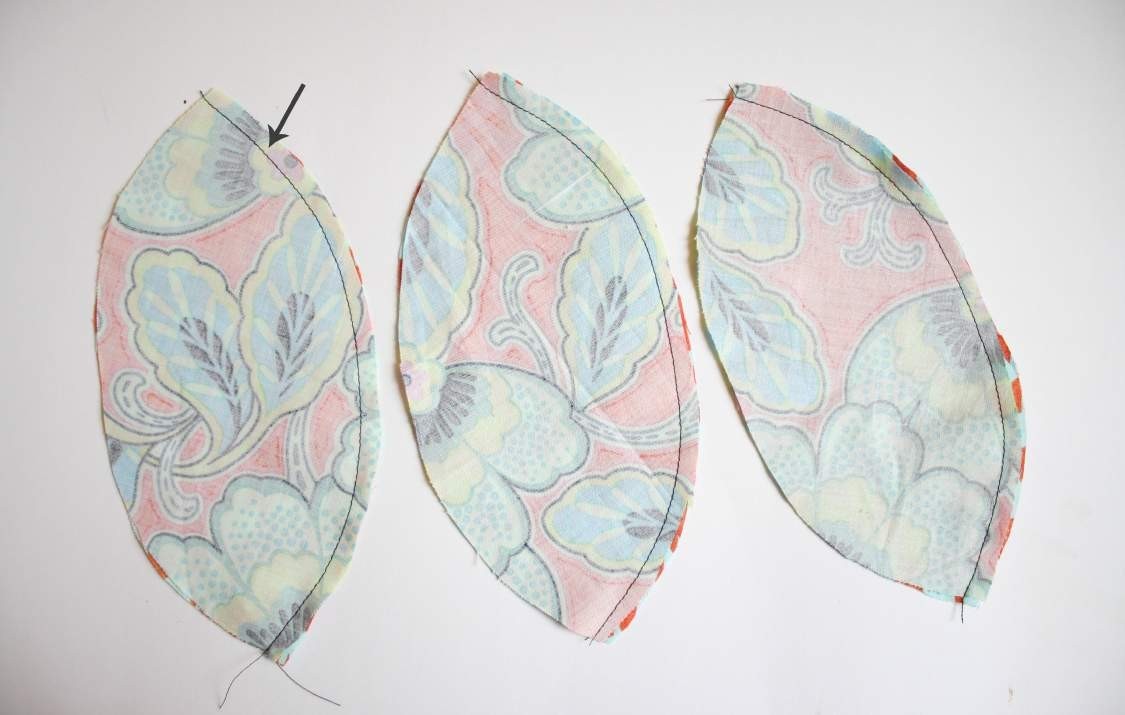
Match two pieces together and sew down one side. Do this for all three sets.

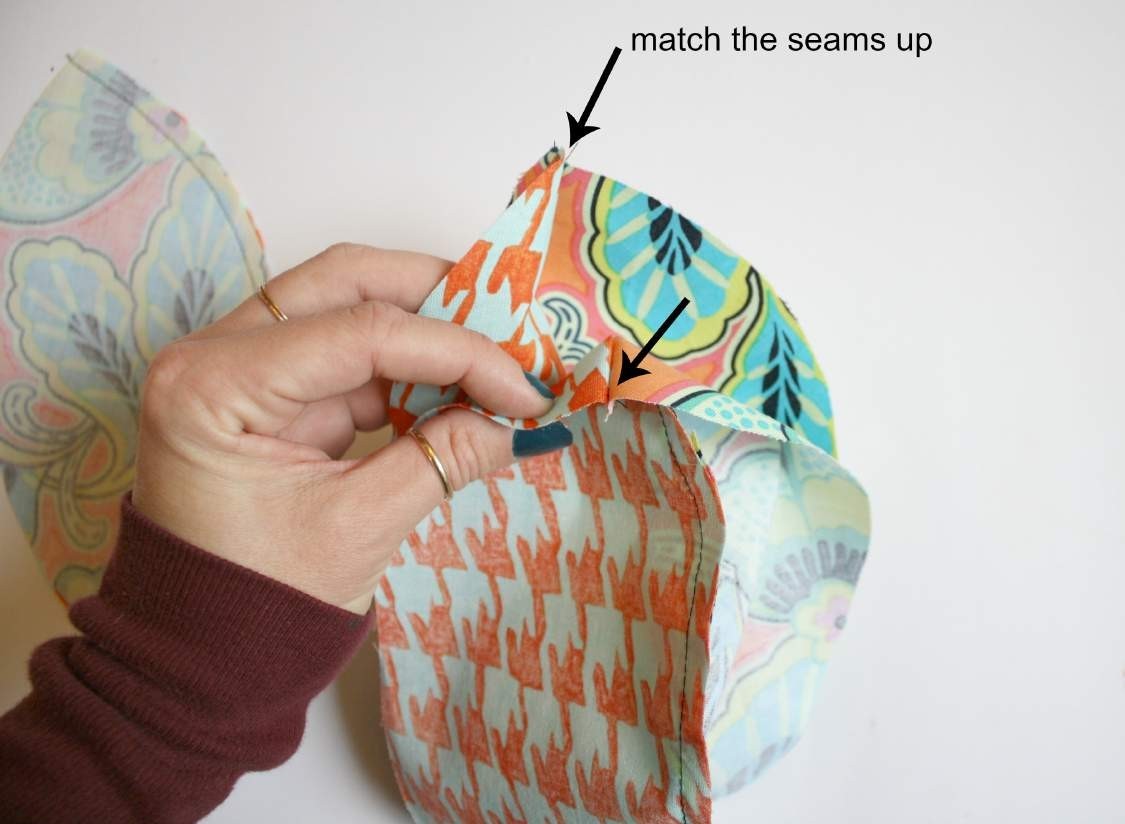
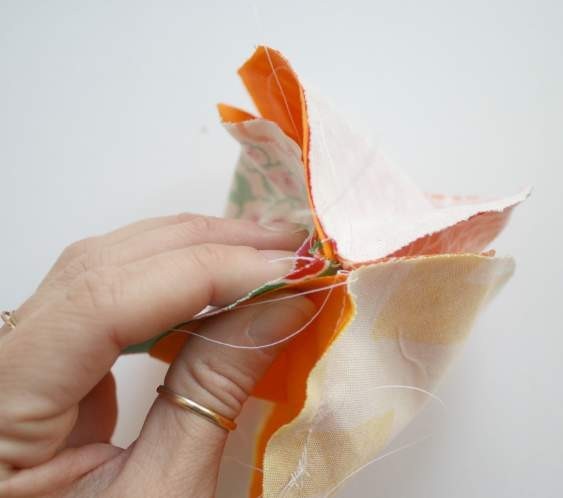
Match one pair of pumpkin sides to another pair, pin and sew down one side again just like before. Now you will have 4 cutouts sewn together.


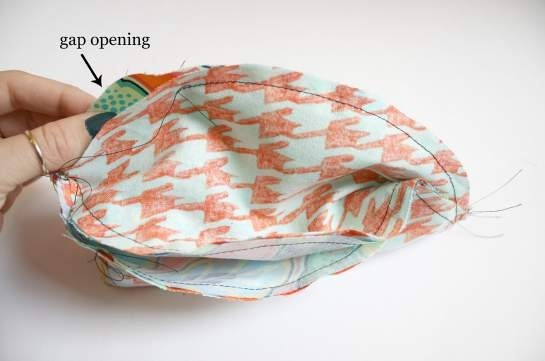
Repeat this for the last set. Matching up the seams again and sewing down one edge, leaving a gap at the top for turning.

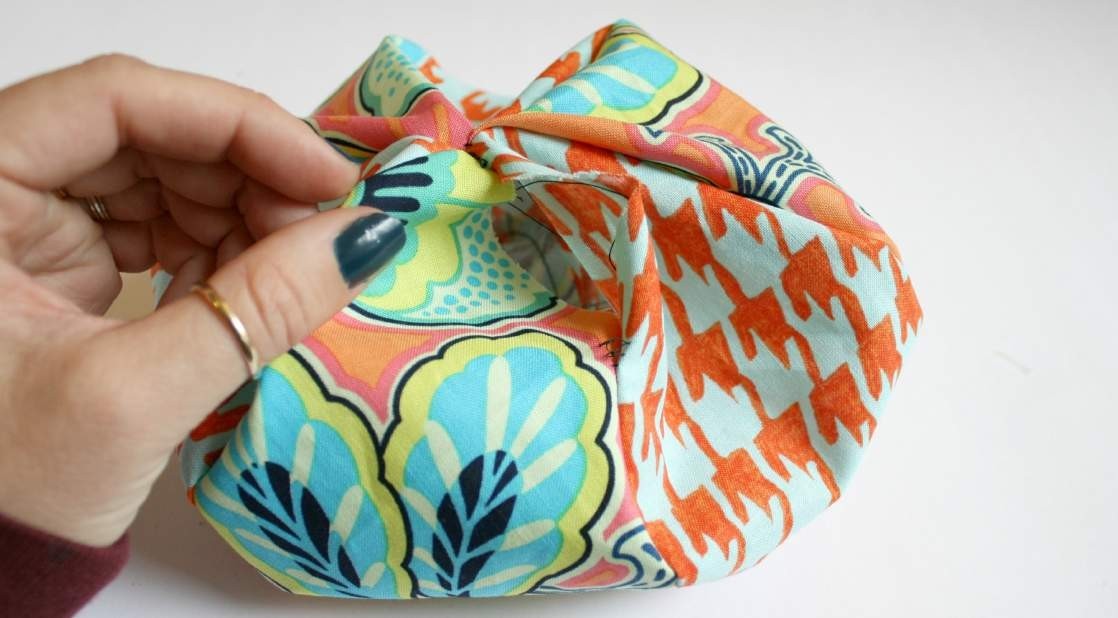
Now you will have an inside out pumpkin shape ball. Carefully turn right side out pushing the seams out with your fingers.

Grab the rice or kitty litter and a funnel. If you have access to kids that are so inclined, get them to help with this next part.

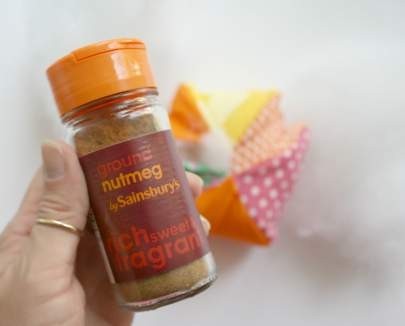
Pour the cup or so of rice (or kitty litter) into the pumpkin and arrange it level and even across the bottom. It’s now you will find out if your seams are sewn properly (LOL)–if any leaks out, dump it out and re-sew those seams. This is also when I put in my spice mix. Cinnamon is lovely, All Spice, and or Nutmeg all smell Autumnal.


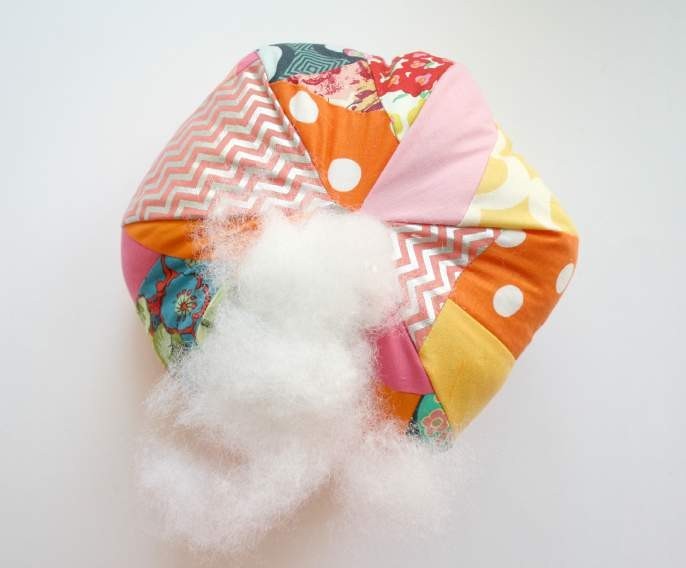
Proceed to stuff the pumpkin, pushing the stuffing into the seams especially, to bulge those bits out. I usually have to manipulate it a bit so it takes on that classic pumpkin shape. Once it is sufficiently stuffed, get your felt to make the stem and leaves.


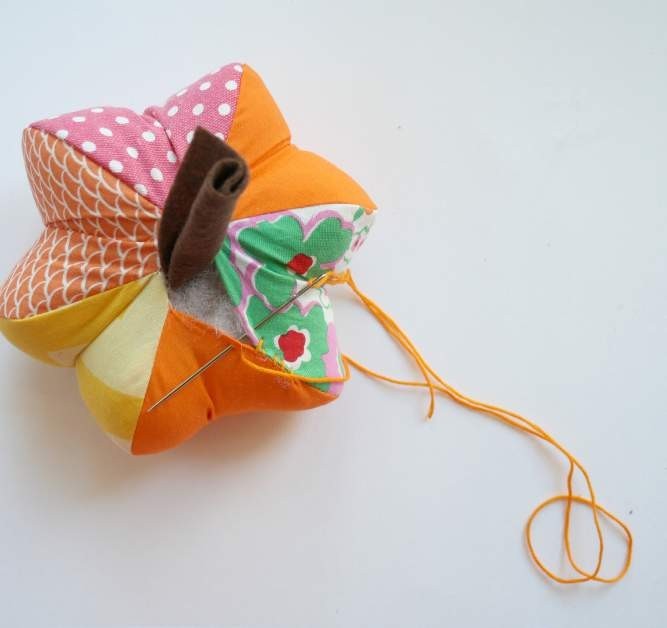
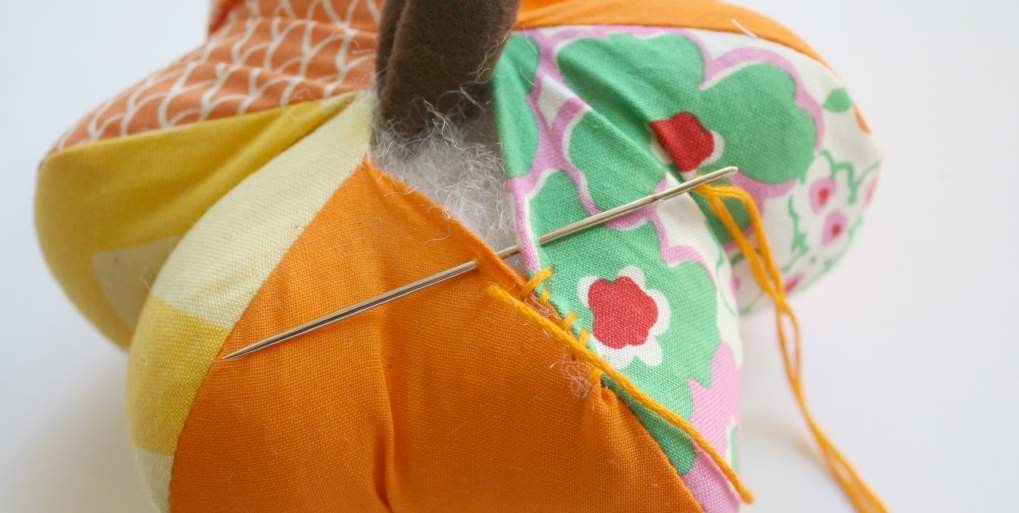
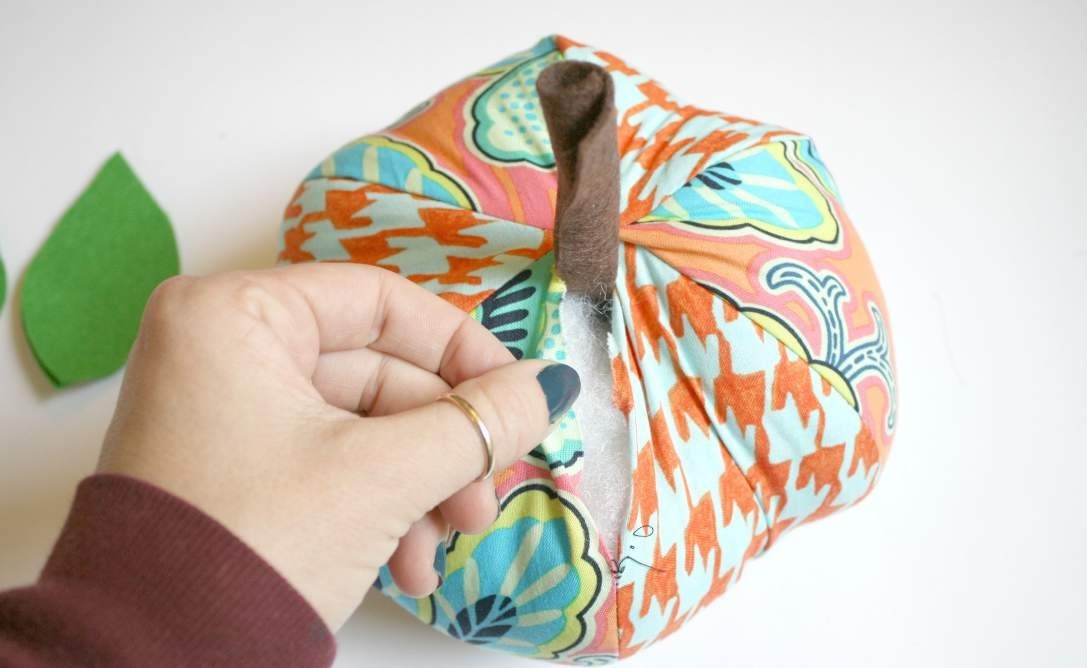
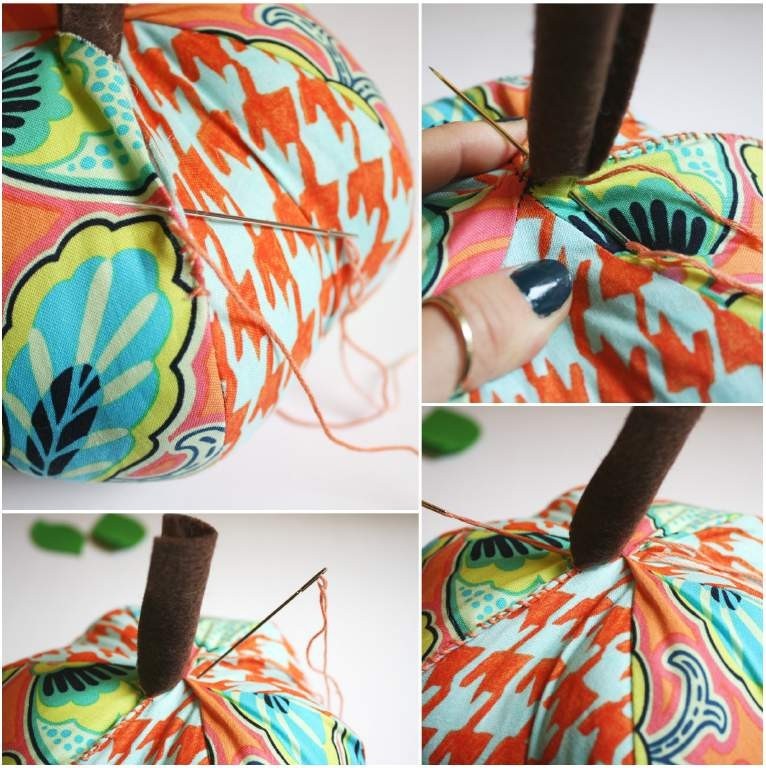
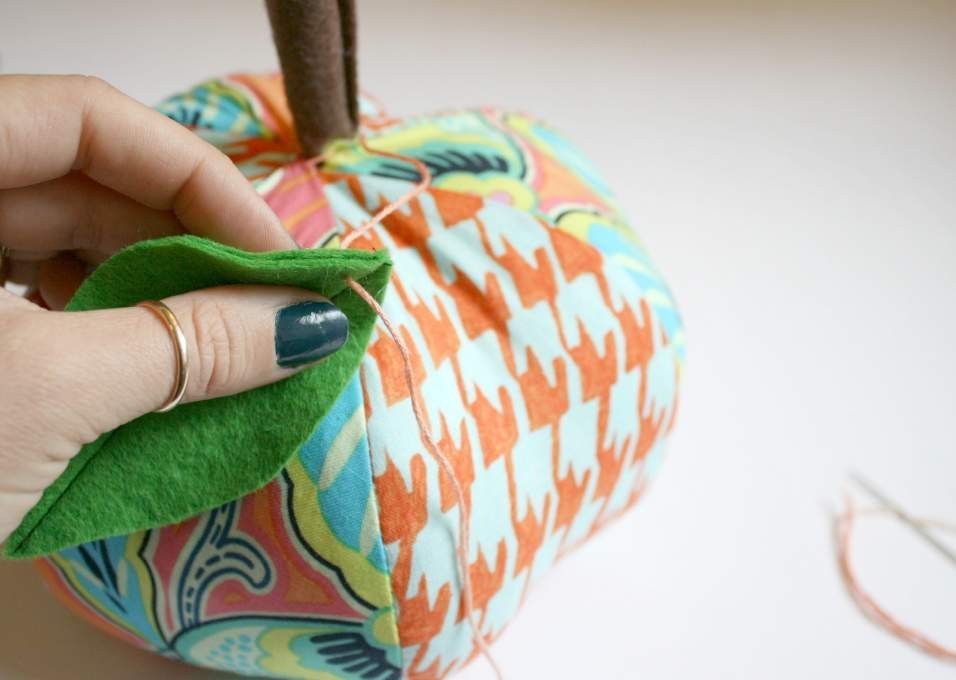
Cut out the stem and roll it up like a sausage. You have the option of stitching it into a closed sausage shape or just leaving it like I do. Stick it half way into the pumpkin, check to make sure the place- ment is pleasing to you, then stitch it into place as you sew the pumpkin sides closed.

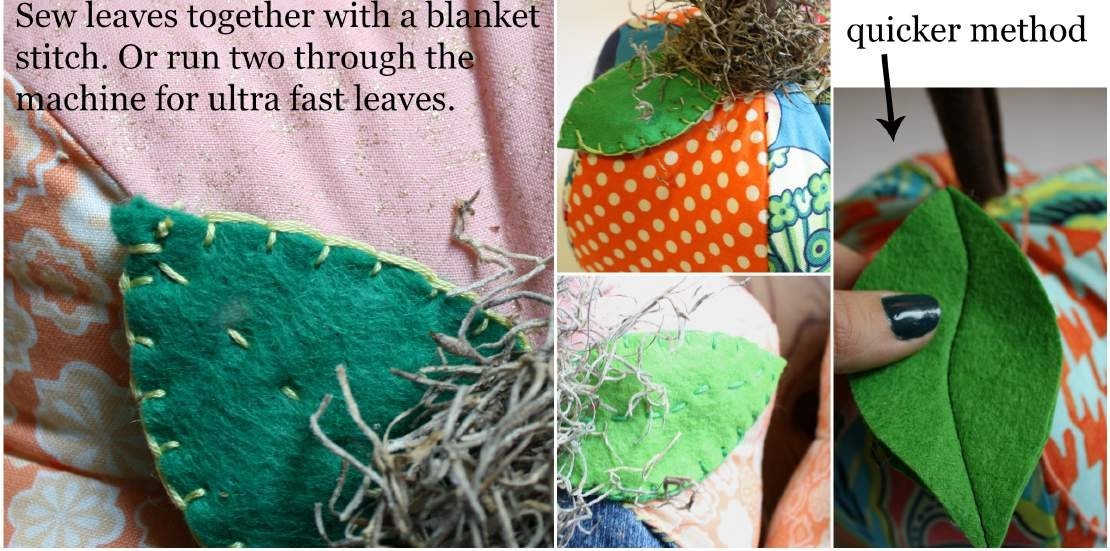
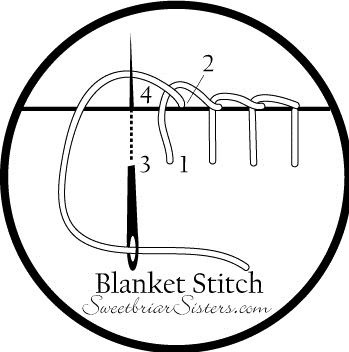
There is an easy to follow tutorial online for learning how to do a blanket stitch, search for a video on YouTube or look at this diagram by Sweetbriar Sisters. 
Feel free to experiment with your leaf construction! There is no wrong way. 😉


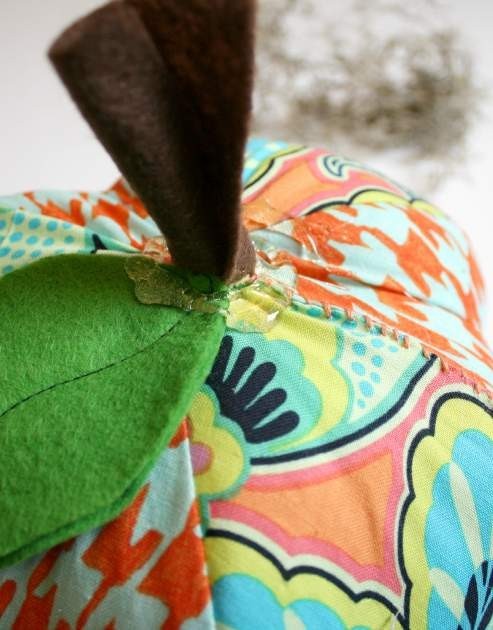
More up close pictures of closing and attaching stem & leaves.


Sew your leaves on now as well. We will hot glue them for extra staying power next.


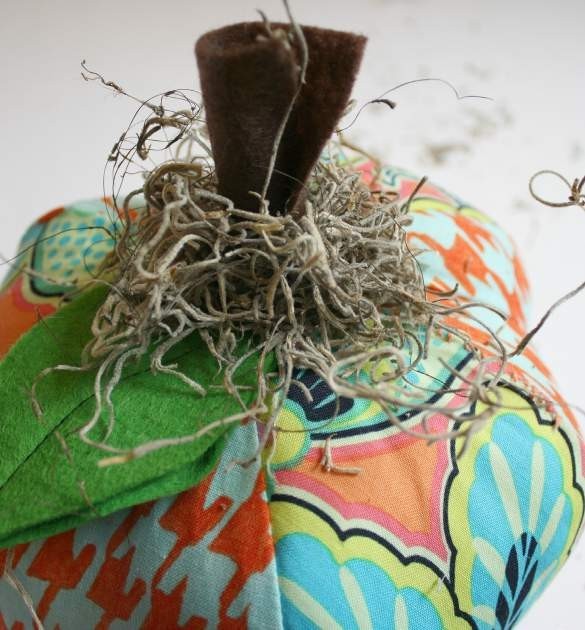
Dab some hot glue from the glue gun under the leaves and near the insertion point of the stem. This is for extra strength, if you don’t have a glue gun handy, it’s not the end of the world. At this time, add some Spanish Moss if you fancy the look.


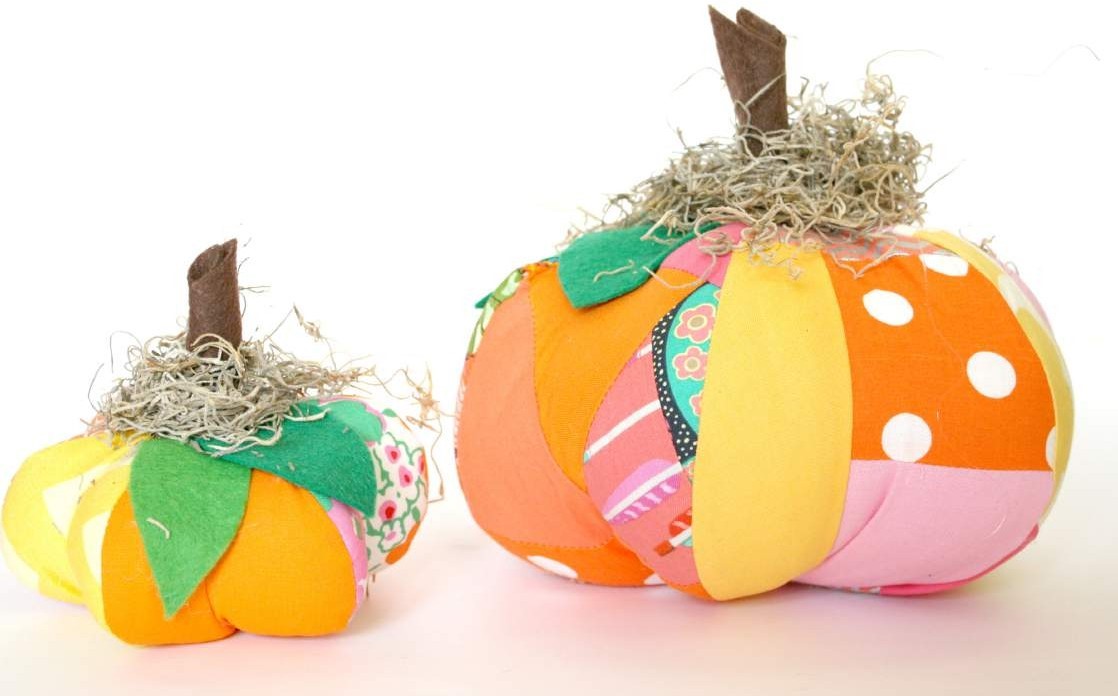
Well done! You’re finished making a pumpkin softie! Now make an entire family and watch others ohhh and ahhh over your cute softies.


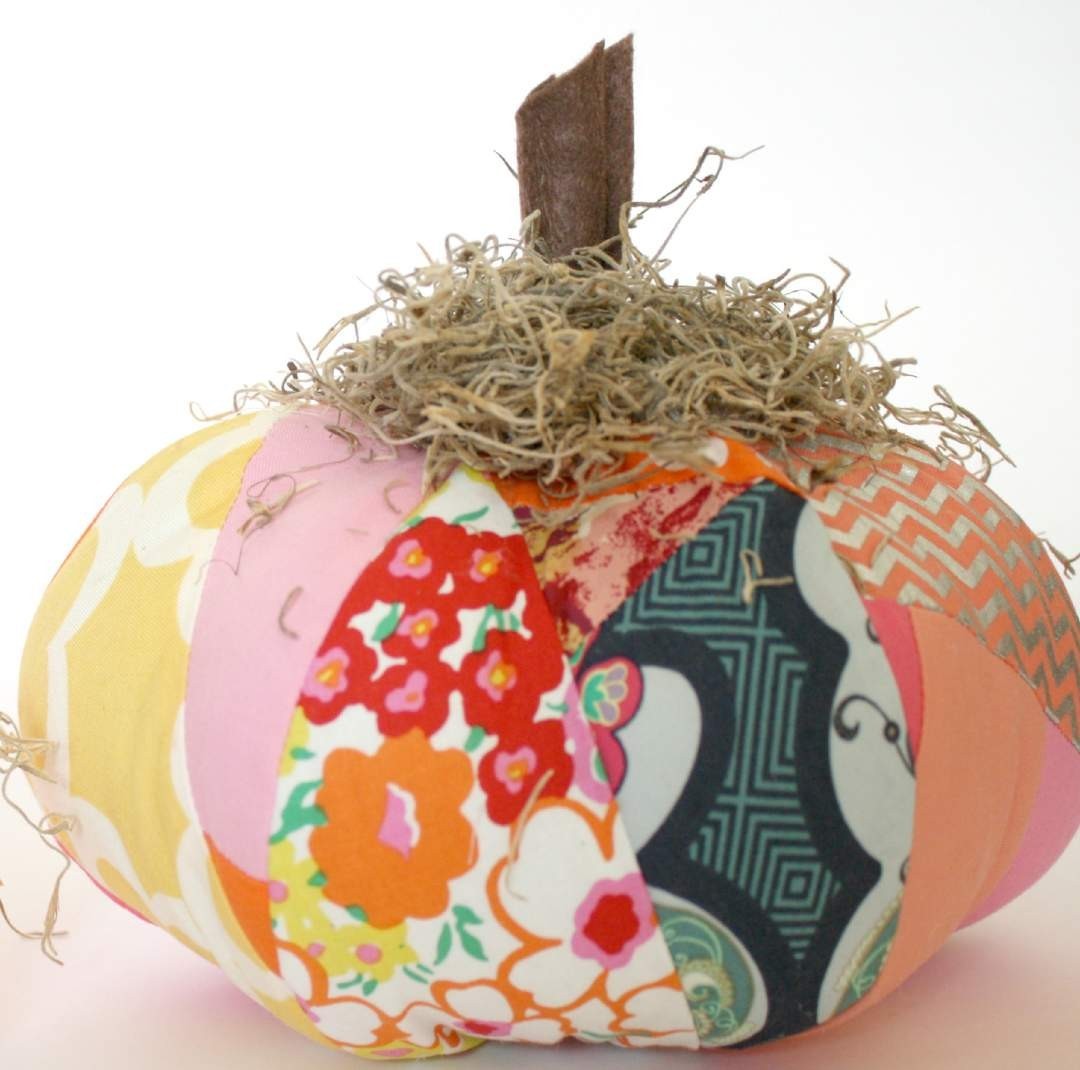
Make a CRAZY Patchwork Pumpkin

These patchwork pumpkins are made with scraps of fabric.
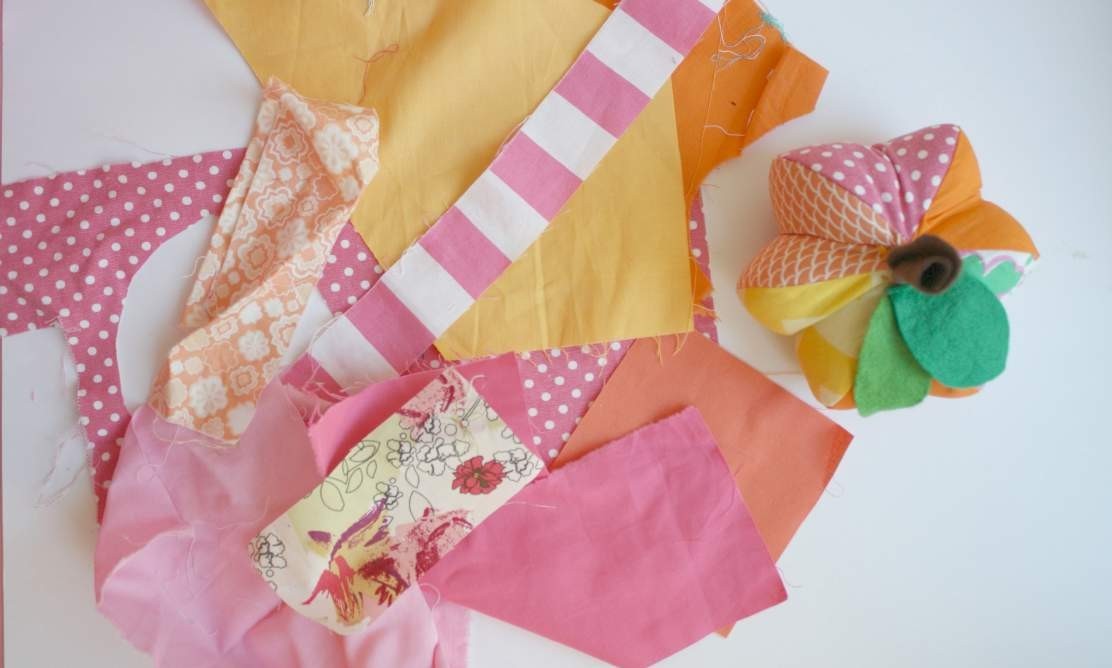
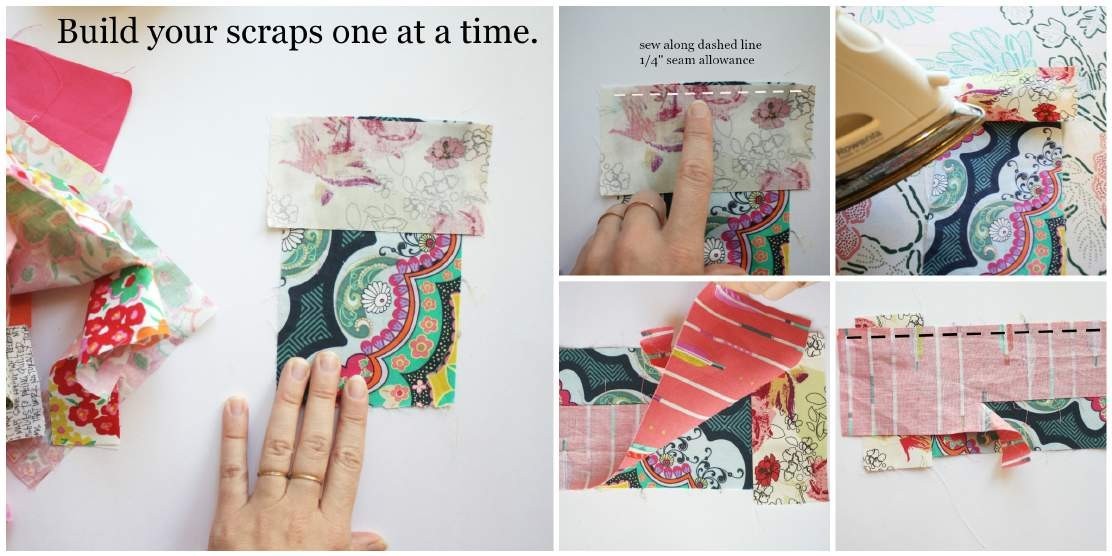
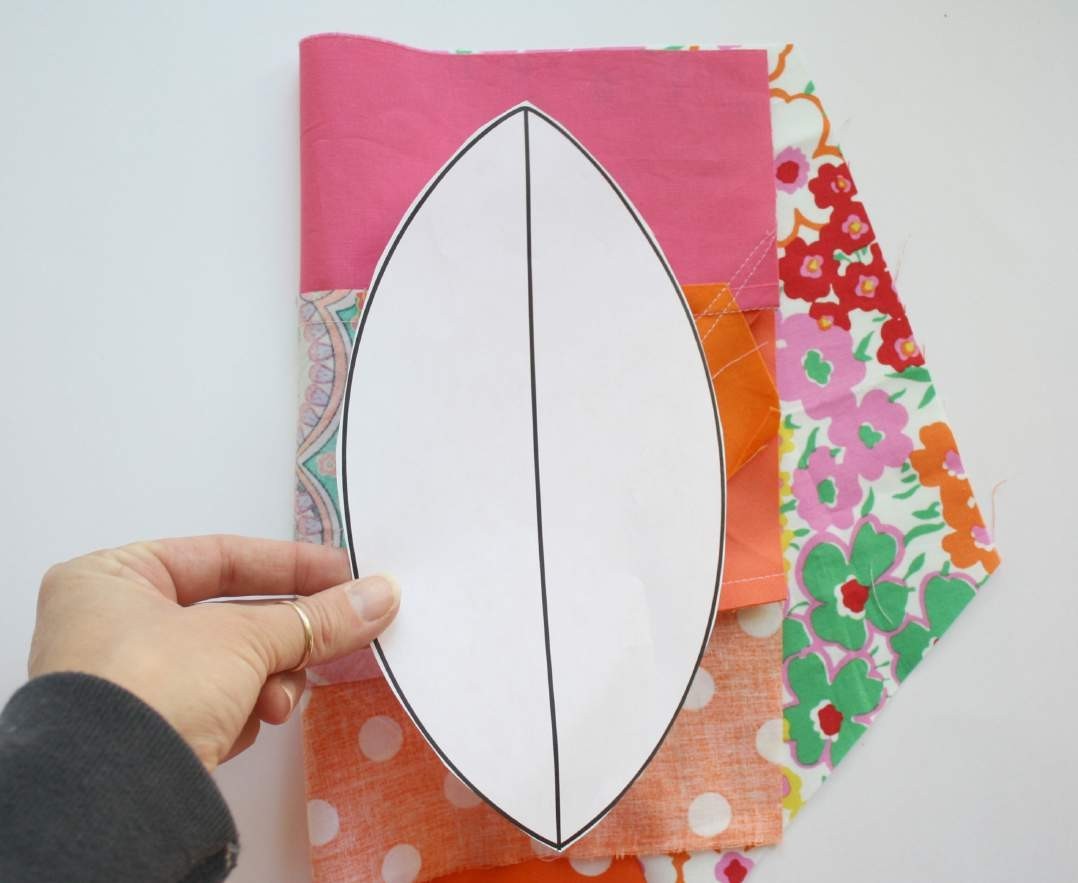
“Build” your own fabric pieces, then cut out the pattern shapes and pro- ceed as normal.

This is a great way to use up scraps and make ultra unique softies.


Gather a bunch of scraps, color coordinating or not, it’s your choice.
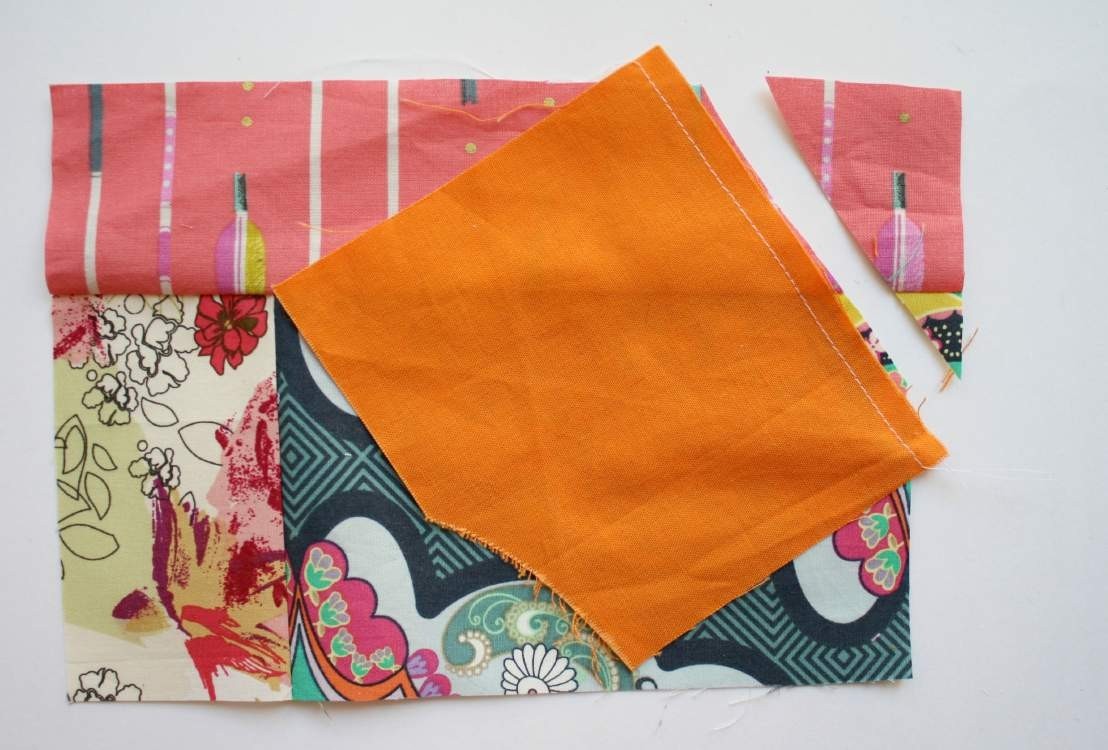
Build a “fabric sheet” by sewing the scraps together at straight angles and straight edges, always pressing the stitches before folding back over to the right side. Then press again to set the seam. You may need to trim the seam allowance as well, see the following photos.

Keep adding bits of fabric at straight angles-remembering to trim the seam allowance and keep edges straight.
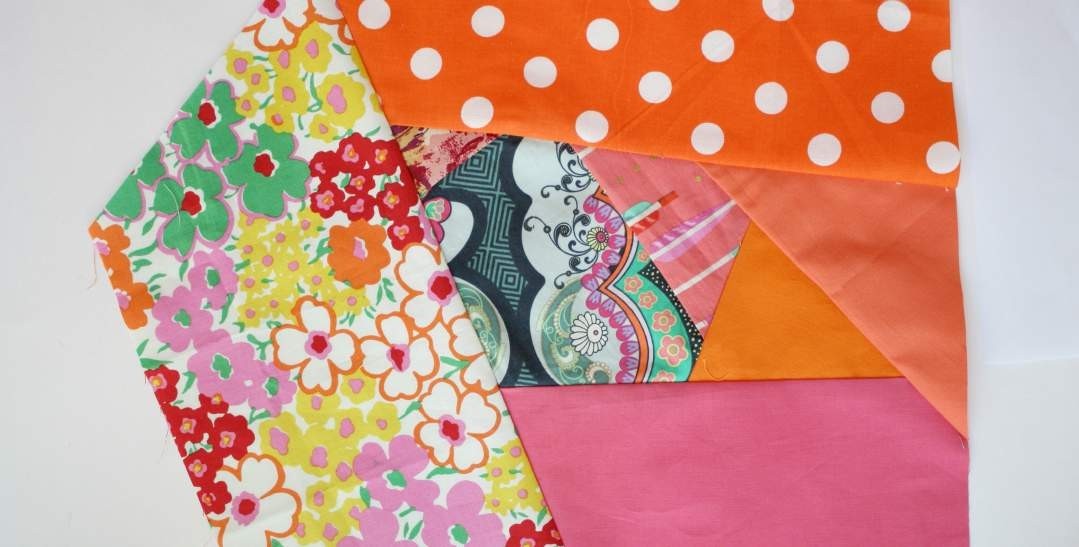
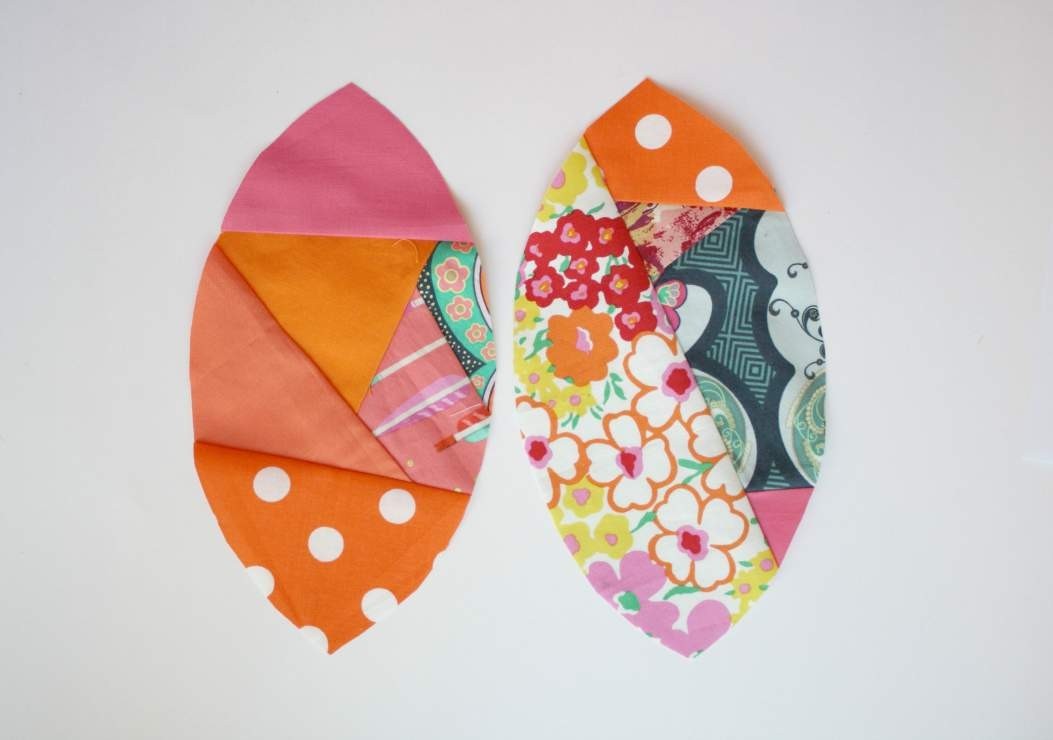
The scrap piece must cover the entire edge of where it’s added. Here is a fabric “sheet” ready for cutting into a pumpkin shape:

I had a large enough sheet to fold it over -so I was able to cut two pumpkin shapes at once. 🙂


Keep going until you have six pieces. Then construct the pumpkin softie the same way we did the first one.

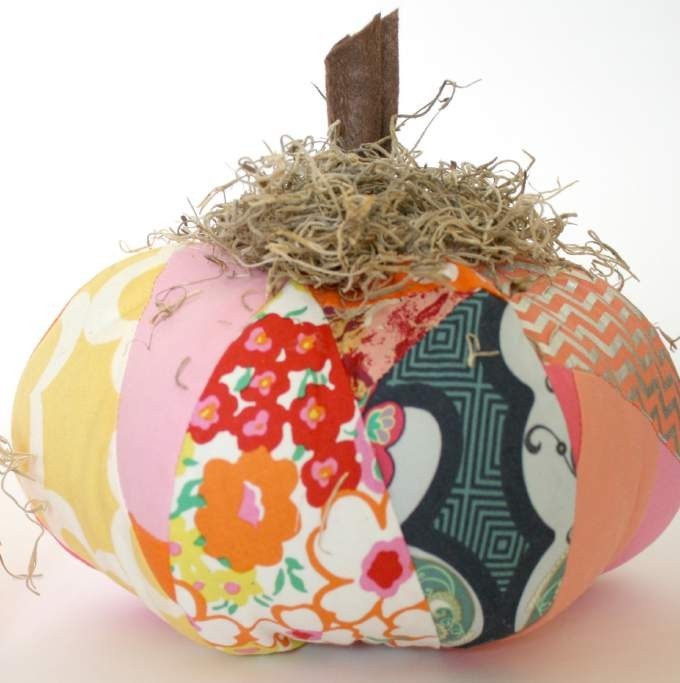
There you go! All finished, wasn’t that easy & fun?!


I’m Natalie, aka the Hungry Hippie.

I wear flowers in my hair, obsess about recycling, and I am always eating cheese. I’m a former Army Nurse Corps Officer turned tree hugging, granola eating “hippie” as my 20 yr Vet Husband likes to call me. I create patterns for sewing and quilting projects that are modern and fresh, with the aim of helping everyone through – no matter your skill level.

Sew HungryHippie is all about sewing projects for the adventurous beginner or intermediate sewer. Nothing too intense. No focus on absolute perfection. (Gross.) JUST CREATE.

My patterns are here in my shop and also in local stores- ask your local shop to carry them if they don’t yet.  🙂

YES I do occasionally teach or give trunk shows and workshops. Find that info here: https://www.hungryhippiesews.com/p/teaching-workshops.html

I love to collaborate! Drop me an email anytime.
I SUPPORT MAKERS- yes you can sell what you make with my patterns on a home based scale.  YES you can do a video on my patterns please just TELL ME first so I’m on board.  Ya dig?
If you make stuff with my products or patterns please link or tag me so I can share your work!  😀
Posted in art ideas, craft, Craft to make, Crafting, Free Craft Projects, Free Sewing Project, Fun Stuff, Halloween, Natalie Santini, Seasonal, Uncategorized | Comments Off on PUMPKIN SOFTIE SEWING PATTERN

Colorful Half Square Triangle Pillow

Colorful Half Square Triangle Pillow

by Emily Lang


Finished size: 18” x 18”

Fabric requirements:

Scraps of several fabrics.
1/2 yd for envelope backing
20” x 20” muslin
20” x 20” batting

Cut:

(16) 5 3/8” x 5 3/8” squares of various coordinating prints
(2) 13 1/2” x 18 1/2”


Sew:

1) Using a fabric marking pen, mark a diagonal line on the wrong side of (8) 5 3/8” x 5 3/8 squares. (Figure 1)

2) Pair each marked 5 3/8” x 5 3/8” square with an unmarked 5 3/8” x 5 3/8” square. Place these pairs RST and sew a scant 1/4” from each side of the marked diagonal line. (Figure 2)

3) Cut along the diagonal line, press all HST units with seams open. These squares should now measure 5” x 5”. (Figure 3)

4) Arrange the HST blocks in a 4 x 4 grid, play around with the placement and try out the numerous different layout options.

5) Take a photo of your final layout for reference.

6) Sew the HST’s together.

Prepare the pillow top:

7) Baste the patchwork, batting, and muslin together. Quilt as desired, and trim the excess batting / muslin from the edges.

Prepare the pillow back:

8) Take one 13 1/2” x 18 1/2” piece, along one 18 1/2” side, fold down 1/2” and press. Fold down 1/2” again and press, concealing all raw edges.

9) Sew 1/2” from folded edge.

10) Repeat for the second 13 1/2” x 18 1/2” piece.

Assemble pillow:

11) Arrange pillow top right side up, and backing pieces right side down. Align all raw edges (folded seams toward the middle).

12) Sew around all four sides. Clip corners, and turn right sides out. Fill with an 18” pillow form for a cozy look.


I’m a twenty-something mom who loves to sew and read. I’ve been sewing for about fifteen years, and fell in love with quilting after my daughter was born. I love to design quilts, and enjoy the challenge of working with teeny tiny pieces. Zip pouches, paper piecing, and flickr swaps are some of my favorite things.

Posted in craft, Craft to make, Cutting Mat, Emily Lang, Fabric, Fabric Cutter, Fabric Rotary Cutters, Free Craft Projects, Free Quilt Projects, Free Sewing Project, Fun Stuff, Patterns, Pillows, Quilting, Quilting, Quilting Tools, Uncategorized | 4 Comments