Sweet Spring Baby Quilt

By Terry White

Let spring dance its way in with this
seasonal quilt project!

rabbit-dance-baby-quilt-by-terry-white

This design is about spring, budding trees and the way our rabbits dance and play across my backyard. I used a color palette in my design that’s popular right now for nurseries, which I love. The silhouette of the rabbits and berry tree on the soft gray polka dot fabric creates a strong graphic quilt, which works well in the current baby nursery decor.

You will need:

Fabrics

  • 1 1/2 yards of 100% cotton white muslin for the appliqués
  • 1 yard of gray small polka dot 100% cotton fabric for the quilt top
  • 1 yard of aqua medium polka dot 100% cotton fabric for the borders and binding
  • 1 yard of medium weight non-woven interfacing
  • Batting, backing and binding to fit quilt dimensions (I used the border fabric for the binding)

*When doing the stitching on the quilt top, the dimensions of the top can change. I always suggest cutting the backing fabric and batting after the quilt top is finished.

Thread

I used a gray Star multi-colored cotton thread called “Graystones”. It’s a light-to-dark gray variegate with 3 to 5 inch random color changes. It’s also one of the threads I designed for the Star line. I think it has a softer effect than a black or solid dark gray would have. Use the same Star thread in the needle and the bobbin for the quilting.

Also:

  • 1 1/2 yards of Wonder-Under paperbacked fusible web
  • 90/14 machine embroidery needle for the whole project

*I suggest you use an open toe embroidery foot for stitching the appliqué. I also suggest you use a darning, free-motion or stippling foot on your machine for the thread drawing and quilting.

Instructions:

Enlarge pattern according to the pattern guide photos located at the end of this article.

Trace the appliqué designs and details onto fusible web. Trace the shapes as they appear in the pattern – they are already reversed for the fusing technique. In the case of the rabbit, trace a second one in reverse.

I made the appliqué designs large enough so that you can use a color thread to appliqué them with the small buttonhole stitch without cutting off any of the design. I always draw my appliqué shapes a little larger than they need to be so that the stitching doesn’t appear to cut off the shape. You don’t need to cut the shapes any bigger to allow for the stitching.

Fuse (according to manufacturer’s directions) the pattern pieces to the white muslin.

fuse-two-tree-designs

Fuse your two tree design pieces next to each other for a continuous flow.

Two tree design pieces are fused right next to each other for the continuous tree design.

trace-details-with-dark-marker

Trace the details with a dark marker at the same time you trace the rabbits onto the fusible web.

When tracing the rabbits onto the fusible web, trace the details with a dark marker at the same time. After fusing the web to the fabric, turn the appliqué over and trace the details with a light marking pen onto the fabric.

rabbit-applique-shapes

These are what your dancing rabbit applique shapes will
look like.

Cut the shapes out. My suggestion is to arrange the appliqués onto the quilt top first. Reference the first photo at the beginning of this article for placement of the appliqué pieces. You can make some marks on the top with a light or disappearing marker. Take the pieces off and lay them aside.

Then, only fuse the center tree shape to the top.

Back the quilt top with the interfacing before doing the appliqué work. I always use a stabilizer when doing any kind of machine embroidery, and this part is embroidery. It adds body to the quilt top fabric which helps to prevent puckering and distortion.

adjust-machines-settings

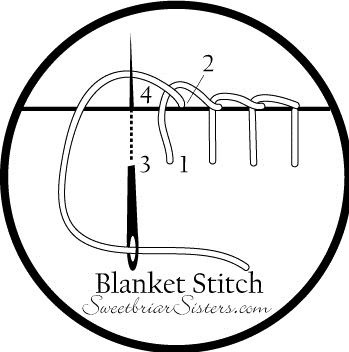
Adjust your machine’s settings for a small buttonhole stitch.

Set your machine for a small blanket (or buttonhole) stitch. The stitch should also be adjusted to a lower tension so that the stitches are not too tight. This is a good time to do some experimenting with the same materials you’re using in this quilt to make sure the tension settings work for a beautiful stitch. Make a note of the stitch settings that work for you.


Next, fuse a rabbit and stitch.

fuse-rabbit-stitch-together

Fuse your rabbit and stitch together.

Fuse the other rabbit and stitch. Fuse the circles along the tree and stitch. Then, fuse the blossoming pieces and stitch. This helps to keep each appliqué shape in pristine condition until you are ready to stitch it.

Layer the quilt top with batting and backing.

Baste the quilt, and quilt with free-motion stitching.

use-variegated-gray-thread

Using the same variegated gray thread will give this piece a softer finish.

I love the effect of using the same variegated gray thread for quilting. The scrolls don’t have a harsh solid appearance, as the color fades in and out on the gray background.

The two photos show my quilting design. I used the rabbit’s tail as my quilt pattern for the allover.

close-up-of-quilt-design

A close-up of the quilt design.

For the border, I made two scrolls — I quilted one, completing it all around the border, then I quilted the other scroll.

close-up-of-quilt-outer-border

A close-up of the quilt’s outer border.


Pattern Guide Photos:

make-two-rabbit-one-reversed

Rabbit — make two, one reversed.

berry-tree-outline

Berry tree — berries are numbered for placement.

enlargement-guide-for-rabbit-pattern

Guide for enlargement of rabbit pattern.

enlargement-guide-for-berry-tree

Guide for enlargement of berry tree pattern.

Bind the quilt, love the quilt and give the quilt to a special baby.

If you don’t thread paint or do any kind of free-motion work, you can use a light gray fabric marker for the details on the rabbit, and then quilt as you know how.

If would like to learn free-motion embroidery, I have 2 Craftsy classes online where I teach free-motion machine embroidery techniques.

Click here for a printable PDF version of Terry’s Rabbit Dance Baby Quilt.


TerryWhite

Terry White is a studio fiber artist who has been doing this kind of work since 1996. She discovered the techniques she uses, including threadpaint, machine appliqué, piece, quilt, embellish with beads, fibers and minutiae with sewing machine techniques, through experimentation and self-study. She is a wife, stitcher, artist, sister, mother, friend, nana, gardener, baker, writer, student, teacher and American. See more of Terry’s work at www.threadpaint.com.


Posted in art ideas, Baby Quilt, craft, Craft to make, Cutting Mat, For Baby, Free Craft Projects, Free Quilt Patterns, Free Quilt Projects, Free Sewing Project, Fun Stuff, Patterns, Quilt Throw, Terry White, Tutorials, Uncategorized, Wall Hangings | Comments Off on Sweet Spring Baby Quilt

Morning Sun Quilt by Melanie Traylor


Get the Morning Sun Quilt Pattern!

It’s release day for Morning Sun quilt. We are having a sale on all of our patterns starting today through Sunday (sale ends 11/23/20). Find all patterns here.

Chats about Morning Sun

Finished Morning Sun quilt posts:

Block + Technique Tutorials:


Get the pattern here.

This pattern was designed back in 2017 and written especially for quilt along style construction where you cut fabrics as you go instead of at the beginning. Each section will tell you the fabrics needed to complete it. Because the fabric requirements are broken into foreground and background, each section will also tell you which fabric should be cut from the background fabrics. This doesn’t mean that you have to use certain fabrics in certain places, by all means, do your own thing, but if you have purchased the amounts of fabrics stated in this pattern and are cutting foreground from foreground and background from background, you’ll have enough of each when you reach the end of the quilt.

Morning Sun is a sampler quilt perfect for beginners.

This quilt is made easier with the use of the EZ Dresden ruler, you can purchase one here. However, there is a template included if you prefer in the back of the pattern.

Blogged about the quilts I made with this pattern here.


Here’s a look at a few of my tester’s Morning Sun quilts.

Be sure to have at a look at the #MorningSunQuilt on Instagram. There are many more versions there.


Melanie Traylor lives in Northern Alabama with her husband and two children. She has a home studio dedicated to her love of making quilts. In her spare time she likes to crochet, read and travel. You can find her on:
Pinterest at – melaniestraylor
Instagram – @southerncharmquilts
Facebook – https://www.facebook.com/SouthernCharmQuilts

She blogs regularly at:
Quilt Making
You’ll find lots and lots more pictures of her quilts and studio on her blog.

Posted in How to Make a Quilt, Machine Quilt, Melanie Traylor, Patterns, Quilting, Quilting, Tutorials | Comments Off on Morning Sun Quilt by Melanie Traylor

Sweet Pumpkin Softie Pattern

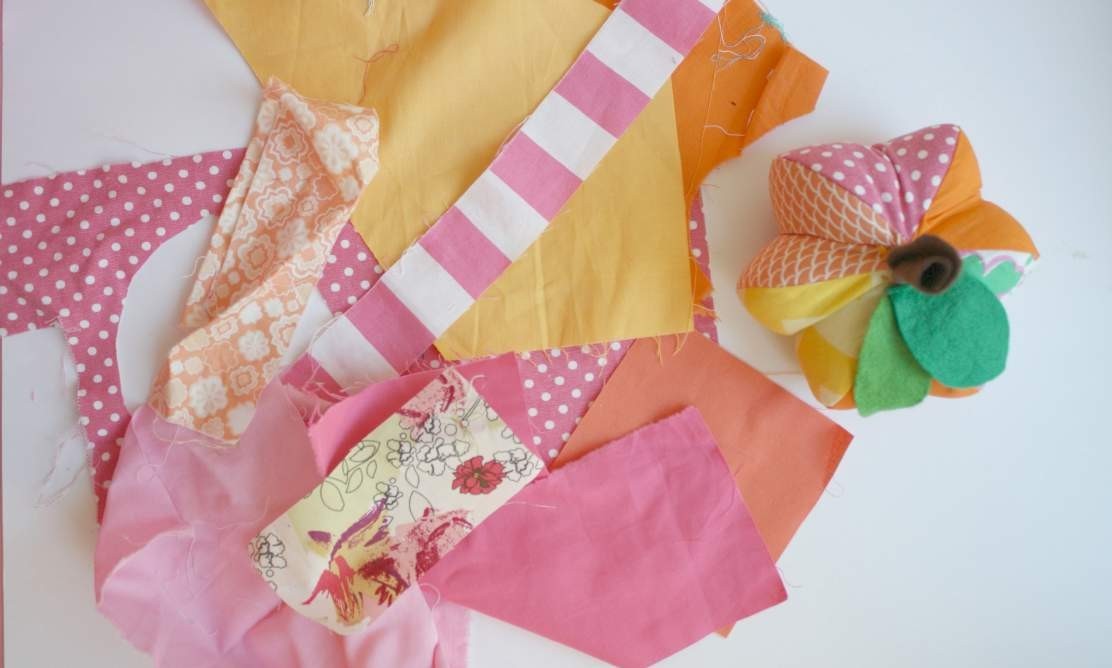
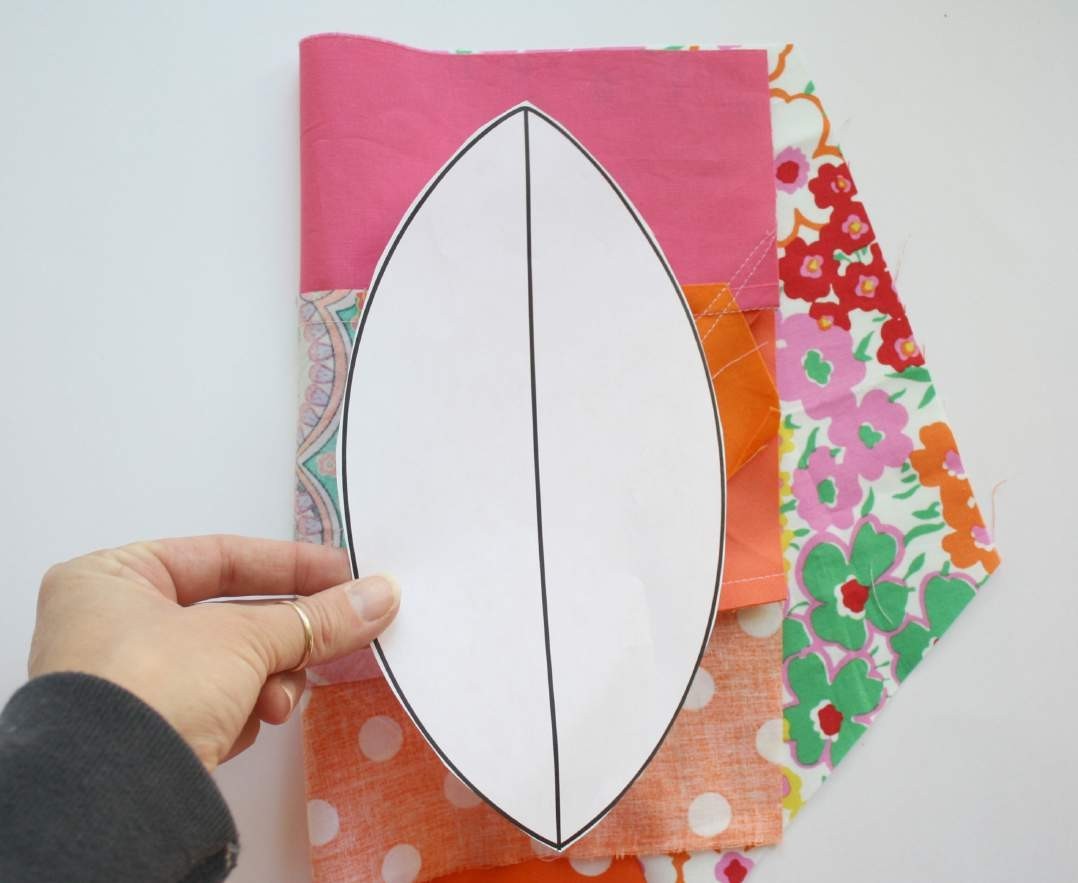
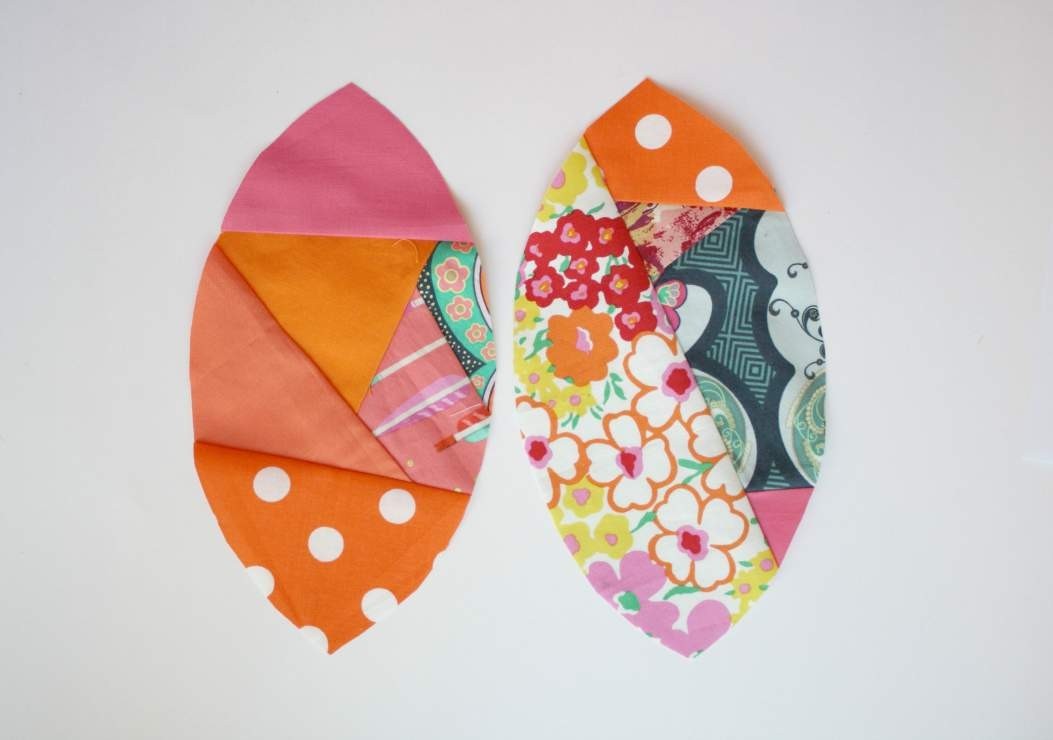
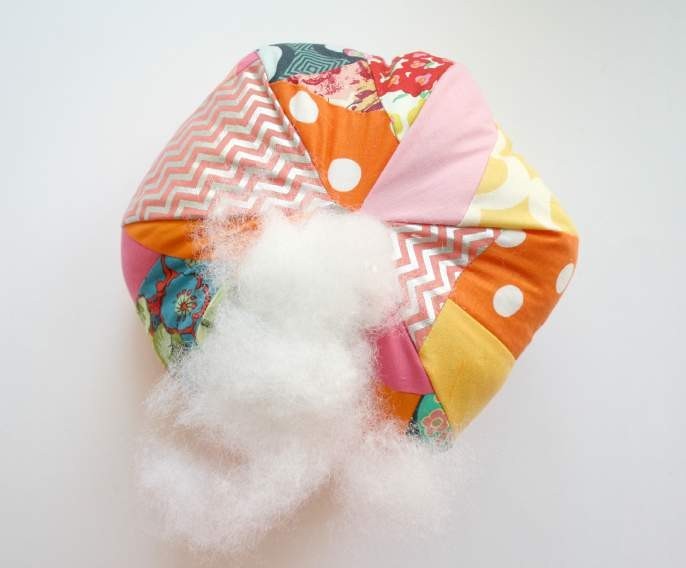
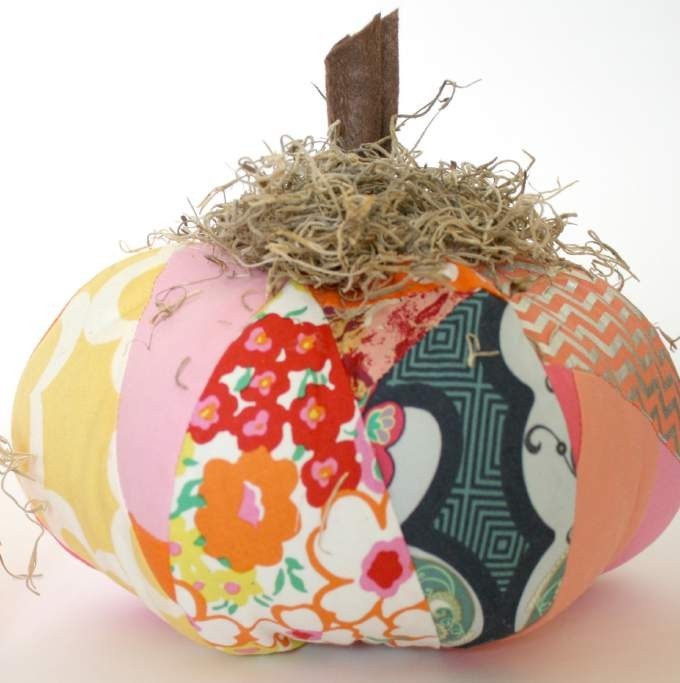
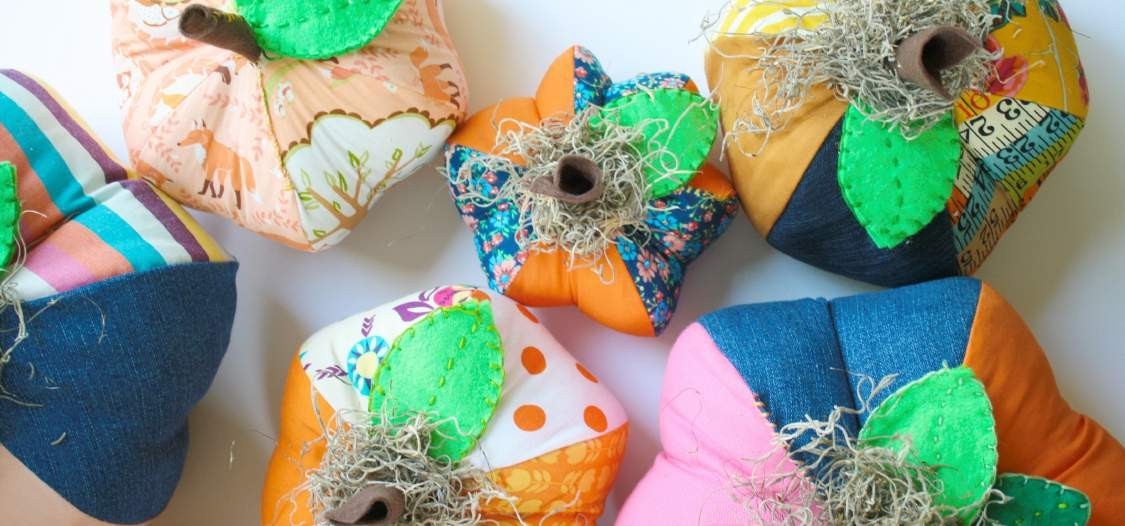
Pumpkin Softie Sewing Pattern

by Natalie Santini of SewHungryhippie

A step-by-step tutorial and pattern download so you can make these adorable pumpkin softies in small, medium, and large.

Materials:
1. Fabrics in various colors and patterns, at least three fat quarters to make a pumpkin family. I like to use six different fabrics, but it’s up to you to decide. Maybe just orange does it for you, and that’s great too.
2. Felt: I highly recommend 100% or at least 70% wool felt. It has a lovely hand to it and feels so
much nicer on your finished softie. Easier to stitch too!
3. Floss: I use DMC floss which is widely available online and in most craft or sewing shops. Also
a nice, large needle helps tremendously.
4. Polyfill for stuffing (or use an old pillow-cut it open and use that).
5. Rice and spices for making the bottom heavier so the softie will stand up appropriately. A funnel is helpful. I use cheap white rice and add cinnamon & cloves to it.
6. Optional: Glue gun with glue sticks, and Spanish Moss.
*My friend Zoe of Scented Sweetpeas said the Spanish Moss in Majorca is the best! Book a flight now! LOL

All seams are sewn with a 1/4” seam allowance. Whatever you usually sew with, stick with that and carry on throughout the entire pattern. 😉
Let’s begin.

1. Cut out six sides for your first pumpkin. Start with the medium size first, as it’s good to get the hang of it the first time around. I will show both small and medium sizes in these photos. Above is a size “small”.

These are the medium pumpkin cut outs.

You can mix up the fabrics to have each one different, or alternate fabrics like I’ve done here, or do them all in one fabric. It’s up to you and your aesthetic.


Match two pieces together and sew down one side. Do this for all three sets.

Match one pair of pumpkin sides to another pair, pin and sew down one side again just like before. Now you will have 4 cutouts sewn together.


Repeat this for the last set. Matching up the seams again and sewing down one edge, leaving a gap at the top for turning.

Now you will have an inside out pumpkin shape ball. Carefully turn right side out pushing the seams out with your fingers.

Grab the rice or kitty litter and a funnel. If you have access to kids that are so inclined, get them to help with this next part.

Pour the cup or so of rice (or kitty litter) into the pumpkin and arrange it level and even across the bottom. It’s now you will find out if your seams are sewn properly (LOL)–if any leaks out, dump it out and re-sew those seams. This is also when I put in my spice mix. Cinnamon is lovely, All Spice, and or Nutmeg all smell Autumnal.


Proceed to stuff the pumpkin, pushing the stuffing into the seams especially, to bulge those bits out. I usually have to manipulate it a bit so it takes on that classic pumpkin shape. Once it is sufficiently stuffed, get your felt to make the stem and leaves.


Cut out the stem and roll it up like a sausage. You have the option of stitching it into a closed sausage shape or just leaving it like I do. Stick it half way into the pumpkin, check to make sure the place- ment is pleasing to you, then stitch it into place as you sew the pumpkin sides closed.

There is an easy to follow tutorial online for learning how to do a blanket stitch, search for a video on YouTube or look at this diagram by Sweetbriar Sisters.
Feel free to experiment with your leaf construction! There is no wrong way. 😉


More up close pictures of closing and attaching stem & leaves.


Sew your leaves on now as well. We will hot glue them for extra staying power next.


Dab some hot glue from the glue gun under the leaves and near the insertion point of the stem. This is for extra strength, if you don’t have a glue gun handy, it’s not the end of the world. At this time, add some Spanish Moss if you fancy the look.


Well done! You’re finished making a pumpkin softie! Now make an entire family and watch others ohhh and ahhh over your cute softies.


Make a CRAZY Patchwork Pumpkin

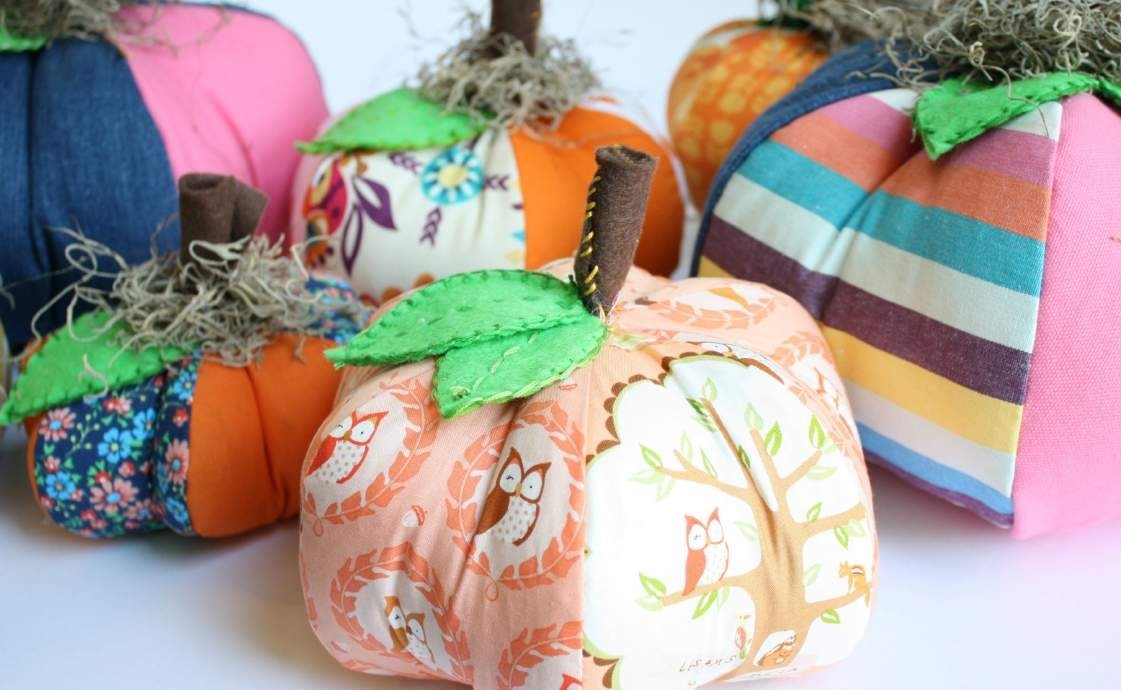
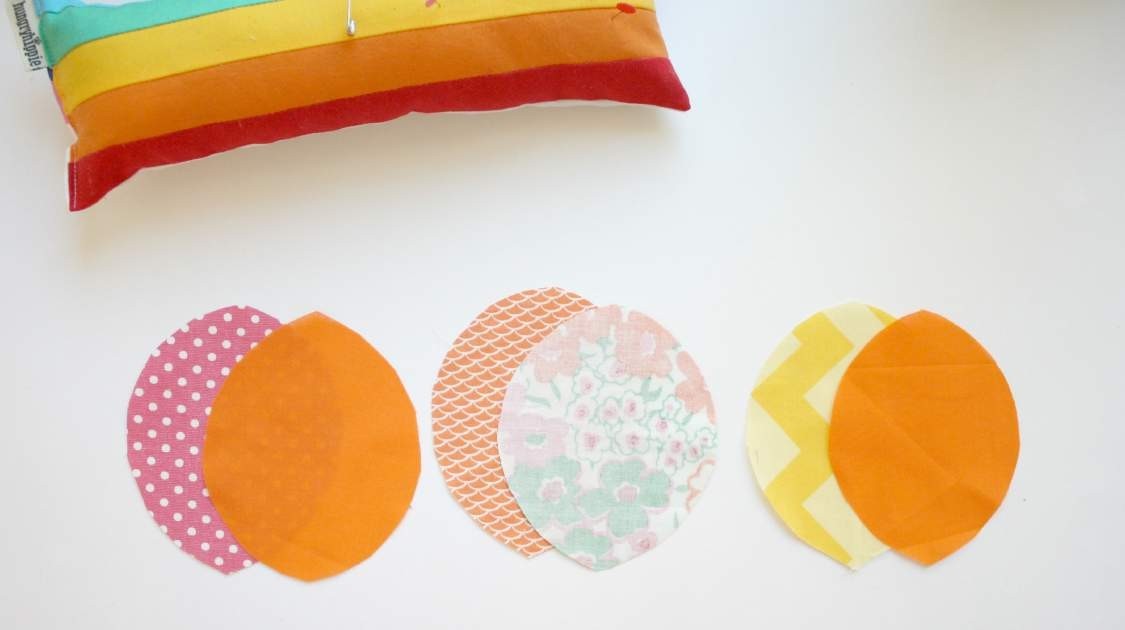
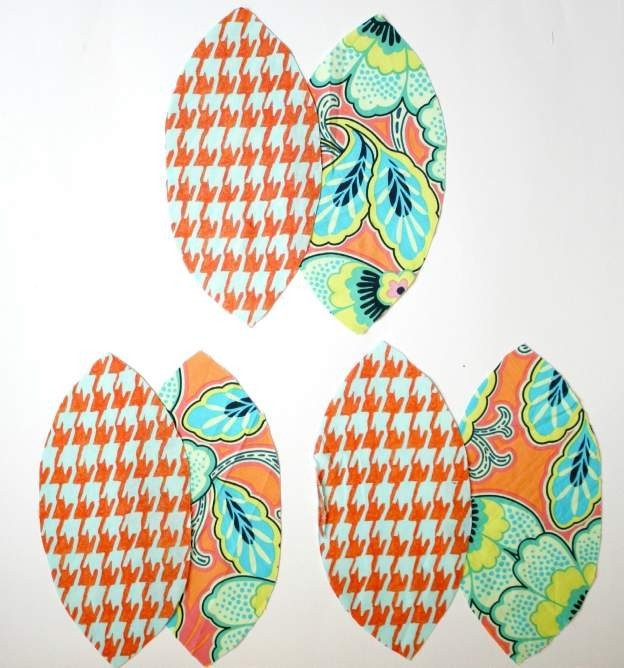
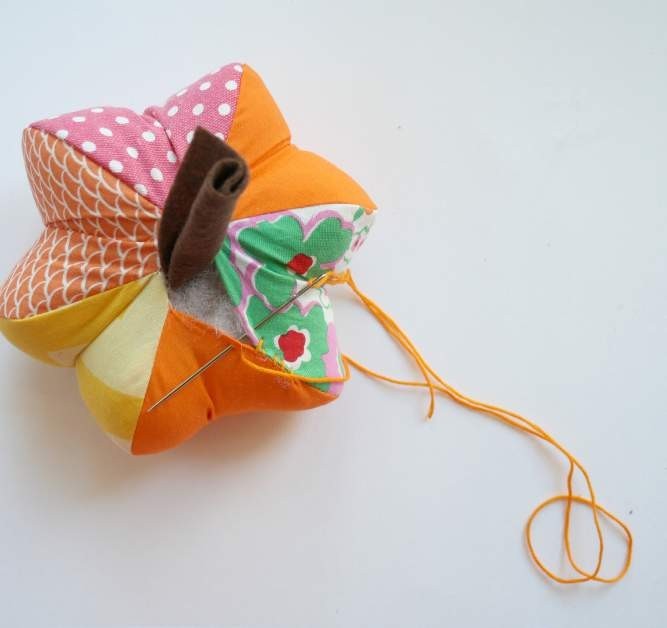
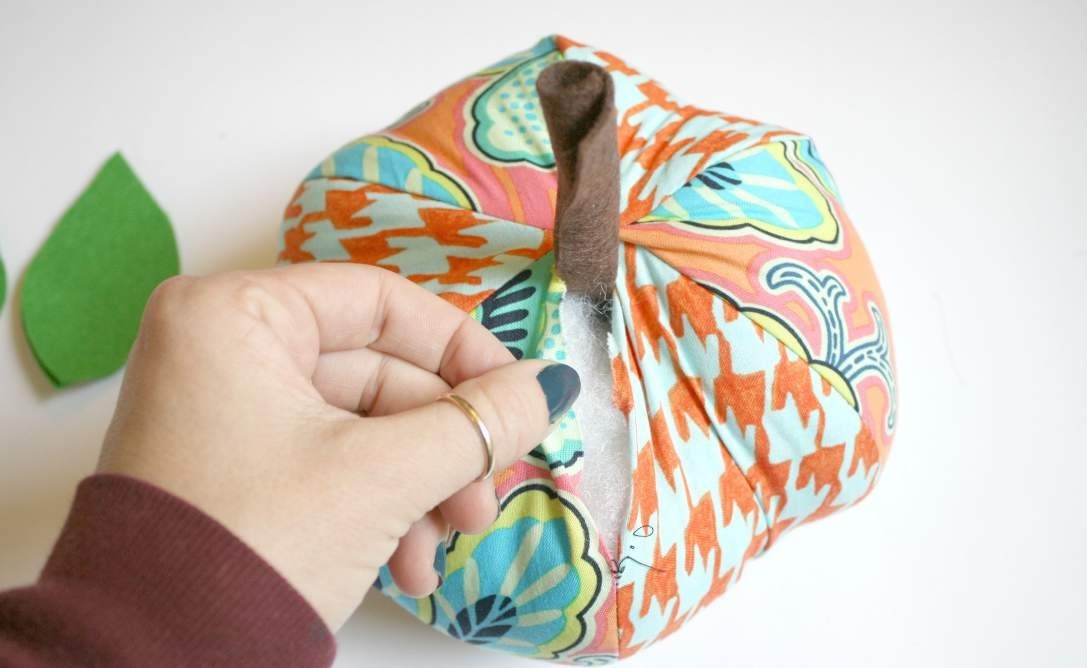
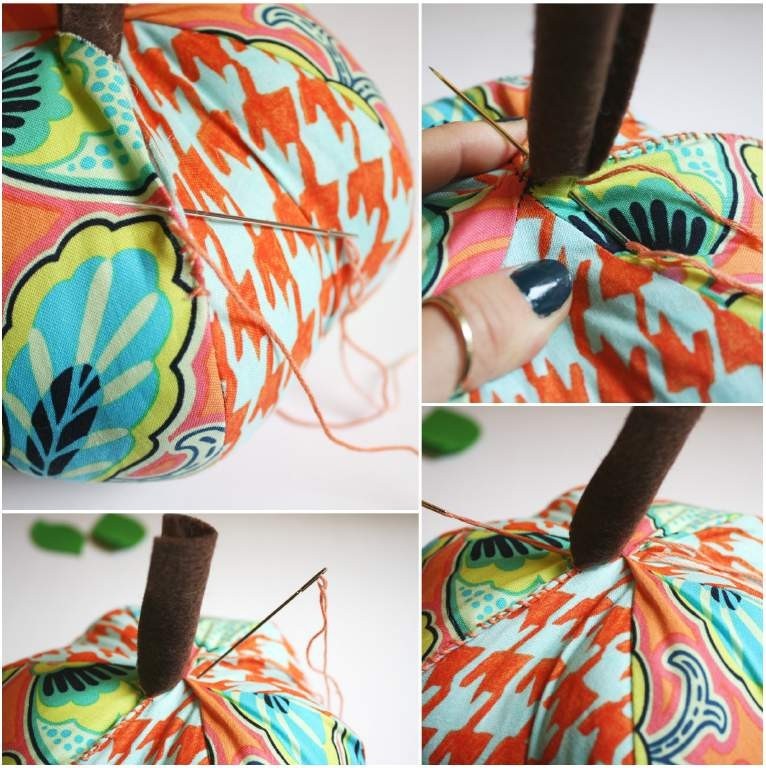
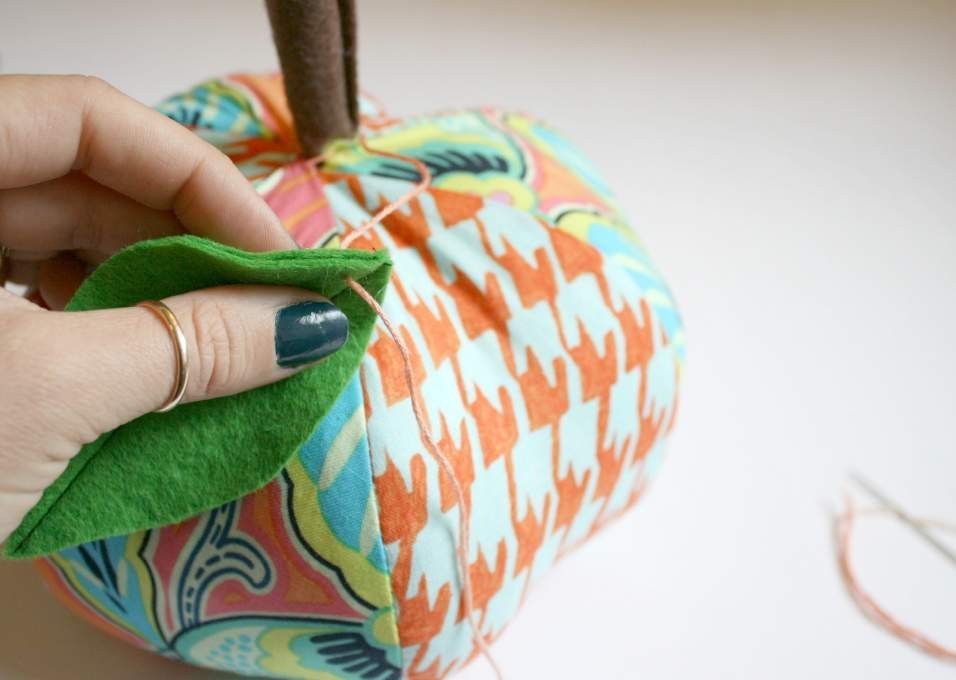
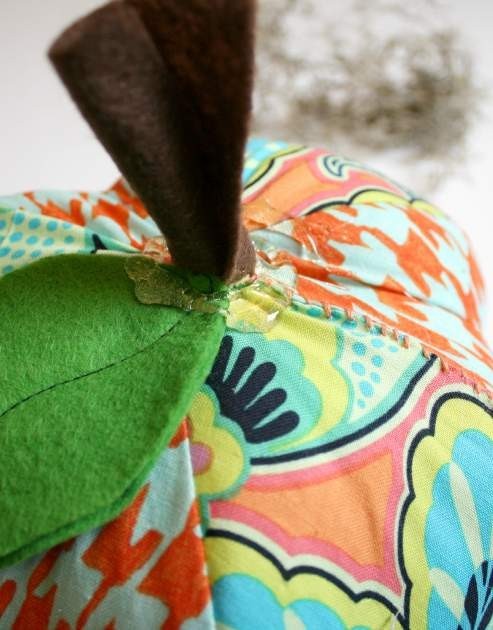
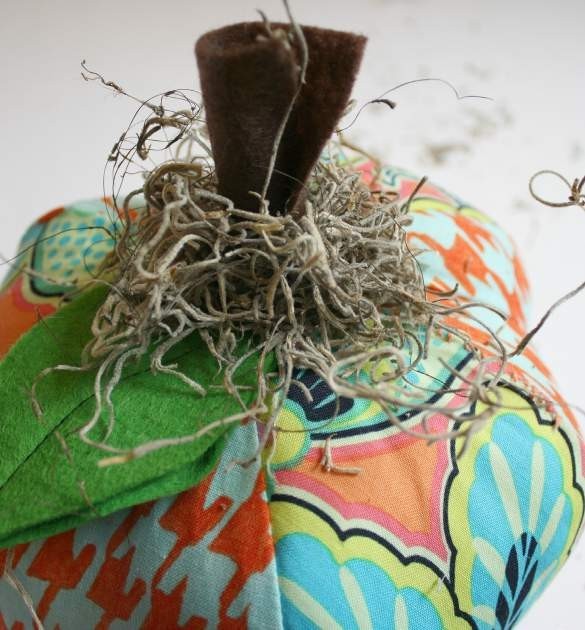
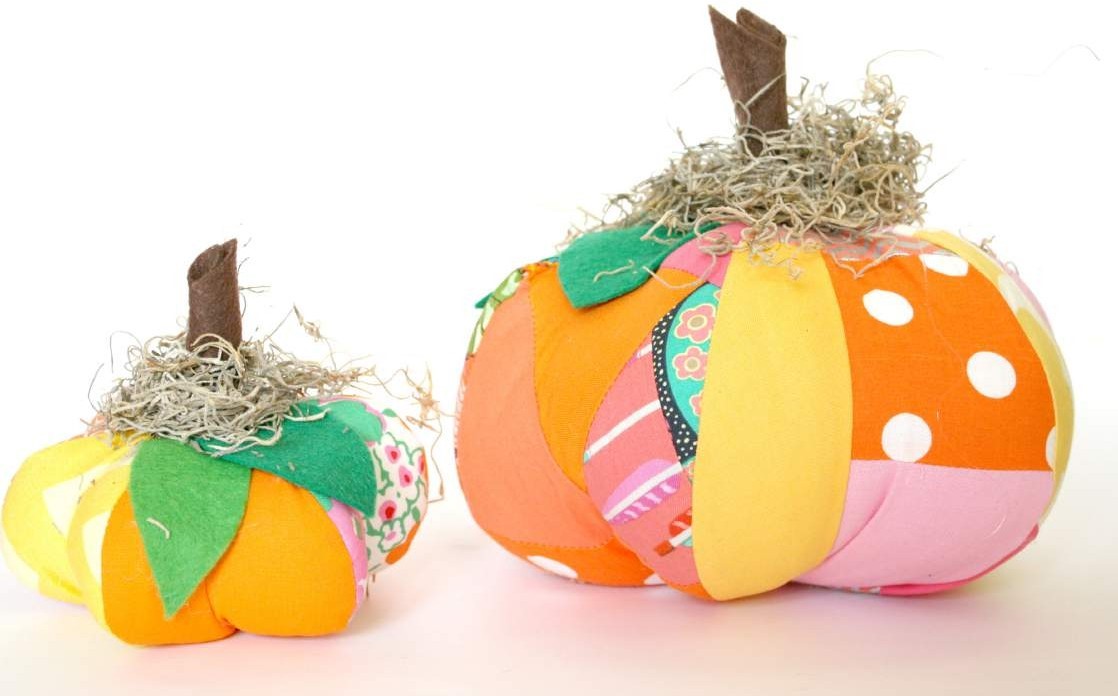
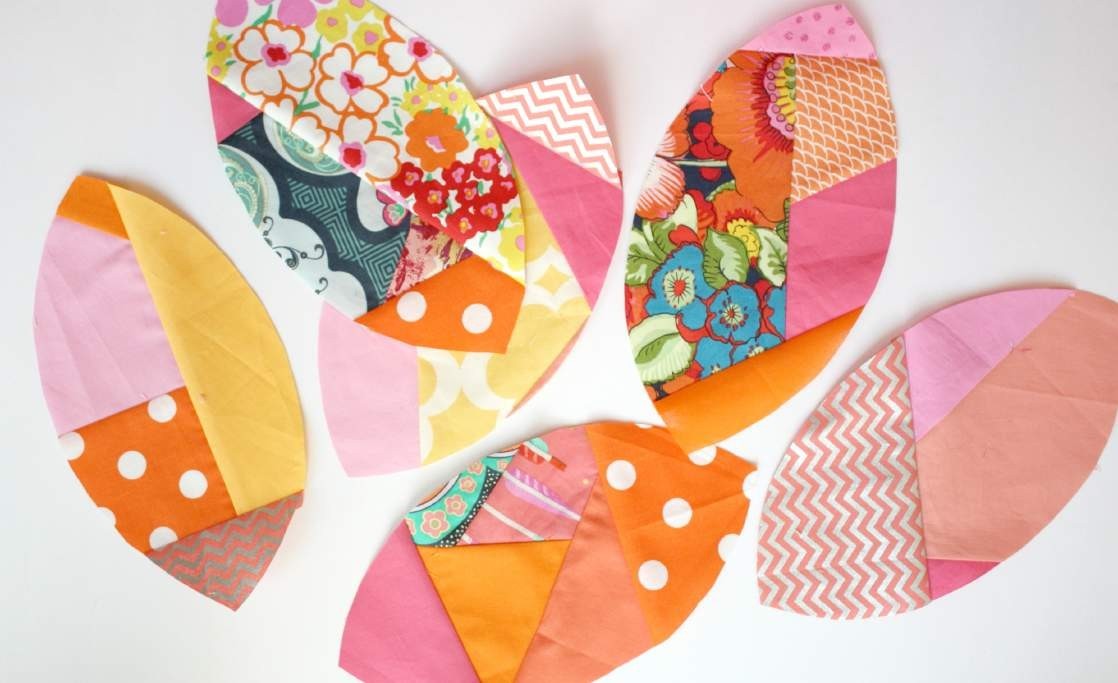
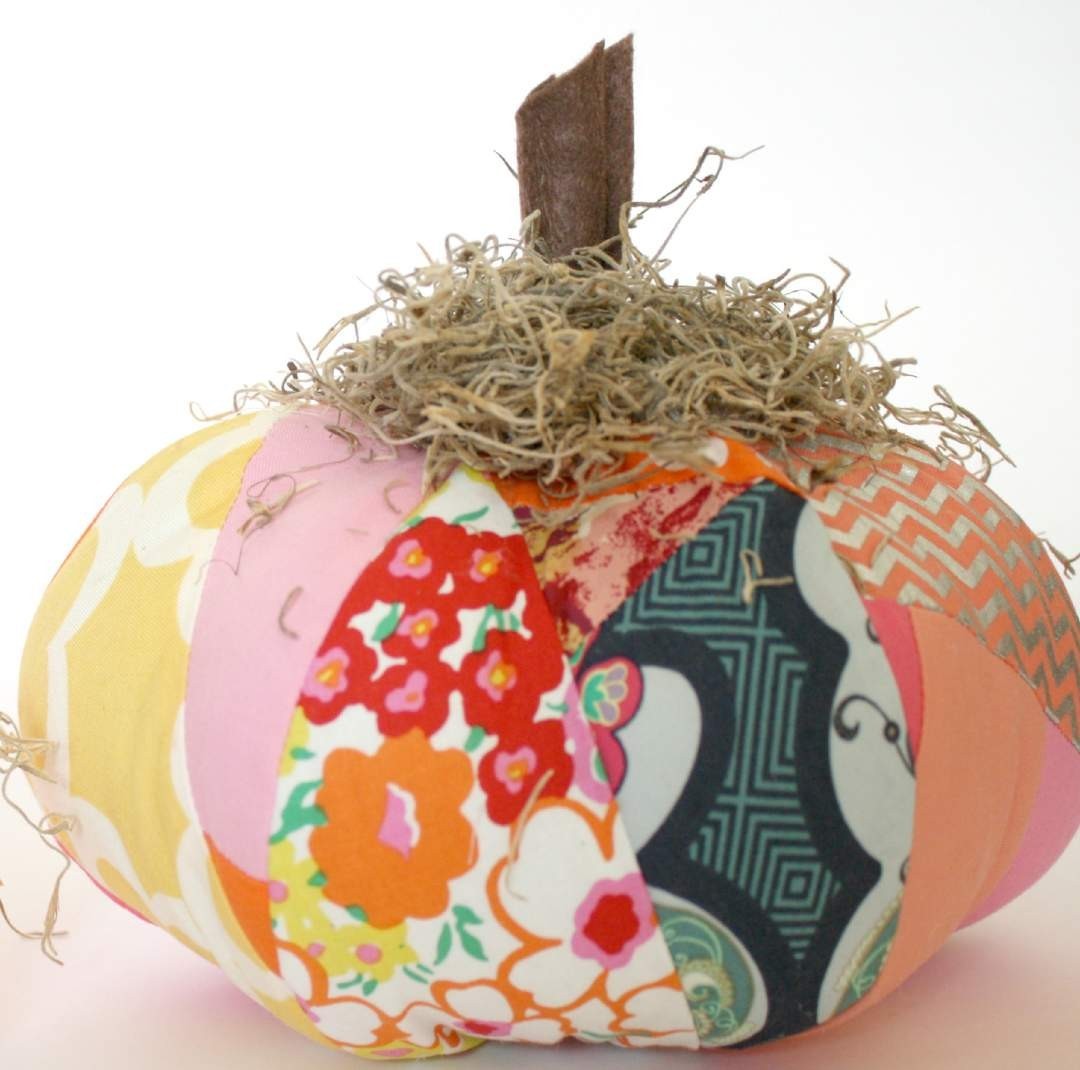
These patchwork pumpkins are made with scraps of fabric.

“Build” your own fabric pieces, then cut out the pattern shapes and pro- ceed as normal.

This is a great way to use up scraps and make ultra unique softies.


Gather a bunch of scraps, color coordinating or not, it’s your choice.
Build a “fabric sheet” by sewing the scraps together at straight angles and straight edges, always pressing the stitches before folding back over to the right side. Then press again to set the seam. You may need to trim the seam allowance as well, see the following photos.

Keep adding bits of fabric at straight angles-remembering to trim the seam allowance and keep edges straight.
The scrap piece must cover the entire edge of where it’s added. Here is a fabric “sheet” ready for cutting into a pumpkin shape:

I had a large enough sheet to fold it over -so I was able to cut two pumpkin shapes at once. 🙂


Keep going until you have six pieces. Then construct the pumpkin softie the same way we did the first one.

There you go! All finished, wasn’t that easy & fun?!


I’m Natalie, aka the Hungry Hippie.

I wear flowers in my hair, obsess about recycling, and I am always eating cheese. I’m a former Army Nurse Corps Officer turned tree hugging, granola eating “hippie” as my 20 yr Vet Husband likes to call me. I create patterns for sewing and quilting projects that are modern and fresh, with the aim of helping everyone through – no matter your skill level.

Sew HungryHippie is all about sewing projects for the adventurous beginner or intermediate sewer. Nothing too intense. No focus on absolute perfection. (Gross.) JUST CREATE.

My patterns are here in my shop and also in local stores- ask your local shop to carry them if they don’t yet. 🙂

YES I do occasionally teach or give trunk shows and workshops. Find that info here: https://www.hungryhippiesews.com/p/teaching-workshops.html

I love to collaborate! Drop me an email anytime.
I SUPPORT MAKERS- yes you can sell what you make with my patterns on a home based scale. YES you can do a video on my patterns please just TELL ME first so I’m on board. Ya dig?
If you make stuff with my products or patterns please link or tag me so I can share your work! 😀
Posted in Uncategorized | Comments Off on Sweet Pumpkin Softie Pattern

Tiny and Mini-Pops Tutorial

Tiny and Mini Pops Quilt Blocks: A Tutorial
by Jessica Schunke of A Blue Sky Kind of Life

It’s been crazy hot here in Missouri, and if you’re like me, you can’t get cold things off the brain. Today, we’ve got two more mini versions of my Little Pops quilt block (which was a simplified version of my Ombré Popsicle quilt), so you have no shortage of options for bringing more popsicle goodness into your life, calorie free. The instructions below are for making just a single popsicle block (not an entire quilt, though you could certainly make enough blocks for one) in one of two sizes: Tiny Pops (the smallest) and Mini Pops (just a bit bigger). These blocks are great for incorporating into sampler quilts and any number of other summer-themed projects. A table runner of popsicles all in a line would be the cutest..


The fabric supplies listed below are for ONE block.

Supplies:
–Tiny Pops: 2” x 6” finished
• Popsicle fabric: (1) 2.5” x 4.5”
• Stick fabric: (1) 1” x 2.5”
• Background fabric:
o (2) 1.25” x 2.5”
o (2) 1” squares

–Mini Pops: 2.5” x 7.5” finished
• Popsicle fabric: (1) 3” x 6”
• Stick fabric: (1) 1” x 2.5”
• Background fabric:
o (2) 1.5” x 2.5”
o (2) 1” squares

–Rotary cutter (I adore my Havel’s 60mm cutter)
Havel’s cutting mat

**A ¼” seam allowance is assumed throughout.

Instructions:
(1) Draw a diagonal line on the wrong side of each 1” background square. Place one 1” square right sides together in the top left corner of the popsicle fabric with the marked line oriented in the direction shown below. Sew along the line, then trim ¼” away from the line as shown. Press the triangle open.

(2) Repeat Step 1, placing the remaining 1” background square in the top right corner of the popsicle fabric. Make sure the marked line is oriented as shown below.

(3) Placing right sides together, sew the background rectangles to each side of the stick fabric. Press seams.

(4) Sew the stick unit to the bottom of the popsicle unit. Press your seam.

(5) Use your block as desired! I made a whole row of rainbow mini pops with sashing in between (cut 2.5” wide) for a traveling quilt I’m working on. What do you have in mind? Be sure to post on Instagram using #tinypopsquiltblock and #havelssewing so we can see what you made! Happysewing!


[Bio: Hi! I’m Jessica, a sewing, baking, editing, mommying Texan transplanted to the Midwest. I’m a proud Havel’s brand ambassador and member (and former president) of the St. Louis Modern Quilt Guild. I’m most active on Instagram, where you can find me as @blueskycrafter.]

Posted in art ideas, craft, Craft to make, Crafting, Cutting Mat, Fabric Cutter, Fabric Rotary Cutters, Free Craft Projects, Free Sewing Project, Fun Stuff, Jessica Schunke, Quilting, Seasonal, Tutorials | Comments Off on Tiny and Mini-Pops Tutorial

Little Pops Baby Quilt Tutorial

Little Pops Baby Quilt Tutorial
Finished size: 36” x 40”
by Jessica Schunke of A Blue Sky Kind of Life

If the hot summer days have you longing for a quick quilt to whip up, I’ve got just the thing for you today. The Little Pops quilt is a simplified version of my Ombré Popsicle quilt. The instructions below are for a baby-size quilt, but it could easily be sized up to a crib or throw size by just increasing the number of blocks and enlarging the borders. Wouldn’t it make the cutest summer picnic quilt? If you’ve got a little one in your life who could use a little extra sweetness right about now, get started on this one, and they’ll be cuddling up in no time.

Supplies:
–Popsicles
• Cut (14) 4.5” x 8.5” rectangles from a variety of fabrics — make your popsicles as scrappy or streamlined as you like. I used six fabrics in mine. The 14 rectangles could be cut from as little as two fat quarters (you can get eight rectangles from one fat quarter).
• (1) tan fabric: 1/8 yd.
o From (2) 1.5” x WOF strips, subcut (14) 1.5” x 4.5” rectangles

–Background: 1-1/8 yd.
Subcut as follows:
• (7) 4.5” x WOF strips
o From (1) WOF strip, subcut (7) 4.5” squares and (1) 4.5” x 8.5” rectangles
o From (1) WOF strip, subcut (4) 2” x 4.5” rectangles and (4) 4.5” x 8.5” rectangles
o From (1) WOF strip, subcut (21) 2” x 4.5” rectangles
o From (2) WOF strips, cut (1) 4.5” x 8.5” rectangle off of one end; the remainder of these two strips (roughly 33”) will be your side borders.
o Leave the remaining (2) strips alone; they will be your top and bottom borders.
• (1) 1.5” x WOF strip: sub-cut (28) 1.5” squares
• (1) 4.5” x 6.5” rectangle: subcut (3) 2” x 4.5” rectangles

–Binding: 3/8 yd.
• Subcut (5) 2.25” x WOF strips

–Backing: 1.25 yd.

–Rotary cutter (I adore my Havel’s 60mm cutter)
Havel’s cutting mat

**A ¼” seam allowance is assumed throughout.

Instructions:
(1) Draw a diagonal line on the wrong side of each 1.5” background square. Place one 1.5” square right sides together in the top left corner of each 4.5” x 8.5” popsicle rectangle with the marked line oriented in the direction shown below. Sew along the line, then trim ¼” away from the line as shown. Press the triangle open.

(2) Repeat Step 1, placing one of the remaining 1.5” background squares in the top right corner of each 4.5” x 8.5” popsicle rectangle. Make sure the marked line is oriented as shown below. This is Unit A.

(3) Placing right sides together, sew (1) 2” x 4.5” background piece to each side of the tan 1.5” x 4.5” pieces. Press seams. This is Unit B.

(4) Sew (1) 4.5” background square (Unit C) to the bottom of (7) of the B units. Press seams.

(5) Sew (1) 4.5” x 8.5” background piece (Unit D) to the bottom of (4) of the B units. Press seams. (Note: Three B units won’t have anything added to them.)

(6) Sew the (3) remaining B units to the bottom of (3) of the A popsicle units. Note: These will be the popsicles on the bottom row of your quilt, so consider your layout before sewing these units. Press seams.


(7) Arrange units in rows as shown below. Sew units into rows and then sew rows together. Press seams.

(8) Sew (1) 4.5” x 33” border strip to each side of the quilt top. Press the seams toward the border strips and trim as needed. Sew the remaining border strips to the top and bottom of the quilt top. Press the seams toward the border strips and trim as needed.

(9) Baste, quilt, and bind as desired.

(10) Enjoy your beautiful new quilt! Be sure to post on Instagram using #littlepopsquilt and #havelssewing so we can see what you made! Happy sewing!


Hi! I’m Jessica, a sewing, baking, editing, mommying Texan transplanted to the Midwest. I’m a proud Havel’s brand ambassador and member (and former president) of the St. Louis Modern Quilt Guild. I’m most active on Instagram, where you can find me as @blueskycrafter.

Posted in Baby Quilt, Cutting Mat, Fabric Cutter, Free Quilt Patterns, Free Quilt Projects, How To Make A Baby Quilt, How to Make a Quilt, Jessica Schunke, Patterns, Quilting, Quilting, Seasonal, Uncategorized | Comments Off on Little Pops Baby Quilt Tutorial