Free Christmas Quilt Pattern Introduction ~ by Terry White

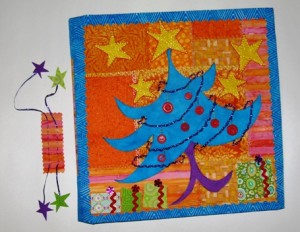
The Happy Christmas Tree Album Cover- A Free Quilt Pattern In 12 Parts

Free Quilt Pattern-Happy Christmas Tree Album Cover

Each part will include the patterns, fun and simple techniques and photo steps that take just a little time. So, have fun with the Twelve Days of Havel’s Holiday Project!

This free quilt pattern finishes at approximately 13″ square. So, my album cover has finished measurements to fit an album 14″ to 16″. The size of the border can be measured to fit your album.

The bookmark is a very simple project with lots of pizzazz!

You Will Need:
A photo album at least 14″ square in size

Fabric:
● Scraps of cotton in Orange (about five different prints for the background, spine label, back label and bookmark), Green (for the presents and bookmark stars), Purple (for the tree trunk), Bright blue (for the tree) **Please note that you should use any colors of fabric that you choose!
● 13 inch square of fabric for the back of cover
● 1/2″ yard of bright blue batik fabric for borders
● 1/2 yard of lining fabric – I used a polyester taffeta – it is light weight and doesn’t add bulk to the finished album cover
● A 10″ square of yellow felt
● A 10″ square of fancy novelty tulle

Adhesives:
● Two pieces of medium weight fusible interfacing
● A yard of fusible web (one of your choosing and be sure to follow the manufacturer’s directions)
● Fabric or Craft glue
● Spray adhesive

Threads:
● Decorative cotton and rayon threads for the decorative stitching on the orange background in Orange, Pink, Warm Yellow and multi-colors and Dual Duty thread for bobbin in warm yellow
● Blue variegated cotton thread for buttonhole stitches on the tree
● Purple variegated cotton thread for buttonhole stitches on the tree trunk
● Purple rayon thread to stitch the garland onto the tree
● Two yards of purple metallic ribbon yarn for the tree garland and the bookmark strings
● Multi-color pearl cotton yarn for the ornament hangers

Embellishments:
● 12 inches of red rick rack
● Four flower sequins
● Eight red buttons
● Deep pink fine point marker
● Black fine point marker

Next : On The First Part of Havel’s Holiday Project,
My True Love Is The Jumbo Rotary Cutter


For a printable PDF, please click here.

Posted in Fabric, Fabric Scissors, For Beginners in Sewing, Free Craft Projects, Free Quilt Patterns, Free Quilt Projects, Fun Stuff, Guest Writers, Holiday Projects, Patterns, Quilting, Terry White, Tutorials, Uncategorized | Tagged , , , , , , , , , , | 1 Comment

Fly Your Own Flag: How To Create 3 Fabulous Fabric Flags

by Jamie Fingal

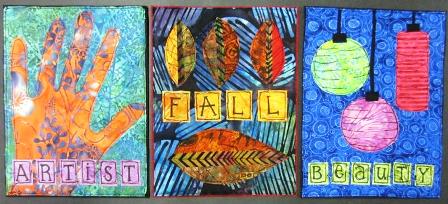
Learn how to make three flags, using scrap fabrics, fusing, wool blended felt backing and free motion machine quilting.
pic 28 448x204

Each flag measures 6″ x 8″ vertical format.  I used wool blended felt for the foundation and backing.  If you so desire one layer of felt is okay.  I prefer the firmness of 2 layers.  I would not recommend polyester felt, because noxious fumes will release when ironed or fused to other materials.  Choose three background colors, that fit on a 6×8 foundation.
pic 2 445x336

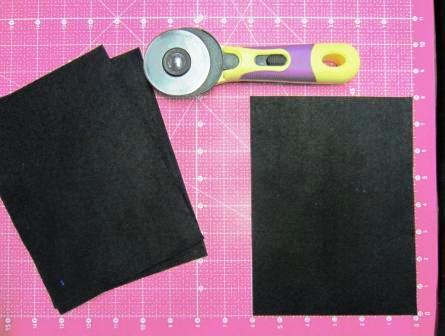
So, let’s get started.  Cut out the felt 6” x 8” using a rotary cutter, ruler and cutting mat.

Fusing Lesson

A Fusing Lesson
Picture 1: I use Mistyfuse, a fusible web, that doesn’t change the hand of the cloth.  It is very easy to sew though on the machine, as well as, hand sewing.  I buy it by the bolt.  So, I have rolled it out onto the wrong side of the fabric.

Picture 2: Using a pressing sheet (Goddess Fat Sheet by Mistyfuse), I run my dry iron on the cotton setting over the entire area, making sure that the edges are all melted into the fabric.  You can lift up an edge of the sheet to see how it is working.

Picture 3:  On the left is the fabric without Mistyfuse, and on the right, is the fused fabric.  You see it has a sheen to it, so you will know what side has the fusible on it.  Trim off the edges that are not fused, and set aside.  You will need 3 different pieces of fabric for the backgrounds.  Fuse all of your fabrics for this project.
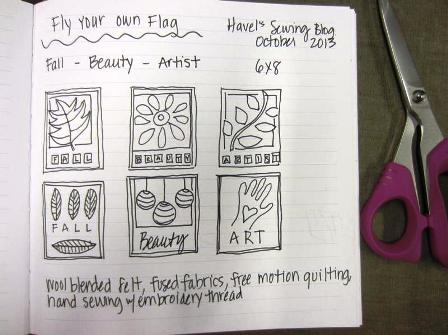
Brainstorming Quilt Project Ideas

Here is a page from my journal/sketchbook on brainstorming ideas for this project.
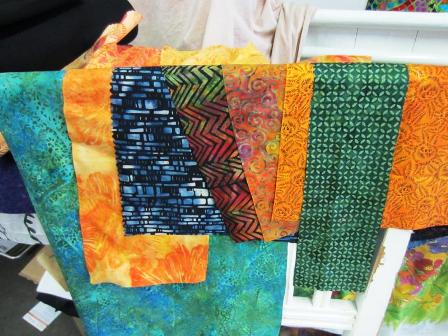
Auditioning Fabric Options

These are fused fabrics that I am auditioning for this project.  This is the way that I normally work when I am making an art quilt.   I am looking for colors that compliment each other, good contrasts, texture, and to make sure they are the same value.  I am seeing that the blue/black geometric is too strong for this group.  The batik with the chevrons is also too strong, but could be used, if cut for an accent.
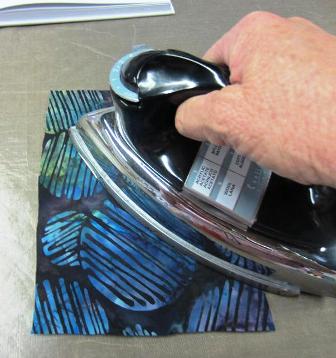
Fusing the Backing of the Project

This is the background for the FALL flag, and I am fusing it into place on the wool blended felt.  All of the flags will use the same method.
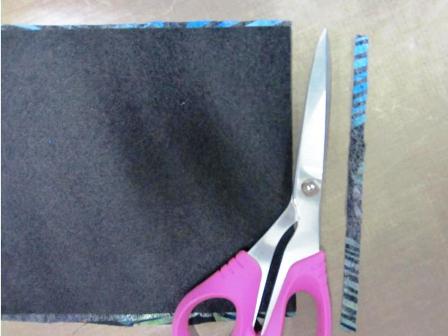
Trim the Sides

Turn it over and cut from the back, to trim the sides.
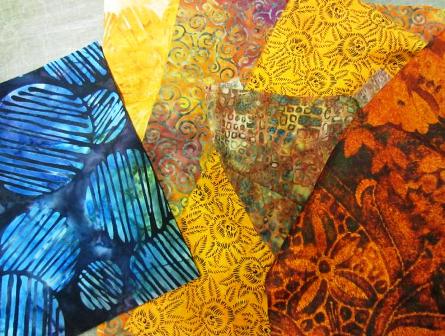
Auditioning More Fabric Options

I am now auditioning fabrics that will work well with this background.
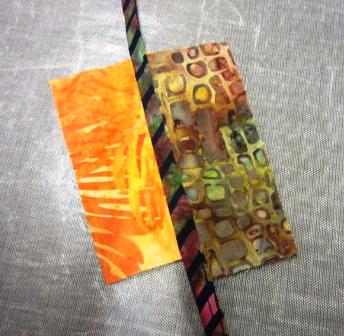
Fusing to Create Fabric Leaves

Making Interesting Leaves: For this I am using 3 fabrics.  2 for the leaf sides and one for the center.  I am fusing them together on a Goddess Sheet, but you can use Parchment Paper too.  The fabric won’t stick to either, and it is a great way to build objects before fusing them to your actual project.
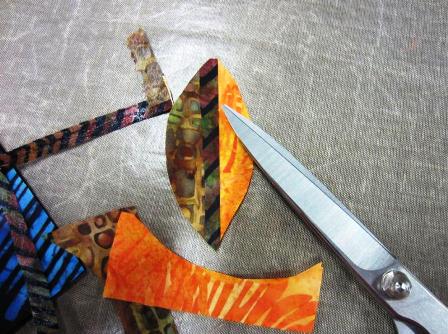
Cutting Out Fabric Leaves

Fussy cut your leaves out – one by one.  You will need three of the same size, and one larger size.  I would say that the smaller ones are 2” long and 1- 1-1/2” wide.  I used 5 pieces of different fabric for the small leaves, and 3 pieces for the large leaf.  The large leaf is about 4” long by 2” wide.
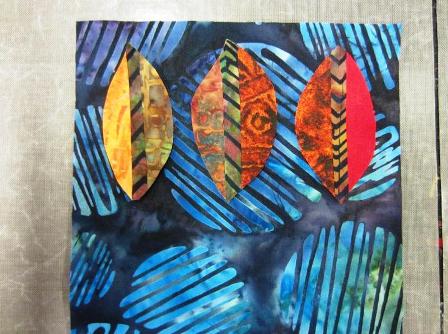
Situating Fabric Leaves on Background

Fuse them onto the background, leaving room for the text in the middle.  Note: the fabric that I used for the leaves, is echoed onto the next leaf, sort of like a natural progression into fall.
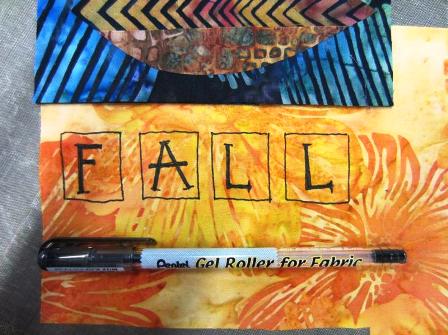
FALL Using Fabric Pen

Place the lower portion of your flag on the piece of fabric that you have selected for your text.  Draw squares onto the fabric with a Pentel Gel Roller for Fabric.  The flag will be your guide to making sure that you don’t run out of room.  You can write each letter into the square, but out with your scissors and fuse them on the flag, making sure there is some space between each letter.  If you don’t trust your own writing, you could print the text out on your computer, and copy it onto your fabric by using the light coming through a window as your light box.
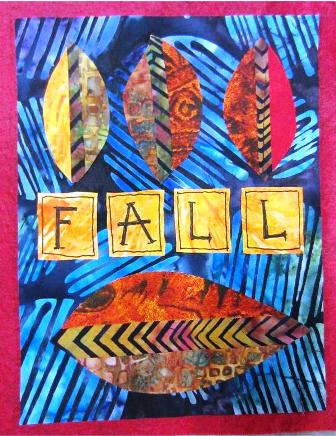
Finished Fall Flag Quilt

The flag is backed with another piece of felt.  You can choose not to do this step.  This is the way that I make all of my quilts.  This piece is ready to be free motion machine quilted.
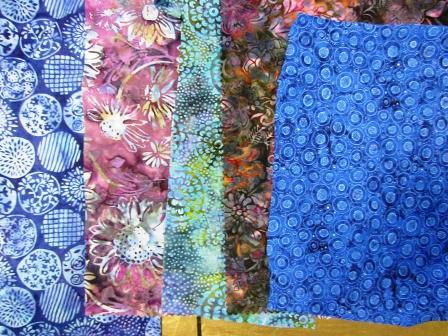
Auditioning Fabric For Second Fabric Flag

Now on to the next flag – I begin by auditioning the background fabrics for the 3 lanterns.
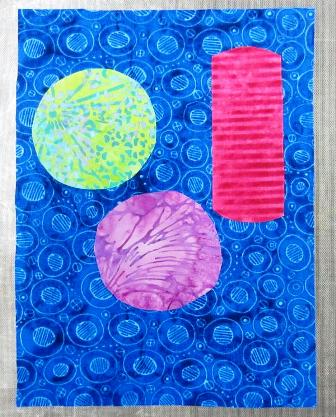
Fabric Lanterns For Flag 2

The royal blue makes a great background, and the colors that I chose for the lanterns are all complimentary colors, so they POP out.  Cut 2 round and 1 rectangle.
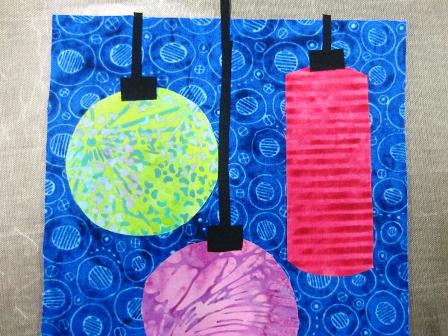
Creating the Fabric Lanterns

Add the lantern tops and rope, by using black fabric.  You could use another color for these, but I think the black really sets it off.
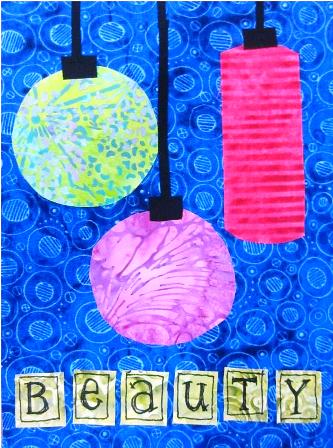
Finished Lanterns and Beauty Fabric Flag

The text using the same method as the FALL flag. It doesn’t have to be perfect. Use a color that goes with everything else that you have chosen, but is set off by the background.  Back the flag with another piece of wool blended felt, or not, and set aside for the sewing machine.
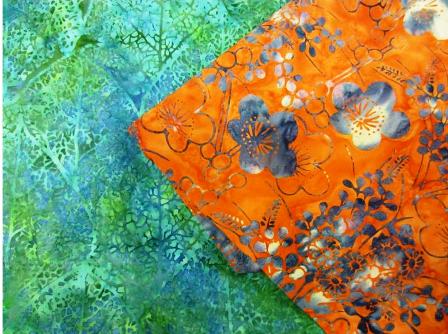
Creating the Third Fabric Flag

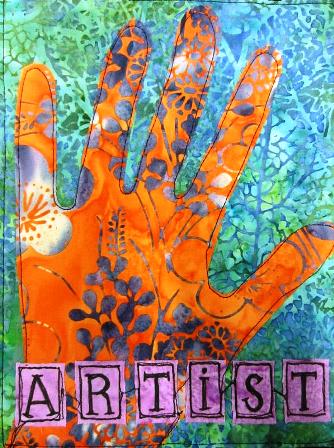
Creating the Third Flag – Artist: You only need 3 pieces of fabric.  One for the background, the hand, and the text.  I used the green for the background and the orange for the hand. Lavender for the text.
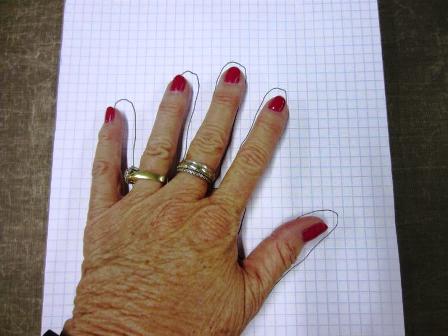
Tracing the Third Flag

Trace your hand on a piece of paper, using a black pen. It doesn’t have to be perfect.
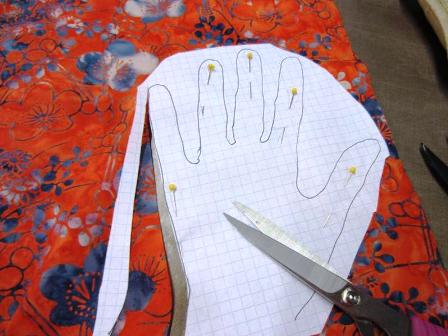
Tracing the Fabric Hand

Lay it on the piece of fabric that you have chosen for the hand.  Pin it into place.  I find it easier to pin where the fingers are. Cut it out.
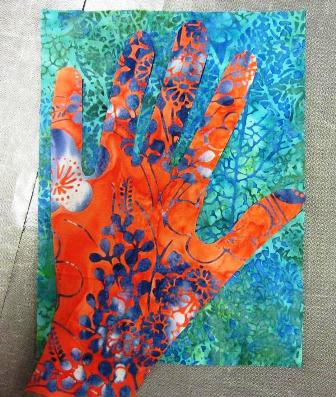
Putting the Fabric onto the Backing

Fuse it into place and cut the excess from the back, like how we did it on the first flag.
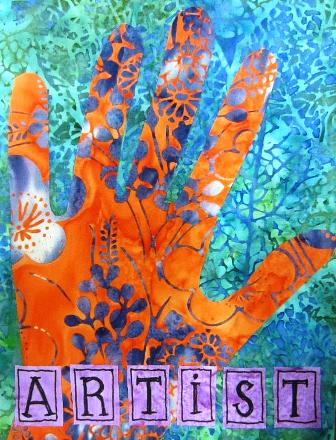
Completed Third Fabric Flag

Line up the bottom portion of the flag to make sure that the boxes fit.  Draw, cut, and fuse into place.
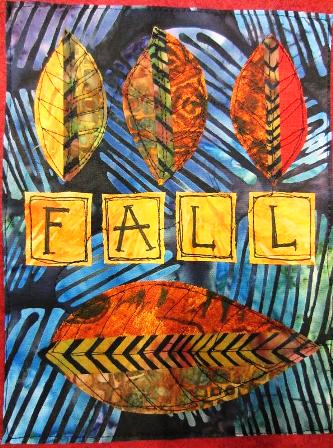
First Fall Fabric Flag

FALL
Free motion machine quilting.  This is a great way to practice this skill.  Simply outline the leaves and do as little or as much as you want in the veins of the leaves.  Follow the lines of the text boxes.  I did not stop and start these separately, but chose a dark line to sew over to the next block.  I simply sewed the sides to the felt backing.
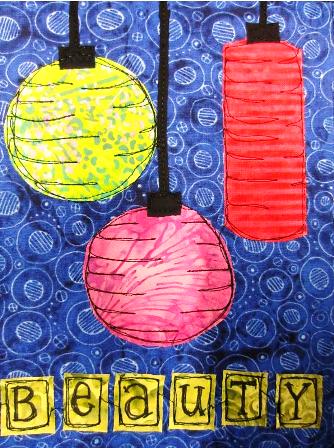
Second Fabric Flag Beauty

BEAUTY

Third Fabric Flag Artist

ARTIST

All Three Finished Fabric Flags

The Finished Flags: I have all of my flags hung using a laundry line and clothes pins.  You can also sew pop tops on the back of the flags and hang on the wall with a small nail. I hope you have enjoyed this project.  Happy FALL!

Posted in craft, Craft to make, Crafting, Fabric, Free Craft Projects, Free Quilt Projects, Free Sewing Project, Guest Writers, How To, Jamie Fingal, Uncategorized, Wall Hangings | Tagged , , | Comments Off on Fly Your Own Flag: How To Create 3 Fabulous Fabric Flags

How to Make A Quilt-Throw

By Leslie Tucker Jenison

Use your favorite themed fabric and create your own
one-of-a-kind quilt throw.

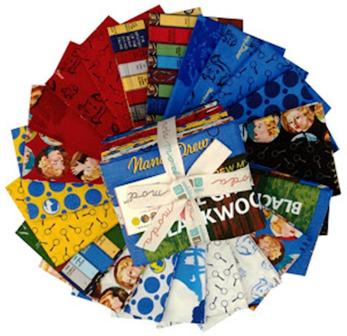
Moda Fabrics Nancy Drew Prints - image01-347x336When I found out that Moda was launching a line of Nancy Drew-themed fabrics, my young-reader-self crawled out of hibernation and starting jumping up and down! Nancy Drew. I credit these books with sparking my love of reading. Birthdays, holidays, sick days: all I wanted was another Nancy Drew Mystery.
I decided to make a throw-sized quilt, something that you could curl under on the sofa while watching “Murder, She Wrote” (which is a ritual around here on occasions when my daughter, Natalie, is here visiting).

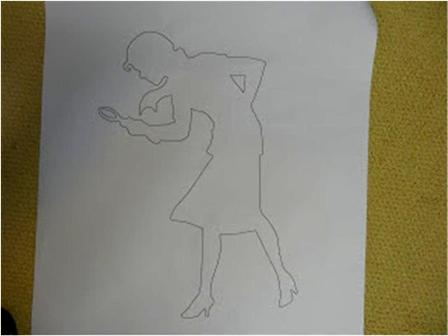
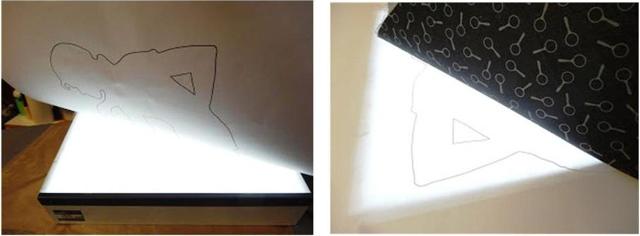
First, I asked my architect friend to enlarge this figure, as derived
from one of the cloth designs.

Enlarged Nancy Drew Image - image02-448x336

Placing the image over a lightbox, I traced the shape onto a piece of the
Nancy Drew fabric that had been pre-fused with Mistyfuse.

Traced images on a light box - images03&04-640x236

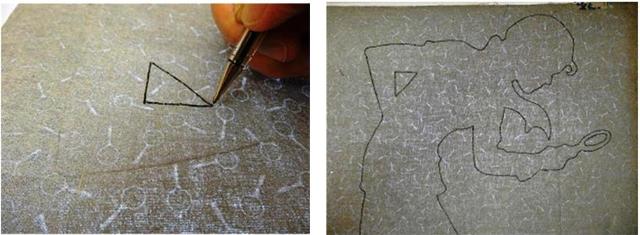
I worked on the reverse (fused) side of the cloth, tracing with a Pentel Gel Roller Fabric pen (which I adore BTW!) Here is the complete tracing on wrong side of fused fabric.

completed tracing on the fused fabric - image05&06-640x235-

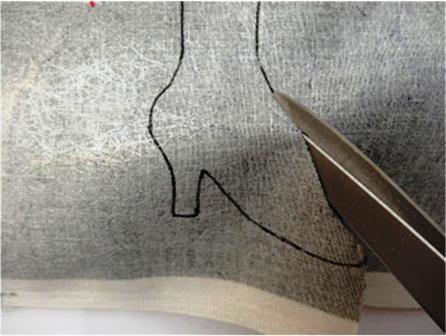
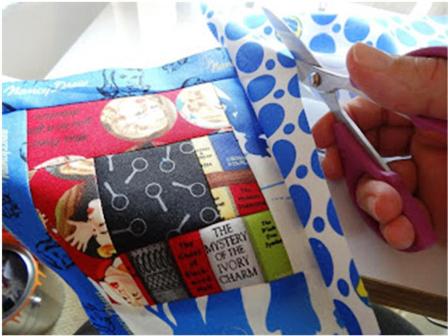
Now, I cut the shape out. It was easy because I was using my fabulous 7″ Havel’s Scissors with the micro-serrated blade. You should try these scissors because they are
amazing for this type of work!!

cutting out the shape - image07-446x336

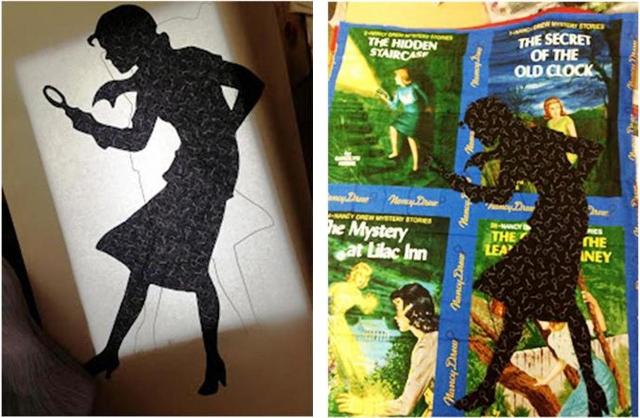
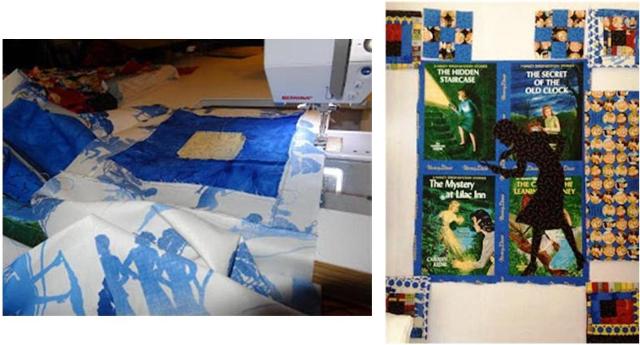
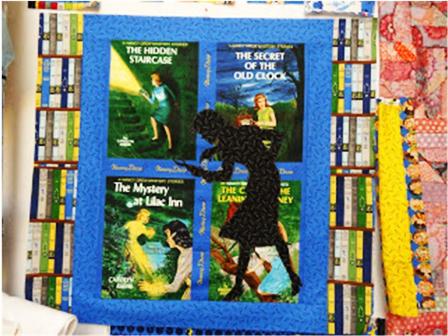
Here’s Nancy! She is ready to be fused onto the book panel.
So far, so good! I like how this looks!

nancy drew image in silhouette - image08&09-640x418

Here I am free-cutting block strips with my seriously-great 7″ Havel’s Scissors. They are as sharp and precise as the day I bought them 2-1/2 years ago!

free cutting block strips - image10-448x336

I made a bunch of pieced blocks that I later changed my mind about.
These are now on the back of the quilt…

pieced quilt blocks-image11&12-640x205

Before…
I changed my mind and switched to the blue-yellow colorway for the quilt top.

nancy drew quilt blocks-image14&13-640x345

After…

nancy drew quilt blocks with blue and yellow-image15-448x336

Here is a corner block, under-construction.

corner block under construction image16 447x336

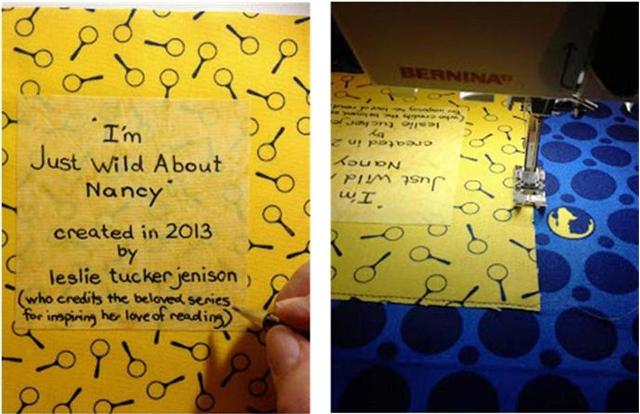
I wrote the quilt label on a piece of plain yellow pre-fused cotton, using my Pentel Gel Roller Fabric Pen (LOVE). After fusing, I stitched around each edge…

quilt label written with fapric pen image 17&18 640x414

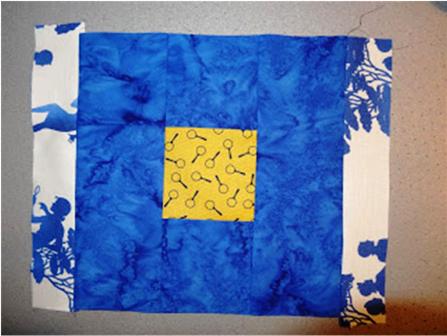
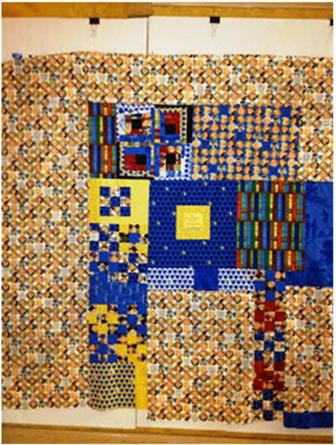
The label is the yellow block with blue border in the center of the quilt back. I decided to place the label prior to the quilting. I used all the extra pieces of Nancy Drew fabric to create a scrappy-pieced quiltback. I like how it looks!

quilt label with blue border image 19 336x445

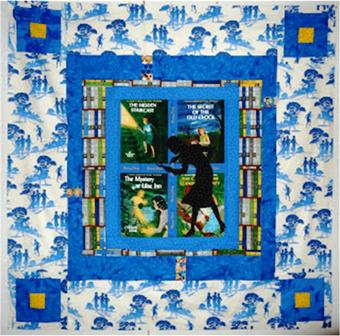
Here is the finished quilt, long-arm quilted by my friend, Danielle Wilkes.
I machine-stitched the binding.

finished nancy drew quilt image20 340x336

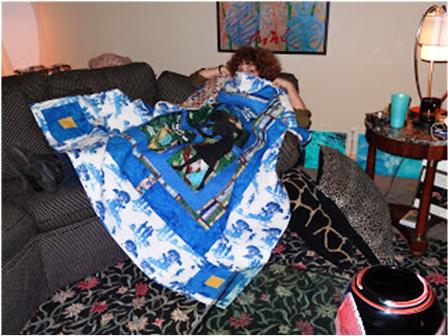
Here is the quilt “in action” – tucked around my daughter, Natalie, who was visiting from Austin. We have a ritual of watching old “Murder, She Wrote” episodes on Netflix. I think it was even more fun all cozied-up under “Nancy”!

natalie tucked under nancy drew quilt image21 448x336

This project was part of a fun blog hop. I hope you will stop by my blog soon and say hello! LeslieTuckerJenison.Blogspot.Com

Here is a link to the entire blog hop on a day-by-day basis: Just Let Me Quilt

Click here to read more articles by Leslie Tucker Jenison
and read what other’s say about their Havel’s Scissors

Posted in Free Quilt Projects, Guest Writers, How To, How to Make a Quilt, Quilt Throw, Uncategorized | Tagged , , , | Comments Off on How to Make A Quilt-Throw

How to Make A Baby Quilt

Quick and Easy Reversible Baby Quilt

By Linda Hall

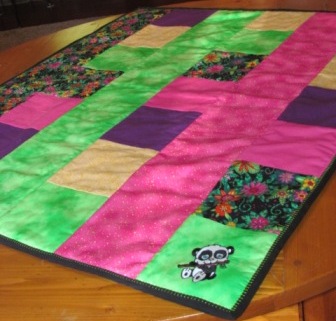
You will love making this fun reversible quilt in an afternoon! It’s the perfect gift to Insert1 336x448have on hand for baby showers, or for the special babies in your life.  Add your own special touches. If you have an embroidery machine you can add fun designs to some of the squares.

Sewing Supplies: 

Cut:

From print #1:Insert 2 448x336
9 squares 6”x 6

From print/ solids  #2:
8 squares 6”x 6”

From print/solids #3:
8 squares 6”x6”

From print/solids  #4:
9 squares 6”x6”

From print/solid   #5:Insert 3 448x336
8 squares 6’x6”


Insert 4 448x336From each of the three strip fabrics:

Two strips 6”x width of the fabric

From Batting:
Six strips 6” wide x 39”


Sew:

  1. Thread your sewing machine with sewing thread top and bobbin.
  2. Attach the 1/4” piercing foot.
  3. Begin by sewing 7 squares into vertical strips following the diagram above. Mark each row by number as you finish it. These will be referred to as the pieced strips.
  4. Press the seam allowances all towards the bottom of the strip. Set aside.
  5. Attach the dual feed foot.
  6. Place pieced strip #1 wrong sides together with one of the plain 6” strips with  batting  in between them. Sew the left edge close to the raw edges securing all the layers together. This will be the outside edge of the quilt.inseert 5 336x448
  7. Place a plain strip on right side down on top of the pieced strip (these two will be right sides together). Pin.
  8. Place pieced strip 4 right sides up underneath the plain 6” strip (these two will be right sides together). Re-pin through the new layers.
  9. Place batting underneath all.
  10. Align the edges of the fabric and batting with the edge of the Dual Feed. This will be a bit more than 1/4”. Stitch the strip in place.
  11. Fold out the pieces and press with steam. Pin the new edges together.
  12. Repeat, adding the remainder of the strips in the same manner. Always combine a pieced strip and a solid strip right side together. On the side where strip #1 was placed, strip #2 goes next. On the side where strip #4 was placed strip #5 goes next, etc.
  13. Stitch the outer edge on the final strip securing the edges together.
  14. Bind the quilt in whatever method you choose.Insert 6 448x336Insert 7 448x336

    Click here to Get the Tools You Need 


Enhanced by Zemanta
Posted in Baby Quilt, For Baby, How To Make A Baby Quilt | Tagged , , , , , | 2 Comments

How to Quilt with Appliqué

Fuse Shadow Appliqué
By Terry White

Shadow appliqué is simply adding a background to an appliqué that is cut around the appliqué shape. It separates the shape from the quilt. In this case, it is important because the blue cat would fade right into the blue sections of the quilt. This would give an awkward shape to the cat. The yellow also accentuates the appliqué so that it has more presence in the quilt….it makes the cat shape a bigger deal.

The Blue Cat

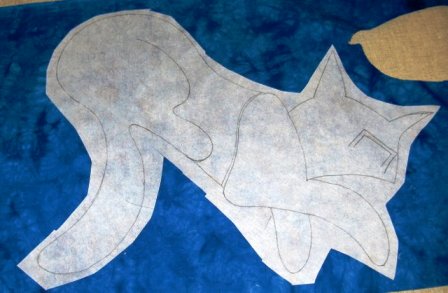
1-fused-applique-cat-448x293
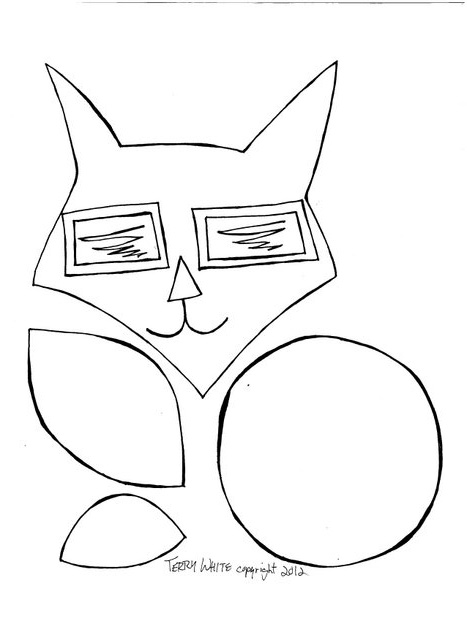
Trace the cat pattern pieces onto the fusible web. I have traced all the pattern pieces together onto the fusible web so that you can see the shapes together. Be sure to reverse the pattern so that the cat faces the left.

2-cat-applique-353x336
Iron the blue fabric to the web and cut out the cat. The blue fabric that I chose is a deep blue with soft texture. I think that the texture makes the cat livelier.

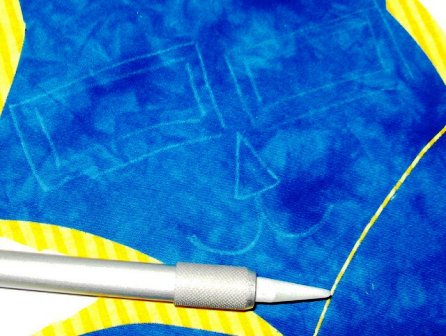
4-trace-cat-face-446x336
Trace the cat’s face onto the blue fabric. I used a graphite marker. The graphite marker lasts forever and works on dark fabrics.

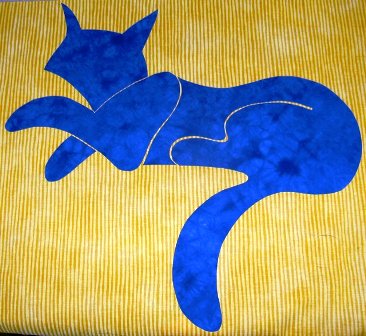
5-fuse-blue-cat366x336
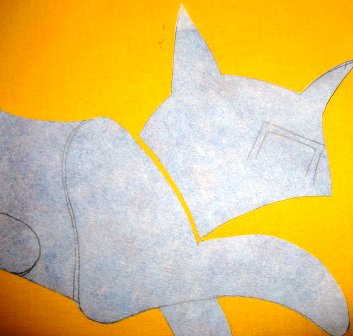
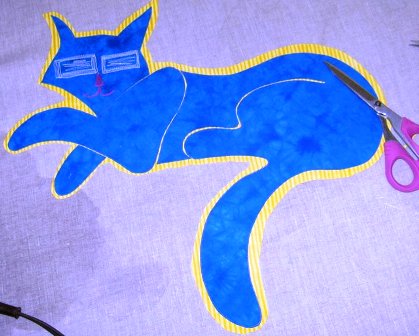
Fuse the blue cat to a yellow piece of fabric. The yellow stripe fabric adds a bit of humor to the cat. Rough cut the yellow fabric about half an inch around the cat shape.

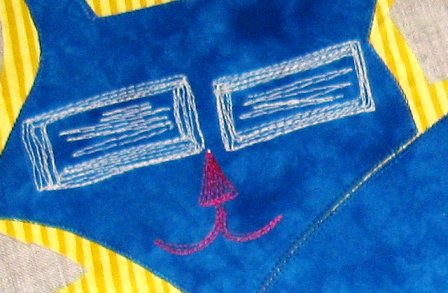
6-thread-paint-cat-face-448x293
The yellow fabric acts as a stabilizer. Now, the cat’s face can be hand embroidered, painted, stenciled, or stitched with free motion embroidery (as I have done). I used white and fuschia STAR cotton threads to do the embroidery. Use your favorite technique for this detail work.

7-stitch-blue-cat-421x336
Stitch the blue cat to the yellow fabric. Use the same stitching method as with the leaves and oranges. I used a variegated blue cotton thread to do the stitching. It blends in best with the mottled blue color fabric.

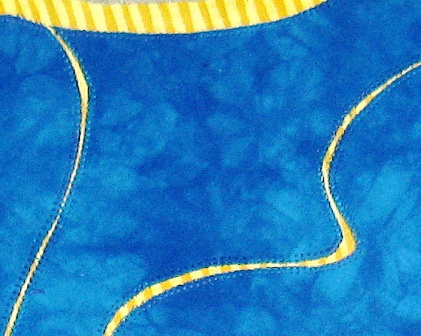
8-trim-yellow-419x336
Trim the yellow fabric to create the cat’s shadow. At this point, after embroidering the face, I pressed the appliqué. Then, I carefully trimmed the yellow shadow to make a nice smooth shape. Notice that the yellow shadow is thin in some spots and thicker in others. This was done to make a pleasing silhouette.

9-stitch-yellow-to-quilt-448x336
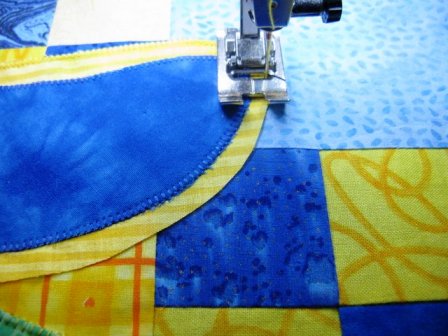
Pin the cat appliqué in place and stitch as with the oranges and leaves. I used a bright yellow variegated cotton thread to stitch the cat to the quilt top.

Sometimes, people like to cut the pieced fabric from beneath the appliqué shapes. It does make it easier to quilt. In this case, I chose to keep the pieced top intact. This will be a picnic quilt that will be well used and I want to keep the integrity of the patchwork intact for strength.

10-blue-cat-quilt-448x336
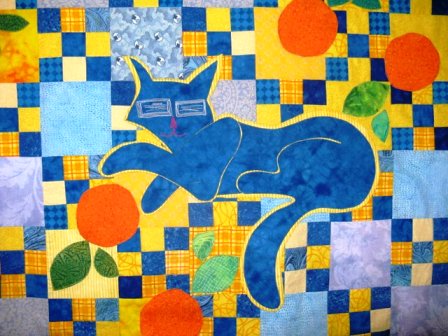
Here the blue cat is stitched to the finished quilt top. The blue cat looks very happy among the oranges on this picnic quilt.

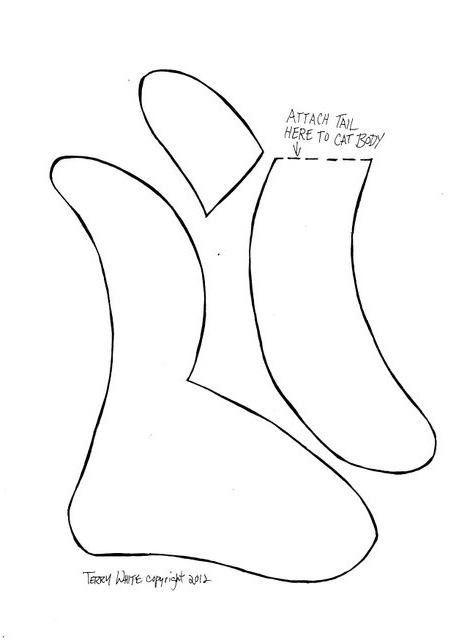
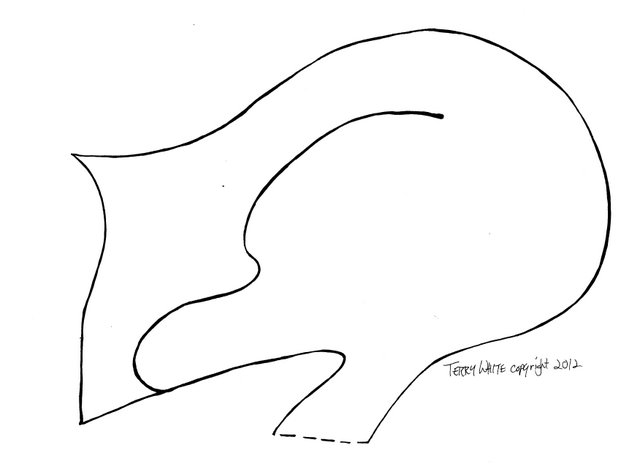
Here are the pattern pieces for the Blue Cat With Oranges quilt.

pattern-1-blue-cat-and- oranges-467x640

Pattern 1

pattern-2-blue-cat-and-ornages-467x640

Pattern 2

pattern-3-blue-cat-and-oranges-640x467

Pattern 3

For the best Applique Scissors Click Here

For more articles by Terry White, click here.

Posted in Free Quilt Projects, Fuse Shadow Applique, Guest Writers, How To, Terry White, Uncategorized | Tagged , , , | 2 Comments