Quilting: Conquering Quilt Doubts and Inner Critics

Conquering Quilt Doubts and Inner Critics

By Kathy Mathews

??????????????????????????????????????????????????????

Recently my quilt guild had the opportunity to apply to have quilts with a pre-chosen topic be shown at a Major Quilt Show. It was pretty exciting and I submitted mine for consideration. Yay! I got in! I was very happy.

I was surprised when a fellow guild member did not submit hers for consideration and it reminded me of myself last year. We had the same opportunity then and I nearly didn’t take a chance for a number of reasons. I think many quilters battle these inner critics for not making, not finishing, not liking, not giving or not showing a quilt. I want to address each reason and rip it apart by the proverbial seams.

My quilt is not perfect – Yes, that is true. It is also true for every quilt by every quilter that has ever been made. Welcome to the club of imperfect quilters with imperfect quilts. Isn’t it a great club? No one and nothing is perfect so you can stop worrying about that.

Look at this flaw – Oh that insignificant flaw right there that I would have never seen? The one that I thought was part of the design? The one that no one will notice unless you point it out to them? Would you point that out on a Friend’s quilt or a stranger’s? Then stop doing it to your own.

It is slightly different from the directions – Last year I panicked because my quilt was not 36” by 36” but instead one side was 35.75” and another was about 35.6. Then I realized that the human eye couldn’t detect that difference and I was entering a photograph where no one would be able to tell. Plus it was my quilt, the very size I made it.

I don’t like this aspect; I will redo it – If you want another quilt, go for it. But it is NOT a replacement for this lovely one. Submit this one, finish this one, this imperfect wonderful quilt. This is not homework; it is fun and a hobby. You are sabotaging yourself. Cut it out!

I didn’t finish on time – I have used this excuse myself. This way your quilt didn’t fail to get in or be appreciated, it just wasn’t done on time. If that is truly the reason, submit it, give it or show it next year.

It will never be accepted – So what? Then you can get yourself a t-shirt and proclaim your quilt is a reject and laugh about it. The quilt is still fabulous.

The recipient won’t want a quilt of mine – If someone for whom you are making a quilt will not appreciate it then do not give it to him or her. This says much more about that person then your quilt. Keep it or give it to a more worthy recipient. Some people are not quilt worthy!

Another quilter told me what was wrong with my quilt – Oh really? And what the heck is wrong with that quilter? Jealous?Rude? Mean? Limited social graces? A know it all? Your quilt might not win best in show but you could always grow and improve and make one in the future that would. That quilter will probably be miserable forever. Love that quilt!

This top isn’t worth quilting – How many people do you know that have a favorite quilt top? No one that I know. Everyone has a favorite quilt that keeps them warm and gives them comfort. The most pathetic quilt I ever made is the one my daughter and granddaughter snuggle under every single day. They adore that quilt. Go and finish yours!

I’m the worst quilter I know – Then you don’t know many people. Most of the people I know can’t quilt at all. The fact that you can sew puts you in a unique and special group. You make quilts? Even more so! You are making the best quilt right now that you are making now. Finish it and see how many people LOVE it.

I’ve seen way better quilts in shows or online – I have too. Those are their highlight reels, their best of the best. Do not compare your first quilt, worst quilt or even best quilt to some professional who may or may not have help cutting, sewing, designing or quilting that masterpiece. That quilter may well have bad breath. Your quilts are great!

Quilters make quilts because they want to exercise their brains, play with fabric and meet other quilters. They make them for their beds, their walls, their friends, their pets and their family. Don’t be the quilter who makes quilts to have one more thing to feel bad about. Finish them and feel the joy.

Your quilts are wonderful just like you!

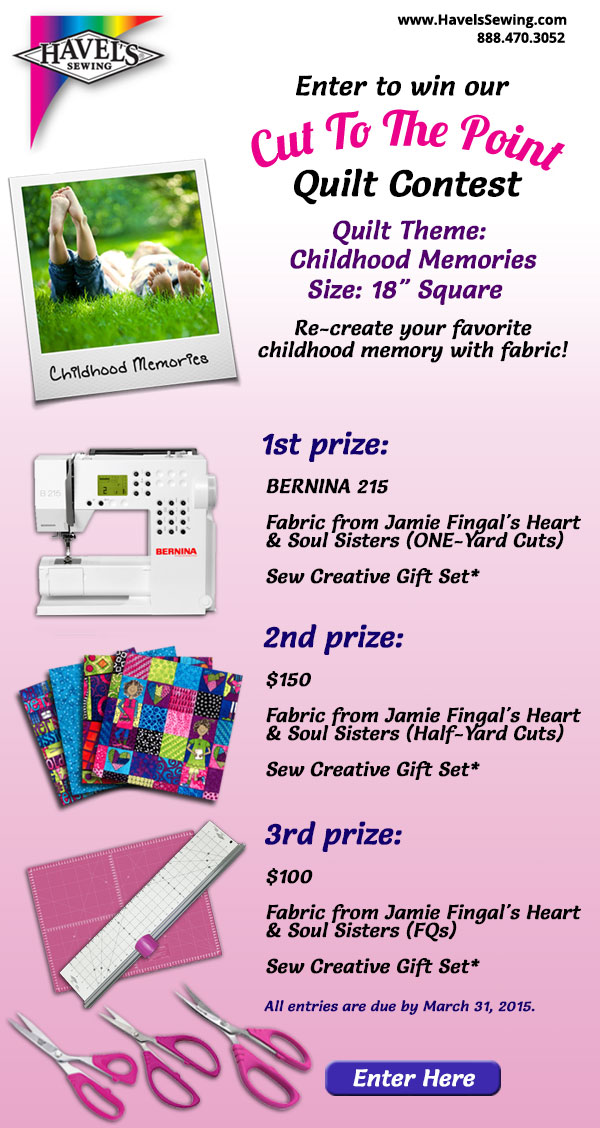
CLICK HERE FOR GREAT DEALS ON SCISSORS

CTA with 5.5 inch curved scissors

Posted in Quilting, Uncategorized | Tagged , , , , | Comments Off on Quilting: Conquering Quilt Doubts and Inner Critics

Quilting: What Is The Most Important Part of A Quilt

What’s the most important part of a quilt?

By Kathleen Mathews

beautiful quilted wheels


I have a quilt in my head nearly all the time. I might be thinking about one I’ve made, am making or want to make. Those frisky quilts that I want to make prompt me to stop at quilt stores, haul fabrics out of my stash when I am smack dab in the middleof another project and call my name. The yet to made quilts are perfect. I’ve found the greatest fabric, the actual quilt matches my fantasy and everything is sewn per.fect.ly.

None of my actual already made quilts are perfect, no way. But I love them all the same. Somehow, in spite of whatever missteps I may make, I love the whole completed quilt. And I find I really don’t like a quilt as I am making it, I change it up or stop. The reasons why vary which begs the question, what is the most important part of a quilt? What is the element that makes or breaks a quilt?

Maybe it’s the fabric. Certainly we all spend a lot of time buying fabric. Heck, I buy it all over the world. If I love it I buy lots and I figure out later what I am going to do with it. So is that the most important part? Maybe! However, I am currently in a round robin and one participant sent a gorgeous center block that had stimulated tremendous additions by the other Round Robin participants and the fabric was kindof lousy. Nope, really lousy. You could see through the white and it was very cheap fabric. But oh I lusted after that quilt!

Hmmm, if I coveted a quilt with lousy fabric that wasn’t even finished then design must be the trump card, the central element that makes a quilt. Maybe? But I have seen quilts which are clever and well designed and should work, they really should. But somehow, they just don’t sing. And I’ve seen colorful Gee’s Bend quilts many of which have no discernible design and they make me want to grab them and shout MINE, ALL MINE as I run for the hills!

There’s a thought, color. There are color workshops in every quilt store in America. There are color wheels, hand dyed fabrics and color swatches so you get exactly that shade of frosted apricot blush that you want, no NEED for your quilt. And then there are threads in every pastel, bold, classic, blended shade a computer can come up with. Now we know, it’s color. Or is it? If that is true, why are whole cloth quilts so stunning? It’s just one piece, one color and a whole lot of gorgeous stitching.

Now we are getting somewhere. It’s the stitching. It’s the perfect corners, the 12 stitches to an inch and the diamonds whose points are as sharp as a knife. It must be the impeccable binding whose endings and beginnings are a mystery known only to the creator.

It feels good to have nailed down the most important element of a quilt, the sewing itself. Phew, I am glad that is settled. Hold on there for a minute, partner. Let’s not rush to judgment. So that must mean that the quilts that sell, gather votes and grace our beds as well as our walls are sewn with impeccable skill. Those are the quilts that sing?

Maybe for some they do but not always to ME. I have seen some gorgeous examples of skill beyond my wildest dreams made by expert Amish quilters. There is not a discernible error in the entire quilt and I admire the heck out of the skill of that quilter. But the fabric might be meh, the colors blah and the design overdone and trite.

I have personally seen beautiful skills create a quilt that doesn’t speak to me. I have experienced fabulous designs that just don’t work. I have seen gorgeous fabrics and exciting colors that are squandered in a quilt that just doesn’t grab me.

On the opposite side, I have seen poorly constructed quilts that are truly works of art. Some quilts have colors that have faded but have left the beauty behind. I’ve been lucky enough to view quilts made out of leftovers, used jeans or flour sacks that make me gasp with pleasure.

We can focus on just the right fabric, using the unaccessibly correct color theory, honing our skills and designs that are time tested and not be guaranteed a quilt that will please us in the end. I think that is the most important aspect, which has to be the goal, to please the maker when it is done.

I contend that there is not one most important element when making a quilt. The magic that is a quilt is between the maker and the quilt and subsequently those who behold this masterpiece. If it whispers in your ear and makes you happy then that is the most important element, the enjoyment.

I love luscious fabrics, vibrant or rich colors, master level skills and clever designs. But more than all of that, I want to adore my quilts and your quilts. I want some intangible element to grab me by the lapels and make me smile at that fabric magically transformed into the wonder that is a quilt.

Magic, maybe that’s the most important part of making a quilt. Abracadabra, let’s go make some now.

LEST WE FORGET, THE BEST SCISSORS ARE JUST AS IMPORTANT AS EACH PART OF THE QUILT

CTA with 5.5 inch curved scissors

Posted in Fabric, Quilting | Tagged , , , | Comments Off on Quilting: What Is The Most Important Part of A Quilt

Craft Project – Fly Your Own Flags

By Jamie Fingal

Jamie is author, teacher, and now, fabric designer!  Be sure to visit Hoffman Fabrics and check out the Heart & Soul Sisters line.  This fabric line is also featured in our “Cut to the Point” Quilt Contest Childhood Memories.

Happy New Year everyone! Fly Your Own Flags for January with brave, strong and bold girls. Each flag is 6x8 inches, vertical format. These are easy peasy. No batting, no binding. Just fun.

Happy New Year everyone! Fly Your Own Flags for January with brave, strong and bold girls. Each flag is 6×8 inches, vertical format. These are easy peasy. No batting, no binding. Just fun.

Mistyfuse and a Goddess Sheet or Parchment Paper Rotary cutter, mat and ruler You will need to pre-fuse all of your fabrics for this project. I didn’t use this particular fabric for this project, but you can get an idea of how to fuse using Mistyfuse. I rolled out the Mistyfuse from this 35” bolt. I usually fuse very large quantities of fabric in my studio to make quilts for my fabric lines, so that is why this is so large.

Mistyfuse and a Goddess Sheet or Parchment Paper
Rotary cutter, mat and ruler
You will need to pre-fuse all of your fabrics for this project. I didn’t use this particular fabric for this project, but you can get an idea of how to fuse using Mistyfuse. I rolled out the Mistyfuse from this 35” bolt. I usually fuse very large quantities of fabric in my studio to make quilts for my fabric lines, so that is why this is so large.

I lay a Goddess Sheet over the top. This happens to be a Holy Cow one – the largest and it covers the entire surface of my design table, and the fabric. Mistyfuse has Goddess Sheets in many different sizes for even the smallest pieces of fabric. With an iron on the cotton setting, press the Mistyfuse into place on the fabric. The Goddess Sheet will protect your iron and make the fuse to the fabric even better. Make sure that you iron all of the way to the edges. If you lift up one corner, and see that it is not bonded, go over it again with your iron. Wait for it to cool before removing it carefully.

I lay a Goddess Sheet over the top. This happens to be a Holy Cow one – the largest and it covers the entire surface of my design table, and the fabric. Mistyfuse has Goddess Sheets in many different sizes for even the smallest pieces of fabric. With an iron on the cotton setting, press the Mistyfuse into place on the fabric. The Goddess Sheet will protect your iron and make the fuse to the fabric even better. Make sure that you iron all of the way to the edges. If you lift up one corner, and see that it is not bonded, go over it again with your iron. Wait for it to cool before removing it carefully.

Materials: ½ yard of black wool blended felt by National Nonwovens #TOY002, available at big box sewing stores and some quilting stores. It is a more narrow bolt, so it is easy to find on shelves. I would not recommend using polyester felt, because it is not a secure substance in which it iron on. Also, you will need about a ½ yard of the same wool blended felt in a fun color for the back. Fabric? The fabric that I am using for this ‘tutorial’ is from my fabric line “Heart and Soul Sisters” by Hoffman California Fabrics. It came out in December 2014. I used about ¼ yard of the girl fabric and the text fabric, but you may want more, because there are other things that you can make with it. To start. Cut 3 pieces of wool blended felt – 6” x 8”

Materials: ½ yard of black wool blended felt by National Nonwovens #TOY002, available at big box sewing stores and some quilting stores. It is a more narrow bolt, so it is easy to find on shelves. I would not recommend using polyester felt, because it is not a secure substance in which it iron on. Also, you will need about a ½ yard of the same wool blended felt in a fun color for the back.
Fabric? The fabric that I am using for this ‘tutorial’ is from my fabric line “Heart and Soul Sisters” by Hoffman California Fabrics. It came out in December 2014.
I used about ¼ yard of the girl fabric and the text fabric, but you may want more, because there are other things that you can make with it.
To start. Cut 3 pieces of wool blended felt – 6” x 8”

Your fused fabric will look shiny like this. Don’t fold it right away. Just lay it on a flat surface or over a drying rack. You can use it right away. Let it dry at bit before you fold it to store on a shelf or in a drawer for another day. It will never dry out or flake off the fabric. It doesn’t change the hand of the cloth and you can sew by machine or by hand easily. I have fused very large pieces, such as this, and very small pieces, the size of my finger.

Your fused fabric will look shiny like this. Don’t fold it right away. Just lay it on a flat surface or over a drying rack. You can use it right away. Let it dry at bit before you fold it to store on a shelf or in a drawer for another day. It will never dry out or flake off the fabric. It doesn’t change the hand of the cloth and you can sew by machine or by hand easily. I have fused very large pieces, such as this, and very small pieces, the size of my finger.

Here is the girl fabric. This has been pre-fused with Mistyfuse. Each one of these squares is 2”. All of the artwork is from my drawings. It is totally fun to see them come alive on fabric. This is the perfect fabric for this project, because of the grid design.

Here is the girl fabric. This has been pre-fused with Mistyfuse. Each one of these squares is 2”. All of the artwork is from my drawings. It is totally fun to see them come alive on fabric. This is the perfect fabric for this project, because of the grid design.

This is the text fabric. All about brave, bold and strong girls. Heart and Soul Sisters. Dream big to live the life you imagined for yourself.

This is the text fabric. All about brave, bold and strong girls. Heart and Soul Sisters. Dream big to live the life you imagined for yourself.

Place your focus fabric on each of the felt foundations. There will be a space at the top, but it will be covered with another piece of fabric. Press into place.

Place your focus fabric on each of the felt foundations. There will be a space at the top, but it will be covered with another piece of fabric. Press into place.

Using some of the leftover 2” squares from the girl fabric and some of the artwork from the text fabric, select the words that you want, cut, and place them on the upper portion of the flag. Press into place.

Using some of the leftover 2” squares from the girl fabric and some of the artwork from the text fabric, select the words that you want, cut, and place them on the upper portion of the flag. Press into place.

Trim the excess fabric off the edges, by turning it over and cut from the back, using the felt as your guide.

Trim the excess fabric off the edges, by turning it over and cut from the back, using the felt as your guide.

Select the text that you want for the lower portion and press into place.

Select the text that you want for the lower portion and press into place.

Using the squares, you can cut them into smaller pieces and add them to your flags, to add more color, interest and fun.

Using the squares, you can cut them into smaller pieces and add them to your flags, to add more color, interest and fun.

Like here is an example. You can use more grid squares and artwork from the text fabric. It brightens up the entire piece!

Like here is an example. You can use more grid squares and artwork from the text fabric. It brightens up the entire piece!

Back your flags with another piece of wool blended felt in another color. They don’t have to be cut perfectly, but you want the color to be visible from the front. These are ready to take to the sewing machine for some free motion machine quilting. Are you ready?

Back your flags with another piece of wool blended felt in another color. They don’t have to be cut perfectly, but you want the color to be visible from the front. These are ready to take to the sewing machine for some free motion machine quilting. Are you ready?

The first thing that I did was to free motion zig zag around the edges of each flag. If you are uncomfortable with using a free motion foot, like shown here, you can use the #1 foot with the feed dogs up to zig zag around all of the edges.

The first thing that I did was to free motion zig zag around the edges of each flag. If you are uncomfortable with using a free motion foot, like shown here, you can use the #1 foot with the feed dogs up to zig zag around all of the edges.

This is pretty simple, and a great way to practice free motion machine quilting. Just guide your needle around the squares and the lettering. Be sure to get the small shapes inside of the squares. It doesn’t matter if you cross the lines or go over something twice.

This is pretty simple, and a great way to practice free motion machine quilting. Just guide your needle around the squares and the lettering. Be sure to get the small shapes inside of the squares. It doesn’t matter if you cross the lines or go over something twice.

Here is what the back looks like. Don’t stress yourself out. I didn’t take my needle around the girls. You could, if you so desire, but it is not necessary.

Here is what the back looks like. Don’t stress yourself out. I didn’t take my needle around the girls. You could, if you so desire, but it is not necessary.

When you are finished free motion quilting all three pieces, trim the colored felt with a rotary cutter, ruler on a cutting mat. You want to have a bit of it show through from the front. It’s a design element, and brings out the colors on your piece.

When you are finished free motion quilting all three pieces, trim the colored felt with a rotary cutter, ruler on a cutting mat. You want to have a bit of it show through from the front. It’s a design element, and brings out the colors on your piece.

Like this. Great flags to hang in your own studio, or give to a friend. I attach them to laundry line in my studio, securing them with wooden clothes pins. Totally inspirational.

Like this. Great flags to hang in your own studio, or give to a friend. I attach them to laundry line in my studio, securing them with wooden clothes pins. Totally inspirational.

Be Brave

Be Brave

Be Strong

Be Strong

Be Bold

Be Bold

Fly Your Own Flags – Be Brave, Be Strong, Be Bold

Fly Your Own Flags – Be Brave, Be Strong, Be Bold

CLICK HERE FOR THE PRODUCTS FEATURED

CLICK HERE TO LEARN MORE ABOUT JAMIE FINGAL

Posted in art ideas, Craft to make, Crafting, Cutting Mat, Fabric, Fabric Rotary Cutters, Free Craft Projects, Fun Stuff, Jamie Fingal, Uncategorized, Wall Hangings | Tagged , , , | Comments Off on Craft Project – Fly Your Own Flags

“Cut To The Point” Quilt Contest

ENTER TO WIN OUR CUT TO THE POINT QUILT CONTEST – 1st PRIZE: BERNINA  215!  CLICK HERE FOR CONTEST RULES AND ENTRY FORM.


"Cut To The Point" Quilt Contest

Posted in Uncategorized | Tagged | Comments Off on “Cut To The Point” Quilt Contest

Sewing for the Very First Time

by Kathleen Mathews

The first time you do something is often memorable and if you close your eyes you can conjure up poignant memories of many first time experiences. Nothing has better memories for me than when I learned how to sew. My Mother did not know how to sew, she claimed that growing up in the depression, her family didn’t want to risk her breaking the machine as they didn’t have the money to fix it. Maybe, but I think that sewing can skip a generation if all you have to do to get homemade delights is to ask your Mom for it!

I was aware that my Grandmother and her sisters sewed and they had shown me a bit of how to make a quilt at a very young age. I had to bide my time to really learn until I was in Jr. High.  I can still remember the excitement of preparing for Home Ec class. We got a list of supplies and my Mom took me to a fabric store to purchase them all. I got needles, thread, thimble, seam ripper and a small ruler. This was in 1967 and I still have that little ruler.

In those days, Home Ec was only for the girls and that difference was part of the excitement as we sat at tables. One the first day, we learned how to use some of our sewing items and to thread the machine. Finally we got our first assignment, an apron. I went with my Mother to Marshall Fields to buy my pattern and fabric. I looked in the easy section of the Simplicity catalogue and chose a dress.

Yes, from an early age I was a sewing rebel! This dress had kimono sleeves and finished with braid. The clerk assured my mother it was an easy first project. And it wasn’t but I sure did find out what a seam ripper was used for. After a couple of weeks, ta da, I finished my dress. It even had a zipper. (Feel free to ooh and aahhh.)

Here was the significant detail – it fit! I loved it. The fabric was a clever blue and beige kettle cloth and to this day, I love that color combination. It was a glorious feeling! I will never forget the sheer pleasure and joy of completing that first project.

I was off to the races after that, I made myself a pink and white gingham peignoir set. Because really, what 13 year old girl doesn’t need one of those? My Mother had me make a blue and white set for my aunt. I sewed culottes for my Mother and party dresses for my sister.

I sewed and sewed for the next 17 years. I loved it but after a while, it became a bit routine. I was no longer making all my clothes; I felt the need for that triumphant rush of completing that first dress. What to do?

How did I revisit the joy of conquering sewing? I took a quilting class and learned the completely old school way how to make a quilt, 100% by hand. I was older now so I could wait for the gratification and within several months I had made two sampler quilts. I was thrilled and I still have the book we used.

And naturally I still have those quilts! They hang in my current sewing studio and I get a kick out of looking them. It reminds me that while there is only one first time, you can discover that joy and sheer fun by seeking out new projects and skills.

Did they all give me that rush? In a word, no. Don’t talk to me about paper piecing. But I have learned to Longarm, I’ve done traditional quilts in a modern way and done improvisational piecing. I never want to lose that terrific high of doing something for the first time.

This year I plan to perfect my free motion quilting and work with wool. For the very first time. Want to join me and feel that first time sewing delight? Or perhaps you’d rather create your own new goals?

Just don’t bring up paper piecing.

CLICK HERE FOR THE BEST SCISSORS & NOTIONS

Posted in For Beginners in Sewing, Guest Writers | Tagged , , , | 2 Comments