Let’s Go to Quilt Camp

Remember the long, lazy days of summer camp as a kid? How about all those folksy crafts you made during activities time? Well, camp isn’t just for kids, you know? For all you quilters out there, Havel’s Sewing has compiled a list of quilt camps that offer a variety of classes to inspire and energize your creativity. Most offer on-site lodging and meals, all offer the promise of quilts and camaraderie.

For the Midwestern explorer, Hen & Chicks Studio in Conrad, Iowa, offers a fully-equipped quilting and scrapbooking retreat center, known as The Nest, ready and waiting for you and your friends. The Nest can be rented seven days a week and can even be rented by one person. They also host retreats, such as the Come Create with Me day-only events. Check their retreats page for upcoming dates.

hen-and-chicks-quilt-retreat-studio-iowa


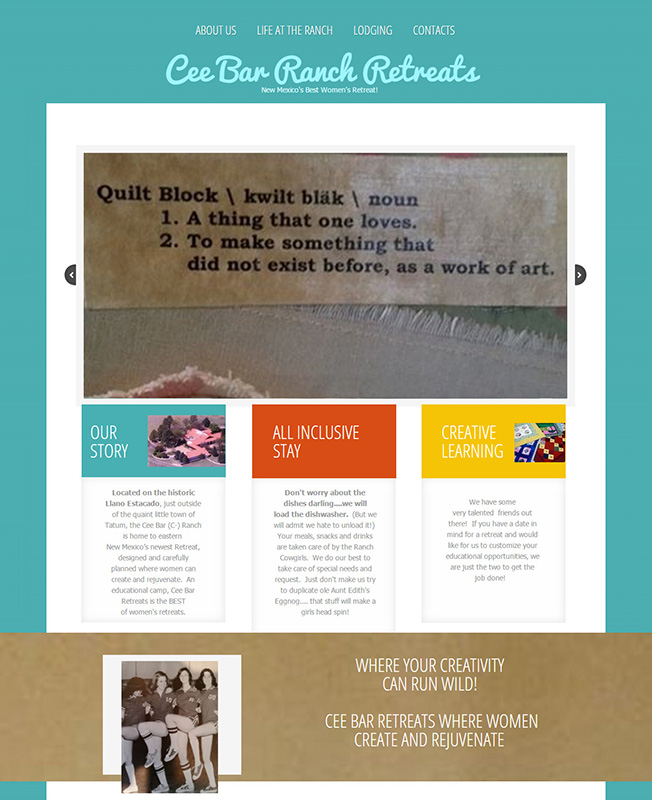
Or make the desert your destination at the Cee Bar Ranch Retreat, in Tatum, New Mexico, offering an all inclusive stay allowing you to just create, and rejuvenate.

cee-bar-ranch-retreat-quilting


Set around a 7 acre private lake with extensive walking paths and surrounded by stone walls, tall trees, abundant wildlife and comfortable accomodations, Selah Among the Hills in Arcadia, Missouri, will soothe your soul as well as inspire.

selah-among-the-hills-meeting-spaces


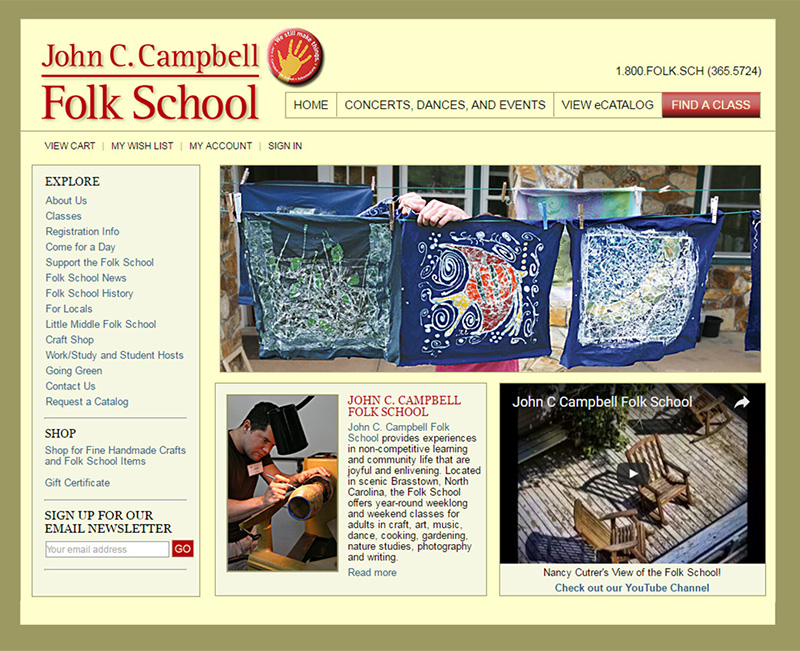
More than a quilt camp,  the John C. Campbell Folk School in Brasstown, North Carolina, has a class to inspire almost every type of artist, and offers 37 different quilt classes. You can stay for a week, or stay for a day.

john c campbell folk school image 800x651

Instead of the usual vacation in 2016, spend several days or a week at quilt camp, and take a friend or two along. You’ll find yourself relaxed, rejuvenated and inspired.


**These are just a few of the quilt camps and retreats that are available around the country. To find a camp closer to home, go to www.QuiltersResources.net for a more complete list – including quilt cruises!

havels tools_quilt camp blog cta v1 800x599


Posted in craft, Fabric, For Beginners in Sewing, Fun Stuff, Quilting, Quilting | Tagged , , , , , | 2 Comments

Free Craft Project: Altered Print Tray

By Terry White

Scissors as Art

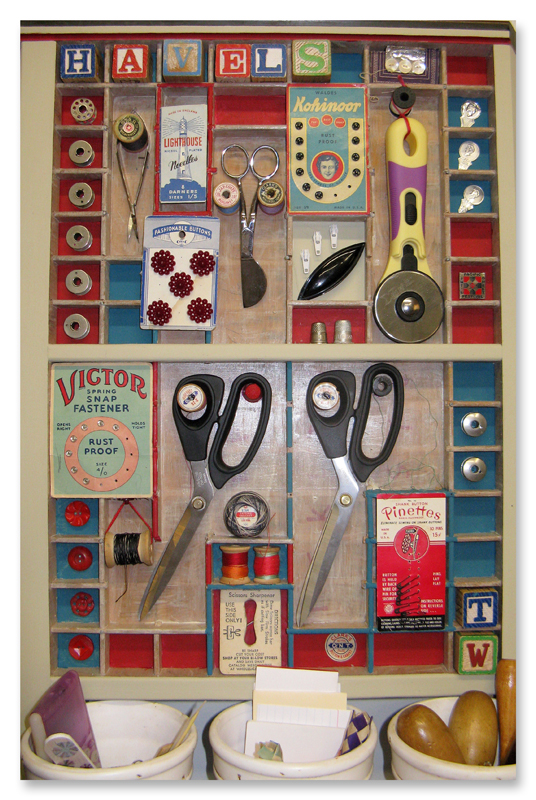
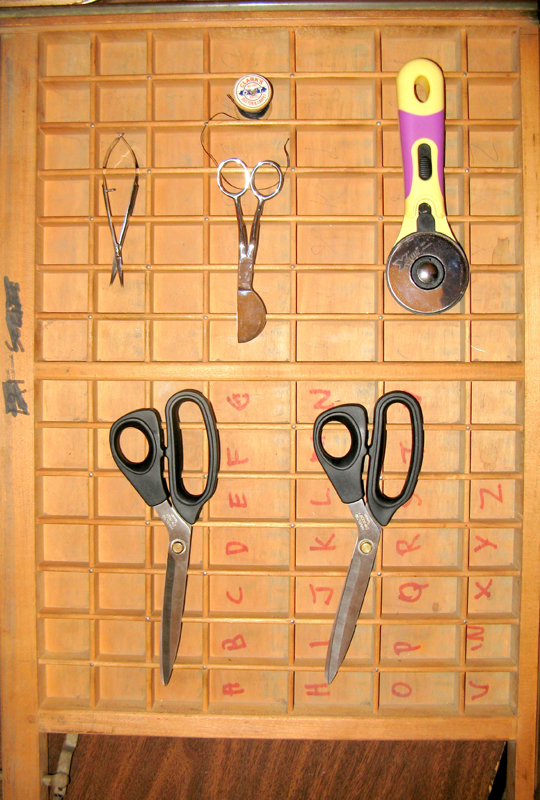
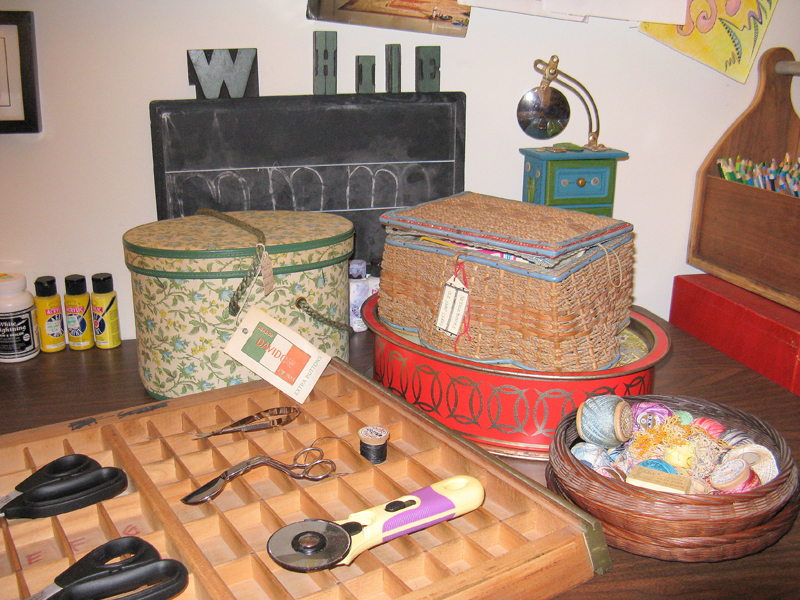
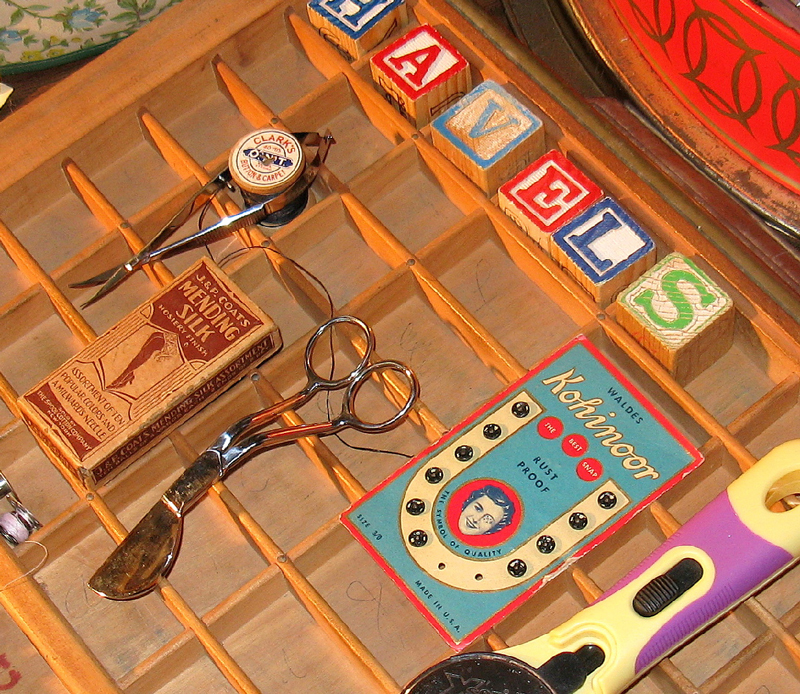
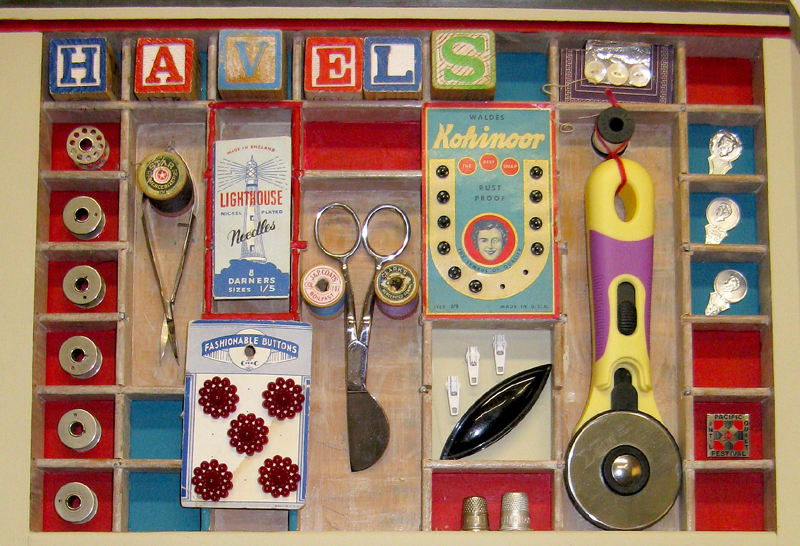
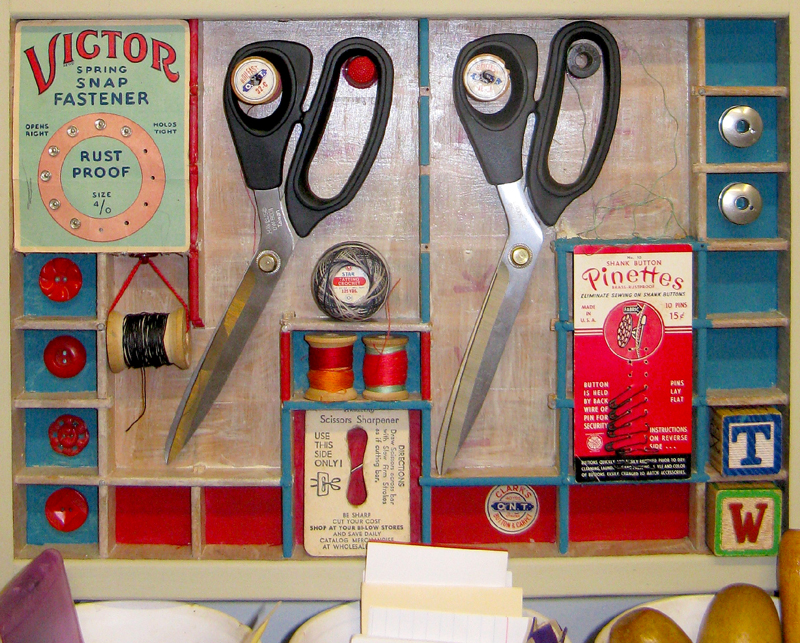
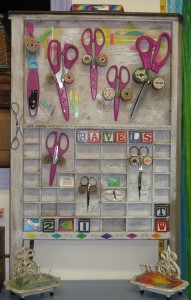
My brother, Wally (the carpenter) gave me 20 old printer’s trays. Then, I received a beautiful set of Havel’s scissors….I know….I’ll make cool displays for my scissors! The first one I made is now on the set of Quilting Arts TV. So, I took photos of step-outs for my second tray. I still have to make another to replace my first one…..that’s okay, because this is fun!make-displays-with-printers-traysSo, the first thing to do was to lay out the scissors in the best arrangement. This grouping of scissors includes 9″ Professional Dura-Sheers9″ Serrated Dura-Sheers and 60mm Rotary Cutter. Good scissors are essential to my fiber work.

lay-out-scissors-in-arrangementNext, I pulled out my cool notion collection. The way I feel about it is that, if I don’t use my cool notions, then someday, somebody else will buy them in an estate sale!

use-notions-to-decorate-as-well

As I began to lay things out, the colors and graphics of the Kohinoor Snap Card set the tone for the work. So, I exchanged some of my first ideas and used strong graphic design pieces.

kohinoor-snap-card-set-color-pallet

After getting an idea of where things would go, I placed them on a large corkboard. I was careful to place them in the same arrangement.

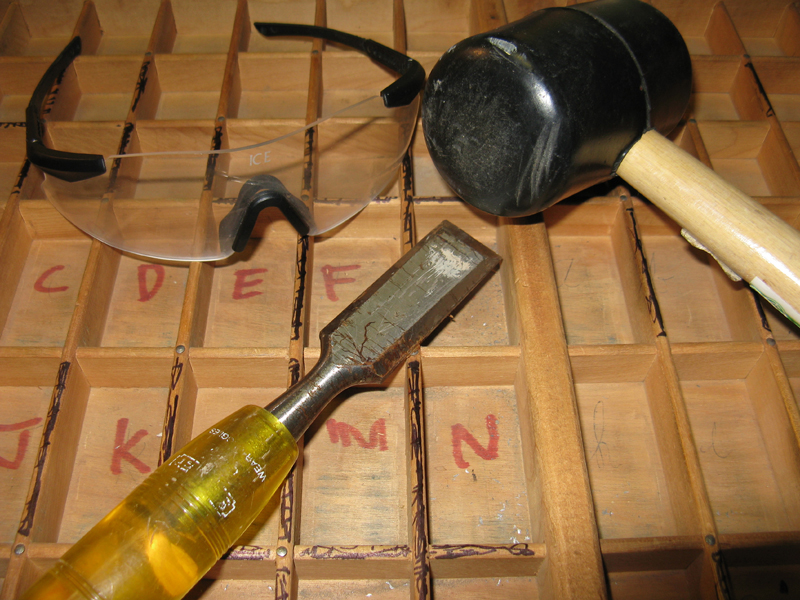
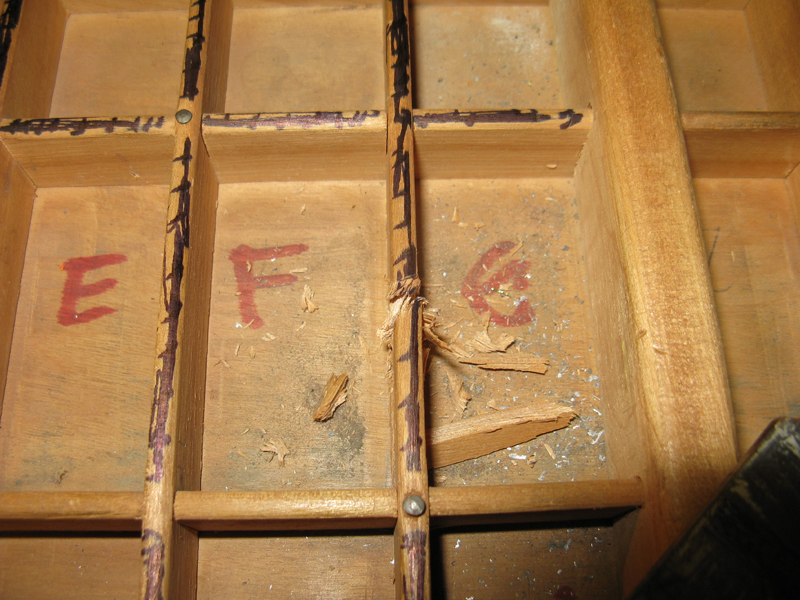
When doing this next kind of work, I wear my safety glasses – using a chisel and mallet, I made angled cuts in the center of each little partition slat. Then, I cut the slats at the intersections.

use-chisel-and-mallet-to-make-cuts-slats

make-angled-cuts-in-center-of-slats

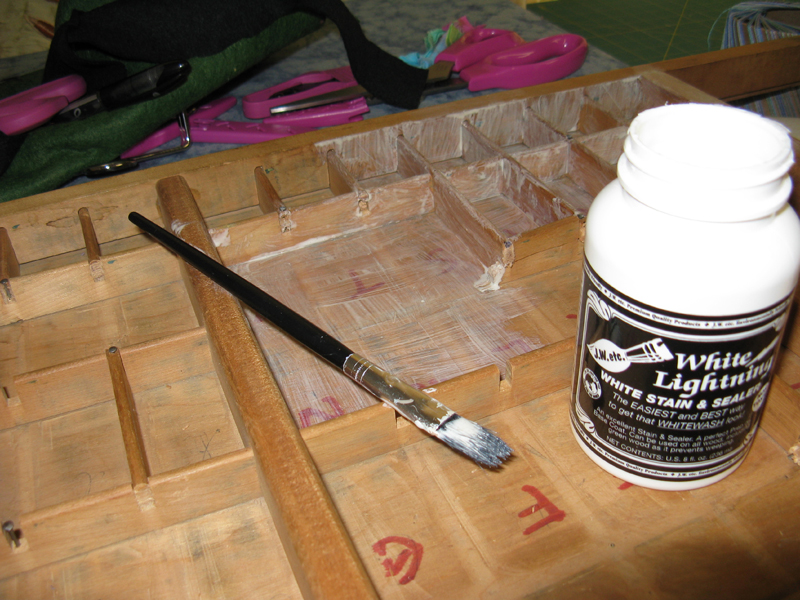
When all my cuts were made, I sealed the tray with “White Lightening”. It is a white stain and a sealer; very easy to use, just brush it on. From this point, I can paint with acrylics and use my hot glue gun to add my pieces.

coat-tray-with-white-lightening-sealant

I attached some of the notion cards with “HandiTak” reusable adhesive. It doesn’t hurt the notion card – just in case I find out that one of these antiques is a National Treasure!

attach-notion-cards-with-handitak-1

attach-notion-cards-with-handitak-2

This could be a weekend project, but I like to work on a project like this over some time. It gives me a chance to think about the little vignettes I can create, and consider design choices.


Terry White

Terry White is a studio fiber artist. She has been doing this work since 1996, and she discovered the techniques she uses: threadpaint, machine appliqué, piece, quilt, embellish with beads, fibers and minutiae with sewing machine techniques, through experimentation and self-study.  Terry teaches these techniques through classes and videos.  Over the years Terry has been published in over 50 articles in magazines and books, including: McCall’s Needlework; Quilter’s Newsletter; Machine Embroidery and Textile Arts; CMA trade magazine; Stitch n Sew Quilts; Quick n Easy Quilts; Quilt World magazine and Calendar; Quilting Arts Calendar 2003; America from the Heart; America’s Best; America Sews.  She is a wife, stitcher, artist, sister, mother, friend, nana, gardener, baker, writer, student, teacher and American.  See more of Terry’s work at www.threadpaint.com.


Posted in Embroidery Scissors, Free Craft Projects, Fun Stuff, Guest Writers, Quilting Tools, Terry White, Uncategorized | Tagged , , , | 4 Comments

Free Appliqué & Quilt Project: “Yay! It’s Spring!”

By Terry White

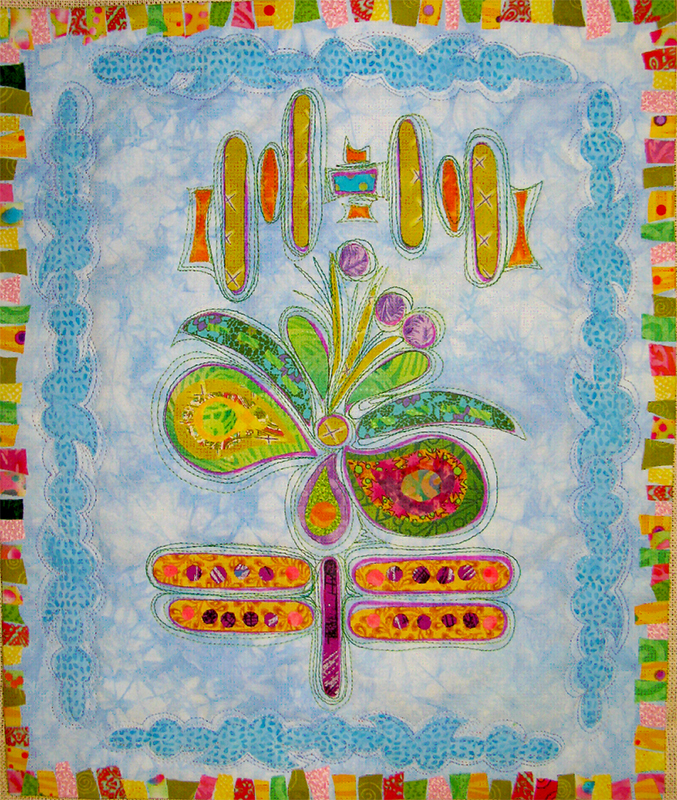
This little art quilt says hello to spring. The techniques here are simple, but not quick. When making fused appliqué elements, the important thing is to take your time to cut the shapes nicely. Enjoy the process!

yay its spring quilt project

“Yay! It’s Spring!” 14” wide x 16” high

My design began with the paisley shapes. The stem and leaves changed into a dragonfly because of my color choices…this is when serendipity show up to play! The other design elements found their places as a result of repositioning shapes until I liked the layout. I suggest you make the finished design elements and then arrange them. The process of play is enjoyable, artistic and freeing. You will end up with a very unique arrangement and it is wonderful to have the finished shapes to play with, because when they are in the perfect arrangement, you can proceed with the next step.

The instructions and photos here go along with the video and each show different techniques used in the project.

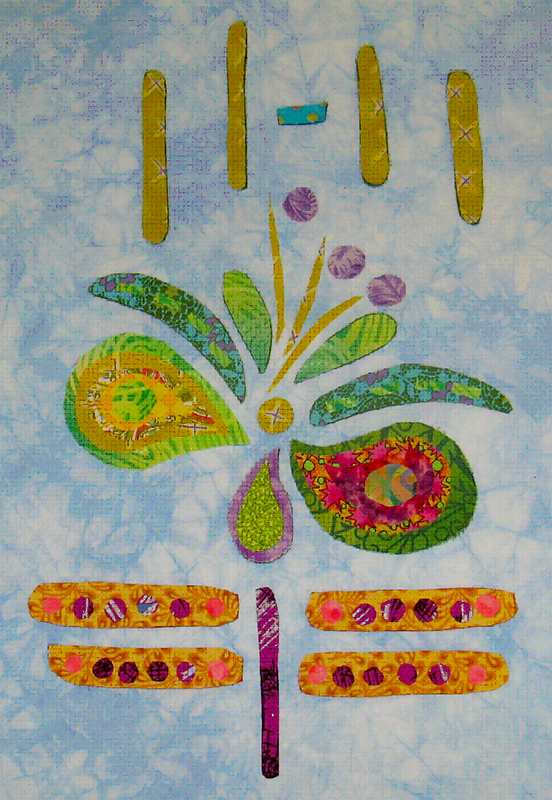
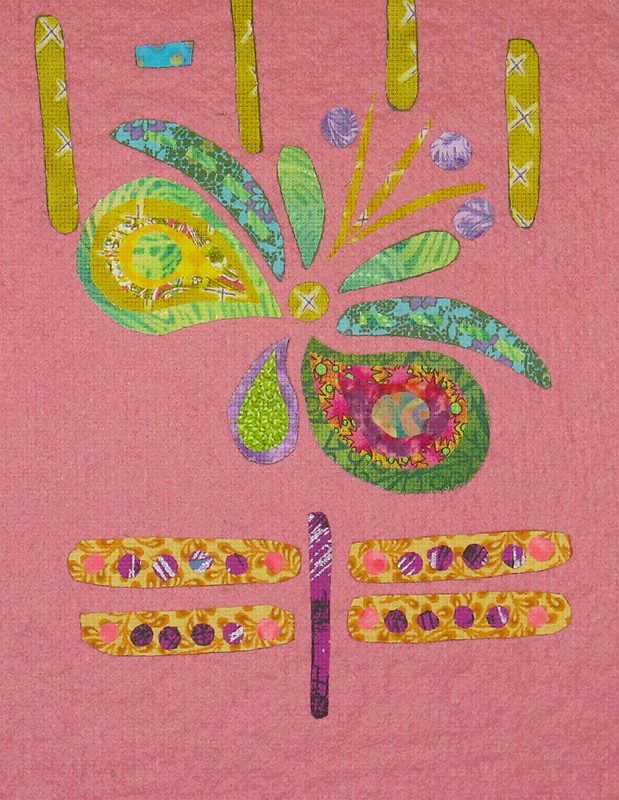
photo shows design elements laid out

This photo shows the design elements laid out onto the background fabric.

The video demonstrates how to create the fused felt shapes, tips for fused appliqué, and the novelty binding technique.

Start by choosing your design or use my design. I think using simple shapes to form the overall design is most effective with this technique.

Materials:


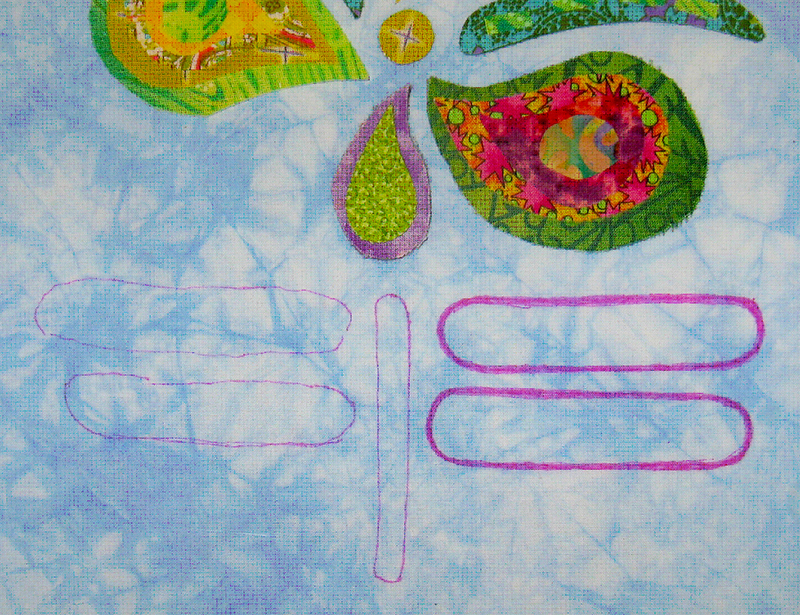
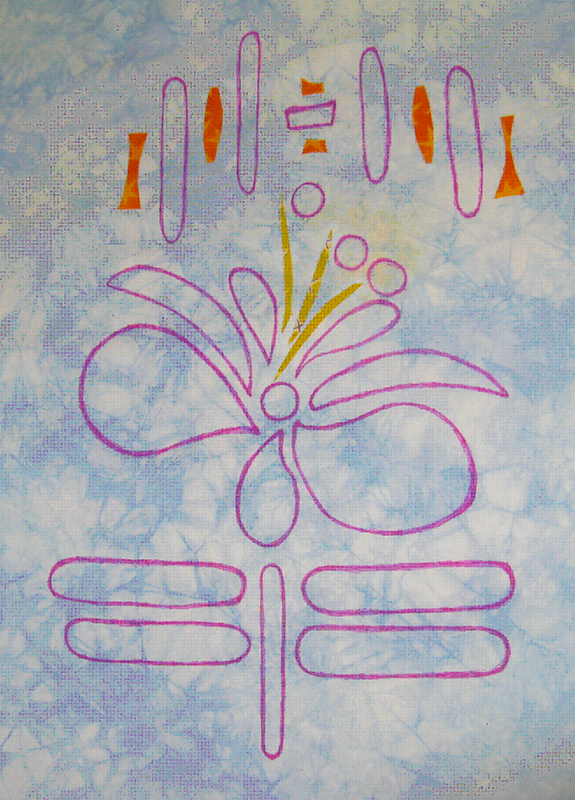
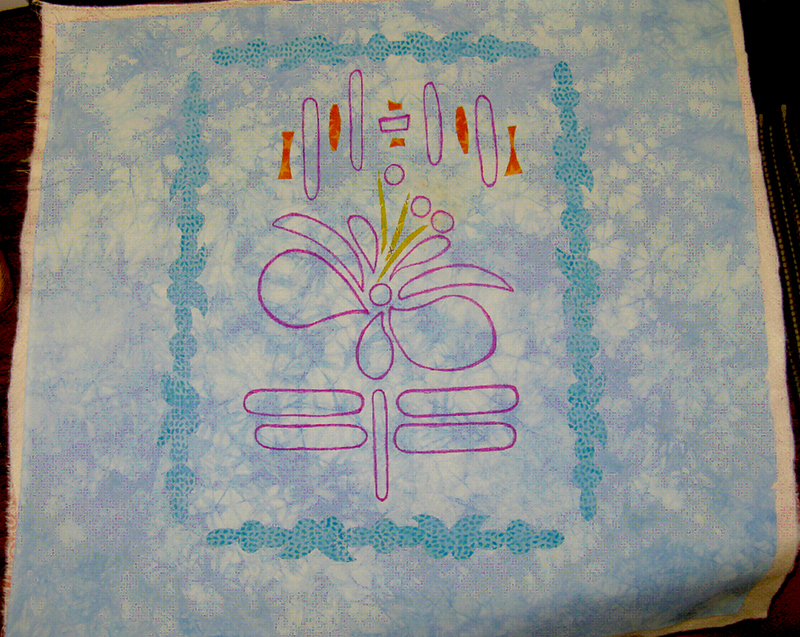
Trace around each shape with a permanent marker. Then, set the shapes aside.

trace-around-shapes-with-permanent-markerI use a flannel board to hold the shapes and keep them from getting lost or flying around the studio!

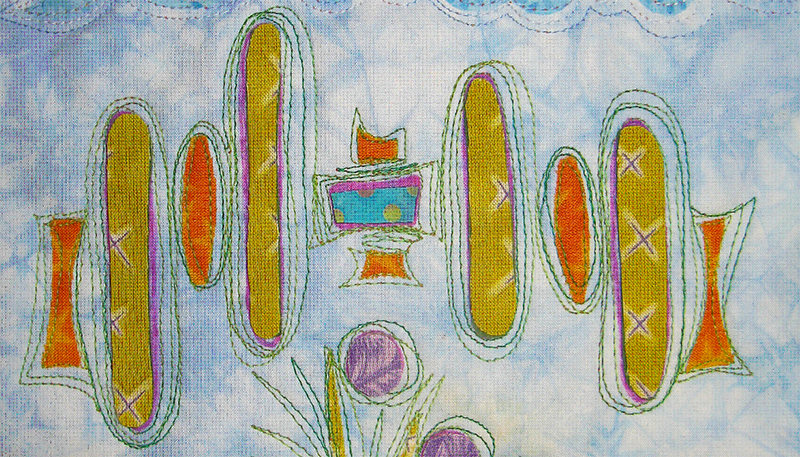
use-flannel-board-to-keep-shapesSome of my shapes are backed with felt – they are fused onto the quilt top before quilting.

some-shapes-backed-with-felt

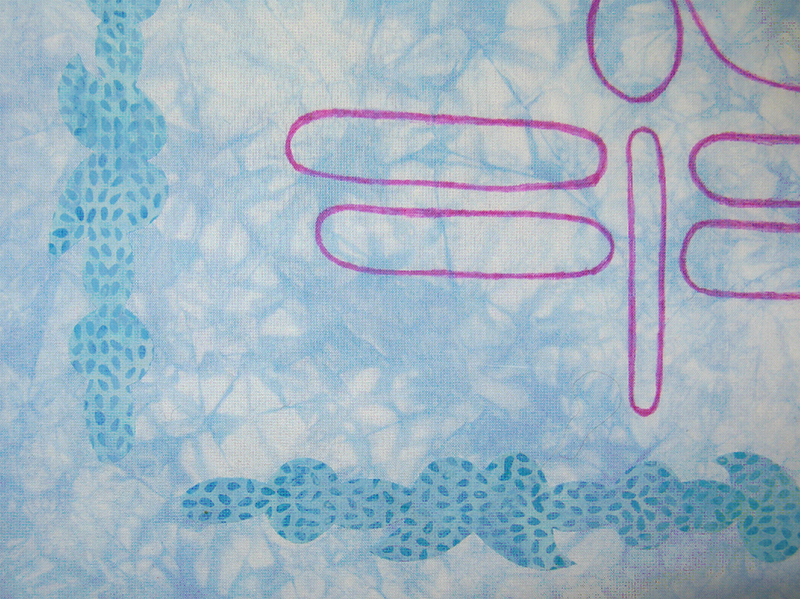
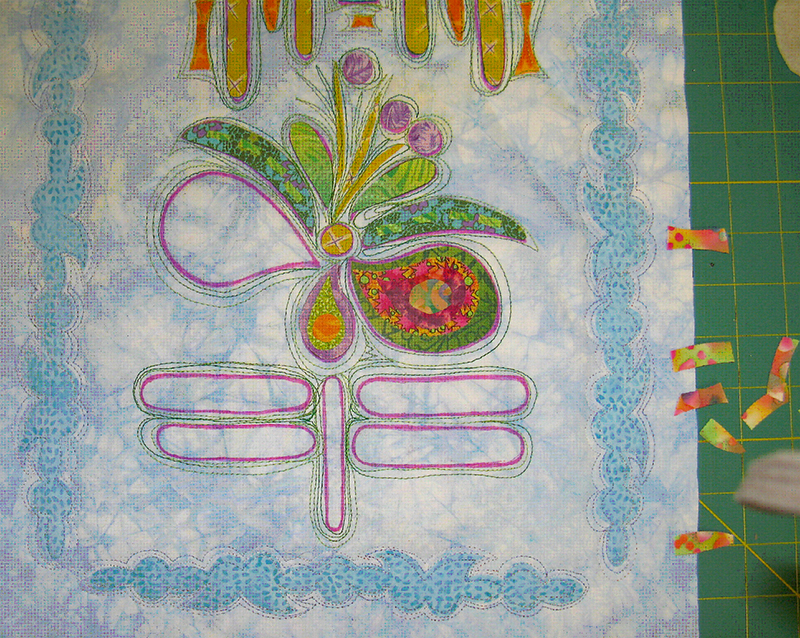
The border designs are also fused before quilting. A word about the border; the design was created by combining shapes from the flower i.e. paisleys, circles and lozenge shapes. I used a blue just a little darker and in a different hue than the background. When the appliqué pieces were laid onto the quilt, I realized the borders looked like clouds. The video shows the careful cutting with Havel’s 5 1/2″ Curved Tip Embroidery Scissors.

border-used-shapes-from-flowerThe work is ready to quilt. I used a lovely Legacy 100% cotton low loft batting and a cotton fabric for the backing.

the-work-is-ready-to-quiltI used two variegated threads for the quilting, one is a spring green,
the other is a soft blue and both are 100% cotton 30 weight.

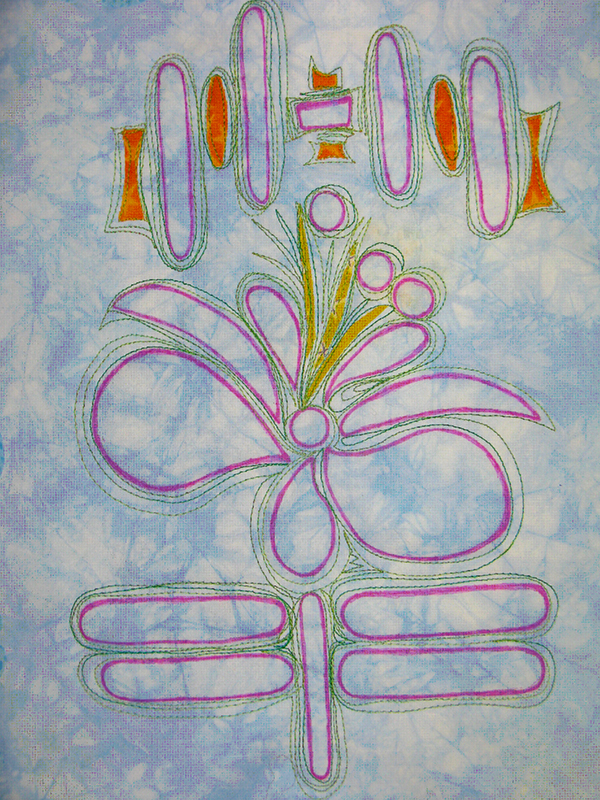
used-variegated-threads-for-the-quiltingI also used the green thread to quilt around the drawn shapes.
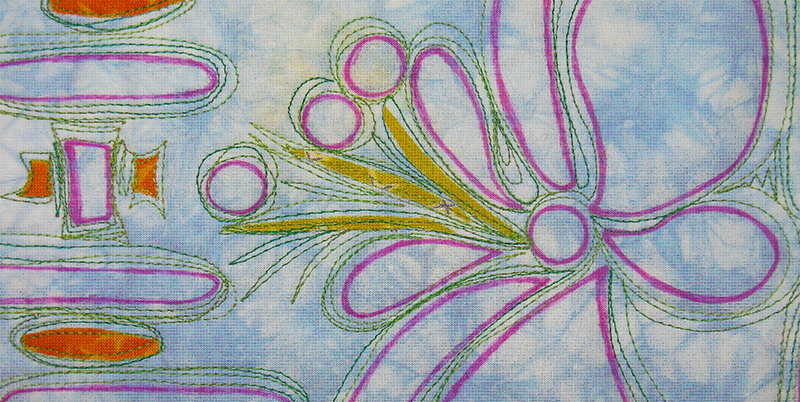
The blue border is quilted with the blue thread. The quilting traces around each shape about three times. This is total fun, free machine quilting.

Here is a close-up of the quilting.

close-up-of-quilting-mage-1close-up-of-quilting-mage-2The final steps are to glue the fused felt shapes in their places and to make the fun “confetti” binding.

glue-fused-shapes-make-confetti-bindingDetail of “Blue Cloud” border and “Confetti” binding.

detail-of-blue-cloud-confetti-borderBelow are my design shapes to use – or create your own!

my-design-shapes

My design shapes.

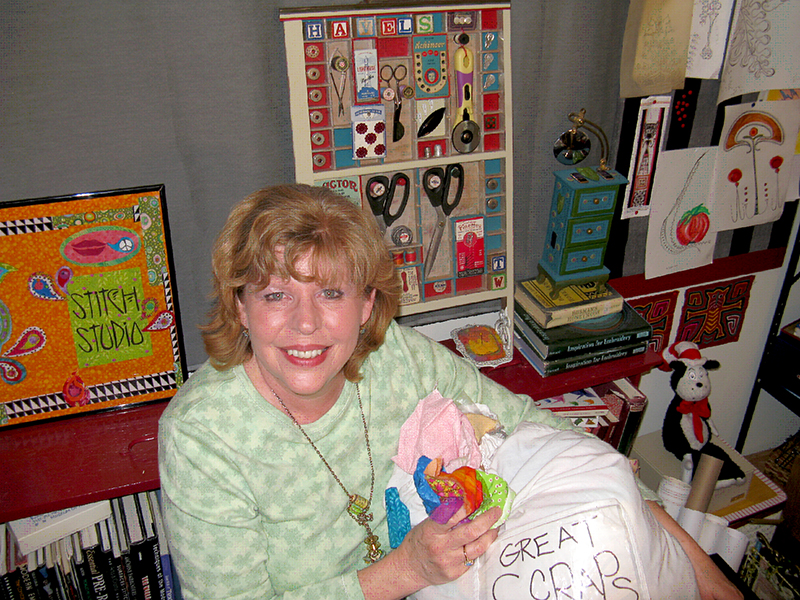
Hi! I am in my studio with my Great Scraps. The Havel’s Scissor Art Box (behind me) is one of two in a series that I made, using old printer type trays. Click here to read how to make your own.

terry-white-with-scraps-and-scissor-art-boxes-1 Terry-White-Havels-scissors-storage-art-2

Have you tried making your applique’ art quilt? What were your results?
Let us know, we’d love to hear from you!


Terry White is a studio fiber artist. She has been doing this work since 1996, and she discovered the techniques she uses: threadpaint, machine appliqué, piece, quilt, embellish with beads, fibers and minutiae with sewing machine techniques, through experimentation and self-study.  Terry teaches these techniques through classes and videos.  Over the years Terry has been published in over 50 articles in magazines and books, including: McCall’s Needlework; Quilter’s Newsletter; Machine Embroidery and Textile Arts; CMA trade magazine; Stitch n Sew Quilts; Quick n Easy Quilts; Quilt World magazine and Calendar; Quilting Arts Calendar 2003; America from the Heart; America’s Best; America Sews.  She is a wife, stitcher, artist, sister, mother, friend, nana, gardener, baker, writer, student, teacher and American.  See more of Terry’s work at www.threadpaint.com.


shop-havels-sewing-now

Posted in Applique, Embroidery, Embroidery Scissors, Fabric, Free Craft Projects, Free Quilt Projects, Free Sewing Project, Fun Stuff, Fused Applique, Guest Writers, How To, Quilting, Terry White, Tutorials, Uncategorized, Wall Hangings | Tagged , , , , , , , , | Comments Off on Free Appliqué & Quilt Project: “Yay! It’s Spring!”

Modern Baby Wall Hanging

By Jamie Fingal

Learn to make a whimsical wall hanging to celebrate the birth of a new baby girl and/or baby boy. 

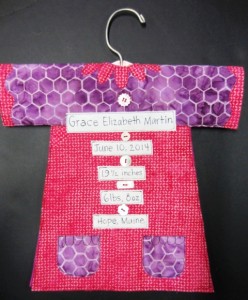
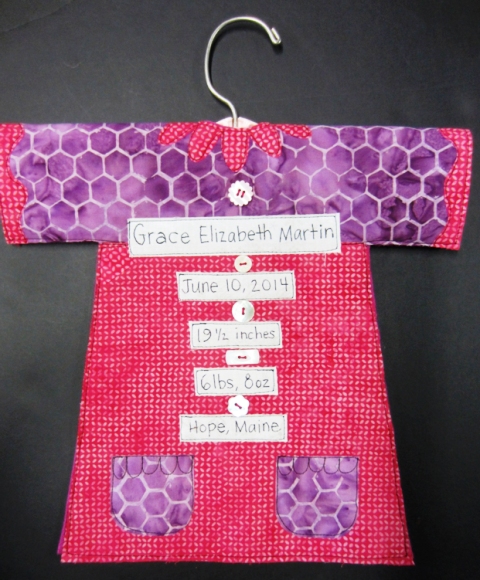
The girl has a dress and the boy has overalls, and they hang on a baby hanger.  They are each unique and fun, and personalized.  You can add your own touches, like lace, unusual buttons, funky baby hangers.  This is a perfect craft to make in an afternoon, and you’ve got something really unique that you can give as a gift or keep for yourself.

Whimsical Baby Girl

The girl wall hanging, sweet and simple!

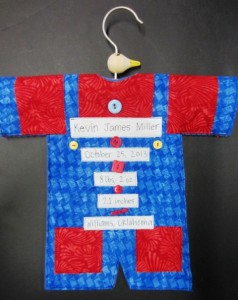
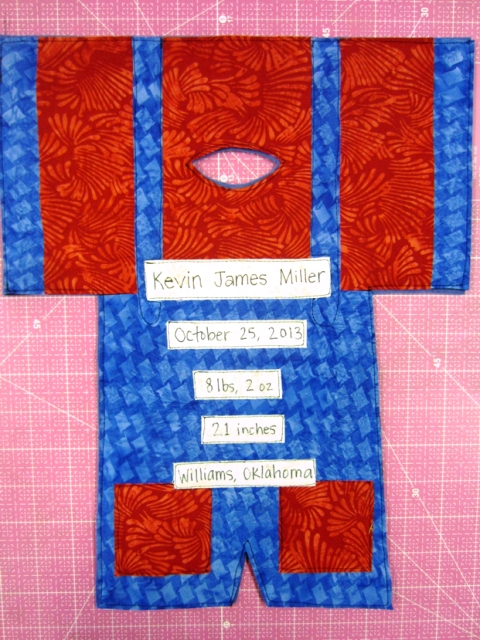
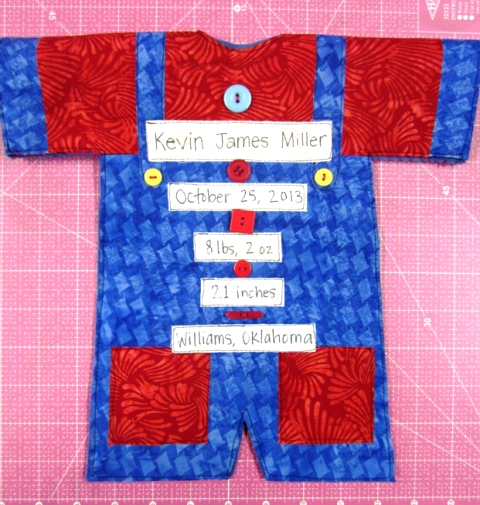
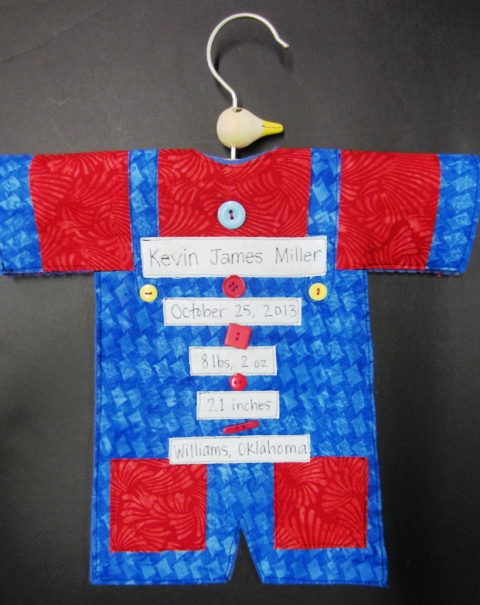
The boy wall hanging. Cute as a button.

The boy wall hanging. Cute as a button.


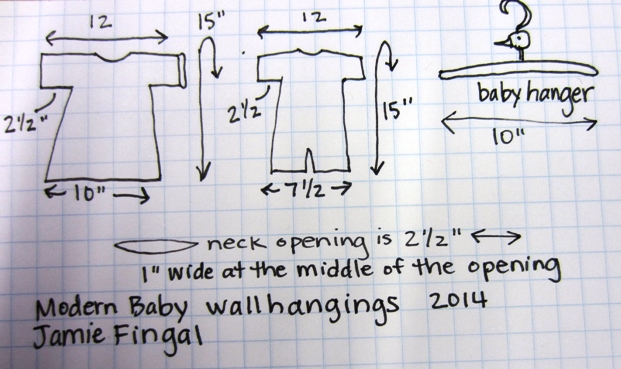
modern baby wall hanging pattern

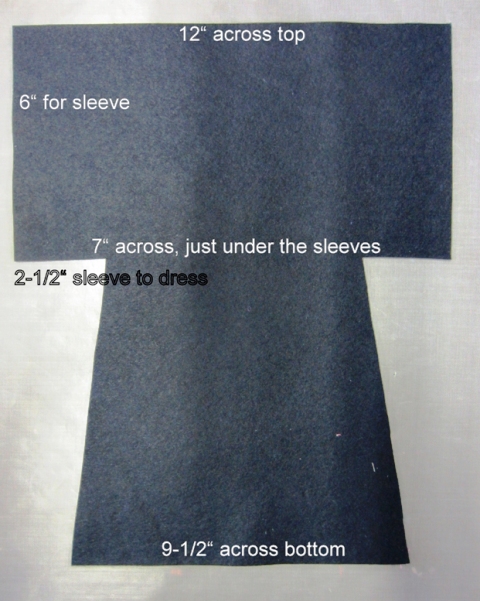
The pattern is not to scale, but you can get an idea of the dimensions for each. The upper portion folds over, like the top of a shirt. It enables the hanger to work correctly, and finishes the piece nicely. You can make a pattern on a piece of larger paper, and draw the dimensions. Then cut out whichever pattern you want to make. Just wait to cut out the neck opening.

Materials Needed

  • 2 pieces of black wool blended felt, National Nonwovens #TOY002 12” wide x 15” long
  • 12” wide piece of fabric for each; one blue, one pink
  • Scraps of pre-fused fabrics, 2 contrasting fabrics
  • White fabric for the text
  • Baby hangers, which are about 10” across
  • Girl – 5 mother of pearl buttons
  • Boy – 5 contrasting color buttons, and 2 for the straps
  • Ruler and rotary cutter
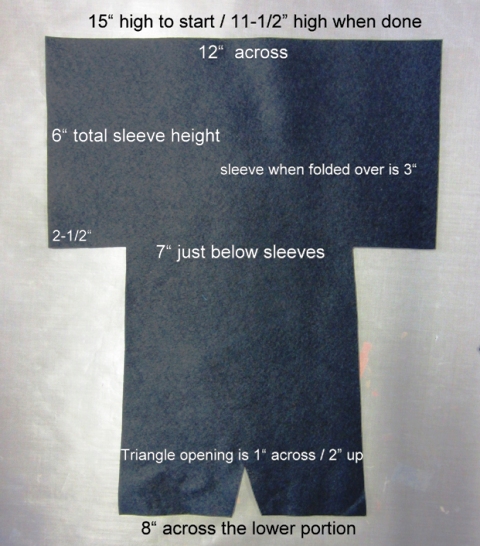
boy overalls dimensions

Dimensions for the boy overalls, so you can make your own pattern.

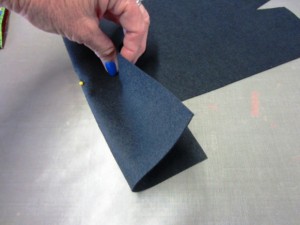
fold over sleeves

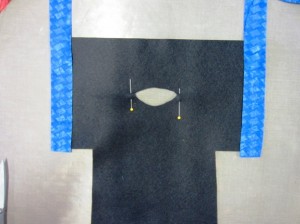
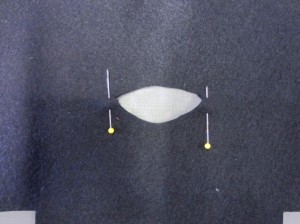
Fold over the sleeves, matching them up on the lower edge. Place a pin at the center fold on the top.

cut neck hole

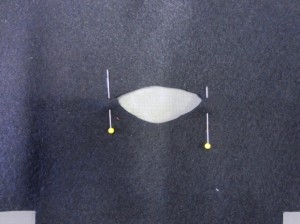
Cut out the neck hole, which is 2-1/2” long across, and 1” in depth. I marked the 2-1/2” mark with pins to be my guide.

blue strips for shirt cuff

1” strips of blue for the shirt cuff. Line up and iron into place.

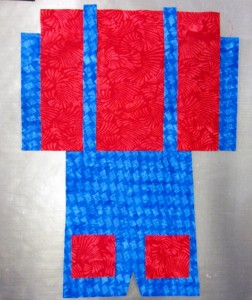
iron overalls to lower portion

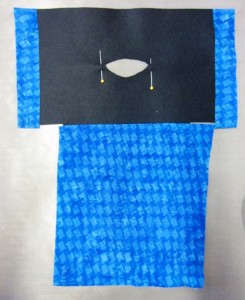
Add the overalls part to the lower portion, and iron into place.

flip over and cut from back

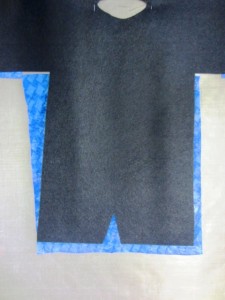
Flip it over and cut from the back, using the felt as your guide.

add red on sleeves

Add the red on the sleeve portion, and cut the pockets which are 2” squares. Add ¾” strips for the overall straps. They hang over onto the blue, which is hard to see. Iron everything into place. From the back, so you can see the neck opening, cut the fabric away, to open it up.

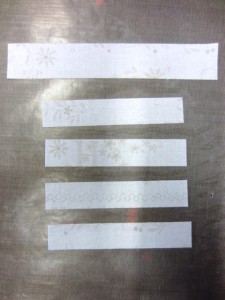
white fabric for text

White fabric for the text. The largest one is for the name of the baby and it is 1” high, all others are ¾” high. You can make them any length you want. I didn’t use plain while fabric, but chose a fabric with a slight print on it in faded gray. These are fused, and are ironed to a Mistyfuse Goddess Sheet, so I can write my text easier. You can iron them to a piece of parchment paper if you so desire.

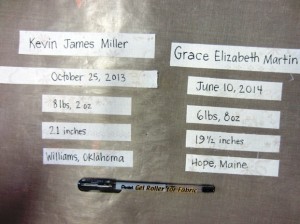
use pentel gel roller for fabric

I hand wrote the information on the white strips with a Pentel Gel Roller for Fabric. If you don’t trust your handwriting, you could print out the text from your computer, and then trace it onto the white fabric. I would suggest cutting more white strips than you need, in case you flub up. I did, of course. Trim the sides, so that the text is centered.

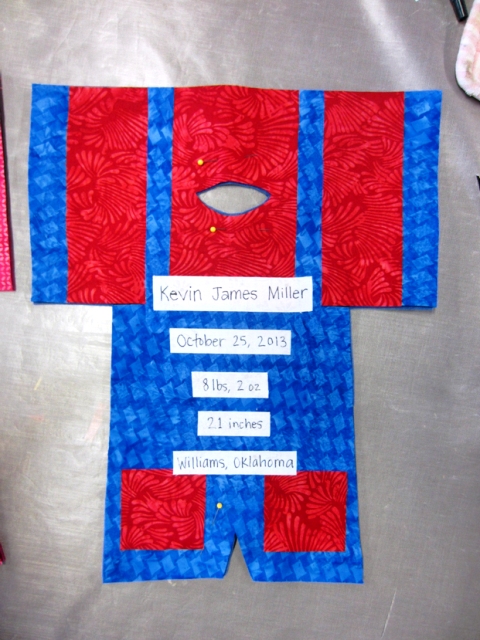
place white strips on overalls

Place strips on the overalls, making sure it stays centered and then iron into place. It’s looking good! Get out your coordinating color for the back. This will add stability to the piece. Lay it into place and pin, so you can take it to the sewing machine.

sew over entire piece

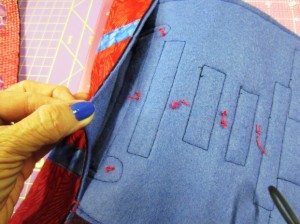
Sew with a straight stitch over the entire piece, with the sleeves open. You can use a free motion foot too. You just want to get everything sewn down. The text and the pockets and all around the edges. And don’t forget the neck opening. Press it one more time,
so it is flat.

hand sew buttons

Hand sew the buttons on. I used a variety of funky buttons, and I used red Perle Cotton #8 thread.

hand sew sleeves on lower portion

Hand sew the sleeves on the lower portion, but not in the center portion of the back, leave open. You can see in the lower left hand corner, that this portion is hand sewn.

insert hanger from back

Insert your hanger from the back, and now you have a ‘cute as a button’ baby quilt to hang on the wall. Be sure to add a label inside, that you made it and date it. Fabulous!

the girl quilt is made much the same

The girl baby quilt is made the same as the boy, just different measurements, because you are making a dress. This will help you make a pattern 12” wide by 15” high.

cut neck first

Cut the neck first, scroll up to the boy quilt, and see the steps.

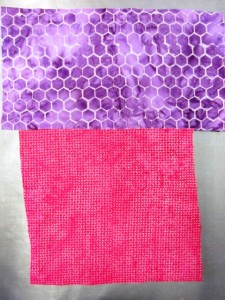
place fabrics on black felt

Place your fabrics on the black felt, and then press into place.
Cut from the back.

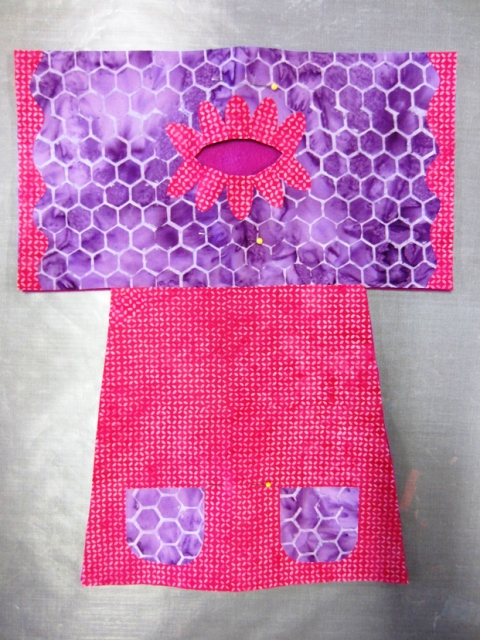
add fabrics for sleeve and skirt

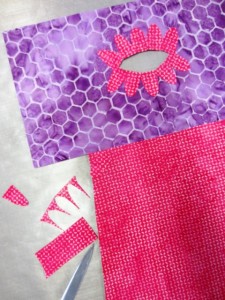
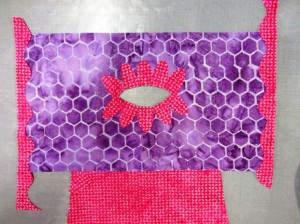
Add the fabrics. One for the sleeve portion and one for the skirt. Using the skirt fabric cut flower petals for the neck line. Use sharp scissors and fussy cut them. They don’t have to be perfect, just generally around the same size. Place them on the neckline, and press into place.

cut strips 1 inch wide

Cut two strips about 1” wide, and then cut wavy lines, so it ends up being about ¾” wide.
Press into place.

cut two pockets 2 inch square

I cut two pockets that are 2” squares. Then cut one where I rounded the corners on the lower edge. Take that pocket and lay it over the other square to use as your guide for cutting.

Take out your coordinating felt for the backing.  You can either leave it 12×15 inches and sew the quilt, or cut it the same size as your pattern.  The second layer will add stability to your piece, especially during the sewing part.  Cut out the neck portion before you
start sewing.

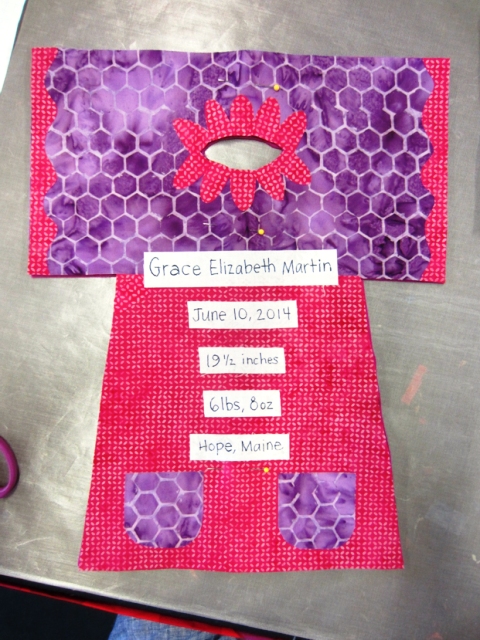
place text on dress and press

Scroll up to see how text is done, then place it on the dress and press
into place.

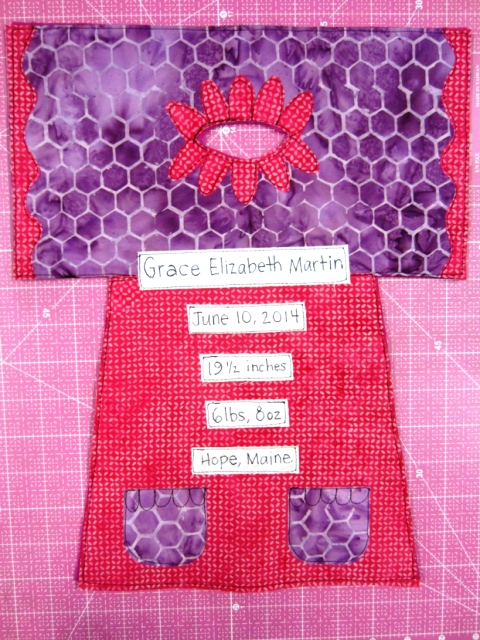
sew straight stitch around entire dress

Sew with a straight stitch around the entire dress, text, neckline petals and pockets. I added some petals on the pockets with stitching. Be sure to sew around the neckline. Then press to get the entire dress flat. Fold over the sleeves and hand sew just the lower sleeve portion, same as the boys.

sew buttons insert hanger

I sewed the buttons with pink Perle Cotton #8 thread. Inserted the baby hanger from the back. Modern Baby Girl – finished 12” across, and 11-1/2” from shoulder to hem. Happy quilting!

Click here for a printable PDF of Modern Baby
by Jamie Fingal


jamie fingal headshot smallJamie Fingal is an artist, author, teacher, fabric designer, and curator who hails from Orange, California.  An award winning artist and the author of the book Embellished Mini Quilts.  Her whimsical and abstract work has been juried into International quilt exhibitions, featured in many books and various magazines and has two instructional DVD’s – The Whimsical House Quilt and Rebel Quilting. She has been a guest on Quilting Arts TV numerous times. As well as being the other half of the curating team of Dinner at Eight Artists, with Leslie Tucker Jenison. You’ll find her work in private, public, churches, and corporate collections, www.jamiefingaldesigns.com.


60mm-rotary-and-cutting-mat-set_cta


Posted in Craft to make, Fabric Cutter, Free Craft Projects, Jamie Fingal, Wall Hangings | Tagged , , , , , | 2 Comments

Free Craft: Spring Bloomin’ House

by Jamie Fingal

image 01 342x336

Materials Needed:

  • 2 pieces of wool blended felt in black and a coordinating color
  • Cutting mat, ruler and rotary cutter
  • Pre-fused scrap fabrics, and fabrics from your stash
  • Mistyfuse
  • Parchment paper or Goddess sheets
  • Bamboo felt – in a few bright colors
  • Pinking Shears
  • Iron
  • Sewing machine

Start by cutting a piece of wool blended felt (black) for your foundation 12×12 inches.
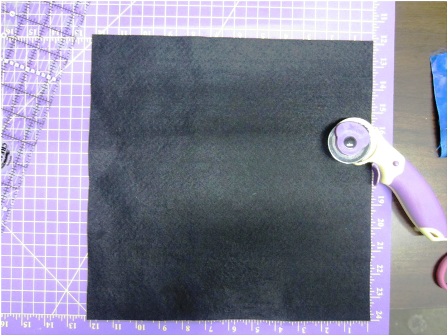
image 02 448x336

Select fabrics for the background – blue for the sky and green for the landscaping.  The sky fabric should cover about  2/3rds from the top.  I used pinking shears to cut the top of the green landscape fabric, to add some fun.  Iron into place.
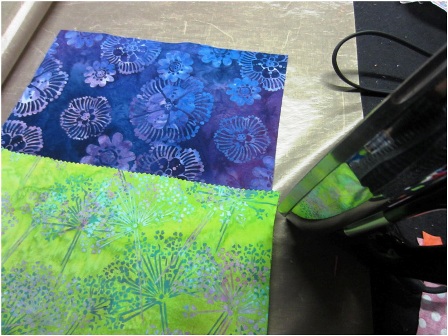
image 03 448x336 Auditioning fabrics.  This is the main part of my stash of fabrics, and Batiks are center stage, because that is what I use most in my work.  Select fabrics that are the same value.   The majority of my fabrics all go together, because ‘brights’ are my color palette.  There is not one pastel in the bunch.
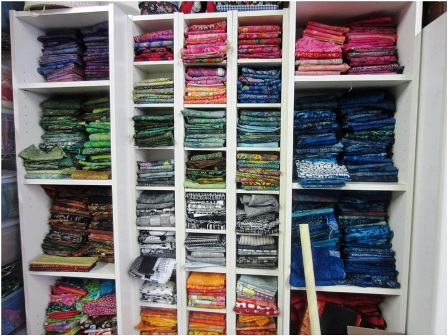
image 04 448x336

I kept thinking of my theme for this house quilt, so it was easy to select the fabric for the house, something bright and cheerful.
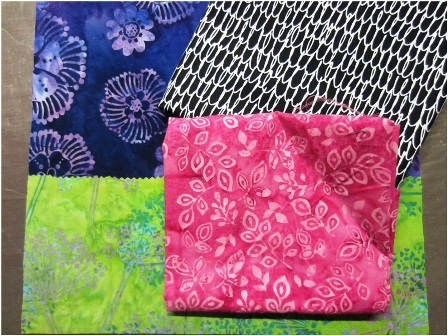
image 05 448x336

This is a 12” roll of Mistyfuse, that is oh so easy to use.
Roll it out onto your fabric, and cut.
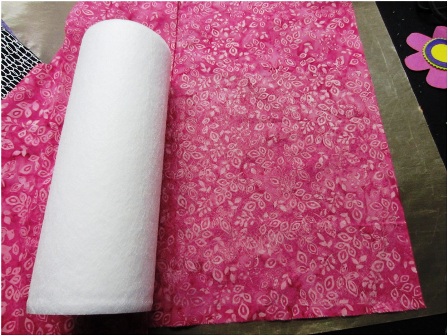
image 06 448x336

Place parchment paper or a Goddess Sheet over the top and press with an iron on the ‘cotton’ setting, no steam.  Press in a circular motion, making sure that all of the edges are secure.  As you fold back the sheet, you can clearly see which side is fused, because of the shiny appearance that is visible.  Cut the around the entire piece, trimming off the parts that are not fused.
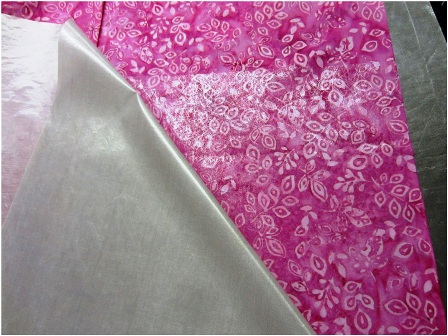
image 07 448x336

Figure out the placement of your house.
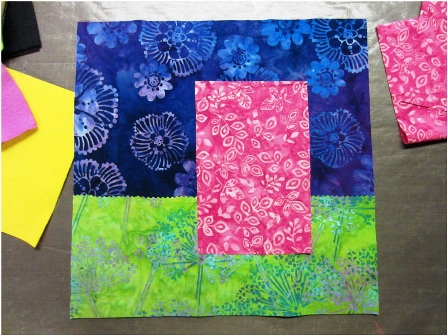
image 08 448x336

After looking at black and white fabrics that I would usually use for the roof, I decided on a yellow roof because it was more Spring like. I cut the fabric edges with pinking shears, and ironed into place.
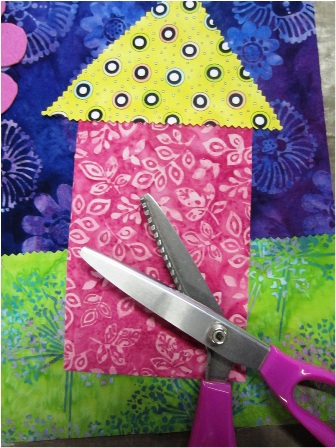
image 09 336x448

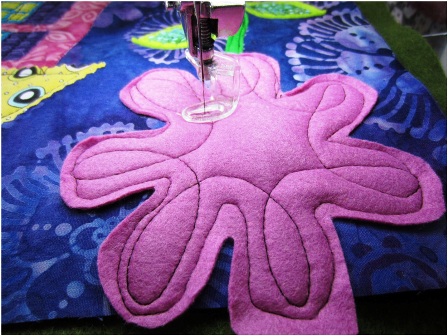
The Bamboo felt flower is about 3” in diameter.  Then I cut three other colors for the center.  I would recommend 2 for the center, because when you sew them onto the quilt, your needle will be going through 6 layers of felt, and this is where I broke a needle.  So please be careful.
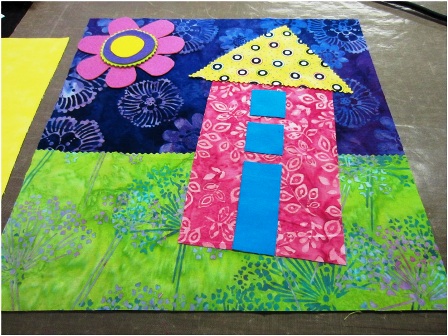
image 10 448x336

The windows and door are made with solid robin egg blue fabric (leftover from another project).  I don’t use solids in my work, so this is a stretch, even for me.  You could add more windows, but I decided that I wanted to add shutters to the windows, so there wouldn’t be room for more windows.  Keep it simple, I keep telling myself.
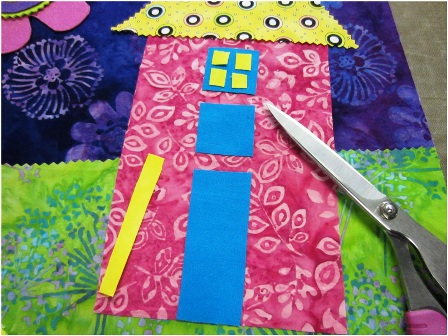
image 11 448x336

Cut small squares for each of the windows.  This is when Havel’s 8″ Serrated Scissors, really come into play.
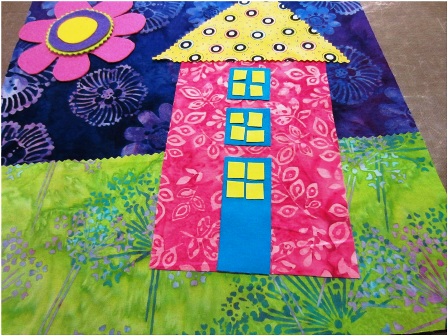
image 12 448x336

After you have placed all of the window panes where you want them, iron carefully into place.  They don’t have to be perfect.
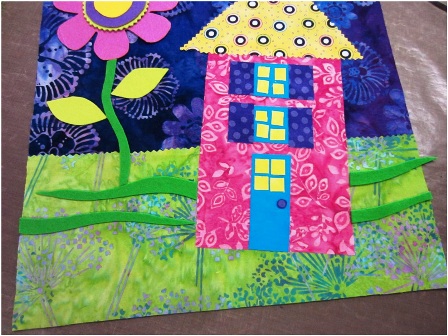
image 13 448x336

The Bamboo felt can be fused with Mistyfuse, and it adheres pretty well to the art quilt.  When it gets heavy, like the flower, it won’t stick.  Just know that going in.  Cut the stem and leaves, and the extra curvy pieces in the landscaping.  These add depth, color and texture to your piece.  Add a tiny circle to the front door.
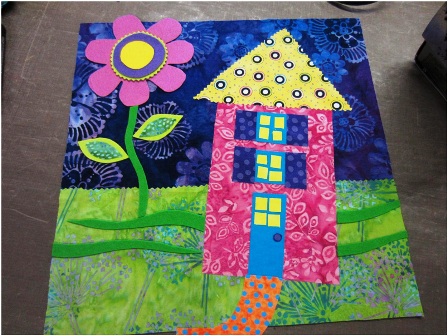
image 14 448x336

It’s looking good!  Now you can add the walkway.  An inviting part to the landscape!
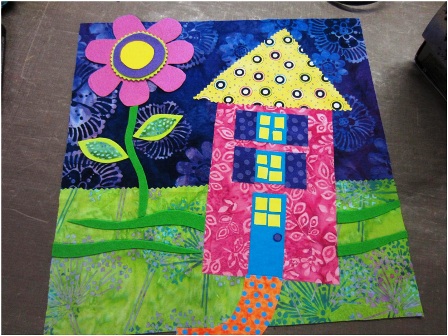
image 15 448x336

Now we are ready for the backing.  I am using a piece of wool blended felt from National Nonwovens TOY002, sage green.  Cut it a bit larger than your top piece.  You can pin it if you feel more comfortable in securing the top to the backing.
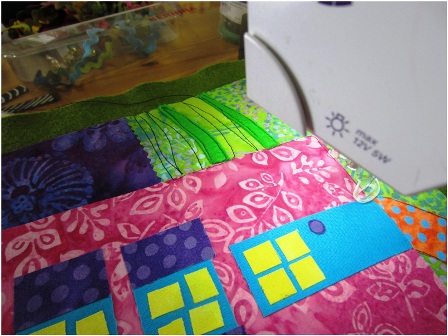
image 16 448x336

Take it to the machine. I started with the landscaping on the right side and then moved onto the house. My thread choice, black Isacord 40 weight poly thread.
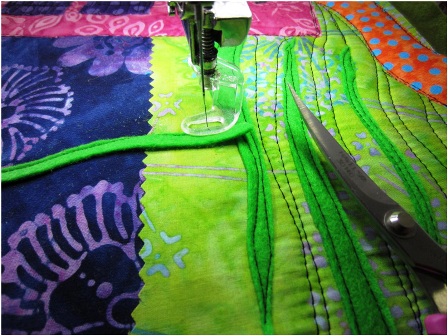
image 17 448x336

Free motion quilt the landscape, and make sure the felt does not flip up when sewing it into place.  You can secure it with one hand when you put the needle down, and then proceed to sew it down.
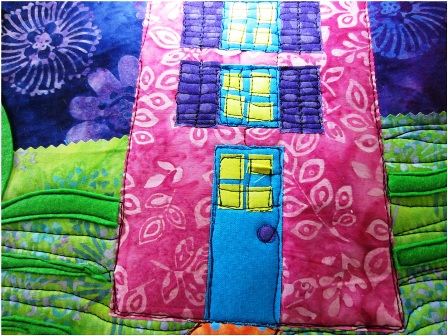
image 18 448x336

I am not about perfection, but more about having fun with what I am doing – hence free motion quilting.  However, I seemed to have had a little mishap on one of the windows and I am going to have to fix that window, because it doesn’t look good.
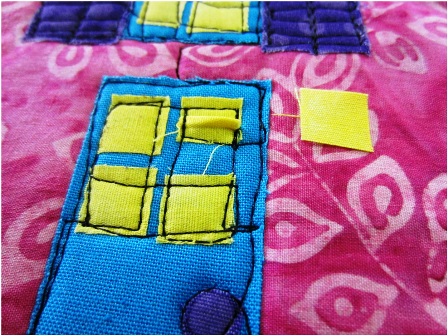
image 19 448x336

To fix the window, I cut out another window piece that has Mistyfuse on the back. I am simply going to iron it into place over the messed up window.

The window has been repaired, and sewn into place, and know one would ever know.  Whoohoo!
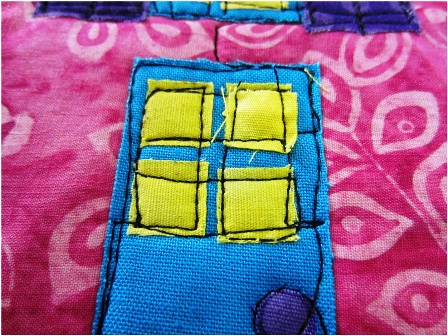
image 20 448x336

For the two leaves of the flower, I added fused fabrics inside for added interest.  I used one pin, just so the leaf would be anchored in the right position, before free motion machine quilting it’s leaf design on the inside.
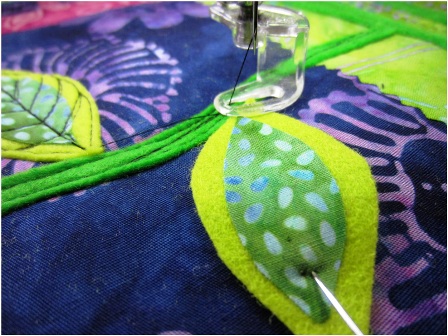
image 21 448x336

The flower.

image 22 448x336

The center of the flower is where you want to use less Bamboo felt.  I was sewing through 6 layers of felt and broke my needle, because it was simply too thick.  You could have 1-2 contrasting colors, and call it a day.
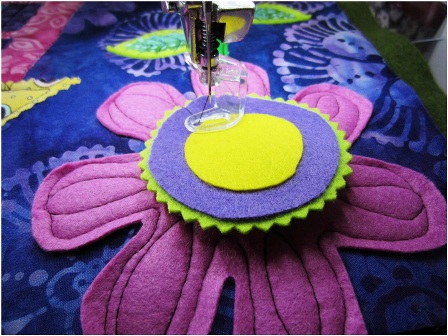
image 23 448x336

In free motion machine quilting the blue background, I just echoed the flower motifs on the blue fabric, in and around the flower, and the leaves. Easy-peasy.  An alternate method would be to free motion machine quilt the background, before you add the flower, stem and leaves.
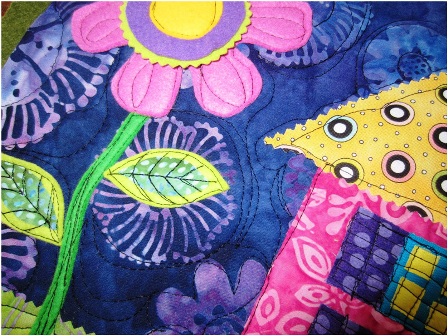
image 24 448x336

Finish the edges by sewing a zigzag around the entire art quilt, making sure to anchor your stitches at the beginning and end.
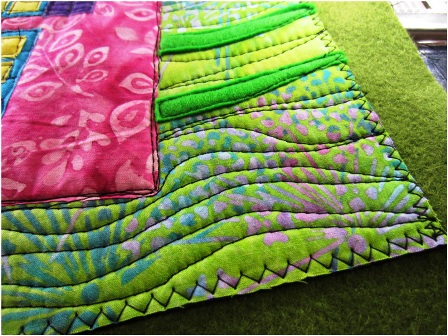
image 25 448x336

When you get to the flower, anchor your stitches before you skip over a petal, then anchor again, when you start stitching.  Repeat when you go over the next one. Cut the threads on the front and back that cross the petals.
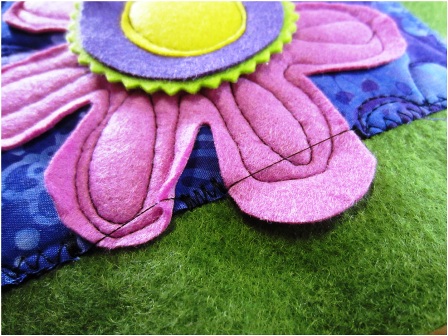
image 26 448x336

When cutting the edges, use a rotary cutter and ruler to trim the green felt, just so you can see it from the front.
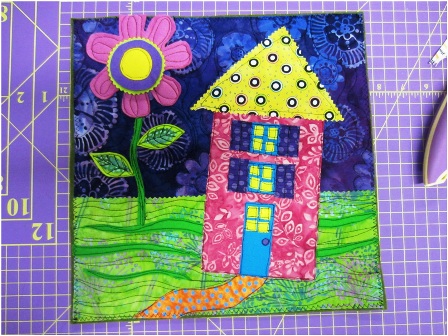
image 27 448x336

Here’s what the back of the quilt looks like.  I think it looks so cool to see the
stitching lines!
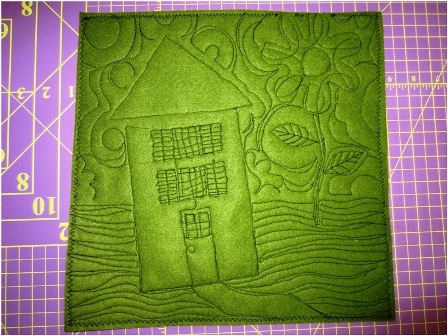
image 28 448x336

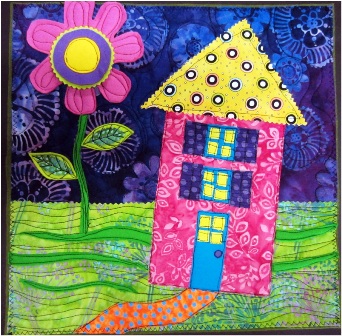
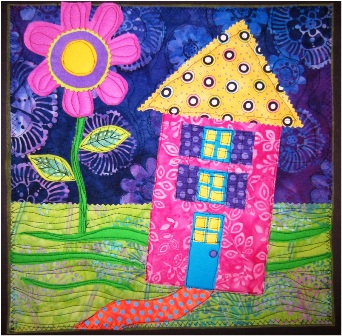
The finished Spring House!

image 29 342x336

I invite you to email me at Jamie.Fingal@gmail.com to share your own house creation!


jamie fingal headshot smallJamie Fingal is an artist, author, teacher, fabric designer, and curator who hails from Orange, California.  An award winning artist and the author of the book Embellished Mini Quilts.  Her whimsical and abstract work has been juried into International quilt exhibitions, featured in many books and various magazines and has two instructional DVD’s – The Whimsical House Quilt and Rebel Quilting. She has been a guest on Quilting Arts TV numerous times. As well as being the other half of the curating team of Dinner at Eight Artists, with Leslie Tucker Jenison. You’ll find her work in private, public, churches, and corporate collections, www.jamiefingaldesigns.com.



 

shop havels now_spring bloomin house cta


Posted in craft, Craft to make, Free Craft Projects, Jamie Fingal, Tutorials, Uncategorized | Tagged , , | 2 Comments