Coffee in the Garden

Coffee in the Garden by Jamie Fingal

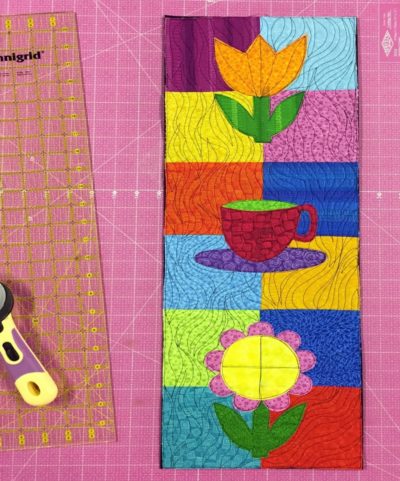
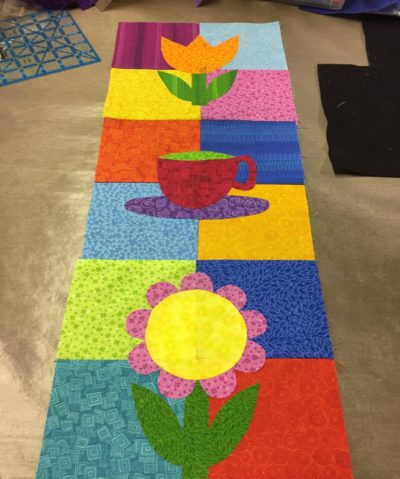
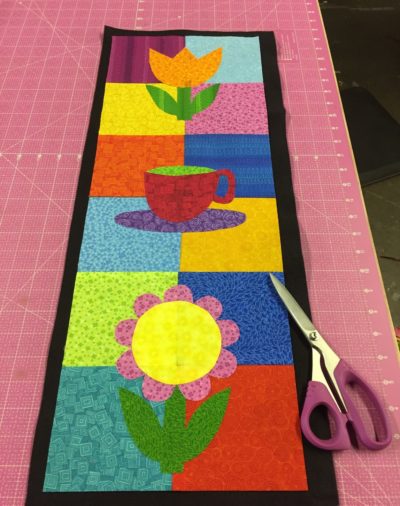
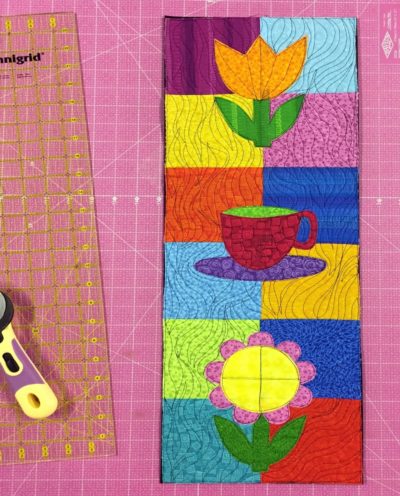
A fun Spring to Summer narrow wall hanging that will fit most anywhere in your house 9×25, that is both pieced and raw edge applique. A charm pack friendly project.

</p

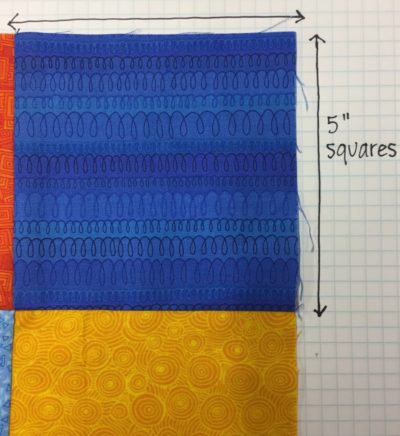
20 each 5” squares
Mistyfuse
½ yard Wool blended Felt by National Non Wovens WCF-001
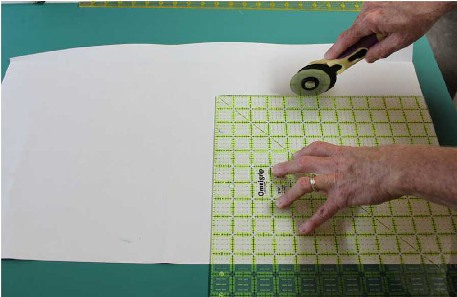
Rotary Cutter, Ruler, Mat, Scissors

You could make this with batting too, and do binding if you prefer. I am just giving you another option by using the wool blended felt. If you can only find TOY-002 at your local quilting store, you only need one layer.

Coffee in the Garden #2

Select what squares you want for the background. You will need 12. Sew them together using a ¼” seam allowance in a four patch, then sew the four patches together to create the narrow background. Press seams to the dark side.

Coffee in the Garden #3

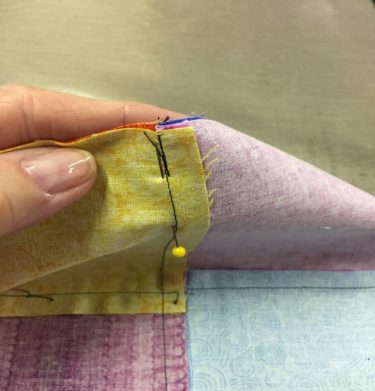
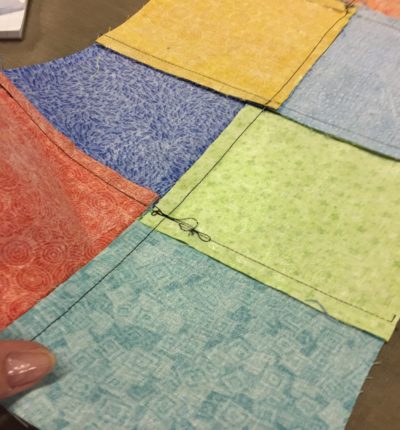
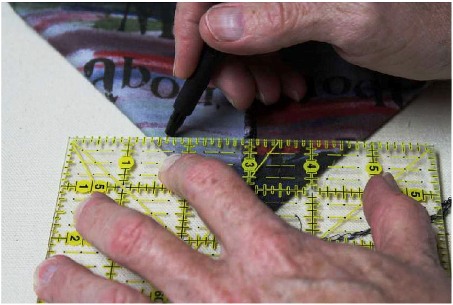
Line up the seams with a straight pen. I admit this has always been a challenge for me, because I am not a piecer. But, I did it, and it was like riding a bike, you just don’t forget. May the force be with you. It doesn’t have to be perfect, just perfect for you.

Coffee in the Garden #4

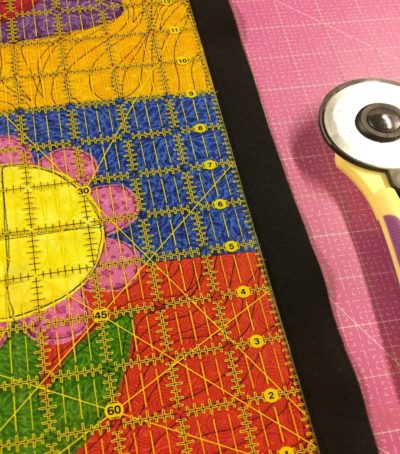
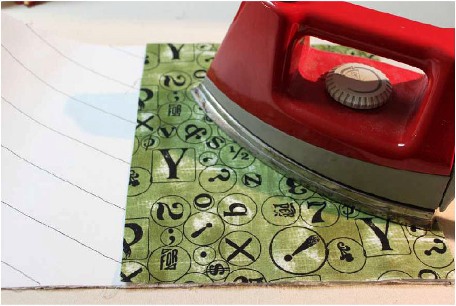
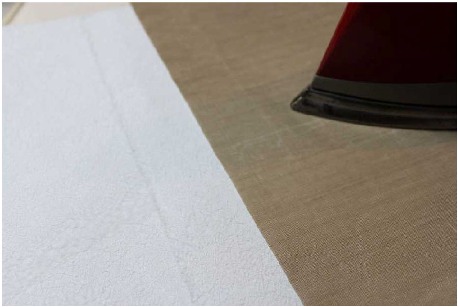
Apply the Mistyfuse to the back of the background and all of the other squares that you have set aside for the raw edge applique. You can do this in two sections, one for the background and one for the remaining squares. Cut off any MF that is over the edges. You want a nice clean cut. If you get fusible web on your iron plate, use a few dryer sheets folded together, and a potholder to protect your fingers. Wipe the entire iron plate with dryer sheets until clean. Then swipe your iron on a scrap piece of fabric to wipe off any residue.

Coffee in the Garden #5

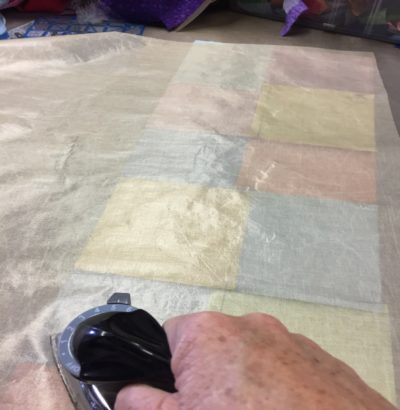
Lay a sheet of parchment paper over the top. I used a Goddess Sheet that is made by Mistyfuse. Run a dry iron on the cotton setting over the top in a circular motion being careful to get all of the edges. Let it cool.

Coffee in the Garden #6

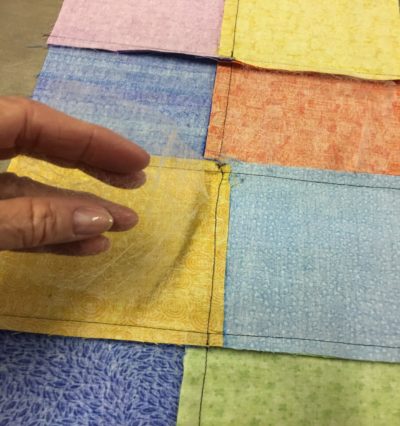
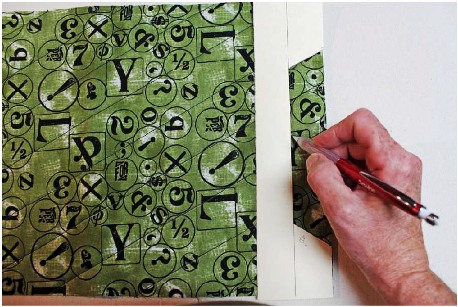
Pull up one corner to see if it is cooked. It should have a shine to it. If you pull it up and it has strings attached, it’s not done, so run your iron over it again and let it cool. For the 5” squares that are for the raw edge applique, carefully separate the squares by using your fingers to open them up and then cut them apart with your scissors.

Coffee in the Garden #7

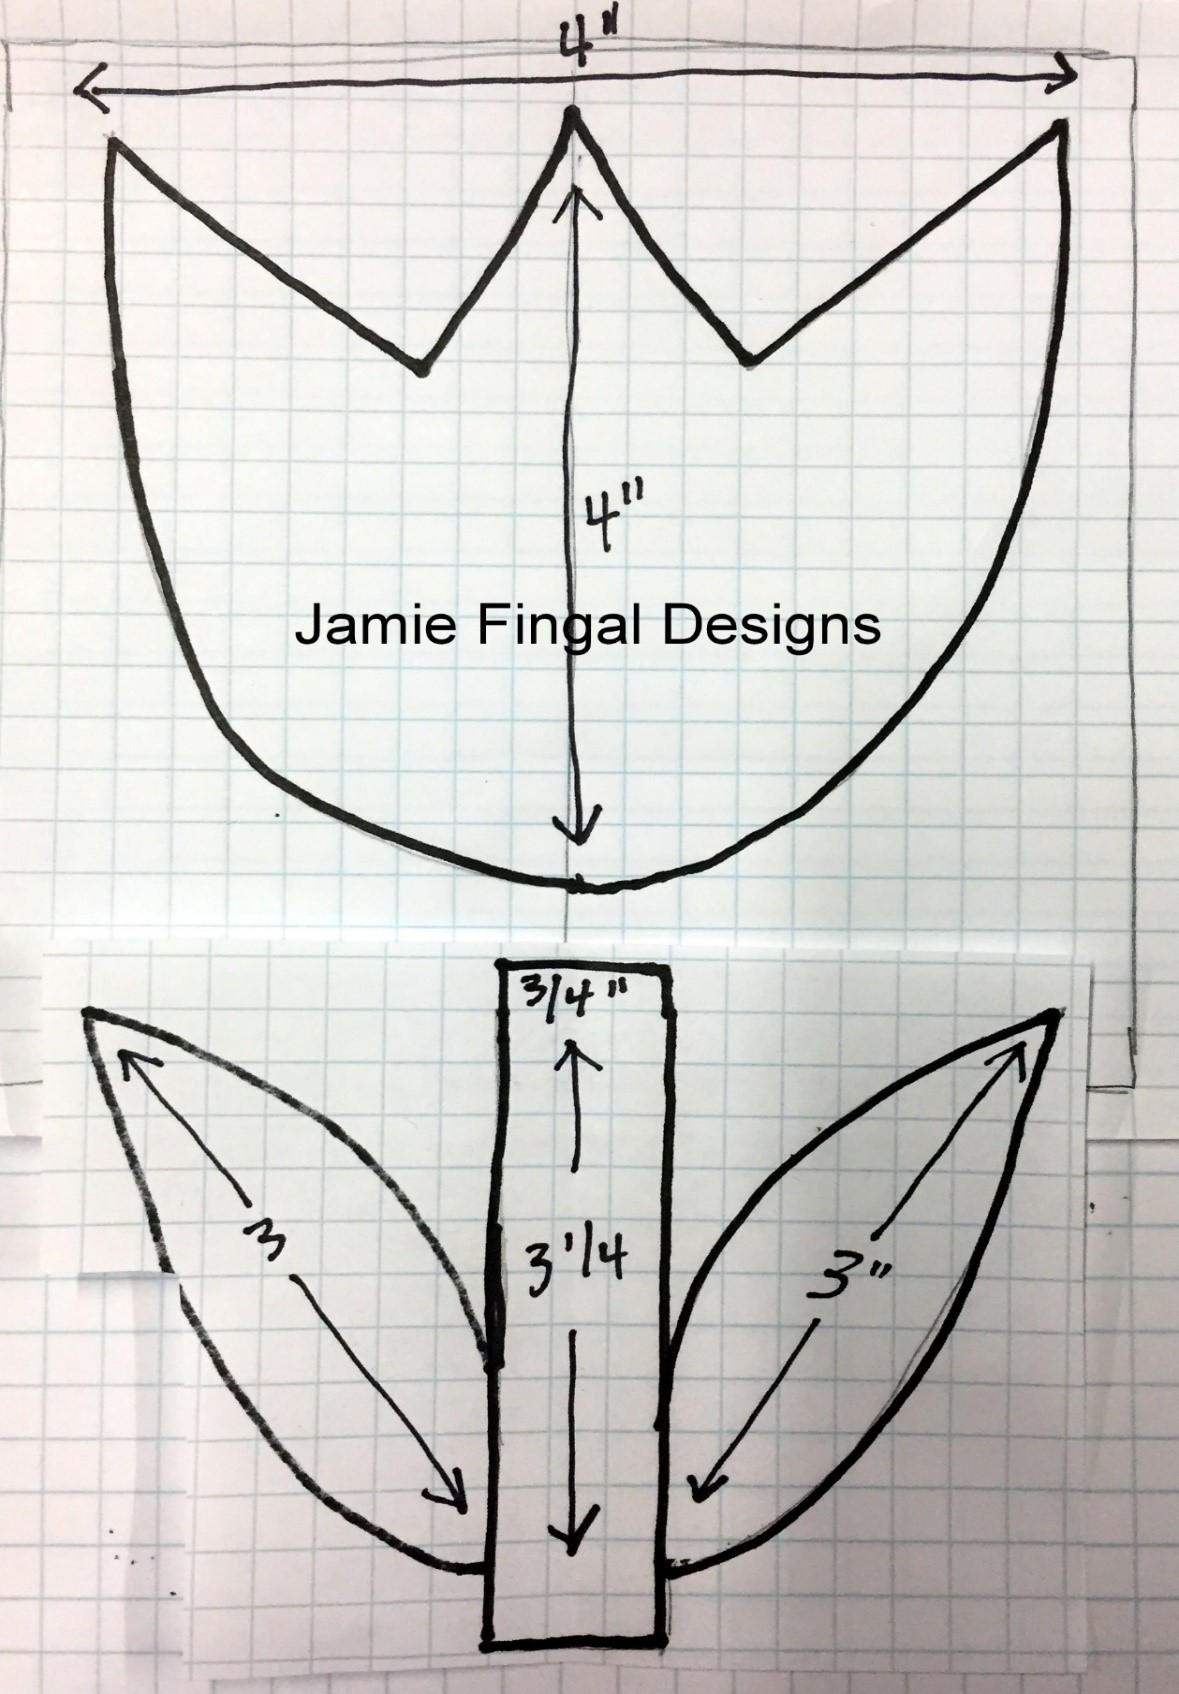
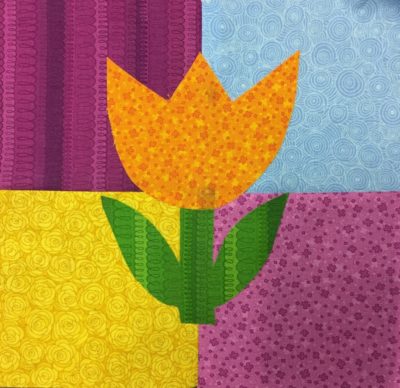
Pattern for the tulip.

Coffee in the Garden #8

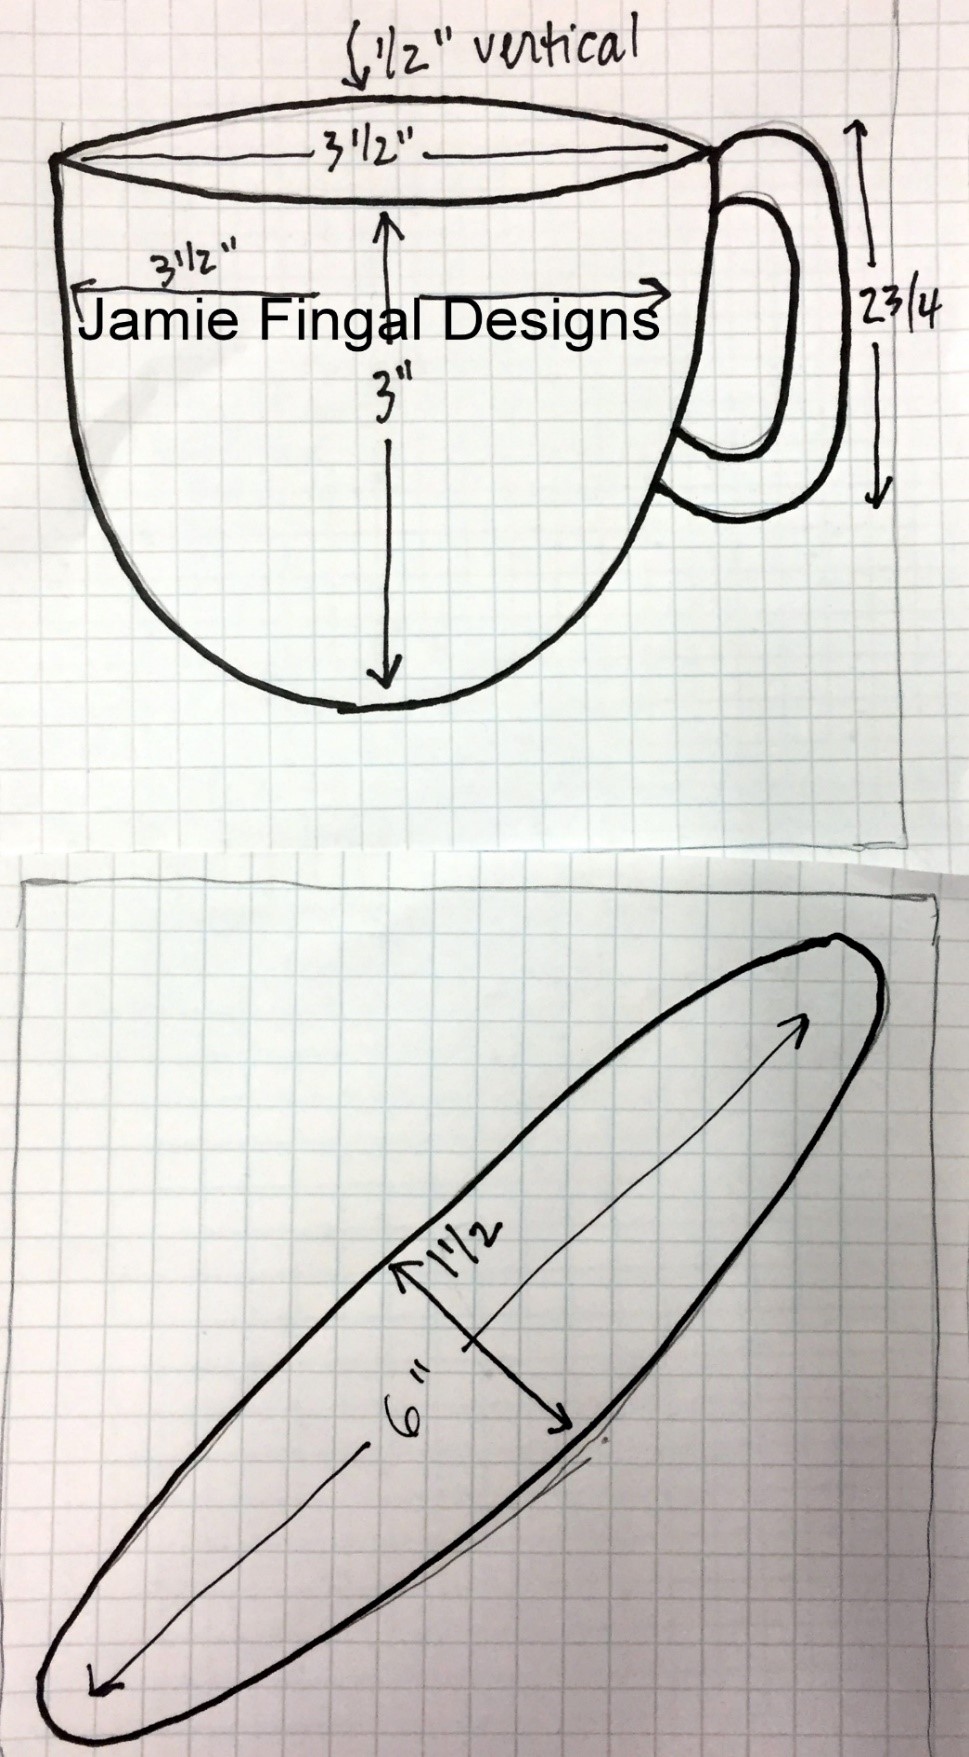
Pattern for the cup and saucer.

Coffee in the Garden #9

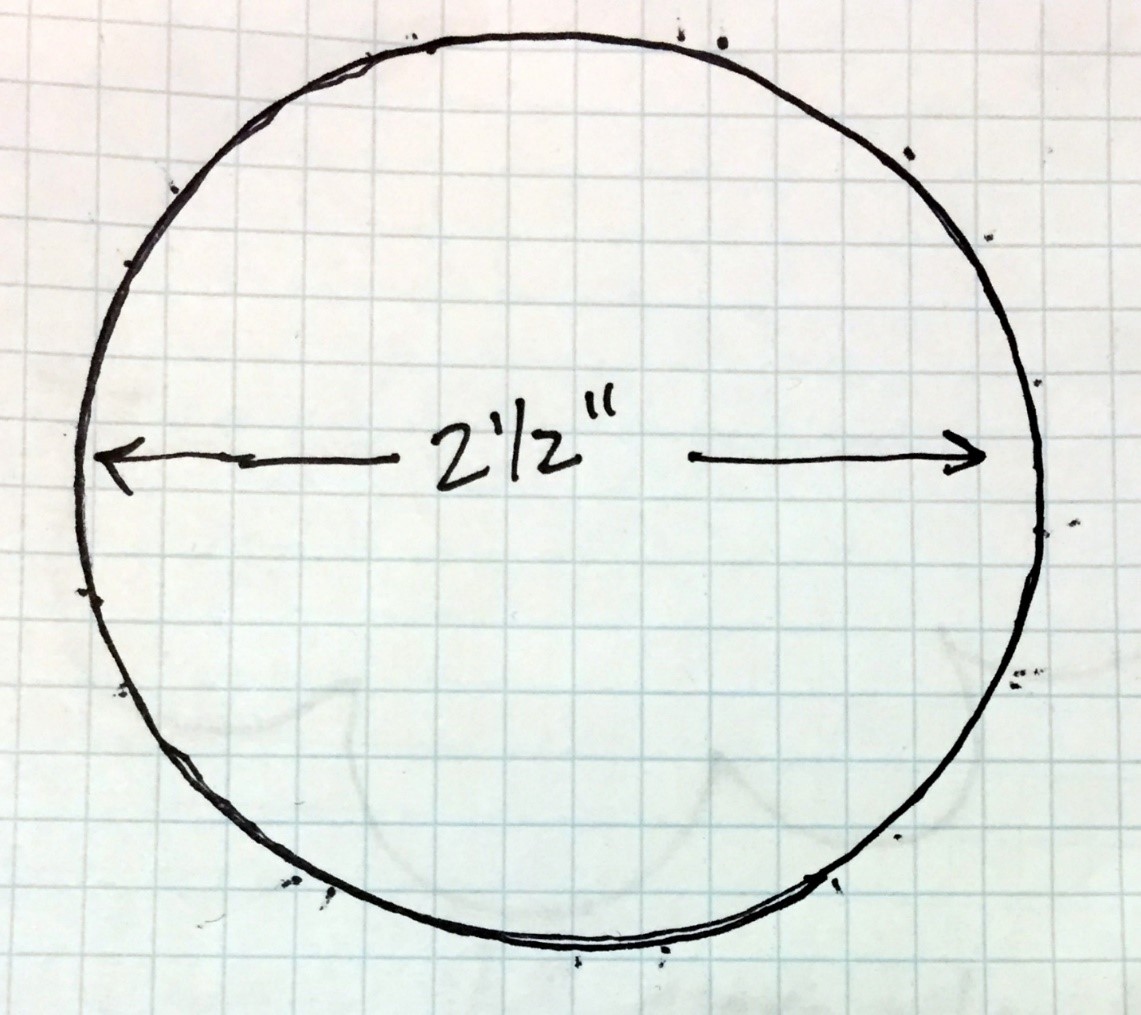
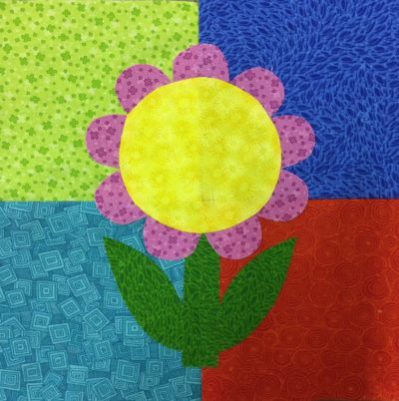
Pattern for the sunflower center. You can use the stem and leaves from the tulip pattern for this flower too.

Coffee in the Garden #10

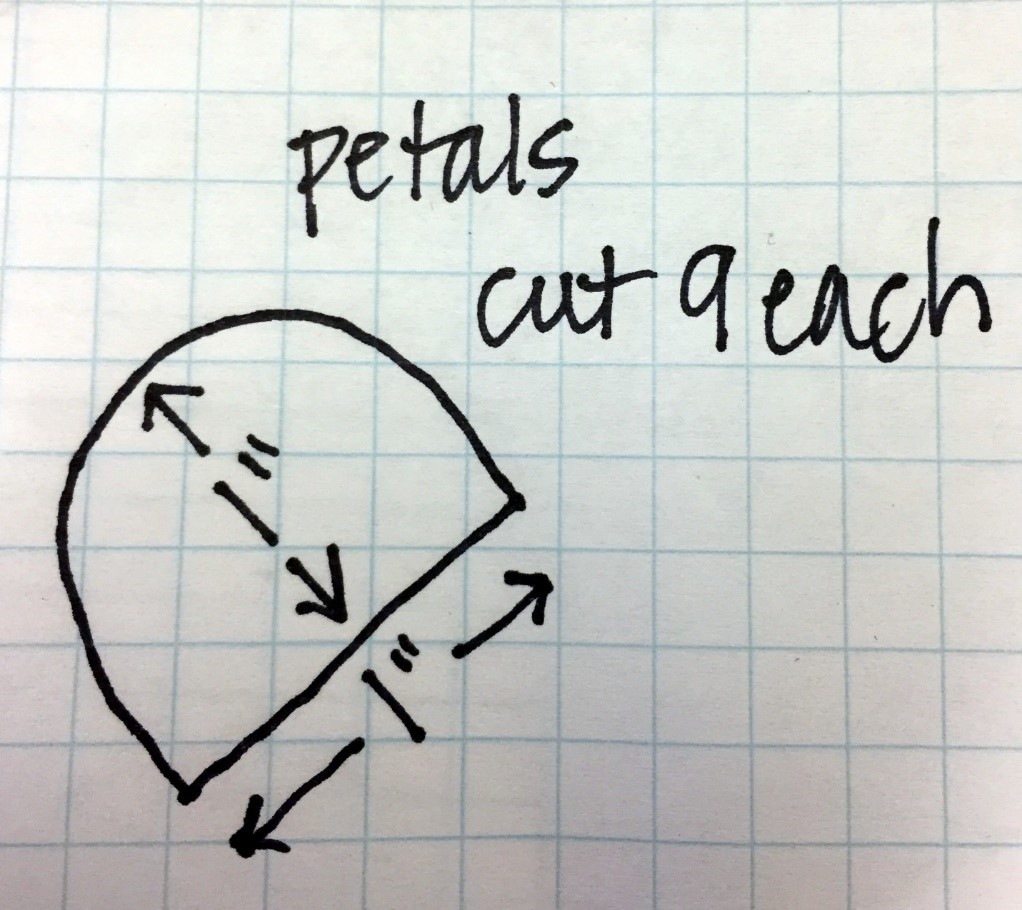
For the petals.

Coffee in the Garden #11

Cut out the tulip, stem and leaves. Tuck the stem a touch under the tulip. Place it on the background. If you are happy with the placement, press it into place.

Coffee in the Garden #12

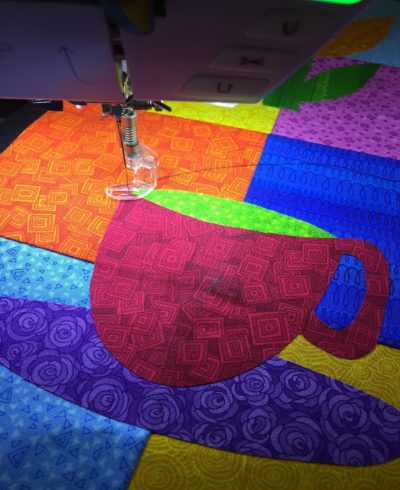
Cut and saucer. The green insert in the cup goes behind the cup, as well as the saucer. Press into place.

Coffee in the Garden #13

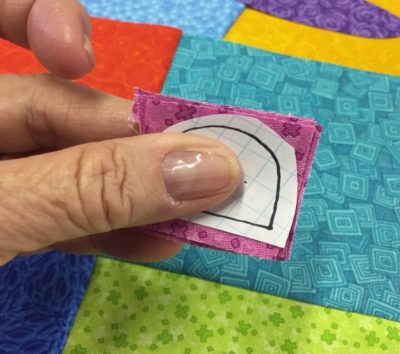
Making the flower. You can cut 4-5 piece out at a time for the petals. I didn’t use a straight pen, because my thumb worked pretty well.

Coffee in the Garden #14

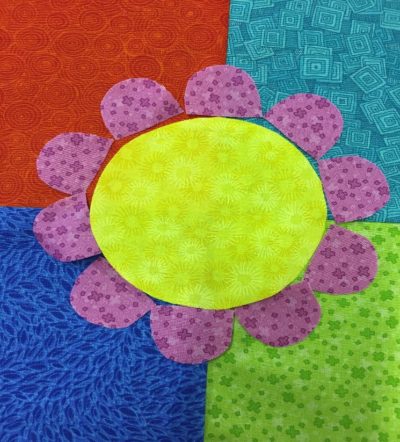
After you have all of the petals cut out and they don’t have to be perfect, line them up around the yellow circle. You will place them just a tad under the circle, but don’t press with the iron, until you have the stem in place.

Coffee in the Garden #15

Tuck the stem under the petals and flower and press into place.

Coffee in the Garden #16

Now you have a completely fused piece. Now is time for the wool blended felt.

Coffee in the Garden #17

Press the piece onto a piece of wool blended felt, and trim the edges with a pair of sharp scissors or a rotary cutter. Then add another layer of felt to the back and secure with a straight pen on the top and the bottom. Now we’re ready to free motion machine quilt.

Coffee in the Garden #18

Simply outline the cup and saucer with your needle and thread.

Coffee in the Garden #19

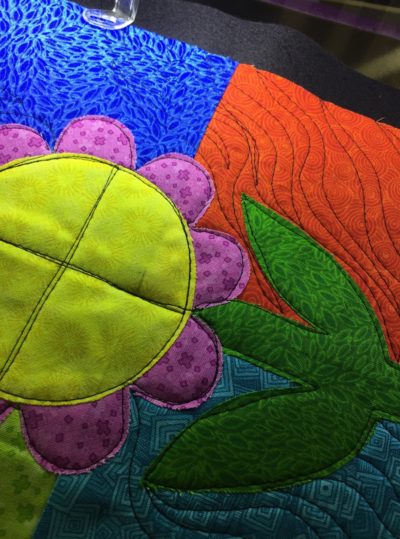
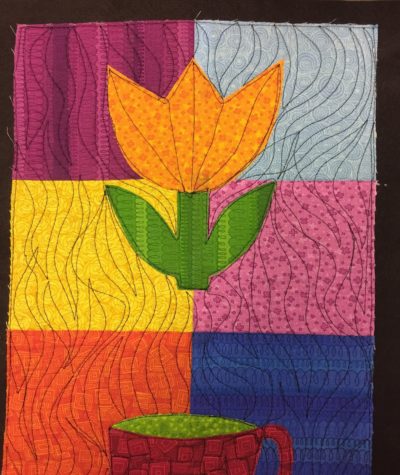
I have outlined the objects and sort of free styling with the needle and thread in an all over organic look.

Coffee in the Garden #20

You can clearly see my quilting lines, and yes, I cross over quite a bit. Just have fun with it. Press your piece after the machine quilting is done.

Coffee in the Garden #21

Two ways to finish. 1) straight stitch all around the edges, then cut or 2) cut all of the way around, so that the felt doesn’t show, then straight stitch the edges, so you have a nice clean line.

Coffee in the Garden #22

The end result. Hope you enjoyed making this project! Hand sew aluminum pop tops in the upper back corners and it makes for easy hanging with two nails. Have fun!

shop havels now_spring bloomin house cta

Posted in art ideas, craft, Craft to make, Crafting, Cutting Mat, Fabric, Fabric Cutter, Fabric Rotary Cutters, Fabric Scissors, Free Craft Projects, Free Sewing Project, Fun Stuff, Jamie Fingal, Seasonal, Uncategorized, Wall Hangings | Comments Off on Coffee in the Garden

A Fun Memorial Day Table Runner Project!

by Jessica Schunke of A Blue Sky Kind of Life [http://ablueskykindoflife.blogspot.com]

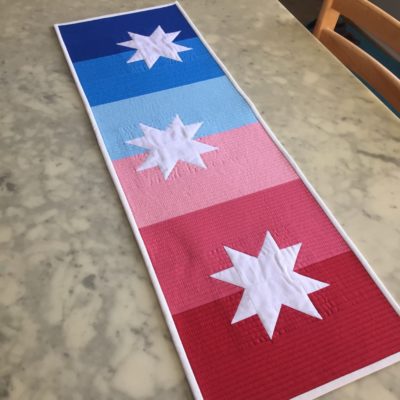
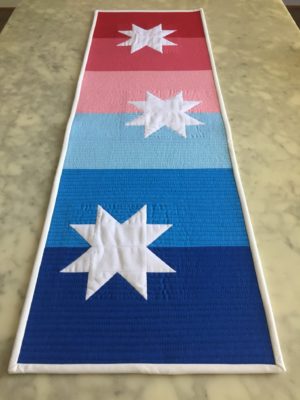
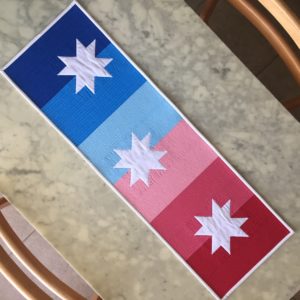
I don’t often make decorations for many holidays other than Christmas, but this spring, I was really itching to add a little color to my dining room table. This Ombré Star Table Runner is perfect for your Memorial Day celebrations, but you can also easily change up the colors for any number of looks. Try an array of springy pastels for Easter; shades of gold, red, and orange for fall; an ombré of hues of a single color; or maybe even a rainbow.

Star Tablerunner 1
Supplies:
Solid fabrics in 7 colors (three blue shades and three red shades for the background, plus a white for the stars): 1/8 yd. each
Backing fabric (I used a white-on-white print): ½ yd.
Binding fabric: ¼ yd.
Batting: Scrap piece measuring 14.5” x 38”
Rotary cutter [http://www.havelssewing.com/rotary-comfort-cutter-cushion-handle-32045.html]
Cutting mat [http://www.havelssewing.com/large-cutting-mat-self-healing-2-sided-32124.html]
Embroidery scissors or snips [http://www.havelssewing.com/embroidery-scissors-3-5inch-double-curved-60040.html]
Matching thread
Marking pencil

Cutting instructions: 
Star Tablerunner 2

–From each of the dark blue (B1), medium blue (B2), light blue (B3), and light red (R1) solids, cut the following:
–(1) 2″ x 3.5″
–(2) 2″ squares
–(2) 2.5″ squares
–(1) 3.5″ x 12.5″ squares
–(1) 3.5″ x 5″
–From the medium red (R2) and dark red (R3) solids, cut the following:
–(2) 2” squares
–(2) 2.5” squares
–(1) 3.5” x 12.5”
–(2) 3.5” x 3.5”
–From the white solid, cut the following:
–(12) 2.5” squares
–(6) 3.5” x 2”
–From the backing fabric, cut (1) 16.5” x 40” rectangle.
–From the binding fabric, cut (3) 2.25” x width-of-fabric strips.

Tip: Save time cutting by stacking your 1/8 yd. strips and cutting the pieces for each set all at once.
Star Tablerunner 3

Piecing instructions:
Seam allowance is ¼” throughout.

1. Make your half-square triangles (HSTs):
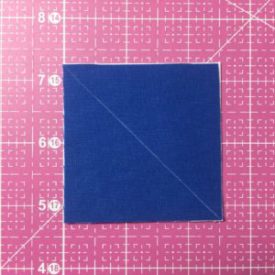
a. Pair each of your 2.5” color squares with a 2.5” white square.
b. Use your marking pencil to draw a diagonal line across each of the color squares.
Star Tablerunner 4

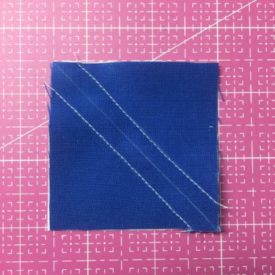
c. Sew on each side of the line, 1/4″ away from the line.

Star Tablerunner 5

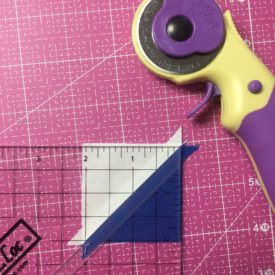
d. Using your rotary cutter, cut on the line to create two HST units. Press your seams.
e. Trim each HST to 2″ square.

Star Tablerunner 6

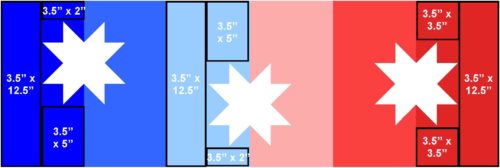
2. Piece your half stars:
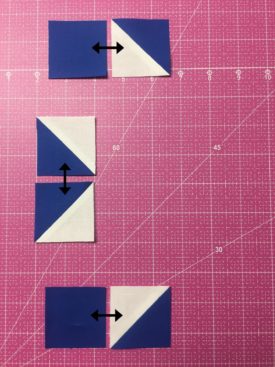
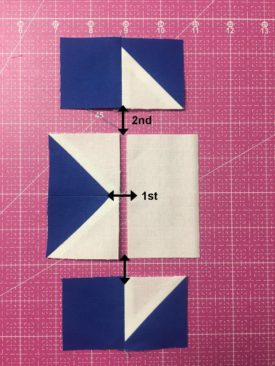
a. Following the layout in the picture, pair (2) of your dark blue HSTs with (2) of your dark blue 2″ squares. Pair the other (2) dark blue HSTs together. Sew each pair together. Press your seams.

Star Tablerunner 7
b. Finish piecing your half star by pairing a 3.5” x 2” white piece with the double HST unit and sewing together along the 3.5” side. Press your seams. Then, sew the HST/solid square units to the top and bottom of this new unit as shown.

Star Tablerunner 8
c. Repeat for each of the sections, following the layout diagram.

Star Tablerunner 9


3. Piece your sections:

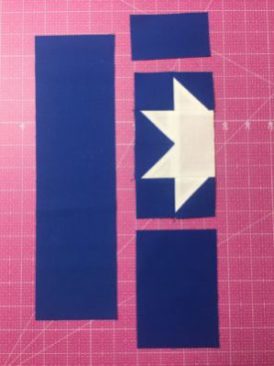
a. Finish piecing your dark blue section as shown in the picture. Sew the 3.5″ x 2″ dark blue rectangle to the top of your dark blue star unit. Then, sew the 3.5″ x 5″ rectangle to the bottom of the star unit. Press your seams.
b. Sew the 3.5” x 12.5” rectangle to the side of the star unit as shown. Press your seams.

Star Tablerunner 10
c. Repeat for each of the sections, following the layout diagram.

Ombre Star Table Runner #11
4. Piece all of your sections together in the order shown in the layout diagram. Press your seams.

Ombre Star Table Runner #12


Finishing instructions:
1. Layer your backing, batting, and top together.
2. Baste as desired.
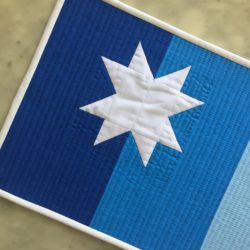
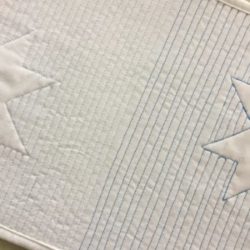
3. Quilt as desired. I chose to use matching thread to straight-line quilt each section separately. I stitched in the ditch around each star but left the actual stars unquilted so they would “pop.” Using a white-on-white print for the backing helped to show off the changing thread colors and made another ombré design on the back.

Star Tablerunner 13Star Tablerunner 12

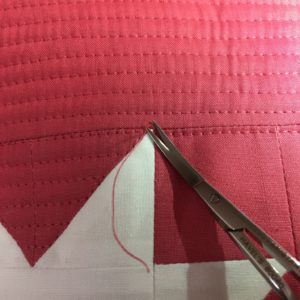
Tip: Use your embroidery scissors to snip right up next to the fabric when you’re burying threads or trimming your backstitch threads during quilting.Star Tablerunner 144. Sew your binding strips together to create one long strip. Press the strip in half lengthwise to create your binding. Attach it to the front of the quilt using 1/4″ seam. Fold the binding around to the back of the quilt and attach it as desired (by hand or machine).
5. Enjoy your new table runner!

Star Tablerunner 15Ombre Star Table Runner #17


60mm-rotary-and-cutting-mat-set_cta

Posted in 4th of July, craft, Craft to make, Crafting, Cutting Mat, Fabric, Free Craft Projects, Free Quilt Projects, Free Sewing Project, Fun Stuff, Jessica Schunke, Quilting, Uncategorized | 1 Comment

A Handy Piecing Trick!

by Emily Lang

Use this piecing trick anytime you want perfectly matching patchwork, especially when using small pieces.

What you’ll need:
Scraps, or cut squares
Lightweight fusible interfacing – such as Pellon’s Quilter’s Grid (Pellon 820)
Havel’s Ultra-pro seam ripper

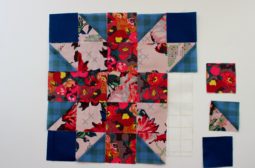
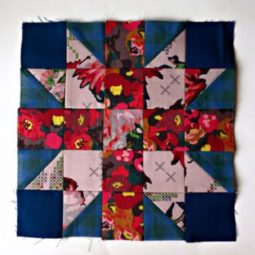
First cut 25 squares paying attention so as to cut as precisely as possible. (for this example I’m using a Rolling Star block, using squares cut at 2 1/2” x 2 1/2”. The block will finish at 10” x 10”)

Arrange the squares in five rows of five with the edges touching, but not overlapping.

Measure the width of these squares laid out. Use this measurement to cut your interfacing. I like to cut my interfacing a smidge shorter than the measurement to prevent getting fusible on my iron.

picture 1


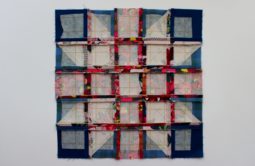
Place the fusible interfacing glue side up on your ironing board. Carefully arrange the squares, right side up, on top of the interfacing. Be sure that the edges are touching, but not overlapping.


Using a damp pressing cloth, press the blocks to the interfacing. Remove the pressing cloth when it is dry, and allow the block to cool completely before moving.

picture 2


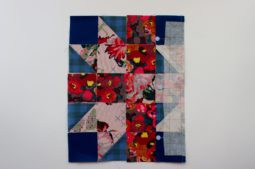
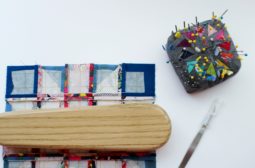
Fold over one column of squares so they are right sides together on top of the rest of the squares. Sew 1/4” away from the fold.


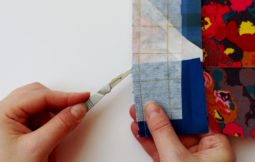
picture 3 (1)Starting at the bottom end of the seam, carefully put the point of the Ultra-pro seam ripper between the two edge squares, within the seam allowance, with the sharp edge facing the interfacing. Gently move the seam ripper blade side to side while pulling it up along the fold. It will easily slice through the interfacing on the fold.


picture 4


Press the seam open. I use a tailor’s clapper to hold the seam open after pressing. This provides very flat seams.


Once all the rows in one direction are sewn and pressed, turn the block 90 degrees and continue with the cross rows.

picture 2picture 6

Final block (1)Rotary cutter call to action

Posted in Fabric, Fabric Cutter, How to Make a Quilt, How to Quilt, Quilting, Ultra-Pro Seam Ripper, Uncategorized | Comments Off on A Handy Piecing Trick!

Great Gifts for the Grad!

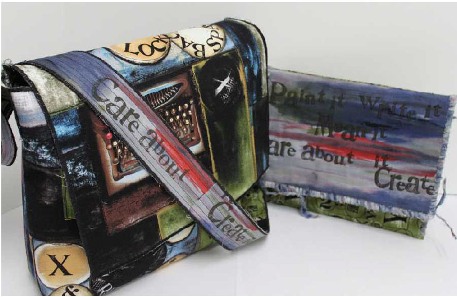
Messenger Bag & iPad Case by Liz Kettle

photo 1(a)

Looking for something more personal than a check or cash for the high school graduate in your life? Why not send them off to college next fall with a stylish messenger bag and iPad case! These projects are so simple and quick that your gift will be ready in time for spring graduation parties!

Supplies:

Multi-Purpose cloth or canvas
Fabrics of choice
Batting (optional) choose a very flat batting such as Thermore
Misty Fuse or other fusible web
Rotary cutter with traditional and skip blades
Embroidery scissors
Hand Needles: 22 or 18 chenille or tapestry or a yarn darner
Machine Needles: size 90 sharp

A note about Multi-purpose cloth: Multi-Purpose Cloth or MPC is a wonderful non-woven canvas that is perfect for bags, totes, home décor and much more. It holds its shape better than canvas and is a dream to stitch through. MPC can also be painted with any type of fabric paint and you can skip the fabric layer all together.i

iPad or Tablet Case

photo 2(a)

Using a rotary cutter, ruler and cutting mat, cut a piece of Multi Purpose Cloth 10 1/2″ x 24″. I prefer the larger 60mm rotary cutter for basic cutting because it cuts through everything so easily and it feels like I am done faster with the bigger blade.
Choose your fabrics. The case is made from just one piece of MPC so if you have a directional print like I do, you may want to cut it and piece it, to ensure the print is the proper direction when
the flap is folded over.
If you don’t have a directional print, simply cut your fabric 10 1/2″ x 24″.
If you do have a directional print, you will want to cut the main piece 10 1/2″ x 17 1/4″ and the piece that is for the front flap 10 1/2″ x 7 1/4″.
Piece the two fabrics together to create a piece that is 10 1/2″ x 24″.
Batting (optional): You may want to skip it for your first case. If you want to add a flat
batting, cut it 10 1/2″ x 24″.
Layer the MPC with a thin piece of batting and your fabric piece. Pin or fuse the layers together with Misty Fuse. I like Misty Fuse because it doesn’t add a lot of weight to the project and stiffen it, and I know the layers won’t shift while I am quilting it.

photo 3(a)

Choose some simple quilting for the surface. I stitched diagonal lines on the lower portion, and stitched around the text printed on the fabric on the flap portion. I use my indispensable 5″ double curved embroidery scissors to snip the threads between each of the layers. I don’t know how I lived without these scissors! They are perfect for snipping threads at the machine. The holes are faced up so they are really fast to pick up and the sharp points easily slide under the tightest thread snarl. Best of all, the gentle curve prevents me from accidently snipping my fabric. When I can’t find my seam ripper (a fairly common occurrence) I even use these to easily un-sew.

photo 4(a)

If you desire, you can also fuse a layer of fabric on the inside of the flap,
but it is perfectly fine to leave the MPC bare on the inside of the case.
If you do decide to line the flap with fabric, cut fabric and Misty Fuse 10 1/2″ x 9″.
Do not add batting to this layer. Double check to make sure you are fusing on to the back of the flap.
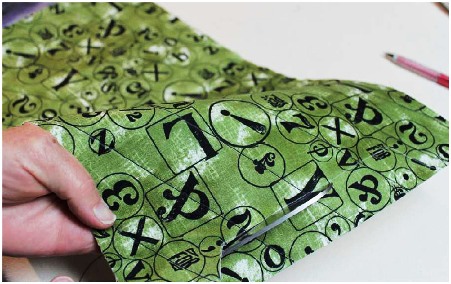
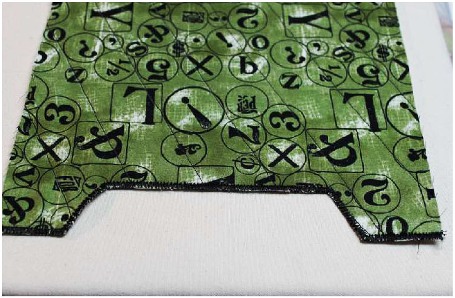
If you would like to create a small cut-out in the front panel of the case to make it easier to slip things in and out, do so now. I made a template to make the process easier because I make a lot of these bags. Cut a piece of card stock 10 1/2″ x 3″. Draw a line 1 1/2″ from one edge. Mark in from each edge 1 1/2″ and draw a 30 degree angle to join the lines. Cut out the resulting piece from your template. This is only a guideline you can make your cut out, any size you like, or even curved!

photo 5(a)

photo 6(a)

Mark the opening with a chalk pencil and then cut out with shears.
The micro serrated Havel’s shears help to cut nice sharp turns because
they hold on to the fabric while you turn it.

photo 7(a)

To finish this edge use a zigzag stitch.

photo 8(a)

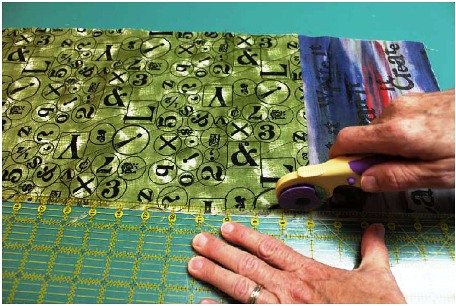
Load the skip cutting blade into your rotary cutter. Cut along the length of the fabric 1/4″ from each long edge and the front edge. The skip blade will make tiny slits along the edge but not cut off the fabric. Press hard to ensure you go through all layers of fabric. You can not re-cut if you don’t go through all layers. For this reason I suggest that you practice on a scrap of MPC layered with batting and fabric to get the feel of how hard you have to press to go through all the layers.
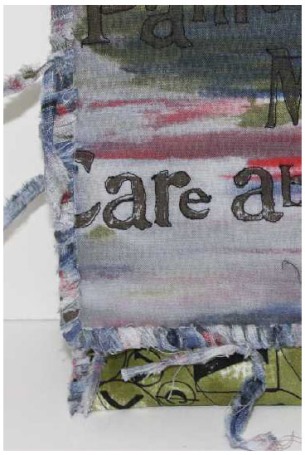
Next we will lace up the sides of the case. I used ripped strips of fabric for my case but I have also used ribbon, rayon seam tape and thick yarn. The ribbon and seam tape give the most polished look and the ripped fabric the most casual look. Ripped fabric strips, ribbon or seam tape should be between 3/8″ and 1/2″.

photo 9(a)

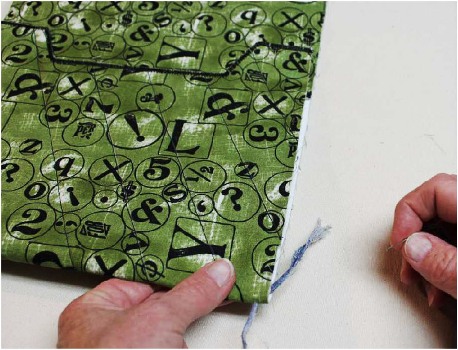
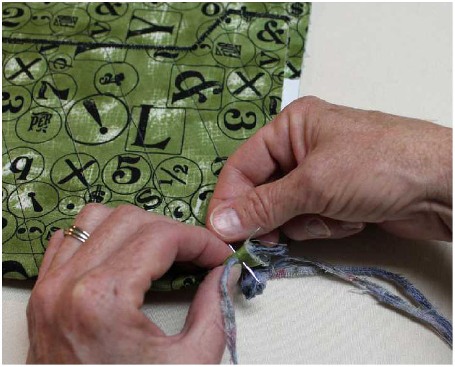
Fold the bottom half of the case up 8 1/2″. Thread your ribbon or fabric strips onto your large needle. Begin at the very bottom of the case and insert your needle from the inside of the case to bring it out the lowest slit created by the skip blade. Leave a tail, you will tuck this inside as you stitch to
encase it in the seam.

photo 10(a)

Use a simple whip stitch all the way up the side of the case, around the flap edge and down the other side. Simply thread the needle through the slits along the edge. This photo shows me stitching top to bottom but you may find bottom to top easier. When you need to add another strip of fabric simply tie the two pieces in a knot and continue stitching. If you like a neater edge you can work the tails into the seam with the large eye needle or a bodkin.

photo 11(a)

Messenger Bag

Cut a piece of Multi Purpose Cloth 15″ wide by 37″ long.
Cut a piece of Multi Purpose Cloth 2″ wide by 48″ long for the strap.
Cut Misty Fuse to cover both sides of the MPC main piece and the strap.
I did not use batting in this piece because of the bulk it would add to the side seams.

photo 12(a)

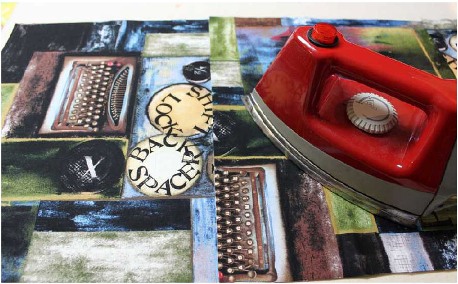
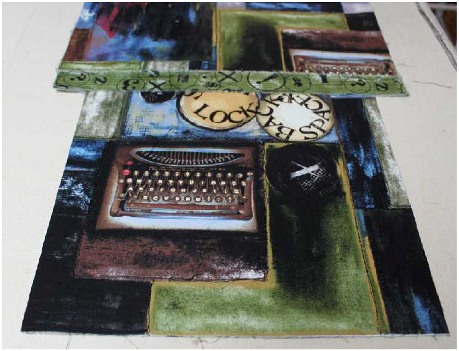
With this larger piece it is easier to pre-fuse the Misty Fuse to the MPC before fusing down the fabric. Place the Misty Fuse on the bag fabric, cover with a Teflon pressing sheet and heat with an iron. This is especially helpful if you have a directional print as I did. Once again the bag is made from one piece of MPC so I cut the fabrics into three pieces to keep the text oriented correctly.
If your print is not directional, cut your fabric 15″ wide by 37″ long.
If your print is directional, cut three pieces:
The flap will be 15″ wide by 10 1/2″ long.
The two remaining pieces will be 15″ wide by 13″ long

photo 13(a)

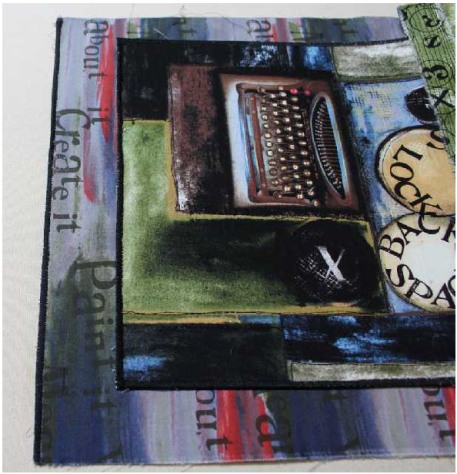
Place the fabrics on the pre-fused Multi-Purpose Cloth and fuse with a hot iron.

photo 14(a)

In this photo you can see the placement of the directional prints.

photo 15(a)

Quilt the piece by stitching as desired. I simply outlined some of the images
using an organic free motion stitch.

photo 16(a)

If desired, use Misty Fuse to fuse fabrics to the back of the Multi-Purpose Cloth.
You can cover the entire back (lining of the bag) or just the flap area.

photo 17(a)

Trim the front flap by cutting a 10 1/4″ x 1 1/2″ strip off of both sides of the flap section.

photo 18(a)

photo 19(a)

Finish the flap edges and the other edge with a satin stitch.

photo 20(a)

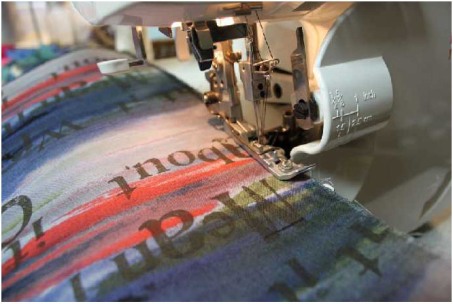
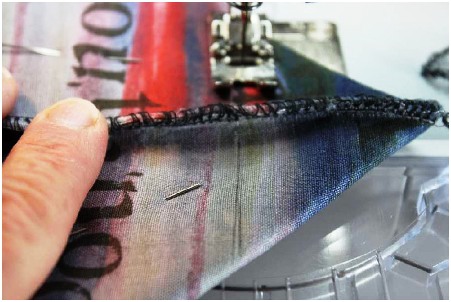
With right sides facing, fold the bottom half of the bag up 13″. The end of the bag should be right at the edge of the flap cut outs. Pin the edges. Stitch a 1/4″ seam along each edge. I used a serger for a strong seam. If you don’t have a serger simply stitch a straight stitch and then finish the
inside edge with a zigzag stitch.

photo 21(a)

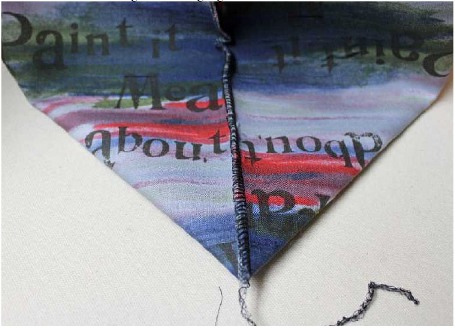
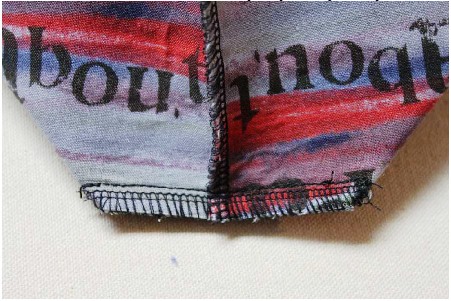
To create the bottom base of the bag fold the bag as shown
with the seam in the middle of the triangle.

photo 22(a)

Mark a stitch line 1 3/4″ from the point of the triangle.

photo 23(a)

Stitch across this line. Then trim off the remaining triangle leaving a 1/4″ edge.

photo 24(a)

Serge the edge or zigzag stitch. Turn your bag right side out and set aside.

photo 25(a)

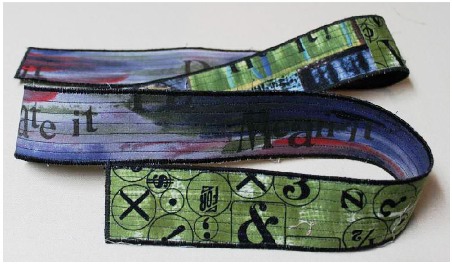
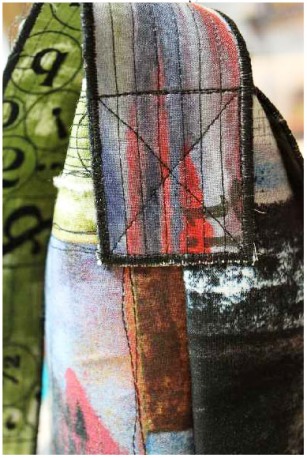
To make the strap, fuse fabric to both sides of the Multi-Purpose Cloth. Stitch along the length in straight lines or as desired. Finish the edges with a satin stitch.

photo 26(a)

Center the strap on the side of the bag 2″ from the top edge of the bag.
Stitch around the edges and across the center as shown.
You can find Multi Purpose Cloth, and Havel’s scissors
and skip blades at these on-line stores:
www.ArtisticArtifacts.com
www.BlueTwigStudio.com

Fabrics used in this project are available at Artistic Artifacts.

60mm rotary and liz kettle memory book_cta_400x282


Liz Kettle

Liz Kettle is a mixed media and textile artist living in Colorado. She is co-author of two books, Fabric Embellishing: The Basics and Beyond, and Threads: The Basics and Beyond. Liz loves teaching and sharing the joy of making the things in her articles, classes and at her fabulous retreat, Textile Evolution. Visit her blog and website, www.TextileEvolution.com
For a printable PDF version of Liz’s Messenger Bag and IPad Case, click here.

Posted in craft, Craft to make, Crafting, Embroidery Scissors, Fabric, Fabric Cutter, Fabric Rotary Cutters, Fabric Scissors, Free Craft Projects, Free Sewing Project, Fun Stuff, How To, Liz Kettle, School, Seasonal, Uncategorized | Comments Off on Great Gifts for the Grad!

A Fun Project For National Serger Month!

I used Havel’s 5-1/2″ curved scissors as the pattern for my appliqué design. By tracing the actual scissors, I can easily identify what’s in the pocket. There are several techniques presented here, some may be new to you or a variation of something you do. This is an interesting and quick little project and the result is sweet.
Fabrics used are 100% cotton. This project uses small amounts of fabric, so instead of telling you yardage amounts, I’ll cut to the chase and give you the cut requirements. I used gorgeous batiks for mine; I think this project will work with vintage prints, hand dyes and novelty prints. The lining fabric is cotton sateen. The finished size is 4 ½ x 7 ½ inches.
Fusible web is used in this project. Choose your favorite (I use a lightweight paper backed fusible web.) Press according to the manufacturer’s directions. 1 yard is more than sufficient for this project. I like to have extra in case I make mistakes.
I use Havel’s Rotary cutter to cut my strips, rectangles and the triangles in this design. This big rotary cutter saves time and its large handle is easy to hold while working.
Cut:
Front piece, back piece and two lining pieces- 5”x 8”
Two 1 1/8” wide x 6” long strips of contrasting fabric for the top of pocket
1 1/8” wide strips from two contrasting fabrics for neck strap (mine is 34” long)
Cut two pieces of fusible web 5”x8”. Fuse to the wrong side of front and back pieces. Fuse the lining to the wrong side of the front and the back pieces.
Appliqué:
There are six fused appliqué pieces in this design. Trace the shapes onto fusible web. Press the shapes to desired fabrics. Cut and fuse them to the front of the pocket according to the drawing.
I use Havel’s 5 ½ inch curved scissors to cut my appliqué shapes. The scissors are very sharp. The curve and point on these scissors help me to get a clean cut in intricate shapes. They are also easy to handle while cutting because they are a perfect size.
Free-Motion Stitching:
I used a free-motion stitch technique to stitch the appliqué pieces to the front of the pocket and to add details. I used three different cotton multi-color threads (Star threads from my own design collection).
If you don’t want to free-motion stitch, you can use a very tiny zigzag or buttonhole stitch on your sewing machine. Other options are to use textile paints along the edges or don’t finish them at all and let the fusible web do its job.
Assemble the Pocket:
Place the front and back pieces of pocket, wrong sides together. Trim the front and back together according to the drawing. I use Havel’s big rotary cutter for this process. You may draw the lines and use big sharp shears instead.
Cut two strips of fusible web 1”x 6”. Fuse to the top contrasting strips. This is the green fabric strip at the top of the pocket. * Fold the strip lengthwise over the top of the front of the pocket. Trim the strip along the width if necessary to the design. Press to fuse the strip over the top pocket edge…pressing and fusing the strip to itself at the ends. Trim the ends to the size of the pocket. Repeat from * for the back piece.
Use an edge stitch to sew the pocket pieces together. You can use a serger for this. I used an overcast stitch with a special edge foot. Use a decorative thread in a contrasting color for a pretty finish.
Neck Strap:
You must determine the length of your strap. Fuse strips of two contrasting fabrics together. This creates a double sided fabric strap which has body and strength. I use Havel’s Pinking Shears to cut a lovely decorative edge as I trim the strap to about ½ inch width.
Use a wide bar tack stitch on your sewing machine to attach the strap.
Double fuse Tag:
Fuse a small rectangle of fusible web to the back of a yellow fabric. Pull the paper off, fold the rectangle to form a square with wrong sides together, then press to fuse.. Trim to the desired size. Write the scissor identification, “5 ½” or your initials with a permanent pen. Use good fabric glue to glue in place according to the drawing.
Enjoy this scissor pocket and make one for your sister! (I did)
Stitch On!
Terry White

Instructions for Artistic Scissors Pocket

by Terry White

Artistic Scissors Pocket

Artistic Scissors Pocket

I used Havel’s 5 ½ inch curved scissors as he pattern for my appliqué design. By tracing the actual scissors, I can easily identify what’s in the pocket. There are several techniques presented here, some may be new to you or a variation of something you do. This is an interesting and quick little project and the result is sweet.

Fabrics used are 100% cotton. This project uses small amounts of fabric, so instead of telling you yardage amounts, I’ll cut to the chase and give you the cut requirements. I used gorgeous batiks for mine; I think this project will work with vintage prints, hand dyes and novelty prints. The lining fabric is cotton sateen. The finished size is 4 ½ x 7 ½ inches.

Fusible web is used in this project. Choose your favorite (I use a lightweight paper backed fusible web.) Press according to the manufacturer’s directions. 1 yard is more than sufficient for this project. I like to have extra in case I make mistakes.

I use Havel’s Rotary cutter to cut my strips, rectangles and the triangles in this design. This big rotary cutter saves time and its large handle is easy to hold while working.

Cut:

Front piece, back piece and two lining pieces- 5”x 8”

Two 1 1/8” wide x 6” long strips of contrasting fabric for the top of pocket

1 1/8” wide strips from two contrasting fabrics for neck strap (mine is 34” long)

Cut two pieces of fusible web 5”x8”. Fuse to the wrong side of front and back pieces. Fuse the lining to the wrong side of the front and the back pieces.

Appliqué:

Using Free Motion Stitching

Using Free Motion Stitching

There are six fused appliqué pieces in this design. Trace the shapes onto fusible web. Press the shapes to desired fabrics. Cut and fuse them to the front of the pocket according to the drawing.

I use Havel’s 5 ½ inch curved scissors to cut my appliqué shapes. The scissors are very sharp. The curve and point on these scissors help me to get a clean cut in intricate shapes. They are also easy to handle while cutting because they are a perfect size.

Free-Motion Stitching:

I used a free-motion stitch technique to stitch the appliqué pieces to the front of the pocket and to add details. I used three different cotton multi-color threads (Star threads from my own design collection).

If you don’t want to free-motion stitch, you can use a very tiny zigzag or buttonhole stitch on your sewing machine. Other options are to use textile paints along the edges or don’t finish them at all and let the fusible web do its job.

Assemble the Pocket:

Place the front and back pieces of pocket, wrong sides together. Trim the front and back together according to the drawing. I use Havel’s big rotary cutter for this process. You may draw the lines and use big sharp shears

Assembling the Pocket and Neck Strap

Assembling the Pocket and Neck Strap

instead.

Cut two strips of fusible web 1”x 6”. Fuse to the top contrasting strips. This is the green fabric strip at the top of the pocket. * Fold the strip lengthwise over the top of the front of the pocket. Trim the strip along the width if necessary to the design. Press to fuse the strip over the top pocket edge…pressing and fusing the strip to itself at the ends. Trim the ends to the size of the pocket. Repeat from * for the back piece.

Use an edge stitch to sew the pocket pieces together. You can use a serger for this. I used an overcast stitch with a special edge foot. Use a decorative thread in a contrasting color for a pretty finish.

Neck Strap:

You must determine the length of your strap. Fuse strips of two contrasting fabrics together. This creates a double sided fabric strap which has body and strength. I use Havel’s Pinking Shears to cut a lovely decorative edge as I trim the strap to about ½ inch width.

Use a wide bar tack stitch on your sewing machine to attach the strap.

30140_terry-white-cta

Posted in art ideas, craft, Craft to make, Crafting, Fabric, Fabric Cutter, Fabric Rotary Cutters, Fabric Scissors, Free Craft Projects, Free Sewing Project, Fun Stuff, Sewing Supplies, Terry White, Uncategorized | Comments Off on A Fun Project For National Serger Month!