
by Jessica Schunke of A Blue Sky Kind of Life [http://ablueskykindoflife.blogspot.com]
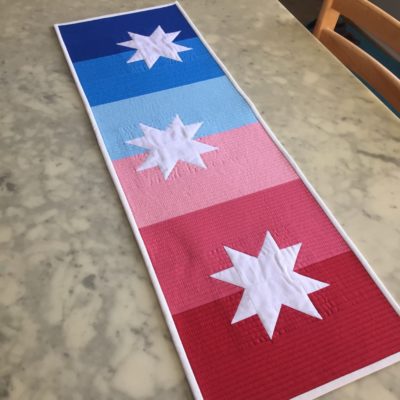
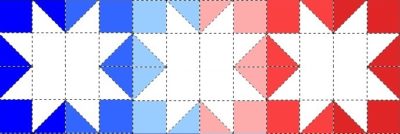
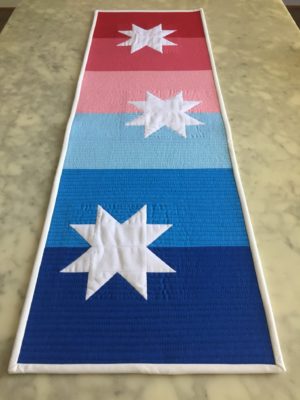
I don’t often make decorations for many holidays other than Christmas, but this spring, I was really itching to add a little color to my dining room table. This Ombré Star Table Runner is perfect for your Memorial Day celebrations, but you can also easily change up the colors for any number of looks. Try an array of springy pastels for Easter; shades of gold, red, and orange for fall; an ombré of hues of a single color; or maybe even a rainbow.
Supplies:
Solid fabrics in 7 colors (three blue shades and three red shades for the background, plus a white for the stars): 1/8 yd. each
Backing fabric (I used a white-on-white print): ½ yd.
Binding fabric: ¼ yd.
Batting: Scrap piece measuring 14.5” x 38”
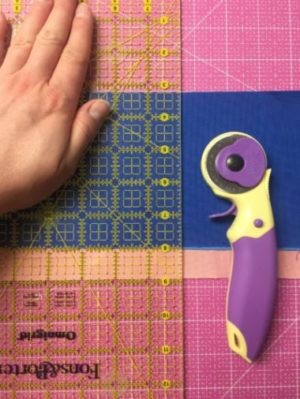
Rotary cutter [http://www.havelssewing.com/rotary-comfort-cutter-cushion-handle-32045.html]
Cutting mat [http://www.havelssewing.com/large-cutting-mat-self-healing-2-sided-32124.html]
Embroidery scissors or snips [http://www.havelssewing.com/embroidery-scissors-3-5inch-double-curved-60040.html]
Matching thread
Marking pencil
Cutting instructions:
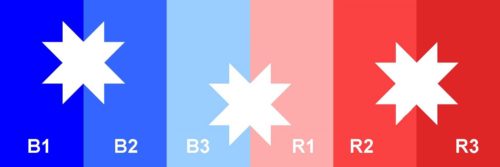
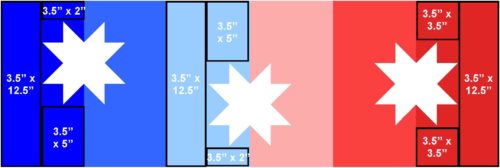
–From each of the dark blue (B1), medium blue (B2), light blue (B3), and light red (R1) solids, cut the following:
–(1) 2″ x 3.5″
–(2) 2″ squares
–(2) 2.5″ squares
–(1) 3.5″ x 12.5″ squares
–(1) 3.5″ x 5″
–From the medium red (R2) and dark red (R3) solids, cut the following:
–(2) 2” squares
–(2) 2.5” squares
–(1) 3.5” x 12.5”
–(2) 3.5” x 3.5”
–From the white solid, cut the following:
–(12) 2.5” squares
–(6) 3.5” x 2”
–From the backing fabric, cut (1) 16.5” x 40” rectangle.
–From the binding fabric, cut (3) 2.25” x width-of-fabric strips.
Tip: Save time cutting by stacking your 1/8 yd. strips and cutting the pieces for each set all at once.
Piecing instructions:
Seam allowance is ¼” throughout.
1. Make your half-square triangles (HSTs):
a. Pair each of your 2.5” color squares with a 2.5” white square.
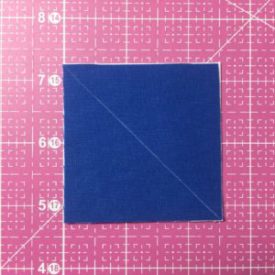
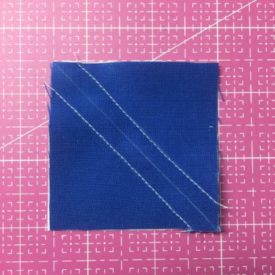
b. Use your marking pencil to draw a diagonal line across each of the color squares.
c. Sew on each side of the line, 1/4″ away from the line.
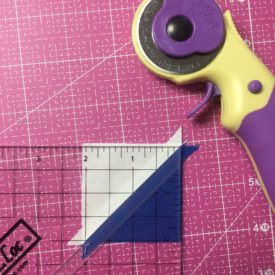
d. Using your rotary cutter, cut on the line to create two HST units. Press your seams.
e. Trim each HST to 2″ square.
2. Piece your half stars:
a. Following the layout in the picture, pair (2) of your dark blue HSTs with (2) of your dark blue 2″ squares. Pair the other (2) dark blue HSTs together. Sew each pair together. Press your seams.
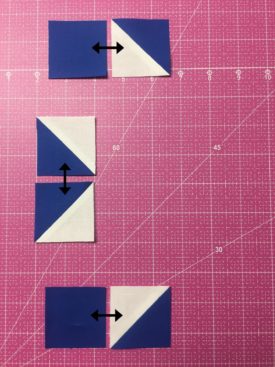
b. Finish piecing your half star by pairing a 3.5” x 2” white piece with the double HST unit and sewing together along the 3.5” side. Press your seams. Then, sew the HST/solid square units to the top and bottom of this new unit as shown.
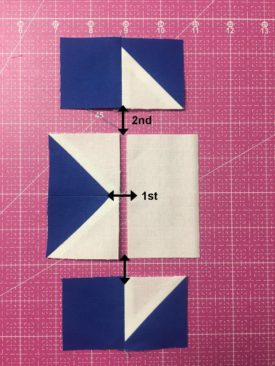
c. Repeat for each of the sections, following the layout diagram.
3. Piece your sections:
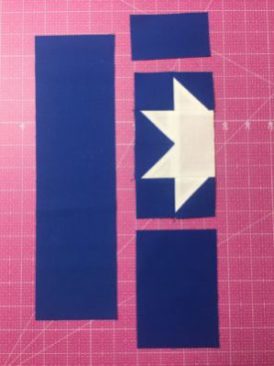
a. Finish piecing your dark blue section as shown in the picture. Sew the 3.5″ x 2″ dark blue rectangle to the top of your dark blue star unit. Then, sew the 3.5″ x 5″ rectangle to the bottom of the star unit. Press your seams.
b. Sew the 3.5” x 12.5” rectangle to the side of the star unit as shown. Press your seams.
c. Repeat for each of the sections, following the layout diagram.
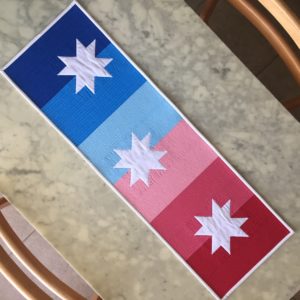
4. Piece all of your sections together in the order shown in the layout diagram. Press your seams.

Finishing instructions:
1. Layer your backing, batting, and top together.
2. Baste as desired.
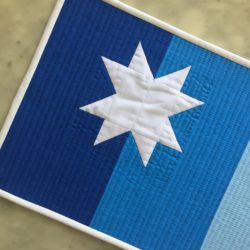
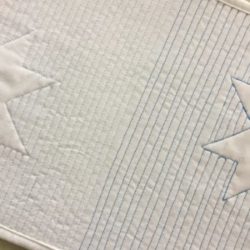
3. Quilt as desired. I chose to use matching thread to straight-line quilt each section separately. I stitched in the ditch around each star but left the actual stars unquilted so they would “pop.” Using a white-on-white print for the backing helped to show off the changing thread colors and made another ombré design on the back.
Tip: Use your embroidery scissors to snip right up next to the fabric when you’re burying threads or trimming your backstitch threads during quilting.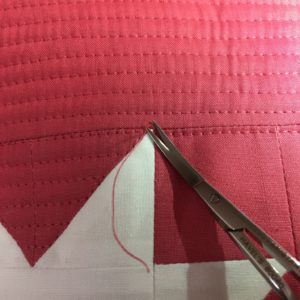
4. Sew your binding strips together to create one long strip. Press the strip in half lengthwise to create your binding. Attach it to the front of the quilt using 1/4″ seam. Fold the binding around to the back of the quilt and attach it as desired (by hand or machine).
5. Enjoy your new table runner!

One Response to A Fun Memorial Day Table Runner Project!