Charming Geese Comfy Pillow

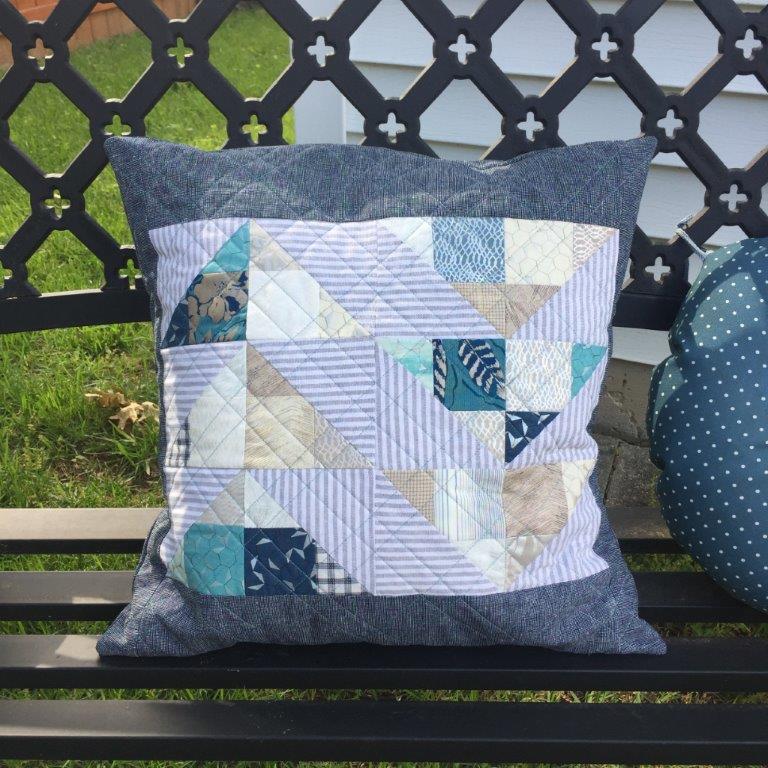
Charming Geese Pillow Tutorial
by Jessica Schunke of A Blue Sky Kind of Life

Do you, like me, have a million mini charm packs lying around, just waiting for the chance to be put into service? Sometimes they just seem too cute to pop open, but let’s face it, they’re not doing anyone any good just sitting in a bin. So let’s put them to use, shall we? This fun flying geese pillow uses about half of a standard mini charm pack, but you can easily expand on this idea to transform it into a wall hanging, table runner, baby quilt, or even larger project if you’re really trying to make a dent in your stash. Don’t have any mini charm packs? No worries; this pattern is super scrap friendly.

Here’s what you need to make an 18″ pillow:
(1) 24 – 2.5″ squares in a variety of fabrics (pull from a mini charm pack or cut from your stash or scraps)
(2) 1/4 yd. or FQ secondary fabric (for outside part of flying geese and binding on pillow back); sub-cut the following:
• 6 – 4.5″ squares
• 2 – 2.25″ x 18″
(3) 1/2 yd. border and backing fabric; sub-cut the following:
• 2 – 3.75″ x 15″
• 2 – 2″ x 18″
• 2 – 12″ x 18″
(4) 20″ square of batting
(5) Pillow form (I like to use the 20″ Ikea Inner pillow forms; they’re inexpensive and squish down nicely into the 18″ pillow cover)
(6) Standard sewing supplies: Havel’s rotary cutter and cutting mat, coordinating thread, ruler, marking pen

This tutorial uses a 1/4″ seam allowance throughout.

Note: If you want to add on additional geese, you will need 4 – 2.5″ squares (mini charms) and 1 – 4.5″ square of secondary fabric for each finished goose. Adjust your borders as needed to reach your desired finished size.

Instructions:
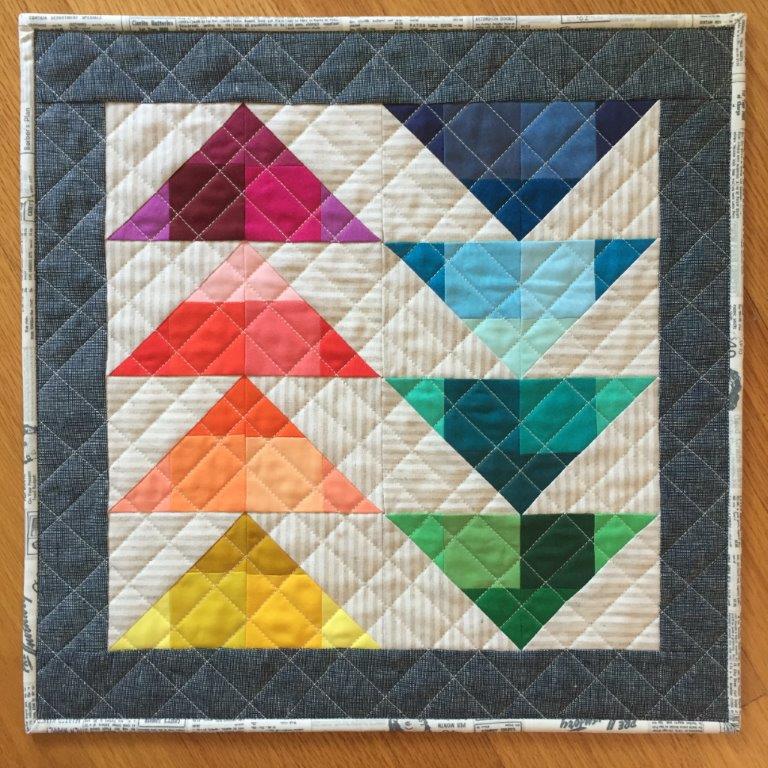
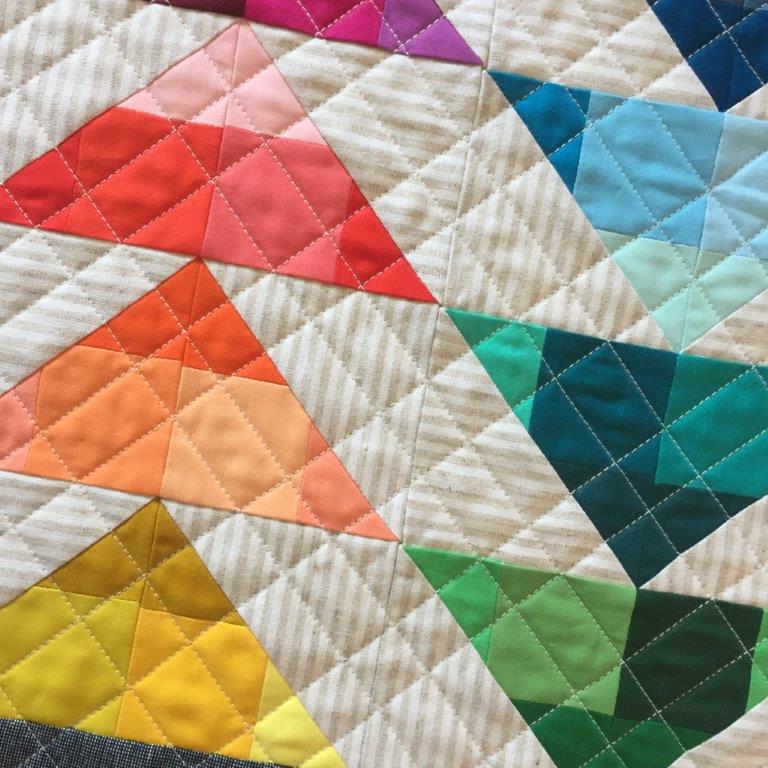
(1) Group your mini charms into sets of four. Sew each set into a four-patch block.

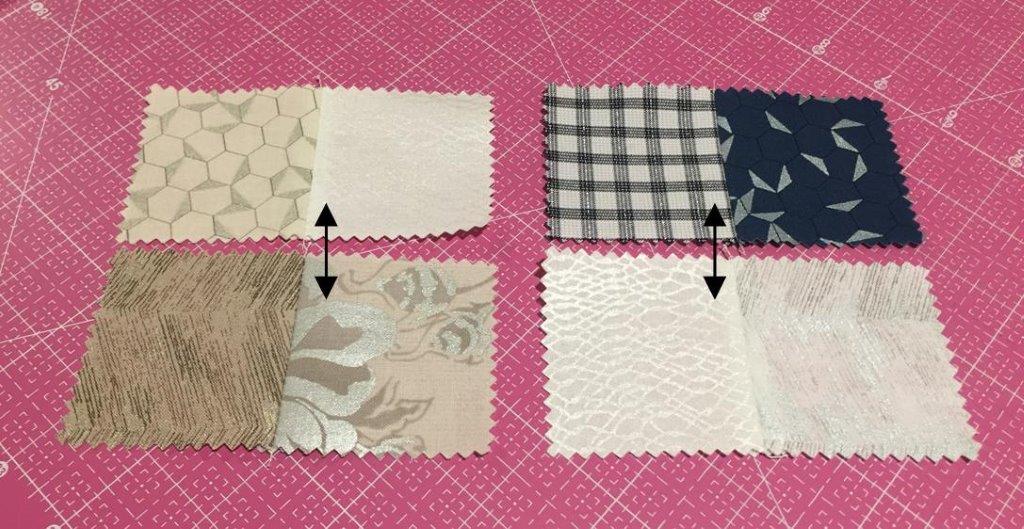
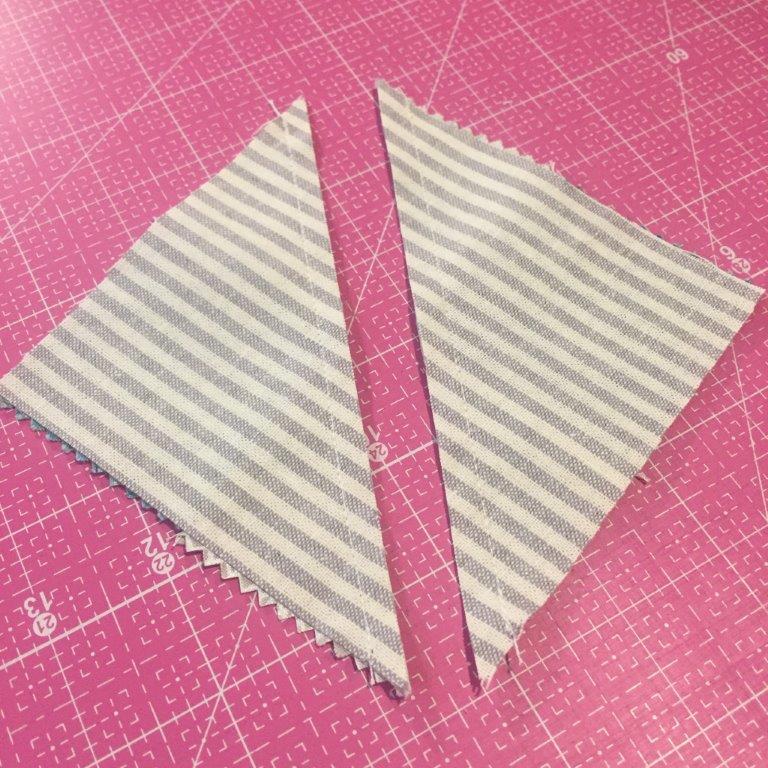
(2) Draw a line diagonally on the wrong side of each square of secondary fabric. Pair each four-patch block with a 4.5″ square of secondary fabric and place right sides together. Sew 1/4″ away from the line on each side. (Note: In the second picture, my marked line has disappeared, but you can see the sewn lines are 1/4″ to each side of the square’s diagonal.)


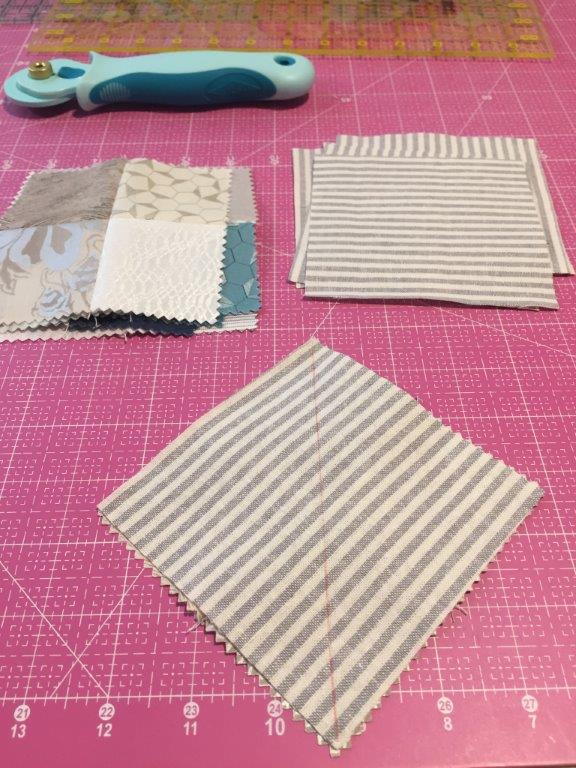
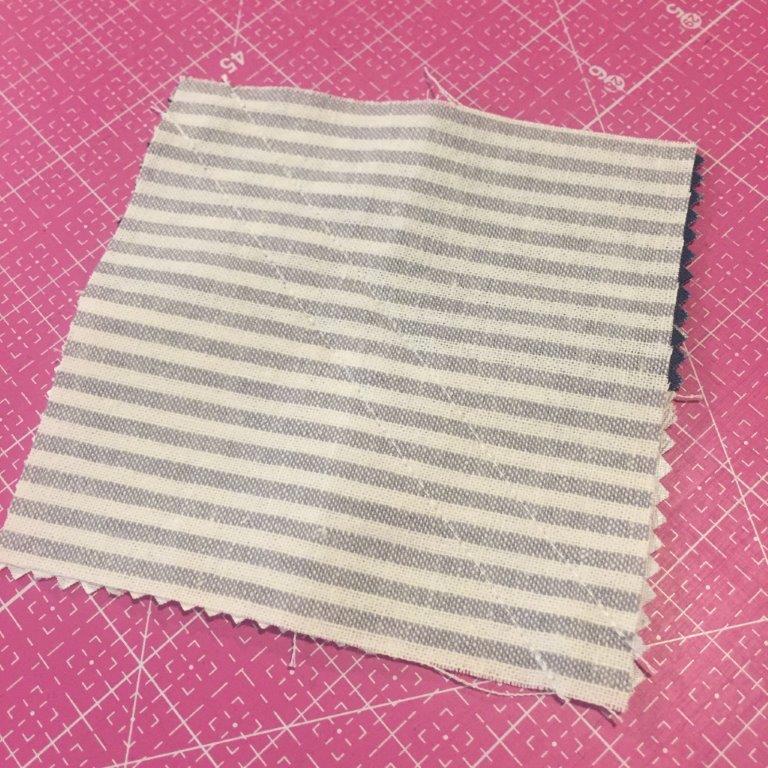
(3) Using your rotary cutter, cut each set along the marked line. Press seams open.

(4) Match up the new half-square triangle units in sets of two as shown. I chose to mix up my blocks for a scrappy look.

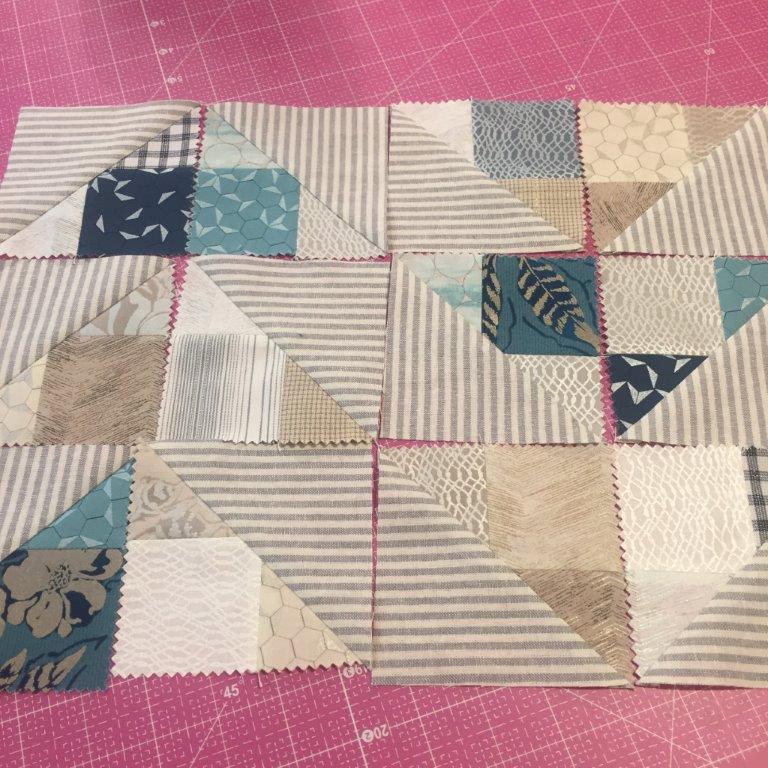
(5) Sew sets of two half-square triangle units together to form flying geese. Press seams open.

(6) Sew flying geese together into two columns and then sew the columns together. Make sure your geese are facing the direction you want (I made my columns go in opposite directions). Press seams open.

(7) Attach the two 3.75″ x 15″ border strips to the top and bottom of the geese unit. Press seams toward border strips.

(8) Attach the two 2″ x 18″ border strips to the sides of the geese unit. Press seams toward border strips.

(9) Center pillow top on top of batting and baste using your preferred method. Quilt as desired. Square up your pillow top to 18″ (don’t worry if it’s a bit smaller). Set aside.

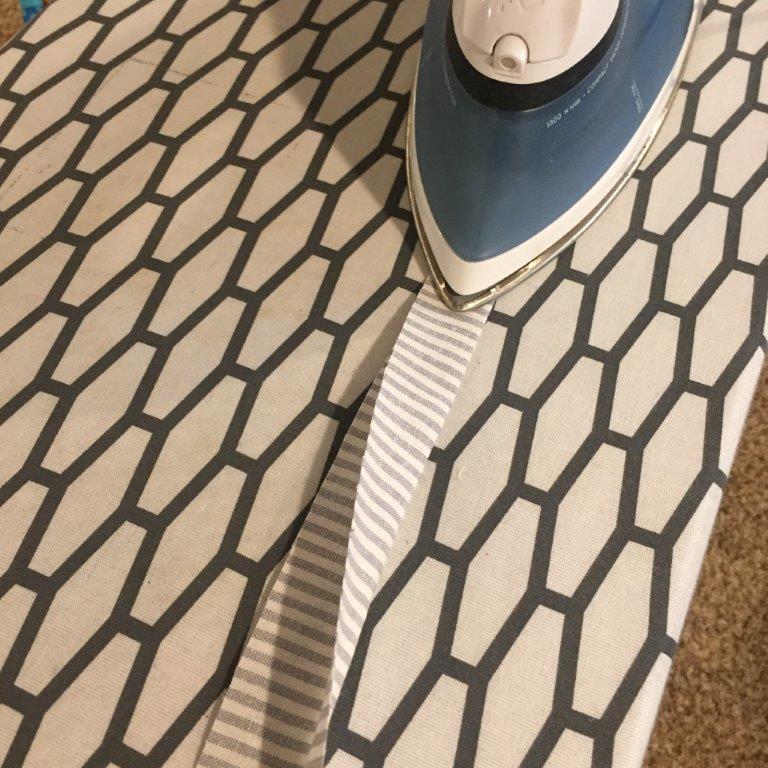
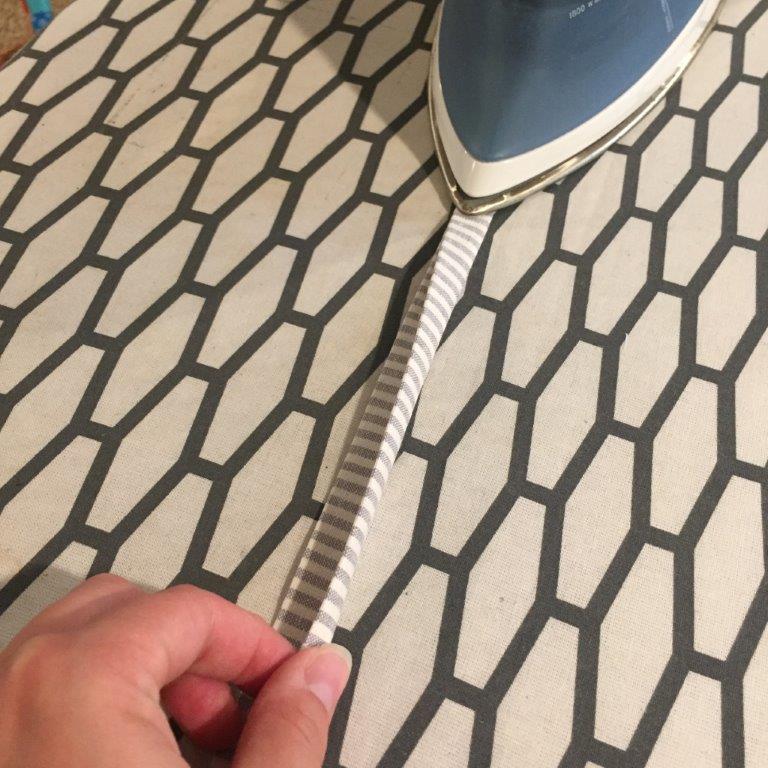
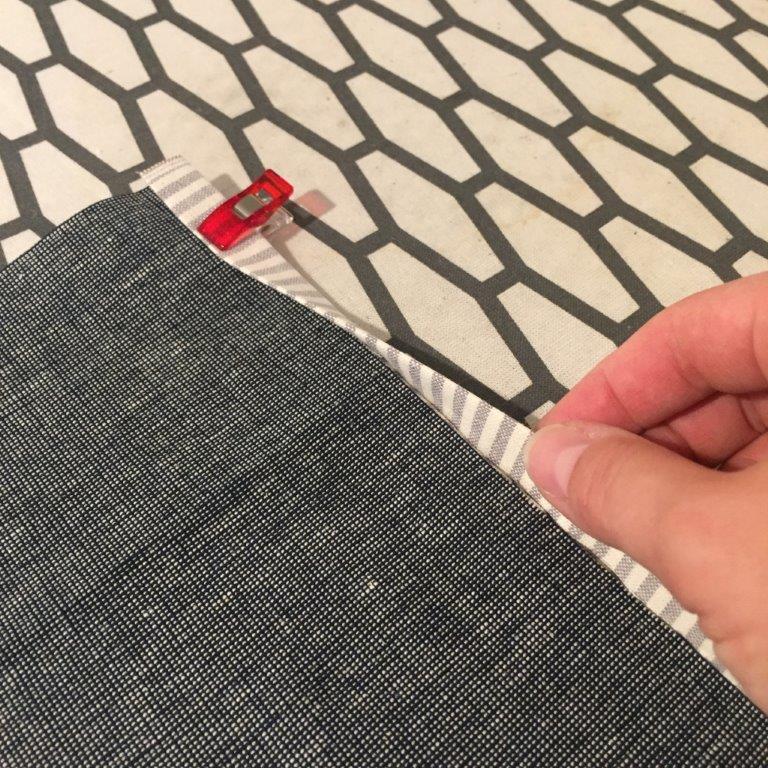
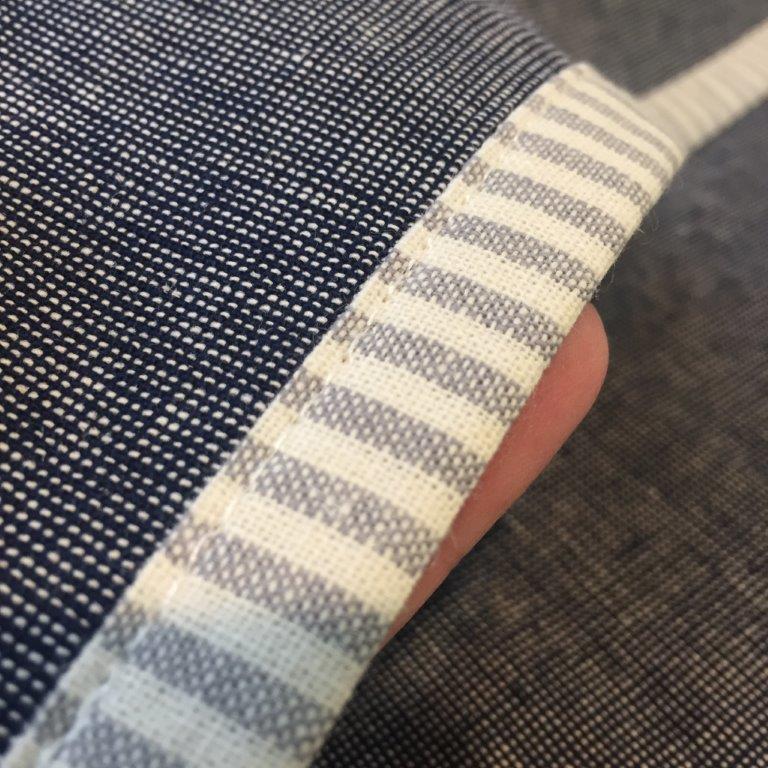
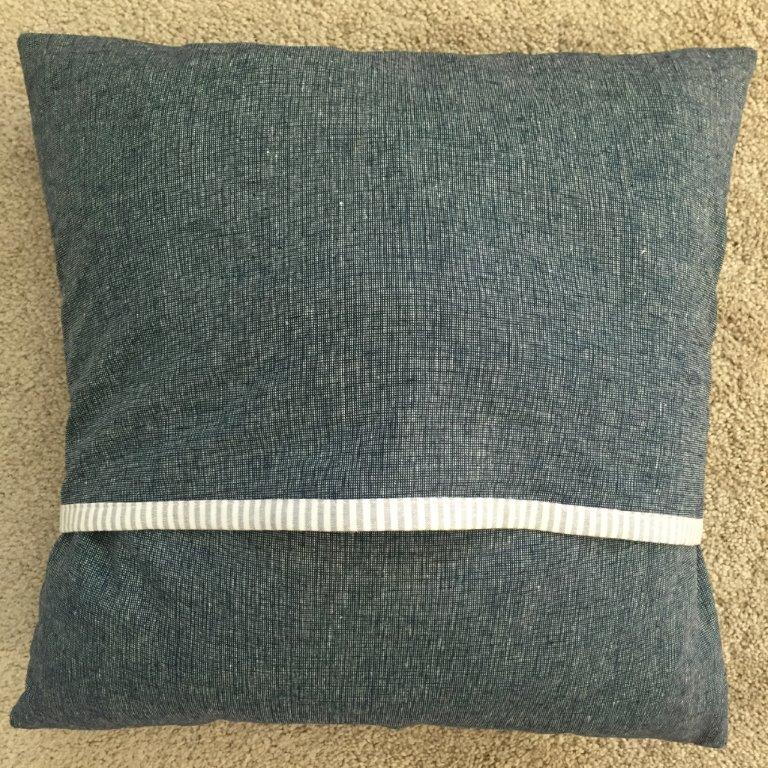
(10) To make the binding strips for the pillow back, press the two 2.25″ x 18″ binding strips in half lengthwise. Open the strips and press each side in toward the middle crease, then press the strip in half again.

(11) Sandwich each backing piece inside one of the binding strips. Clip or pin in place. Topstitch binding 1/8″ from the edge.

(12) Layer your pillow sandwich in the following order: (1) quilted pillow top right side up; (2) top of pillow backing, right side down (the raw edge should be at the top, aligned with the top raw edge of the pillow top; the bound side should be at the bottom); and (3) bottom of pillow backing, right side down (the raw edge should be at the bottom, aligned with the bottom raw edge of the pillow top; the bound side should be at the top). The two parts of the pillow backing will partially overlap. Clip or pin in place.

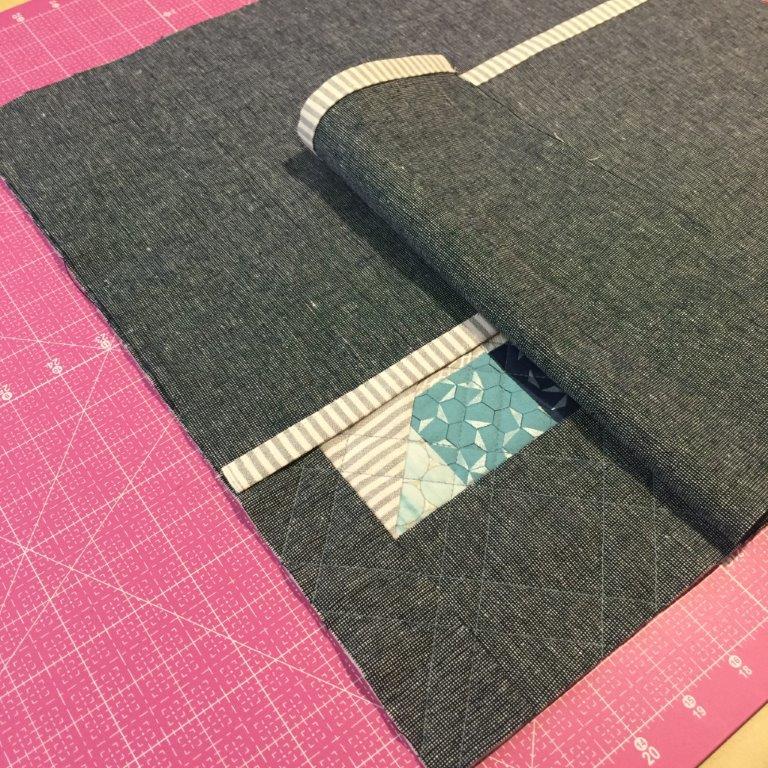
(13) Sew all around the outside edge with a 1/4″ seam allowance.

(14) Turn the pillow top inside out, push out the corners, and insert the pillow form. Enjoy your pillow!

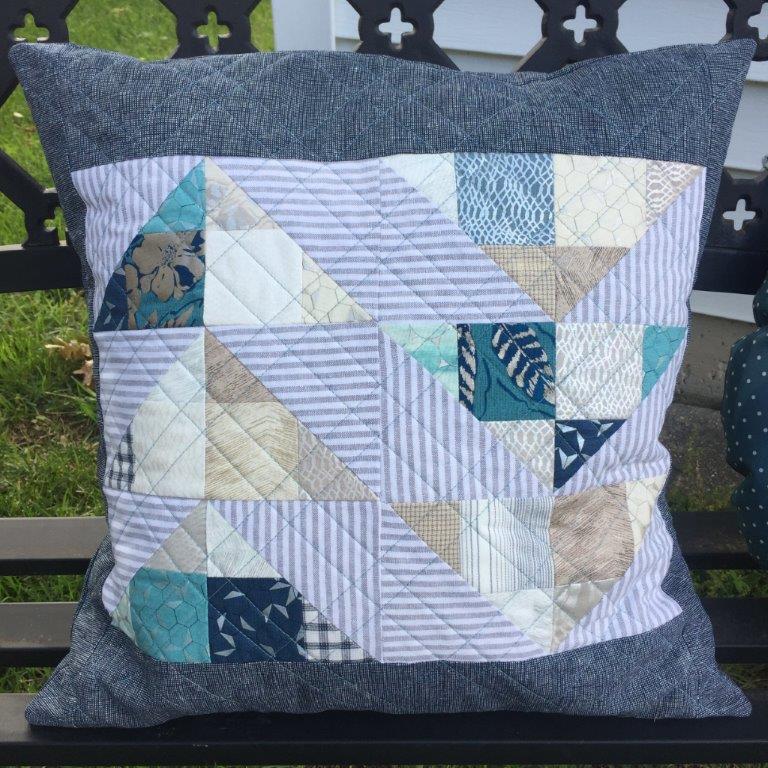
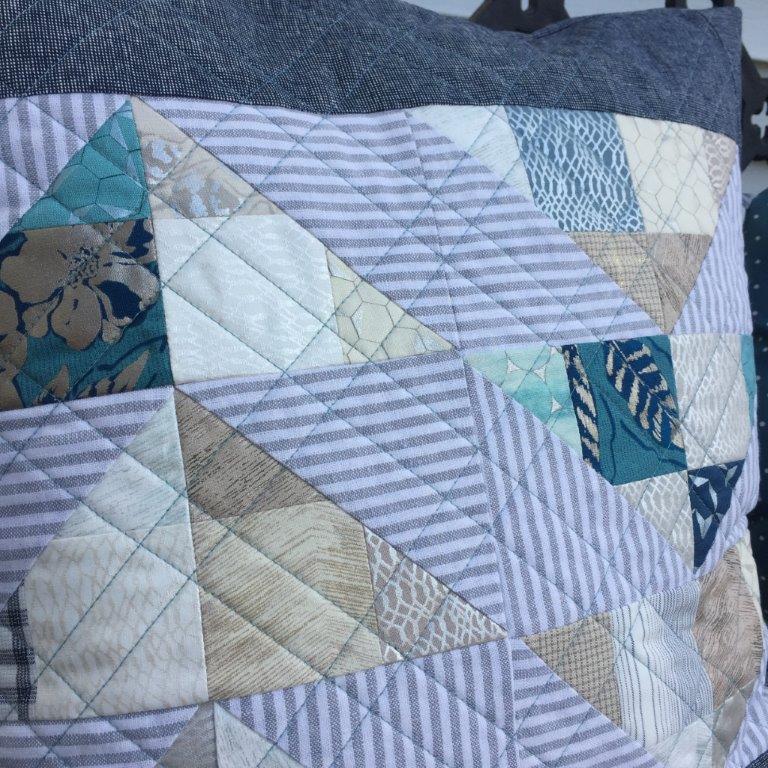
Here’s another example of a wall hanging I made using eight geese. Once you’ve made the additional geese, just adjust the size of your borders to reach your desired size. The possibilities are endless, so pop open those mini charm packs and get to work!

[Bio: Hi! I’m Jessica, a sewing, baking, editing, mommying Texan transplanted to the Midwest. I’m a proud Havel’s brand ambassador and the president of the St. Louis Modern Quilt Guild. I’m most active on Instagram, where you can find me as @blueskycrafter.]

Posted in Uncategorized | Comments Off on Charming Geese Comfy Pillow

Belle Brunner – Our Newest Sewing Ambassador!


Belle Brunner – Our Newest Sewing Ambassador
by Luv2Sew

Havel’s is excited to introduce our newest ambassador, Belle Brunner. Belle is living proof that it’s never too late to start quilting. In just a couple of years and with some informational videos, she is now creating beautiful things. We’ll let Belle tell you more in her own words. Welcome to the team!


I’m a wife to a loving and supportive husband and bonus Mom of a sweet, resilient 10 year old, who also enjoys creating. Although I am an Arkansas native, we currently live in southwest Missouri with our two furbabies, Jax and Tripp. I also own a part time business providing professional development, leadership, strategic planning, vicarious resiliency and self-discovery training for teams and individuals. I am starting to expand some of these trainings into the quilting industry. Prior to this, my career was as a regional trainer, working with leaders and teams within a 16 state region. I am an encourager, includer and supporter of others. My two leading values in life are understanding and compassion. Lastly, you should know I use the word ‘ya’ll’ a lot. It’s in my blood, due to being raised in the rural South.

(The future site of Belle’s AIRBNB quilting retreat homes!)

You will also often find me on the hunt for vintage and antique quilty goodies at local thrift stores, flea markets and yard sales. I love walking, flowers, being in nature and visiting my sweet Dad back ‘home’ in the Ouachita National Forest. It’s a little slice of paradise. We are currently building two AIRBNBs there, which will also serve as quilting retreat cabins on the property to host quilters!

Quilting began as a hobby at the onset of the 2020 pandemic and as a way to create joy for not only myself, but for others by gifting quilty goodness. Little did I know I would become hooked to all things quilty! My only regret is that I didn’t discover it sooner than age 45. I am a self taught quilter thanks to YouTube University, a lot of trial, error (‘teaching moments’ as we say in our home) and patience. I love fabrics in various shades of orange and creams and was just recently invited to be part of a 2022 Maker Ambassador Program for a fabric company (soon to be publicly announced). One of the fun things that also came out of quilt making is my small Etsy shop where I make and sell handmade quilting notions when time permits.


I am a forever learner and still learn something new everyday from the quilting community. I recently purchased the Accuquilt Cutting System and am starting to experiment with all of the cutting dyes! One of my favorite discoveries on this quilting journey is the Babylock Sashiko machine. Oh what a beautiful Sashiko stitch it makes! I use it often when quilting and post about both of these loves regularly. I have a few tutorials about it on my YouTube page, with more soon to come in the months ahead.


Welcome once again, Belle. We look forward to your inspirational posts!


Posted in Belle Brunner, Crafting, For Beginners in Sewing, Guest Writers, Wall Hangings | Tagged , | 1 Comment

Christmas Cheer Blocks!


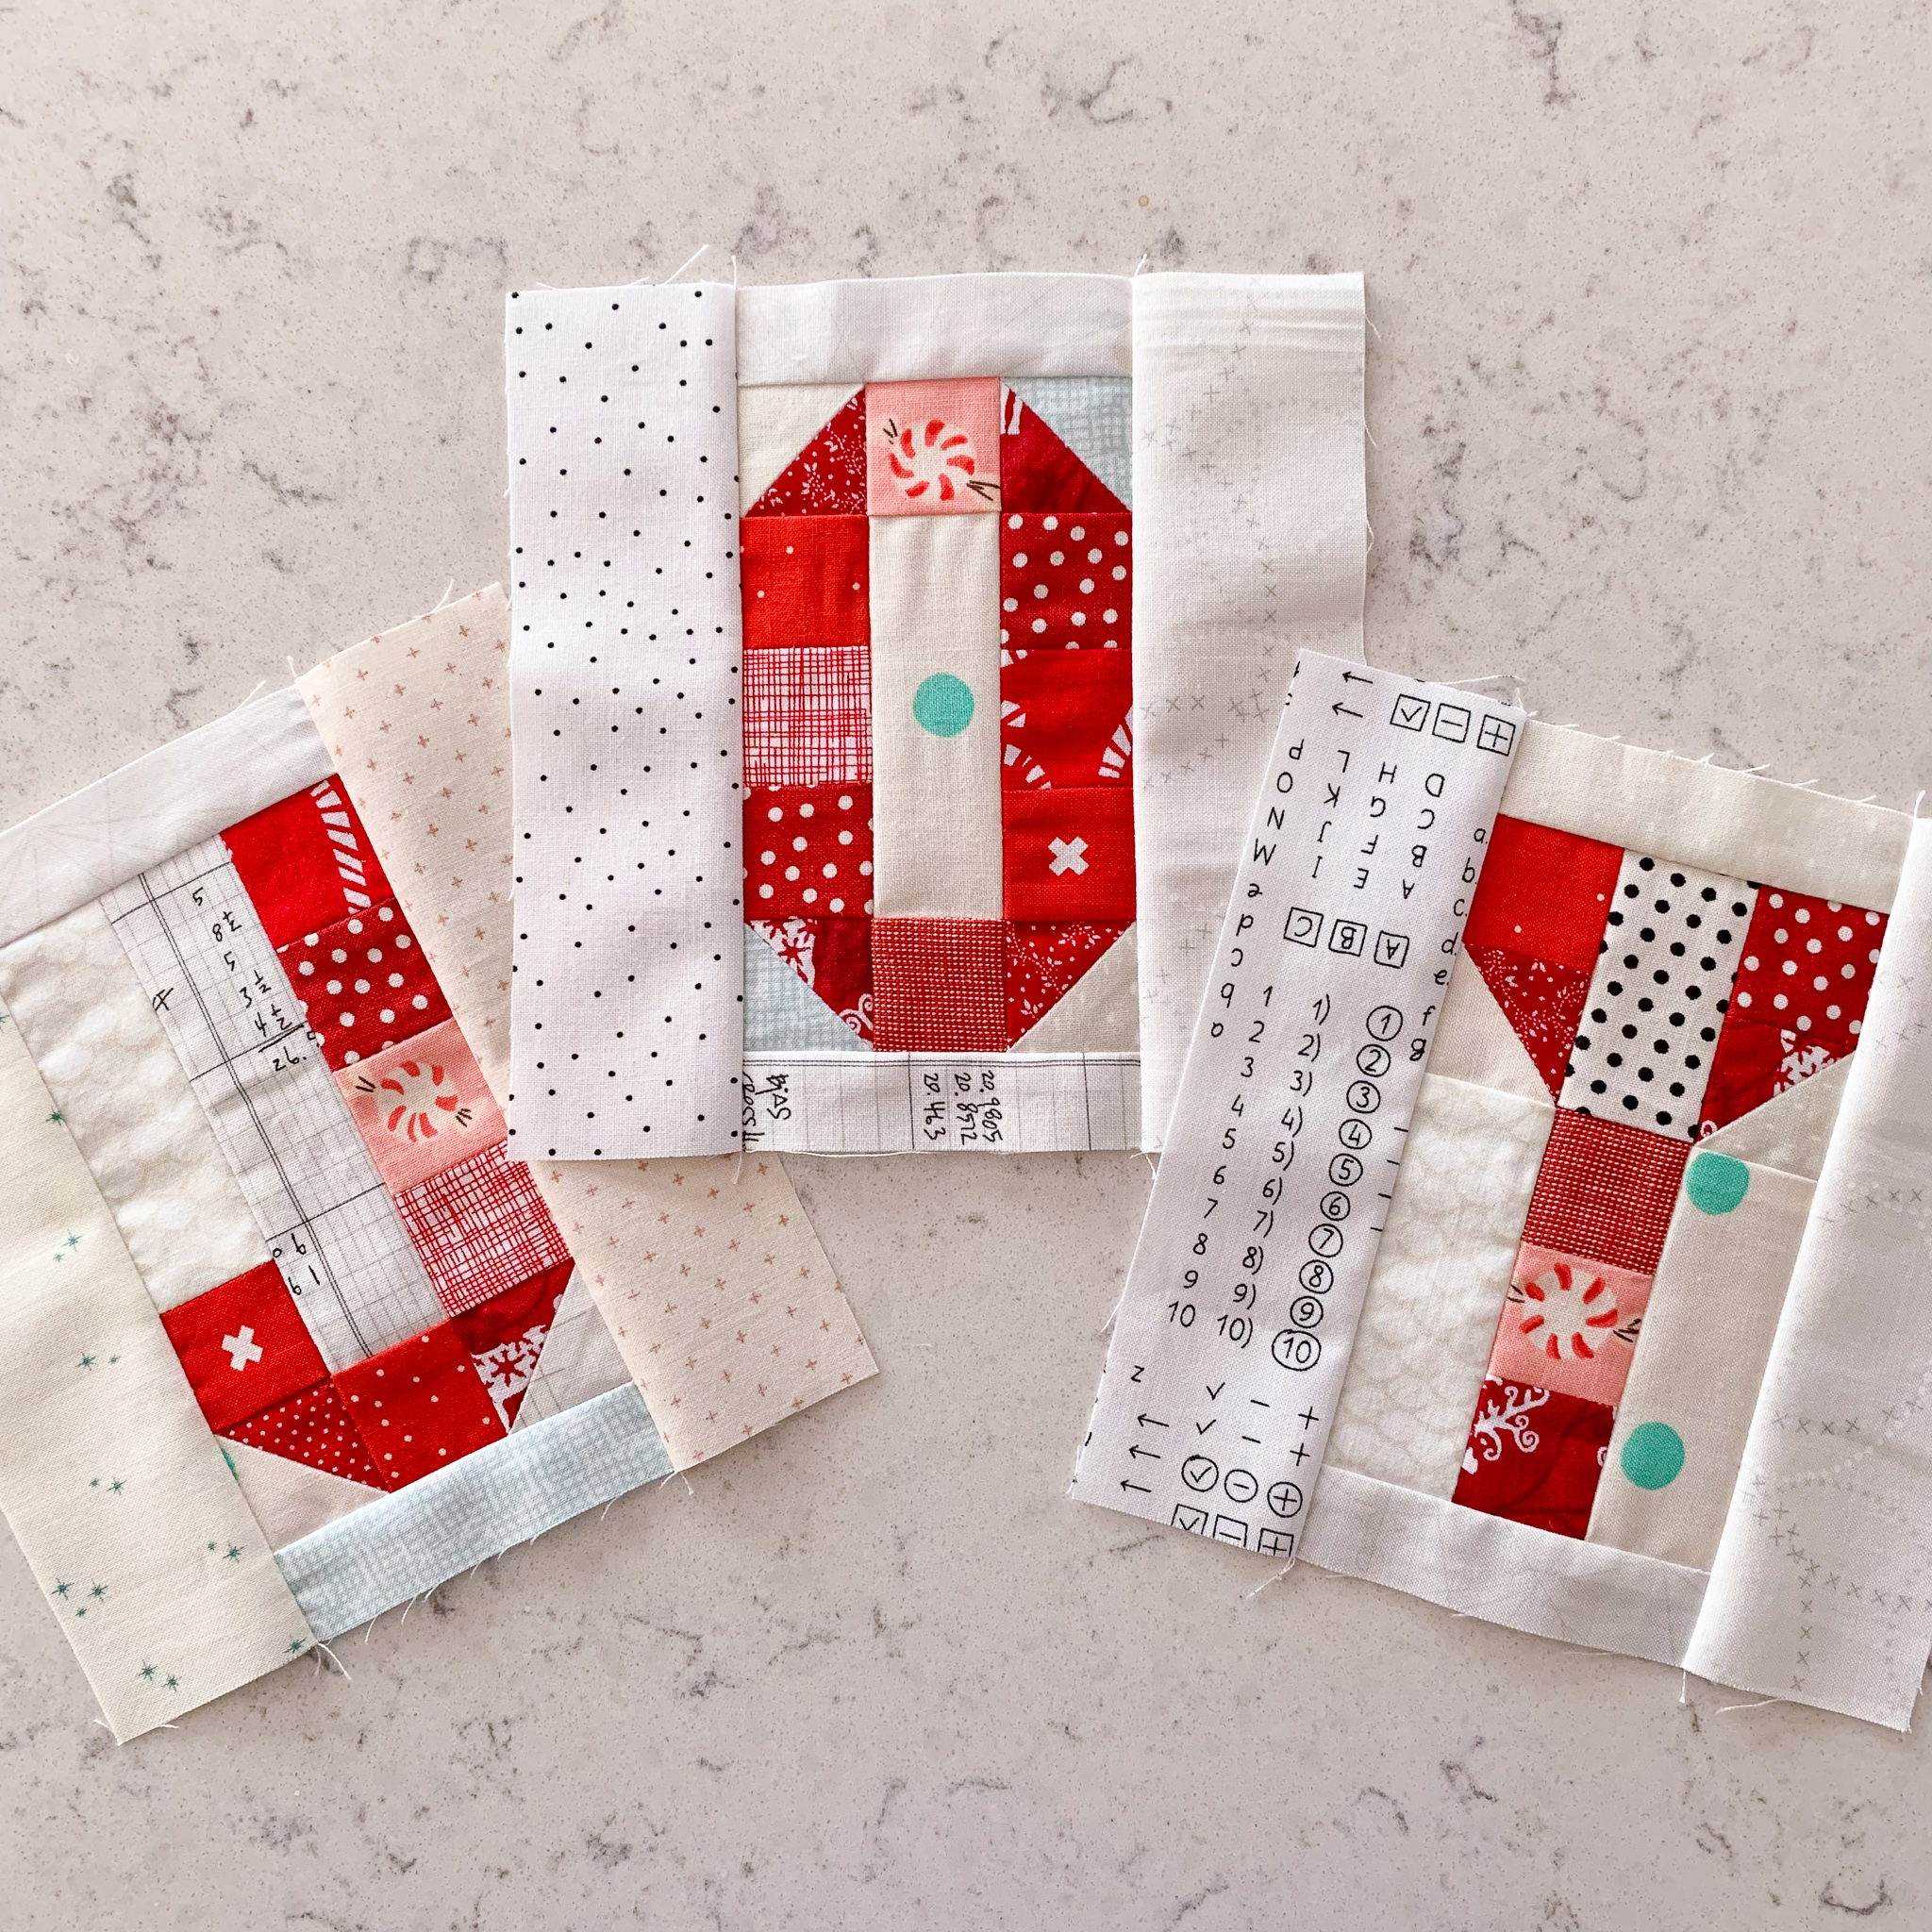
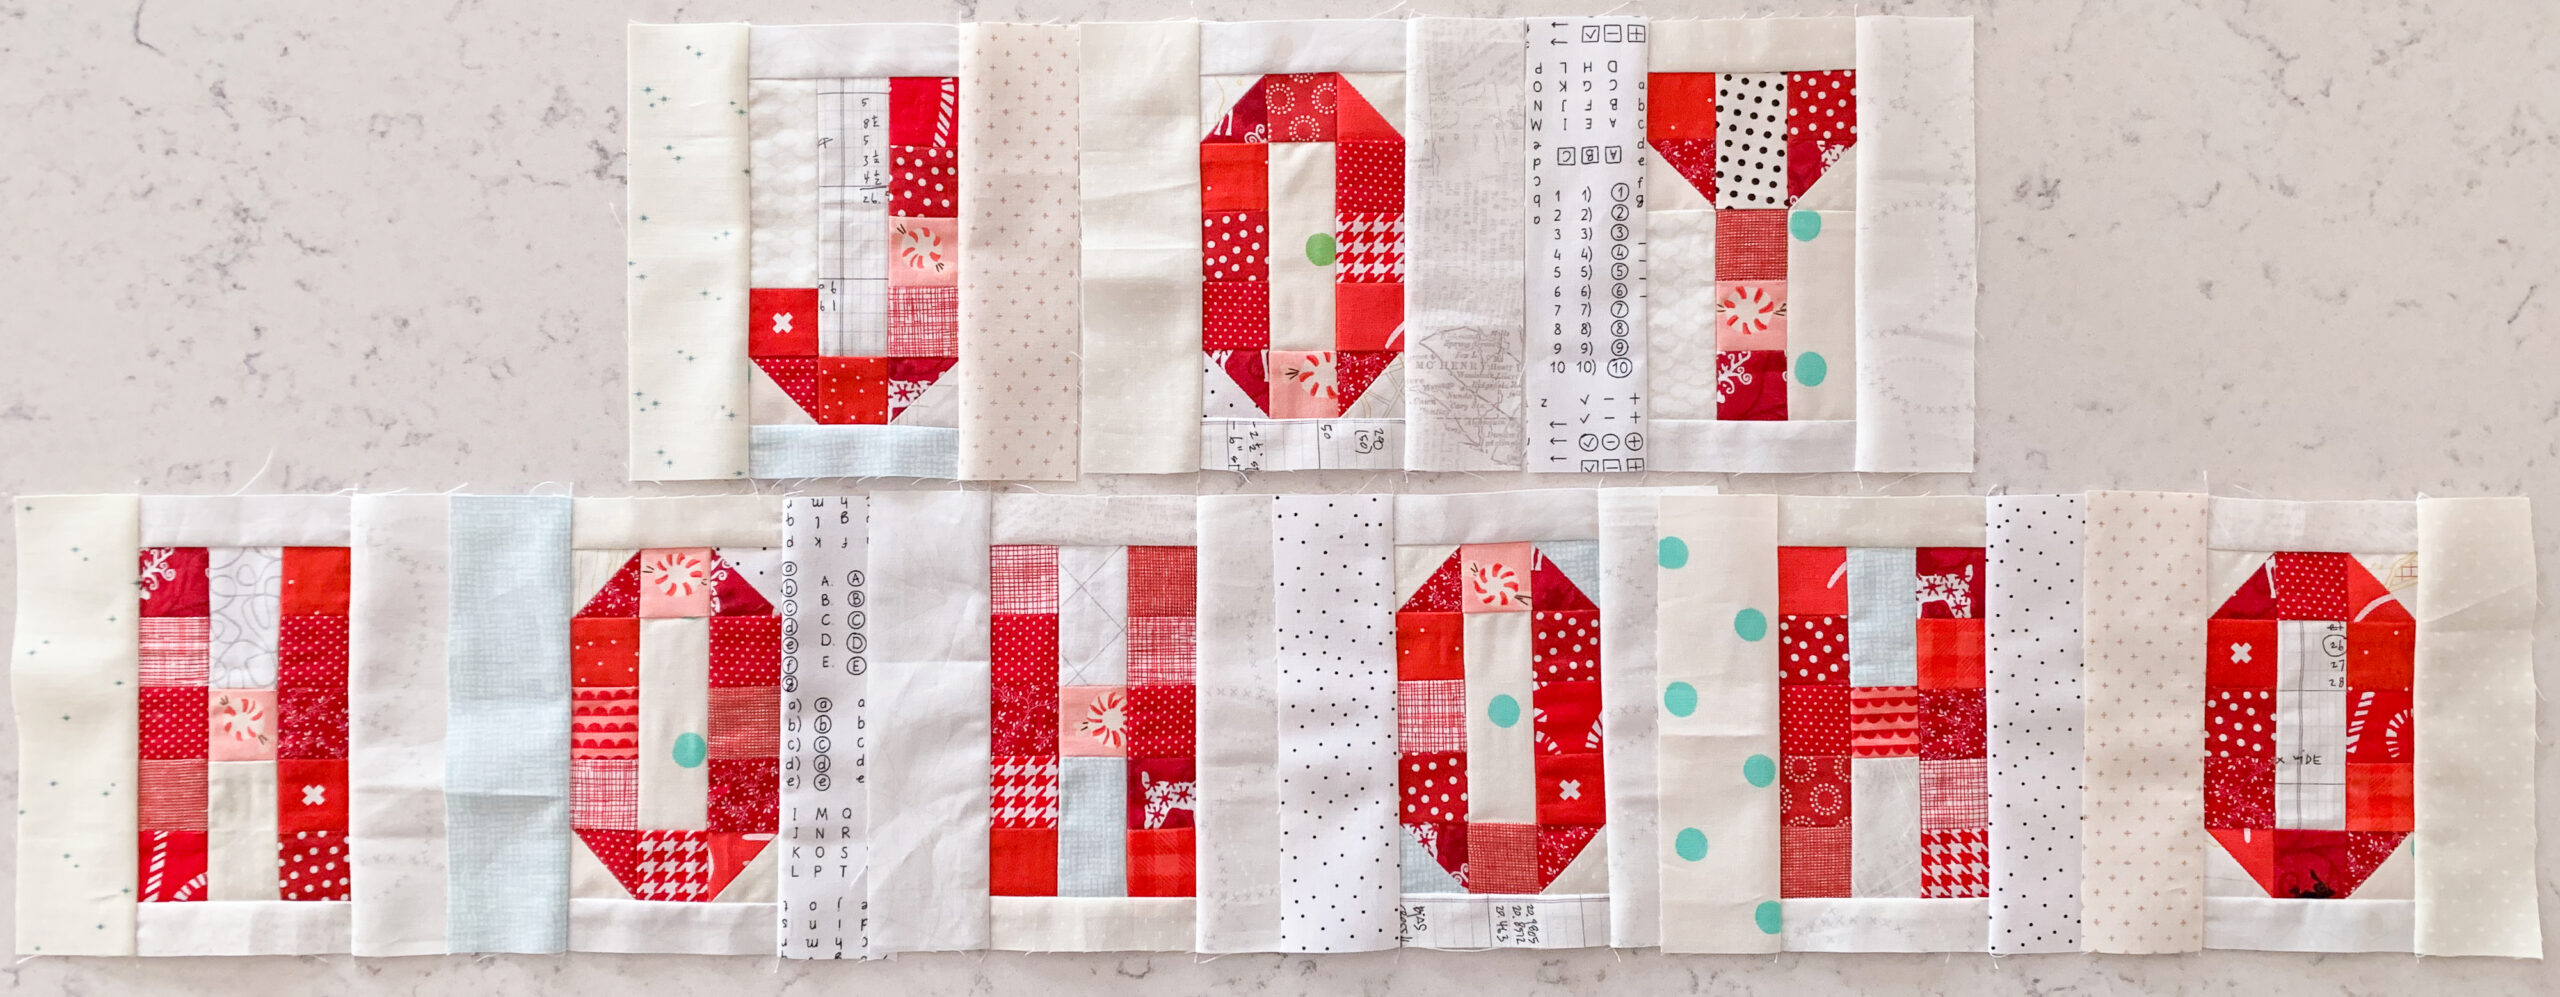
 Christmas Cheer Blocks Tutorial
by Jessica Schunke of Blue Sky Modern Craft

After making the Halloween BOO! Blocks pattern, I couldn’t resist adding on to it for more holiday fun. Meet the Christmas Cheer Blocks! With the simple addition of “H,” “J,” and “Y” blocks to the “O” in the original pattern, you’re all set for the holidays with blocks that can spell out “HoHoHo” and “Joy.” These blocks also work with the exclamation-point block from the BOO! Blocks pattern, so feel free to add it on for a little extra cheer.

The pattern walks you through making the individual blocks and then provides basic instructions for turning them into coasters, a “Joy” pillow, and a “HoHoHo” table runner. The size of these blocks also makes them perfect for sampler-style holiday quilts. I can’t wait to see how you use them in your own crafts.

You can download the pattern here . Happy holiday crafting!


Jessica Schunke is a proud Texan living in St. Louis, Missouri. She began sewing and quilting in 2009 after spending months reading sewing blogs before she finally decided to jump in herself. A former president and secretary of the St. Louis Modern Quilt Guild, she is the owner/designer of Blue Sky Modern Craft and an editor by trade who’s bridged the gap between her work and craft, writing and tech editing a growing number of her own and other designers’ patterns. Follow her crafty adventures on her website, https://www.blueskymoderncraft.com, and on Instagram @blueskycrafter.

Posted in art ideas, Christmas, craft, Craft to make, Crafting, Free Craft Projects, Free Sewing Project, Holiday Projects, Jessica Schunke, Seasonal, Uncategorized | Comments Off on Christmas Cheer Blocks!

Pretty Holiday 18″ Doll Dresses

Sulky 18 inch Doll Blog

COTTON + STEEL, FASHION, GIFT IDEAS, INSPIRATION, MACHINE EMBROIDERY, SEWING FOR KIDS, TUTORIALS
A Perfect Little Dress – Tips for Making a Dress for 18″ Dolls

Sulky doll-book-cover-792x1024
My friend Erin Hentzel just came out with the most adorable book, “Doll Dress Boutique.” It is full of over 40 projects for 18″ dolls. If you have a young girl in your life, she most likely has a doll this size. These dresses make great gifts, but they are also great projects to use to teach the younger generation how to sew!

Sulky Doll-Dress-close-up

Because of my love for all things 70’s fashion, and because I had a small piece of this awesome 70’s-style fabric, I decided to do a take on this dress from the book. The directions in the book are great, and easy to follow. Here are my tips to make sewing easier, and for ending up with a great final product.

Sulky Doll Blog Thread

Supplies
I used:

The vintage 70’s fabric
Grey Kona® Cotton
A scrap piece of a darker grey
Cotton+Steel® Thread by Sulky, 50 wt. cotton thread in Cornsilk (#0502) for all my piecing
Sulky 30 wt. Cotton Thread 733-1147 (Christmas Red) and 733-1225 (Pastel Pink)
Sulky Cotton Blendables® 30 wt. 733-4002 (Buttercream)
Sulky 12 Wt. Cotton 713-4068 (Dark Chocolate)
Sulky Totally Stable® Stabilizer to trace the pattern pieces
1/4″ strips of Sulky Sticky Fabri-Solvy™ Stabilizer to use as guides for sewing the decorative stitches
Sulky Tear-Easy™ Stabilizer to stabilize the fabric for sewing the decorative stitches.
Janome® Quilt Maker Memory Craft 15000 – this machine had wonderful decorative stitches!
Havel® Sewing Cutting Mat

Sulky Totally Stable Stabilizer for Pattern Pieces

  • Sulky Doll Blog Stabilizer
    BTW – I adore my Havel Cutting Mats
    I like to use Sulky Totally Stable when tracing off patterns, because it is easy to see through and it can be ironed to the front of the fabric. Use a medium temperature iron, and just press lightly.

Sulky Doll Blog Iron

This keeps the fabric from slipping around when you are cutting. One you have cut the piece out, just peel it off and iron it in place for the next piece.

Decorative Stitches

Sulky Doll Blog Decorative Stitches

The book said to use decorative ribbons to embellish the front panels, but I really wanted to use some of the cool decorative stitches on my Janome Quilt Maker Memory Craft 15000 and a variety of Sulky threads.

Sulky Doll Blog up close stitches

Because I used a variety of thread weights and stitches, I put a piece of Sulky Tear Easy under the fabric.

Sulky Doll Blog Up Close Stitches 2

Just look at the difference in this test stitch with and without the stabilizer! The top half of this picture has Sulky Tear-Easy under the stitching. The bottom half, where the stitches start to pucker and distort is without the stabilizer.

Sulky Doll Blog Skirt on Cutting Mat

Sulky Doll Sewing Machine

I also cut two 1/4″ strips of Sulky Sticky Fabri-Solvy, and used those as guides so my stitches would be straight.

Since I used both 30 wt. and 12 wt. threads on top, I put 50 wt. Cotton+Steel Thread by Sulky in the bobbin, and used a 90/14 topstitch needle.

The Finished Dress

Sulky Doll Blog Dress on Cutting Mat
I just love how it turned out! My perfect little flower child.

Sulky Doll Blog Dress on Smaller Doll

Bonus: The dress fit my daughter’s smaller doll, too!


Peace. Love. Sewing.

Posted in Uncategorized | Comments Off on Pretty Holiday 18″ Doll Dresses

Boo Blocks Tutorial

This gallery contains 8 photos.

Boo Blocks Tutorial by Jessica Schunke of Blue Sky Modern Craft (https://www.blueskymoderncraft.com/) My house is sadly devoid of crafty Halloween projects — limited to one very basic table runner I bring out each year — so this year, I decided … Continue reading

More Galleries | Comments Off on Boo Blocks Tutorial