Easy And Fun To Make Hair Bows

by Stephanie Kendron of Modern Sewciety,

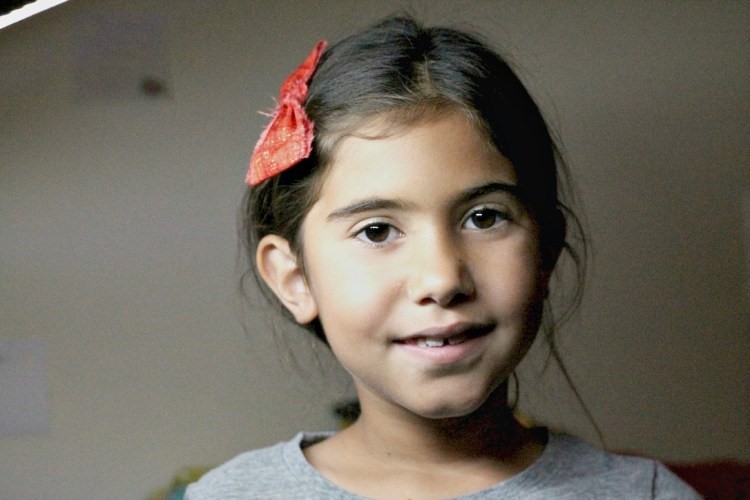
Hi everyone and welcome to Modern Sewciety and our stop on the Back to School Blog Hop. I really tried to overthink this assignment but when it came down to what I wanted to do I thought about my kids. What is something I could make that would be used a lot and needed for that matter. I happen to be lucky enough to have two beautiful girls with a head full of beautiful hair. So hair bows seemed like the perfect project. Easy and useful.

Hair Bows 1

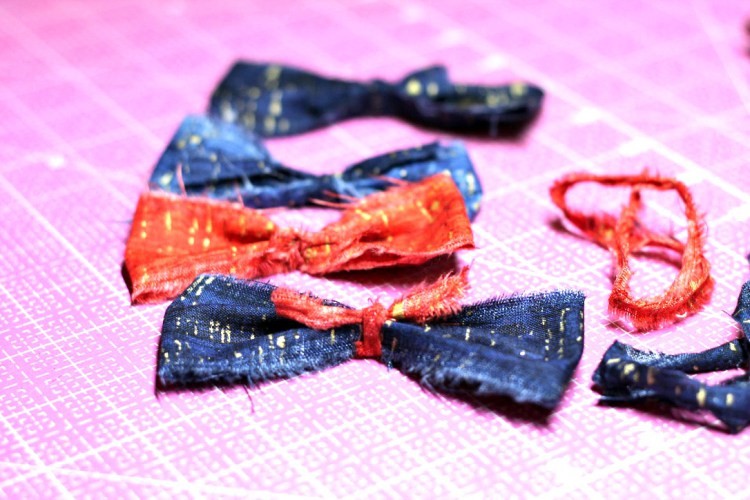
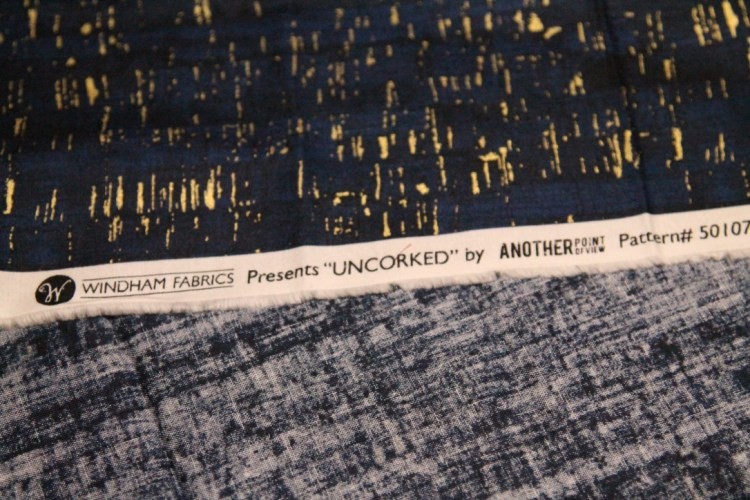
My kids wear uniforms and are limited to certain colors for their bows. I love the new fabric line by Another Point of View called “Uncorked” which looks like cork with a beautiful shimmery gold metallic. It is the perfect glammed up basic for your fabric collection.

Hair Bows 2

As most of you know we just went through hurricane Irma. Time was limited on this project because for a week we were anticipating this storm and trying to get ready. Goodness I am so glad that it is over. We are all okay and had minimal damage which is a miracle. I haven’t stopped thanking the trees in our yard for being so good to us.
I happen to be terrible at keeping on track with projects when life gets hectic. So this project is super simple and we happened to wait until nighttime to take pictures. Thank goodness I have my SlimLine LED table lamp from Daylight Lighting. So the lighting could be better but, hey, we got them done and my kids love them so so much. I mean bows with flecks of metallic gold seems like a win for us.

Hair Bows 3

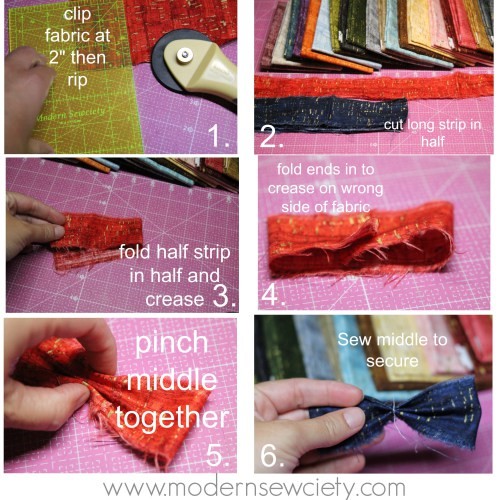
1. I grabbed a fat quarter and ripped 2″ strips of fabric.
2. I cut the long strip in half to make two smaller strips.
3. Fold the strip in half to mark your center
4. turn strip to wrong side and fold raw edges in toward center crease. You want to overlap those raw edges a little.
5. Pinch your middle together to cinch the center
6. Sew several passes to secure the middle.
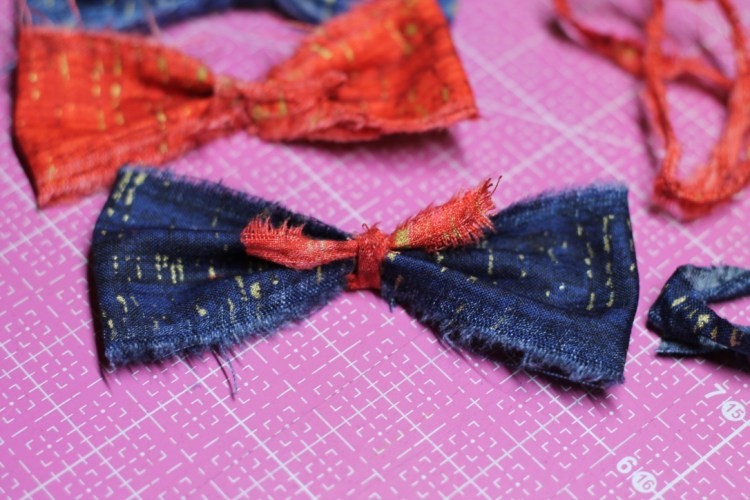
Below:: I then took a scrap of fabric and hid the stitches with a little knot. You could use ribbon or lace here. The possibilities are endless. My girls are already planning out their next batch. I ripped my fabric to save time and make them easier for the kids to help me make them but you could easily make the edges crisp and neat.

Hair Bows 4

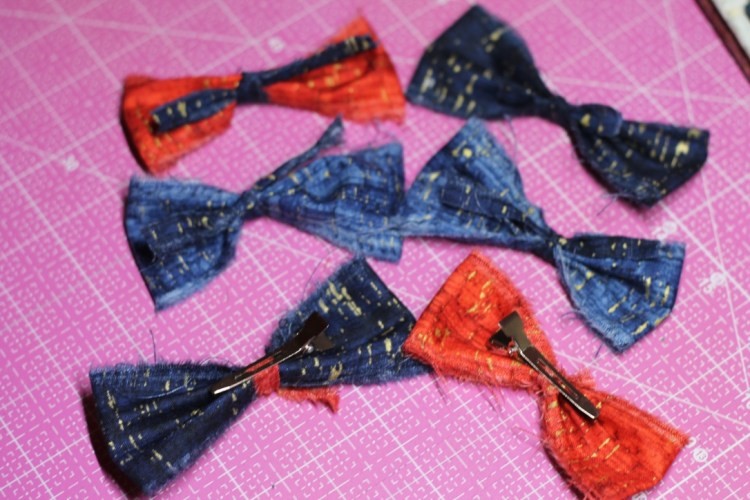
We had some extra clips around the house which was so handy. Yea for hoarding craft supplies I guess. We just snuggled one side of the clip under the back of the bow on the knot. It worked perfectly. You could also use some hot glue here to secure it. We didn’t have time and this worked just fine for what we needed.

Hair Bows 5

My daughter loves the bows and she has already started pulling more fat quarters to make more. I often get asked projects to make with kids and this is the perfect project. I think this would even be fun to make as gifts for friend’s birthdays as well. It is something that she can make herself and be proud of.

Hair Bows 6

60mm-rotary-and-cutting-mat-set_cta

Posted in craft, Craft to make, Crafting, Fabric, Free Sewing Project, How To, School, Stephanie Kendron, Stephanie Kendron, Tutorials | Comments Off on Easy And Fun To Make Hair Bows

DIY Halloween T-shirt – from our friends at Sulky Thread!

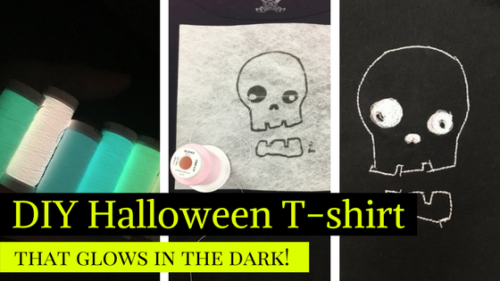
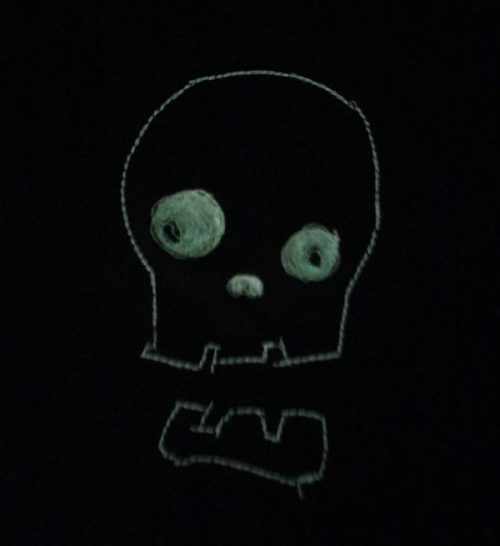
DIY Halloween T-shirt Glows in the Dark! (And you can make it in less than an hour)

by Kelly Nagel

SULKY HALLOWEEN BLOG - 1

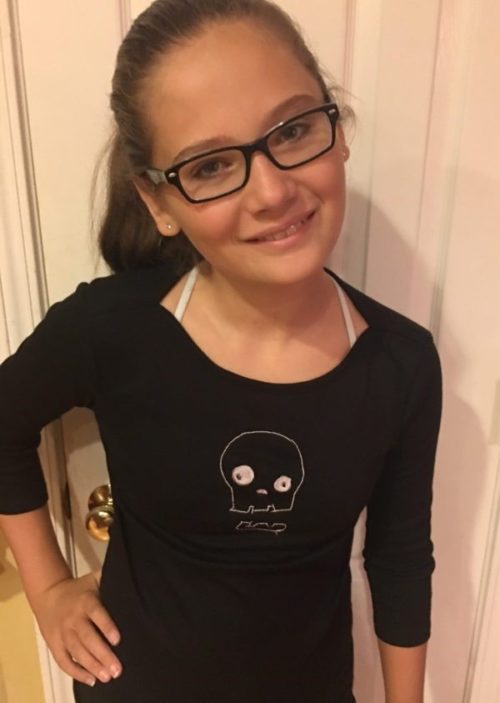
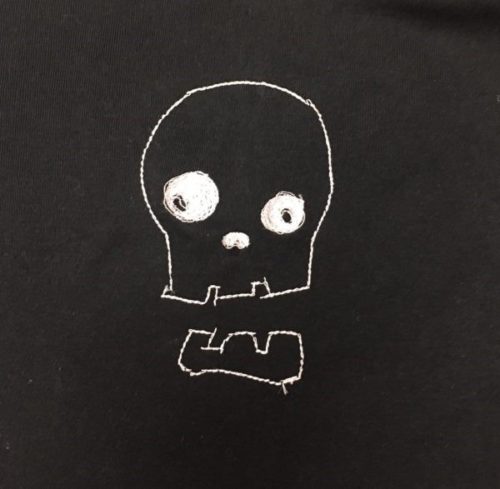
It’s the most wonderful time of the year! No, not Christmas – Fall! I love Fall. The colors are beautiful, the weather is perfect; there is football every weekend and Halloween! We love Halloween at my house. This year, to kick off the season, I made this adorable skull t-shirt.
Halloween T-Shirt 2

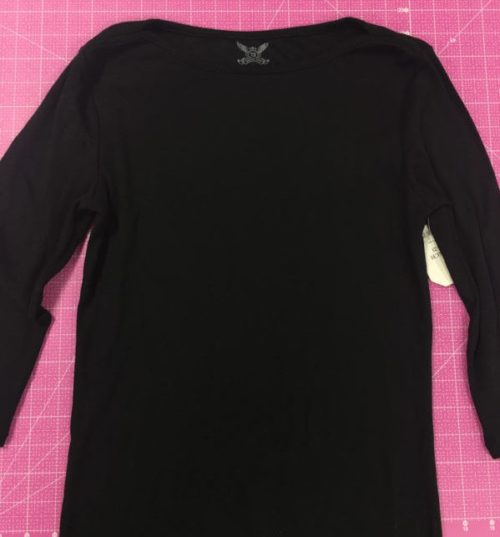
And by ‘made’ I mean I purchased the actual shirt and just put the skull on the front.

Halloween T-Shirt 3

It is quick and easy to do and took me less than an hour.
Here’s how I did it…

Halloween T-Shirt 4

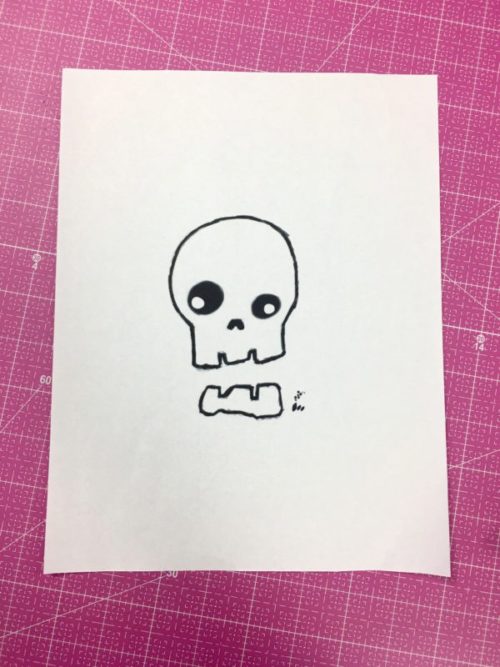
I found a cute skull online, and printed it onto Sulky Stick ‘n Stitch™ Stabilizer. (Just go to Pinterest and search “skulls”; you will have plenty to choose from.)

Halloween T-Shirt 5

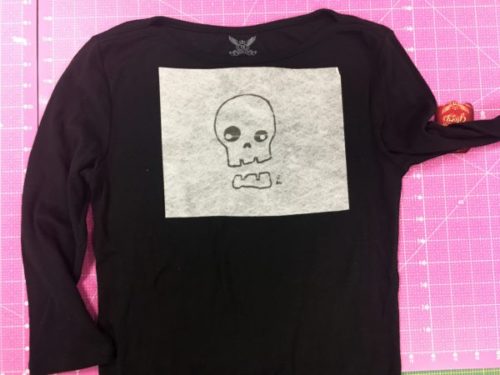
I pulled off the release sheet, and stuck the skull to the front of the shirt; placing it where I wanted the skull to be stitched.

Halloween T-Shirt 6

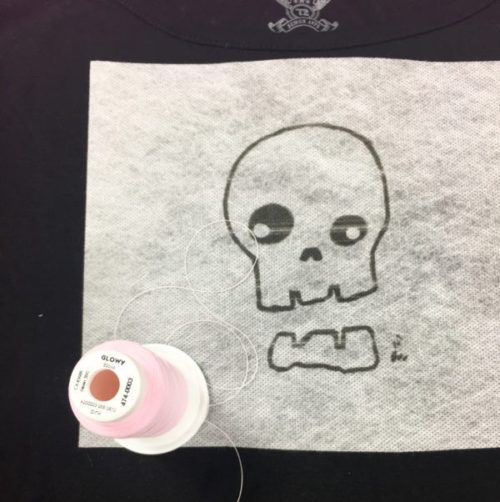
I grabbed my spool of Sulky Glowy™ Thread in pink (because I have daughters and they want pink skulls. Glowy also comes in yellow, orange, blue, purple, green and white)

Halloween T-Shirt 7

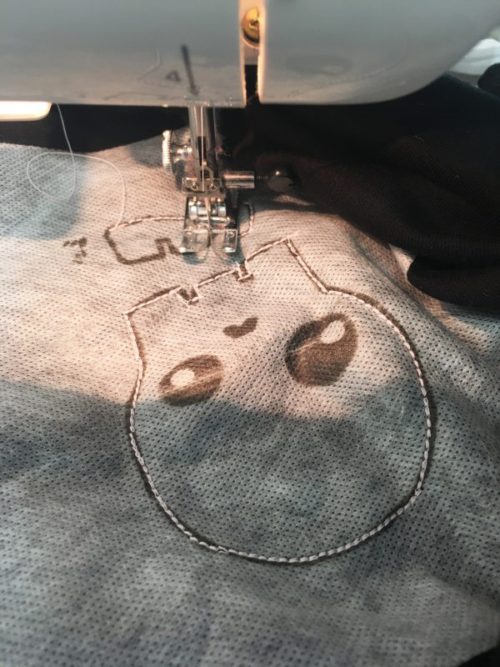
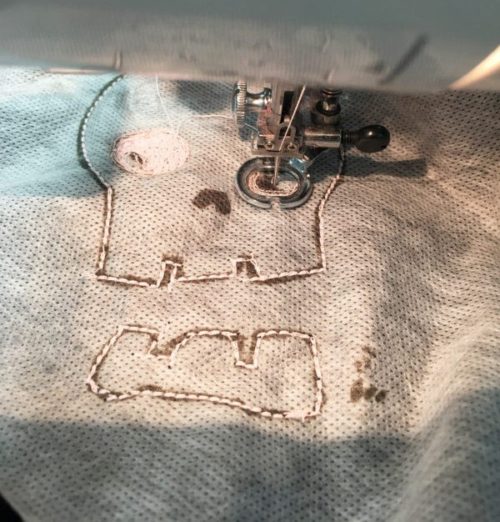
I put a white Sulky Prewound Bobbin on the bottom, and used the Glowy on top. I just used a regular straight stitch and my presser foot to do the outline of the skull. The beauty of Sulky Stick ‘n Stitch is that it is water soluble, so it stabilizes as I am sewing, gives me a pattern to follow, but will wash away when I am finished!

Halloween T-Shirt 8

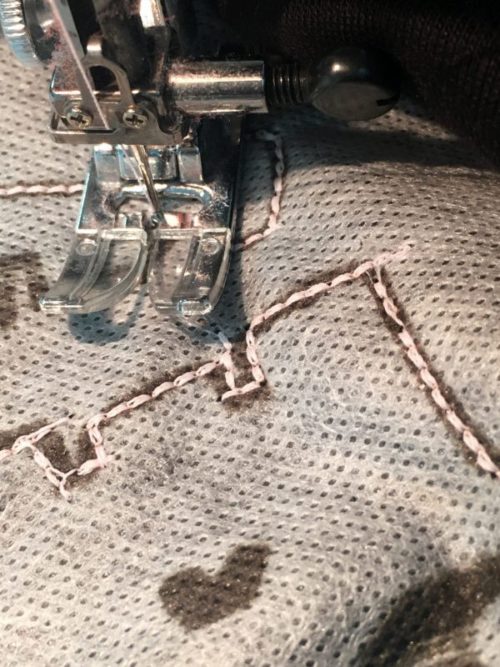
You can see in this close up that I went off the pattern lines a couple times. It doesn’t matter! The pattern is just going to wash away when I am finished! Plus, I think those wonky stitches give this skull some extra character.

Halloween T-Shirt 9
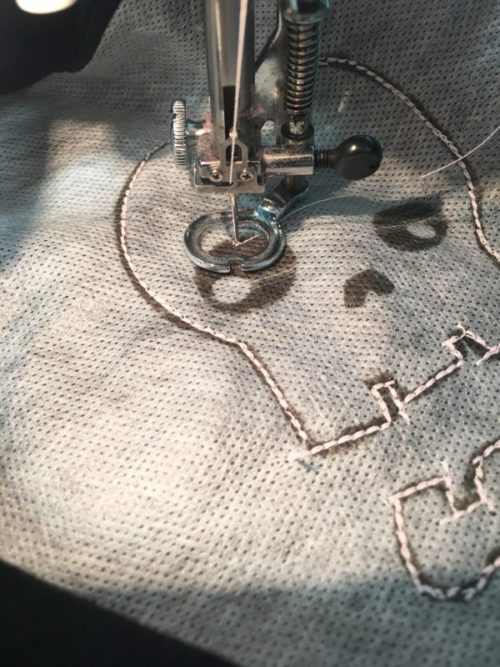
For the eyes and nose, I switched over to free-motion. I lowered the feed dogs on my machine, and put on the free-motion foot.

Halloween T-Shirt 10

After stitching the first couple stitches slowly back and forth (like a back-stitch of sorts), I just kept going in circles and filling in the area until I was happy with it.

Halloween T-Shirt 11

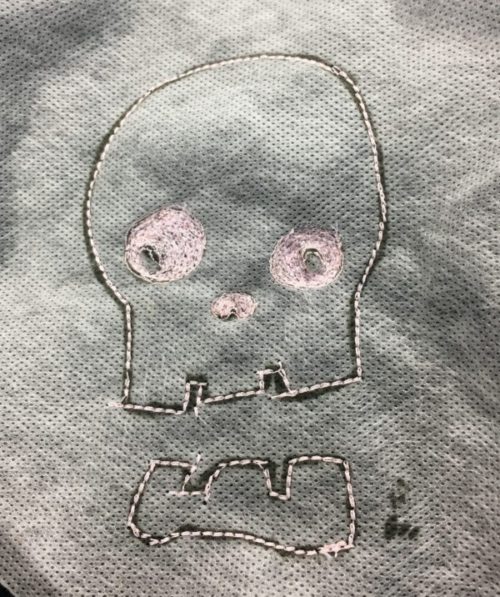
When the stitching was complete, I just washed away the Stick n Stitch.

Halloween T-Shirt 12

And it’s done!
I completed this shirt, including washing the Stick ‘n Stitch away and ironing the shirt dry, in about an hour.

Halloween T-Shirt 13

BONUS! It glows in the dark. How cool is that!?!?!
Happy Fall and Happy Sewing!

60mm-rotary-and-cutting-mat-set_cta

Posted in art ideas, craft, Craft to make, Crafting, Cutting Mat, Free Craft Projects, Free Sewing Project, Fun Stuff, Halloween, Holiday Projects, Seasonal, Tutorials | Comments Off on DIY Halloween T-shirt – from our friends at Sulky Thread!

Tips For New Quilters!

Tips for fabric, cutting & more!

By Kathy Mathews
bernette sewing machine

I can clearly remember signing up for my first quilting class. I had been sewing since I was twelve but as I was about to turn the big THREE – O I felt the need for something new in my life. I had seen a handmade quilt on a bed of a friend of mine and knew that I had to make one. I was pretty set for basic sewing notions but the class list of what I needed to start quilting had some items that were new to me. The list was a bit anxiety producing, thrilling and a tad expensive.

I was self-motivated because we had family quilts. My grandmother and her two sisters had been quilters and exposed me to it. They planted a seed which was dormant for about 20 years but when it blossomed, it grew big time.

I was so lucky to have had someone who exposed me to quilting. I wish everyone did. I havestarted the wonder that is quilting for me, my step daughter and now my granddaughter. My step daughter was 20 and my granddaughter is only 2 so my approach was and is quite a bit different.

My step daughter lived with us when she was in middle school. It seemed like grades 5 through 8 involved quite a bit of sewing. I made her play costumes, quilts, pillowcases and favors for her birthday parties. She and I get along really well now but then, there were some definite non Brady bunch moments. Sewing was our first and enduring bond.

She became interested in sewing by seeing the things around the house and the handmade items I gave her. I signed her up for lessons, just like I had Shelby and Emily. She made a little quilt in a Mother daughter class and we were all thrilled with it. After she left, she missed the sewing on demand that was available around here. A seed had been planted for her. This kind of exposure is what I am doing with Zara now also, she plays in my sewing room, she adores quilts and sewing is just a part of everyday life.

For Olivia’s 20th birthday, she wanted a sewing machine. Her sister and Mom got her one at Target and I begged to help and by help I meant completely control this present. They all agreed to let me, even took the machine back. I was in heaven! The early exposure had taken root and I was about to “water”the sprout completely!

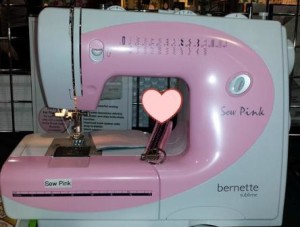
I got Olivia a Bernettesewing machine, a necessity for all new quilters. I am all about avoiding play sewing machines or tricky antique ones for young sewists. (I made that mistake with my oldest and I have never heard the end of it.) Buy a lower level mechanical sewing machine of the brand you adore.

After that I put together a quilting sewing kit for her, with some attention paid to a quilt class list. She was not living with me so I wanted her to be completely prepared. She was the only child interested in sewing so far, I didn’t want to blow this!

First: cutting. I got her a decent sized cutting mat, quality rotary cutter and replacement blades. I wanted her to have really good scissors so I got my first pair sharpened and passed them on to her. I think being able to cut well is the most important start for a new quilter. And what’s the secret to being able to cut well and accurately? Quality tools that cut consistently and last for decades, a bargain in the long run.
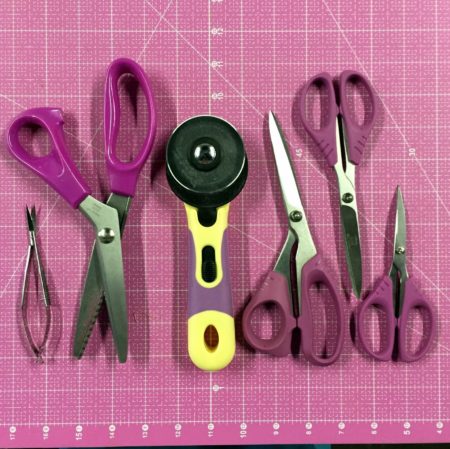
jami-fingal_pinking-shears_image-10
Second: measuring. When you cut, you have to be able to measure. There are so many fabulous rulers out there. I chose a simple 18” plastic ruler and a really good 12.5” acrylic square. It’s important to cut but it has to be accurate.

Third: sewing. By golly, sewing a quilt does involve sewing. She would have well cut, accurate pieces but she needed a quarter inch foot for that machine and a walking foot for the quilting. Luckily, these are not that expensive for a Bernette. And when you sew, you’re going to make mistakes. It’s just part of sewing and quilting. I did not get her as quality a seam ripper as I have, some holiday I will have to upgrade her.

Fourth: Pins and thread. Almost done but sewing involves thread and pins. I have fabulous pins and magnetic “pin cushions” for them. I had hundreds of standard pins and a pin cushion. Before a year was up, I got her a magnetic one. I also got her a big spool of off white Aurifil thread. She has never bought herself a replacement spool of Aurifil but having one luxurious spool is at least amongst her stash.

Fifth: Fabric. Oh yeah, she needed to have some fabric and I think this is where most people start when they sew. We got her a gift certificate to the quilting store for lessons and fabric.

Finally: some fun. Once you have a machine with the proper feet, you can cut, measure, pin and sew that fabric butit’s fun to have some extras. I had a sewing basket I had barely used, a measuring tape and some duplicate books. Olivia loved them!

Keeping it going: I have given her gift certificates for more fabric, dual duty thread I no longer want and fabric I can’t see myself using. We got her extra bobbins because really, can you ever have too many?

Olivia made a quilt in her class and was enthralled. She is a Pinterest nut and finds all kinds of cool projects. She makes purses, bags, Halloween costumes and presents. She’s very inventive and creative.

I can’t wait to do this all again with my granddaughter. She’ll start out sewing with me in my sewing room so do I really need to buy anything for her? Probably not but that hasn’t stopped me. She has her own sewing table and chair where now she just colors. I got her a pink and white Bernette for Christmas and birthday which are 9 months away. Yes, it is fairly insane.

I couldn’t control myself because as quilters and sewists, I think we have to first expose, then encourage and finally launch the next generation. I’ve been successful with one and I am hoping I am with my granddaughter.

If not, I may have a cute little pink and white machine for sale in a couple of years!

Rotary cutter call to action

FREE eBOOK INSTRUCTIONS FOR THE BEGINNING QUILTERebook cover part2(a)_quilt instructions for beginner
Posted in Crafting, Cutting Mat, Fabric, Fabric Cutter, Fabric Rotary Cutters, Fabric Scissors, Fabric Selection, For Beginners in Sewing, How To, How to Choose Fabric Scissors, How to Make a Quilt, How to Quilt, Quilting, Quilting, Quilting & Embroidery, Quilting Tools, Tutorials, Uncategorized | Comments Off on Tips For New Quilters!

Birds On A Stick

Birds on a Stick

By Liz Kettle

birds on a stick - finished project 1
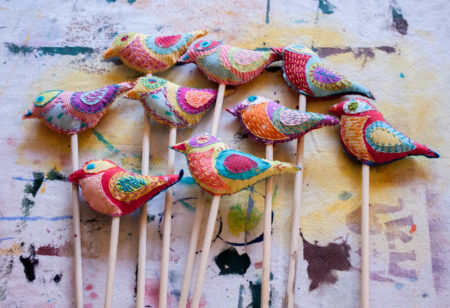
Create a flock of fabulous feathered friends with this fun summer stitch project! I like to have a bunch of birds ready to go for a travel stitch project. What I especially love about small projects is that I feel free to experiment with stitches and colors…go wild and play!

Supplies:

Craft felt

Assorted fabrics-scraps are fine

Misty fuse or similar fusible web

Assorted threads: WonderFil perle cotton 8 wt  and Spagetti 12wt are two favorites

Chenille or embroidery hand sewing needles

Havel’s 5 ½” curved embroidery, 8” sewing and Teflon coated scissors

Marking pen/pencil or Sharpie marker

Polyester stuffing

Dowel and craft glue


Steps:

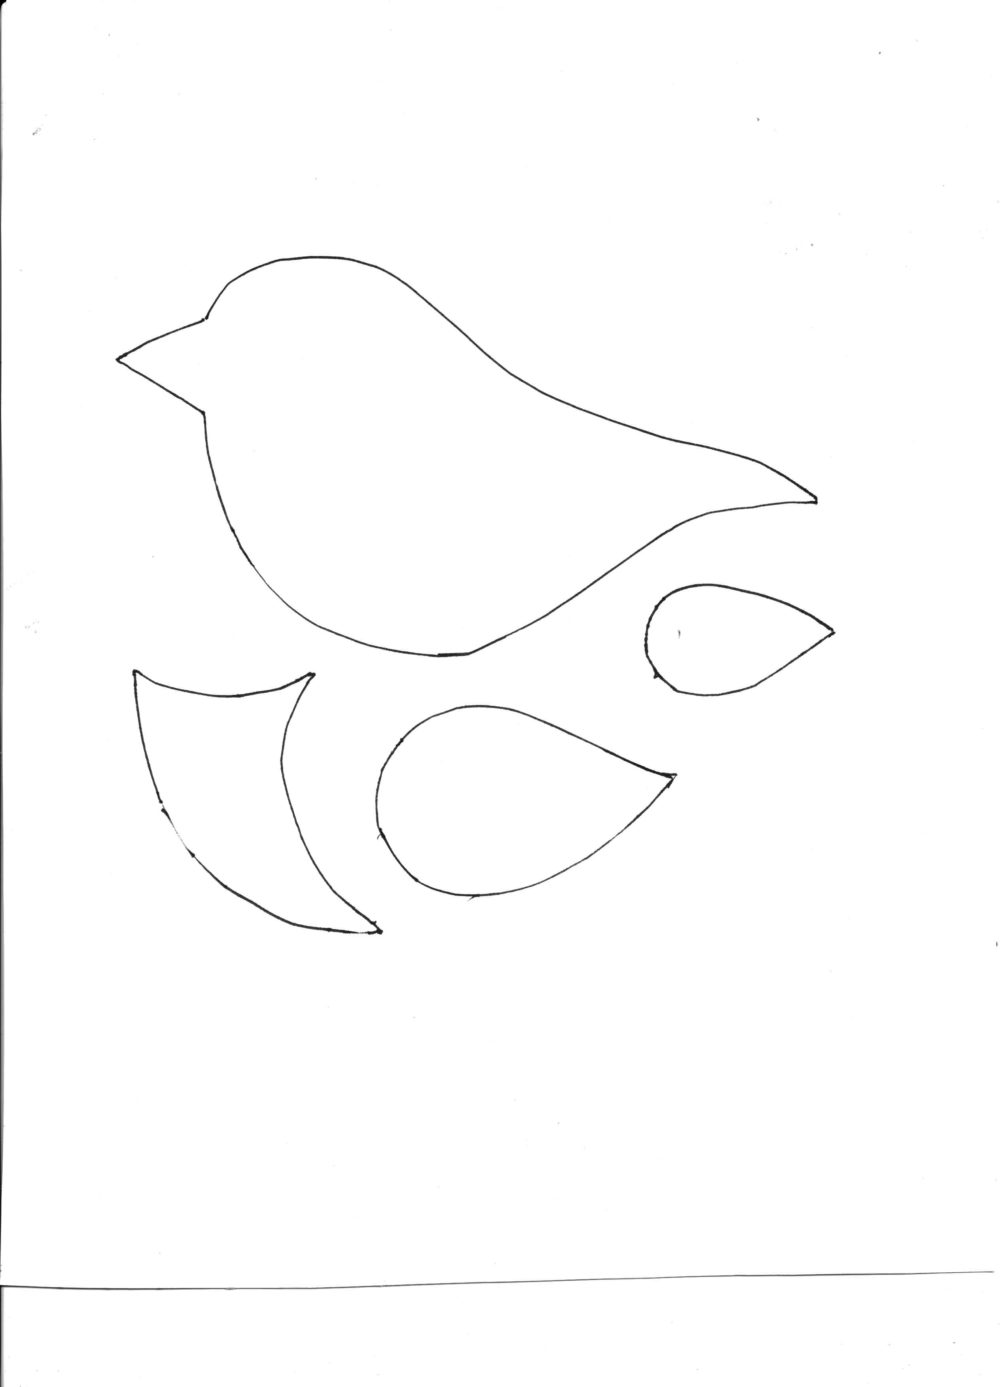
    1. Print out the bird pattern and create a template using template plastic or thin cardboard. Cut out the template shapes. Use Havel’s Teflon coated scissors to cut out the templates. The micro serration helps you cut on the line even on slippery plastic.

birds on a stick pattern pieces 15
Birds On A Stick 1

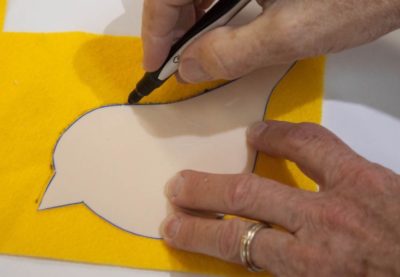
    2. Trace the bird body on the felt with the marking pen

Birds On A Stick 2

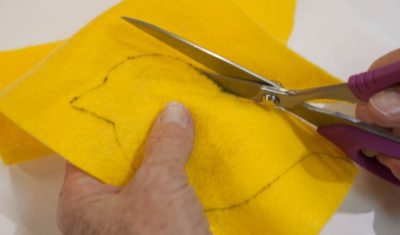
      3. Cut out the felt using Havel’s 8” sewing scissors. You need two pieces of felt for each bird. The colors don’t have to match. Set aside one for the back of the bird.

Birds On A Stick 3

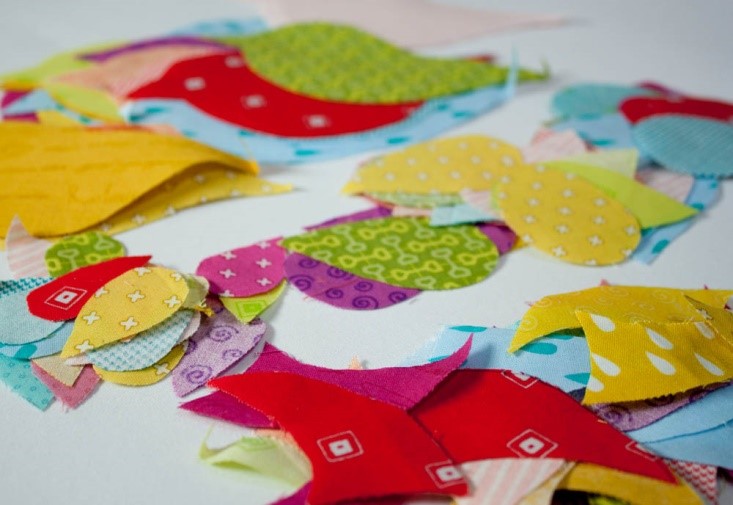
      4. Following manufacturer’s directions apply fusible web to the back of your fabrics. Trace the bird body, breast, and wing pieces on the chosen fabrics and cut out using the curved embroidery scissors. Cut out a lot of bits so you can mix and match.

Birds On A Stick 4

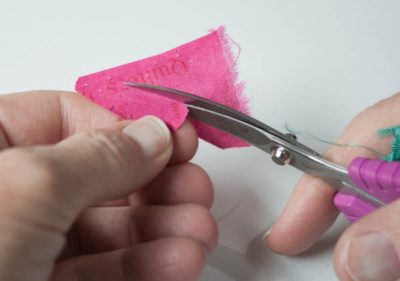
      5. Free cut a small circle for the inner eye. These curved embroidery scissors are my go to tool for cutting smooth curves. I know they are made specifically for cutting threads close but once you try them for curves you will want a few pairs….trust me.  Opps, almost forgot. Cut out a triangle for the beak too.

Birds On A Stick 5

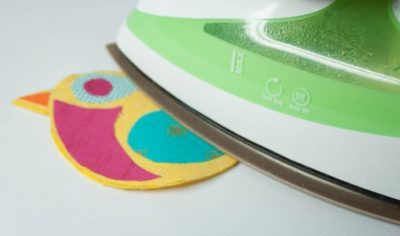
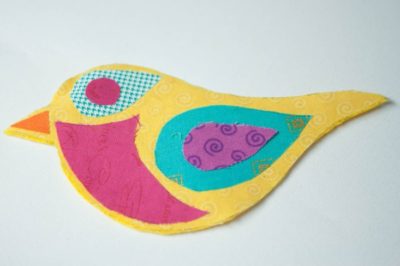
      6. Fuse the bird body to the felt. Arrange the breast, wings, eye and nose on top of the bird body and fuse in place.

Birds On A Stick 6

      7. Now the fun begins, embellish your bird with stitches! The stitches I used the most are straight, cross, fly, and knots but feel free to use any stitch you love. I use both WonderFil Spagetti 12 wt. cotton thread and WonderFil Eleganza 8wt perle cotton. They come in such luscious colors, don’t be afraid to play with all the colors. They don’t need to match!
      8. When you are finished stitching details on your birds, grab the remining felt bird for the back. Place them wrong sides together and beginning in the middle of the belly, stitch around the outside using a running or whip stitch. Leave 1 – 1 ½” unstitched at the belly.
      9. Stuff the bird with polyfil making sure to get it into the beak and tail. Then stitch the opening almost closed. Leave just enough room to insert the dowel rod. Put a small amount of craft glue on the top of the dowel and insert it into the opening on the bird. Stitch the remaining opening closed.
      10. Ta-Da! You have a Bird on a Stick. I know you want to go make a bunch more now….have fun,
      Liz


      Stitch directions

Bird On A Stick 7
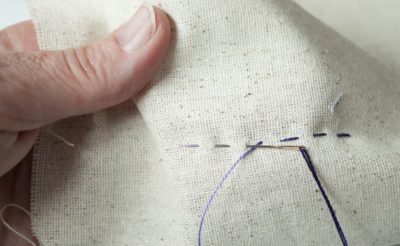
Straight or Running stitch- The straight stitch can be stitched as a single line or in patterns. Be sure to keep the needle on top of the fabric when you are stitching to prevent hand fatigue.

Bird On A Stick 8

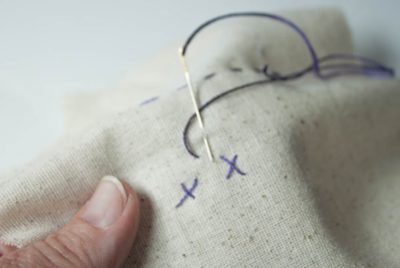
Cross Stitch- A variation of the straight stitch, traditionally the cross stitch is created in rows but I love to make single cross stitches and scatter them all over the place or use them in unusual ways. Vary the size and angle of the cross over stitch.

Bird On A Stick 9

Bird On A Stick 10

Bird On A Stick 11
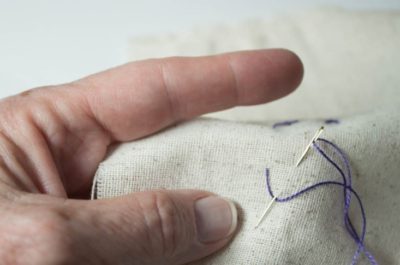
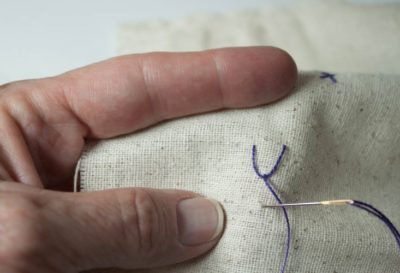
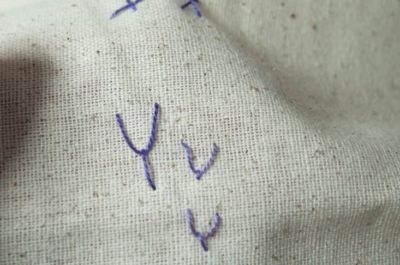
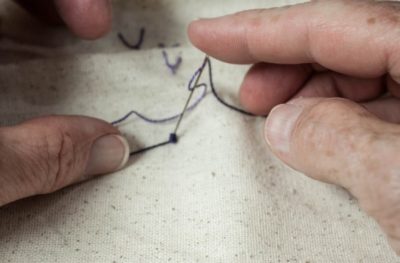
Fly stitch- When making the fly stitch think of a V shape. Knot the thread and come up from the back of the fabric. Put the needle back into the fabric a small distance from where it came out (the other top point of the V) and bring it out a similar small distance away (the bottom of the V). Put the needle back into the fabric either a tiny distance or larger distance away.

Bird On A Stick 12

Bird On A Stick 13

Bird On A Stick 14

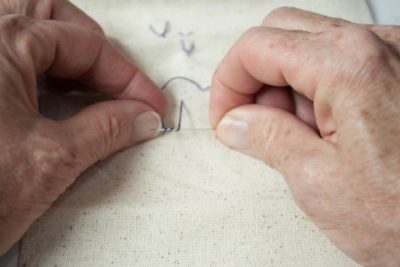
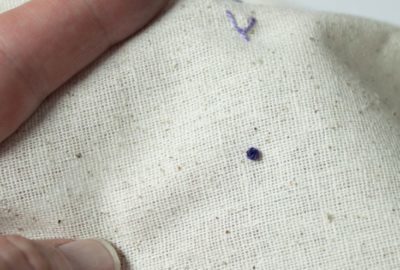
Knots- Knot the thread and come up from the back of the fabric. Hold the thread in your non-dominant hand and wrap the thread around the needle 3-4 times. Put the needle back into the fabric very close to where the needle came out. Hold it taut as you take your needle back into the fabric to create a knot.

havels-pinking-shears_liz-kettle-cta-400x286

Posted in Applique Scissors, art ideas, craft, Craft to make, Crafting, Fabric, Fabric Scissors, For Beginners in Sewing, Free Craft Projects, Free Sewing Project, Fun Stuff, Liz Kettle, Seasonal | 7 Comments

Internationally Known Quilter, Shruti Dandekar is Havel’s Newest Ambassador!

by Luv2Sew and Shruti Dandekar

Havel’s Sewing is  thrilled to introduce our first ambassador from India, Shruti Dandekar. She’s talented and business savvy, and using both skills to keep the art of quilting alive and vibrant in her home country!

We asked Shruti to share a bit about her journey from architect to internationally known quilter, as well as the story behind her intense passion for quilting. So without further ado…

Shruti Dandekar 1

If I were to describe myself in one sentence I would say, “I am Shruti, a creative person who derives happiness and contentment from sharing her gift with others!”

I am an Architect who took up Quilting on a sabbatical and now it has taken over my life! Quilting is more than just a hobby to me now. It is my passion, my calling! I started quilting when no one around me knew how to do that. The internet and the wonderful bloggers from all over the world were my teachers! I kept on experimenting and working out new ways to do stuff! I found alternatives for material that wasn’t available in the local market. I made do with what I had!

Shruti Dandekar 2

The first sign that Quilting was going to be more than an expensive hobby came when I made the Portrait Quilt of Dada Ajoba – my husband’s great grandfather and the founder of our family business.

It is about 33″ x 48″ and is made with more than 3500 raw edge appliqued pieces in over 30 shades of gray! It was a monumental task. And for someone who was attempting something like that a little (lot) overwhelming.

Making this quilt made me aware of my capacities. I knew ‘I had it in me’! I started thinking about taking this up as a full time career. But in my heart, I also knew that if it took 3 months and so much work to make a portrait quilt, the chances of me making another one are bleak!

That got my brain whizzing with ideas. I had one idea in particular that I was toying with. But I knew there were experts in the field that I was just starting out in and was sure they must have thought about it!

It took me almost an year to build up the courage and develop my own method to make portrait quilts that was easier and much, much faster. I made the quilt of Steve Jobs (iQuilt) for my little brother.

Shruti Dandekar 3

This was a turning point in my career! After I shared the iQuilt, I got a lot of questions asking me how I did it! I did a portrait-quilt-along for a few friends on Facebook and it all escalated from there. Before I knew it, I was launching my eBook – ABOUT face!

Shruti Dandekar 4

I believe it is the FASTEST method IN THE WORLD to make portrait quilts!
Alex Veronelli of Aurifil gracefully volunteered to be my subject for the book. I was delighted to meet him in person and hand over the quilt to him at Quiltcon 2015 in Austin, TX.

Shruti Dandekar 5

Very soon, I was made the Brand Ambassador for BERNINA India. That gave me an opportunity to teach all over the country! It has been quite a journey.

Shruti Dandekar 6

My journey from an unknown quilter in a quaint town in India to a Brand Ambassador to BERNINA and an AURIFIL Artisan as well as the Regional Representative for SAQA (Studio Art Quilt Association) for India & SE Asia has been totally fun! My best moment was when I was up on stage at QuiltCon 2017 in Savannah GA expecting to see just a couple of friends scattered over the auditorium; and instead, came face to face with a fully packed hall that was eager to listen to what I was saying about the Quilts of my land!!! I knew I had arrived!

Shruti Dandekar 7

I have learnt a lot of lessons along the way. Some hard and some totally unbelievable. I think, if I had not had to experiment so much, I would have reached here faster and much more easily.

I have always attempted to share the knowledge I have assimilated over these years. I have been teaching Quilting all over India for quite some time. But now I have also started providing coaching and mentoring to Creative Entrepreneurs.

My focus is on Indian Women Entrepreneurs who are operating home based businesses and have the desire to grow it into something big! Over the course of the next few months, I will be introducing various short courses that will help her grow her business into her dream!

If you are a quilter or want to be one sign up for my Newsletter to keep updated about my upcoming classes, courses and of course all of my FREE resources!

If you have a business that you want to grow or want to start something new sign up for my Entrepreneur Newsletter to get all information about my upcoming gigs right into your Inbox!

Shruti Dandekar 8

To know more about it you can read my blog post about 20 random things about me!
Cheers!!!

shruti_dandekar
www.shrutidandekar.com


60mm-rotary-and-cutting-mat-set_cta

Posted in Guest Writers, Shruti Dandekar | Comments Off on Internationally Known Quilter, Shruti Dandekar is Havel’s Newest Ambassador!