Hexie Play by Melanie Traylor of Southern Charm Quilts

Kingfisher button.jpg This post is part of the Kingfisher Stitch Along, hosted by Rachel from Stitched in Color and Jodi from Tales of Cloth.

For more details click here.


It’s my turn on this series to post! And my subject is other things to do with those sweet little, yummy hexie flowers! YES!

I’ve been scheming about this since early May, more like obsessing. In fact these little lovelies have dropped me down a rabbit hole and I’m not sure I want to come out!

I’ve got three ways of using hexagon flowers for you other than that delectable Kingfisher quilt.

Let’s go see!


FREE 7 Day Bluprint Trial at Craftsy.com

Formerly Craftsy Unlimited


Idea #1

I learned how to English Paper Piece (EPP) spring of 2017, fell in love, finished a whole project, put it down and left it there. When Rachel asked me to be a part of this series, I said sure. I’m currently loving any type of project with hand sewing. Making those hexagon flowers (different from last year’s project) made me a bit giddy.

When I joined in I knew I wouldn’t be able to do the whole quilt, but I could make a mini or something. I made three hexie flowers. After finishing them, setting them down on my table and gazing at them lovingly, I knew there was no way I could stop at just three. BUT what I really wanted to make was a Grandmother’s Flower Garden quilt. It was on after that! Obsession set in and here we are.

I’ve been EPPing (is that a thing) consistently since then. The above picture shows my progress.

It doesn’t look like much, but it’s three month’s worth of fairly consistent work (an hour here, two there, most days). It may take me a long time to finish, but I will eventually finish.

I have no idea the size I’ll make, but I’d like a decent quilt size. We will see where this goes. I’ve still got lots of questions about what my plan is, but for now I’m just enjoying the process.


[easy-image-collage id=14472]

Find the Falling Slowly Quilt pattern here.


Idea #2

When this idea popped in my head, I might have started giggling. That’s a great feeling, I tell you!

Hexie flower on my jeans? Oh, yes!

I cut my hexagons at 3/4″. That means that each of the six sides is 3/4″, but if you measure directly across the hexagon (point to point in the middle) it measures 1.5″. I tell you these measurements because so many of you measure them a little differently.

So I made my itty bitty hexagon and then picked a pair of older jeans that gets a little less wear from me due to how snug they happen to me. Yeesh!

I worried that I might not wear them, but…….


I can promise you that all my other jeans might get a little jealous! I’ll be wearing these everywhere. Even if they are a big tight. 🙂

Materials used for Hexie Flower Butt


Idea #3

Remember those three hexie flowers for the Kingfisher I started with? Well, I wanted to make that too! So I did, but in pillow form.

I followed all of Rachel’s directions for cutting and sewing those triangles (which I was worried about messing up), but it worked.

I made three of the full diamonds with the hexie flowers and then cut four of the partial diamonds and voila!

This was a VERY fun project.

I used my wool batting that Hobb’s sent me a few months ago, because it’s puffy, you see. And I knew that if I did a serious fine quilting all over everything but the flowers then they would have an extra puffy look to them, making them pop.

It’s hard to tell in the pictures, but they are puffy, I promise.

Here’s What I used for the pillow:


In case you are interested, I’ll tell you how I made the pillow.

First – I made two quilt sandwiches for my top and backing with top, batting, backing.

Second – I quilted both.

Third – I put them right sides together, pinned, and then sewed them 1/4″ around the perimeter leaving about 3-4″ opening for turning.

Fourth – I turned the pillow right side out.

Fifth – I stuffed it very thick with the polyfil.

Sixth and finally – I used a ladder stitch or blind stitch to close.


If you’d like to follow the stitch along

Stitching
8 Hexagon flowers per week

Finishing Up

Melanie Traylor Headshot 2

Melanie Traylor lives in Northern Alabama with her husband and two children. She has a home studio dedicated to her love of making quilts. In her spare time she likes to crochet, read and travel. You can find her on:
Pinterest at – melaniestraylor
Instagram – @southerncharmquilts
Facebook – https://www.facebook.com/SouthernCharmQuilts

She blogs regularly at:
Quilt Making
You’ll find lots and lots more pictures of her quilts and studio on her blog.

Posted in art ideas, craft, Craft to make, Crafting, Fabric, Free Craft Projects, Free Quilt Projects, Free Sewing Project, How To, Melanie Traylor, Pillows, Quilting, Quilting, Tutorials, Uncategorized | Comments Off on Hexie Play by Melanie Traylor of Southern Charm Quilts

Havel’s Ruler Cutter – A Video Tutorial

Hiya!

Today I’m doing a sponsored post on a product that I’m newly in love with from Havel’s Sewing.  It’s their ruler cutter!

Find it in their shop here.

I’ve got a video tutorial for you to watch me use this gadget.  Don’t mind the fact that the whole time in my video I’m calling this a rotary cutter and am tongue tied every time I use the word.  It’s a RULER cutter!  A RULER cutter.  I keep telling myself that, but rotary cutter keeps coming out of my mouth.  Sorry about that!


The Landslide Quilt Pattern

[purchase_link id=”16460″ style=”button” color=”white” text=”Purchase” direct=”true”]


So what’s a ruler cutter?

I’m so glad you asked!

The Havel’s ruler cutter is a ROTARY cutter with a ruler attached.  You use it in place of your everyday rotary cutter.  In my opinion it is best when you are about to get on your “LOOOOOONG cutting sessions”.  As in, I’m about to cut one hundred and forty strips of fabric and then I’m going to cut squares from all of that.  Yah!

For those of you (like me) who like to get everything cut all at once this is ideal for you!

What’s so great about it?

Let me make you a list.  Yes, a list!  It’s great enough for that.

  1. No need to grip a rotary cutter – If you are older and experience arthritis, this might be just the kinda thing you need to help you get your fabrics cut with less pain on your hands.  If you are younger and don’t have hand pain you might be singing another tune after cutting those one hundred and forty fabric strips with your standard rotary cutter.
  2. Precision – Okay, this one actually surprised me.  I’m pretty precise with my rotary cutter, and I’ve come up with my own ways of making sure I do a good job cutting fabrics, but I have to admit that I have ruler sliding problems fairly often.  Does this sound familiar?  You are cutting your strips of fabric and as you near the end of cutting a single strip your ruler budges just a hair and you end up with strips that start out at 2.5″ and ended up a little narrower than that at the end.  This happens to me a lot!  The ruler cutter is weighty.  Put your hand on the ruler to hold it down and with your other hand move the cutter and cut.  No need to adjust your hand or the ruler.  It doesn’t move at all!
  3. Speed – When I used the ruler cutter for my first project I didn’t think it was much faster.  I was learning.  When I used it for my second I was surprised at how much time it shaved off my cutting.  It really is faster once you get the hang of it.

I love cutting fabric!  I know that for most quilt makers I’ve talked to it’s not their favorite.  For me, it’s exciting working through all the fabrics I chose and it’s the step right before you start your piecing when all the magic happens.  Naturally, I’m going to like anything that cuts as good as this thing does.  But let me list some cons to be fair and do this review properly.

Cons:

  • It won’t cut through more than four layers of fabric.  I’ve tried and just ended up having to go over it with my regular rotary cutter.
  • It’s pricy.  It really is, but if you (like me) cut fabric ALL. THE . TIME. I feel like it’s a worthy investment.  Plus, if you decide to purchase, be sure to use my coupon code “SouthernCharm7”.  This will give you $7 off at Havel’s Sewing.  Or Havel’s also sells this on Amazon for a bit cheaper here.

How to Use it

Tips:

  • It’s kinda tricky at first learning where to place the ruler and how to cut where you want.  Stick with it.  It will make sense soon.
  • It’s best used at cutting strips and squares from strips.  I wouldn’t swap my rotary cutter unless I’m going to be doing a lot of cutting.
  • Match up the lines on the ruler with the lines are your rotary mat.
  • Don’t use more than four layers of fabric.
  • Be sure to press down on the cutter handle.  It needs to meet the fabric.
  • Don’t worry about the “silver” part that blocks the lines on mat.  Focus getting the lines on the ruler portion and the lines of your mat aligned.


Other Havel’s Posts I’ve Written


I hope you found this post helpful.  Let me know in the comments if you have a ruler cutter and if you like it.  Thanks for reading!

 2 Weeks Craftsy Unlimited For $1 6/20 - 6/23/18 at Craftsy.com


Southern Charm Quilts - Melanie Traylor

Melanie Traylor lives in Northern Alabama with her husband and two children. She has a home studio dedicated to her love of making quilts. In her spare time she likes to crochet, read and travel. You can find her on:
Pinterest at – melaniestraylor
Instagram – @southerncharmquilts
Facebook – https://www.facebook.com/SouthernCharmQuilts

She blogs regularly at:
Quilt Making
You’ll find lots and lots more pictures of her quilts and studio on her blog.

Posted in Cutting Mat, Fabric, Fabric Cutter, Fabric Rotary Cutters, Melanie Traylor, Quilting, Reviews, Sewing Supplies, Tutorials, Uncategorized | Comments Off on Havel’s Ruler Cutter – A Video Tutorial

I Am Enough Quilt Along 2018

by Melanie Traylor – Quilt Maker, Southern Charm Quilts and Havel’s Sewing

Hello!!

I am over the moon excited to announce a new FREE quilt along that I’m partnering with Havel’s Sewing to bring to you.

When:

The quilt along starts September 28, 2018, with the last pattern releasing February 2019.

Where:

The quilt along will take place at The Sew Creative Blog on the Havel’s website.

What you need to do:

You can RSVP to the quilt along here. RSVPing will sign you up to a newsletter where you can download a coloring sheet and get reminders and nudges when the quilt along begins (you can also opt out if life gets in the way). After signing up you will receive an email immediately with more details.

Make sure you are following me on Instagram here and that you are following Havel’s Sewing here. There will be random announcements there.

Who can join:

YOU can! Yes, you. No matter who you are, where you’re from, what you do, or what you think, YOU are welcome here just as you are.

Are there prizes?

Yes, how did you know? Every other week, with each pattern release Havel’s will be giving away one tool to one lucky winner that posts a picture of their progress on Instagram. The tool will probably be something we could use with that week’s block pattern.

Havel’s has some of the sharpest cutting tools on the market. Visit their shop here.

What are we making:

We are making a modern sampler quilt! Yep, yep. If you enjoyed the Anthologie quilt we finished this past spring, I think you will find this one right up your alley. Plus, with this quilt along we are diving deep, very deep into mixing fabrics together, learning about our own personal styles and lots of yummy bits of knowledge about the color wheel.

You see the color wheel right? It’s not a basic color wheel at all! It’s a color wheel of YOUR colors. Shh! I can’t tell you more about that just yet.

This quilt is meant to be a reflection of you, a celebration of your imperfections and a journey into learning that most of the time life doesn’t have to be perfect to be wonderful or enough. Sometimes “average” is perfectly hunky dory.

Let’s stop comparing ourselves to somebody else’s highlight reel and accept ourselves just as we are. Let’s make new friends and be supportive and encouraging of our fellow quilt maker’s.

We are all enough.

RSVP to the “I am Enough” quilt along here.

PS. I haven’t decided on fabrics yet. Any ideas?

Southern Charm Quilts - Melanie Traylor

Melanie Traylor lives in Northern Alabama with her husband and two children. She has a home studio dedicated to her love of making quilts. In her spare time she likes to crochet, read and travel. You can find her on:
Pinterest at – melaniestraylor
Instagram – @southerncharmquilts
Facebook – https://www.facebook.com/SouthernCharmQuilts

She blogs regularly at:
Quilt Making
You’ll find lots and lots more pictures of her quilts and studio on her blog.

Posted in art ideas, Free Quilt Patterns, Free Quilt Projects, Free Sewing Project, How to Make a Quilt, How to Quilt, Melanie Traylor, Patterns, Quilting, Quilting, Quilting & Embroidery, Select Fabric, Sewing Supplies, Tutorials | Comments Off on I Am Enough Quilt Along 2018

The Kingfisher Stitch Along

The Kingfisher Stitch-Along
by, Stitched in Color, Tales of Cloth, Southern Charm Quilts, and more…

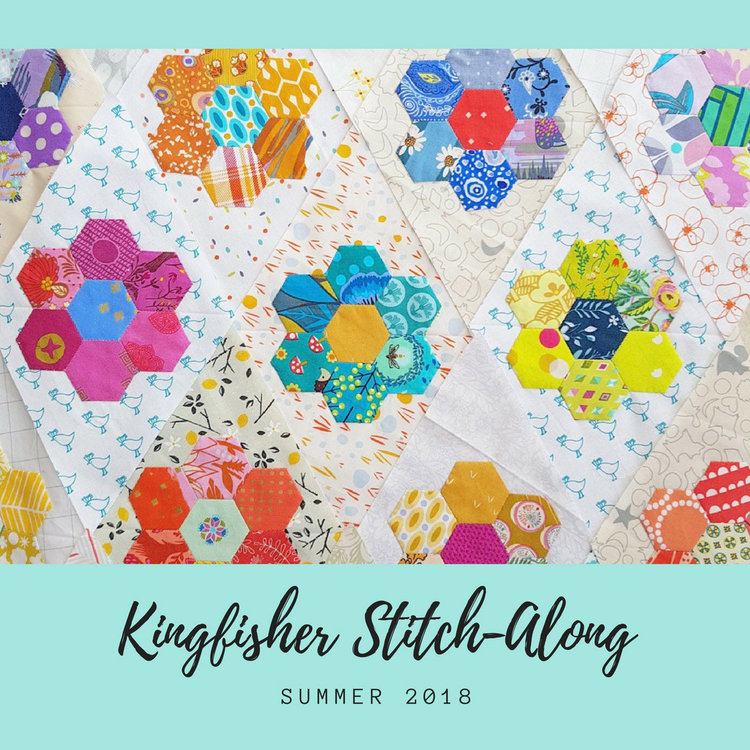
I’m helping promote the Kingfisher Stitch Along hosted by Rachel of Stitched in Color and Jodi of Tales of Cloth, two AMAZING quilt makers.

If you’ve been following me in my Instagram stories, this is the project I’ve been working on secretly that got me hooked on these hexie flowers and made me want to keep making them.

I love how portable and slow this work is. Every time I lounge about outside, I’m working on my EPP, on car rides I’m working on my EPP. You get the picture. It’s addicting! Why haven’t I finished my Gypsy Skies quilt and pattern? I’m working on my EPP. It’s everything in my head right now.

Come on! Admit you get obsessed with skills too and feel the need to go nuts with them.

This stitch along is exactly what that is for.

Kingfisher button.jpg

Here’s a little sneaky picture and button to give you a bit of a view of the project, but go and visit Rachel’s blog to see the whole quilt and get a coloring sheet too. Find all the info here.


FREE 7 Day Craftsy Unlimited Trial at Craftsy.com


I know I’ve said this over and over again, but my early quilt making years were very anti-hand sewing. It was too hard, it was too slow, I had plenty of excuses. Several years ago that all changed and now I love hand sewing just as much as I love sitting at my sewing machine.

Making these little hexie flowers is my new favorite thing! And it’s WAY, way easier than I had once thought.

The Kingfisher Stitch Along will have lessons for the complete newbie and prizes along the way. Yes, prizes!

I thought I’d give you a rundown of my favorite supplies that will get you started. You will need:


Product Spotlight

Beauty Shop Peach Hankie Quilt Panel <br/>SKU# C6000-02

Beauty Shop by Melody Miller & Sarah Watts for Cotton + Steel Fabrics

Panel size is 23″ x 42″

Price: $7.75 per panel
Purchase here.


Kingfisher Stitch Along Schedule

Prelude

  • May 16 – Supplies List at Stitched in Color and Printable Papers at Tales of Cloth
  • May 28 – Color Scheme Ideas at Stitched in Color and Kingfisher Prizes at Tales of Cloth

Stitching
8 Hexagon flowers per week

  • June 4 – EPP Basting Methods at A Little Patchwork and EPP Joining Stitches at Tales of Cloth
  • June 11 – Fussy Cutting at Ava & Neve
  • June 18 – Cutting Diamonds at Stitched in Color
  • June 25 – Keeping Momentum at Tales of Cloth
  • July 2 – Hand Applique at Charm About You and Machine Applique at Bonjour Quilts
  • July 9 – Joining Diamonds at Stitched in Color

Finishing Up

  • July 16 – Kingfisher Border at Stitched in Color
  • July 23 – Hexie Flower Play at Southern Charm Quilts

Today’s post is brought to you by Havel’s Sewing. Let me know if you have any questions or thoughts. I love it when I hear from y’all! Hugs!

HavelsSewingWebMasthead1a


Southern Charm Quilts - Melanie Traylor

Melanie Traylor lives in Northern Alabama with her husband and two children. She has a home studio dedicated to her love of making quilts. In her spare time she likes to crochet, read and travel. You can find her on:
Pinterest at – melaniestraylor
Instagram – @southerncharmquilts
Facebook – https://www.facebook.com/SouthernCharmQuilts

She blogs regularly at:
Quilt Making
You’ll find lots and lots more pictures of her quilts and studio on her blog.

Posted in art ideas, Free Quilt Projects, Melanie Traylor, Quilting, Quilting, Quilting Tools, Reviews, Sewing Supplies, Tutorials | Comments Off on The Kingfisher Stitch Along

A Throw Size Quilt in a Weekend! – Melanie Traylor of Southern Charm Quilts

Hey sweet friends!

A week or so ago I tested one of my own patterns to be sure that YES, it can be completely finished up in a weekend. Well, at least the throw size can.

I’m showing off my second version of my Good Girl quilt. This time is luscious plums, purples and lavenders.

Find the pattern here.


For this quilt, I made the lap throw size once again. I think it ends up really close to 60″ square, but not quite. This is a great size for just putting on your lap while on the sofa or front porch swing, taking with you for trips for sitting (though prob only one person could actually sit on this size unless you are a very tiny person.

It’s one of my favorite quilt sizes and I make many, many quilts this size.

Today, I thought we’d break down exactly what I did each day to finish this quilt in two days time.

Day 1

  1. Choose color palette and pull fabrics.
  2. Cut all fabrics – This step took me probably an hour to an hour and a half, and that is without breaks or stopping. I was alone at home, so if you have little ones running about or dinner cooking this could take longer for you.
  3. Piece blocks – I consider this step to be completely finishing all the blocks and the two borders, and that means pressing and all that. I spend no more than three hours on this step and I’m probably exaggerating that a bit. These are very simple blocks to make and require very little thought. You can zone out to TV or a podcast without fear of making a mistake. It was probably close to only two hours. Again, my time was all my own without distractions. When my kids were little this might have been a longer process.
  4. Lay out quilt – I do this step on my design wall and I usually put some good thought into this. I like to step back and make sure no two fabrics of the same are touching (it’s a pet peeve of mine and I’ve made several quilts where that happens and it always annoys me. You may not have this pet peeve and that’s even better.). Took maybe thirty minutes.


Day 2

  1. Make quilt top – This part of making a quilt top is my least favorite. I don’t like sewing blocks together and I drag on this step. Took me around two hours. Again, that includes pressing and getting a completely finished quilt top.
  2. Cut and make backing + batting – Took 30 minutes tops.
  3. Baste – I spray baste on the wall. It’s super quick, especially a quilt of this size. I have a tutorial here for it. Took 30 minutes at least.
  4. Quilting – I did a tight meander or stipple for this quilt all over. Took me about an hour. I have had several people contact me about doing it so quickly and I think that just comes with doing it over and over again. A meander is (for me) the easiest design to do and I do that quickly without much thought in it. I think of it more of just a therapeutic part of making quilts. I’m always listening to a podcast when I do this step and I like to finish in one sitting. Again, I’m not adding special touches to my quilt design. I’m using a very simple meander. I have heard from some people that a meander is not the easiest and if that’s true for you, that’s okay. Find something that is. I have not explored free motion quilting designs much, just a little and this is my favorite. I don’t want to spend a lot of time with this step, but if you do, I say go for it.
  5. Binding – I machine bind. Here’s my tutorial. I think I bind a little differently (and weirdly), but it works for me. Took me just over an hour to make binding and bind the quilt.

And that’s it! Okay, okay. Making a quilt is not “that’s it!”. There’s a lot of work and a lot of steps involved. We all know it. I just wanted to show you what I did each day to be able to gift this quilt on the third day. Obviously, making a quilt is so much enjoyable when you get to take your time, not feel rushed, and enjoy the making. But sometimes you need a quilt right now! And I think this is a quick, but cool pattern. Plus, it really shows off that yummy low volume, don’t you think?


Product Spotlight

Oh, yum yum yum!

Low Volume Bundle

Moda Fabrics

6 Fat Quarters

Bundle includes fabrics from Tuppence, Modern Background Paper, Farmer’s Daughter and Victoria

Fat Quarters Measure 18″ x 21″

100% Cotton, Quilt shop quality fabric.

Purchase here.


I don’t have fabric names for you on this quilt, because I truly dipped into my purple scrap basket and just pulled all the width of fabric scraps that were in it. I might be on a roll of clearing out scrap baskets. As long as I keep making monochromatic quilts……

My only baskets now that are running over is the basket of green scraps and the basket of gray and black scraps. I can see myself using all those greens, but what am I going to do about the gray and black. I just don’t see me using those much at all. Ugh.

I have a pinterest board called SCRAP QUILTS to try and keep me inspired to make them. And even broken down even more, I have a board called STRIP QUILTS, because I have a lot of strips. Maybe they might inspire you too?


Cotton + Steel Boutique


Helpful Links


Thanks so much for reading along!


Southern Charm Quilts - Melanie Traylor

Melanie Traylor lives in Northern Alabama with her husband and two children. She has a home studio dedicated to her love of making quilts. In her spare time she likes to crochet, read and travel. You can find her on:
Pinterest at – melaniestraylor
Instagram – @southerncharmquilts
Facebook – https://www.facebook.com/SouthernCharmQuilts

She blogs regularly at:
Quilt Making
You’ll find lots and lots more pictures of her quilts and studio on her blog.

Posted in art ideas, Fabric, Fabric Selection, Free Quilt Patterns, Free Quilt Projects, Free Sewing Project, How to Make a Quilt, How to Quilt, Machine Quilt, Melanie Traylor, Melanie Traylor, Patterns, Quilt Throw, Quilting, Quilting, Select Fabric, Tutorials | Comments Off on A Throw Size Quilt in a Weekend! – Melanie Traylor of Southern Charm Quilts