Eight Tips for Perfect Rotary Cutting
By Liz Kettle
Rotary cutting is one of the best tools in the modern quilter’s box. I was so excited when I got my first rotary cutter when I was a budding quilter but that quickly turned to dismay when it turned out a bit harder than it looked. I have gathered some of my best tips for successful rotary cutting.
1. Square it up! One of the things that frustrated me the most was the dreaded curve in the middle of my cut fabric strips. I would try to steam it out but that never worked. Quilter friends gave advice for cutting a straight strip but I still ended up with those pesky curves. My friend Cat M. came to the rescue with her great technique for squaring up your fabric for cutting straight strips.
Begin by ironing your fabric. Match up the selvedge edges so they are as close to parallel as you can get. Selvedge edges are not always straight. Lay your fabric on your cutting mat and smooth it flat. Cutting is best done on a counter height
table to prevent back fatigue.
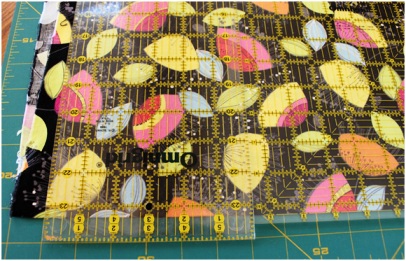
Use two rulers: a long one and a square one. Place the long one down first on the fold line and then the square one right next to it. Use a line on the ruler rather than the edge of the ruler to place your ruler accurately on the fold of the fabric. Using two rulers ensures that you will have a straight edge for your first cut.
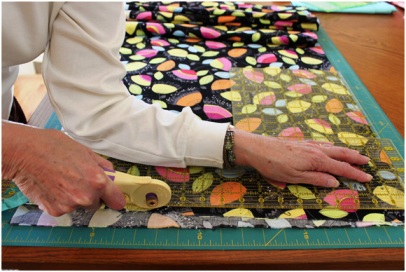
Hold the ruler firmly with one hand or arm while you make your cut. Many people use their hand to hold the ruler. In order to keep the ruler from shifting as they cut along the length, they have to stop the cutting motion when they have moved past their hand in order to move the hand up to the top part of the ruler. You might want to try this approach in which you lay your arm from elbow to fingers along the entire length of the ruler. I never have a problem with the ruler shifting when I hold the ruler this way and I am less likely to accidently cut myself.
2. Don’t let it slip! There are some great tools to help prevent your ruler from slipping.
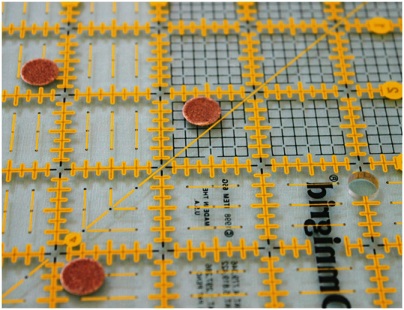
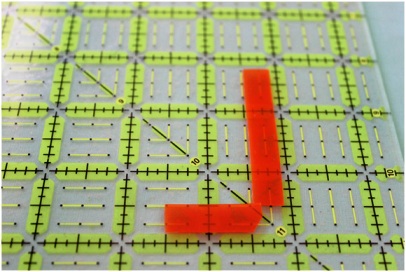
Small sandpaper dots (Fabric Grippers from Nifty Notions).
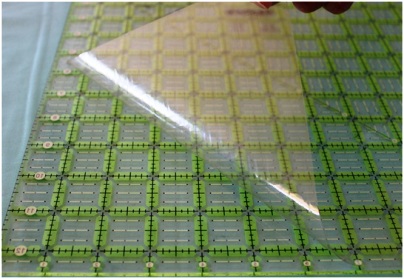
And a plastic cling film called InvisiGrip™.
Both keep the smooth plastic rulers from slipping.
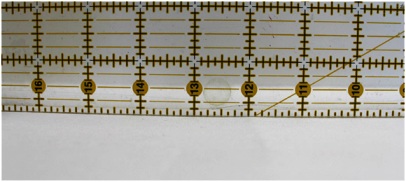
3. Rulers wear out! Over time the sharp edge of your rotary cutting blade can shave off the plastic of the ruler. This tends to happen about the middle of the ruler. Check your ruler to see if it needs replacing by placing it on edge on a flat surface. If there is a section that is not in contact with the table it is time to get a new ruler. In this photo you can see a tiny bit more shadow around the 13″ mark where the ruler is not completely in contact with the table. It is very slight but there are also a couple of good nicks in the edge so I need to start looking for a good sale.
4. Mark it! Use blue painters tape or specialty ruler tape such as Glow-Line Tape to mark corners when squaring up multiple quilt blocks or along a line when cutting multiple strips the same width. This saves time and prevents you from accidently using the wrong measurement.
5. Consistency Counts! Some quilters caution you to only use the lines on the ruler for measuring and some insist that the lines on the cutting mat are the best way to measure. We can have a passionate discussion about who is right but in the end as long as you are consistent with your measuring choice it doesn’t matter if you chose the mat or the ruler. The same goes for which side of the line you measure off of or if you use the middle of the line, as long as you are consistent you won’t have any problems. You should also be consistent in the brand of ruler you use. There can be tiny differences between brands that may affect your finished project.
6. Baby your mat! You can extend the life of your self-healing cutting mat with a little TLC. Always store your mat flat especially when traveling. If you do a lot of strip cutting be sure not to cut on the same line all the time as this will eventually cause cuts too deep to heal. Treat your mat to a spa day once a year. Use a soft brush and warm water to clean out fibers caught in the cuts. Then give your mat a soak in cool water with a little white vinegar so it can re-hydrate. Make sure you soak them flat though! You can make a temporary soaking tub with thick plastic sheeting that is gathered up in the corners to make a shallow basin.
7. Use the right rotary cutter! When you are cutting through two layers of cotton a 45mm rotary cutter is perfect but when you want to cut through 4 layers of cotton or heavier fabrics you may want to choose the 60mm cutter. The small cutter is great for small shapes and curves. Havel’s rotary cutters are designed to prevent hand fatigue and repetitive motion stress so they are the perfect choice for cutting lots of strips of fabric.
8. Change those blades! Cutting with a sharp blade makes our work easier. As soon as your blade shows signs of dullness, or if you nick it on something don’t put off changing it. You have to use a lot more pressure to cut with a dull blade and that means arm fatigue and a higher chance of accidents.

Liz Kettle is a mixed media and textile artist living in Colorado. She is co-author of two books, Fabric Embellishing: The Basics and Beyond and Threads: The Basics and Beyond. Liz loves teaching and sharing the joy of making stuff in her articles, classes and workshops. Visit her blog and website at www.TextileEvolution.com
Click Here to See Other Articles By Liz

