Reverse Applique Journal Cover: Free Sewing Project

Free Sewing Project:
Reverse Applique Journal Cover

By Liz Kettle
journal cover lead photo 1

As we say farewell to the previous year and look forward to the wonders of the upcoming year it is common to become introspective and ponder how we may have our best year ever. For me that means beginning a new sketchbook or journal. I don’t actually sketch like you imagine a fine artist would sketch…indeed most of my sketches are just some rough ideas of designs for quilts and collages. I don’t actually journal either…that conjures up images of one pouring out words on clean crisp pages capturing the nuances of their life.
journal cover lead photo 2

Just what do I do with these journals? Well my pages are an untidy mess of scribbles of shopping lists, phone numbers and details about a technique or project that I don’t want to forget. Tips written on the back of an envelope and sticky notes are stuffed in willy nilly and tend to leave a trail behind me. Quick sketches keep track of ideas when I think…that would make a great quilt!
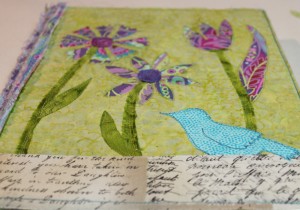
journal cover lead photo

I do keep visual art journals. These are a collection of small works of art to help me keep creating when I can’t get to the studio for a few days. I use paper, paint, fabric and bits of old projects to create collages. These collages also give me some great ideas for larger quilts and art pieces.

Whether my journal is for daily notes or a little art play time,I always make a fabric cover for them. My covers are quick to finish and make my journal special. Who wants to grab a boring black notebook when inspiration strikes? Of course these covers can be made in any size for any sort of book you like…even an electronic reader!
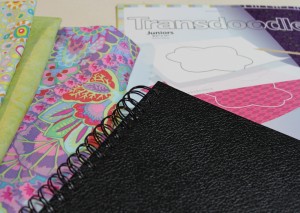
Journal Cover supplies

Supplies:

  • Journal: I like spiral bound journals because they lie flat when open
  • Craft felt and fabrics: enough to cover your journal. I use white felt with light colors and black felt with dark colors.
  • Cotton thread, size 80 or 90 quilting or microtex machine needles and a sewing machine
  • Pencil
  • Rotary cutter, ruler and mat
  • 51/2″ Embroidery and Snip-eze scissors
  • Transdoodle transfer paper
  • Misty Fuse or other fusible web

Now lets get to work…

journal cover 1

    1. Lay the craft felt on your table, lay the journal, opened, on top. Trace around the edge with a pencil. Remove the book and draw another line at the top and bottom edges ¼” from the edge of the book line and extending beyond the side edge lines.
journal cover 2

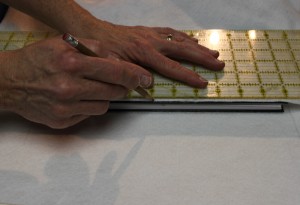
    1. To accommodate the spine of the book we must re-measure with the book closed. Place the journal back on the felt with one side on the side edge line. Close the book and wrap the felt around the book. Fold the felt back at the edge of the journal. Lay a ruler on top and draw a new edge line.

journal cover 3

    1. Remove the journal and use your ruler to draw your final side edge line 31/2” away from the previous edge line. This will create the pockets you slide your journal into. Your felt should look like this example.
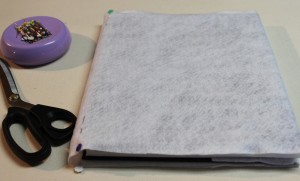
journnal cover 4

    1. Cut along the outside drawn lines. Try the cover on your journal with the fold back pocket edges tucked inside. Use pins to mark the edges of the journal cover.

journal cover 5

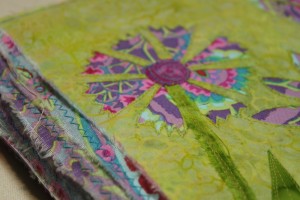
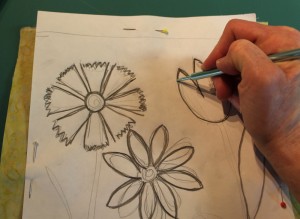
    1. To create your reverse appliqué cover, choose two fabrics. The bottom layer is the fabric that will be revealed when the top fabric is cut away. I choose a muted fabric for the top layer and a wild design fabric for the under layer. You will also need a design that you want to use…my rough sketch is shown…Transdoodle transfer paper and a stylus or in this case, a knitting needle.
journal cover 6

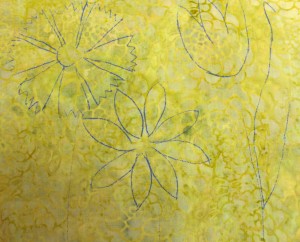
    1. Layer the two fabrics on a hard surface. Place the Transdoodle paper on top and your pattern on top of that. Pin in place to prevent shifting. Use the stylus/knitting needle to trace the pattern.
journal cover 7

    1. Remove the pattern and Transdoodle paper to reveal your pattern.
journal cover 8

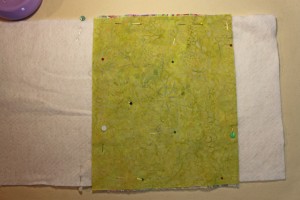
    1. Place the fabrics on the felt pattern. Be sure to place them on the right side of the felt (not including the pocket flap) so it will be on the cover not the back of the journal.
journal cover 9

journal cover 9b

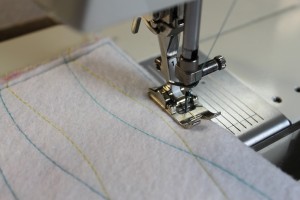
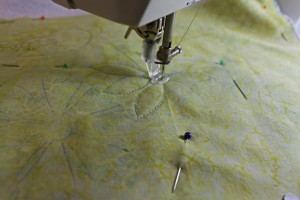
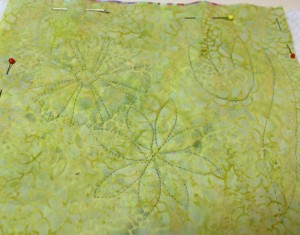
    1. Set your machine up for free motion stitching by dropping the feed dogs and attaching the darning or free motion foot. Stitch on the pattern lines. Don’t worry if you stray from your original line a bit. Flowers aren’t perfect.
journal cover 10

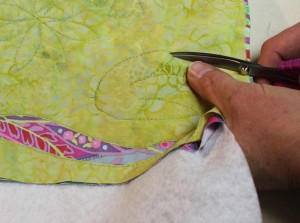
    1. The only scary part is cutting into the top fabric to reveal the bottom fabric. Gently, pierce the fabric with the very tip of your scissors. You want to go through the top layer but not the bottom layer of fabric. I find the 51/2” curved embroidery scissors and the Snip-Eze are perfect for this task. The tips of both of these scissors are very sharp and thin to enable you to pierce the top layer of fabric easily. The curve of the blades helps to prevent accidentally cutting into the bottom layer and allows you to get really close to the stitch line. I love these scissors and never let them stray very far from me! Cut out along the stitch line to remove the top fabric layer.
journal cover 11

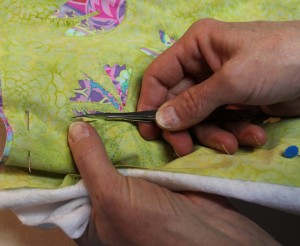
    1. The Snip-Eze are the perfect size for the little tiny bits.
journal cover 12

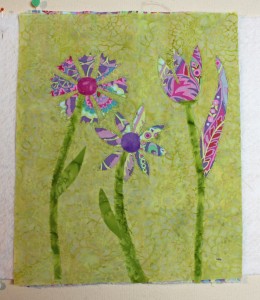
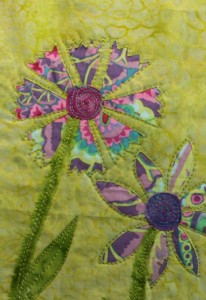
    1.  Cut two small circles for the centers of the two flowers. Cut or rip some darker green fabric for the stems and leaves. My stems are ¼” ripped fabric and the leaves are cut from the same fabric. These pieces can be fused or basted in place.
journal cover 13

    1. Stitch the stems and flower centers.

journal cover 14

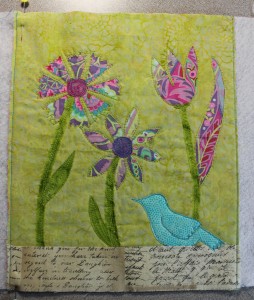
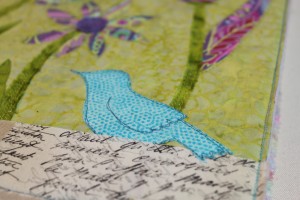
    1. For additional interest I added a bit of text fabric to the bottom edge and a little blue bird. The bird is a reminder for me of my focus word for the year; voice. You can add any motif that interests you, flowers, a heart, a cat or rabbit. Stitch around the edge of the bird. Finally, trim any excess fabric and stitch each side edge down to the felt.
journal cover 15

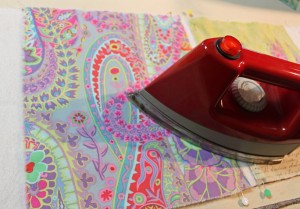
    1. Choose a fabric for the back of your journal. I chose the same fabric that is featured in the reverse appliqué. Cut it to size and use Misty fuse to fuse to the felt.
journal cover 16

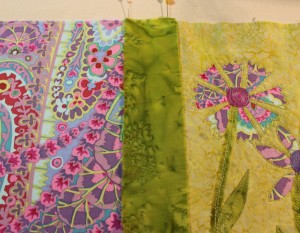
    1. For the binding cut or rip a 2” wide piece of fabric the length of your journal. Center the strip between the pins that mark the edges of the hard covers. Fuse in place.
journal cover 17

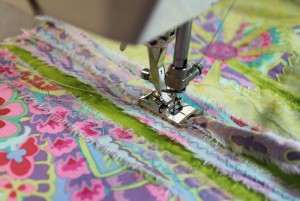
    1.  I like to embellish the spine. I ripped ½” strips of fabric and applied them to the spine with a zigzag stitch. If you do not want to add strips of fabric or ribbon to the spine, simply stitch along the length a few times to strengthen and secure the fabric.
journal cover 18

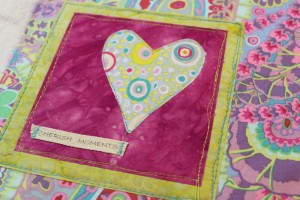
    1. A little embellishment to the back is quick and fun. I simply fused down two squares of fabric with a heart and gentle reminder printed on twill tape.
journal cover 19

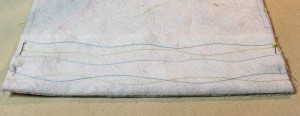
    1. To finish the pockets for the journal to slide into fold the felt edges to the inside and pin in place. Yes, I couldn’t resist a little bit of thread embellishment here too!
journal cover 20

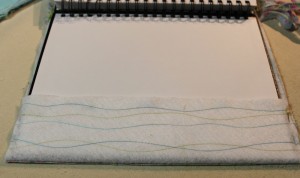
    1. Slide the journal into the pockets and adjust the pins as needed. You want a snug fit.
journal cover 21journal cover 21b

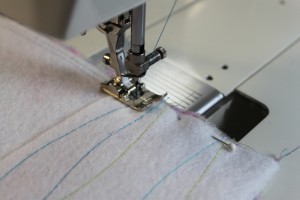
    1. Stitch the pocket flaps closed where you marked them with the pin. Continue stitching around the entire perimeter of the cover including the folded side edges, top and bottom.
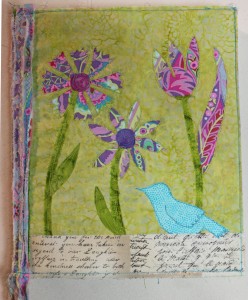
journal cover 22 front

Slide your journal into the pockets, grab your pens and you are ready to journal! I probably won’t be able to resist adding some hand stitching to my cover.
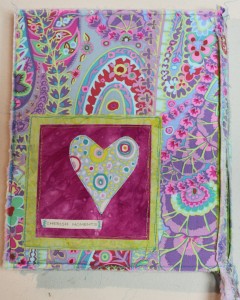
journal cover 22 back

Liz Kettle is a textile and mixed-media artist who loves sewing and creating and sharing that joy with others. She is co-author of two best selling books: Fabric Embellishing: The Basics and Beyond and Threads: The Basics and Beyond.  Share Liz’s stitch journey on her website and blog www.TextileEvolution.com

Posted in For Beginners in Sewing, Free Sewing Project, Liz Kettle, Quilting, Tutorials | Tagged , , , , | 5 Comments

October Email Subscriber Winner Announced

Havel’s Sewing is pleased to announce that Nancy Medley of Missouri has won a free Havel’s Sew Creative Scissors set .  Nancy was eligible because she subscribed to our email news during the month of October.   Her prize: one 5-1/2″ Curved Tip Embroidery Scissors, one 7″ Serrated Fabric Scissors, one 9″ Pinking Shears, one Dura-Snips on a Neck Strap.

If you want to be eligible to win, just sign-up for our email news on the home page of our website.  Good luck!

Posted in Embroidery Scissors, Fabric Scissors, Uncategorized | Tagged , , , | Comments Off on October Email Subscriber Winner Announced

New Fabric Scissors and Rotaries a Hit at Houston Quilt Market

Renowned thread-painting artist Terry White, left, and Bev Crone, Havel's executive vp and sales team leader for our scissors division, right

Renowned thread-painting artist Terry White, left, and Bev Crone, Havel's executive vp and sales team leader for our scissors division, right

Thank you to everyone that stopped by our booth in Houston! We had such a good time talking with you and hearing so many great ideas for product innovations in fabric scissors.   Our new Dura-Snips on a Neck Strap were well received and we had a good time giving them out (over 300 of them) as free samples!

Pokey Bolton, quilt artist and host of Quilting Arts TV, with Bev Crone at the International Quilt Market 2010.

Pokey Bolton, quilt artist and host of Quilting Arts TV, with Bev Crone at the International Quilt Market 2010.

Special thanks to Terry White, Pokey Bolton, Liz Kettle, Ruth Chandler, Angie Steveson, Linda Everheart, Sue Hausmann, Patrick Lose, Beth Novak, Jennifer Keltner, Kathie Downie, Sarah Thompson, Mary Fons, Christy Adamski, Kathy Stull and so many more!

See you at Spring Quilt Festival in Cincinnati (our home town!!!) April 7 – 10, 2011, and at Spring Quilt Market in Salt Lake City, May 13 – 15, 2011.

Posted in Fabric Scissors, Quilting, Uncategorized | Tagged , , , , | 2 Comments

5 Important Questions for Choosing Your First Fabric Scissors

Scissors For the Beginner in Sewing and Quilting

By Bev Crone

Bev Crone, <br>Executive Vice President of Havel's

Bev Crone, Executive Vice President of Havel's

In the rush to buy your machine, fabrics, threads, needles and various tools, the last item to land in the cart is usually the scissors.  The ones you grab just before you head to the checkout line. The cheap scissors, right?

Once you begin your project, however, it doesn’t take long to grow frustrated with the “cheap” scissors.  They quickly start tearing the fabric instead of cutting clean straight lines.  They push your fabric forward too much so it bunches as you are trying to cut it.  They wear out your hands because they take extra muscle power just to make your cuts.

 So how do you determine what is a good quality fabric scissors  that will last a long time? Glad you asked.  Here are 5 Important Tips to help you answer that question:

1)      Comfort?  Comfort is important.  You should be able to handle the scissors in the store to get a sense of how you like the feel in your hand.  With today’s packaging, that isn’t always easy but it is important.  If you can’t get the scissors out of the box to test, ask if there is a sample you can try.  If the scissors doesn’t feel good in your hands or if it feels too heavy, then you should try another set.  Good quality scissors should feel firm in their action, but still silky smooth.

2)      Carbon or stainless steel?  You have two basic choices.  Which is best?  The better question is which is best for you?  Classic professional shears are usually big pieces of carbon steel.  Carbon steel can be exquisitely sharpened and tempered to a high level of hardness so they will retain their sharp edge for a “lifetime” of regular use.  However, these are usually very heavy and expensive.  Stainless steel manufacturing has advanced very far in the past 30 years.  Stainless steel alloys are made with high carbon content and then tempered in such a way that they too can be given an “exquisitely” sharp edge at a very good level of hardness.  Most stainless steel scissors are lighter in weight and economical in price because only the blades are metal and the bows or finger grips are plastic.  As with comfort, weight is a critical factor in how well you’ll like your scissors. Another reason it is important to handle the scissors to get a sense of how you like the feel in your hand.  

3)      Small or large?  Buy the right tool for the task at hand.  For fine detail work, you will have success with a smaller, fine pointed scissors better known as “embroidery scissors.”  Many are available with larger finger loops and comfort grip handles.  If you like decorative designs in your scissors, (think storks here) there are plenty of styles to choose from.  You usually get what you pay for in this style, so be careful to buy quality.  For cutting fabric and patchwork, you’ll be happier with something in the 7” range with fine serrations on one side of the scissors.  The serrations will grip your fabric to reduce or prevent the forward push.  Cutting slippery fabric like silk?  Use a serrated scissors.  To cut multiple layers or thick fabrics, choose an 8” or longer scissors.  Again consider using a serrated style for best success.

4)      Where to buy?  Visit your local fabric or quilting store to buy your sewing scissors, not a drugstore or office supply place.  Acquaint yourself with the people who work there. They will be happy to help and answer any question you have. After all, they do a great deal of sewing themselves and in any case spend a lot of time cutting fabric. They will become a great resource for all your sewing needs.

5)      Brands?  Good brands will stand behind their quality.  Choose scissors from a brand you can talk to and trust.  At Havel’s, we offer a 100% satisfaction guarantee so if you aren’t happy with a pair of Havel’s scissors, we want you to call us.  We’ll do our best to make it right for you with an exchange or refund. 

Innovation  – Quality  –  Creativity

Use Havel’s When You Need to “Cut it Close.”

Posted in Embroidery Scissors, Fabric Scissors, For Beginners in Sewing, Frequently Asked Scissors Questions, Quilting & Embroidery, Uncategorized | Tagged , , , , , , , , | 2 Comments

What’s the Difference Between Scissors and Shears?

Havel's 7" serrated scissors This is a question that’s on the minds of a lot of beginning sewists and quilters.   The term “shears” is usually applied to scissors that are longer than six inches.  This is not a rule carved in stone, however.  You will notice at Havel’s we tend to use the term “shears” only with scissors that have an especially strong fulcrum force that gives them a better than normal ability to cut thicker materials or several layers of material at once.   So for us at Havel’s, we use the term “shears” to communicate extra strong fabric cutting power.   

All scissors create a force when cutting that propels the material forward.  Excellent scissors are sharp enough and have their blades carefully matched with appropriate cutting angles that you will experience little or no problem with your fabric moving forward.   If you are having this problem then your fabric is too thick for normal scissors, or you are trying to cut layers, or your scissors are simply not very high quality and have dulling edges. 

It usually doesn’t take long for the cheaper scissors available in the market to disappoint you.   They dull quickly, they begin to tear fabric rather than cut it, or they stop cutting clean lines as some slips through them uncut.  If you have “cheap” scissors, then the answer is to upgrade.  We believe you’ll find Havel’s fabric scissors to be an excellent combination of high quality engineering, long lasting edges and affordable pricing.   If you are cutting thick material or multiple layers of material, you should use a serrated scissors.  The serrations on one side of the scissors will grip the fabric to prevent excessive forward push.    

What tips can you give a beginner about scissors?  Leave a tip here:

Posted in Fabric Scissors, Frequently Asked Scissors Questions, How to Choose Fabric Scissors | Tagged , , , , | Comments Off on What’s the Difference Between Scissors and Shears?