Free Craft: A Pocket Full of Posies

By Liz Kettle

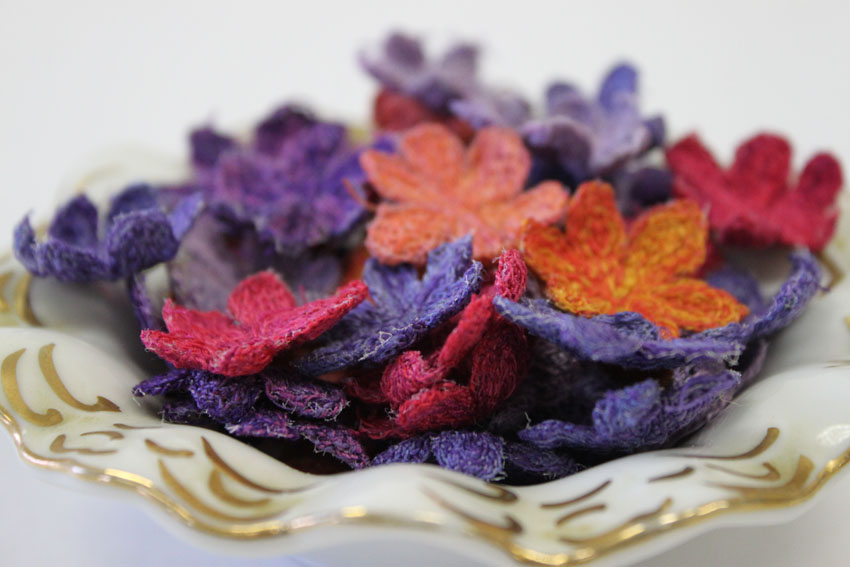
posies image 01_posies-in-bowlDo you ever have those days where nothing seems to go right? Your grocery bag rips and apples go rolling everywhere, you burn a hole in our favorite fleece vest, the plumber calls with bad news (do they ever call with good news?)…maybe he can get the water back on next week, and then someone hacks your email account and sends everyone you know a less than wholesome web link…sigh…you want to escape to the studio and stitch your troubles away, but how can you focus on creation when you are stressed to the max? Thread painting to the rescue!!
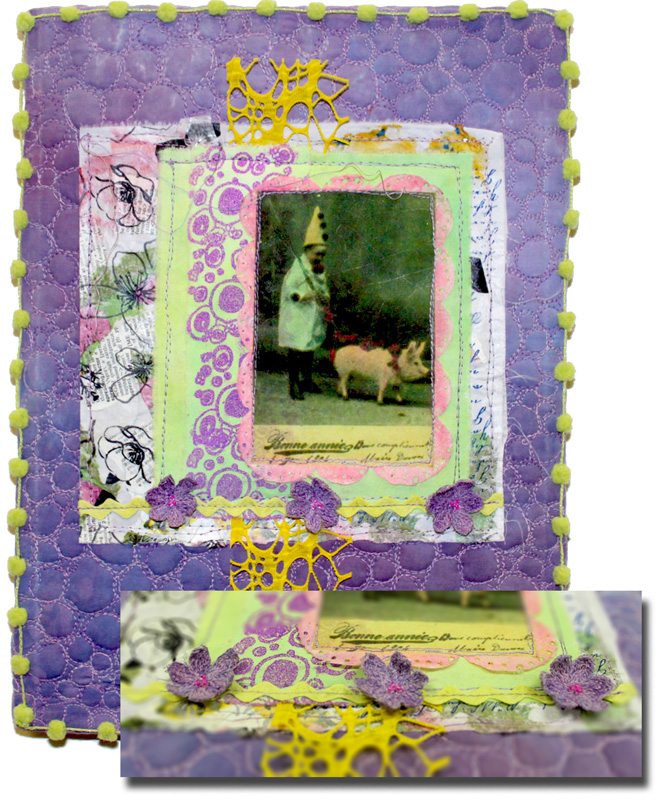
pigs and posies collageNO, I am not kidding…chocolate is a close second choice but one of the most relaxing stitching tasks you can find is making thread painted embroideries and you don’t have those pesky calories to worry about later. The key is to pick a simple pattern and let the thread colors do the work…you hardly have to think at all.  The stitching becomes rhythmic and you slip in to that Zen like creative flow that melts those blues away. Best of all you will have created a pile of great one-of-a-kind embellishments. Try some of these posies, or some leaves or hearts or whatever…just get stitching and everyone will be wondering just how you stay so calm, cool and collected!

SUPPLIES

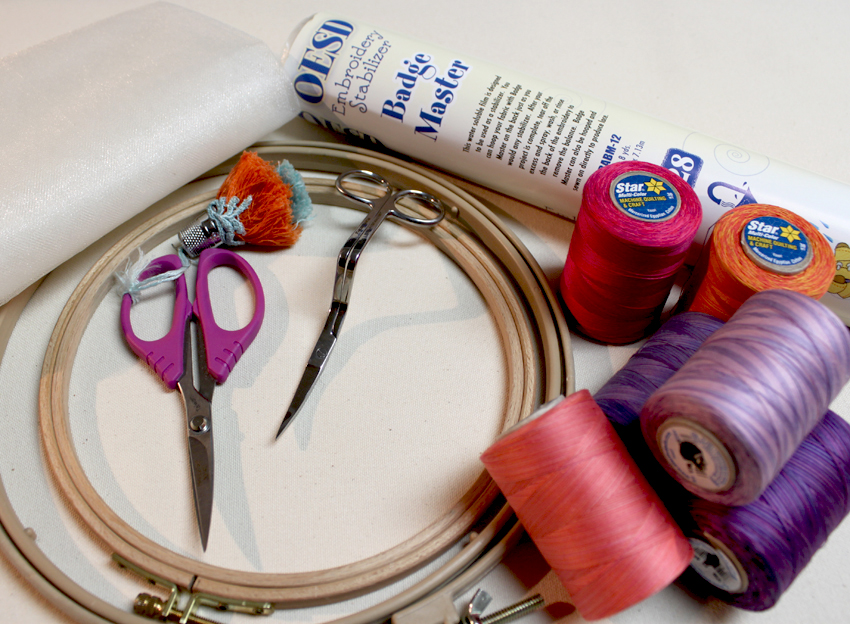
needed supplies for posies

step 1- make a circle

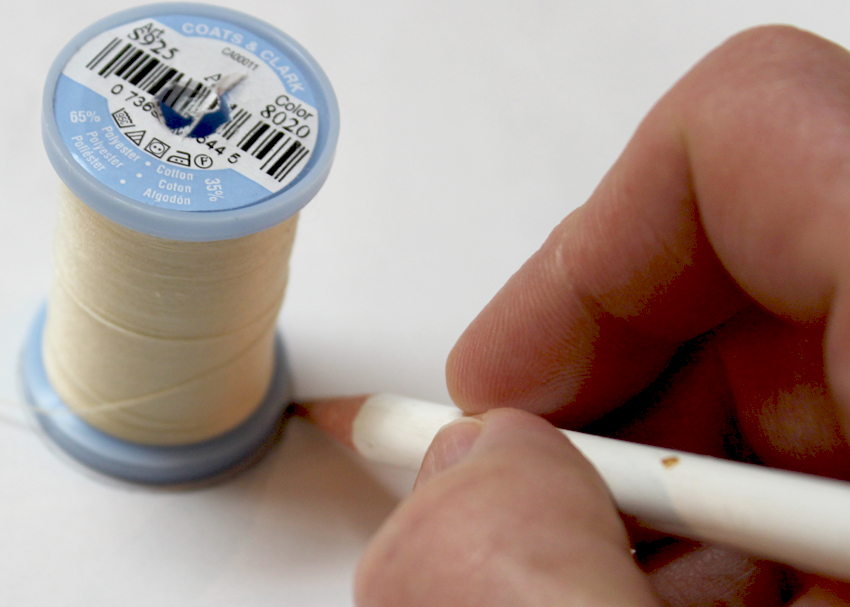
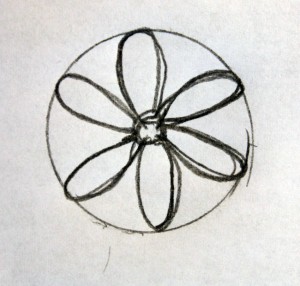
1. To draw your flower design, trace a small circle on a piece of paper. The spool I traced is about 1 ¼” in diameter. In the center of the circle draw a small circle for your flower center. Draw 6 petals from the flower center to the perimeter of the circle.
posies step 2

Don’t worry about drawing a ‘perfect’ flower…there isn’t
any such thing.

draw directly on stabilizer

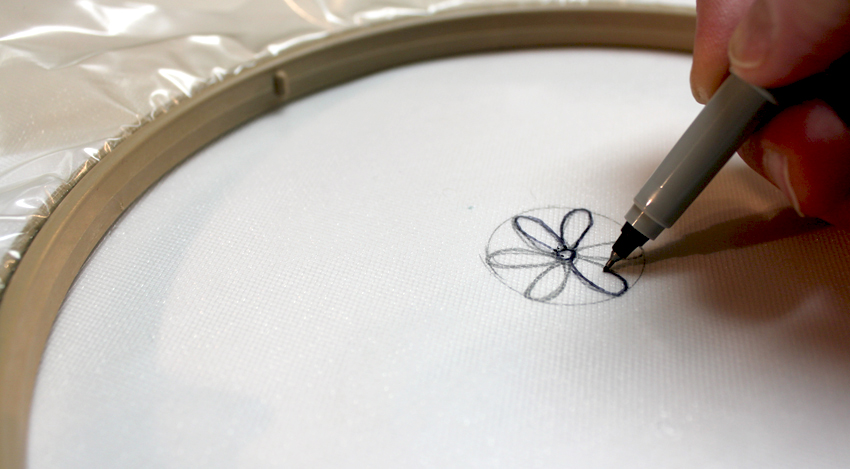
Draw directly on the water-soluble stabilizer.

hoop full of posies

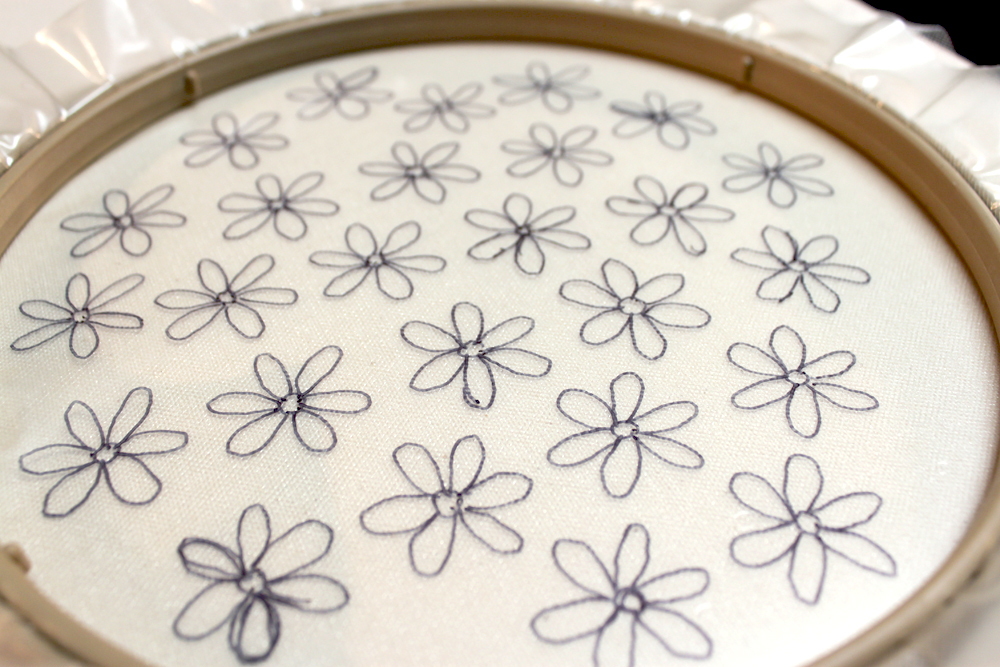
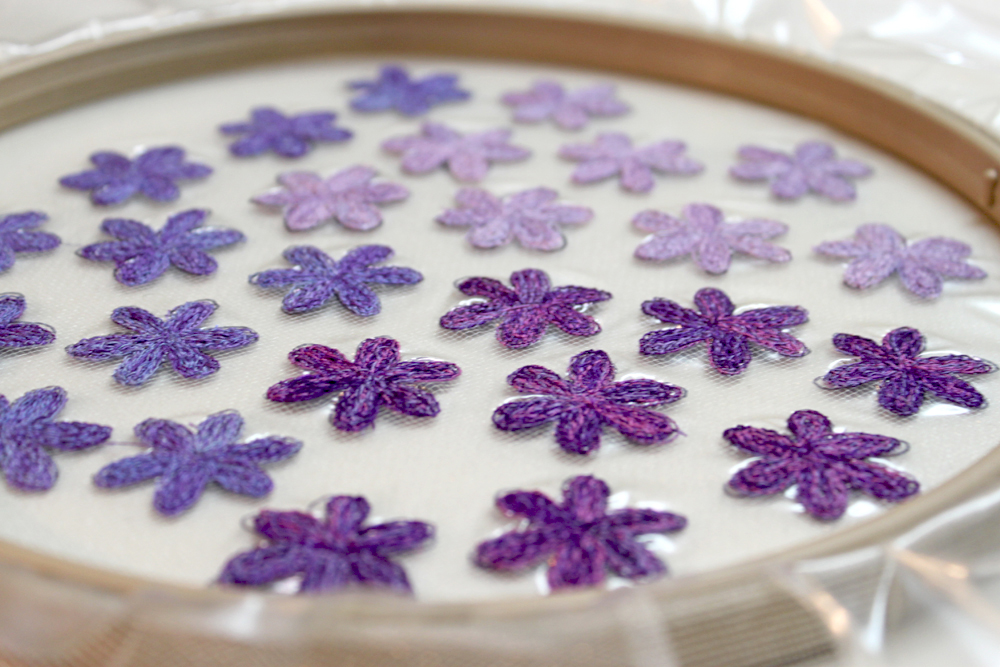
2. Cut a piece of tulle and heavy weight water soluble stabilizer slightly bigger than your hoop. Place the stabilizer on top of the tulle and secure in the machine embroidery hoop. You can do this without a hoop but the hoop does help keep the stabilizer taut and is easier on your hands. Place the hooped stabilizer and tulle on top of the flower pattern. Use a sharpie marker to trace the pattern on the stabilizer. Fill the hoop with the flower pattern. I use tulle as a base to give some underlying structure to the thread embroidery. This project can be worked without the tulle but you must be a bit more careful that all your stitches interlock or your work could unravel when the stabilizer is rinsed away. My book, Threads: The Basics and Beyond has more detail on this technique.

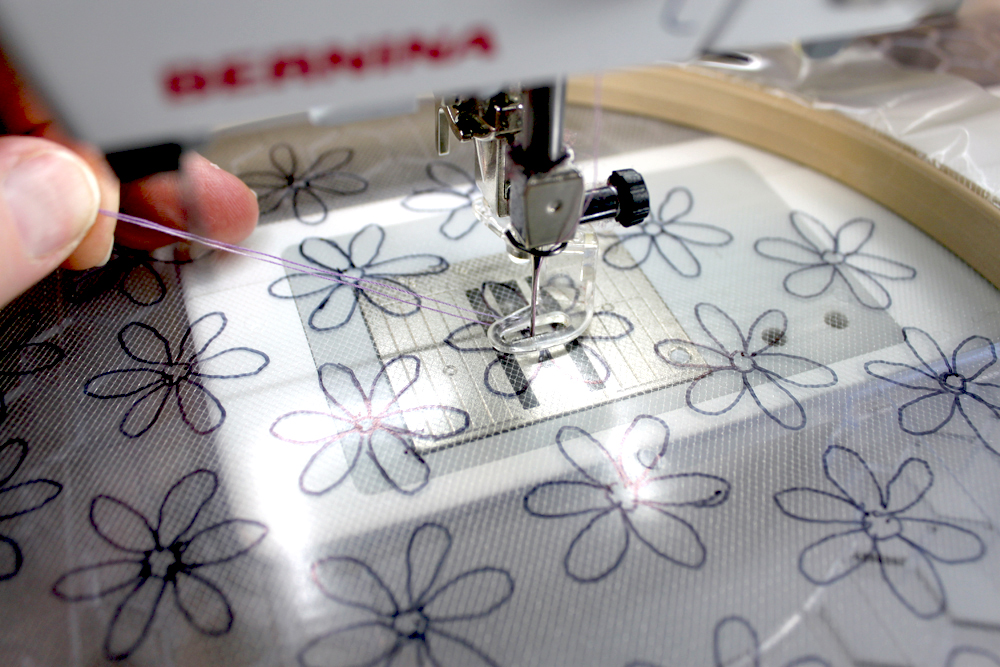
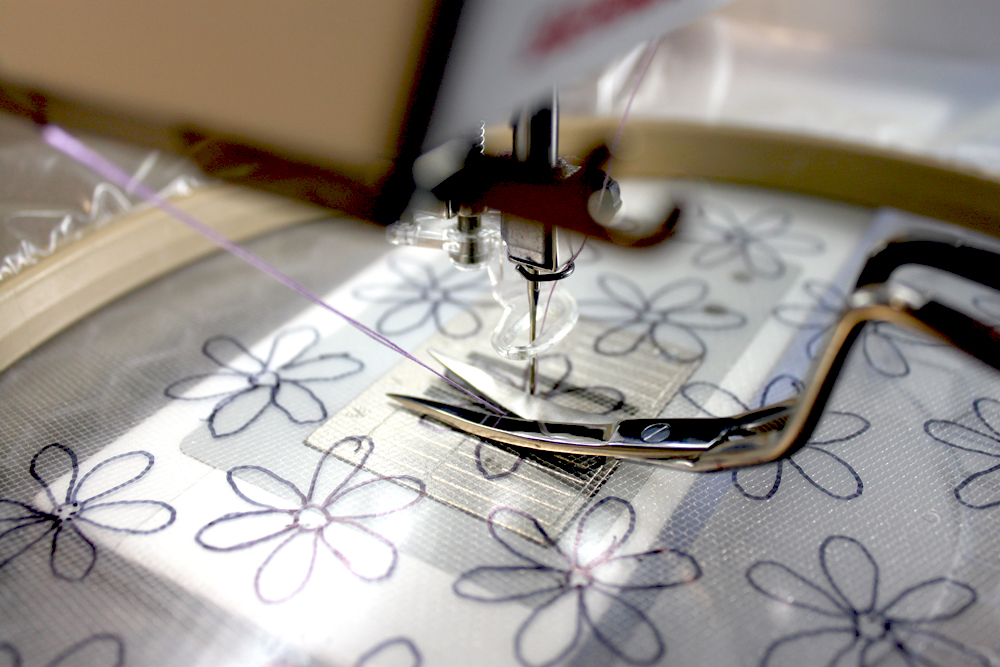
3. Take the hooped tulle and stabilizer to the machine. Set up for free motion stitching by dropping or covering your feed dogs and use a darning or free motion foot. To begin stitching pull the bobbin thread up and hold it to the side with the top thread. Make a few stitches and then clip off the tails as close to the stabilizer as possible.

Havel’s 5 ¼” Ultimate Machine Embroidery Scissors are the perfect tool for the job. I had my doubts that I really needed another pair of specialized scissors but I have to tell you…WOW!…the double curve of these scissors get really close to the fabric and eliminate any chance of accidently cutting into your fabric or stitching. When you are using a hoop and regular embroidery scissors it is difficult to get a close cut resulting in little stray bits of thread poking out where you don’t want them. I always opt for fewer tools to keep track of in my studio but these are on the must have list if you like to do any type of machine embroidery.

4. Stitch around your drawn flower shape on the outside lines and then inside the petal.

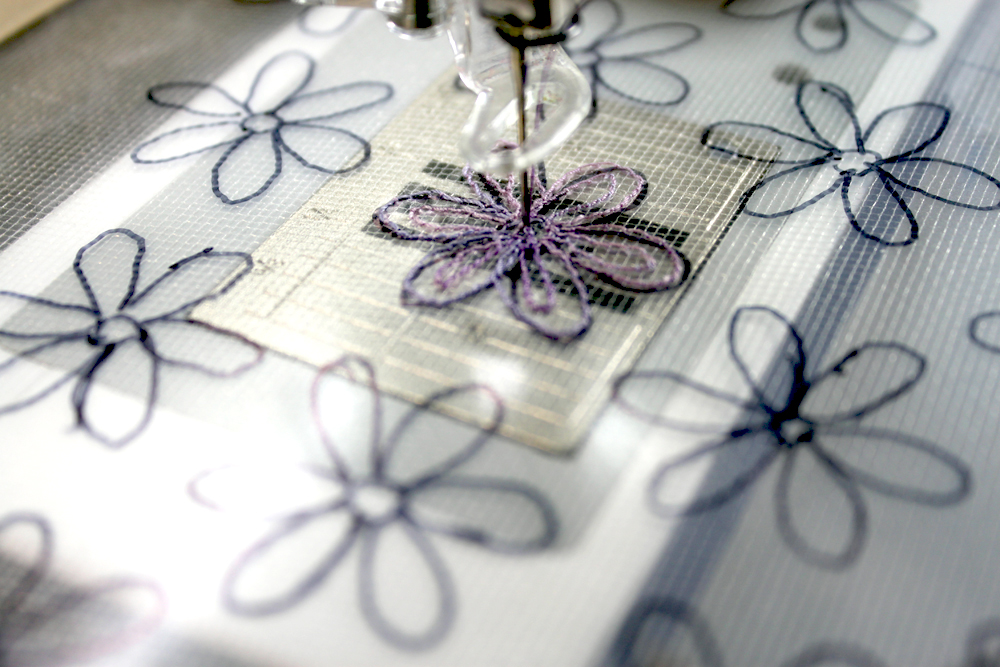
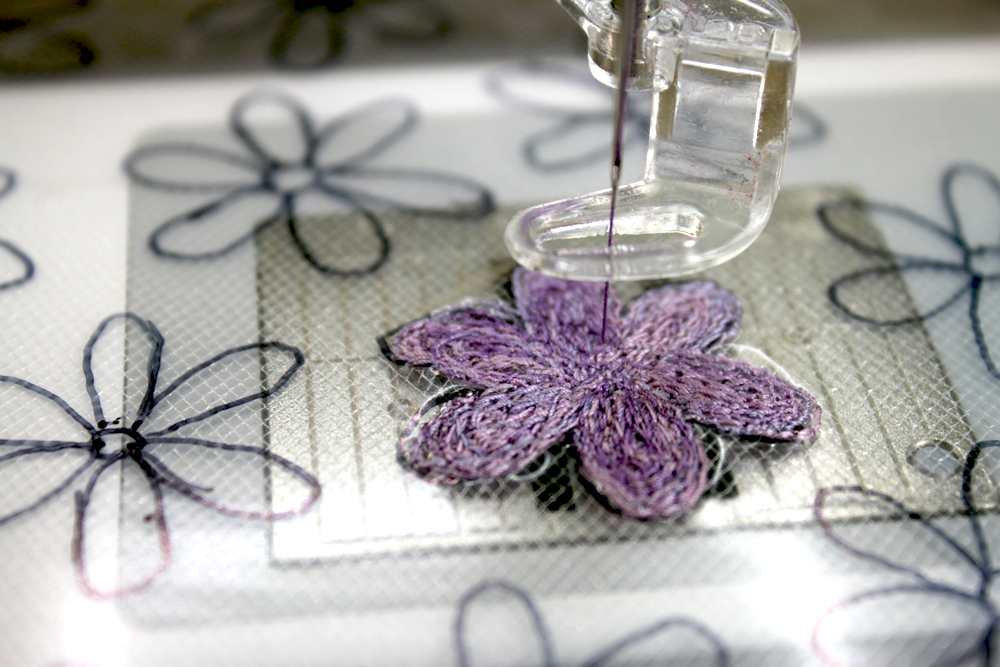
5. Continue stitching around the flower petals. I find it is better to stitch completely around the design as you go rather than filling in one petal at a time. Not only do you get less distortion but this method lays the variegated colors on top of each other so they mix and blend. If you fill in one petal at a time you could end up with each petal a different color. Don’t worry if you stitch outside the lines. Any stray stitches can be trimmed off later and no one will be the wiser…just one of the many reasons I love this technique.

Continue stitching around until you can’t see through the flower and your needle may start to make a thunk sound when an area is full of stitches. Without cutting your thread, move to the center of the next flower and repeat.

Here is my hoop full of posies…

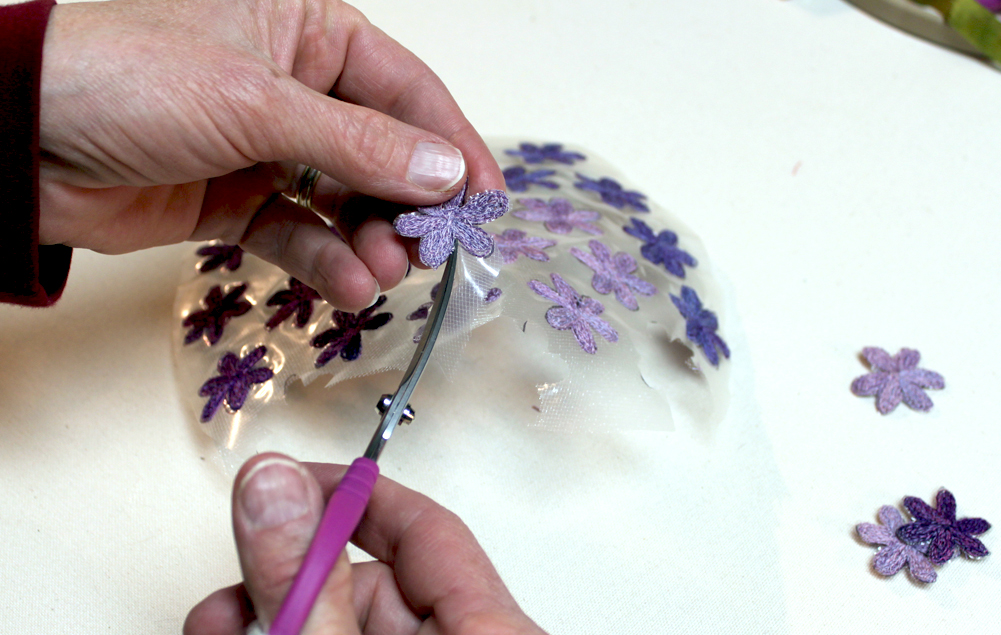
6. The next step is to cut out the flowers. I find the little curved appliqué scissors are great for cutting around the small curves and getting into the points between the petals.

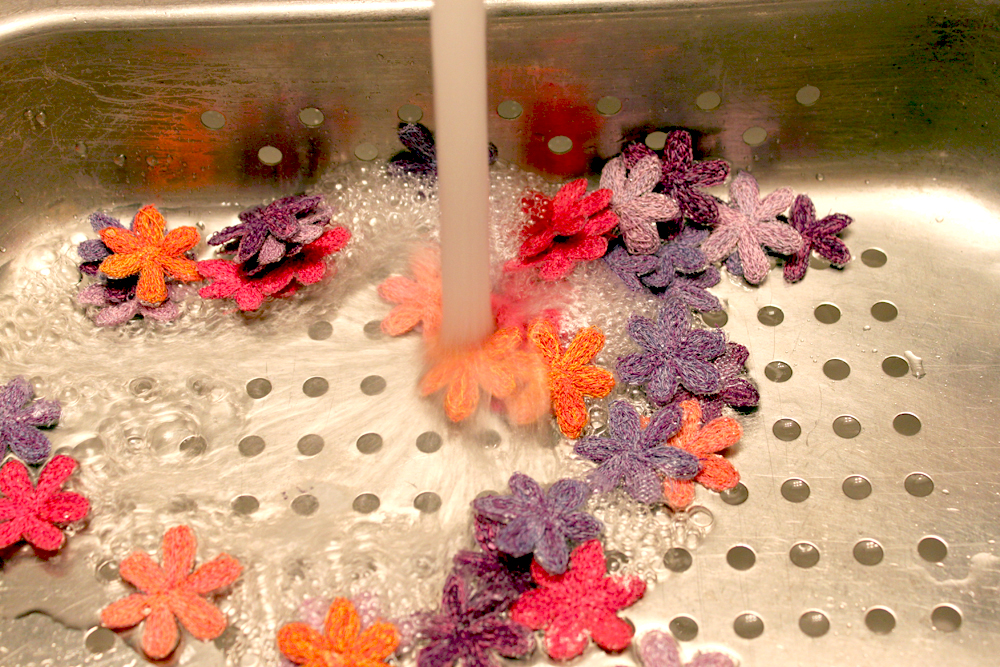
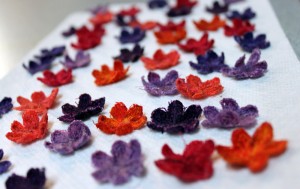
7. Now the flowers get a bath to rinse the water soluble stabilizer out. When working with small embroideries I usually put them in a colander so I don’t accidently lose one down the drain. I will often soak them for a bit so most of the stabilizer will rinse out. I made a hoop full of pink and orange flowers to go with my purple ones…it was a trying week! 🙂
posies step 9

After they are finished soaking I give them one last rinse and squeeze out as much water as possible. Then lay them on a paper towel to dry. I like to shape my flowers so that the petals are curving up. You can iron them flat later if you decide that is best for your project.

These little posies or any little embellishments you create can be used in so many ways and I find they work wonderfully in a wide variety of projects.  I usually attach them with a few stitches or with beads.

Creating a  ‘stash’ of embellishments makes it easy to personalize your work. If I didn’t have these on hand I certainly wouldn’t stop to make them when I am working on a collage or other artwork. No matter how perfect they would be in a piece…I simply wouldn’t stop to do it. I spent quite a bit of studio time creating my own special ‘stash’ of bits and pieces. Not only is it relaxing when I can’t concentrate on creating a piece of art but it is also much more efficient to make a bunch at one time…as a bonus they brighten up my studio when I wonder if Spring will ever arrive.


Liz Kettle

Liz Kettle is a mixed media and textile artist living in Colorado. She is co-author of 2 books, Fabric Embellishing: The Basics and Beyond and Threads: The Basics and Beyond. Liz loves teaching and sharing the joy of making stuff, in her articles, classes and at her fabulous retreat, Textile Evolution. Visit her blog and website: www.TextileEvolution.com


Use the scissors recommended by Liz….

[hs_action id=”8244″]


Posted in Embroidery, Embroidery Scissors, Liz Kettle, Tutorials, Uncategorized | Tagged , , , , , | 9 Comments

Scissors & Pins Gift By Terry White

Scissors & Pins Gift


This is the quickest little gift you will ever make…AND, believe me, it will be totally appreciated by your stitching buddies.

I put this together one evening when I was traveling around the house with a small project. I needed my little scissors, some pins, needles and a little thread. When my sister saw it, well, you know the rest.

So, I made one for a little Valentine for her.

Supplies:
A 2″ felt bead
A 10″ piece of vintage trim or ribbon
Big tapestry needle
An empty wooden spool
Sewing thread
Havel’s embroidery scissors
Hat pin and heart shank button
Various size needles


Thread the ribbon trim through the felt bead with the tapestry needle. Tie the ribbon trim in a knot.

Thread the ribbon trim through the felt bead with the tapestry needle. Tie the ribbon trim in a knot.


Wrap several colors of sewing thread around the spool. Twist the threads together by hand to keep them from raveling.

Wrap several colors of sewing thread around the spool. Twist the threads together by hand to keep them from raveling.


Tie your scissors to one end of ribbon and the spool to the other. Add some needles and use the hatpin to attach the heart shank button.

Tie your scissors to one end of ribbon and the spool to the other. Add some needles and use the hatpin to attach the heart shank button.


This is a great way to give the gift of a beautiful pair of Havel’s scissors to a friend.

Posted in Embroidery Scissors, For Beginners in Sewing, Fun Stuff, Guest Writers, Holiday Projects, Terry White, Uncategorized | Tagged , , , | Comments Off on Scissors & Pins Gift By Terry White

December Email Winner

Cec Holmberg, December Email Winner

Cec Holmberg, December Email Winner


Havel’s Sewing is pleased to announce that Cec Holmberg of Wisconsin has won a free Havel’s Sew Creative Scissors set .  Cec was eligible because she subscribed to our email news during the month of December.   Her prize: one 5-1/2″ Curved Tip Embroidery Scissors, one 7″ Serrated Fabric Scissors, one 9″ Pinking Shears, one Dura-Snips on a Neck Strap.

If you want to be eligible to win, just sign-up for our email news on the home page of our website.  Good luck!

Posted in Embroidery, Embroidery Scissors, Fabric, Fun Stuff, Quilting & Embroidery, Uncategorized | Tagged , , , , | Comments Off on December Email Winner

Let it Snow, Let it Snow, Let it Snow: Free Craft Project

Make Your Own Fabric Christmas Cards

A Free Craft Project By Liz Kettle

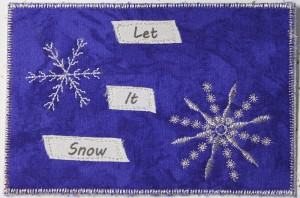
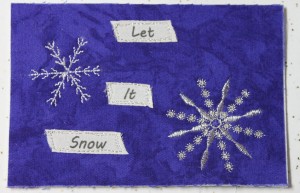
snowflake postcard

I love sending fabric postcards to friends and family but I have gotten out of the habit in the last year as I spend more time communicating virtually. A friend posted a challenge on her blog to send out some actual physical mail and I thought I would take up that challenge and challenge all of you to consider it as well. We all love getting real mail!

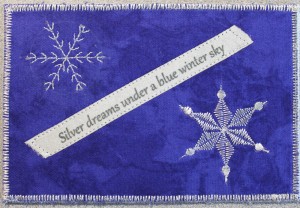
snowflake postcard 2

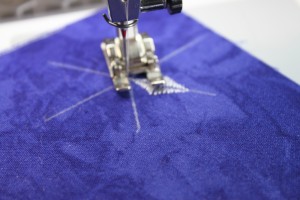
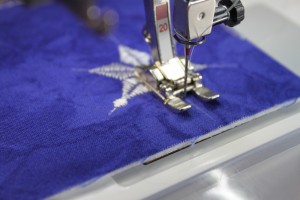
Snow season is just getting started in earnest here in Colorado so I thought some snowflake postcards would be perfect. These snowflakes are created by combining and manipulating the decorative stitches on your machine. Even if you don’t have a lot of fancy stitches I know you will find a couple that can be combined to make a pretty snowflake.

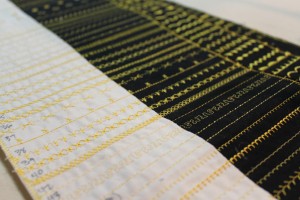
stitch outs

Look at your programmed decorative stitches for patterns that are geometric in form; triangles, diamonds, circles, points. Consider creating a program stitch dictionary as in the photo above that shows what all those stitches you have actually look like…you will be so glad you did this! How do these stitches change when you alter the length or width? What pattern do they create when stitched back to back in mirror image? It can take a bit of play and experimentation to find ones that work well together so be sure to make some notes about the ones you like and the adjustments you make for future reference.

These snowflakes look great on winter and holiday themed quilts as well as make great postcards. Have fun playing with your different stitches!

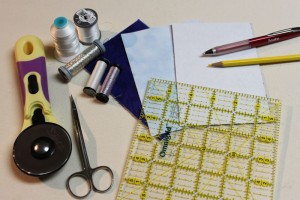
snowflake supplies

Supplies:
Rotary cutter, ruler and mat
Embroidery scissor with double curve
Light and dark blue fabric
Firm stabilizer (I used Pellon Peltex #72-fusible on both sides)
Threads: White rayon, silver or white metallic or hologram and a lightweight polyester bobbin thread.
Embroidery or metallic machine needle 90/14
Chalk or marking pencil in white
Ruler with a 60degree line
Ribbon for text

In nature snowflakes are created around six fold symmetry. A ruler with a 60degree line makes creating a snowflake guide easy. The 2” length described here is the length I used for the Vintage German Snowflake. To create smaller or larger flakes simply draw a shorter or longer line. Sorry about the dye on my hands in the photos…just having too much fun around here!

snowflake 60d 1

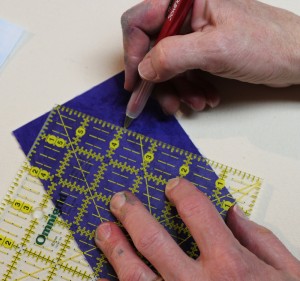
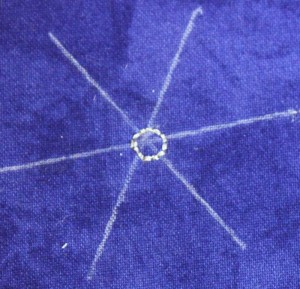
1. Use a ruler to draw a line 2 inches long. Place a small dot in the center.

snowflake 60d 2

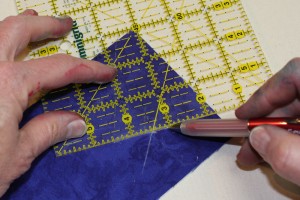
2. Place the 60degree line on your ruler on the drawn line with the edge of the ruler at the center dot. Draw a line approximately 2” long

snowflake 60d 3

3. Move the 60degree line on the ruler to the new line. Place it at the intersection of the two previous lines. Draw a line approximately 2” long.

Making the snowflake postcard:

1. Use the rotary cutter, mat and ruler to cut your fabrics and stabilizer 4”x6”. The 60mm rotary cutter makes cutting through heavy stabilizers a dream!
2. Fuse the dark blue fabric to one side of the stabilizer. If you don’t have Peltex 72, use a fusible web such as Misty Fuse to adhere the fabric to the stabilizer.
3. Pick one of the snowflake designs I have given you below or experiment with your stitches to come up with new patterns. Determine the best method of stitching your chosen design. Does it look better stitched from the outside to the center, from the center out, or can it be stitched across the length of the snowflake.
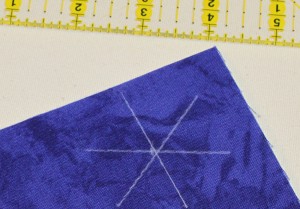
4. Use a marking pencil to mark the 60degree lines on the dark blue fabric as shown above.

5. Stitch the snowflakes on the dark blue fabric and stabilizer using the directions below.

snowflake postcard text

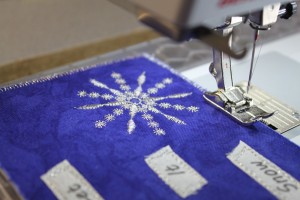
6. For the text, I printed on ribbon using my inkjet printer. This technique is in both of my books and I have a tutorial on my web site in the group forum section. Alternative methods would be to use rubber stamps or a fabric marker to write by hand. Use fusible web to secure the ribbon and stitch around the edge as desired.

snowflake postcard fuse back

7. Fuse the light blue fabric to the back of the postcard.

snowflake postcard edge

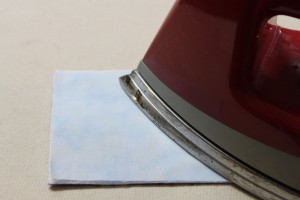
8. Stitch around the perimeter of the postcard. I used a zigzag stitch in silver metallic thread. I like to stitch around the perimeter twice for a full but not quite satin stitch. Straight and decorative stitches are great options as well.
9. Use a Sharpie or fabric marker to write your message and address your card. I apply a 1st class stamp rather than a postcard stamp and send it on its way.

VINTAGE GERMAN SNOWFLAKE

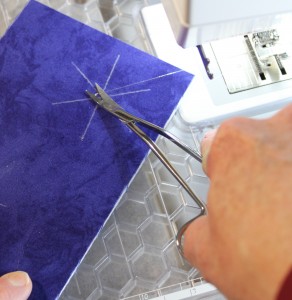
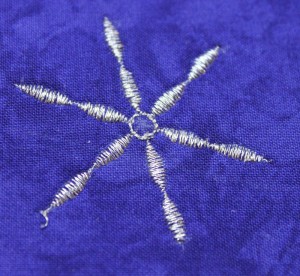
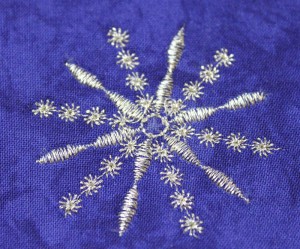
I used a silver metallic thread to give a vintage mercury glass feel to this snowflake. The stitches for this snowflake are two that are on my 22 year old machine that only has a total of 12 stitches. Havel’s 5” double curved scissors are the perfect tool for clipping threads during machine embroidery. They get super close to the fabric to give you a clean cut but the curve prevents that horrid moment when you realize you just cut your fabric. The double curve is great when you are using an embroidery hoop and the finger holes are the perfect size. You are going to love these scissors!!

snowflake vintage first

You can see how closely the curved embroidery scissors trim the thread. No whispy fray bits of thread in sight!

You can see how closely the curved embroidery scissors trim the thread. No whispy fray bits of thread in sight!

1. An eyelet stitch was stitched to provide an open center. If you don’t have an eyelet stitch, simply draw a small circle and begin your stitching at the edge of the circle.

snowflake vintage german 1

2. Next an oval satin stitch at a slightly reduced width was stitched from the edge of the eyelet stitch out for two repeats.

snowflake vintage german 2

3. A flower chain stitch was inserted between each of the previous stitch lines to create this vintage look snowflake.

FEATHER SNOWFLAKE

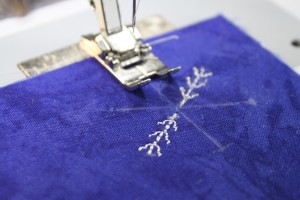
This delicate snowflake uses a programmed feather stitch that looks best stitched from the outside into the center. I drew my lines 1 1/5” long.

snowflake feather 2

 Begin the stitch at the outer edge of the circle then stitch towards the center. Stitch on all 6 radiating lines.


POINSETTIA SNOWFLAKE

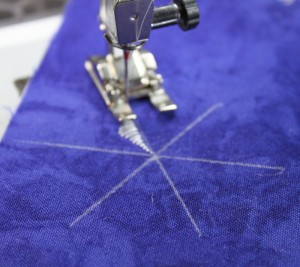
To create this snowflake the stitch is made by slightly lengthening the stitch length on a satin stitch triangle stitch. My length setting was .80

snowflake poinsettia 1

1. Stitch the design in one direction for one repeat, pivot 180degrees and stitch back to the center.

snowflake poinsettia 2

2. Pivot again and repeat along each snowflake guide line.

snowflake poinsettia circle

3. Finally, one repeat of a circle satin stitch and a couple straight stitches are added to the tip of each point.

I have a dear friend who is leaving her frigid climate for the warm breezes of Florida next week…I will be sending her one of these so she doesn’t forget the pleasure of snow! She will be jealous of all our snow don’t you think?

Liz Kettle is a mixed media and textile artist living in snowy Colorado. She is co-author of 2 books, Fabric Embellishing: The Basics and Beyond and Threads: The Basics and Beyond. Liz loves teaching and sharing the joy of making stuff in her articles, classes and at her fabulous retreat, Textile Evolution. Visit her blog and website, www.TextileEvolution.com

Posted in Craft to make, Embroidery, Holiday Projects, Liz Kettle, Quilting & Embroidery, Tutorials | Tagged , , , , , , | 4 Comments

Artistic Scissors Pocket by Terry White

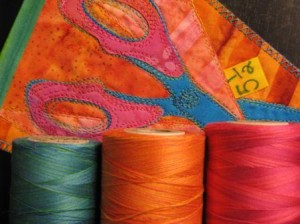
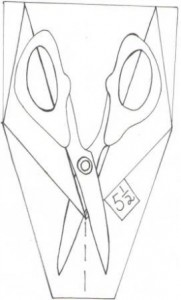
I used Havel’s 5-1/2″ curved scissors as the pattern for my appliqué design. By tracing the actual scissors, I can easily identify what’s in the pocket. There are several techniques presented here, some may be new to you or a variation of something you do. This is an interesting and quick little project and the result is sweet.
Fabrics used are 100% cotton. This project uses small amounts of fabric, so instead of telling you yardage amounts, I’ll cut to the chase and give you the cut requirements. I used gorgeous batiks for mine; I think this project will work with vintage prints, hand dyes and novelty prints. The lining fabric is cotton sateen. The finished size is 4 ½ x 7 ½ inches.
Fusible web is used in this project. Choose your favorite (I use a lightweight paper backed fusible web.) Press according to the manufacturer’s directions. 1 yard is more than sufficient for this project. I like to have extra in case I make mistakes.
I use Havel’s Rotary cutter to cut my strips, rectangles and the triangles in this design. This big rotary cutter saves time and its large handle is easy to hold while working.
Cut:
Front piece, back piece and two lining pieces- 5”x 8”
Two 1 1/8” wide x 6” long strips of contrasting fabric for the top of pocket
1 1/8” wide strips from two contrasting fabrics for neck strap (mine is 34” long)
Cut two pieces of fusible web 5”x8”. Fuse to the wrong side of front and back pieces. Fuse the lining to the wrong side of the front and the back pieces.
Appliqué:
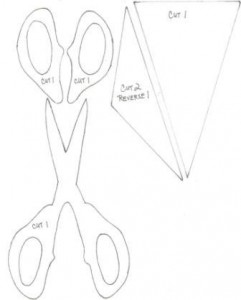
There are six fused appliqué pieces in this design. Trace the shapes onto fusible web. Press the shapes to desired fabrics. Cut and fuse them to the front of the pocket according to the drawing.
I use Havel’s 5 ½ inch curved scissors to cut my appliqué shapes. The scissors are very sharp. The curve and point on these scissors help me to get a clean cut in intricate shapes. They are also easy to handle while cutting because they are a perfect size.
Free-Motion Stitching:
I used a free-motion stitch technique to stitch the appliqué pieces to the front of the pocket and to add details. I used three different cotton multi-color threads (Star threads from my own design collection).
If you don’t want to free-motion stitch, you can use a very tiny zigzag or buttonhole stitch on your sewing machine. Other options are to use textile paints along the edges or don’t finish them at all and let the fusible web do its job.
Assemble the Pocket:
Place the front and back pieces of pocket, wrong sides together. Trim the front and back together according to the drawing. I use Havel’s big rotary cutter for this process. You may draw the lines and use big sharp shears instead.
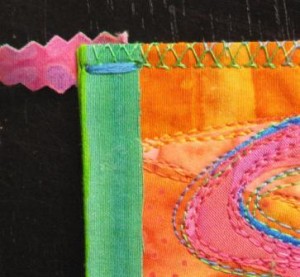
Cut two strips of fusible web 1”x 6”. Fuse to the top contrasting strips. This is the green fabric strip at the top of the pocket. * Fold the strip lengthwise over the top of the front of the pocket. Trim the strip along the width if necessary to the design. Press to fuse the strip over the top pocket edge…pressing and fusing the strip to itself at the ends. Trim the ends to the size of the pocket. Repeat from * for the back piece.
Use an edge stitch to sew the pocket pieces together. You can use a serger for this. I used an overcast stitch with a special edge foot. Use a decorative thread in a contrasting color for a pretty finish.
Neck Strap:
You must determine the length of your strap. Fuse strips of two contrasting fabrics together. This creates a double sided fabric strap which has body and strength. I use Havel’s Pinking Shears to cut a lovely decorative edge as I trim the strap to about ½ inch width.
Use a wide bar tack stitch on your sewing machine to attach the strap.
Double fuse Tag:
Fuse a small rectangle of fusible web to the back of a yellow fabric. Pull the paper off, fold the rectangle to form a square with wrong sides together, then press to fuse.. Trim to the desired size. Write the scissor identification, “5 ½” or your initials with a permanent pen. Use good fabric glue to glue in place according to the drawing.
Enjoy this scissor pocket and make one for your sister! (I did)
Stitch On!
Terry White

Instructions for Artistic Scissors Pocket

Artistic Scissors Pocket

The instructions presented here, go along with my video below…

I used Havel’s 5 ½ inch curved scissors as the pattern for my appliqué design. By tracing the actual scissors, I can easily identify what’s in the pocket. There are several techniques presented here, some may be new to you or a variation of something you do. This is an interesting and quick little project and the result is sweet.

Fabrics used are 100% cotton. This project uses small amounts of fabric, so instead of telling you yardage amounts, I’ll cut to the chase and give you the cut requirements. I used gorgeous batiks for mine; I think this project will work with vintage prints, hand dyes and novelty prints. The lining fabric is cotton sateen. The finished size is 4 ½ x 7 ½ inches.

Fusible web is used in this project. Choose your favorite (I use a lightweight paper backed fusible web.) Press according to the manufacturer’s directions. 1 yard is more than sufficient for this project. I like to have extra in case I make mistakes.

I use Havel’s Rotary cutter to cut my strips, rectangles and the triangles in this design. This big rotary cutter saves time and its large handle is easy to hold while working.

Cut:

Front piece, back piece and two lining pieces- 5”x 8”

Two 1 1/8” wide x 6” long strips of contrasting fabric for the top of pocket

1 1/8” wide strips from two contrasting fabrics for neck strap (mine is 34” long)

Cut two pieces of fusible web 5”x8”. Fuse to the wrong side of front and back pieces. Fuse the lining to the wrong side of the front and the back pieces.

Appliqué:

Using Free Motion Stitching

There are six fused appliqué pieces in this design. Trace the shapes onto fusible web. Press the shapes to desired fabrics. Cut and fuse them to the front of the pocket according to the drawing.

I use Havel’s 5 ½ inch curved scissors to cut my appliqué shapes. The scissors are very sharp. The curve and point on these scissors help me to get a clean cut in intricate shapes. They are also easy to handle while cutting because they are a perfect size.

Free-Motion Stitching:

I used a free-motion stitch technique to stitch the appliqué pieces to the front of the pocket and to add details. I used three different cotton multi-color threads (Star threads from my own design collection).

If you don’t want to free-motion stitch, you can use a very tiny zigzag or buttonhole stitch on your sewing machine. Other options are to use textile paints along the edges or don’t finish them at all and let the fusible web do its job.

Assemble the Pocket:

Place the front and back pieces of pocket, wrong sides together. Trim the front and back together according to the drawing. I use Havel’s big rotary cutter for this process. You may draw the lines and use big sharp shears

Assembling the Pocket and Neck Strap

instead.

Cut two strips of fusible web 1”x 6”. Fuse to the top contrasting strips. This is the green fabric strip at the top of the pocket. * Fold the strip lengthwise over the top of the front of the pocket. Trim the strip along the width if necessary to the design. Press to fuse the strip over the top pocket edge…pressing and fusing the strip to itself at the ends. Trim the ends to the size of the pocket. Repeat from * for the back piece.

Use an edge stitch to sew the pocket pieces together. You can use a serger for this. I used an overcast stitch with a special edge foot. Use a decorative thread in a contrasting color for a pretty finish.

Neck Strap:

You must determine the length of your strap. Fuse strips of two contrasting fabrics together. This creates a double sided fabric strap which has body and strength. I use Havel’s Pinking Shears to cut a lovely decorative edge as I trim the strap to about ½ inch width.

Use a wide bar tack stitch on your sewing machine to attach the strap.

Double Fuse Tag:

Pattern 1
Pattern 1
Pattern 2
Pattern 2

Fuse a small rectangle of fusible web to the back of a yellow fabric. Pull the paper off, fold the rectangle to form a square with wrong sides together, then press to fuse. Trim to the desired size. Write the scissor identification, “5 ½” or your initials with a permanent pen. Use good fabric glue to glue in place according to the drawing.

Enjoy this scissor pocket and make one for your sister! (I did)

Stitch On!

Terry White


See Terry’s website for books and more information on threadpainting!

http://www.threadpaint.com/

Terry White         Studio Fiber Artist

Terry White, Studio Fiber Artist

Posted in Embroidery Scissors, Fabric, Fabric Scissors, Fun Stuff, Guest Writers, Patterns, Terry White, Tutorials, Uncategorized | Tagged , , , , , , | 1 Comment