by Kristina Greene Gabalski, Daily News Correspondent
– Posted: Saturday, October 15, 2011 2:30am
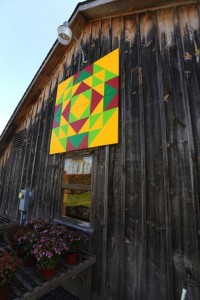
There’s a lot of “quilting” going on in Le Roy these days – not the kind that involves fabric – but quilt designs painted on plywood and hung on the sides of barns.
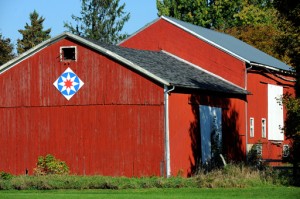
It’s the beginnings of a barn quilt trail that will help mark the Town of Le Roy’s bicentennial in 2012. About a half-dozen quilts have already been erected around town with more in the works and a goal of at least 20. The quilts range in size from a 4’x4′ to 8’x8′.
Le Roy Historical Society Director Lynne Belluscio says the project is an appropriate way to celebrate because Le Roy is an agricultural community.
The project also helps to create a sense of community pride, she said.
“We want people to feel good about the community they live in. When they hear about the barn quilt project they say, ‘Hey, that’s a neat idea.’ In Genesee County and Le Roy the agricultural heritage is so important,” says Belluscio, who has a quilt on her barn at her home on North Road.
Enthusiastic Response
She says she did not know much about barn quilt trails and how to develop them until she went online and searched for “barn quilts.”
“I was totally blown away,” she says.
Belluscio learned that barn quilt trails got their start only about 10 years ago in Ohio.
“Now almost 30 states have barn quilt projects,” she notes.
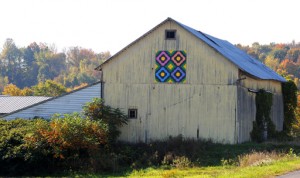 Among them, is a barn quilt trail in Kendall that began in 2006. Belluscio visited with Lora Partyka of Partyka Farms to find out how the project came together. “I had a lot of questions and I wanted to find all that out,” Belluscio says.
Armed with her recently acquired knowledge, Belluscio approached Shelley Stein of Stein Farms in Le Roy to get her reaction to the idea of a barn quilt project for their community.
“She was extremely enthusiastic,” Belluscio says.
Together, they had “a ‘quilting bee’ in my garage,” Belluscio says, to work on the first barn quilt and see what it took to put one together.
Stein, who painted a quilt for her barn on Conlon Road and is working on a second for a Gulley Road barn, says the project is a great undertaking for Le Roy. Not only does the project celebrate the town’s bicentennial and increase community awareness, but it also highlights “the history and heritage of the are through agriculture.”
It’s also a project that can carry on into the future, she says.
“The outpouring of creativity is so, so special,” says Stein. “It’s a wholesome project. It has set everybody on fire with enthusiasm.”
Quilts Tell Stories
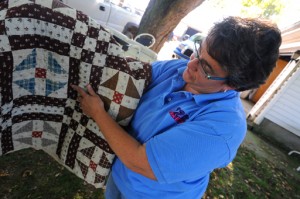 Stein said the story behind the quilts is fascinating because each participant has chosen patterns and colors with significance for them. Stein’s first quilt, on a yellow family barn on Conlon Road, uses a pattern called “Nonesuch.” The design was taken from a quilt owned by her great-grandmother.
The project’s first quilt was up by Labor Day weekend for a family reunion at Sylvia Fraser’s home (Matthews Farm) on Route 5 just west of the Village of Le Roy. The barn is in a highly visible location on the north side of the road.
Fraser chose a pattern known as “Friendship Circle” or “Dresden Plate.”
“I like the title,” she says, “because of the many friends that are part of the Le Roy Historical Society and because people in Le Roy are so friendly.”
Fraser’s family worked together on the quilt. Her niece, who is an architectural engineer, enlarge the pattern to the 8’x8′ size.
It was a fun project, Fraser says. “I would encourage other people to do it,” she says.
A Community Project
The entire community is embracing the idea. “As people learned about it, everybody wanted to do one,” Belluscio says.
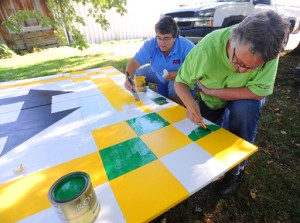 Belluscio is working to get the community’s business involved. Potter Lumber is providing plywood at a discount and Crocker’s Ace Hardware on North Road is helping with paint. Crocker’s, on North Street Road, has added a quilt block using the “Railroad Crossing” pattern to one of it’s buildings, and Potter is also planning a quilt, Belluscio says.
Belluscio would also like school kids to get involved designing their own quilts.
“Families can get involved,” she says. “It’s a postitive, exciting thing.”
History Included
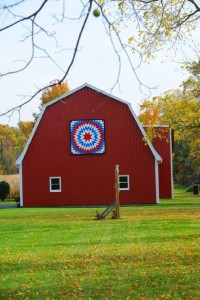
The barn quilts provide an opportunity to remind people that the barns are still here. The history fo the the barns will be a part of the project, says Belluscio, who is willing to help residents do any research involved.
Belluscio is designing a community barn quilt that will feature and eight-point “Le Roy Star.” The interior of the star will include 200 diamond shapes to represents the town’s 200 years. Symbolic colors will be used in the pattern.
“Blue for Oatka Creek, red and black for the school, light blue for Ingham University,” she explains. “I would like to have community members come and help oaint the quilt, possibly during festivities that will likely be on June 8, 2012 – the date that makes the 200th anniversary of New York State’s passing of legislation creating the town.
The Le Roy Star quilt might eventually hang on the town’s Highway Department buildings after being displayed at Town Hall, Belluscio says.
Looking Ahead
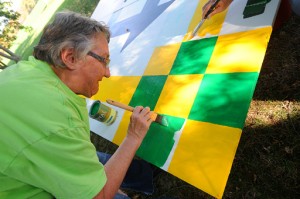 Next summer’s exhibit at Le Roy House will also feature quilts and will include tie-ins to the barn quilt project, she adds.
Belluscio says she can help those interested in having a barn quilt get one up. Participants can get as involved as they like – from doing every step of the process by themselves to having the Historical Society complete an entire quilt for a fee.
Belluscio hopes the Historical Society will have some 4’x4′ barn quilts ready to auction off early next year.
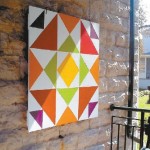 There is already a barn quilt on display at the Jell-O Gallery. Appropriately named “Jell-O Jigglers” it features all the bright colors of the popular dessert invented in Le Roy.
A barn quilt trail website is active at www.leroybarnquilt.org. The website provides information about each quilts pattersn and the barns, with more to come.
“We hope to have at least 20 up by next year of the big ones,” Belluscio says, “that would make a really good driving route.”
Where to Look
 Le Roy’s barn quilts can be found at:
Matthews Farm on north side of Route 5, just west of Le Roy. Features “Dresden Plate” or “Friendship Circle” pattern.
Stein Family Barn on Conlon Road. The quilt pattern and color scheme was taken from a quilt owned by Shelley Stein’s great grandmother. It is known as “Nonesuch” or “Friendship Pattern.”
Jell-O Gallery, 23 East Main St. The 4’x4′ square is named “Jell-O Jigglers.” Its colors represent Jell-O flavors of lemon, lime, grape, strawberry and orange.
Lynne Belluscio’s Northview Farm, 8148 North Rd. The barn quilt is easy to miss because of the trees, but it is the “Whig Rose” pattern. The pattern was painted by Belluscio from a quilt that she sewed for her granddaughter.
Crocker’s Ace Hardware, 8457 North Street Rd. The quilt pattern is “Railroad Crossing.”
Walters Barn, 9306 Summit Street Rd. Town Historian Irene Walters painted the patriotic “Star of Hope” or “Sunflower” pattern.
Crnkovich’s Farm Market, 8041 East Main Rd.
West Bergen Road, between Randall and Selden roads, features a red barn with a red, white and blue “Starburst” patterned quilt.
For more information, contact Lynne Belluscio at (585) 768-7433.

