The Science of Quilting

PopSci Q&A: Kate Findlay Talks About the Confluence

of Quilting and the Large Hadron Collider

How A Quilter Ended Up In The Pages Of A Particle Physics Publication
By Dan Nosowitz – Posted 03.02.2012 at 1:06 pm
We first became aware of Kate Findlay’s work thanks to Symmetry Magazine, which publishes articles relating to particle physics. Kate isn’t a particle physicist; in fact, she’s not even a scientist. She works as an art teacher at a private elementary school in the U.K., and also makes these amazing quilts. Symmetry’s interest (and ours, and yours, we think) comes from her inspiration for one particular line of quilts: the hardware of the Large Hadron Collider. We’ve put together a gallery of her work, and also did a little Q&A with her, below.

PopSci: How long have you been making quilts? Do you work with other materials?

Kate Findlay: I have not been making quilts that long, really. My first one was in 2008, about six months before I started work on the Hadron Collider series. I have always been a painter in my spare time, mostly landscapes and still-lifes, but I work exclusively in fabric now, even when doing more pictorial pieces (like my Henley river series on my website).

PS: Where did the inspiration come from to look to the LHC?

KF: I was reading The Times in September 2008 and came across an illustrated article about the LHC. I knew about it anyway, but something just struck a chord with me and I immediately started researching online to find more images. I was very excited by what I found and knew without a shadow of doubt that this was something I wanted to develop into a body of work. (CERN gave me permission to use their photos.)

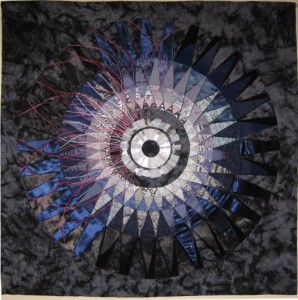
Kate Findlay: Dark Matter Eye

Click on the image to see more of
Kate Findlay's work.

KF: The LHC is a remarkably beautiful machine. Its symmetry, the repeating motifs, [and] the colors were all things that I was drawn to–for any textile artist, pattern and color are top of the list and the LHC has all these! The other aspect I particularly liked was the idea of a regular circle within a square; I wanted to explore variations on this theme. Working in fabric is extremely slow and laborious, and there have been a number of occasions over the past three years when I wished I was just painting the subject. But fabric has an added dimension, its texture and sheen, which has really worked for me in making these pieces.

PS: How did you come across the LHC’s work? Were you a fan of that branch of science beforehand?

KF: I did know about it, but in a pretty general way–just what had come up in the news and through people talking about it. I have always liked science, but certainly wasn’t paying much attention to the physics of it all. That has changed with this work, and I have been reading up on the physics discoveries of the 20th century and what the current theories are, although I confess I don’t understand much of it!

PS: What is it about the LHC that you’re trying to capture in these quilts? How do you choose the colors, patterns, and techniques that go into them?

KF: When I started, I was just enjoying creating pieces that had a flavor of parts of the machine I had seen images of. As I read more, I have been trying to get some of the physics concepts into my work. One of the things that has struck me most is the aspect of scale–the huge Hadron Collider is trying to split infinitesimally small subatomic particles–to find out how our vast, vast universe is put together. So I have found aspects of astronomy creeping in to my work as well as studies of how atoms are formed and split.

The colors in my work have been very influenced by things I have seen in the CERN photos as well as using lots of metallic fabrics. More recently I have started to dye and screen print fabrics to get more subtle effects. The early pieces were mixed media: mostly fabric, but incorporating wire, card, beads, strange objects and anything else that achieved the right effect. The large quilts are more traditional in construction, being three layers, but without anything stuck on to the surface. I realized belatedly that I need to be able to roll them up to store them, as they take up a lot of room!

Posted in Quilting, Uncategorized | Tagged , | 1 Comment

Sewing Needles

Finding Needle Clarity

By Liz Kettle

Standing in front of the wall of sewing machine needle options can be daunting. Just what are all those different needles for? Thoroughly confused, you grab an assorted pack of universal needles because they should work for anything right? Back home you pick up your latest piecing project, some lovely batik fabrics in blues and greens. You start stitching away and arrrgghhhh the stitching starts puckering and the thread breaks. Tension issues? Bad thread? Maybe not, it could just be your needle choice.

Finding Needle Clarity by Liz KettleThere is an amazing amount of engineering that goes into those small sewing machine needles! Each type of needle is designed for a specific task, fabric or type of thread. Learning which needle to use when, will keep your stitching time joyful instead of frustrating. Just as important, is experimenting to see which needles can substitute for each other when you break your last ‘perfect’ needle at 2am. As an example you can use an embroidery or topstitch needle instead of a metallic needle with metallic threads. Choose the embroidery needle if you are free motion stitching, and the topstitch needle can fill in when you are stitching programmed stitches.

There are many brands of needles made. Two predominate manufacturers are Schmetz and Organ. Some machines work better with one or the other. My Bernina does not do well with Organ, but friends who have Janome machines prefer them.

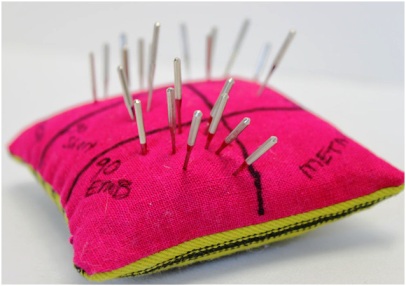
It is very important to change your needles often. I change needles after about every 8-10 hours of stitching; more often when I am stitching on upholstery fabrics, paper or metal. When I am having a problem stitching, the first change I make is to put in a new needle. Your needle may look fine but microscopic nicks and a blunted tip will cause stitch problems.

I have compiled a list of the most common needles and a description of what they are best used for. Print it out and put it by your machine.

Universal: the point is slightly rounded for use on knits but they are still sharp enough for some woven fabrics. They work better with loosely woven fabrics such as homespun and flannel. I don’t find this needle to be useful for fine knits or tightly woven fabrics. Available in sizes 60-120.

Microtex/sharps: the point is sharp and they feature a narrow shaft that works well with tightly woven fabrics such as batiks, silk, faux suede and microfibers. They are good for quilting, heirloom stitching, topstitching, pintucks and edge stitching. If you want a very straight line this is the needle to use. Available in sizes 60-110.

Quilting: this needle features a slightly rounded, tapered point and is designed to stitch through thick layers and intersecting seams. Good for quilt piecing and general quilting. Available in sizes 75-90.

Embroidery: these needles have a light ball point, a deeper scarf on the back to help with loop formation with fine threads, and a larger eye to reduce friction and allow you to use specialty threads with ease. They are designed to stack the stitches close together without damaging the treads next to them. They are the first needle that was designed to stitch in many directions. Available in sizes 75-90.

Topstitch: designed to go through layers of fabric or heavy fabrics, this needle has a larger shaft to reduce flex. They also have a very sharp point to aid in obtaining a straight line. They have a very long eye and deeper groove for heavier threads or to accommodate two threads at one time. Available in sizes 80-100.

Metallic: designed especially for use with metallic threads this needle has an even larger elongated eye than an embroidery needle. It has a fine shaft and a sharp point to reduce friction on the thread. And finally, it has a deeper scarf as well as a deeper groove. The metal in the thread can wear a groove in the needle itself so they generally have to be changed more frequently. Available in size 80-90.

If you would like to find out more about needles you can find a great chart that shows all the needle parts on the Schmetz Needle website:  www.schmetzneedles.com

CLICK THE COVER FOR A FREE eBOOK

4 easy sewing craft projects by liz kettle

Posted in Guest Writers, How To, Liz Kettle, Uncategorized | Tagged , | Comments Off on Sewing Needles

Rotary Cutters for Quilters

Eight Tips for Perfect Rotary Cutting

By Liz Kettle

Rotary cutting is one of the best tools in the modern quilter’s box. I was so excited when I got my first rotary cutter when I was a budding quilter but that quickly turned to dismay when it turned out a bit harder than it looked. I have gathered some of my best tips for successful rotary cutting.

1. Square it up! One of the things that frustrated me the most was the dreaded curve in the middle of my cut fabric strips. I would try to steam it out but that never worked. Quilter friends gave advice for cutting a straight strip but I still ended up with those pesky curves. My friend Cat M. came to the rescue with her great technique for squaring up your fabric for cutting straight strips.

Begin by ironing your fabric. Match up the selvedge edges so they are as close to parallel as you can get. Selvedge edges are not always straight. Lay your fabric on your cutting mat and smooth it flat. Cutting is best done on a counter height
table to prevent back fatigue.

Eight Tips for Perfect Rotary Cutting - Image 1

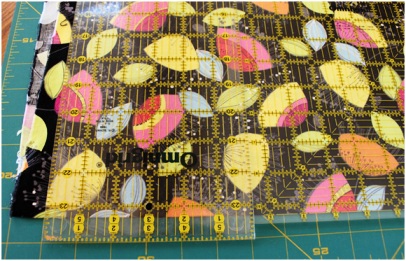
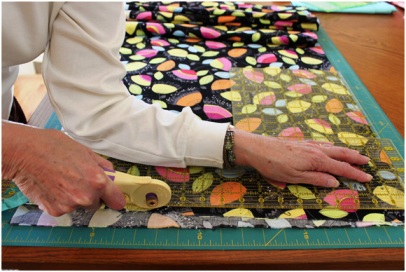
Use two rulers: a long one and a square one. Place the long one down first on the fold line and then the square one right next to it. Use a line on the ruler rather than the edge of the ruler to place your ruler accurately on the fold of the fabric. Using two rulers ensures that you will have a straight edge for your first cut.

Eight Tips for Perfect Rotary Cutting - Image 2

Hold the ruler firmly with one hand or arm while you make your cut. Many people use their hand to hold the ruler. In order to keep the ruler from shifting as they cut along the length, they have to stop the cutting motion when they have moved past their hand in order to move the hand up to the top part of the ruler. You might want to try this approach in which you lay your arm from elbow to fingers along the entire length of the ruler. I never have a problem with the ruler shifting when I hold the ruler this way and I am less likely to accidently cut myself.

2. Don’t let it slip! There are some great tools to help prevent your ruler from slipping.

Eight Tips for Perfect Rotary Cutting - Image 3

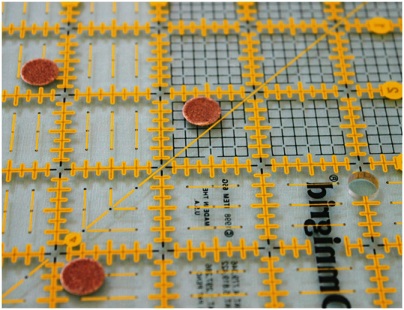
Small sandpaper dots (Fabric Grippers from Nifty Notions).

Eight Tips for Perfect Rotary Cutting - Image 4
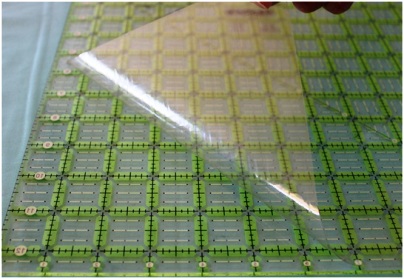
And a plastic cling film called InvisiGrip™.
Both keep the smooth plastic rulers from slipping.

Eight Tips for Perfect Rotary Cutting - Image 5

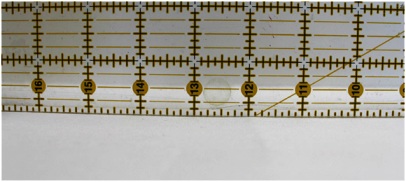
3. Rulers wear out! Over time the sharp edge of your rotary cutting blade can shave off the plastic of the ruler. This tends to happen about the middle of the ruler. Check your ruler to see if it needs replacing by placing it on edge on a flat surface. If there is a section that is not in contact with the table it is time to get a new ruler. In this photo you can see a tiny bit more shadow around the 13″ mark where the ruler is not completely in contact with the table. It is very slight but there are also a couple of good nicks in the edge so I need to start looking for a good sale.

Eight Tips for Perfect Rotary Cutting - Image 6

4. Mark it! Use blue painters tape or specialty ruler tape such as Glow-Line Tape to mark corners when squaring up multiple quilt blocks or along a line when cutting multiple strips the same width. This saves time and prevents you from accidently using the wrong measurement.

5. Consistency Counts! Some quilters caution you to only use the lines on the ruler for measuring and some insist that the lines on the cutting mat are the best way to measure. We can have a passionate discussion about who is right but in the end as long as you are consistent with your measuring choice it doesn’t matter if you chose the mat or the ruler. The same goes for which side of the line you measure off of or if you use the middle of the line, as long as you are consistent you won’t have any problems. You should also be consistent in the brand of ruler you use. There can be tiny differences between brands that may affect your finished project.

6. Baby your mat! You can extend the life of your self-healing cutting mat with a little TLC. Always store your mat flat especially when traveling. If you do a lot of strip cutting be sure not to cut on the same line all the time as this will eventually cause cuts too deep to heal. Treat your mat to a spa day once a year. Use a soft brush and warm water to clean out fibers caught in the cuts. Then give your mat a soak in cool water with a little white vinegar so it can re-hydrate. Make sure you soak them flat though! You can make a temporary soaking tub with thick plastic sheeting that is gathered up in the corners to make a shallow basin.

7. Use the right rotary cutter! When you are cutting through two layers of cotton a 45mm rotary cutter is perfect but when you want to cut through 4 layers of cotton or heavier fabrics you may want to choose the 60mm cutter. The small cutter is great for small shapes and curves. Havel’s rotary cutters are designed to prevent hand fatigue and repetitive motion stress so they are the perfect choice for cutting lots of strips of fabric.

8. Change those blades! Cutting with a sharp blade makes our work easier. As soon as your blade shows signs of dullness, or if you nick it on something don’t put off changing it. You have to use a lot more pressure to cut with a dull blade and that means arm fatigue and a higher chance of accidents.

Liz Kettle
Liz Kettle is a mixed media and textile artist living in Colorado. She is co-author of two books, Fabric Embellishing: The Basics and Beyond and Threads: The Basics and Beyond. Liz loves teaching and sharing the joy of making stuff in her articles, classes and workshops. Visit her blog and website at www.TextileEvolution.com


Click Here to See Other Articles By Liz

www.havelssewing.com


Posted in Fabric Rotary Cutters, How to Quilt, Liz Kettle, Quilting Tools, Uncategorized | Tagged , , , , | Comments Off on Rotary Cutters for Quilters

How To Make A Quilt: Part 4 – Quilting Patterns

Let’s Make Some Patchwork!

By Terry White


Patchwork refers to the technique of cutting pieces of fabric and then stitching them together to make a quilt top. The cut pieces of fabric are called patches.When the pieces are stitched together into a single unit, the unit is called a quilt block.When quilt blocks are stitched together, this is called the quilt top.When the quilt top is layered with the batting and the backing and quilted together, this is called a quilt.

Today’s quilter uses “strip piecing” to cut and stitch patchwork together. The “strip piecing” technique can be described as cutting strips of fabric, stitching them together, cutting them again and stitching them back together. Many complex designs can be created in this manner. The wonderful thing is that one only needs to know how to sew a straight line on the sewing machine.

So, I will start with the simplest block and that is called a Nine-Patch because it has nine patches in it.

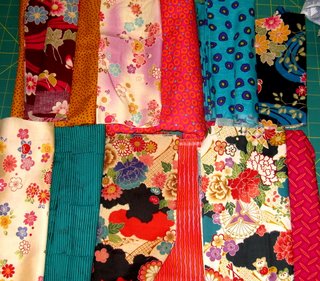
I start with laying out fabrics and here is the Japanese design group shown in an earlier blog. I laid them out making sets of two with contrasting colors.
There are six sets of two.

Before cutting my strips, I cut off the woven edge of the fabric, this is called the “selvedge”. It is more tightly woven than the rest of the fabric. You see little holes in it; this is where the fabric is held by machines as it is processed.

In a previous blog, I show how to use a rotary cutter.
We also have a video tutorial on this website.

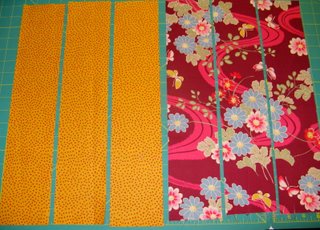
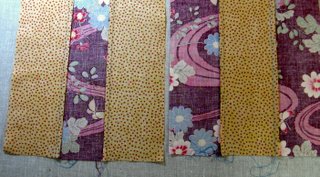
Starting with one set, I cut three (3) 1/2″ wide strips
with my rotary cutter of each fabric.

I arrange the fabrics into two sets.

Now, the strips will be sewn together with a 1/4″ seam. Quilters have proven that this is the best seam allowance for patchwork. The key here is to stitch very carefully so that the seam is 1/4″ exactly all the length of each strip.
This may take practice to always have a good seam.

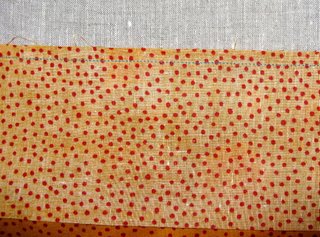
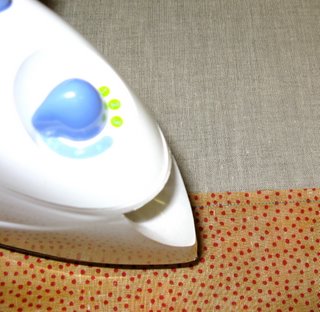
Press the seams together with a hot iron. Don’t use steam, it may distort the blocks.

Now, press the seams together to the darker fabric side.

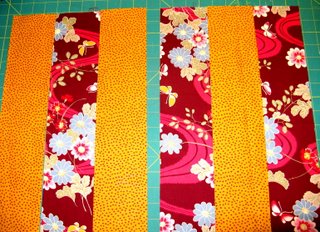
See, the strip set on the left has the seams pressed inward and the set
on the right has the seams pressed outward.

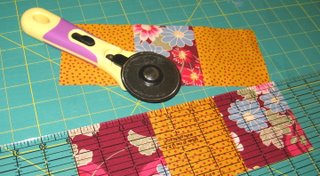
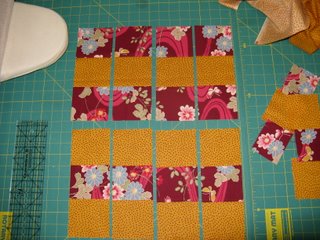
Now, cut the strip sets 3 1/2″ wide to create a strip of three patches.

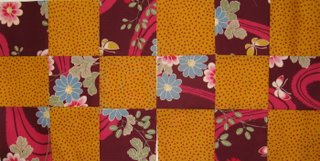
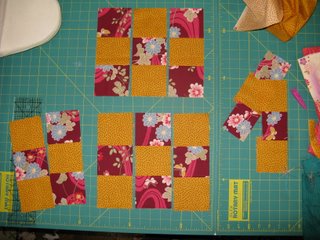
Arrange the sets into two nine-patch blocks. The blocks are reversed!
You will have extra patch sets and pieces; we will use those, too.

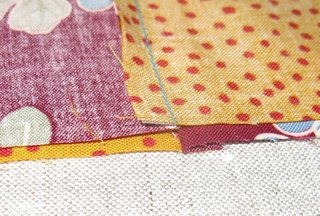
Sew the patch sets together with a 1/4″ seam. Now, you can see that by pressing the seams the way we did, the seams snug into each other making it easy to have matching points at the corners.

Terry White, Threadpaint Artsit

Terry White is a studio fiber artist. She has been doing this work since 1996, and she discovered the techniques she uses: threadpaint, machine appliqué, piece, quilt, embellish with beads, fibers and minutiae with sewing machine techniques, through experimentation and self-study. Terry teaches these techniques through classes and videos.Over the years Terry has been published in over 50 articles in magazines and books, including: McCall’s Needlework; Quilter’s Newsletter; Machine Embroidery and Textile Arts; CMA trade magazine; Stitch n Sew Quilts; Quick n Easy Quilts; Quilt World magazine and Calendar; Quilting Arts Calendar 2003; America from the Heart; America’s Best; America Sews.She is a wife, stitcher, artist, sister, mother, friend, nana, gardener, baker, writer, student, teacher and American.

See more of Terry’s work at www.threadpaint.com

Posted in How to Make a Quilt, How to Quilt, Terry White, Uncategorized | Tagged , , , , | 1 Comment

Fabric Art

Artist Melds Photography, Sewing and Painting

By Denise Baran-Unland For The Herald-News February 2, 2012 8:16PM

Chistery by Darcy Berg

Chistery by Darcy Berg


They say every picture tells a story, but that’s especially true for stories on the faces of Darcy Berg’s handmade dolls and art quilts.

For instance, the images on Berg’s quilts are of “people on the street,” individuals with an intense aura about them, whom Berg obtains permission to photograph. One doll, on display at a Southern Illinois steak house, depicts the fictional story of a woman with too many cosmetic surgeries: she has huge lips and failed breast implants.

“Her name is Delores, but she wants everyone to call her Candy,” said Berg, of Plainfield. “I have a sense of humor and this is a creative outlet for it.”

Berg teaches and displays her work at Gallery 7 in Joliet and teaches the Photography Meets Art Quilt and Nature Photography classes at Joliet Junior College. She said her artwork is the marriage of two loves she began nurturing in childhood: sewing and photography.

At the Picnic by Darcy Berg

At the Picnic by Darcy Berg


At 5, Berg played with sewing cards, but by 7 she was hand-stitching clothes for her Barbie dolls and finery for playing “dress up” with her friends. When Berg was 10, her grandmother passed down her electric sewing machine and an aunt presented Berg with her first camera.

“It was a natural combination from me and I just built from there,” Berg said. “The title of my blog is ‘Fear is Not an Option.’ You can’t be afraid to experiment with art. I’ll try anything, just for the heck of it. I feel that, if I’m going to charge people for my work, it’s my responsibility to give them something different and unique. I try to be on the cutting edge as much as possible.”

Merge and Flow Bee by Darcy Berg

Merge and Flow Bee by Darcy Berg

Six years ago, Berg was already designing dolls when an acquaintance invited her to join a quilting club. She started with traditional quilting, but grew frustrated with its many rules and guidelines. Art quilts grant her greater flexibility, from size to media.

“I use paint, colored pencil, water color, screen print and dye my own fabric,” Berg said. “Some of my quilts are really small, about two inches by two inches. Some people use plastic thread and attach candy wrappers. The only limit is the door to your imagination.”

Although Berg, like many people, has been affected by the recession (she was laid off in 2009 from her job as a senior environmental planner), she has used this time to focus and further develop her creative process and is pleased at the progress she is making. She hopes people enjoy the stories she tells.

“People have encouraged me to write more,” Berg said, “but I just haven’t had time to do it.”

Visit www.darcyberg.com and Darcy Berg Art on Facebook.

Posted in Quilting, Uncategorized | Tagged , , | Comments Off on Fabric Art