Machine Applique: Avoid These 3 Mistakes

Don’t Make These 3 Mistakes with Machine Applique

By Holly Hanover


Example of machine applique

Always check the position of your sewing needle while working with machine applique so the trim is even.

Working with a machine applique can be tricky depending on where you’re using it exactly, and especially when you are learning how to quilt. However, there are three very important things that you need to check first so your project turns out as great as possible.

1. Check the Thread Size

The first is to make sure you have the right thread. It’s always a good idea to check this out on a scrap piece of fabric first, so you can check the tension on top and bottom. Minor adjustments can be made on this piece without ruining the look of your finished project. Once you have determined that the thread matches, and it has the right tension, and you have the right stitch ready to go, then you can prepare the machine applique itself.

2. Stabilize the Applique

Next, you need to make sure the machine applique is not going to move around while you’re working with it. If it does, then you’re going to have puckers, thread drags and other problems that will not give you the polished look you desire. Here is where using a stabilizer will help you keep the applique in place while you’re attaching the edges. The style you use will be up to you, as there are cut-away, wash-away and tear-away options.

3. Watch Your Trim Margins

Finally, the next important thing to watch out for actually occurs while you’re sewing the applique on. Always be checking the position of your sewing needle so the trim is even all the way around. If you have a quarter-inch of thread on one side and a half-inch on the other, it’s going to make a big difference. However, if you’re careful to measure first all around the applique, then you can keep the sewing needle within those marks and end up with a great project. Use these tips the next time you’re working with a machine applique and avoid three very common mistakes.

What are your tips for mistakes to avoid in machine applique?  Share some tips below.

Click here to See Tutorials on How to Quilt

Posted in Applique, For Beginners in Sewing, How to Quilt | Tagged , | Comments Off on Machine Applique: Avoid These 3 Mistakes

Sewing Tension

It’s all about the Tension! or, Don’t Touch That Dial!
by Liz Kettle

It’s all about the Tension! Or Don’t Touch That Dial! by Liz Kettle Image 1

Understanding your sewing machine’s tension system is the single most important thing you need to know to become an incredible stitching queen (or king). However, tension is often the most confusing aspect of your machine and we aren’t taught much beyond turn it this way to loosen the top tension and that way to tighten it. So, most of us just leave that dial alone and never move it off of the little line in the middle that is supposed to give us perfect tension.Before I hand out my great tips for understanding your machine’s tension let’s get a few technical terms down.


It’s all about the Tension! Or Don’t Touch That Dial! by Liz Kettle Image 2
Balanced Tension:
achieved when your upper and lower threads meet in the middle of your seam or quilt. The top thread is not visible on the underside and the bobbin thread is not visible on the top of whatever you are stitching.
Unbalanced Tension: tension is not balanced and either the top thread is visible on the underside or the bobbin thread is visible on the top. Unbalanced tension can be used for cool special effects.
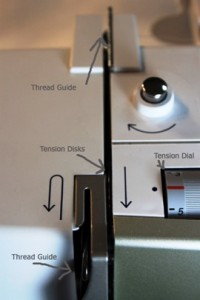
Tension Dial: an adjustable dial (technically called a regulator) on your sewing machine that allows you to increase or reduce the tension on your thread. Some computerized machines have adjustments located on the programing board and you push a button to adjust the tension but we still call it the tension dial just because…well because we always have.
Tension Disks: two disks through which the thread passes when you thread your machine. These disks squeeze together to put tension on the thread. The amount of pressure put on the thread is determined by the setting on the tension dial.
Thread Guides: These are hooks or slots along the threading path for your machine. They add a little tension to the thread as they guide it in the proper direction to the needle. If you skip a thread guide you will reduce the thread tension a teensy amount.

If you always use the exact same thread in the top and bobbin, keep your machine clean, have it serviced often, change your needles regularly and always stitch with the feed teeth (dogs) up you may never have to adjust your upper thread tension. But, if you are stitching a little on the wild side and like to play with more than one type of thread, keep reading!

One of the first things I explain to my students is that there is no one right answer for which tension setting to use with a particular thread and fabric combination. The unique settings for each and every sewing machine vary. Humidity (or lack of) and temperature effect your thread, fabric and machine. Additionally, the age and health of each machine is as much a factor as the disposition of the machine operator is.

The very best exercise for understanding your machine’s upper tension settings with different thread combinations is one that I developed when I began teaching my Stitch Journeys classes. It doesn’t take much time and will give you a wealth of knowledge about your machine.
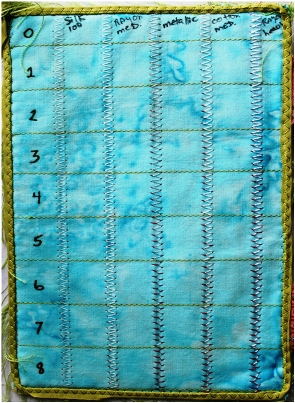
It’s all about the Tension! Or Don’t Touch That Dial! by Liz Kettle Image 3You will need the following supplies:
Fabric: choose a medium to light color solid or mottled fabric. Cut to 5″x7″ in my sample but you can make it larger if you like.
Thread: choose an assortment of specialty threads. This sample uses a Silk 100wt., a Rayon (medium wt.), Metallic, Cotton (medium wt.) and a Rayon (heavy wt.). Choose a contrasting color thread for the bobbin in a medium wt. cotton.
Tear away stabilizer
Fine tip marker

Use a Sharp or Microtex needle.
Change needles as needed for larger or metallic threads.

Assumption: Most machines have adjustments from 0-9 or 10. If yours has fewer or more simply adjust the number of grid lines you draw.

STEPS
1. Draw horizontal grid lines on your fabric 3/4″ apart or further apart if making a larger sample. I stitched my lines for extra stitch fun.
2. On the left side, write the numbers 0-8. These are the tension settings you will test. It is not necessary to go to a 9 or 10 tension setting because the fabric will usually begin drawing up and puckering because the tension is high. Set up your machine for a zigzag stitch (as wide as possible with a slightly shortened length-about a 1 to 1.5) and choose one of the specialty threads. Choose the needle down option if available
3. Begin at the top of the grid with the upper tension disks set to ‘0’. Stitch to the first grid line.
4. With the needle in the down position, lift the presser foot, adjust the tension dial to next high number. Lower the presser foot and stitch to the next grid line. Repeat all the way down the length of your fabric changing tension at each line. Always lift the presser foot to change your tension setting or it will take a few stitches to register the change.
5. Repeat the process with different threads in vertical rows across the width of the fabric. Write the thread fiber and weight next to each sample.

What You Get!
You now have a visual record of the settings that work best for each thread you use. This may not be a guarantee across different brands but it gives you a starting point. Look at the metallic thread stitching in the middle column of my sample. I had a lightweight poly thread in the bobbin so my balanced tension is at 2. At 3 I was already pulling the bobbin thread up here and there. With the silk 100wt there is hardly any pull up of the bobbin thread because the bobbin thread and upper thread were more closely matched in weight.

In general, you will see that in the Zero-2 or 3 settings the top thread is pulled to the back of your work. The top tension is too loose. Most threads will show their ‘balanced’ tension between the 3 to 5 setting points. You will start to see the bobbin thread coming to the top between 6-8. The top tension is too tight.
It’s all about the Tension! Or Don’t Touch That Dial! by Liz Kettle Image 4Free Motion Tension:
When you are free motion stitching with the feed teeth disengaged you become part of the thread tension system. You may have to adjust your machine tension to compensate for the way you move the fabric. For example, I sew fast and move my fabric pretty fast too, so I usually set my upper tension to zero when I am free motion stitching with a rayon or metallic thread, and to 1 when I am using cotton or polyester threads. If I am relaxed and sewing slower, I may not change my upper tension at all.

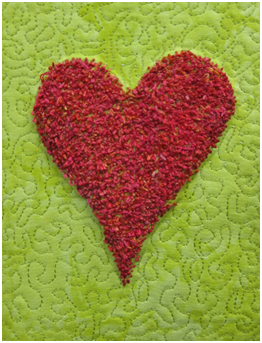
I hope that helps solve all your tension issues! For more wild stitching adventures such as the moss stitch heart to the left, get my book; Threads: the Basics and Beyond written by Debbie Bates and myself.


Liz Kettle, Fabric Artist

Liz Kettle is a mixed media and textile artist living in Colorado. She is co-author of 2 books, Fabric Embellishing: The Basics and Beyond and Threads: The Basics and Beyond. Liz loves teaching and sharing the joy of making stuff in her articles, classes and workshops. Visit her blog and website, www.TextileEvolution.com.

Click HERE to read more articles by Liz.
Posted in For Beginners in Sewing, Guest Writers, How To, Liz Kettle, Uncategorized | Tagged , , | 2 Comments

How to Piece Your Quilt ~ by Terry White

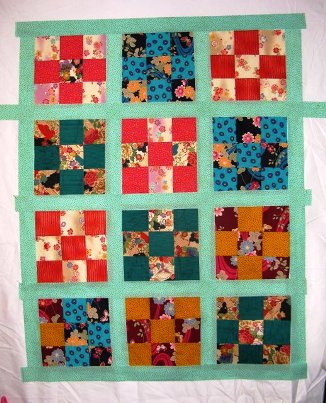
Lattice Strips and Sewing Sequence
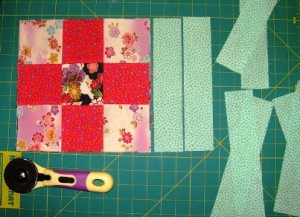
I have chosen to cut my lattice strips 2″ wide. When they are sewn in, the size will finish at
1 1/2″ wide. I cut my first lattice strips the length of a block which is 9 inches long.
Cut eight of these strips.

Lattice Strips and Sewing Sequence By Terry White Image 1

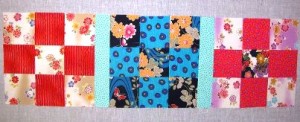
This is the “Sewing Sequence” in photos. I find that showing the sequence in photos will teach a lot better than words alone. Sew a lattice strip to two sides of a block. Then, sew a block on each side of the block. This is the first row; it is a “three block strip”.

Lattice Strips and Sewing Sequence By Terry White Image 2

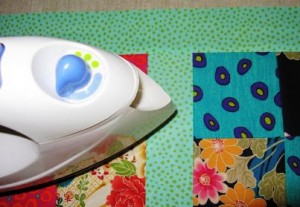
Press each seam with a hot iron. I don’t use steam because it can distort straight seams.

Lattice Strips and Sewing Sequence By Terry White Image 3

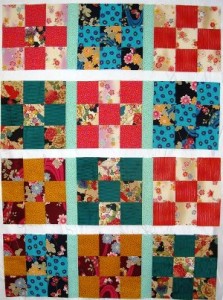
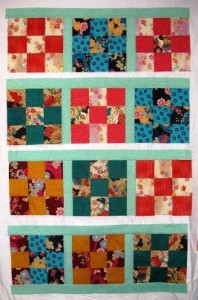
Repeat this for all your rows. Now you have four “three block strips”.

Lattice Strips and Sewing Sequence By Terry White Image 4

Lattice Strips and Sewing Sequence By Terry White Image 5

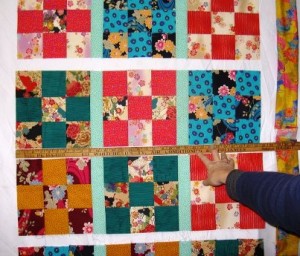
Measure the length of the “three block strip” to determine how long to cut your next lattice strips. Cut five lattice strips approximately 28″ long. However, measure to be sure.

Sew the “three block strips” together to the next “three block strip”
with a lattice strip in between.

Lattice Strips and Sewing Sequence By Terry White Image 6

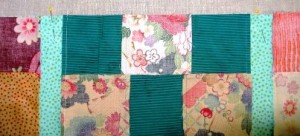
Pin the lattice strip to the edge of the block strip before stitching.
Anytime I work with long strips like this, I think that pinning is so helpful.

Lattice Strips and Sewing Sequence By Terry White Image 7

Here is the continuing sequence of stitching the quilt top together.

Lattice Strips and Sewing Sequence By Terry White Image 8

Lattice Strips and Sewing Sequence By Terry White Image 9

Then, sew the lattice strips around the edge to create the effect
of the blocks floating in the green fabric.

Lattice Strips and Sewing Sequence By Terry White Image 10

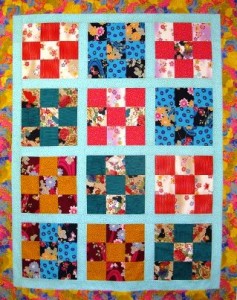
The final; outside border is a strong floral. I figured I would use a floral
that had all the colors of the other fabrics.

I cut the border the same width as one of the nine-patch blocks 3″ wide. Sew the top and the bottom borders on. Then, sew the two side borders on to finish the quilt top.

Lattice Strips and Sewing Sequence By Terry White Image 11

Click HERE to see more articles by Terry.

Posted in Guest Writers, How To, How to Make a Quilt, Terry White, Uncategorized | Tagged , , | Comments Off on How to Piece Your Quilt ~ by Terry White

How to Layout and Set Your Quilt

Layout and Setting the Quilt
By Terry White
The layout of a quilt is when you decide where the blocks
are going to go and how you will sew them together.
Setting the quilt is when you set them in the arrangement of your layout.

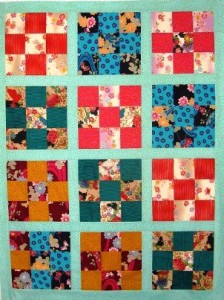
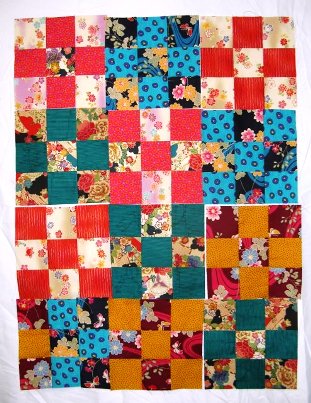
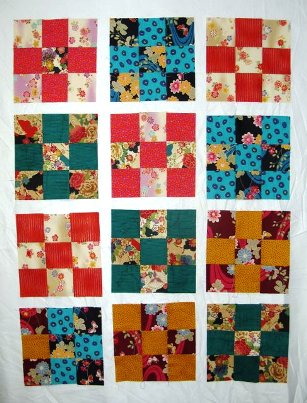
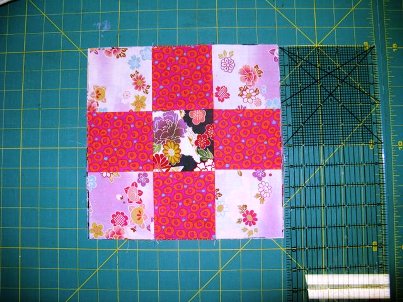
So, here are two sets of nine-patches. As I make them,
two at a time, I’m laying them out to see how they look.

Layout and Setting the Quilt  by Terry White Image 1 Layout and Setting the Quilt  by Terry White Image 2

Layout and Setting the Quilt  by Terry White Image 3

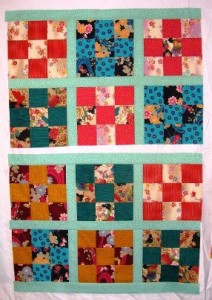
I could sew them together as they are laid out just above in PHOTO 3, but I want to add lattice strips. Lattice strips are strips of fabric sewn between quilt blocks. This will separate the blocks like frames
and make the quilt bigger.

Layout and Setting the Quilt  by Terry White Image 4

Here, I’ve separated the blocks and I like the amount of white space between them. There is about 1 1/2″ of white space between the blocks.
So, I’ll make my lattice strips the same width.
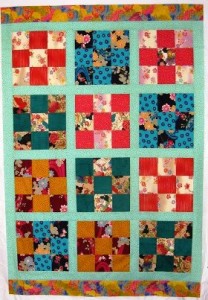
This is the layout I’ve decided upon.

Layout and Setting the Quilt  by Terry White Image 5

The next thing I do is to try out different fabrics to see what would work as lattice strips. Green is a good choice because it is the color of grass and leaves…it is a natural neutral. I lay my different blocks against this color of green to see how they look. I like this green with the blocks. It doesn’t overpower the fabrics in the blocks and some of the blocks have this soft green in the fabric prints. I tried a few other colors before this one. I tried a blue and several brighter greens, this one was the best choice for me.

Layout and Setting the Quilt  by Terry White Image 6

I cut strips and laid them out to see better how they would look. I like it!
I cut the strips 2″ wide, so after they are sewn
the strips will finish at 1 1/2″ wide.

Layout and Setting the Quilt  by Terry White Image 7

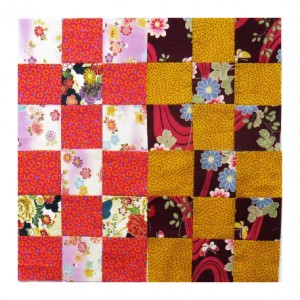
Make sure that your nine-patch blocks are all the same size. You may have to measure and cut some to make them the same size. This is called, “Squaring up the blocks”. I prefer to always sew every block perfectly the same size every time. Yes, we all want that to happen. However, because we are not all perfect machines, the term “squaring up” was invented!

Layout and Setting the Quilt  by Terry White Image 8

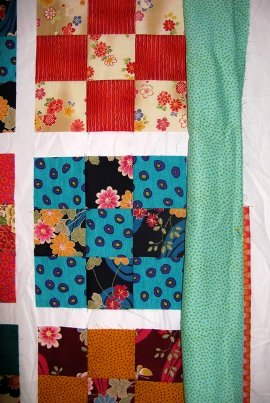
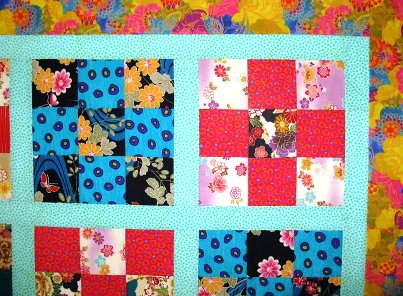
Here is a detail shot of the corner of the quilt top to show the fabric I chose for a border. This fabric is softer than the fabric prints in the blocks and it picks up a lot of the colors in the quilt.

Click HERE to see more articles by Terry.

Posted in Guest Writers, How To, How to Make a Quilt, Terry White, Uncategorized | Tagged , , , | Comments Off on How to Layout and Set Your Quilt

Essential Materials for the Beginning Quilter ~ by Terry White

The Best Battings For Your First Quilts

Batting is the inner layer between the top of the quilt and the back of the quilt. It is this stuffing that makes a quilt a quilt, and not a blanket. There is a dizzying array of battings available to the quilter these days! I will break it down for you and suggest a good quilt batt for the beginner.

Essential Materials for the Beginning Quilter by Terry White - Image 1

Thirty-four years ago, when I began to make quilts, there were few choices from few companies: traditional cotton batting (low-loft) and polyester batting in fluffy and low-loft. I hand quilted at the time, so a low-loft polyester batting was my best choice because it was easy to hand quilt.

I machine quilt now, so I can quilt easily through cotton batting, so a traditional or low-loft cotton batting is what I choose for most of my quilts. However, most of my quilts are artwork for the wall with lots of embellishing and quilting, so I want a very flat finished look. I get that with cotton.

Essential Materials for the Beginning Quilter by Terry White - Image 2

For bed, baby and lap quilts, many people choose to use polyester batting for several reasons:

1. It is relatively inexpensive.

2. It washes beautifully and doesn’t shrink.

3. It gives a lovely loft to the quilt stitching, creating that great quilted texture.

My suggestion is to use good quality low-loft polyester batting for your first quilts.

That being said, the internet has many sites about quilt battings. For instance, the companies that make them have charts that explain the fiber content and intended use for each batt. It is hard to stay current with all the innovations made by the batting companies….they are improving and adding to the variety of products all the time. A few of the companies that make good battings are Legacy (by Pellon), Mountain Mist, Hobb’s, Fairfield, Quilter’s Dream, and Warm’n Natural.

Essential Materials for the Beginning Quilter by Terry White - Image 3

The packaging will also give you information about the fiber content, instructions for use and other important information.

Essential Materials for the Beginning Quilter by Terry White - Image   4

Competition quilters (those that enter contests to win) use specialty battings for their unique qualities. Three notable examples are:

1. Wool batting- it is very springy, so when you have a very closely quilted design, the batting still fluffs up in the un-quilted spaces.

2. Silk batting- you can get a lovely quilted texture even when quilting very close. It keeps the quilt soft, drapey and lightweight.

3. Bamboo batting- environmentally friendly as it is a renewable source. This batting is lovely to the touch and quilts like butter by hand or machine.

Some fabric stores have batting on a roll with no brand on it. This stuff may be for upholstery or it may be a low quality batting. Check to see if there are holes in it, rough texture or globs of resin. Don’t use it if you spot these things.

Some fabrics have good quality batting on rolls or boards….these will have a brand on the ticket and this is a great way to get batting at a good price.

The thing to do is to go to your local fabric store or quilt shop and see what is available. I like to pick up samples of different battings when I go to the quilt shows, too. When you have the chance to pick up samples of different battings, use them to make samples for yourself so that you can see the different qualities yourself.

You can get battings in white, natural and black. The white is, of course, good for a pure white quilt and the black for a black or very dark colored quilt.

Essential Materials for the Beginning Quilter by Terry White - Image 5

Keep in mind that when you hear about a great batting from somebody, they are talking from the experience of using it in the type of quilts they make, in other words, consider the source. The fiber content and the way different battings are made really do make a difference in the way they perform and finish when made into a quilt.

Click HERE to see more articles by Terry.

Posted in For Beginners in Sewing, Guest Writers, How To, Quilting, Terry White, Uncategorized | Tagged , , | 1 Comment