SEWING WITH SUE

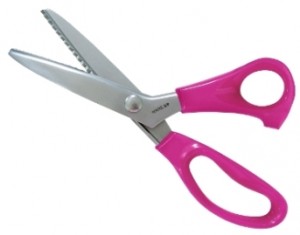
Get rid of bulk with your with Havel’s Pinking Shears.

Sue Hausmann shares her tips on how to streamline your quilting projects with our Havel’s Pinking Shears.

I feel trimming, grading and clipping seam allowances is very important to eliminate bulk in garments, projects and quilting projects but can take quite a bit of time. My motto is make it fast, easy and professional so I use my Havel’s Pinking Shear to trim, grade, and clip all in one quick step. The 9″ Havel’s Pinking Shear is very lightweight and very sharp. When trimming the seam allowances after “enveloping a quilt or quilted table mat, etc. my Havel’s Pinking Shear trims all three layers, top, batting and backing, quickly and easily. When teaching a ‘hands on’ class, I always ask the students to use my Havel’s pinking shear for their trimming and they are amazed how easily it cuts.

If you do the “turned handlook appliqué” pieces with fusible tricot interfacing, after stitching, trim the appliqué shape with Havel’s Pinking Shear to eliminate bulk and clip curves all in one step. The added advantage when trimming any seam allowance with your Havel’s Pinking Shear is that the seam allowance edge does not press through to the right side as a straight edge. You barely see the ‘pinks’! Happy Sewing!”


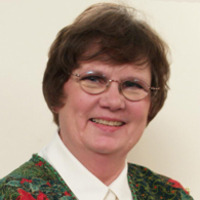
Sue has been sewing since she was 10 years of old! She has traveled all over the country as a Sewing Educator inspiring women for over 20 years. Sue has been a pioneer in changing the world of sewing and making it the amazing industry it has grown into today.

Click Here to learn more about Sue Hausmann

For Havel’s Pinking Shears Click Here

Posted in Fabric Scissors | Tagged , | Comments Off on SEWING WITH SUE

QUILT CONTEST

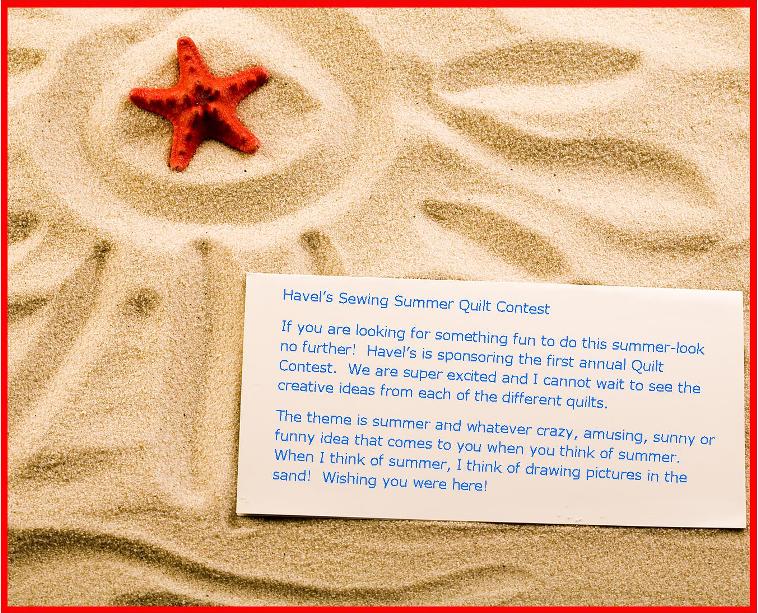
WIN $500 THIS SUMMER AND HAVE FUN IN THE PROCESS!

CLICK HERE FOR CONTEST RULES AND ENTRY FORM

Posted in Fun Stuff | Tagged , | Comments Off on QUILT CONTEST

SEWING TIPS WITH SUE HAUSMANN

“Snip” Those Ends in the Bud!


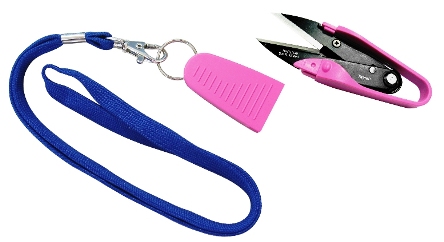
Do you ever need a great tool for snipping loose threads while sewing that prize winning quilt? Havel’s Dura-Snips will do the job, just ask, Sue! Havel’s Sewing did, and here are some tips she shared.


“I love Havel’s Thread Snips on Lanyard and use it whenever I’m sewing at the machine or by hand and when I’m ironing. This 4 3/4″ snip scissor slips into a protective sheath so that it is not hanging around my neck with the sharp points flopping around to cut into my sewing machine, cabinet or me! Because it is lightweight I don’t even feel it around my neck.
When sewing, it is perfect for snipping threads and fraying ends. Even though my sewing machine has an automatic thread cutter there are still little ends left and this small sharp snip gets every little end. I keep a pair on my ironing board and put it on while ironing too because there are always little thread ends sticking on buttonholes, seams, and other areas of readymade garments and linens. If I did not have my Havel’s Thread Snips at my fingertips I would pull the stray thread and make it worse! Happy Sewing”


Sue has been sewing since she was 10 years of old! She has traveled all over the country as a Sewing Educator inspiring women for over 20 years. Sue has been a pioneer in changing the world of sewing and making it the amazing industry it has grown into today.


Click Here to learn more about Sue Hausmann

Posted in Uncategorized | Tagged , | Comments Off on SEWING TIPS WITH SUE HAUSMANN

Mixed Media Artist Terry White

Interview with Terry White

By Jackie Marsal

Terry was born with a sewing machine in her crib. Art has been a large part of every facet in her life ever since her earliest memories as a young girl. Her work resonates with creativity, imaginativeness and originality. A story can be drawn from every one of her creations, from the unique turtles in “Turtle Crossing” to her cats that sing the blues. I sat down with Terry to see what she had to say about her art, her inspirations and how you too can be an original.

How long have you been a mixed media artist?

I’ve been a mixed media artist since the second grade! I went to Catholic school, and each May we would make a little “May Altar” out of a shoebox. It was a little shrine to Mary, blessed mother of Jesus. I looked forward to making these every year, and I took it very seriously. I gathered plastic flowers, broken jewelry, birthday wrapping paper and magazines to cut for imagery. Creating a garden shadowbox with a statue of Mary in the middle was so much fun! As a child, you don’t worry about good taste, you just cut, glue and paint the thing until nothing else will fit. I still do this at times! I’ve experimented mixing art materials and found objects ever since. The tactile nature of fabric, yarn, beads, etc. interested me because it was real and not just a painting on the wall.

TURTLE CROSSING


How would you describe your style?

Well, describing my style is a tough one. I bring the necessary imagery, techniques and materials to each new project or series I work on. So when I explore new ideas the imagery, colors and materials may vary greatly from one project to the next. Line and form are the first important considerations for me … then color. My drawing style is simple, with lots of flowing lines and nice forms. My colors tend to be clear and bright, and the materials I use to realize a design enhances the lines and forms.

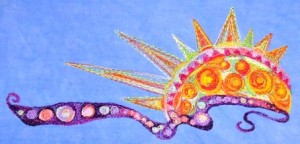
DAYBREAK


Was there a certain artist that inspired you in the early stages of your career?

There’s definitely more than one – Constance Howard for modern embroidery, Robert Rauschenberg for sculptural fiber forms, Dr. Seuss for imagery, Peter Max for color and imagery, Kaffe Fassette for color in fiber, Erica Wilson for embroidery. These are the people I studied in my teens, mostly through their books and other printed material I was able to get a hold of.


Apart from creating art, what else do you do within the industry?

A lot! I design applique quilt patterns and embroidery designs. I design projects and patterns for promotional purposes for Havel’s, Coats & Clark and Bernina. I write books which are published by the American Quilter Society, and I’m also a freelance writer published in magazines, most recently in Quilting Arts, In Stitches and Machine Quilting Unlimited. I teach at quilt shows, guilds and groups across the U.S. and I’ve designed multi-color threads for Wonderfil (the Tutti’s and Fuitti’s) and for Coats & Clark’s Star Line, which is now being distributed by YLI Thread Company.

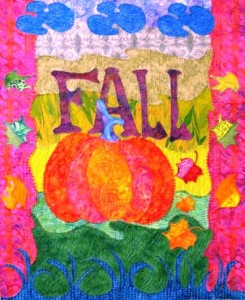
FALL WALL QUILT


What is the most challenging part about creating mixed media art?

The challenge is to master the good techniques … and also invent new ones to do the things you have in mind.

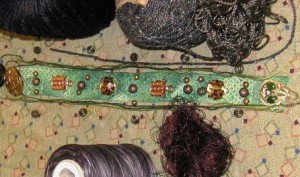
EMBELLISHMENT IN PROGRESS


What’s the best advice you could give someone who wants to try quilting or textile art for the first time?

Just be patient with yourself as you learn the basic techniques for working with your materials. It’s okay to be inspired by other artists, but do it from your own point of view. This way you can grow with your own imagery and techniques. Think in terms of “I envision it, so I will make it with the tools and ability I have” and don’t be afraid – that’s the first thing that stops creativity dead in its tracks.

IT’S NOT THAT SCARY!


Click HERE to see more articles by Terry.

Posted in Interviews, Mixed Media, Quilting, Terry White | Tagged , , | Comments Off on Mixed Media Artist Terry White

Quilt Borders

5 Tips For Attractive Borders For Your Quillts

By Holly Hanover

Quilt Borders

Border Design


You’ve put a lot of time and effort into making your beautiful quilt, and you’re almost done. Just like the proverbial icing on the cake, one of the finishing touches remaining is to add attractive borders. If this is one of your first few quilts, you may be unsure of how to proceed. Here are a few tips to ensure that your quilt has attractive borders and your work is a success.


  1. Border design: Simple doesn’t have to mean boring, just as complicated doesn’t necessarily mean attractive, so start by picking a simple border design. This can be done by adding one strip to each side of your quilt, or double your pleasure by adding two. Once you have this under your belt, you can try more complex or detailed and attractive quilt borders such as squares, rectangles, triangles, or nine-patch.
  2. Color me happy: You can make your quilt border fun and interesting based on the colors that you choose for each strip. Solid strips serve as a pleasing contrast to a patterned base, or you can choose one or more strip colors that appear in the base.
  3. Border type: While there are many types of borders, butted borders (borders that are sewn straight) are quick and easy, and therefore great for beginners. For those who already have completed butted corners, you can try adding corner squares in your butted borders.
  4. Measure twice, cut once: One thing can create an unattractive borders are those that were not measured properly. Always round to the nearest inch and add ¼ inch allowance to all seams. Use the center of your quilt for measuring borders as it tends to have the least fluctuation in length or width. and don’t forget to double check your measurements before cutting – after all, a stitch in time saves nine!
  5. Practice: If you are unsure whether you have the hang of adding quilt borders, why not practice first? Do a trial run not only of measuring a border but also adding it to a small piece of fabric. By learning where your problems areas are and learning how to fix them before working on your quilt, you can guarantee that your quilt will look stunning without the stress of redoing mistakes.

With these few tips in place, you can start to measure and sew your own attractive quilt borders for your quilt. Have fun!

Click here for great tools for Quilt Design

Posted in How to Quilt, Quilting, Quilting & Embroidery | Tagged , , | Comments Off on Quilt Borders