Crafting for a Cause

Crafting for Breast Cancer Awareness Month
By Beth Novak

October is National Breast Cancer Awareness Month, and this year I’m celebrating the survivors! My great-grandmother was a breast cancer survivor (twice over!), my grandmother is a breast cancer survivor, and my aunt, although recently diagnosed, I’m sure will be a survivor!

I want to celebrate the strong women of my family, and give my aunt strength during her treatment. I think a reminder of her roots will do just that.

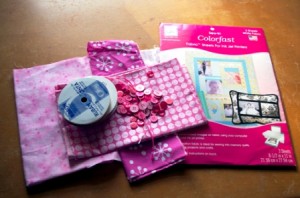
Supplies:
Fabric sheets for inkjet printers*
A variety of fabric scraps, cut into 2.5” squares
A variety of embellishments, such as buttons, ribbons, and trims
Tools: Sewing machine, thread, needle
Fabric glue or glue stick

* These fabric sheets that you can use in your home printer are a great way of personalizing your crafting projects. I love fabric printing services such as Spoonflower, but for small projects these sheets are much more economical. A couple of things to keep in mind: these fabric sheets are very stiff, so I wouldn’t use them too generously through a project. Also, I personally avoid using them in any projects that I plan to wash. You can buy the colorfast version, but I still am not sure I trust it. Please let us know in the comments if you’ve had any experience washing these inkjet fabric sheets! I buy these sheets at JoAnn Fabric, but if you are not near one check your local quilt shop. You can also find them online.

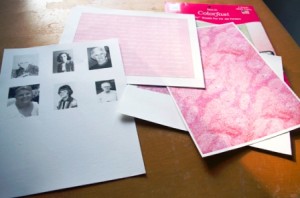
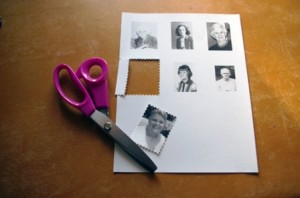
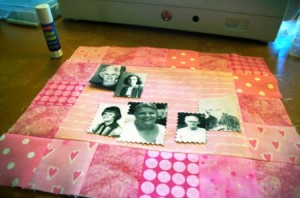
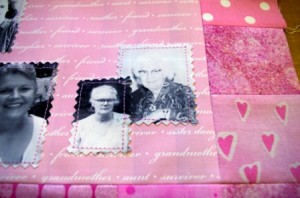
I found photos of my great-grandmother and grandmother both early and later in life, and photos of my aunt both from school and more recently. I scanned them all in black and white so they’d look as if they belong together. If you don’t have a scanner, you can have your photos scanned at your local drug store or anywhere there is a scanning/printing kiosk. I put all the photos onto a page in my word processing software, and printed them onto one page.

I also wanted to print some interesting fabrics to use in my collage. Using the same word processing software, I created a pink box about the size of my page (minus margins) and filled it with text that describes these members of family (mother, sister, aunt, friend, grandmother, survivor).

Finally, I did a Google Images search for “breast cancer cells” and found an interesting image that matched my color palette. I printed the text I created as well as this image to use as fabric.


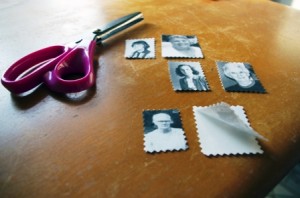
Using my pinking shears, I cut out each family photo. I chose to keep the paper backing on the fabric to provide some stiffness while cutting with the shears.


Once I cut out the photos, I carefully removed the paper backing.

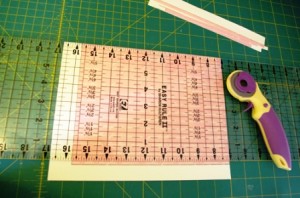
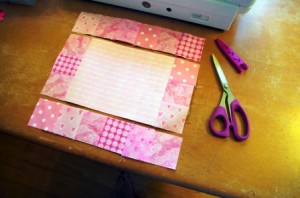
I chose the text-on-pink fabric as my central background fabric. I cut it down to 6.5” by 8.5” with my rotary cutter – but this time I removed the paper backing before cutting so I wouldn’t dull the blade!

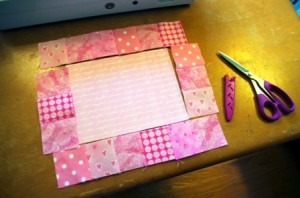
I also cut my last sheet of printed fabric (the breast cancer cells) into 2.5” squares. I need 18 squares to fit all the way around my background fabric.

Using a ¼” seam, sew together the top row of squares and then the bottom row of squares, the left row and then the right row of squares.

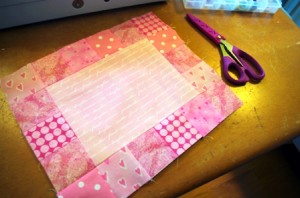
Sew the left and right rows of squares to the background fabric.

Sew the top and bottom rows to the background fabric.

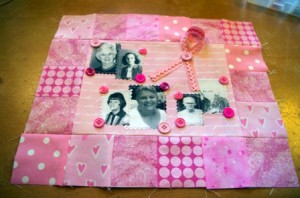
Now comes the fun part! Lay out your photos on the background. Once you are happy with your layout, use a little glue from the glue stick to hold them temporarily in place. This will keep everything in place as you sew.

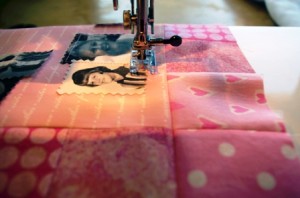
Using your sewing machine, stitch down the edges of your photos.

If your machine has decorative stitches, this would be a great way to use them!

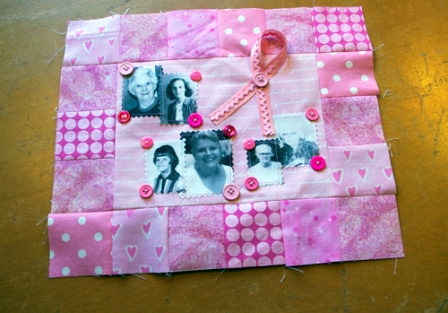
Gather your embellishments, and experiment with what looks good to you. I added buttons at the corners of each photo pair, and made an awareness ribbon. The printed fabric can be hard to manually push a needle through, so I used a little glue on the back of each button before sewing to keep them in place.

Your finished piece can be framed in a traditional frame or shadowbox frame, or finished like a quilt and used as a wall hanging. You could even mount it in an embroidery hoop or wrap it on a canvas.

Because of my family history, I do monthly self-exams and had my first mammogram at age 35. If you have a family history of breast cancer you need to have a baseline mammogram, and if you are 40 or older, you need to have annual mammograms. It’s really not that bad, a few seconds of discomfort could save your life!

Click here to learn how you can help in the fight against breast cancer.


Posted in art ideas, craft, Craft to make, Crafting, How To, Mixed Media, Quilting Tools, Uncategorized | Tagged , , , , , , , , , | Comments Off on Crafting for a Cause

How to Quilt Basics: Pre-washing Fabric?

How To Quilt Basics Q&A: Do You Pre-wash Fabrics?

You asked and the professionals answered!  Whether you are a beginner or intermediate quilt artist you will find these segments valuable.  Feel free to reply and let us know your techniques!


We asked our experts:

Pre-washing fabric:  To wash or not to wash?  Will the reds and purples bleed if you pre-wash?


Jamie Fingal– I almost had to laugh, when I read this.  I don’t pre-wash anything, because my quilts, which are mainly made for the wall, are never washed.  On the back label, I usually add the words “do not wash.”

Leslie Tucker Jenison– Answer (sort of)-when I began quilting a million years ago I always pre-washed my fabric.  I was warned against colors running, shrinkage, and more.

These days I use both commercial and hand-dyed (by me) cloth.  By the time I have finished the processes on my hand-dyed cloth it has been washed multiple times to remove the excess dye and/or print paste.  I know beyond a doubt that my cloth is not going to bleed or shrink because my final wash is always in hot water!

I do not make many bed quilts so I rarely pre-wash my fabrics.

However.  If I plan to make a quilt that I know will be laundered, such as a baby quilt, and I am concerned about the dye stability in the cloth, I prewash.

Liz Kettle– I used to prewash everything but as my work has changed my need to prewash has changed. Besides that who can wait to wash, dry and iron that fabric? I want to get right to it.

The majority of my work is for the wall and won’t ever be washed so I don’t worry about prewashing. For quilts I make that will be washed I still don’t prewash. I am willing to risk it rather than take the time to prewash.

Ruth Chandler– I always wash my fabrics. I wash them in detergent with no color or scent and I always use Synthrapol. Synthrapol will keep the dyes from attaching to the fabrics when they are washed. Reds and blues are especially bad for bleeding even after prewashing so I make it my practice to use Synthrapol when I wash any of my quilts. Synthrapol can be found at most fabric stores and is very inexpensive. I do cut the edges of my fabric with a wave blade or my pinking shears to lessen raveling in the washer.

Terry White– I pre-wash everything!  If the reds and purples, blues, blacks or browns bleed, then you want them doing that before you put them into a quilt.

My reasons:

1. Fabrics have chemicals including sizing, finishing and dyes….these can cause skin allergies over time.

2. The finishing can mask a poor quality fabric…after washing it doesn’t have much body, color or may not be as nicely woven as you thought…..and, it may shrink a little (you would want it to shrink before you put your lovely work into it.)

3. Various weights and thread counts of different fabrics will stitch better together.

Click on the artist name for additional blogs!

We would love to hear your thoughts.  Do you pre-wash fabrics before quilting? Reply below.


Posted in For Beginners in Sewing, How to Quilt, Jamie Fingal, Liz Kettle, Quilting, Terry White, Uncategorized | Tagged , , , , , , , | 2 Comments

How to Make a Quilt

Tips for sewing patchwork
By Terry White 

When I first started to make quilts, the first thing I did was to take a beginner’s quilt class. I am sure glad I did. I was experienced in many needlecrafts, but quilting has its own ways. The class was six weeks long and I loved it! I didn’t obey all the rules, but I learned what the rules were and why they existed. Actually, the “rules” are a compilation of many quilters’ wisdom gained from trial, error and success.

I want to give you some tips on sewing patchwork because there are a lot of things that a new quilter may do that doesn’t work well. These are things that are good to know when learning to quilt.

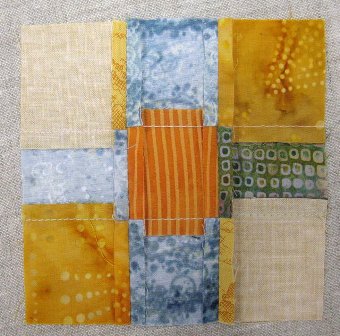
Seam allowance is ¼ inch. This helps to control the shapes of patchwork. More than ¼ inch is unnecessary and less is not wide enough to keep the seams from fraying.


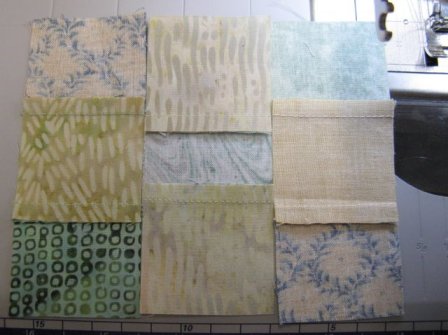
The wrong side of a nine patch showing consistent and straight ¼ inch seams before the three sets are sewn together. Notice the direction in which the seams are pressed.

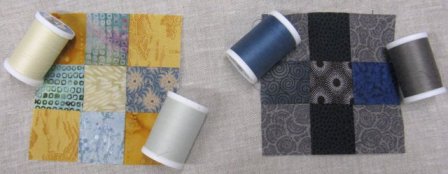
Use the same thread in the bobbin as the top thread. You can choose a neutral color that blends with the colors of your patchwork, instead of changing thread colors all the time. Here are examples of threads that work for these color combinations.

Try to cut and stitch each fabric piece as perfectly as possible… knowing full well that it is hard to make perfect happen. Each cut and each seam that is just “a little bit off” will eventually add up to “a lot off”.

Handle patchwork and fabric pieces gently. It is very easy to pull a small piece of fabric out of shape. As soon as a piece of fabric is cut from the cloth, it begins to fray.

Press, press, press…

(This is different than ironing fabric into submission and distorting the pieces)

Gently pressing your seams as you piece will go along way towards beautiful patchwork. I like to press every set of seams as I piece. The patchwork fabric is easier to manipulate when you press as you go. It is very hard to press an entire quilt if you haven’t been pressing it section by section.

The seams are pressed open to distribute the seam bulk in the corners. This block will stay flat and be easy to quilt.

Use the correct needle size and type for the thread and the fabric. Generally, I like a 75/11 machine embroidery needle. It has a nice sharp point and, most importantly…it lasts a long time, embroidery needles are built to last for a long time …have you ever seen an embroidery machine go? The needle works very hard.

Batik fabrics are very tightly woven and have wax residue from the printing process, so, for batiks I switch to a Microtex needle.

As I said before: the best thing you can do for yourself before you make a quilt is to really get to know your machine. Your machine comes with a book that explains the parts of your machine, how to use and maintain it and what the many functions do. You can learn about tension settings, presser feet, needle positions, needle plate, types of stitches, stitch adjustments, needles to use, threading the machine, spool holder positions…………………..

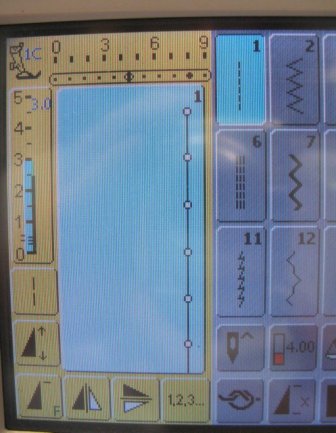
Set the stitch length to 3 and the default setting for thread tension which is usually about 4.

Know and control your tension settings. When you thread your sewing machine, the thread is guided through a series of guides and tension discs. This puts some friction on the thread so that it doesn’t loosely spool off and make messy stitches. You can adjust these settings. Each machine is different and you have to know how to adjust your tension for the different types of sewing you do with different types of fabric, stitches and threads you use. Most sewing machines have a default tension (about 4) which is produces even stitches and is good for patchwork.

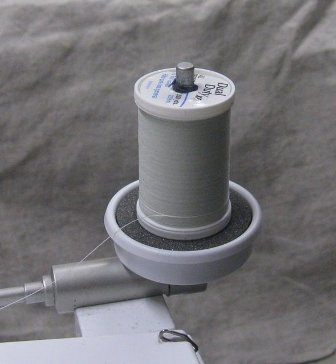
Place spool upright using a spool pad and spool cap to create an even pull (thus, even thread delivery) from the side of the spool.

If your spool is big and heavy, it can cause extra drag on the thread and that can cause the tension to be too tight. Place the spool upright on a spool cap with a felt or foam spool pad in between. The spool cap will act like a “Lazy Susan” and keep the spool moving around. If your spool is lightweight and spins too fast, it can jam up the thread in the tension discs. This will add the friction necessary for the spinning to stop.

If you usually put your spool on one way and you have trouble with it…then change it.  I always think that the best way to pull thread off of any spool is the way it was spooled on… from the side of the spool.

What you want is for the spool thread to have smooth delivery from the spool through the tension disks. Usually, you won’t have this problem with patchwork; it usually occurs when quilting or thread painting, i.e. when you are stitching a lot without cutting the thread. Stitching for a long time can twist up a thread and cause it to break.

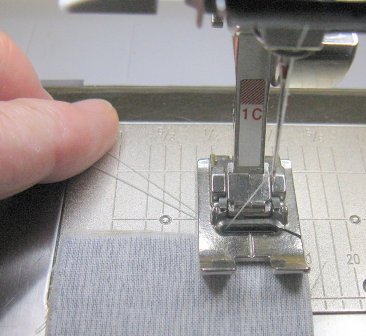
Some machines have the capability to move the needle to the right of center needle position. This way the fabric is moved by both feed teeth which help to keep the line of stitching straight.

You can guide the fabric along the side of the foot, and/or use the stitch plate guide on the sewing machine table so that you can have a consistent seam width.

Don’t stitch too fast…the machine is already sewing faster than you can. Keep control of the fabric pieces and guide them so that the feed teeth are doing the work of moving the fabric. Keep maintaining an even seam to the end of the patchwork.

By holding the top and bobbin thread like this, you are creating tension for that first stitch.

Hold top thread, take a stitch, and bring the bobbin thread up. Hold these threads to the side under the presser foot. Now, you can line up your pieces under the needle and begin to stitch. There is no beginning tension until you take that first stitch.

If you have problems making a good stitch on the sewing machine, check the simplest things first:

Is the bobbin threaded correctly?

Is the top thread threaded through all the correct tensions and guides?

Is the thread stuck on the spool or wrapped around a spool pin?

You would be amazed how often these things happen to everyone!

(Okay…me)

Test your stitches before sewing. Do a little stitch sample every time you adjust a setting on the machine…if there is a problem…..you can adjust it before getting too deep into your project.

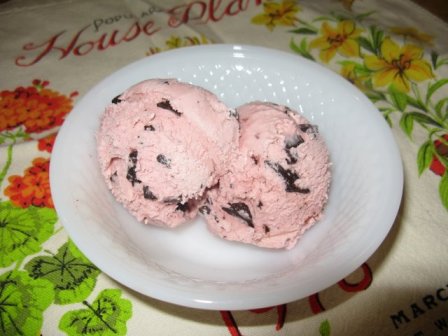
Finally, when you get fatigued, stop stitching. Go wash your hair or eat some ice cream. It is better to get up and walk away before you make trouble for yourself than to wait and make trouble and have to rip it out….right?

Take an ice cream break!

Click here for more tutorials on How to Make a Quilt with Terry White

Talk to us!  Tell us about your quilting ideas and experiences.

Click here to learn more about Terry White


Posted in For Beginners in Sewing, Fun Stuff, How to Quilt, Make a Nine-Patch, Quilting, Terry White | Tagged , , , , , , , , , , | 1 Comment

Mixed Media Artist Candy Glendening

By Jackie Marsal

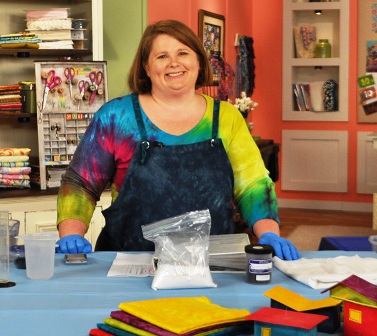
I have been “dyeing” to have Candy as our guest for over a year! I recently had my opportunity and I spoke with Candy about her career, her love of color and what inspires her.  If you are new to  “Candied Fabrics”  and creations you are in for a treat!  Candy is such a fascinating artist and I am honored to debut her artwork.  Enjoy!


How long have you been an art quilter, and what is your favorite part?

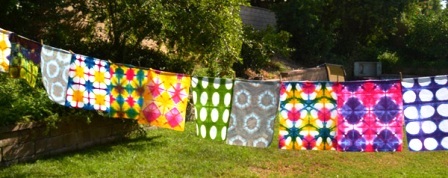
I started dyeing fabric 15 years ago. My ability to create fabric that was uniquely my own propelled me from the world of traditional quilting to creating art quilts. This took time, but I’ll say I’ve been working in a style that is uniquely my own for about 8 years now. You know, I think my favorite part is when I get an idea for a new direction to take on future pieces while creating. Although I’ve read so many artists saying “you’ve got to do the work”, only when I finally started getting in a “zone” that leads me from one artistic idea to another did I truly appreciate this fact myself!

Your talent for combining colors is amazing!  Is that something we can all learn or is it more on a “cellular” level?  

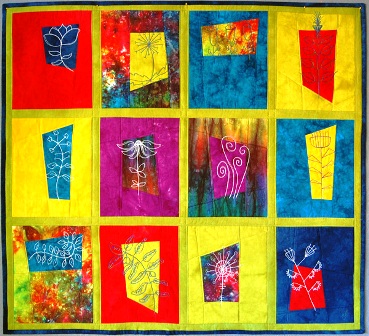
LOL, you are too funny! Although I certainly have studied color theory, and understand the concepts behind it, I don’t necessarily use that information while choosing a set of colors to work with as much as my “gut”. I latch on to a certain color, sometimes becoming quite obsessed with it, and first perfect my ability to dye that color. Then I dye both single and multicolor fabrics that work well with it – this is where some of the color theory gets put into practice. I think the most helpful point I can give someone is to choose colors that you love and THEN pay attention to VALUE, and make adjustments when the value scheme doesn’t support the feel you’re going for in that piece. (Note: I’ve been obsessed with Chartreuse for quite awhile – you’ll see I use that color in every piece pictured in this interview!)

Was there an artist that inspired you in the beginning of your career?

Yes! Melody Johnson! Her art quilts were some of the earliest examples of art quilts that I saw, and they were by far my favorite. I was lucky enough to learn free motion quilting from her at a weekend QSDS class back about 14 years ago now. Later on, her open sharing about how she worked on her blog, Fibermania, provided me with the pieces of the “how do I become an artist?” puzzle I had struggled for years to find.

Apart from creating art, what else do you do within the industry?

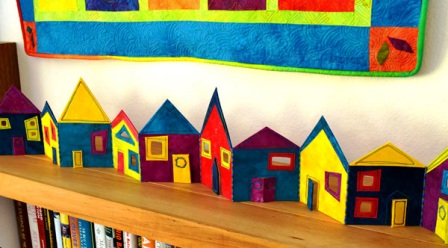
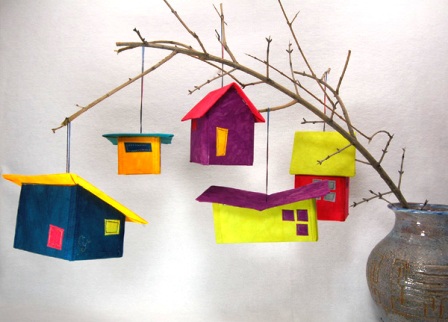
I’ve had a wonderful relationship with the folks at Interweave for a few years now. I’ve published over 15 different articles in several of their magazines (like Quilting Arts Gifts and Quilt Scene) and interactive e-mags (In Stitches). I’ve also filmed four episodes of Quilting Arts TV, and I also have a DVD (Dyeing to Stitch: A Comprehensive Guide to Creating Colorful Fabric Art) that I taped for them last summer.  I found out just the other day that my “Holiday Row Houses” are featured on the cover of Quilting Arts Gifts 2012/13! I was so excited!

Has biology influenced your art quilting?

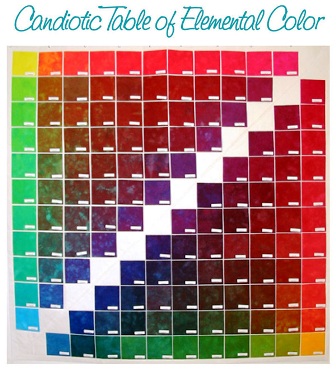
The most significant influence my scientific training has had on my art is my approach to fabric dyeing; I measure dyes accurately and have created several charts of fabric swatches that allows me to know how I can repeatedly dye a particular hue. Dye is unlike paint, the color you see in your dye pot or on your wet fabric is not always what you see on the washed and dry fabric. When I become obsessed with a particular color that has to be JUST SO, I will often design an experiment so that I can narrow in on a very specific hue/intensity/texture, and because I’ve recorded how that happened, I can dye that same fabric again and again!

What’s the best advice you could give someone who wants to try dying fabric art for the first time?  (Your online classes, of course!!!)

Dyeing fabric (with fiber reactive dyes) is fun, easy, and immensely rewarding! Being able to work with fabrics made by my hands allow my work to be unique, something I find very important! And indeed, I have a series of self-paced online courses (2 are complete, 3 are still in the building state) that have been very well received. I make controlling the process very accessible, breaking down the steps of dyeing into easy understandable segments, and I share all my “secrets” that I’ve learned through the years.

Thanks for having me as your guest! These were fantastic questions, and they brought out a lot of insightful answers, some of which surprised me a bit! Feel free to drop by my blog for a visit sometime, it’s my colorful home on the web! J

To see additional artwork or take a class with Candy go to Candied Fabrics. 

We would love to hear your thoughts and comments on Candy and her work!

Posted in Fun Stuff, Interviews, Mixed Media, Uncategorized | 3 Comments

Fiber Art with Liz Kettle

Incredibly Easy Table Runner table runner finished

I have to admit that I have never had any interest in the quilt as you go technique. It simply didn’t appeal to me…maybe because I tend be a very linear girl. You know, step, 1 then step 2, everything in order. It just seemed strange to hop from step 1 to step 10 and then back to step 1 again. But, when I wanted to make some quick table runners for gifts I started re-thinking the quilt as you go method and the ‘what if’ wheels started turning.

I have to tell you right from the start that these are very addicting…good thing they are fast! I have 3 in various stages of production and at least 5 other color and fabric combinations are dancing like sugar plums in my head. As a bonus this design can easily be made into other sizes such as a placemat or smaller table mats to put under a special bowl or plant. You can even make them square.

I use two different types of rotary cutters in this project. When I am cutting fabric strips I love the 45mm Comfort Rotary Cutter. The cushion handle and the curve of the handle help keep my arm and wrist at a comfortable angle for cutting. Having the right angle prevents wrist fatigue so I can cut longer. I also use the 60mm Jumbo Rotary Cutter because it makes cutting through the thick quilt sandwich super easy without applying a lot of pressure and it gives me a really great straight cut, even when cutting across multiple seams.

Supplies:
• Rotary cutters, ruler and mat
• Fabric-top; 5-10 that coordinate. Less than a fat quarter of each. This is a great project to use up scraps.
• Fabric-backing: A piece at least 1/2” larger on each side than your desired finished size.
• Batting: any batting the size of your backing fabric.
• Thread: cotton piecing thread and thread for the satin stitch (medium to heavy weight)
• Quilting machine needle 90/14

Step 1: Cut your back fabric and batting slightly larger (1/2”-1”) than your desired finished size. This project is adaptable to many sizes. I decided I wanted my blocks to be 4” and my runner 12”x44”. Keeping the finished size divisible by 4 makes the math simple. You can work with smaller blocks or larger blocks but plan the final size of your runner to be evenly divisible by the block size. For example a 3″ block size would make a 9″x12″ placemat. Layer the back fabric and batting then set aside.

table runner 2

Step 2: Gather your top fabrics. Using your rotary cutter, ruler and mat cut strips from your fabric in a variety of widths. My smallest strip is 1 ½” and my widest is 3 ½” I cut my solids smaller than my prints. Cut each strip a little longer than the width of your runner. For a 12” wide runner cut strips 13”-14” long. The ends do not have to be straight.

table runner 3

Step 3: Next you will cut each strip in half at an angle…all different angles but not too extreme. Notice the angle in the photo above. Lay each piece on top of the runner base to help determine when you have enough strips as in the photo below.

table runner 3-5

table runner 4

Step 4: Roll your backing/batting layer like a jelly roll to make it easier to stitch. Take your strips and your jelly rolled backing to your machine. I suggest a 90/14 quilting needle since we are quilting and piecing in one step.

table runner 5

Step 5: Choose two strips of fabric to begin with. Place them rights sides together along the left side of your backing fabric. Stitch along the right edge with a ¼” seam allowance. Remember, your bobbin thread will be the quilting thread that shows on the backing fabric. You can match the color or use a contrasting color for interest.

table runner 6

Step 6: Finger press the seam flat. Place the next strip of fabric down on the edge and stitch with a ¼” seam allowance. Alternate the angle of the strips as you go, ie: narrow at the top is followed by wide at the top.

table runner 7

Step 7: Continue adding strips of fabric until you reach the end of your backing fabric.

table runner 8

Step 8: Press with a hot iron after every 6-8 strips

table runner 9     table runner 9-5

Tip: The one difficulty in this project is the bias edges created by cutting the fabric strips on an angle. You can see in this photo where the red strip has become curved because it stretched while stitching. To rectify this problem the next strip is placed at a straight angle to the red piece rather than matching up the edges before stitching. Stitch along the edge of the top piece. After this is pressed open you once again have a straight edge. Be careful to not stretch the fabrics as you stitch.

table runner 10

At this point your runner will look like this.

table runner 11

Step 9: Use the 60mm rotary cutter to trim the runner to the desired finished size (12”x44” in this case).

table runner 12

Step 10: Turn the runner over and cut strips the desired width of your blocks. 4” width in this case.

table runner 13

Step 11: Then cut each strip into blocks your desired size. 4” blocks in this case.

table runner 14

Step 12: Lay out the blocks the width and length of your runner, alternating the direction of stripes in a checkerboard pattern.

serpentine stitch

serpentine stitch

table runner 15

Step 13: To assemble the blocks we will use a serpentine stitch. Butt the edges of two blocks together and stitch. The serpentine stitch is a three step zigzag stitch used for stitching knit fabrics. The three separate stitches make it great for joining two fabric sandwiches.

table runner 16

Sept 14: Assemble the blocks in strips of 3 taking care to keep the pattern alternating.

table runner 17

Step 15: Then, join the strips of three together.

table runner satin stitch

Step 16: After all the blocks are reassembled into your table runner press with a hot iron. Next cover each butted seam with a satin stitch. If Possible, use an embroidery foot that has extra space on the bottom of the foot for the thick satin stitches.

Tips for Satin Stitching:
• If possible use a medium to heavy wt thread (medium wt.= 40-30wt. heavy wt=25-12wt). A fine thread such as a 50 wt. will not fill in as nicely and you may have to re-stitch some of the lines.
• At the beginning of each stitch line hold the thread tails to prevent the top thread from getting stitched underneath and to help prevent thread build up at the edges of the satin stitch.
• A solid thread generally looks best for this technique because variegated colored threads often look like stripes when stitched in a satin stitch. Stripes can be fun depending on the look you want but they can be distracting to the overall pattern. The one exception I have found is the Star Variegated threads that are designed by Terry White. The color change in these threads is generally very subtle and you can see an example in the last photo of this tutorial below.

Step 17: Press well with a hot iron and finish the edges as desired. I used a traditional binding on mine. There are a lot of binding tutorials on the Internet if you need further details. Heather Bailey has a great one. A satin stitched edge would also look nice. If you choose to finish with a satin stitch edge use a stabilizer to keep the edge from stretching and rippling. Cut strips of tear away or water soluble stabilizer 2” wide and center the runner edge over the stabilizer. Stitch the edge then remove the stabilizer.

table runner alternate fabrics

This runner looks great in a wide variety of fabrics from elegant silks to earthy batiks. I hope you have as much fun making them as I do!

Liz Kettle is a textile and mixed-media artist who loves sewing and creating with fabric and thread. Sharing sewing joy and thread addiction with others makes her deliriously happy. Liz is co-author of two best selling books: Fabric Embellishing: The Basics and Beyond and Threads: The Basics and Beyond.  Share Liz’s stitch journey on her website and blog at www.TextileEvolution.com

Posted in Liz Kettle, Quilting, Table Runner | Tagged , | 4 Comments