How to Make A Quilt Block

By Terry White 2012

Designing a Quilt Pattern for
“Blue Cat with Oranges” Picnic Quilt

The Quilting Design
Choosing or designing the quilting pattern for a quilt top is as important as any other design decision. It should be integral to the design and enhance the quilt. There are several things to consider in the process.

Take your experience as a quilter into consideration and choose a quilting design that you know you can accomplish. The more you quilt, the better you get.

orange-peel-quilt-design

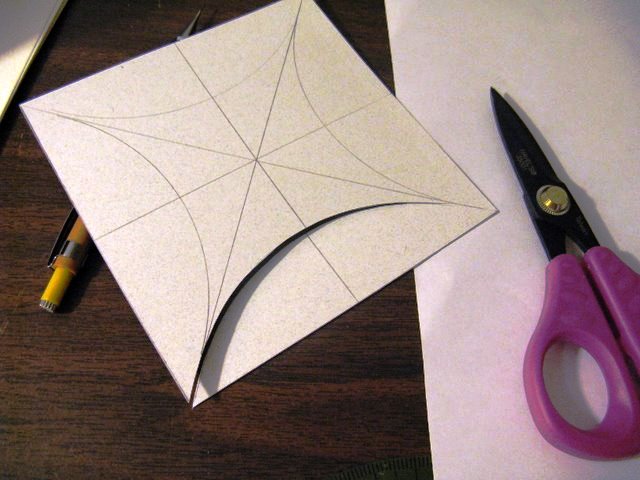
For the “blue cat”, I decided to begin with an old fashioned quilt block called, “Orange Peel”. This is what it looks like.

orange-peel-quilt-block-cut-out

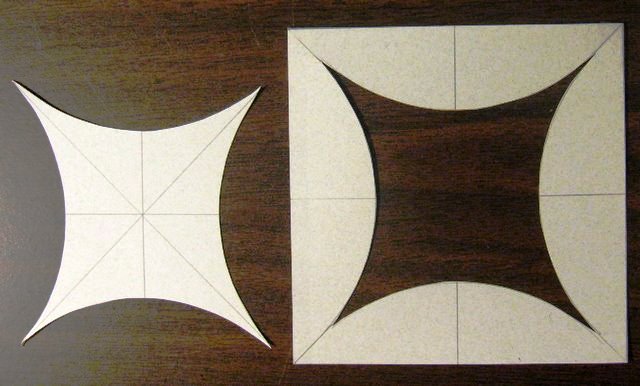
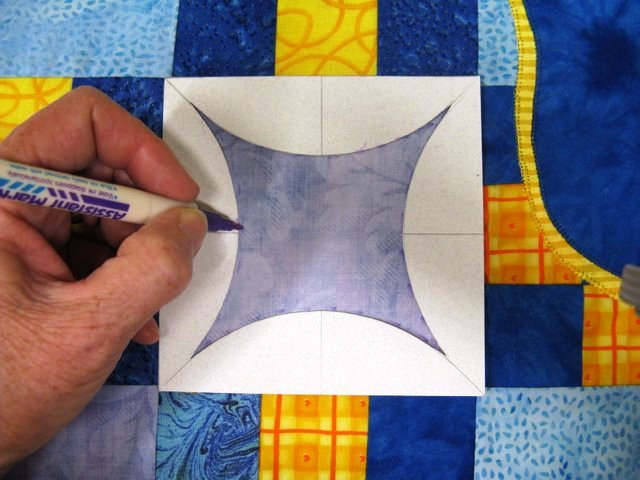
If you want to mark your quilt with this design, you can see the steps here. The design is drafted onto heavy cardstock. The square I started with is the same size as the quilt block. Next, cut out the design (I used tape on my cutting entry point to make the window shape template.) Then place the window template on the quilt and trace the shape with water soluble marking pen.

tracing-the-orange-peel

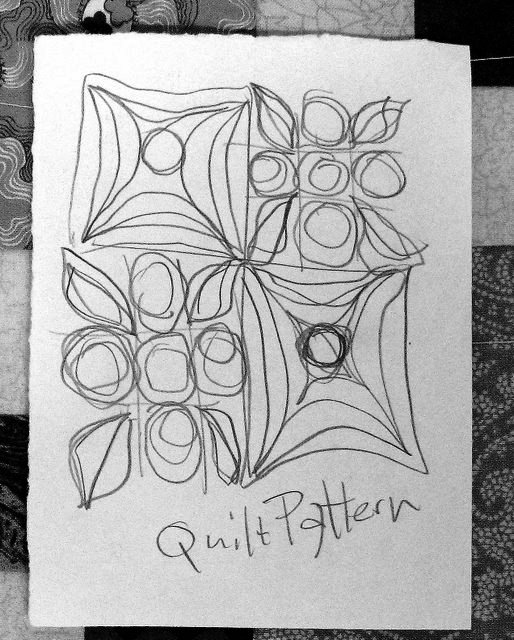
I used the orange peel design as a jumping off point for my quilt design. I played around with the design, drawing out different ideas, keeping in mind the need for a quilting pattern for the nine-patch blocks. This is the design I decided upon.

playing-around-with-the-orange-peel-design

Testing the Quilt Design
Nothing can take the place of testing your designs, materials and set up yourself. Test and practice, test and practice…everybody does it…it is why we have all the quilted blankets for babies, children, dogs and men. We practice and then use the quilt for utility purposes.

Test the pattern: You will see if it works in “real life”. The pattern may be too complex or just not the right thing for you…at this point, you can change it…or it may be perfect and make you very happy!

Practice the pattern: When you practice quilting a pattern, you understand how to quilt it. Then, you keep practicing until it is sort of programmed in your head. This is called “muscle memory” and this is how machine quilters get very good.

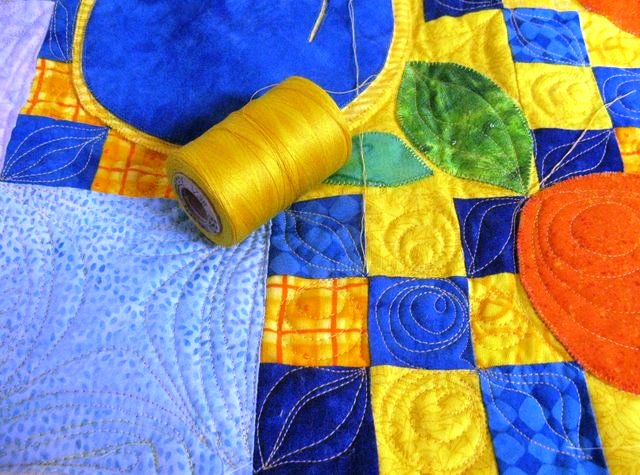
testing-yellow-and-blue-thread

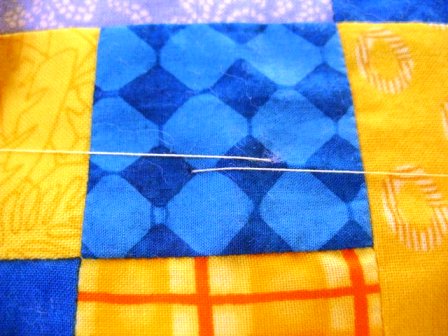
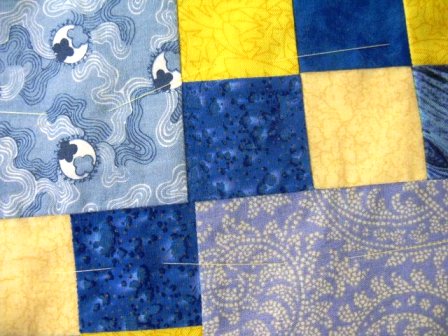
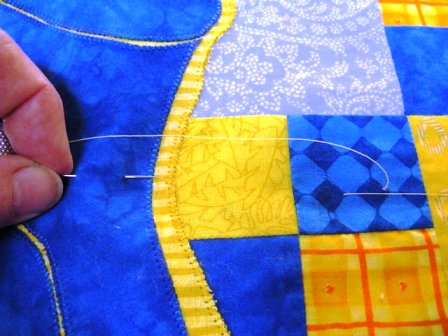
Test a variety of threads: The color and weight of the thread will be very important to the design. I tested a blue to yellow thread first, as you can see in the photo above. I felt the colors were distracting, so I am using a variegated orange to yellow thread and this will cast a yellow color over the whole quilt. I like yellow…you may like a medium or light blue color and that will cast a blue shadow over the quilt…which would be lovely.

As you test, you may need to change the settings on your sewing machine to achieve the kind of thread tension you want. Each project is different and the fabric choices, construction choices, backing and batting will all factor into the tension settings for your threads.

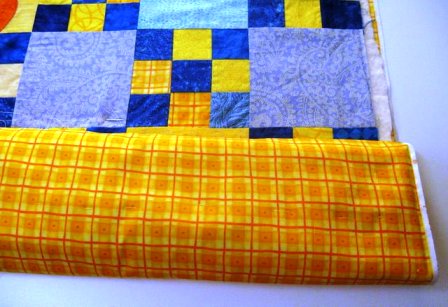
Here is a cheater’s tip: I also like to use a backing fabric that matches the color of quilting thread…this way I can use the same color thread on the top and the bottom. This makes it easier to have good looking stitches, because the matching colors will camouflage imperfect stitching.

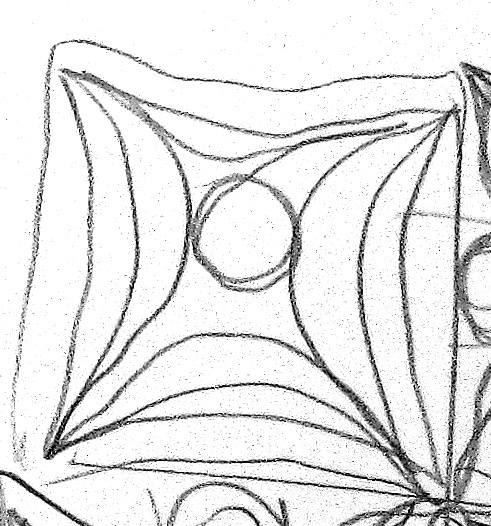
My next step was to make sample quilt test pieces to arrive at my final design decision. When I quilted the orange peel pattern, I didn’t like the circle in the middle. It seemed quite alright in the drawing, but it didn’t work well when actually quilted. So, instead, I changed it. I began with the orange peel shape and then stitched consecutive rows of quilting to get a design that is relaxed and fills up the space. This is called “contour quilting”. The photo shows my first idea sketch with the circle inside the contour stitching.

my-first-sketch-idea

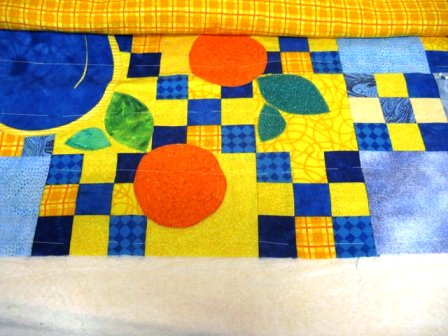
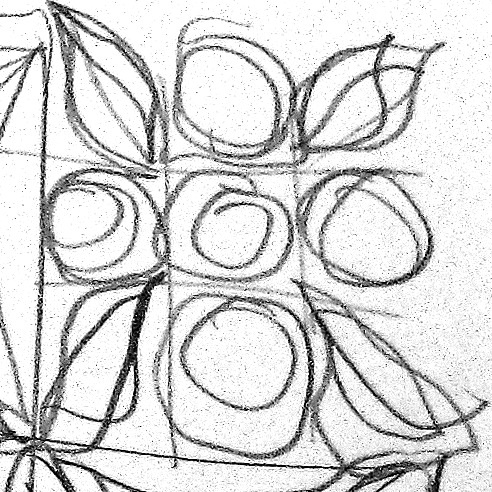
The quilting design for the pieced blocks consists of oranges and orange leaves. Here is the rough sketch of that.

quilting-design-for-pieced-blocks-oranges-and-leaves

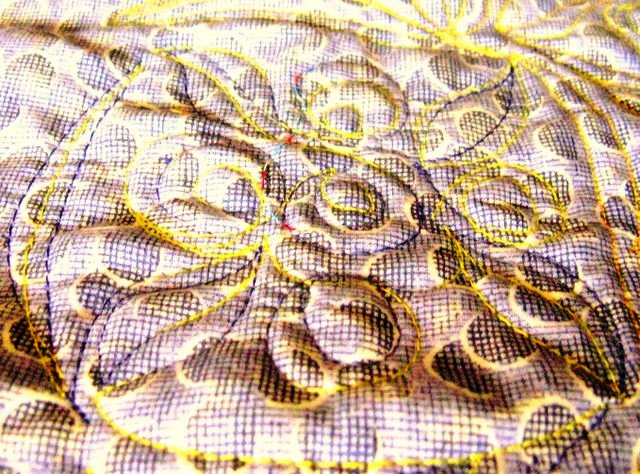
Here is the result of my design choices….I like it!

orange-and-orange-leaves-design-finished

For more articles by Terry White, click here.
And click here for the best quilting scissors.

Posted in Free Quilt Patterns, Free Quilt Projects, Guest Writers, How to Quilt, Terry White, Uncategorized | Tagged , , , | Comments Off on How to Make A Quilt Block

Free and Easy Quilt Project: Holiday House

A Holiday House Free and Easy Quilt Project

by Jamie Fingal

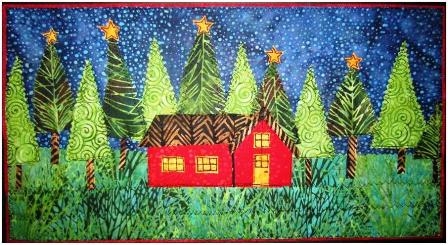
Here’s a fun and easy holiday quilt project that you make for your home or for a gift.  It measures 8″ high by 15″ wide.  It can be made with fused scraps or the fabrics of your own choosing.  The entire piece is fused to a foundation of wool-blended felt in black, and backed with wool-blended felt in red and then free motion machine quilted and there is no binding.  Rebel Quilting that is fast, fun and not perfect!
holiday-house-by-jamie-fingal-image01-448x245

Supply List:

  • 2 pieces of wool blended felt – one in black and one in red
  • Mistyfuse or other fusible web
  • Goddess Sheet or Parchment paper for fusing
  • 2 greens for the trees
  • 1 green for the landscaping
  • 1 blue for the sky
  • 1 yellow for the windows, doors and stars
  • 1 red for the house
  • 1 brown for the roof
  • 1 fabric pen for the windows, door and stars
  • Sewing machine
  • Thread
  • Pinking Shears
  • Scissors for Fussing Cutting
  • Sewing Scissors
  • Rotary Cutter, ruler and mat
  • Iron

palette-of-batik-fabrics-image02-448x336

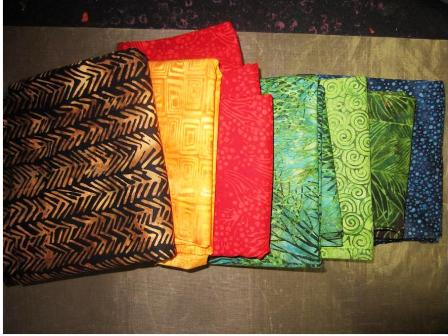
My palette of Batik fabrics that I used, are all the same value. I use all kinds of fabrics in my work, but Batiks remain my most favorite to work with, because they have such saturated color, beautiful designs, and are easy to fuse and sew through, with less fraying.

The greens, one for the landscape, with an obvious print direction that can work, because it resembles grass.  The greens for the trees should be somewhat contrasting, so that you can clearly see the difference, in lining them up in your landscape.  I think it’s important to really look at the colors, and see if they work together.  You can look for fabrics with designs in them, that work for what you want.  Like the roof fabric, it really looks like it could be a thatched roof.  This part of trying out fabric is an important part of quilt design.
cut-wool-felt-image03-446x336

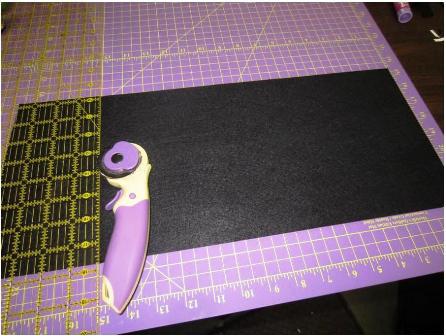
To begin, cut a piece of wool-blended felt in black – 8″ wide by 15″ wide, and set aside.   I used Havel’s Comfort Rotary Cutter.
layout-blue-sky-fabric-and-fuse-image04-446x336

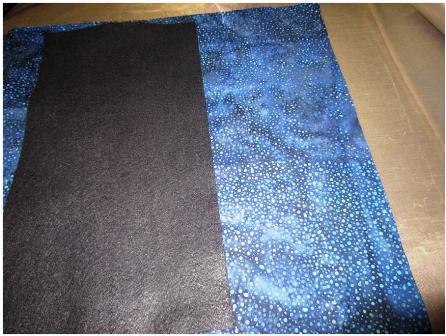
Fusing fabric with Mistyfuse.  Lay out your blue sky fabric with the foundation felt to see how much you will need,  allowing for more room than needed.  Cut and trim.
lay-mistyfuse-on-back-of-fabric-image05-448x336

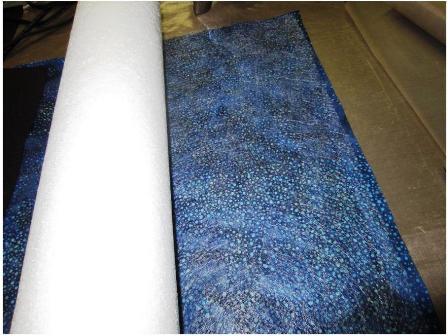
Lay the Mistyfuse on the back side of your fabric (this is a bolt, but you can use a package of Mistyfuse for this project). Cut it and make sure that it is laying flat, and that there are no strings under the web.
i-use-goddess-sheet-under-fabric-image06-447x336

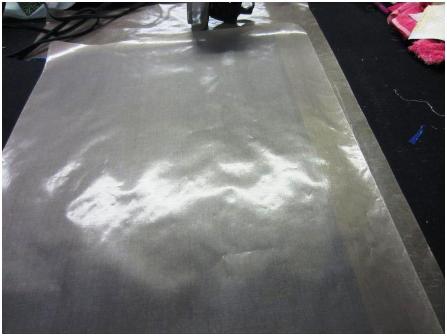
I have a Goddess Sheet under my fabric and I use another one when I fuse Mistyfuse onto fabric, to protect my iron.  You can also use Parchment Paper.  With a dry iron, in a circular motion, glide it over the protective sheet, making sure that the heat of the iron covers every part of the fabric, especially the edges.
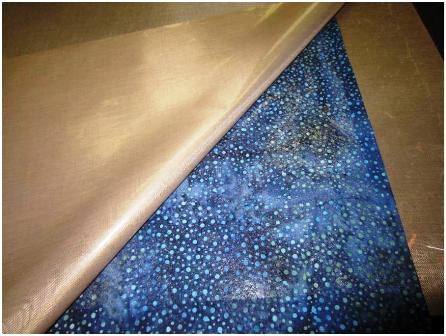
image07-446x336

You will be able to clearly see the Mistyfuse on the fabric, because it will be shiny, so there will be no mistaking it for the front of the fabric.
follow-method-for-green-landscape-image08-448x336

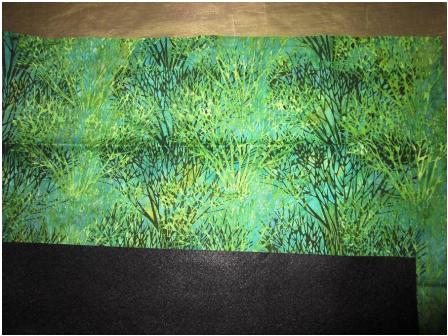
Follow the same method for the green landscape, that will be in the lower portion of the wall hanging.  Cut more than you need.
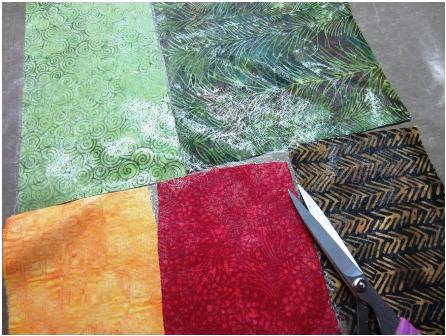
continue-with-coordinating-fabrics-image09-446x336

Continue on with the coordinating fabrics.  You can line them all up and then cover them with one sheet of Mistyfuse, cover with parchment or a Goddess Sheet and iron into place.  Simply cut with your sewing scissors, in between each piece of fabric.

After fusing it is important to trim the edges that are not fused and any residual Mistyfuse that is over the edges, so it doesn’t get on your iron.
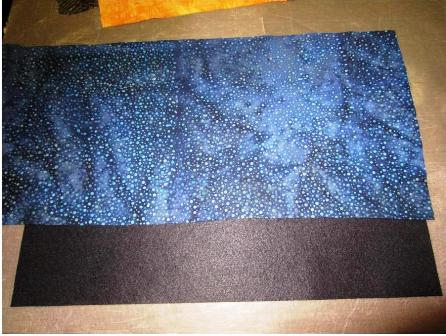
lay-sky-fabric-over-top-of-black-felt-image10-446x336

Lay the sky fabric over the top of the black felt foundation and it should cover 2/3 of the upper portion of the quilt.  Iron into place.
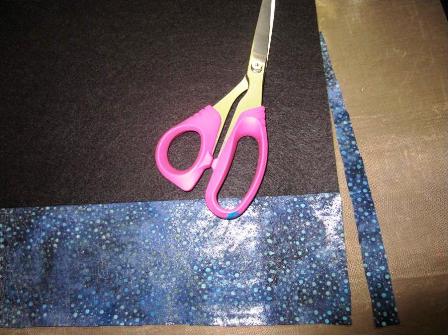
flip-over-and-trim-excess-fabric-image11-448x336

Flip it over and trim excess fabric from the back, so it is flush with the felt.  My favorite scissors for cutting fabric are Havel’s 8″ Sewing/Quilting Scissors.
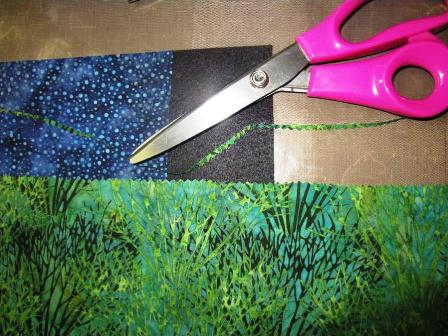
next-is-the-landscape-image12-448x336

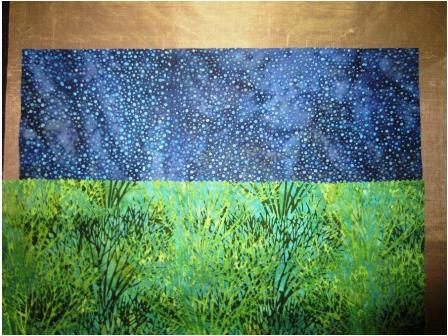
Next, is the landscape.  I used a fabric with an obvious design, so I wanted to make sure it was going the right direction for this piece.  Using Havel’s Pinking Shears, cut the edges of the horizontal side of the fabric, which will meet up with the sky.
line-up-landscape-to-sky-image13-448x336

Line up the landscape fabric, so that it overlaps the sky and the pinking cut should be on the top of the green fabric.  Iron into place.
now-for-the-house-image14-448x309

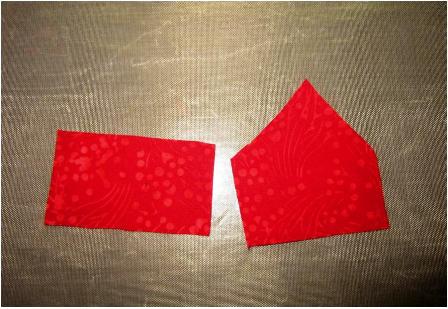
Now we are ready for the elements that bring the quilt to life!  The house.  There is a main section with the triangle roof and a side portion.  The side portion is about 2” tall by 3” wide, and that will help in creating the main section, as far as scale goes.  It doesn’t have to be perfect.  I think that funky sometimes adds a lot of charm to a piece.
build-your-house-on-goddess-sheet-image15-444x336

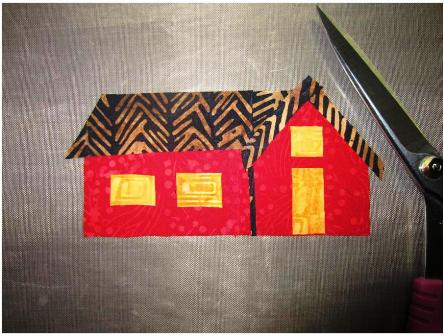
You can build your house on top of a Goddess Sheet or on parchment paper.  Yellow fabric to make the windows and door, brown fabric for the roof.  I added a small stick of the brown between the two houses.
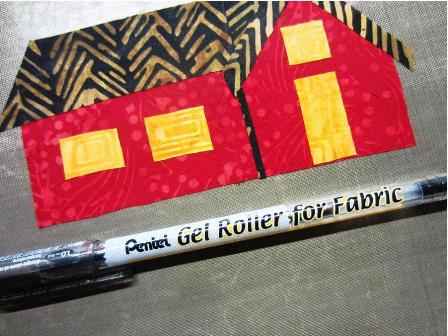
image16-448x336

I used a Pentel Gel Roller for Fabric to draw the window frames, panes and door window and knob.  It draws like butter on fabric.
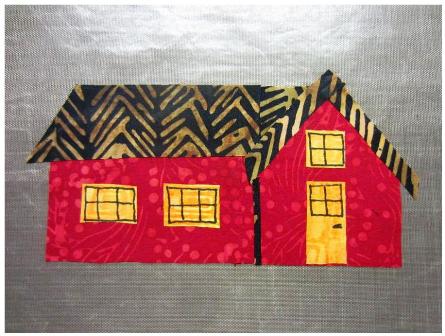
draw-designs-on-fabric-image17-445x336

Just draw your designs directly onto the fabric.  Bring the iron over and press the entire house, sealing in the hand drawn portions.
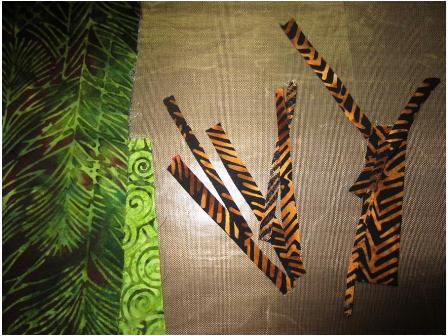
use-brown-fabric-for-trees-image18-448x336

Landscaping! Using the brown from the roof fabric, cut small sticks that will be used for the trunks of the trees.
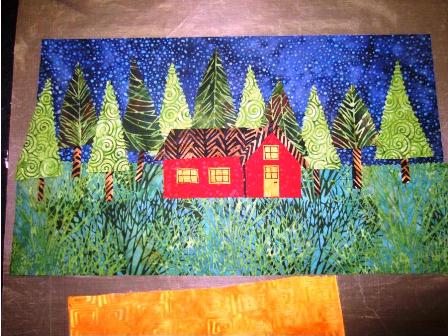
cut-trees-with-pinking-shears-image19-448x336

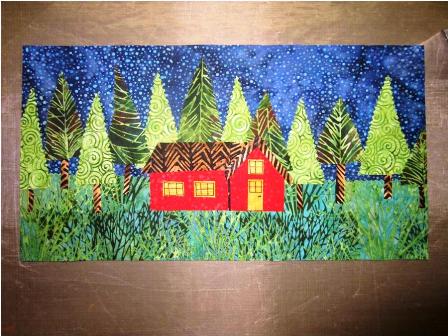
Cut the trees using Pinking Shears to create a zig zag look on the sides of the trees, which are basically long-ish (new word) triangles.  With the house on the background, not fused yet, place the trees, alternating the two different colors.  And make sure that you have one on each side that goes off the edge, to create more depth in your scene.  You can move things around to get the look that you want.
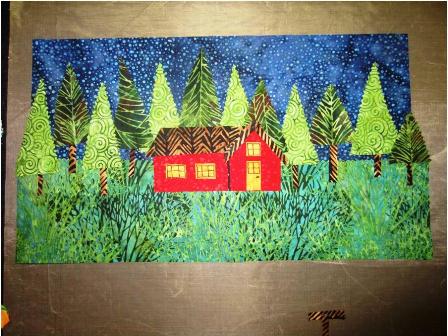
alternate-colors-and-iron-into-place-image20-448x336

How is it shaping up?  Are you liking the way  the trees are displayed?  Alternating the colors.  Iron into place, making sure that the iron presses all of the pieces to the foundation.
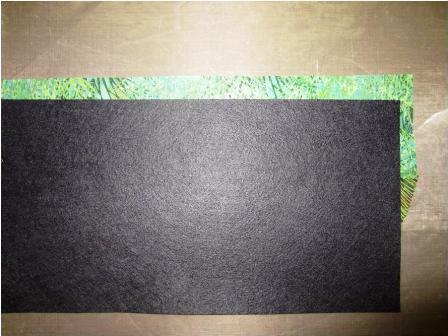
trim-excess-green-from-back-image21-448x336

Trim the excess green from the back.

needs-bringing-together-image22-448x336

Now we’re cooking!  It needs something to bring it all together!
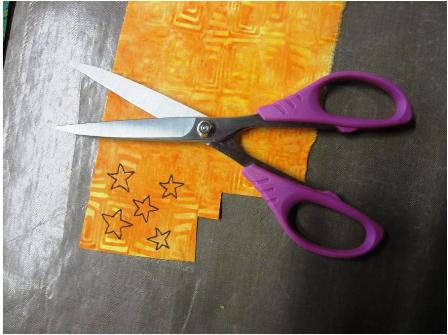
use-scissors-for-fussy-cutting-image23-448x335

What would holiday quilt project be without stars?  Using sewing scissors that are excellent for fussy cutting, I would recommend the Havel’s  7’ Serrated Scissors, because they hug the fabric, especially when cutting small objects.  Draw the stars, using the Pentel pen and cut out, by first separating all of the stars, and carefully cut, not right on the black, but beyond it, just a tad.
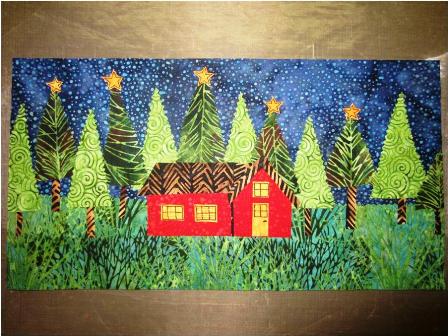
place-stars-on-the-darker-trees-image24-448x336

Place the stars on the darker green trees, so there is more of a contrast.  Iron into place.  It’s looking great!
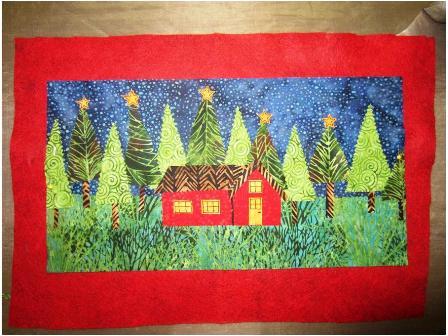
for-backing-use-same-felt-in-red-image25-448x336

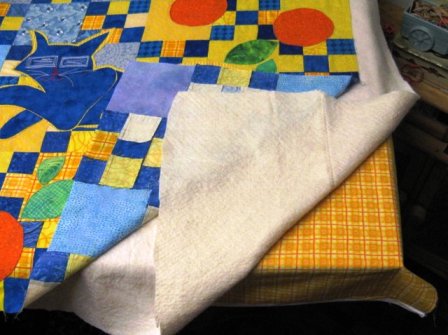
Now for the backing, which will set the entire holiday scene off!  Using the same kind of felt as the foundation, only in red.  Cut a piece that is larger than the quilt.  Pin it into place – one pin at each end.  You will remove these when you need to sew those sections.
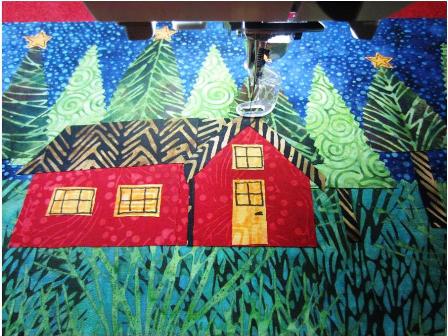
free-motion-machine-quilting-image26-448x336

Free motion machine quilting.  Using a free motion foot on your machine, and the thread color of your choice.  I only use black thread, because it reminds me of a line drawing.  Begin in the middle, by just outlining the house.  Note:  This is very simple quilting, not dense, but just to give you a hang of free motion quilting.  You may decide to do more, and perhaps some thread painting – they skies the limit!
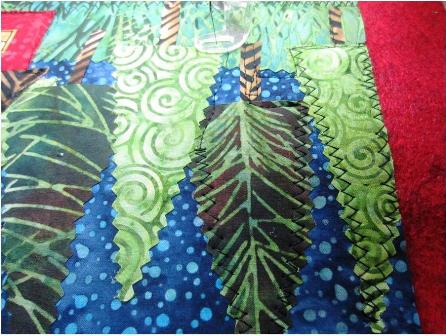
alternate-straight-stitch-and-zigzag-image27-446x336

With the needle, travel onto the trees.  I alternated between the straight stitch and the zig zag stitch.  Zig zag for the sides of the trees, so it follows the design from the Pinking Sheers.  If you try to keep it going in one continuous line of free motion machine quilting, switching back and forth, to do the tree trunks along the way.
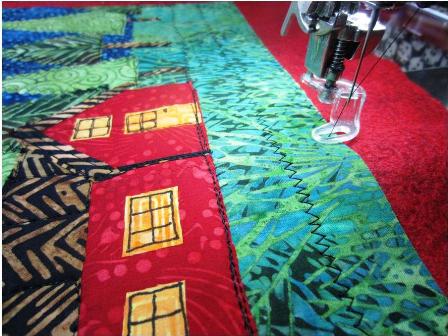
use-zigzag-stitch-around-edges-image28-448x336

Before you begin the stitching of the edges, press the entire piece with your iron to make it flat. Using the zig zag stitch, along the horizontal line of the bottom of the house, from side to side, then in the middle of the landscape, between the lower portion of the house and the edge.  Then with the zig zag stitch, sew all around the edges, all of the way around.
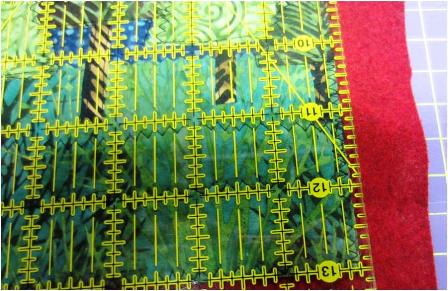
trim-background-to-show-edge-of-red-image29-448x291

Trimming the background.  So, you want the edge of the red to show through to the front.  On my ruler, using the longest yellow line on the sides, probably about 1/8” of an inch, tiny, but subtle.  Trim the piece on all sides.
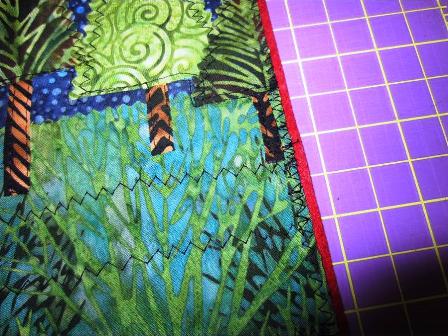
this-is-how-it-should-look-image30-448x336

This is how you want it too look.

holiday-house-finished-image31-448x245

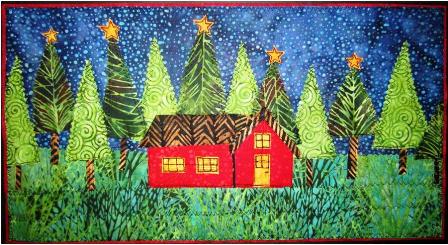
And here we have our Holiday House!  Please remember to make a label with your name, city, state, blog address, the title, when you made it, so your story will be recorded.  I always add the phrase “do not wash’ on all of my quilts, because they are made for the wall.

I hope you enjoyed the journey of making this quilted piece of art!

For finishing, you could sew pop tops on the back to make it easy to hang on the wall.  Or you could sew loops on the top to hang it from a rod or tree branch.  Happy Holidays to you!

Jamie Fingal
Orange, California

JamieFingalDesigns.blogspot.com

 Click here for more Christmas ideas.

Click here to see the best scissors & shears for sewing!


Enhanced by Zemanta
Posted in Christmas, Free Craft Projects, Free Quilt Projects, Guest Writers, Holiday Projects, Jamie Fingal, Uncategorized, Wall Hangings | Tagged , , , , , | Comments Off on Free and Easy Quilt Project: Holiday House

How to Make a Quilt Fabulous!

By Holly Hanover

Quilt by Terry White

There are many different opinions on how to make a quilt fabulous. From different stitch designs to adding borders each person can add a different and unique flair to their quilting project. Each different addition can make a quilt fabulous in a different way. Here are some tips and tricks on how to make a fabulous looking quilt with a few simple flair additions.

Bordering

Borders make for a wonderful addition to any quilt. There are so many different possibilities you are likely to find a few you absolutely love. Mixing border designs to your quilts top can add a unique finished look to your quilt. Though many borders are planned from the beginning of the quilting design, many are also added on as an afterthought.

A good border should enhance the look of the rest of the quilt. It is basically a frame around the original design that gives your quilt a finished look. Your border width should not exceed the size of any one block within the original design.

If you’re just learning how to make a quilt, butted borders are the simplest and require the least amount of fabric. These can even be made from left over material that was used within your quilt. Darker colors will provide stronger frames while lighter colors are more light and open feeling. You can even mix fabrics that were used within the quilt to add a sort of interest to your design.

For the intermediate quilter, the folded ribbon illusion tend to be a more stunning option. This should not compete with or outshine the original design, however, so stick to simple fabric choices from within your original palette.

As for the advanced quilter, adding applique to your border not only looks great but also adds to the entire size of the quilt. A great solution for those dimensions that came up a bit short. Different sizes, shapes and fabric combos make it an endless world to explore.

Stitching

Another idea on how to make a quilt more unique with a finished look is adding stitching to it. From embroidery to big stitching there are many different ways you can add a little extra to your design giving your quilt that handmade love appeal that quilts are best known for.

Big stitch is large and evenly spaced hand quilting technique most often used for a more folk art type of appearance. This is a great stitch for beginning quilters because it doesn’t require as much rocking as a regular quilting stitch.

Adding embroidery to your quilt gives it a unique design within your piece. You can add bead embroidery or you can individually embroider your blocks before stitching them together. Though this step isn’t always done at the end, it does add a finished look and feel to your quilt.

There are machines that will do stitching for you as well in both embroidery and regular or echo stitching. These do not offer the traditional feel of hand stitching but it does add accuracy and speed to your quilt making.

No matter what you decide to do to finish off your quilt, the handmade look and overall love that goes into making it be it for a gift or yourself is irreplaceable. What are some of your favorite unique finishing tips for quilting projects?

Let us know who you make your quilts fabulous. Leave a reply below.

Click here for more blogs on How to Quilt


Posted in How to Make a Quilt, How to Quilt, Terry White, Uncategorized | Tagged , , , , | Comments Off on How to Make a Quilt Fabulous!

How to Quilt Basics: Fabric Backing

How To Quilt Basics Q&A: What’s Best Fabric For Backing My Quilt?


Don’t be afraid of the basics!  We continue with the answers to questions you have when you are a novice to the world of quilting.  Read along and continue to learn how to make a bootiful quilt!


Fabric Backing For Quilts – Our experts answer, “What is the best fabric for the back of the quilt sandwich?”  

Jamie Fingal-I don’t use fabric for the backings of my quilts, I used wool blended felt.  Using fabric on the back was a step that I am not going to take anymore.

Leslie Tucker Jenison– Fabric for quilt backing-I’m admittedly vain about my quilt backs.  I think the quilt back should be fun and funky, and I really feel sad when the back is ignored.  I see the quilt back as another opportunity to express myself!  Think of it this way:  if a quilt is intended for a bed the back will be exposed frequently.  Why not make it as fun as the front?  It doesn’t have to take much:  some great fabric makes it special!  You might consider throwing a few extra blocks on the back for fun.  For my wall constructions I like to choose a piece of fabric that works well with my subject matter on the front.  I always (ALWAYS!) put a cloth label, fused and stitched, which has the quilt name & date it was finished, my name, and perhaps something about the quilt if it was made specifically for a person or occasion.  This is a very important habit to cultivate.

Liz Kettle– One mistake I made early in my quilting days was to economize and use a bed sheet for the backing of a quilt. Bad idea! Especially bad idea if you are using high thread count sheets. They are really difficult to quilt through. Muslin makes a great back as long as it is a reasonable thread count. Muslin comes in all varieties of quality. You don’t want to see right through it. I like to piece my quilt backs so they are interesting to look at.

Ruth Chandler– I think one of the biggest mistakes new quilters make is to skimp on the back. The thought is, no one will see it so I don’t need a good quality fabric. Remember, the back will take the most wear if it is used on a bed. Take as much care for the choice of backing as the front, it is an INVESTMENT of your time and money. One of the most fun ways to back a quilt is to piece the left-over fabric from the front in big squares or rectangles. Another thing to remember if the quilt is to be used on a bed, don’t put a fabric on the back that is not soft or easy on the skin. I made the mistake of using a fabric with metallic flecks on a back and it was not comfortable to snuggle up in. L For baby quilts I have used soft flannel. Don’t skimp here either, you get what you pay for. The less expensive flannel will pill and wear out quickly. I do not recommend flannel for the binding.

I do use the wider fabrics for the backs if I can find them because there are fewer seams to stitch through. This is especially important for hand quilting. If the front of the quilt is a whole cloth top I think the back needs to be so also. Muslin has been the traditional backing and if a plain back is desired there is no reason not to use it. If the front is a traditional pattern and they want to keep it period accurate then use muslin. Once again, do not skimp on the quality of the muslin. My favorite is by Roc-lon and is permanent press. It comes in 45in all the way up to 120 in. widths.

Terry White– For most quilts, I think that the type of fabric on the back should be the same type as the top. This will help to balance the quilting on both sides.

Click on the artist’s name for additional information.

We want to hear from you!  Tell us about your experiences.

Click here for Week 1 on How to Quilt Basics


Posted in How to Quilt, Jamie Fingal, Liz Kettle, Quilting, Terry White, Uncategorized | Tagged , , , , , | Comments Off on How to Quilt Basics: Fabric Backing

How to Quilt Basics

Quilting Q&A

You asked and the professionals answered! We continue with the Q&A sessions with Jamie, Leslie, Liz, Ruth and Terry.


Fabric-how do you choose what type to use?  Is cotton the best choice for beginners?


Jamie Fingal-Cotton is pretty easy to use, but you want to look at good cotton, with a tight weave.  The creases come out better, when ironing them flat.  They fuse better, and when fussy cutting objects, the tighter weave makes it easier to cut.  It is probably easier to start with cotton, so you can get a feel for how everything works, before you jump to Duponi silk.

Leslie Tucker Jenison– When it comes to cloth, I love it all!  I use a wide variety of cloth in my work, and even use some truly weird things, such as my used, over-dyed Oil of Olay facial cloths (yes, I have been told before that I am a bit weird).

For beginners, you just can’t go wrong with a good quality cotton broadcloth.  It has a fairly high threadcount (this refers to how many threads per square inch), it is not slippery, and it is easy to stitch either by hand or machine.  The higher the thread count the more resistance there will be for a needle, so keep this in mind when looking at cloth.

Silk is lovely and adds wonderful sparkle to a quilt.  It can be a real “diva”:  hard to handle and fussy, unless stabilized in some way for stitching.  I know this because I learn everything the hard way.  I came very close to wadding up a gorgeous silk charmeuse project and throwing it in the trash before (duh) it occurred to me that some stabilizer might be in order.  I’m glad I persisted because this quilt won a best of show!

Liz Kettle– I choose fabric based on the call of the fabric sirens. These are the same sirens who used enchanting music to lure sailors close to their islands so they would crash their ships onto their shores. They got bored with sailors and took up luring quilters into fabric stores.

When I make quilts that will be used to cuddle under I stick with cotton fabric. But, when I am making art quilts anything goes! I do mean anything.

One mistake I made early in my quilting days was to economize and use a bed sheet for the backing of a quilt. Bad idea! Especially bad idea if you are using high thread count sheets. They are really difficult to quilt through. Muslin makes a great back as long as it is a reasonable thread count. Muslin comes in all varieties of quality. You don’t want to see right through it. I like to piece my quilt backs so they are interesting to look at.

Ruth Chandler– Cotton is a good choice for beginners. It is easy to sew and does not have much stretch. It is best to try and pick fabric with the same density in weave for the first quilt. Batiks have a tighter weave and have less ravel. Batiks will be harder to hand quilt through because of the tighter weave. Once they are comfortable with cotton and have built up some skills they can move on to other fabrics. This does not mean they can’t but I think they will be happier with the end product if they do.  This is only true for quilts, garments are a different story I choose fabrics for their color and texture so I have a tendency to mix all types.

Terry White– Cotton fabric is definitely the best choice of fabric for beginners:

1. It is readily available and inexpensive

2. It cuts and stitches more easily than any other fabric

3. It is totally washable with minimum shrinkage

4. It is a good basic fabric with which to learn many techniques…later when other types of fabrics are desired, one can learn the special qualities of each fabric and fine tune the technique for that fabric.

Click on the artists name for additional blogs from that artist.

We want to know what you think! Leave a reply with your thoughts.

Click here for Week 1


Posted in Jamie Fingal, Liz Kettle, Terry White, Uncategorized | Tagged , , , , | Comments Off on How to Quilt Basics