Free Christmas Quilt Pattern Part 1 ~ by Terry White

This project is in 12 parts. We will post 2 per week and by the end you will have created a beautiful quilt project which is perfect for the holidays!

On The First Step Of Havel’s Holiday Project,
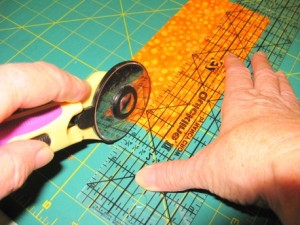
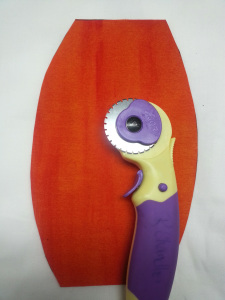
My True Love Is The Jumbo Rotary Cutter

Prepare Background:

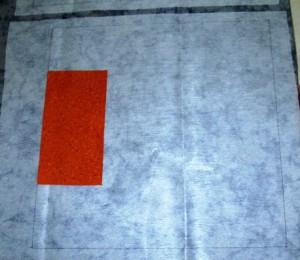
1. Trace a 13″ square onto the two pieces of medium weight fusible interfacing.
Set one aside.

2. Place one right side up (fusible side) onto your ironing surface.

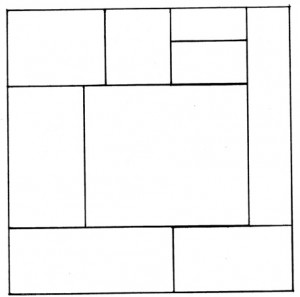
3. Enlarge the grid to a 13″ square and use it as a guide to measure and
cut your pieces. Use it also as a placement guide for your pieces.

Free Quilt Pattern-The Happy Christmas Tree Album Cover (Image 3)
Free Quilt Pattern-The Happy Christmas Tree Album Cover (Pattern Grid)

4. Use Havel’s Jumbo Rotary Cutter to cut out rectangles and squares for the
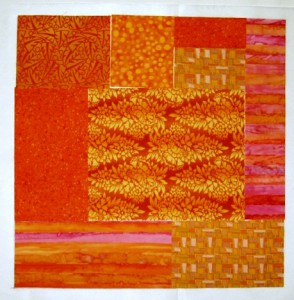
background of our design. I used warm orange fabric scraps.

Free Quilt Pattern-The Happy Christmas Tree Album Cover (Image 4)

5. Lay each piece onto the fusible interfacing. The pieces should be placed
side by side with no overlap.

Free Quilt Pattern-The Happy Christmas Tree Album Cover (Image 5)

6. Cover the 13” square with your patches. Press with a hot iron.

Next : On The Second Step Of Havel’s Holiday Project. . .

For a printable PDF, please click here.

Posted in Fabric, Fabric Scissors, For Beginners in Sewing, Free Craft Projects, Free Quilt Patterns, Free Quilt Projects, Fun Stuff, Guest Writers, Holiday Projects, Patterns, Quilting, Quilting & Embroidery, Terry White, Tutorials, Uncategorized | Tagged , , , , , , , , , | Comments Off on Free Christmas Quilt Pattern Part 1 ~ by Terry White

Fun Craft To Make: Turkey Love – Applique Design

By Terry White TerryWhite


1 Turkey Love

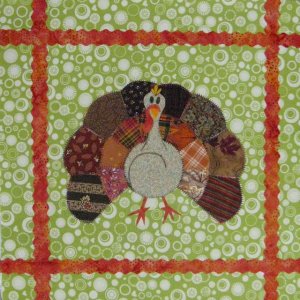
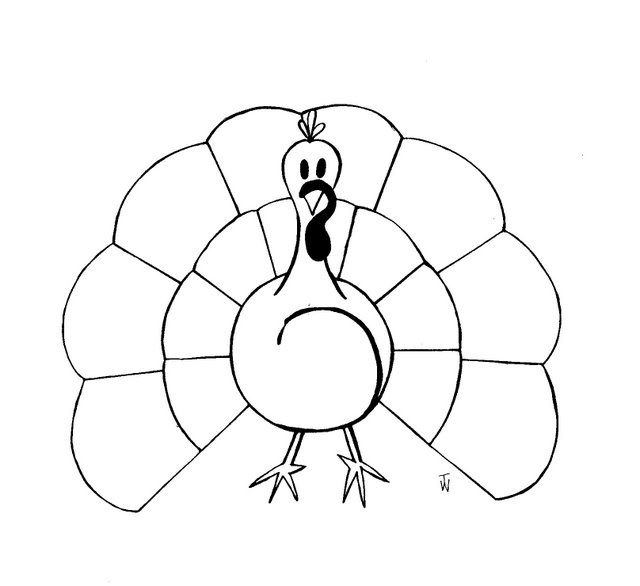
Here is a little Thanksgiving Day design that makes up very quickly. This design panel is 14 ½ inch square and meant to cover a small pillow. However, this design will work for stitchers, quilters, scrapbookers and crafters. I have included a small image of this little guy for use as place cards for the Thanksgiving table.


Supplies Needed:

Fabric scraps for the turkey parts and border. Look at photo for inspiration and pattern for size requirements.

14 ½ inch square is needed for the backing fabric.

14 ½ inch square of medium weight fusible interfacing should be fused to the back of your backing fabric to stabilize before fusing or stitching.

½ yard of Fusible web

Threads to match your fabrics

Use size 90/14 sewing machine needle

Archival quality black pen to draw details on turkey

Applique Scissors
2 Fabric Choices

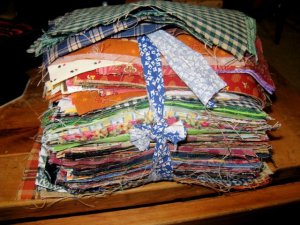
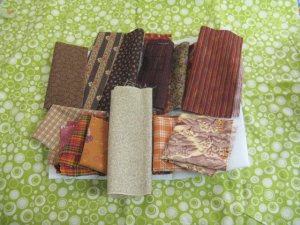
I received this little bundle of fabric scraps from my friend, Pam. I thought it would be a good idea to pull my turkey feathers from this group. This design could also be made with felt (like the Pumpkin Centerpiece pattern).
3 Traditional

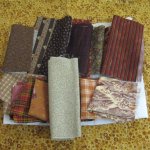
Here are my final choices for the body and feathers. The fabrics for the turkey are shown here are on a traditional fabric as a background choice.
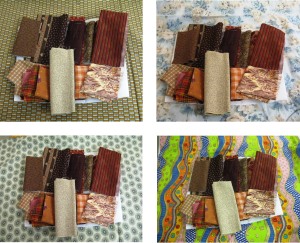
turrkey love images 4-7


Here are four more choices for the background for the turkey. The top left photo shows a fabric that may be “too close for comfort” and the turkey won’t show up well. A solution for that would be to make a shadow appliqué piece (explained in the directions for “Blue Cat”). The top right photo shows a soft blue print…this actually looks like our fall sky. I think it is a pretty choice. The bottom left photo uses a vintage fabric and gives an antique look to the design. The bottom right photo is a crazy choice and it would add a lot of fun to the design. Each choice puts the turkey in a different kind of environment which changes the tone of the project.
8 My Choice

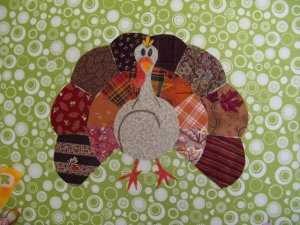
This is my final choice for the background fabric. The green is a strong color contrast to the feathers and there is a bit of whimsy in the print.
9 Trace

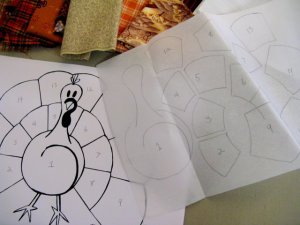
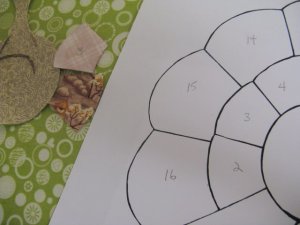
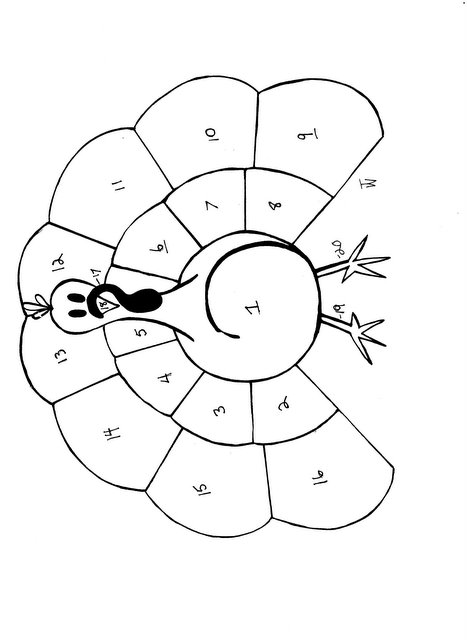
Trace each design piece onto the fusible web. (Follow the manufacturer’s directions.)

Number each piece.
10 Reverse

Keep in mind that the design is reversed and that when you place each piece onto your background fabric, you will be reversing the design. You might want to copy the bird in reverse to help with placement of each appliqué piece. (This can keep confusion to a minimum.)
turkey love images 11-12

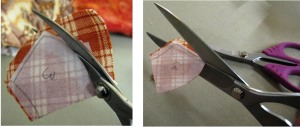
Fuse each shape to the fabric. When I cut out shapes, I use two pair of scissors…. Havel’s 5 ½ inch curved and 8 inch straight… this helps to cut out perfect curves and straight edges.
13 Reverse Stitch

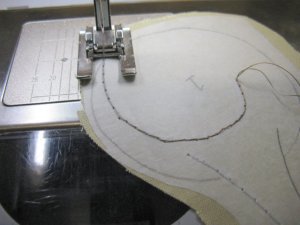
When tracing the turkey body, trace the details on the fusible web. Fuse to the fabric and using brown thread in the bobbin, stitch with a long straight stitch to outline the details. I stitch over each line four times using Star 30 weight cotton thread. I use an open toe appliqué foot and center the center line of the foot on the drawn line. Here, I stitch slowly. Then, cut out the shape and pull off the paper back and position in the middle of your fabric.


Start with the turkey body and, as you cut out each feather, place it around the body. Use the pattern as your guide. Fuse the shapes down when you have placed all the feathers. Next, cut and fuse the small details of the beak, wattle, head feathers and feet.
14 Detail Stitches

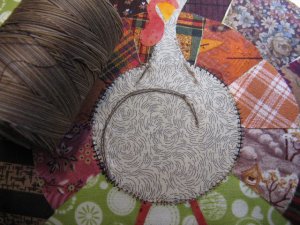
Here is a close up of the turkey body showing details stitched and body stitched to background.
15 Fused Turkey

Here is the turkey fused and ready for stitching.
16 Thread Choice

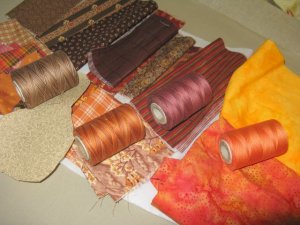
Here are threads to match my fabrics. I often use variegated threads to appliqué. The changing colors give a softer outline to the printed fabrics.
17 Cool Stitch

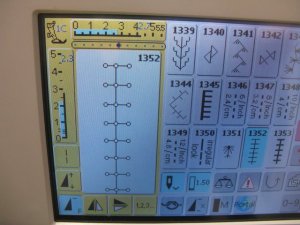
This is the cool stitch I use to stitch along the edge of the appliqués. I use the open toe appliqué foot and stitch along the space between the appliqué shapes. It looks like each side is stitched with a buttonhole stitch (saves a lot of time).
18 Detail Stitching

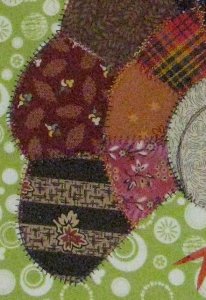
Here is a detail of the finished stitching. I like the way the stitch shoots out from the feather into the background fabric.
19 Draw Details

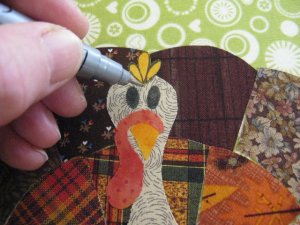
I used a permanent black pen to draw the eyes and detail the head feathers on the bird. I pressed it with a hot iron afterward.
20 Pull Paper

The decorative border fabric matches the turkey’s wattle and feet. Iron a piece of fusible web to the back of your border fabric. Tear away the paper.
21 Wave Cutter

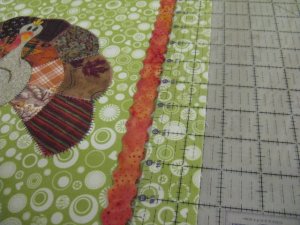
I used the wave cutter cutting blade and cut the edge of the fused fabric. (You can see how to use the wave cutter on my demo video for Havel’s on this site) For my second cut, I lined up my ruler with the inner dip of the scallop and measured ½ inch. This will make a border strip that is ½ inch wide in the center, with the scallop edge on both sides. I think the scallop border design echoes the feather shapes and the circle print in the background fabric.
22 Border

I used my ruler to measure 1 ½ inches in from each side. I placed the scallop edge of the border piece next to the ruler. Take the ruler away and fuse the border piece. Do this for each of the four sides of the panel.


Now, you can make this panel into a pillow!


23 Turkey Design Turkey Love Pattern


24 Little Turkey Love

Little Turkey Love Pattern

This little turkey makes a great place holder card for the Thanksgiving Table. A person’s name can be written on his tummy.

Happy Thanksgiving!

Terry

 CLICK HERE FOR TERRY’S FAVORITE APPLIQUE SCISSORS

Click Here To Learn More About Terry White

Posted in Craft to make, Free Craft Projects, Fun Stuff, Holiday Projects, Terry White | Tagged , , , , | Comments Off on Fun Craft To Make: Turkey Love – Applique Design

Free Craft: No Stitch Pumpkin Cover for your Basket

By Ruth Chandler

20141016_090912_edited


I always wanted a cute pumpkin to hand out candy to those adorable costumed kids but didn’t want the same old thing everyone else had.  When I started using the skip blades from Havel’s I began to wonder if I could use them as a way to make a cover for a simple inexpensive basket or bucket and it worked!

Supplies:

  • Bucket or basket to cover
  • ½ yard Multi-Purpose Cloth
  • Havel’s original or wide skip blade (for the original I used ½ in. ribbon and for the wide 5/8 in. ribbon)
  • 10 yards inexpensive ribbon ( I used a sheer ribbon)
  • Paint for Multi-Purpose Cloth (I used red and yellow and mixed it)
  • Paint brush
  • Copierpaper for pattern
  • Table cover
  • Size 18 chenille needle
  • Scissors  – Havel’s Scissors, of course!
  • First of all you need to find the basket or bucket you want to cover.  Now comes the only hard part, figuring the circumference of the top. My containers were all bigger at the top than the bottom so I only measured the top.

I had to google how to find the circumference since it has been a while since I have needed to figure circumference of anything, but it’s simple.  Just measure the top of the container across the middle (diameter), mine was  9 in. multiply that number by pi which is 3.41. Since the pumpkin cover has 8 sections I added ¼ in. seam allowance for all sides. 16 sides x ¼ in. is 4 inches.

9 inch 9×3.14= 28.26 +4= 32.26 total rounded to 32.5in.  32.50 divided by 8 is 4.06 so I went with 4 inches for each section for the top

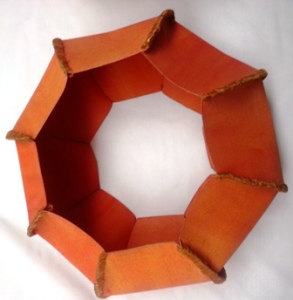
Simple right?   :/Image 5 (From above)

Next I needed to measure the height of the container. Mine was 8 in.I added an inch to the height so that the cover would come over the top of the container.

Painting the Multi-Purpose Cloth

Multi-Purpose Cloth (MPC) is a non-woven canvas. It can be painted, stamped, stenciled and stitched on easily.  Just don’t try to press it while it is wet. I mixed red and yellow paint to create orange and deliberately did not mix it completely so that there would be streaks. I like the look of the two colors streaked on the orange, I felt it gave it more texture.

  • Cover painting surface with paper or plastic
  • In a plastic cup or container mix the paint with water 2 to 1
  • Using a paint brush, paint the MPC
  • Let dry, turn over and paint other side, dry
  • Now it is ready to cut

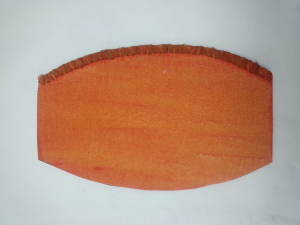
Time to make a pattern

Image 1

If you have ever looked at a pumpkin closely you can see the sections seem to curve out and taper at the top and bottom. It is easier to get a symmetrical pattern by working with folded paper and ½ the pattern.

  • Cut paper the height of the container
  • Fold paper in ½ height wise and again width wise.
  • Using the section measurements form the calculations above, (4 in. for the 9 in.) divide this number in ½, ( 2 in.)
  • Use this number to measure across the top and of the paper. Mark with pencil.
  • For the fold measurement, double the top measurement. Mark with pencil.
  • Using the marks start at the fold with the wider mark and cut a gentle curve to the top mark.
  • Open up the paper and look at the pattern
  • You may have to play with it to get the exact shape you want but always fold it back up to cut to keep the pattern symmetrical.
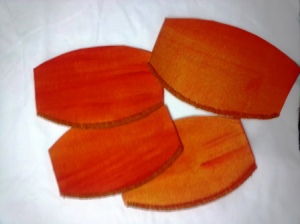
  • Cut out 8 of the pattern pieces on the Multi-Purpose Cloth
  • Using the skip blade, carefully cut along all edges of the pieces, taking extra care at the corners so as not to over-lap the cuts

Time to lace it all up

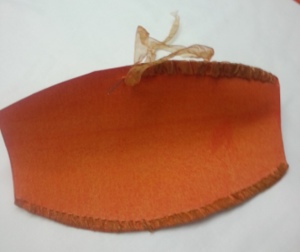
Image 2

The skip blade has done all the work for you so all you have to do is lace up the sections using a whip stitch. A whip stitch starts on one side of the section and goes over the edge and back into the slits made by the skip blade. This will cover the edge of the section with ribbon. The needle will only be pushed through one side of the sections.

  • Cut a length of ribbon about 1 yard long
  • After the first section you lace you will be able to tell more accurately what length of ribbon you will need to cut for the remaining sections.
  • Thread ribbon through the needle ( it is easier to thread the ribbon if the end is cut at an angle)
  • Holding 2 sections together, begin lacing the ribbon through the slits made by the blade on the long edges but not the top and bottom.
  • Leave a 3-4 in. “tail” of ribbon to weave into the stitching when you are finished
  • At the end of the section slide the needle under the ribbon lacing and cut off excess.
  • Re-thread the “tail” ribbon at the start and slide it under the lacing also. This will secure the ends without having to use a knot.
  • Stitch 4 sections together, set aside, and stitch the other 4 sections together.

Now you will have 2 sections of 4 pieces each or 2 halves of the pumpkin. It is time to put it all together.

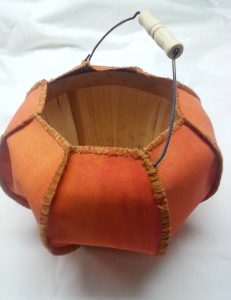
Image 3

  • Lace halfway up the two remaining sides of the sections, leaving the extra ribbon attached.
  • Lace all the way around the bottom edge of the pumpkin cover.
  • You may have to use several pieces of ribbon and just lace the ends into the lacing as you did the ends above.
  • Slide the container into the pumpkin cover.
  • Lace up the edges of the remaining sections.
  • Lace around the top edges of the pumpkin cover
  • When you get to the handles, lace around them to hold the cover in place

The skip blades and multi-purpose cloth can be purchased at your local quilt store or can be ordered from www.artisticartifacts.com or from www.bluetwigstudio.com

If you don’t want to use MPC and still want to make a pumpkin cover you could fuse two layers of craft felt together. The felt is a bit softer and therefore does not stand up as well. The blades work great on felt as well.

All done and ready to fill with candy or any number of fun things. Enjoy!

Click Here To Get Your Copy of Ruth’s New Book – Modern Hand Stitching

Ruth Chandler Book Modern Hand Stitching

Posted in craft, Craft to make, Crafting, Fun Stuff, Holiday Projects | Tagged , , , , | Comments Off on Free Craft: No Stitch Pumpkin Cover for your Basket

Free Quilt Pattern – Pumpkin Patch Centerpiece

Free Quilt Pattern: A Pumpkin Patch Centerpiece

By Terry White ©2012

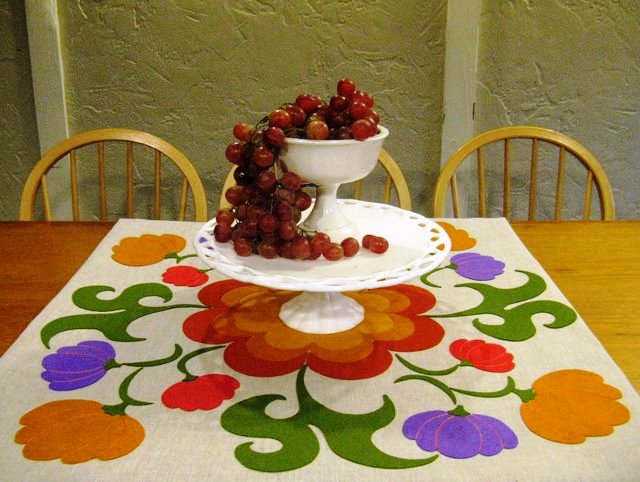
This bright modern pumpkin patch centerpiece can stay on your table all season long. It can be also be used as a wall hanging. The design also works well as a quilt pattern. Add a few borders and it will be large enough for a throw….I think plaid in fall colors would be lovely.

pumpkin-patch-centerpiece-by-terry-white-640x482

I used linen as the base fabric for this quilt applique project. Linen can be found in the drapery section of your fabric store (sometimes on the bargain tables) and it is usually at least 50 inches wide. Good substitutes for linen are osnaburg and heavy weight muslin or homespun.

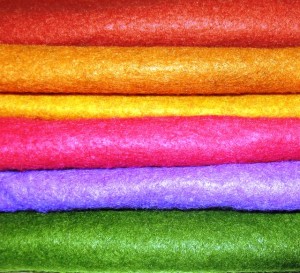
Wool felt is so easy to work with; it has so much body, comes in great colors and is easy to cut. You can simply fuse the wool to the linen and be done (as seen in the photo) or stitch it down….which I intend to do when I finish writing this quilt pattern for the Havel’s blog!

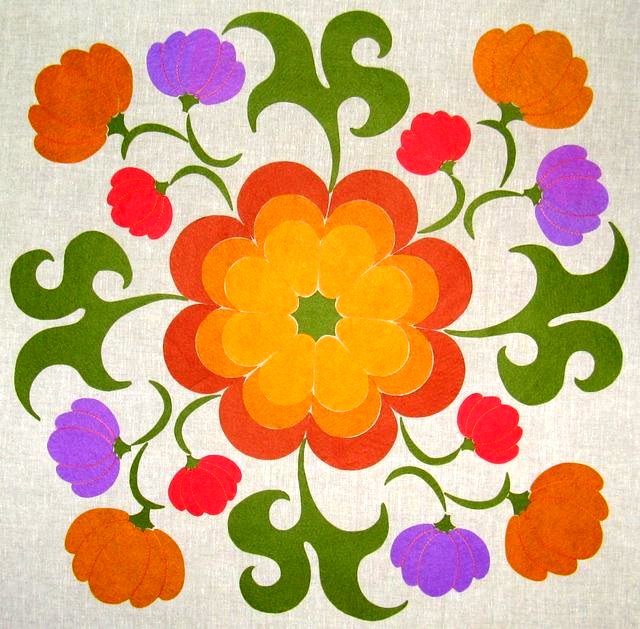
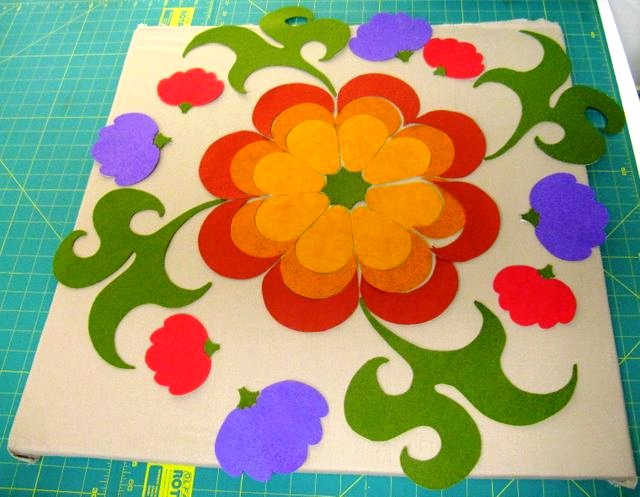
When you look at this design, you are looking down at the top of a large pumpkin. The pumpkin leaves and vines are surrounding the central pumpkin with little orange, purple and red pumpkins growing in the corners. This pattern was so much fun to design!

pumpkin-applique-640x629

Materials List

  • Linen square cut 36”
  • Linen or cotton fabric 36” square for backwool-felt-640x584
  • 18” squares of wool felt in the following colors:
  • Gold, deep gold, orange, rose, purple, green
  • Medium weight fusible interfacing 36” square
  • Fusible web for backing 36” square
  • 1 yard fusible web for appliqué pieces
  • 30 weight cotton thread in orange
  • 30 weight cotton thread in linen color
  • 30 weight cotton thread to match wool felt (if you choose to stitch
    the pieces down)

Supplies

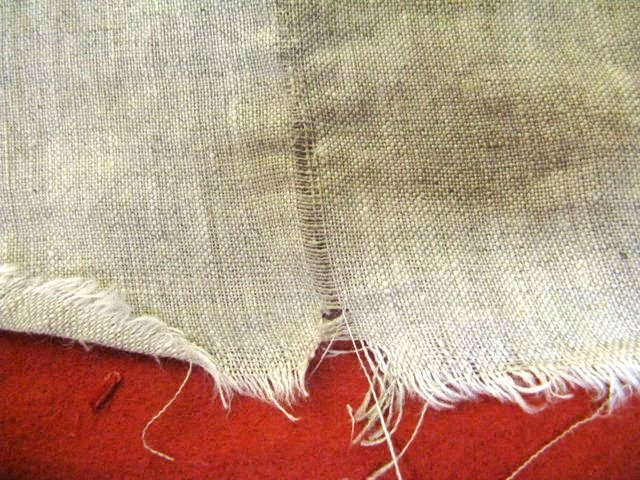
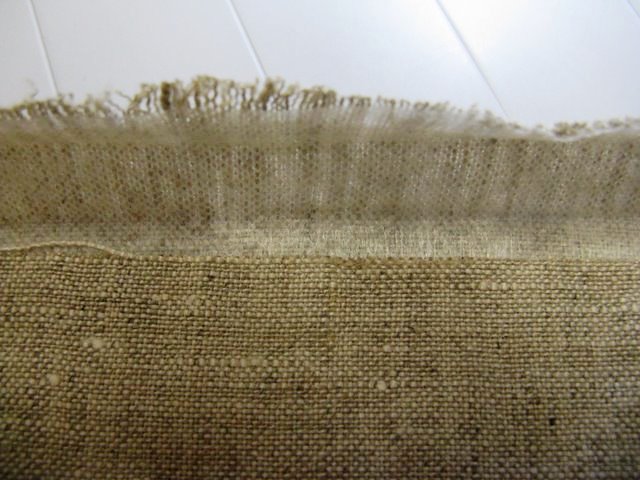
Start by preparing the linen or other even weave fabric. Cut it to 36” square. To do that, make a little cut at the 36” mark and pull threads. Cut along the line that the pulled threads make. When cut, pull a few more threads so that you have a fringe. Square up the fabric and press with sizing (I use a lot of sizing).

prepare-linen-640x480

Next, fuse the iron-on interfacing to the back of the linen.

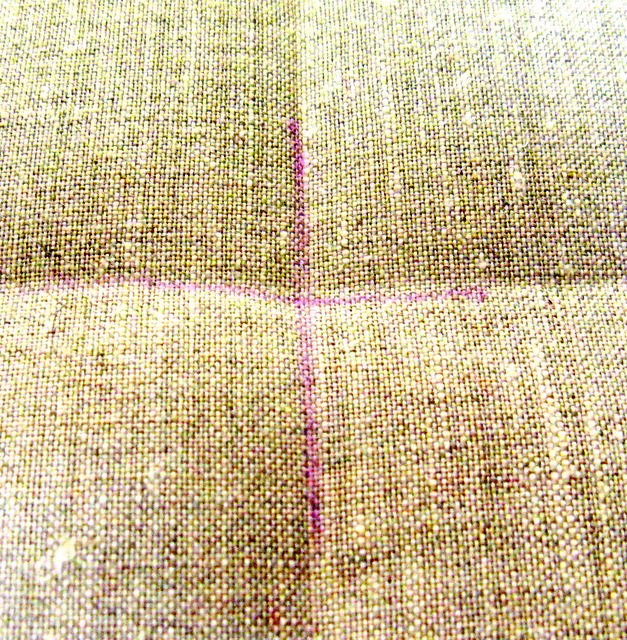
Fold the linen square in half and finger press a few inches in the center. Fold the square in half the other way and finger press the same way. Mark the intersection with a fabric marker. You will center the pumpkin stem on this mark.

find-center-627x640

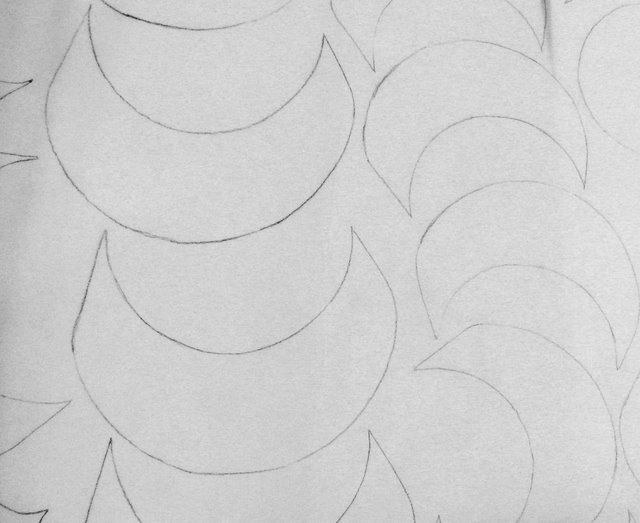
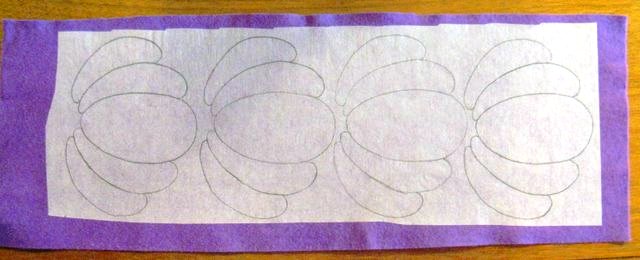
Trace the pattern pieces onto the fusible web. I like to use a mechanical pencil. Trace all the pieces together that will be cut from the same color wool.

trace-pattern-pieces-640x523

Iron the fusible web to the wool according to manufacturer’s instructions.

fuse-pattern-pieces-640-260

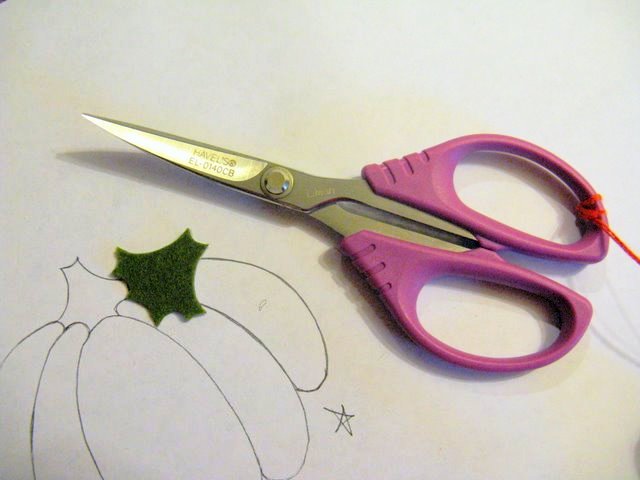
Carefully cut out the pieces. I like to use Havel’s small curved embroidery scissors because they give me better control. The curved blade helps me to cut lovely curved shapes.

cut-wool-640x480

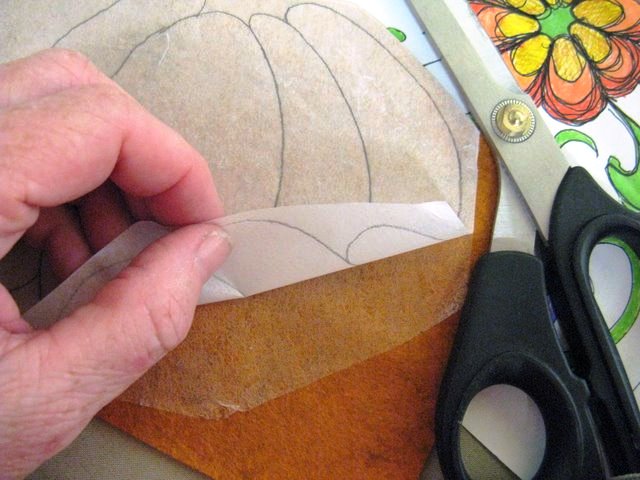
Here is a tip for using fusible web: Pull away part of the paper backing before cutting out the shape. That way it is very easy to pull the paper away from the appliqué….it gives you a starting point.

pre-pull-fusible-640x480

As you cut out the shapes, lay them out on your ironing board or other fabric covered surface. This way, you can see if you like your color choices. Pull away the backing paper before you lay out your appliqués onto the linen. Arrange the shapes according to the photo. You can use a yardstick to help with placement. The central pumpkin is divided into eight equal parts, so you can line up the pieces along the yardstick top to bottom and side to side.

lay-out-wool-pieces-640x497

(Use your colored fabric markers to draw details on the small pumpkins if you are not going to stitch the appliqué down.)

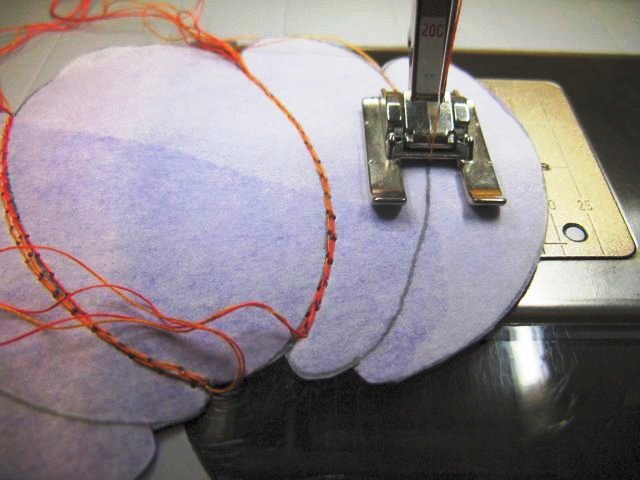
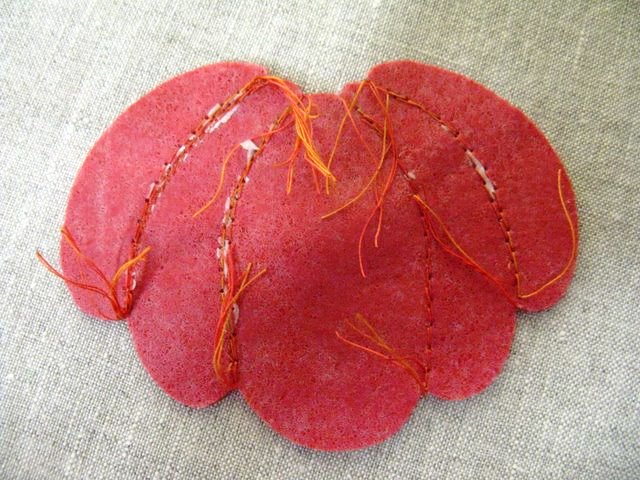
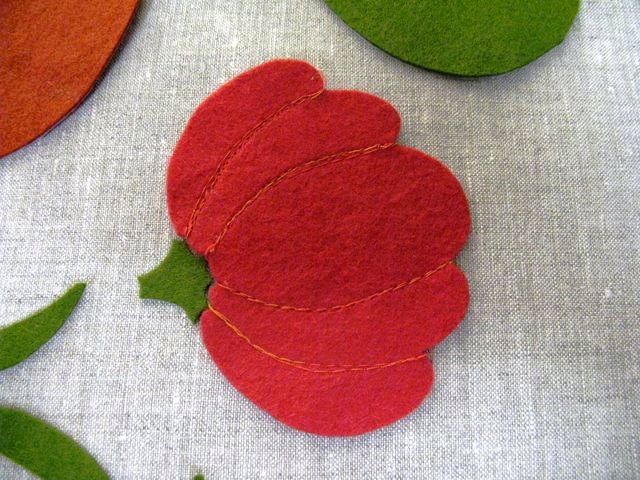
To stitch details on the small pumpkins, turn each upside down and use a long straight stitch following the drawn lines on fusible web paper backing. Stitch each line three times. Use the colored thread in the bobbin. I used Star cotton orange variegated thread. I used the same color for the gold, purple and red pumpkins.

stitch-in-details-640x480

Trim the threads and pull the paper backing away.

gather-threads-on-back-of-pumpkin-640x480

Gather the threads to the back of the appliqué. When you iron the shape to the linen capture the threads underneath.

pumpkin-applique-640x480

Lay out your pieces onto the linen and fuse. Set your iron to wool. The wool is thick and it takes a while to heat through the wool enough for the fusible to melt. Patience is required at this step. Heat a section at a time and go back over it several times. Once the fusible is melted and the felt is secure….it is really secure.

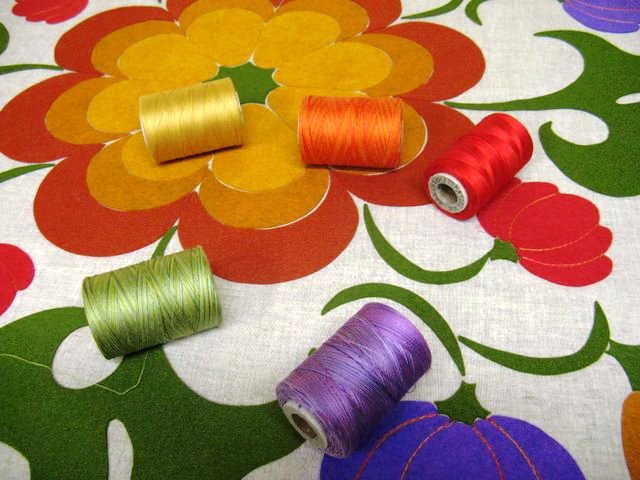
pretty-threads-for-applique-640x480

Here are the pretty threads I’ve chosen to stitch my appliqués.

using-applique-foot-553x640

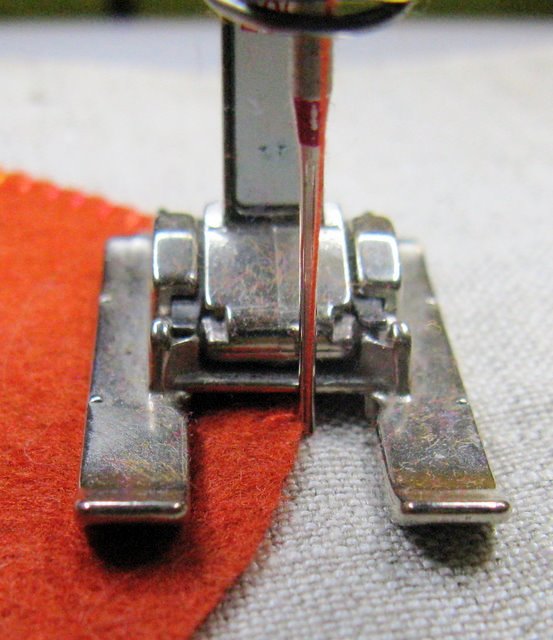
The photo shows an open appliqué foot. I am using a buttonhole or blanket stitch and you can see that I can get right at the edge of the appliqué because I can see it. I lowered the top tension (thread tension) so that the thread can move freely and make a full beautiful stitch. I suggest you test your threads, settings and materials before stitching.

the-stitched-applique-640x480

After all the stitching, the next step is to fuse your backing fabric to the back of the panel.

Make the backing about an inch smaller than your finished panel.

fuse-backing-to-panel-640x480

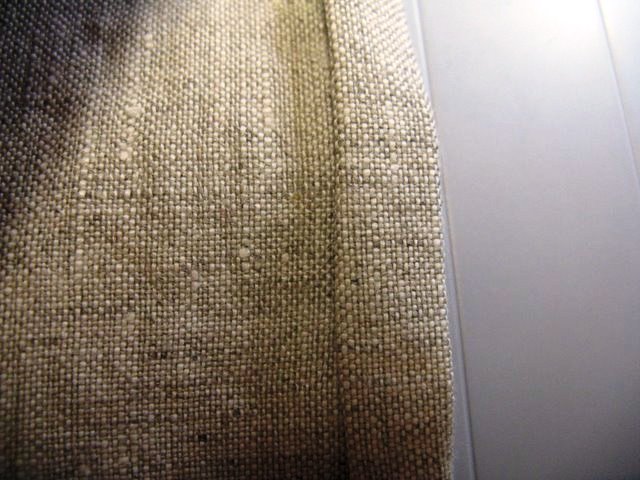
Fold and press the top of the panel to the back.

When starched linen is folded and pressed like this, it is very stable and doesn’t move around too much. However, if you want, you can use fabric glue or fusible hem tape to glue it in place.

fold-and-press-back-of-panel-640x480

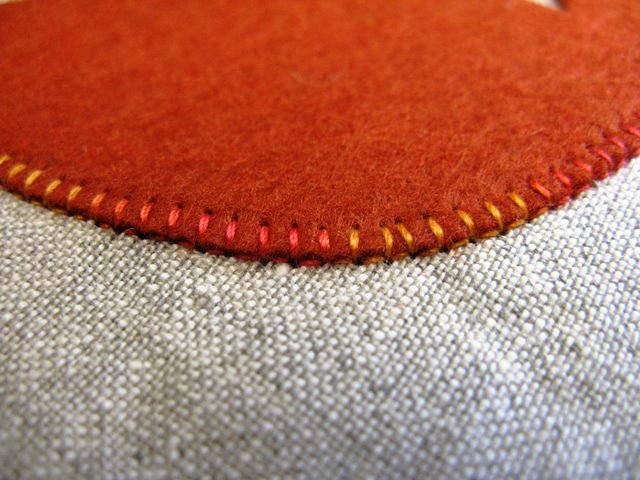
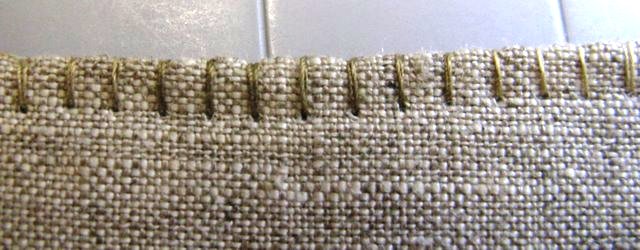
Stitching from the top, use the linen colored thread and a large blanket or buttonhole stitch to sew along the edge. I use the same thread in the bobbin as the top, and lower the top thread tension for a full stitch. I used a variegated linen color thread.

finished-edge-with-blanket-stitch-640x250

Click here to print out the pattern pieces
for the Fall Pumpkin Appliqué Centerpiece.


Click Here For the Tools You Need

Download your FREE copy of
Terry White’s eBook…

Posted in Applique, Craft to make, For Beginners in Sewing, Free Craft Projects, Free Quilt Projects, Fun Stuff, Guest Writers, Holiday Projects, How To, Seasonal, Terry White, Thanksgiving, Uncategorized | Tagged , , , , | 7 Comments

Appliqué Scrap Quilt

Cold Feet

by Terry White
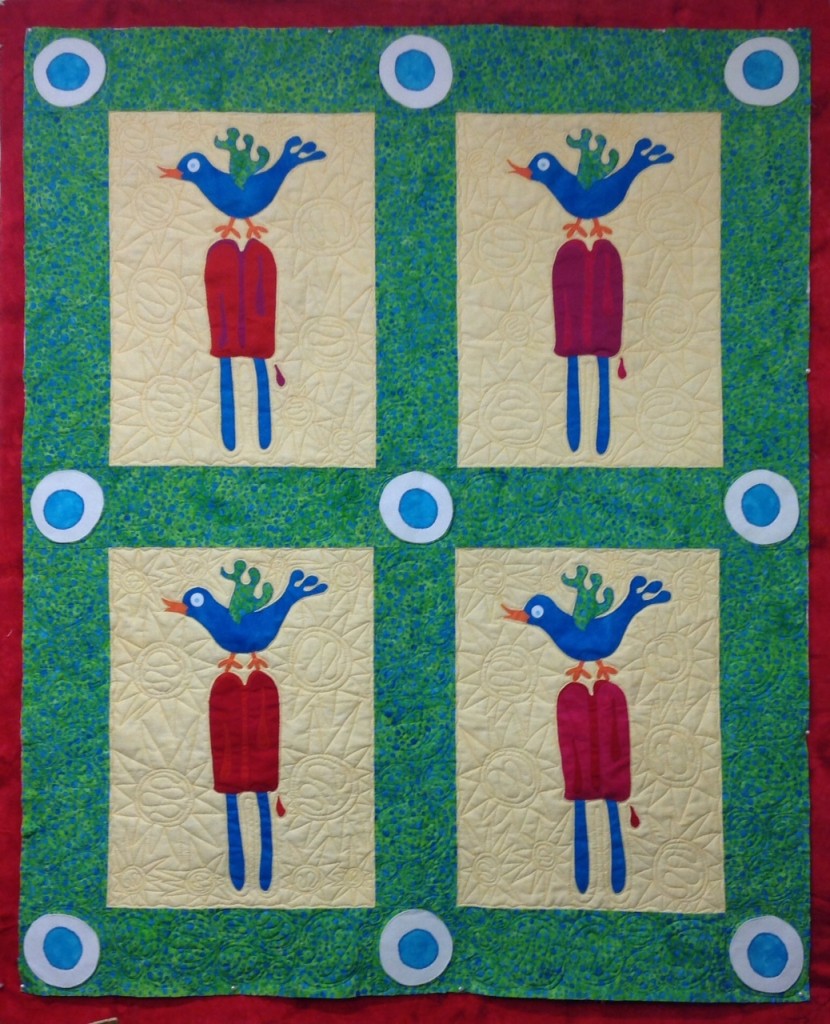
Cold Feet Child's Quilt TW

 Child’s Quilt Measures 38″x 46″

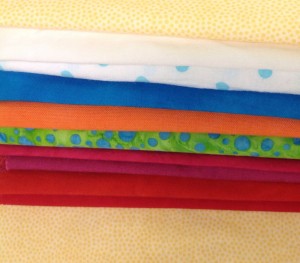
This bird is so hot that she decided to make her perch on a cold summer treat! My design is very simple, so the fabric colors are the key to this very happy summery quilt. I am using CherryWood fabrics in some of their newer clear colors. The stitching is done with Star Cotton threads. I love this particular match up of materials because they work really well together….stitching-wise and color-wise. The cool blue/green bubbles fabric is from Sew Batik. The bright turquoise hand dye for the bird is a piece from Joy’s Fabrics.

The bird pattern has a drawn eye, however, I chose to replace the drawing of the eye with a blue on white polka dot fabric. One thing led to another…..the new eye design became the corner squares! Even the smallest change on one thing can lead to a big change in the whole design of the quilt. The corner square design would never exist if I hadn’t changed the eyeball!
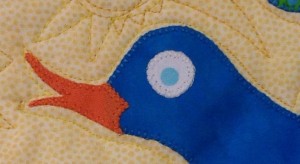
Blue Polka Dot Eyeball

A variation on this design would be adorable made with all prints. This is a scrap appliqué quilt. You can even use fat quarters for each appliqué section.

This is an easy quilt to make. All the techniques you might need to learn are contained in the four e-books”Quilt Instructions for the Beginner”  Click here for all the books.

quilt instructions for the beginner part 1 cover 480x625

Supplies You Will Need:

 FABRICS:Fabrics for Cold feet

 1 yard yellow dot for appliqué blocks

Cut into 19″x 15″ rectangles…you can use four fat-quarters

 Appliqués- Each appliqué is so small and requires small scraps of fabric. One 15 inch square of blue fabric is enough for the bird body and the pop sticks. The rest require less than that.

 1 yard of blue/green fabric for lattice strips and corner blocks

 Cut lattice strips 4 1/2 inches wide-wait to cut the length until you have appliquéd the panels and trimmed them. Then cut the length of the lattice strips the same lengths as the lengths of the two sides of the appliquéd panel.

 Cut 9 corner blocks 4 1/2 inch square

 1 1/3 yard for backing

 1/3 yard of red for binding

 1 yard of fusible web ( I use Wonder Under)

 4 pieces of non-woven medium weight interfacing cut into 19″x 15″ rectangles

 Batting- this is up to you….see batting recommendations in e-book
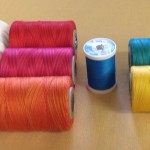
 Threads

THREADS:

The first group of threads are for the appliqué

 The blue sewing thread is for stitching the quilt top together

 The green/blue and yellow threads are for the quilting

 TOOLS: Cutting Tools
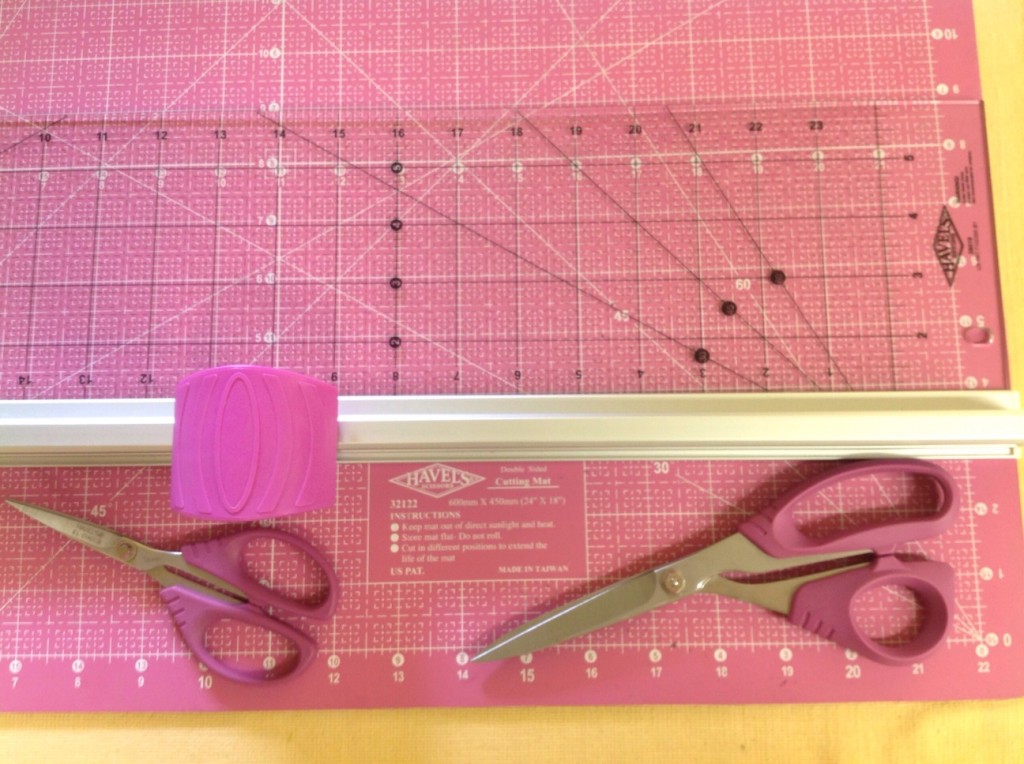
Cutting Tools

I used the new Havel’s Sewing Pink Cutting Mat and Fabric Cutter for cutting my fabric…this tool is really easy on my hands! I use the 5 1/2″ curved scissors to cut out my curved appliqué pieces. I also use them to cut threads from the quilt top…they curve away from the fabric so that I don’t get unexpected holes in my work.The 8″ bent serrated scissors are my go to for many things….they live on my cutting table!

Iron

Sewing Machine- Bernina if you have it

Machine Needle- 90/14 machine embroidery needle
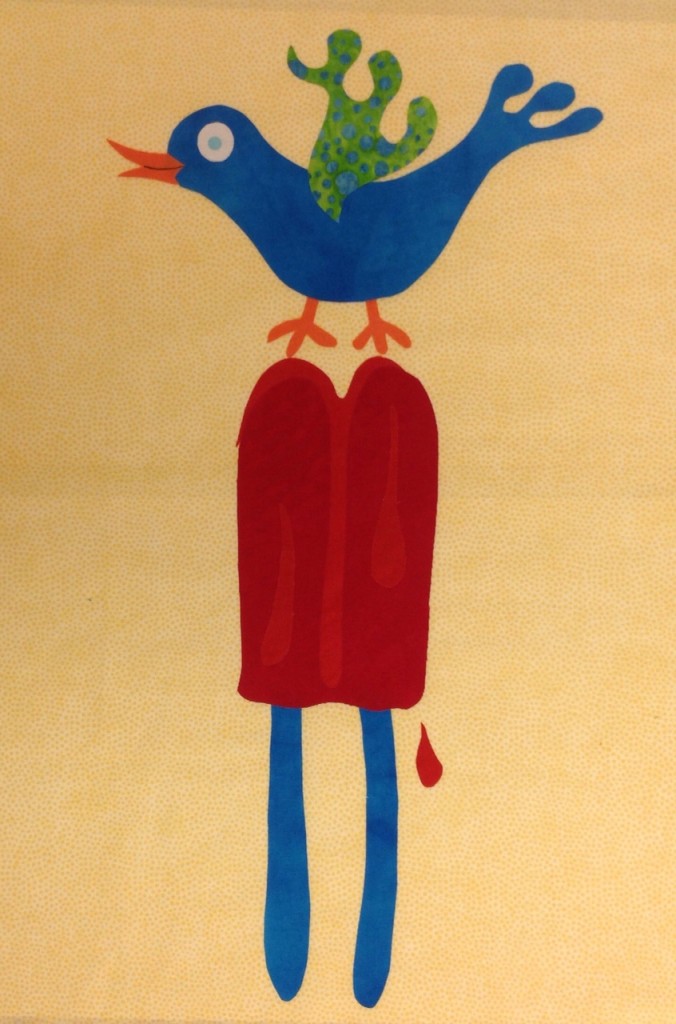
Appliqué Design Fused

Design Area

The total design area of the bird on the pop is 16″ x 9″. Here is the appliqués fused to the background fabric.

 each with the interfacing.

Trace the bird appliqué pieces onto fusible web…making sure that you are tracing  the reverse side of the design. Do the same with the ice pop pattern.????????? I can reverse the patterns for them???????
Shapes Traced On Fusible Web

Ice Pop Tracings on Fusible Web

When tracing the individual pattern pieces, extend some of the outlines when the piece will be underneath another piece.

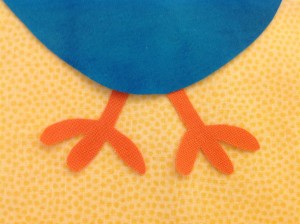
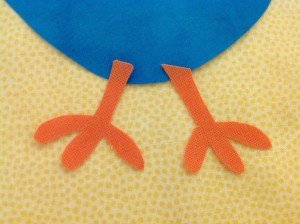
The bird’s feet- extend the leg about 1/4 inch so it can be placed underneath the bird body.

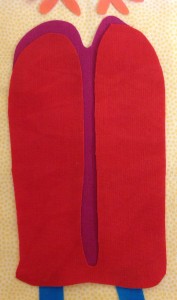
The center section of the ice pop- make the inside line bigger than the drawing, this piece will be placed underneath the main ice pop piece.
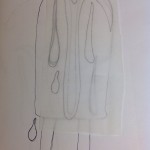
 Appliqué Shape Traced Bigger Than Design

Overlapping Tracings

Eye Appliqué Cut from Blue Polka Dot

Bird’s Eyeball

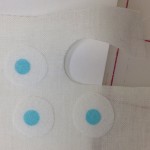
For the white fabrics which will be appliquéd to the quilt, I fuse the white fabric to another piece of white fabric first. This adds some body to the eye and corner block circles and it keeps the darker fabric from shadowing through.
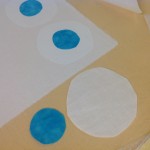
11 ColdFeetTW

 Corner Block Circles

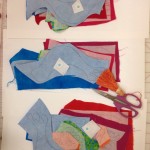
Appliqués For Each Block Stacked On Cardstock

Groups of appliqué pieces for each block

By grouping the appliqués for each block together, you can keep your work organized and be sure that each block has all of its pieces.
 Fold Background Fabric in Half Lengthwise

Fold-line in fabric

Fold your background fabric in half lengthwise and finger press. This will help in the placement of the appliqués.  Lay each block on interfacing. This will insure better machine embroidery.

Place your appliqué pieces onto the background fabric.

Some pieces will overlap. Look at the design for placement, for instance;

The bird’s feet are placed under the bird body.

Bird feet 2Bird leg lengthenedBird Body Overlaps Leg
The Ice Pop details are placed under the main piece.
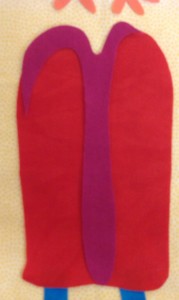
Center Appliqué Cut Bigger Than Drawing             Ice pop 2Ice Pop Shape Overlaps Central Shape

Fuse your appliqué pieces into place for each of the four blocks.

For my stitching, I used a tiny buttonhole stitch and cotton threads in colors that enhanced each appliqué piece.
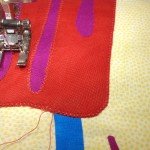
 18 Stitch ColdFeetTW

Appliqué under Presser Foot

The key to the very small curves and points is to stitch slowly and watch where the needle goes into the work. If you can stop, turn the work a little bit, then stitch as you go around a curve, then you can keep the stitches right along the edge of the work all around. For instance, I make one stitch at a time when I’m stitching around the eyeball.
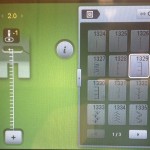
 Machine Settings for Appliqué

Stitch Settings on the sewing machine

For appliqué, First, I choose the stitch, then I tweak it so that it is exactly what I want.

I set my buttonhole stitch so that the edge of the stitch is in center needle position so that I can stitch right along the edge of the appliqué.

I change the width and length of the stitch for a smaller stitch.

I lower the top tension so that I get a prettier, fuller stitch.

I increased the presser foot pressure to have greater control over the fabric.

Appliqué the circles onto the corner squares
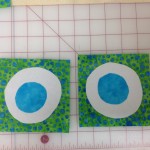
20 Corner Blocks ColdFeetTW

Corner Squares with Circle Motifs

Stitch the quilt top together.

At this point, it is good to trim the appliqué panel to make sure it is square. Then, use the real measurements to determine the length of the lattice strips.

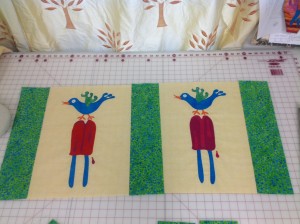
2 Rows-Stitch together two blocks with strips in between and on each end
21 Layout ColdFeetTW

 Blocks Sewn with Strips

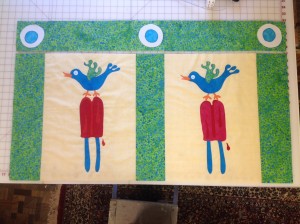
3 Rows- Stitch corner block,strip,corner block, strip, corner block
 22 Layout 2 ColdfeetTW

Layout for Sewing

Stitch rows together.

Layer with batting and backing.

Baste layers together.

MACHINE QUILT:
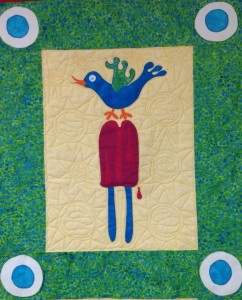
Quilting Pattern

 Section of Quilt

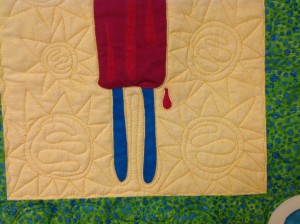
 Close-up of Quilting Suns on the Top24 Quilting ColdFeetTW
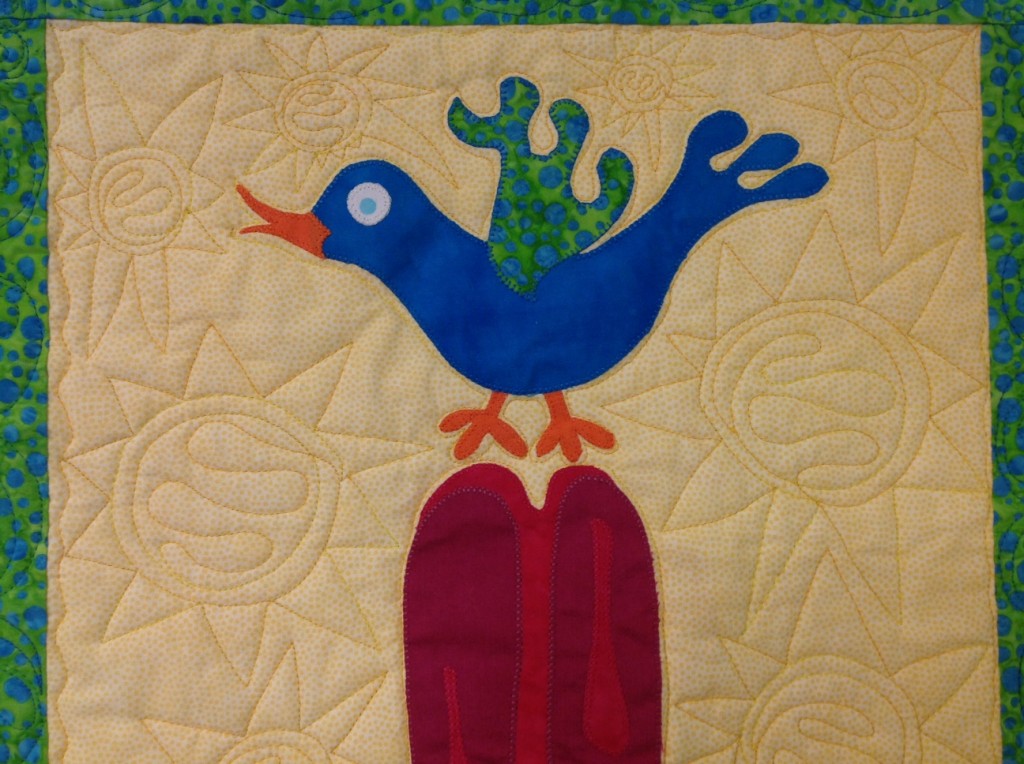
 Section of Quilt

25 SunQuilting ColdFeetTW

 Close-up of Quilting Suns on the Bottom
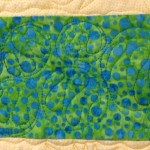
 26 Bubble Quilting ColdFeetTW

Close-up of Quilting Bubbles in the Borders

Bind the quilt in red.

DESIGNS:
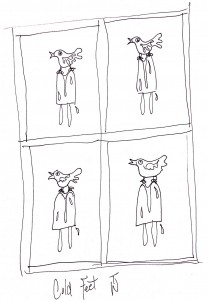
 Layout for Bird Pops Quilt

Original Layout Design

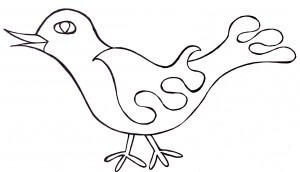
Bird Appliqué Design TW
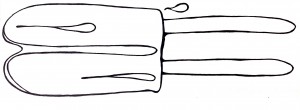
 Bird Appliqué

Ice Pop Appliqué Design TW

Ice Pop Appliqué

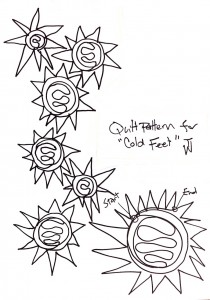
30 Quilting Pattern ColdfeetTW

Quilting Design
Click Here For Additional Projects By Terry White

Posted in Baby Quilt, Fabric Scissors, For Baby, For Beginners in Sewing, Free Quilt Projects, Quilting, Terry White, Uncategorized | Tagged , , , , , , , , , , | Comments Off on Appliqué Scrap Quilt