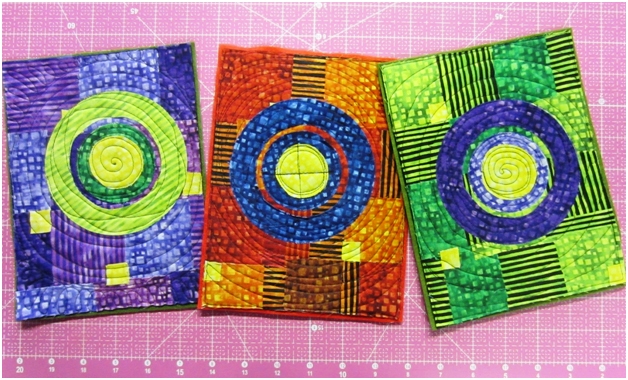
DIY Craft Projects: Patriotic Flags for Your Summer Celebrations

By Jamie Fingal

Easy, fun and whimsical flags —
No batting, no binding, let’s get started!

Summer flags for DIY craft projects
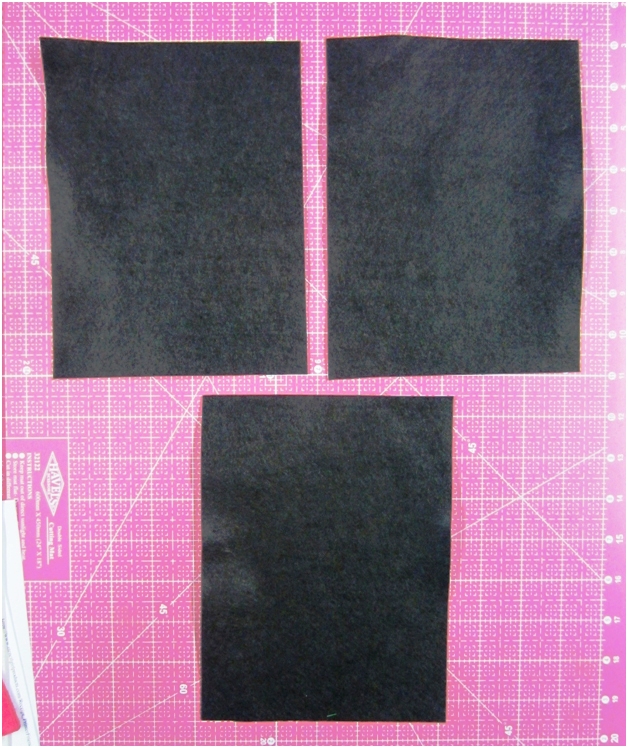
Five easy-to-make flags, measuring 6 x 8 inches. Black wool blended felt for the foundation and red wool blended felt for the back. Probably about a 1/4 of a yard of each, making sure that you have at least eight inches of fabric. You can get all five flags in a row with this cut. National Nonwovens brand #TOY002.

Fabric to be used for summer DIY craft projects
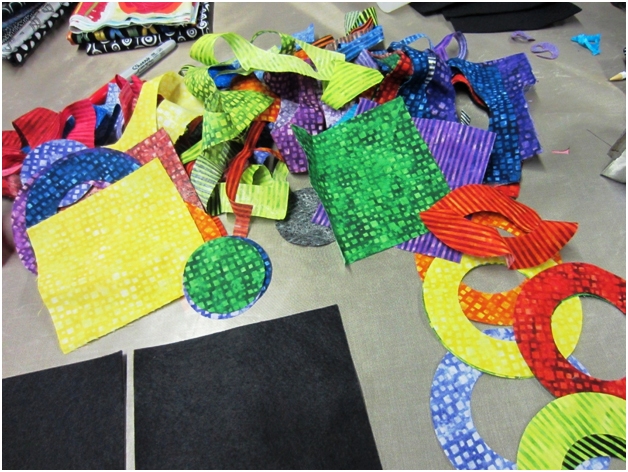
These are scraps from another project, already fused with Mistyfuse. I added a small amount of yellow for two stars, some green, an American flag and a trailer. If you need to see a tutorial about how to use Mistyfuse, there are several other projects on this blog to help you. Just search my name.

Foundation for summer flags
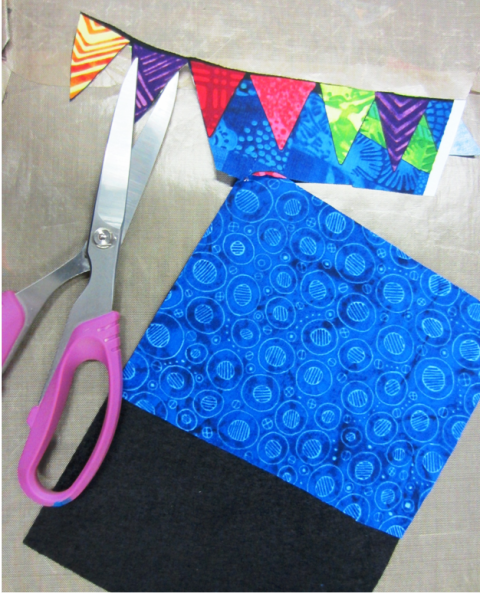
Cut five each 6 x 8 inches of the black wool blended felt. This is what you will use for your foundation.

Strips of fabric being layered for summer flag projectI am layering the strips, cut with scissors (you can cut them with a rotary cutter if you prefer). I wanted them to be a bit wonky because I like that look, but you can make them straighter if you want. Each strip overlaps onto the next strip, so you have a really good bond with the Mistyfuse and the foundation.

Fabric strips used for a summer flag craft projectJust layer the strips and iron into place with a hot dry iron on the cotton setting. You may want to protect the surface of your table with either parchment paper or a Mistyfuse Goddess Sheet. Then you can just peel it off. Here are my wonky stripes.

Cutting from the back of the flag
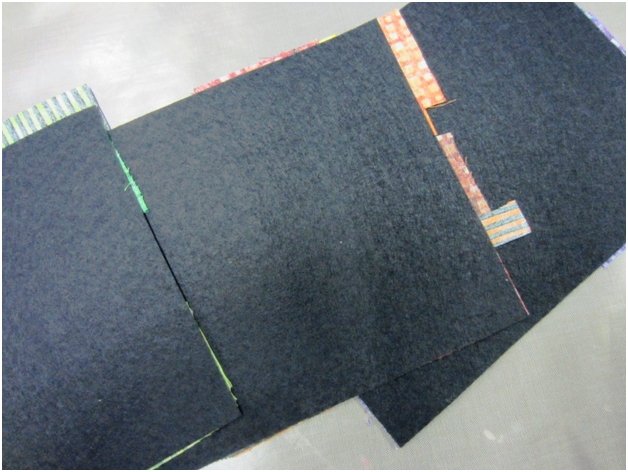
Flip the flag over and cut from the back, using the felt as your guide with a pair of scissors. You will do this for every flag you make.

Background of squares for summer flag project
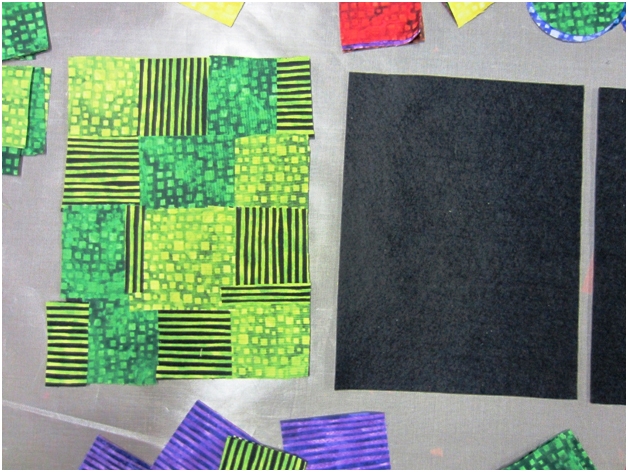
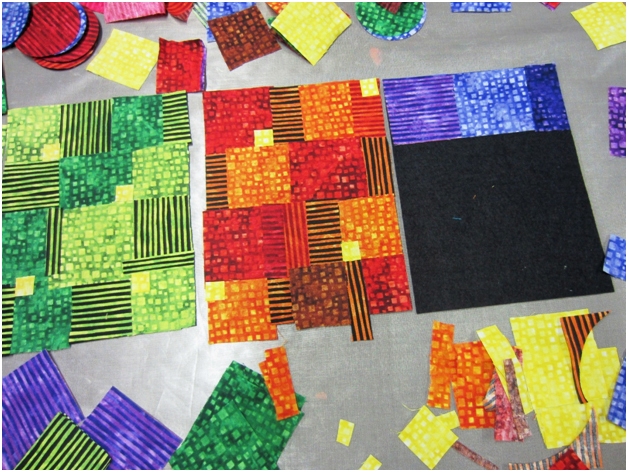
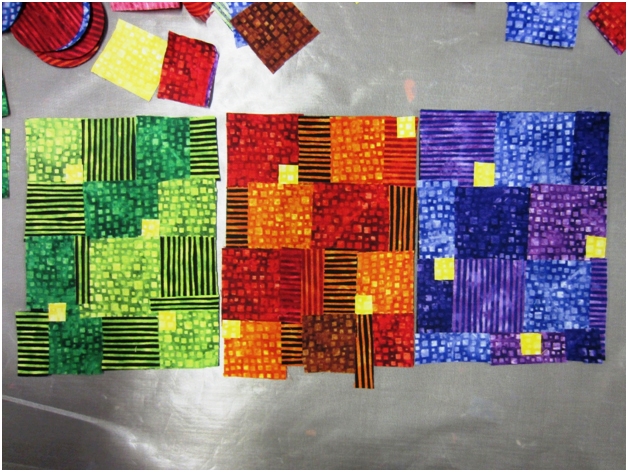
We just made the background for the one on the left, now make a background of squares. You can see that my squares are very wonky, so I am achieving the look that I originally envisioned. Overlap the squares, and iron into place and cut from the back.

Longer strips for summer DIY craft projectsLong strips. Overlapping, ironed and trimmed.

Fabric strips for a summer flagThe next flag has diagonal lines, which is fun. Just lay the strips across the felt at an angle. Press into place and cut from the back.

Summer flag halfway finishedAre we having fun yet?

Bonus fabric for a summer flag quilt
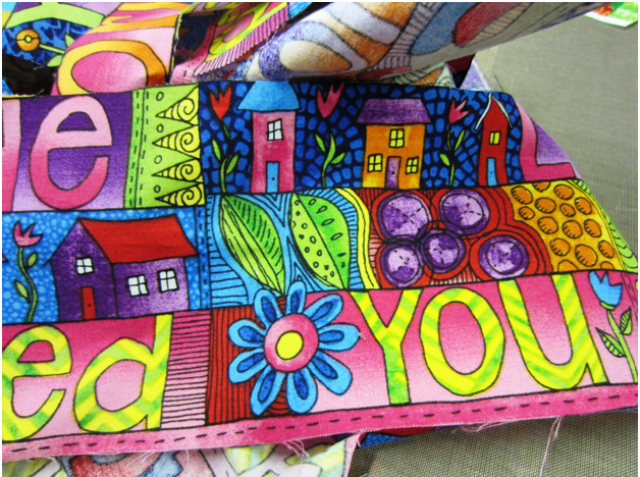
The bonus piece. You can use any fabric that has a house on it or a trailer, or a tent — some sort of dwelling. Or you can make it yourself. I am using a trailer from my fabric line “Home is Where Your Story Begins.”

Fabric to cut and incorporate into flagI am going to collage this into the design that I need for this project. I added some blue for the sky and green for a consistent landscape.

Adding on to summer flagThen I added an American flag on a pole. Trimmed from the back and this one is ready to go!

Stars for the flagNow onto making some stars. On a white piece of paper, draw a star — just a basic five point star, you can see how I drew it. I added an outline around it because after laying the paper over the flag I realized that my start was too small.

Pinning the star pattern to fabricI put two layers of fabrics together and pinned the pattern to them. Cut them out with a pair of scissors.

Stars on your flag backgrounds
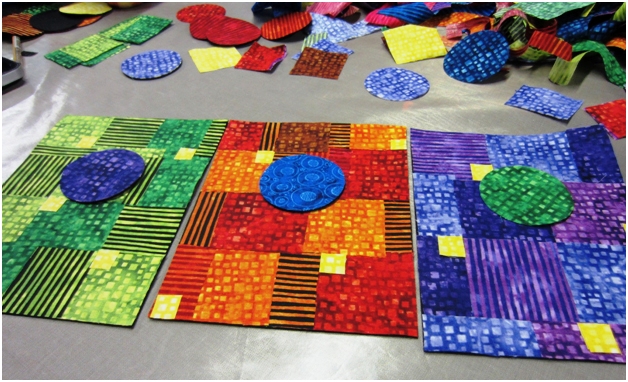
Place the white stars on the backgrounds of your choice.

Stars to go on summer flags DIY craft projectsWith your same pattern, pin to two pieces of yellow fabric. Cut with a pair of scissors. You could throw caution to the wind and cut these a little larger if you desire.

Stars pressed onto background of flags Place on the two remaining backgrounds and press into place.

Five summer flags for your next DIY craft projectsNow you have five flags. Next step is the backing, which is the red layer of wool blended felt.

Sewing fabric bolt infoHere is the info on the bolt so you can see what kind of felt I use. This is Bright Red, the perfect backing for this project!

Summer flags ready for the sewing machine
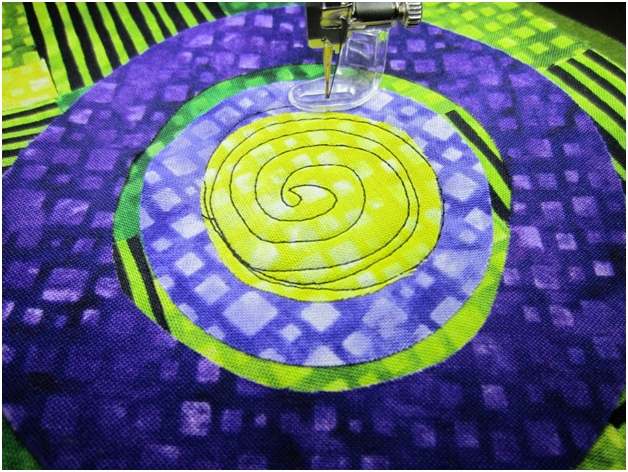
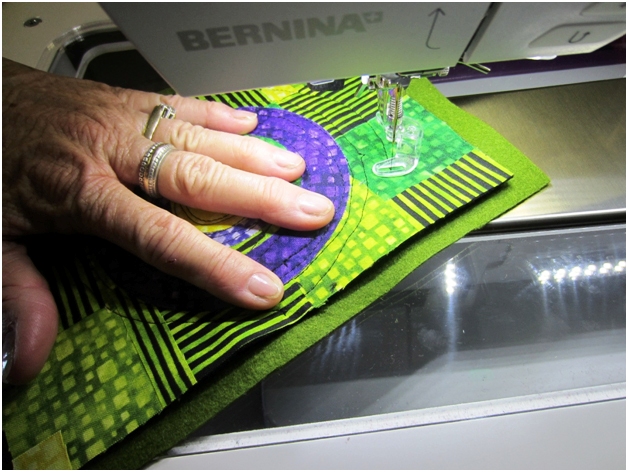
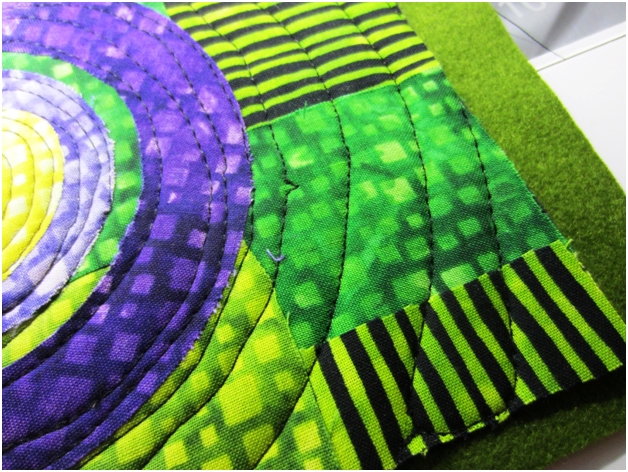
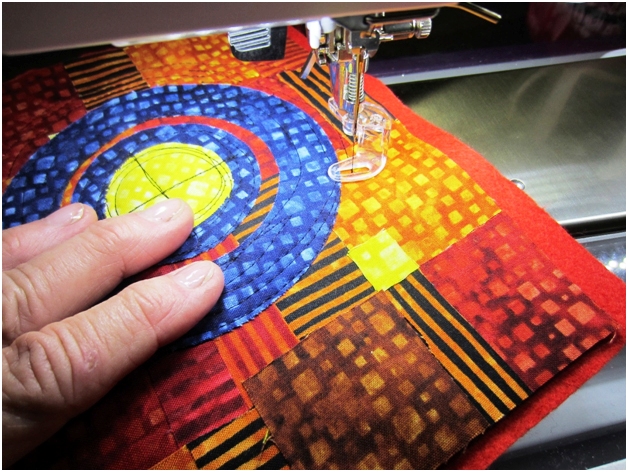
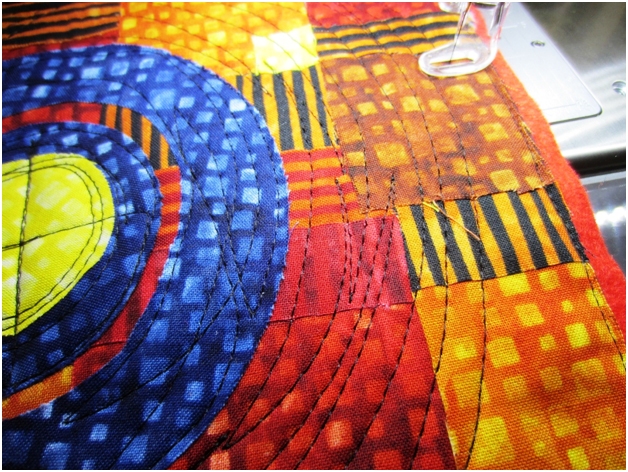
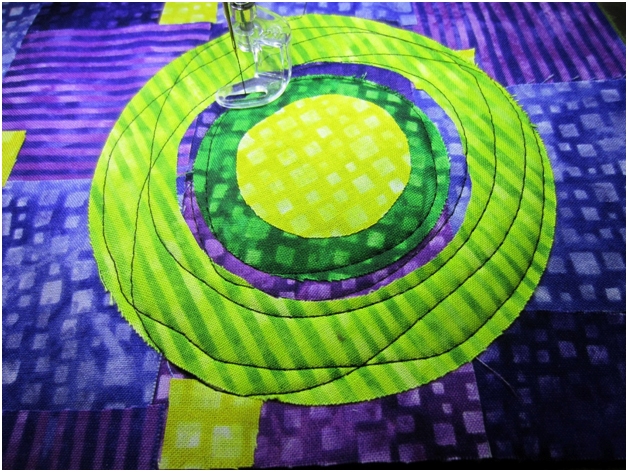
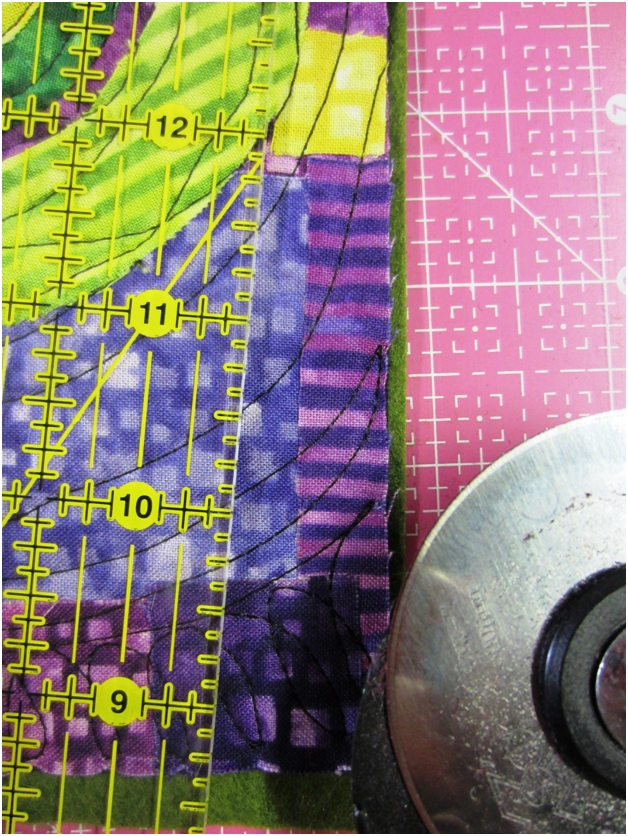
Place each flag on the felt, and make sure it is a little larger than the flag. Now is the time for the sewing machine. I free-motion machine quilted these using a free-motion foot on my machine. The edges are zig-zagged to secure them into place. The quilting is pretty simple. This is a great way to practice free motion quilting. After you are done with the stitching, press each flag with a hot iron.

Five flags made from summer craft ideas
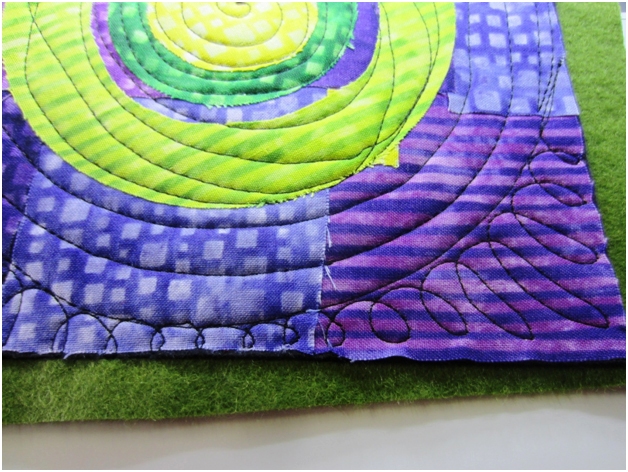
Using a pair of pinking shears, trim the red. It makes a fun edge for each piece. Five patriotic flags. You can paint wooden clothes pins with red paint for an extra touch. I usually hang my flags on laundry line you can buy anywhere. Scroll down to see each flag individually, so you can view it close up.

Diagonal stripe yellow star flagDiagonal stripe with yellow star.

Vertical stripe with white starVertical stripe with white star.

Trailer with flagTrailer with flag.

Checks with white starChecks with white star.

Horizontal stripes with yellow starHorizontal stripes with yellow star.

All five summer flagsThe flags! Thanks for following along! Happy Summer! Visit Jamie’s Twisted Sister blog at http://JamieFingalDesigns.blogspot.com.


Click here for exclusive deals and
savings from Havel’s Sewing!

Havel's Sewing quilting, applique and embroidery scissors


About Jamie Fingal:

Jamie Fingal fabric artistJamie Fingal is an artist, author, teacher, fabric designer and curator who hails from Orange, California. She is an award-winning artist and the author of the book Embellished Mini Quilts. Her whimsical and abstract work has been juried into international quilt exhibitions, featured in numerous books and magazines and has two instructional DVD’s — The Whimsical House Quilt and Rebel Quilting. She has been a guest on “Quilting Arts TV” multiple times in addition to being the other half of the curating team “Dinner at Eight Artists” with Leslie Tucker Jenison. You’ll find her work in private, public, churches and corporate collections. See more at www.jamiefingaldesigns.com.


Posted in Fabric, Free Craft Projects, Free Sewing Project, Guest Writers, Jamie Fingal | Tagged , , , , | Comments Off on DIY Craft Projects: Patriotic Flags for Your Summer Celebrations

What Skills Do You Need to Make a Quilt?

By Kathy Mathews

Apply these skills to your first labor of love!

Basic quilting skills are not that hard to learn and develop

Learning the basic skills needed to make a handmade quilt will provide you and your family with joy that will last a lifetime.

Quilts are eternal. They’ve been a part of our country for centuries, and people love them. If your family is lucky, you own a quilt made by a relative that’s still in pretty good shape. If your family doesn’t have a handmade quilt, why not make one yourself and start a grand tradition? Not only will you and your family enjoy it, but you can also pass it down from one generation to the next. It’s a way to make your home beautiful now and be remembered in the future. Pretty cool, yes?

For those of you saying, “Why can’t I just buy one?” I would say yes, that’s a possibility. But how much can you afford to spend? If you buy a quilt for under $200-$300, it’s not an heirloom and it won’t be passed down. Quilts at department stores and places like Pottery Barn are not using the same quality materials that a handmade quilt uses. The workmanship is not top-shelf — it’s just a fad bedspread made to use and replace. This is fine if you’re looking for a temporary quilt, but it won’t be one you’ll want to pass down from one family member to the next.

So what about buying a high-quality quilt with first-rate workmanship? Again, this is entirely possible, but it will cost you over $1,000. Expensive, yes, but worth every penny. Look for these kinds of quilts at reputable Amish quilt dealerships or from local quilters in your area.

However, instead of shelling out thousands of dollars or buying a cheap knock-off, why not learn how to make a quilt yourself? Yes, I am serious. A simple quilt isn’t too difficult to learn how to make, and you might just enjoy the process enough to make a few more once you’ve tested the waters. If that’s the case, what a lucky family you have!

Once you have your supplies (see my post from last month), you will need to acquire some very basic quilting skills in order to produce a labor from your heart. This will be the gift of love you want to give to a baby or a new couple. Here are the essential abilities you will need to create your own quilt:

  1. Measure and cut accurately — the beginning quilt is not one to trust just by eyeballing it. You’ll be happier with your first attempts if they are measured and cut accurately. You’ll be able to participate in group quilts. You can play with this boundary later on, but for now try to be as precise as possible.
  2. Understand a few basic terms — right side of fabric, right sides together, wrong side of fabric, quarter inch seam, pressing — these are big ones to know if you’re just starting out.
  3. Sew a straight line — my mother did not know how to sew, so I taught her how to turn on the machine, thread it, fill the bobbin and sew a straight line. She used only those skills happily for many years. She made fun pillowcases and afghans.
  4. Sew a quarter inch seam — the easiest way is a quarter inch foot, but I used a strip of masking tape on my throat plate for at least six years and it was very accurate.
  5. Press seams to opposite side so your seams butt up — you don’t want your seams to pile on each other.
  6. Baste together three layers by pins or spray — once you have to top, you have to be able to create the quilt sandwich.
  7. Have the ability to pin the edges together and turn inside out — this will eliminate binding. My daughter used this method for her first two quilts. It shortens the task.
  8. Quilt on your sewing machine with simple lines or tie — once the top is sewn and the quilt has three layers you need to keep those layers together. Some people tie and many people sew designs by hand or machine. Machine quilting in straight lines is very popular now and fairly easy to accomplish. You are now done unless you want binding!
  9. Cut and create binding — your quilt will need to be finished on the sides. If you didn’t do the “pillowcase method” in number seven, you need to create the binding.
  10. Sew binding on a quilt — once the binding is created, you sew it around the edges and then sew it down again. This is the final step, yay!

Ta da, you’re done! Now you have a quilt and it’ll feel great. Celebrate it for the time and love you put into it. You should be proud!

Are these the only skills you will ever need? No, of course not. If you love this wonder we call quilt making, you will surely acquire other skills. But take it slow — your first quilt is meant to express love. It doesn’t have to be a prize winner. You will find that your skills will get better over time, but the love you sewed into that first quilt will remain the same.

I hope you give that first quilt to someone who not only sees stitches and fabric but the love you put into it. The look on their face will fill you up, and you’ll want to repeat that experience again and again.

10 skills, one quilt and you’re hooked. You’ve joined the Quilter ranks.

We welcome you!


After you’ve learned a few skills, make sure
you have the right tools for the job!
Click below to shop Havel’s Sewing today!

Havel's Sewing quilting, applique and embroidery scissors


About Kathy Mathews:

Kathy Mathews headshotKathy Mathews has been sewing for 49 years and quilting for 31, which is odd as she’s so young. She taught Spanish and French full time for 35 years in Illinois Public schools and then continued at the college level until 2014. During all that time, quilting and sewing allowed her a creative outlet and kept her sane. In addition to needle arts she is an avid reader, swimmer, traveler and yoga newbie.  She blogs mainly about quilting at www.ChicagoNow.com. She lives in the Chicago area with her husband, is the mother of two grown daughters and grandmother to the cutest two year old girl in all the land. You can email her at quiltingsewingcreating@gmail.com.

Posted in Guest Writers, How To, How to Make a Quilt, How to Quilt | Tagged , , , | 4 Comments

Fly Your Own Flag- Summer

by Jamie Fingal

Summer in the City – Make three Summer themed prayer flags using fused scraps.  Follow these quick and easy instructions:

three summer themed flags by j fingal


3 Pieces of wool

Start with 3 pieces of wool blended felt from National Nonwovens, that have been cut to be 6×8″ on your mat with a ruler and your Havel’s rotary cutter.

Scraps

I had a lot of scraps from a project that I worked on for Quilt Market in Pittsburgh. All of the fabrics have been fused with Mistyfuse. Fun and bright colors. And the rings, that were made on a Sizzix Big Shot die cutting machine. They are quite fun too.

Scraps with MistyFuse

I am going to throw caution to the wind and make all three at the same time! I decided that I would do a collage background, using a variety of greens for this one. Once I had it the way that I wanted, you know with color, pattern and balance, I ironed it into place.

image 06

So, now you can see where I am going with this. The cool green of nature in Summer, the red and orange heat of the weather, and the soothing purple of a day on the porch sipping iced tea and putting your feet up.

Squares to make background

Yellow is also a happy color for Summer, so I cut small squares and placed them around each flag, and ironed them into place. I like the look and it adds a little spark to each one.

Cut from the back to use felt as guide.

In making art quilts, I fuse all of my quilts this way. The edges can be messy, but I would suggest that you cut with your sharp scissors from the back, using the felt as your guide. It is way easier this way.

Start with circles from scraps

In my scraps, there were these great circles, that were the insides of the rings, that were cut on the Sizzix Big Shot die cutting machine. I think they are so fun to use. Right now, I am trying out the colors on the backgrounds and asking myself, which colors pop out when they come in contact with each other? Which colors kinda blend into the background? I don’t want them to blend in.

Circles

Enter the 6” rings. Now you know where this is going. I am trying these out too. I want to see what works, not only with the backgrounds, but with the circles too.

Place the circles on the flags

Now I am thinking that yellow would look great inside those circles. I am going to place them at different points on the background, instead of being so matchymatchy. I am liking how this looks. I am not going to press them into place, until I get the rings done.

Cut out the circles

Using my really sharp Havel’s Scissors, I am cutting out a portion of the inside of the rings, so there is a space between the inside circle and the outer ring. More like a contemporary sun.

Place fabrics and press

I am pretty happy with how they all look. All of the fabrics have been pressed into place. I added the background wool blended felt – the same kind as the black, only in colors that complimented the quilt tops. You can see that they are rough cut, and I wanted them to be larger than the tops, because they will show on the sides at the end of this process.

Made a spiral using free motion

Next part – free motion machine quilting. First step, just using the needle to make a spiral in the middle and then around the circles.

Free motion sewing

I am turning the prayer flag with my and as the needle echoes the circle on the background.

Quilting lines are not perfect

Yes, I made the arrow thing in my quilting, because it was rather fun. And really I think it adds some interest. You can see that my quilting lines are not perfect. I want to have fun doing this.

Blazing sun

Here is the blazing sun one. I decided that I would change up the design in the yellow portion. This flag is the centerpiece of the three flags, and it was fun to make it different. I am gliding the needle around the circle.

Sew around the flags.

Sew around each flag with a straight stitch. You can do it with a straight stitch foot, but for me who doesn’t want to change the foot, I am staying with the free motion foot.

Sporatic free motion

Here’s the purple one, and you can see I am going with a totally different approach for free motion machine quilting around the circle. Sporatic, wacky and fun. Why not?

Loop-t-loop free motion

And then there is the loop-t-loop. This is really fun and a great way to practice free motion machine quilting.

Trim the felt

After all of the prayer flags have been free motion machine quilted, now is the time to trim the background felt. Using a cutting mat (Havel’s pink), ruler and rotary cutter, make sure you leave some of the felt showing through to the front. This is a nice close up shot to see how much to leave.

Purple prayer flag

Detail shot of the purple.

Orange prayer flag

Detail shot of the red/orange.

Green prayer flag Jamie Fingal

Detail shot of green.


See more creations by Jamie Fingal @ http://www.JamieFingalDesigns.com/

 Click here to download a FREE eBook for projects by Jamie

3 free projects by jamie fingal 480x640

Posted in art ideas, Free Sewing Project, Fun Stuff, Jamie Fingal, Uncategorized, Wall Hangings | Tagged , | 1 Comment

Free and Easy Craft Project to Create This Spring:

Fly Your Own Flag this Spring

By Jamie Fingal

I am excited to tell all of you that I am a new fabric designer and my very first line is titled Home is Where Your Story Begins ,by Hoffman California Fabrics.  So naturally, when Jackie Marsal, the account executive for Havel’s Sewing, asked me to design a “Spring Fling” themed project incorporating my new fabric line (just for fun!) I was obviously more than willing to get to work making these fabric flags for you all to create!

Fly Your Own Flag- 3 Fabric Flags for Spring

Bloom, Spring and Grow! Vibrant & fun these fabric flags are certain to cheer up anyone that is stuck experiencing cold weather!

These festive and fun flags are not only great for a variety of fabric artists, but they are also easy enough to make just in time for the upcoming Spring season.

Sample of Jamie Fingal's New Fabric Line

To give everyone an idea of what Jamie’s new fabric line consists of, here is a visual of the sample card.

 The fabric pictured below is hands down one of my favorites. It is covered completely with words, and based on my watercolors. The best part is that you can use the words available or you can easily cut out individual letters in order to create your own words, which is what we will be doing for this project. It only comes in this colorway – bright and fun!

Jamie Fingal's Word Covered Fabric

One of Jamie’s favorite from her new fabric line- It is covered completely with words, and based on her watercolors.

  This project will break down how to create three fabric flags inspired by the Spring season. (Each flag will measure 6×8 inches, vertical format.)

Black Wool Blended Felt

Three pieces of black wool blended felt by National Nonwovens TOY 002.

We are going to start this project off with 3 pieces of black wool blended felt -cut 6” x 8”- as the foundation. This is made by National Nonwovens TOY 002.

I also fused all of my fabrics with Mistyfuse to prepare for this project.


House Patterned Fabric

This house covered fabric is a perfect focal point for the fabric flags.

The next fabric that we need is the house patterned fabric. This is a a colorful fabric which can be used in a variety of ways.

This particular fabric- covered in different styles of houses of various shapes, colors, sizes- is the perfect focus point for two of the flags we will create.

Next, simply cut out a house out from the fabric, which is near the size of the flag, or slightly larger.

House Covered Fabric

 Fuse this to the felt.

Fused Fabric House

If you turn it over, you can cut the excess from the back, which will make it easier to get it straight. Find the letters B-L-O-O-M and set them aside.

B-L-O-O-M Fabric

Place the letters on the side and iron into place.

Fussy Cut Flowers

Using your favorite fussy cut scissors, cut out some flowers from the house fabric.

Fabric Flower Arrangement

Place the flowers on the lower portion of the flag and iron into place. Trim any areas that overlap from the back. Set aside.

Sky and Flag Fabric Cut Outs

For the second flag, using the blue circle fabric, cover one of the felt foundations, to cover about 2/3 of the felt from the top down.This will be used to create a sky effect.

Turn the flag over and cut from the back.

It would be fun to use some of the bunting flags in this one.  So, from the landscape fabric, find a row that would work for your flag.

Fussy cut out.

SPRING Fabric Flag


Place the flags in the upper portion.

Find the letters for the word SPRING, and place them just below the bunting flags.

Iron into place, and cut the extras from the back.


Using lime green striped fabric, cut the top with pinking shears.

It makes a great little detail, and it’s fun!

Pinked Grass Fabric

Using Havel’s PInking Shears adds a fun & unique effect to your fabric.

Fussy cut out a row of houses, and the larger flowers, like this blue and pink one below.

Houses and Various Pictures

The text fabric also has little houses and artful drawings which are useful for various art.

Place the houses in place, just below the pinking line.

Ironed In Place Fabric

 Once the house is set, iron the fabric in place.

Next, cut out the flowers and place them on the flag.  DO NOT  iron this down yet.

Flower Your Flag

Using the landscape fabric, fussy cut out the stems and leaves. (So that basically you are cutting off the top of the flowers.)

Cutting Larger Flowers

The stem and leaf unit will be used for your larger flowers.

After you decide where you want everything – flower-wise, iron them to the background.

Spring Flag #2

Set this flag aside, and now we are onto Flag number 3.

This house is larger, so you need to allow for that.

Creating the house Flag

We will add the blue circles to the sky, to make up for the empty space.

You can see where I have a strip of blue on the top.

Floral Landscaping

Then you can see where I have added some floral landscaping to the bottom portion of the 3rd flag in order to fill in the green.

Next, find and cut out the letters for the word G-R-O-W.

GROW Flag

Place the letters on the top and iron them into place.

Back each flag with a coordinating color of wool blended felt.

Now they are ready to be free motion machine quilted.

Backing the Fabric Flags

The backing for these flags is Fuschia WCF 001.

  After they are quilted, press with an iron, then trim the backing.

You want the backing to show just a tad- this helps to bring out the colors in the flag.

Havel's Rotary Cutter and Mat for Trimming

Using Havel’s 60mm Rotary Cutter and Cutting Mat to trim the backing.

Using the free motion foot,  zig zag the edges of each flag into place.

Zig Zag Stitching the Backing

Example of how the backs were easy to free motion machine quilt. You can see where Jamie went around the houses, objects and lettering with ease.

Here are the three finished flags:

All Three Fabric Flags

And individually:

BLOOM

BLOOM

SPRING

SPRING

GROW

GROW

I hope that you have enjoyed making this Spring Fling fabric flag project as much as I did!


Jamie Fingal


About Jamie Fingal:

Jamie is a an award winning artist & fabric designer from Orange, CA. You can contact her and order fabric at http://JamieFingalDesigns.com/.


For more of Jamie’s inspiring and creative projects, click here.

[hs_action id=”6875″]

Posted in art ideas, Fabric, Free Quilt Projects, Fun Stuff, Guest Writers, Jamie Fingal, Mixed Media, Patterns, Quilting, Wall Hangings | Tagged , , , , , , , , | 35 Comments

How to Help a New Quilter Get Started

Tips for fabric, cutting & more!

By Kathy Mathews

bernette sewing machine

I can clearly remember signing up for my first quilting class. I had been sewing since I was twelve but as I was about to turn the big THREE – O I felt the need for something new in my life. I had seen a handmade quilt on a bed of a friend of mine and knew that I had to make one. I was pretty set for basic sewing notions but the class list of what I needed to start quilting had some items that were new to me. The list was a bit anxiety producing, thrilling and a tad expensive.

I was self-motivated because we had family quilts. My grandmother and her two sisters had been quilters and exposed me to it. They planted a seed which was dormant for about 20 years but when it blossomed, it grew big time.

I was so lucky to have had someone who exposed me to quilting. I wish everyone did. I havestarted the wonder that is quilting for me, my step daughter and now my granddaughter. My step daughter was 20 and my granddaughter is only 2 so my approach was and is quite a bit different.

My step daughter lived with us when she was in middle school. It seemed like grades 5 through 8 involved quite a bit of sewing. I made her play costumes, quilts, pillowcases and favors for her birthday parties. She and I get along really well now but then, there were some definite non Brady bunch moments. Sewing was our first and enduring bond.

She became interested in sewing by seeing the things around the house and the handmade items I gave her. I signed her up for lessons, just like I had Shelby and Emily. She made a little quilt in a Mother daughter class and we were all thrilled with it. After she left, she missed the sewing on demand that was available around here. A seed had been planted for her. This kind of exposure is what I am doing with Zara now also, she plays in my sewing room, she adores quilts and sewing is just a part of everyday life.

For Olivia’s 20th birthday, she wanted a sewing machine. Her sister and Mom got her one at Target and I begged to help and by help I meant completely control this present. They all agreed to let me, even took the machine back. I was in heaven! The early exposure had taken root and I was about to “water”the sprout completely!

I got Olivia a Bernettesewing machine, a necessity for all new quilters. I am all about avoiding play sewing machines or tricky antique ones for young sewists. (I made that mistake with my oldest and I have never heard the end of it.) Buy a lower level mechanical sewing machine of the brand you adore.

After that I put together a quilting sewing kit for her, with some attention paid to a quilt class list. She was not living with me so I wanted her to be completely prepared. She was the only child interested in sewing so far, I didn’t want to blow this!

First: cutting. I got her a decent sized cutting mat, quality rotary cutter and replacement blades. I wanted her to have really good scissors so I got my first pair sharpened and passed them on to her. I think being able to cut well is the most important start for a new quilter. And what’s the secret to being able to cut well and accurately? Quality tools that cut consistently and last for decades, a bargain in the long run.

Second: measuring. When you cut, you have to be able to measure. There are so many fabulous rulers out there. I chose a simple 18” plastic ruler and a really good 12.5” acrylic square. It’s important to cut but it has to be accurate.

Third: sewing. By golly, sewing a quilt does involve sewing. She would have well cut, accurate pieces but she needed a quarter inch foot for that machine and a walking foot for the quilting. Luckily, these are not that expensive for a Bernette. And when you sew, you’re going to make mistakes. It’s just part of sewing and quilting. I did not get her as quality a seam ripper as I have, some holiday I will have to upgrade her.

Fourth: Pins and thread. Almost done but sewing involves thread and pins. I have fabulous pins and magnetic “pin cushions” for them. I had hundreds of standard pins and a pin cushion. Before a year was up, I got her a magnetic one. I also got her a big spool of off white Aurifil thread. She has never bought herself a replacement spool of Aurifil but having one luxurious spool is at least amongst her stash.

Fifth: Fabric. Oh yeah, she needed to have some fabric and I think this is where most people start when they sew. We got her a gift certificate to the quilting store for lessons and fabric.

Finally: some fun. Once you have a machine with the proper feet, you can cut, measure, pin and sew that fabric butit’s fun to have some extras. I had a sewing basket I had barely used, a measuring tape and some duplicate books. Olivia loved them!

Keeping it going: I have given her gift certificates for more fabric, dual duty thread I no longer want and fabric I can’t see myself using. We got her extra bobbins because really, can you ever have too many?

Olivia made a quilt in her class and was enthralled. She is a Pinterest nut and finds all kinds of cool projects. She makes purses, bags, Halloween costumes and presents. She’s very inventive and creative.

I can’t wait to do this all again with my granddaughter. She’ll start out sewing with me in my sewing room so do I really need to buy anything for her? Probably not but that hasn’t stopped me. She has her own sewing table and chair where now she just colors. I got her a pink and white Bernette for Christmas and birthday which are 9 months away. Yes, it is fairly insane.

I couldn’t control myself because as quilters and sewists, I think we have to first expose, then encourage and finally launch the next generation. I’ve been successful with one and I am hoping I am with my granddaughter.

If not, I may have a cute little pink and white machine for sale in a couple of years!

CLICK HERE FOR THE BEST ROTARY CUTTERS

FREE eBOOK INSTRUCTIONS FOR THE BEGINNING QUILTERebook cover part2(a)_quilt instructions for beginner

Posted in Uncategorized | Tagged , , , , | 1 Comment