Free Craft Project: Back to School Zipper Pouch

By Leslie Tucker Jenison

Whether or not you “really” love school,
you are bound to fall in love with this
fun little pouch!

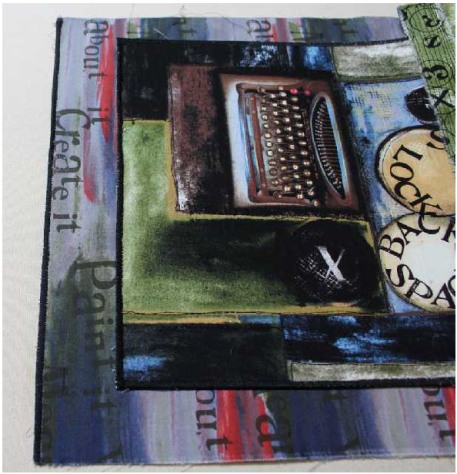
To create this pouch you will need a sturdy piece of canvas. I used a section of painted, ungessoed canvas left over from another project and some leftover strip-pieced cotton for the lining.

Supplies needed:

One 11.5 x 14″ piece of sturdy canvas or home-dec weight fabric
One 9-inch zipper
One piece of 11.5 x 14″ fabric (or pieced remnants) for the lining
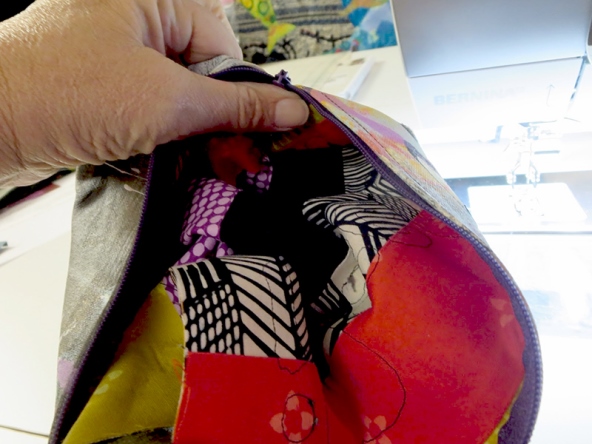
Fabric (pre-fused) or felt for die-cut or hand-cut letters and heart
Fusible (I prefer Mistyfuse)
Notions
Thread
Sewing machine
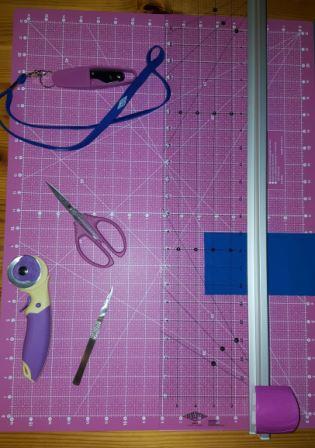
Havel’s cutting mat
Havel’s rotary cutter
Clear ruler
Havel’s nippers

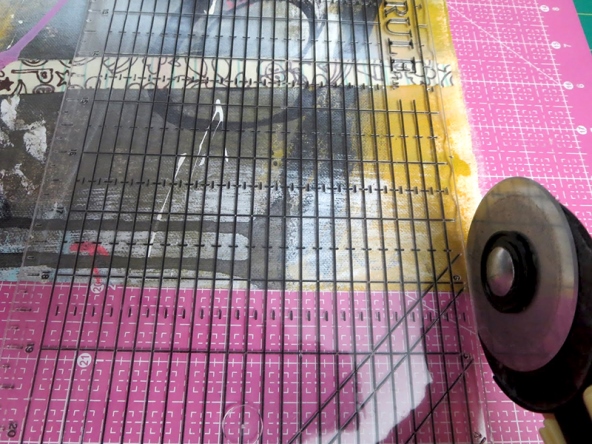
1.) Cut an 11.5 x 14″ rectangle of sturdy fabric. Set aside.

Cutting fabric to start this free craft project2.) Pre-fuse and cut another piece of cotton fabric and cut to 11.5 x 14″.

Another piece of fabric3.) Select your fabric to use for lettering and pre-fuse. Cut pieces that are large enough to cover each letter to be die-cut.

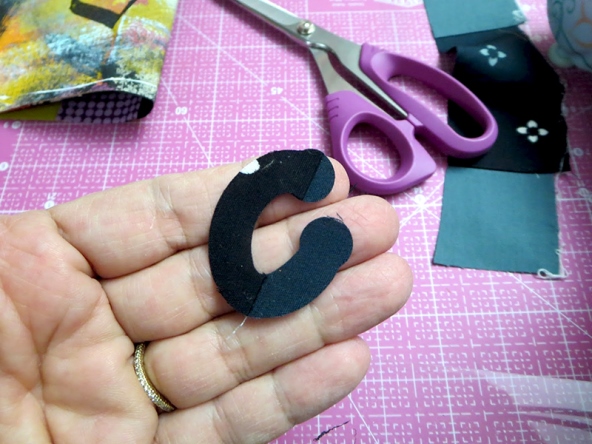
4.) Place each small piece of fabric, fusible side up, over the letter and process through the die-cutter. (Note: if the fusible side is up, your letter will be properly oriented when you fuse it to the surface of your pouch.)

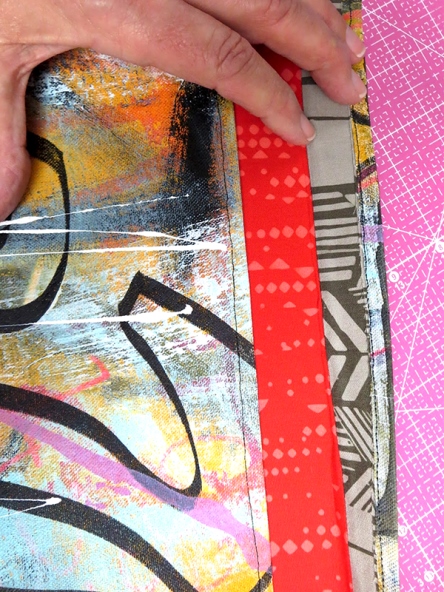
Fabric used for lettering of zipper pouchFabric letters for the final project5.) Fuse the two rectangles together, right sides out. Trim edges with the rotary cutter. Fold the short ends in 1/4-inch toward the inside and stitch.

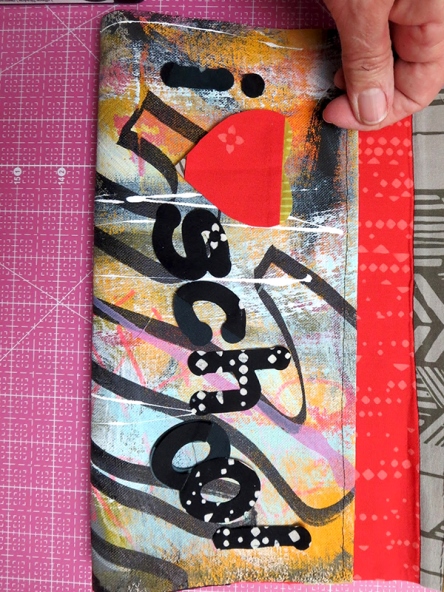
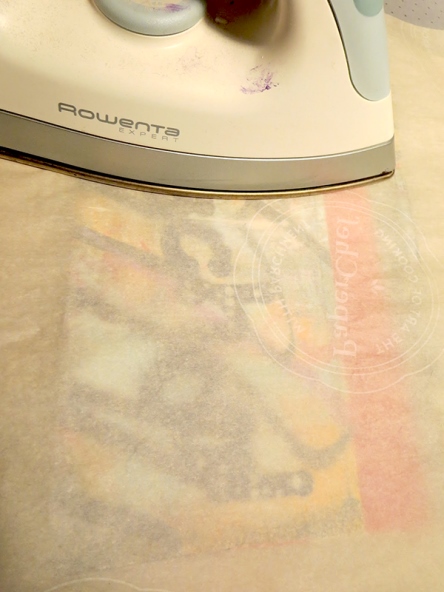
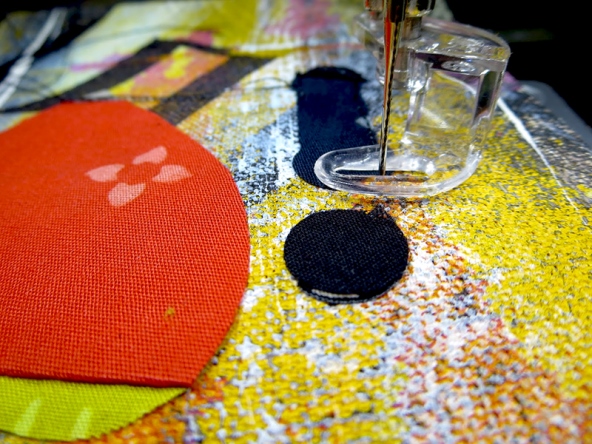
Fusing the two rectangles togetherTrimming edges of fabric with rotary cutterFolding short ends of the fabricStitching the shorter ends6.) Now, position your die-cut, pre-fused letters and heart (which was hand-cut with scissors) to the outside surface of the pouch on one side. Place between pressing sheets or parchment and fuse to the surface with a medium dry iron.

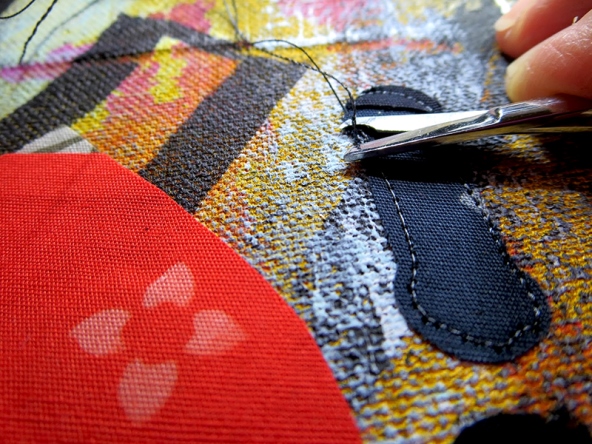
Getting letters ready to be fusedFusing your letters to the outside surface of pouch7.) At the sewing machine with feed dogs down, machine applique around each letter and the heart.

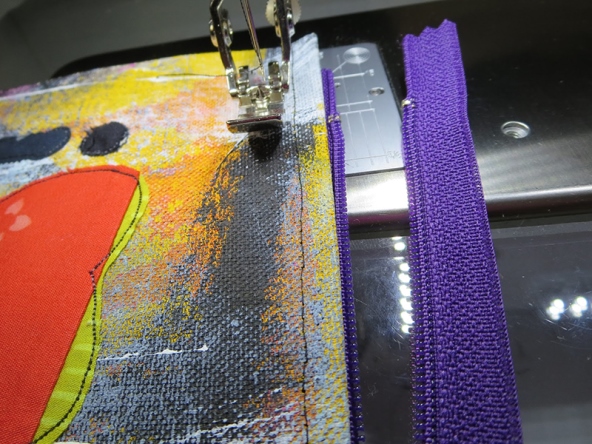
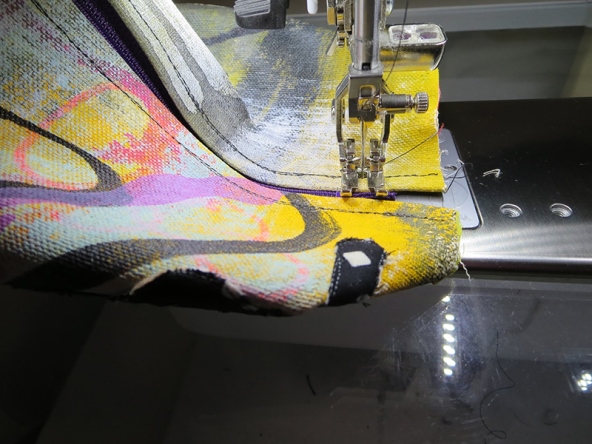
Machine applique each letter on the pouchMore machine applique of letters on the pouch8.) Position the folded edge of the canvas next to one side of the zipper and stitch in place.

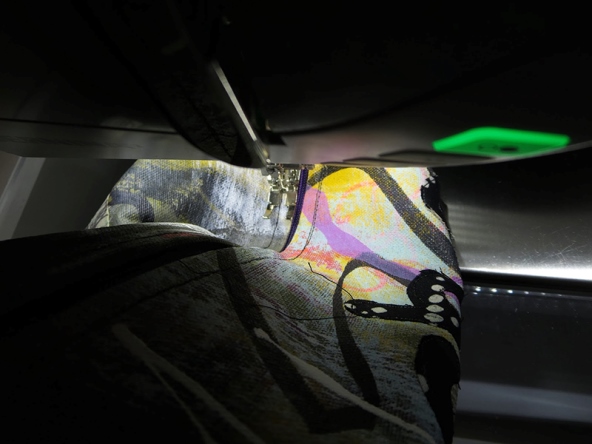
9.) Bring the other end of the canvas to the zipper, right sides together. Since the canvas is quite stiff it is necessary to begin near the center of the second side and stitch outward toward the edge. Turn and repeat toward the opposite edge being careful to avoid catching the center of the bag under the needle. Trim threads.

IMG_3076 800x600_lowresZR942015IMG_3077 800x600_lowresZR94201510.) Open zipper and turn pouch right side out. Using an awl or the ends of a pair of scissors gently push the corners from the inside to fully extent the corners.

Turn pouch inside out11.) At each end of the zipper stitch across the opening from one side to the other to stabilize the ends of the zipper. Repeat on both ends.

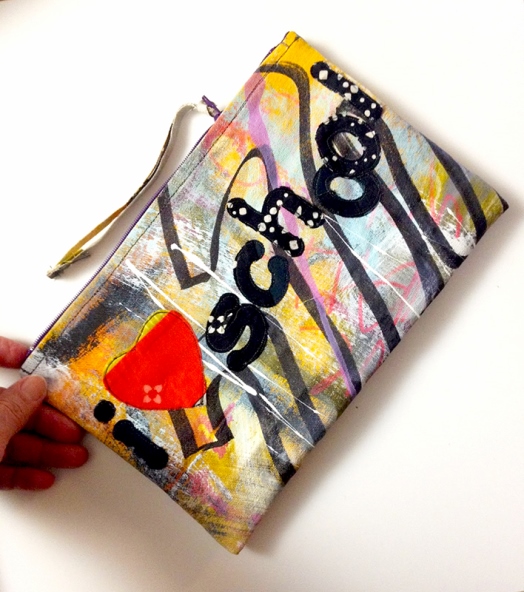
IMG_3078 800x600_lowresZR94201512.) You may wish to add some trim to the zipper pull for a bit more flair! Finished!

A finished back to school zipper pouch

Get the best supplies for all your
fall projects! Click here:

Havel's sewing call to action


Leslie Tucker Jenison headshotSan Antonio artist Leslie Tucker Jenison is inspired by the textural beauty found in the patterns of natural and man-made environments. Leslie loves the tactile experience of working with cloth and paper.  Using dye, paint, and thread, Leslie creates unique imagery on these surfaces.  The juxtaposition of the macro to microscopic world is a recurring theme in her work. Long fascinated by the historical connection of quilts and the people who make them, she serves on the board of the Alliance for American Quilts. Leslie exhibits internationally in galleries and juried exhibitions. Her work  is held in both corporate and private collections. Leslie teaches a variety of quilt and mixed media workshops. She curates exhibitions and teaches as one half of “Dinner At Eight Artists” along with Jamie Fingal.

Posted in Crafting, Fabric, Free Craft Projects, Guest Writers, How To, School, Seasonal | Tagged , , , , , , , | Comments Off on Free Craft Project: Back to School Zipper Pouch

Quilters Are My People

By Kathy Mathews

Are quilters the best? You be the judge!

Havel's sewing scissors and tools

Quilters are a fun, kind and generous group of people, and they can never have too many gadgets! (Photo: Kathy Mathews)

I am a people person. I like being around them, talking to them and eating with them. I think it’s more fun to see a movie with another person so you can exchange a thumbs up or down. I like going to plays with others so we can discuss the meanings and performances. I like eating with other people so I can try their meal have a conversational partner. Think of all the people we spend time with throughout the days and weeks — our family, our coworkers, strangers in public places. And then there’s those we choose to hang around. That last group, those are the quilters and they are my people.

Quilters understand my fabric obsession; in fact, they have one of their own. You can go fabric shopping with them and no one says, “Do you need that?” They know the intense passion that drives us all to buy that fabric because you just never know.

Quilters comprehend on a molecular level my love affair with gadgets. They don’t question why you would have drawers full of them and duplicates. They know that many times you just have to have the exact right tool.

My fellow quilters are wonderful dining companions. Some like appetizers, others love their wine. And all will split a dessert with you, or even order one of their own! There may be some quilters who are in the, “I’ll only have a half a salad and water club,” but I haven’t met them.

Quilters don’t bat an eye about driving long distances to see quilts. The more quilts, the more miles they are willing to go. And if the quilts are particularly exquisite, road trip! If there are famous quilters or quilters you have only met online, the distances almost don’t even matter.

Social media quilters are really my people. I exchange messages, emails, tweets and Instagram pictures with fellow quilters. I talk to them on my blog, my Facebook page and anywhere else quilters go to communicate and talk quilt. Advice on a quilt, virtual hugs and fabric tips are just a click away.

Quilters are also funny. They get the corny jokes I make and share theirs with me. We’re dealing with fabric and thread here, it’s not brain surgery. If you can’t have fun while sewing, when can you? We quilters can laugh at ourselves, our quirks and the wonder that is the quilting world.

In life we need a community, a place where you feel understood and accepted. I have my family and I had my profession, but now I have that vast community of fabric loving, thready folks who quilt. We organically understand what makes the others tick! (Or should I say stitch?)

I have probably expanded my quilting network to 3,000 – 4,000 people and they are the kindest people on this earth. I have never had any troll comments from quilters. I have contributed blocks to quilts that other quilters are making for a quilter in need. One whom they have never met — that is the kind of people you find in quilting.

Not only are quilters kind, but they are generous as well. I just got two rows of size M bobbins a fellow quilter sent me in the mail. She didn’t need them, so she asked if I did. I have also received handmade pin cushions and special outfits for the babies in my family that never got to go home. Quilters have very large hearts.

And that’s just what quilters have sent me. After every disaster, in hospitals across the country and for veterans of every war, there are quilters donating love in the form of quilts they have made. How could anyone not love quilters?

I love quilters! I love their kindness and generosity. I adore their acceptance of me and super fun sense of humor. They share my obsessions and form a constant chatter of quilt love on the Internet. These quilters are the best people around.

Hold on, I forgot to mention quilter’s love of chocolate and their desire to share it. Sigh of contentment.

That decides it — quilters are not only my people, they are perfect!

Find the best deals on the best tools! Shop
Havel’s Sewing today!

Havel's sewing call to action


About Kathy Mathews:

Kathy Mathews headshotKathy Mathews has been sewing for 49 years and quilting for 31, which is odd as she’s so young. She taught Spanish and French full-time for 35 years in Illinois Public schools and then continued at the college level until 2014. During that time, quilting and sewing allowed her a creative outlet and kept her sane. In addition to needle arts she is an avid reader, swimmer, traveler and yoga newbie.  She blogs mainly about quilting at www.ChicagoNow.com. She lives in the Chicago area with her husband, is the mother of two grown daughters and grandmother to the cutest two year old girl in all the land. You can email her at quiltingsewingcreating@gmail.com.


Posted in Fabric, Guest Writers, Quilting | Tagged , , , , | Comments Off on Quilters Are My People

Free Project: Make a Messenger Bag & iPad Case

Messenger Bag & iPad Case by Liz Kettle
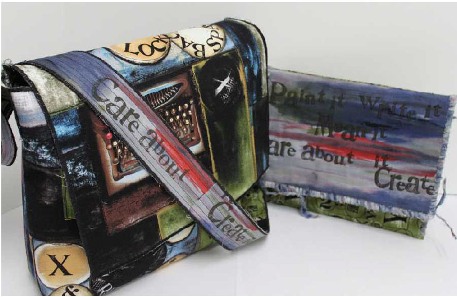
photo 1(a)

Nothing says back to school like a brand new book bag! Times have changed though, and in addition to the traditional bag, we need an iPad or Tablet case too. These simple and quick projects will have you ready for back to school in no time flat so you can enjoy the last remaining moments of summer.

Supplies:

Multi-Purpose cloth or canvas
Fabrics of choice
Batting (optional) choose a very flat batting such as Thermore
Misty Fuse or other fusible web
Rotary cutter with traditional and skip blades
Embroidery scissors
Hand Needles: 22 or 18 chenille or tapestry or a yarn darner
Machine Needles: size 90 sharp

A note about Multi-purpose cloth: Multi-Purpose Cloth or MPC is a wonderful non-woven canvas that is perfect for bags, totes, home décor and much more. It holds its shape better than canvas and is a dream to stitch through. MPC can also be painted with any type of fabric paint and you can skip the fabric layer all together.i

iPad or Tablet Case
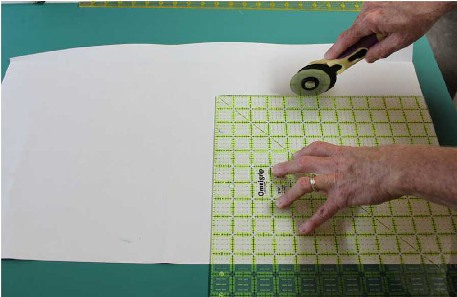
photo 2(a)

Using a rotary cutter, ruler and cutting mat, cut a piece of Multi Purpose Cloth 10 1/2″ x 24″. I prefer the larger 60mm rotary cutter for basic cutting because it cuts through everything so easily and it feels like I am done faster with the bigger blade.
Choose your fabrics. The case is made from just one piece of MPC so if you have a directional print like I do, you may want to cut it and piece it, to ensure the print is the proper direction when
the flap is folded over.
If you don’t have a directional print, simply cut your fabric 10 1/2″ x 24″.
If you do have a directional print, you will want to cut the main piece 10 1/2″ x 17 1/4″ and the piece that is for the front flap 10 1/2″ x 7 1/4″.
Piece the two fabrics together to create a piece that is 10 1/2″ x 24″.
Batting (optional): You may want to skip it for your first case. If you want to add a flat
batting, cut it 10 1/2″ x 24″.
Layer the MPC with a thin piece of batting and your fabric piece. Pin or fuse the layers together with Misty Fuse. I like Misty Fuse because it doesn’t add a lot of weight to the project and stiffen it, and I know the layers won’t shift while I am quilting it.
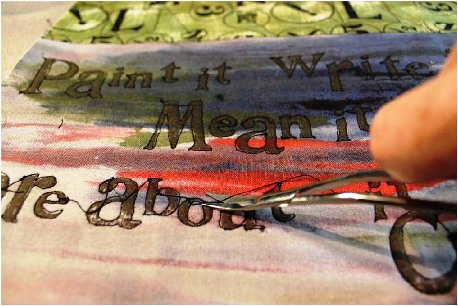
photo 3(a)

Choose some simple quilting for the surface. I stitched diagonal lines on the lower portion, and stitched around the text printed on the fabric on the flap portion. I use my indispensable 5″ double curved embroidery scissors to snip the threads between each of the layers. I don’t know how I lived without these scissors! They are perfect for snipping threads at the machine. The holes are faced up so they are really fast to pick up and the sharp points easily slide under the tightest thread snarl. Best of all, the gentle curve prevents me from accidently snipping my fabric. When I can’t find my seam ripper (a fairly common occurrence) I even use these to easily un-sew.
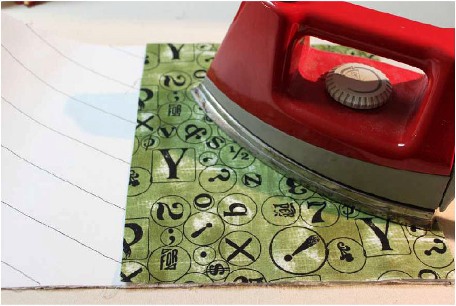
photo 4(a)

If you desire, you can also fuse a layer of fabric on the inside of the flap,
but it is perfectly fine to leave the MPC bare on the inside of the case.
If you do decide to line the flap with fabric, cut fabric and Misty Fuse 10 1/2″ x 9″.
Do not add batting to this layer. Double check to make sure you are fusing on to the back of the flap.
If you would like to create a small cut-out in the front panel of the case to make it easier to slip things in and out, do so now. I made a template to make the process easier because I make a lot of these bags. Cut a piece of card stock 10 1/2″ x 3″. Draw a line 1 1/2″ from one edge. Mark in from each edge 1 1/2″ and draw a 30 degree angle to join the lines. Cut out the resulting piece from your template. This is only a guideline you can make your cut out, any size you like, or even curved!
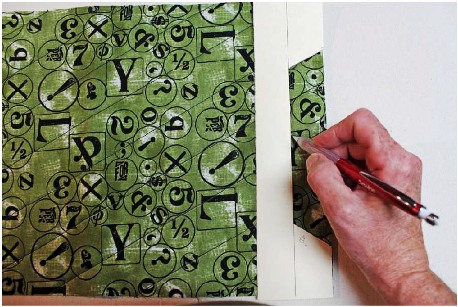
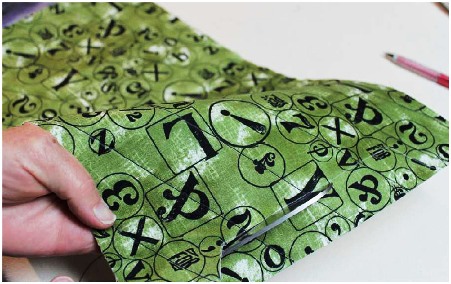
photo 5(a)

photo 6(a)

Mark the opening with a chalk pencil and then cut out with shears.
The micro serrated Havel’s shears help to cut nice sharp turns because
they hold on to the fabric while you turn it.
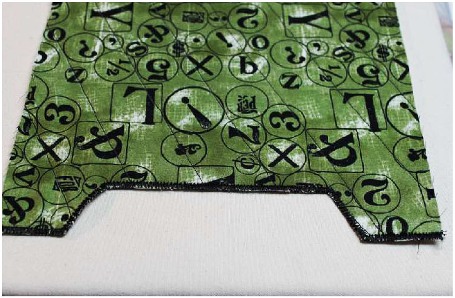
photo 7(a)

To finish this edge use a zigzag stitch.
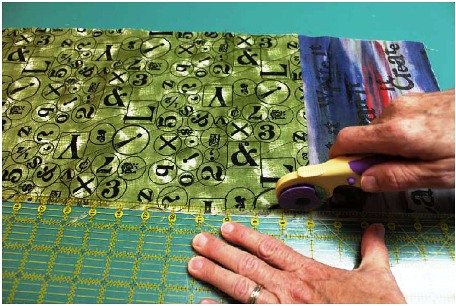
photo 8(a)

Load the skip cutting blade into your rotary cutter. Cut along the length of the fabric 1/4″ from each long edge and the front edge. The skip blade will make tiny slits along the edge but not cut off the fabric. Press hard to ensure you go through all layers of fabric. You can not re-cut if you don’t go through all layers. For this reason I suggest that you practice on a scrap of MPC layered with batting and fabric to get the feel of how hard you have to press to go through all the layers.
Next we will lace up the sides of the case. I used ripped strips of fabric for my case but I have also used ribbon, rayon seam tape and thick yarn. The ribbon and seam tape give the most polished look and the ripped fabric the most casual look. Ripped fabric strips, ribbon or seam tape should be between 3/8″ and 1/2″.
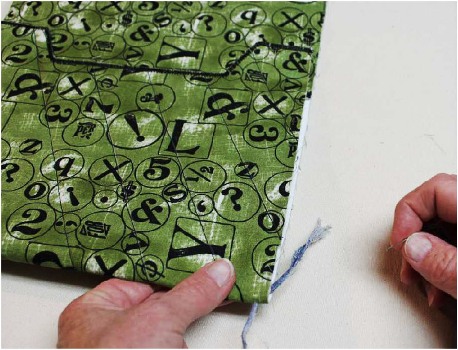
photo 9(a)

Fold the bottom half of the case up 8 1/2″. Thread your ribbon or fabric strips onto your large needle. Begin at the very bottom of the case and insert your needle from the inside of the case to bring it out the lowest slit created by the skip blade. Leave a tail, you will tuck this inside as you stitch to
encase it in the seam.
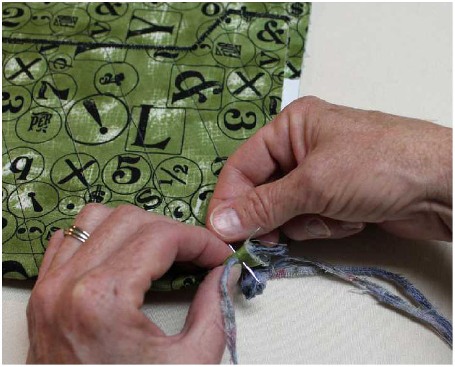
photo 10(a)

Use a simple whip stitch all the way up the side of the case, around the flap edge and down the other side. Simply thread the needle through the slits along the edge. This photo shows me stitching top to bottom but you may find bottom to top easier. When you need to add another strip of fabric simply tie the two pieces in a knot and continue stitching. If you like a neater edge you can work the tails into the seam with the large eye needle or a bodkin.
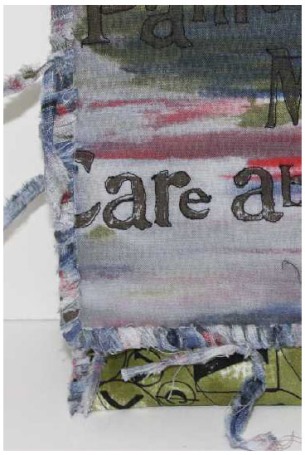
photo 11(a)

Messenger Bag

Cut a piece of Multi Purpose Cloth 15″ wide by 37″ long.
Cut a piece of Multi Purpose Cloth 2″ wide by 48″ long for the strap.
Cut Misty Fuse to cover both sides of the MPC main piece and the strap.
I did not use batting in this piece because of the bulk it would add to the side seams.
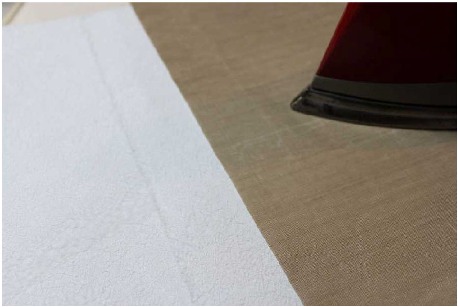
photo 12(a)

With this larger piece it is easier to pre-fuse the Misty Fuse to the MPC before fusing down the fabric. Place the Misty Fuse on the bag fabric, cover with a Teflon pressing sheet and heat with an iron. This is especially helpful if you have a directional print as I did. Once again the bag is made from one piece of MPC so I cut the fabrics into three pieces to keep the text oriented correctly.
If your print is not directional, cut your fabric 15″ wide by 37″ long.
If your print is directional, cut three pieces:
The flap will be 15″ wide by 10 1/2″ long.
The two remaining pieces will be 15″ wide by 13″ long
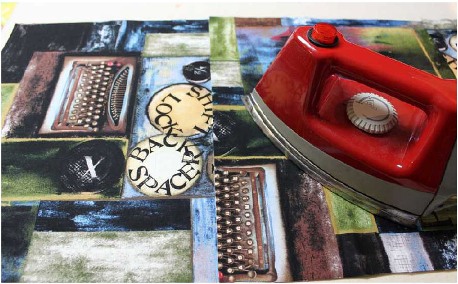
photo 13(a)

Place the fabrics on the pre-fused Multi-Purpose Cloth and fuse with a hot iron.
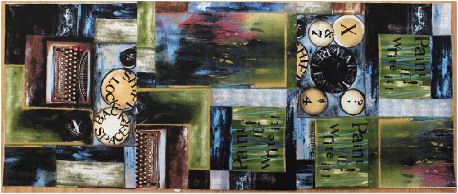
photo 14(a)

In this photo you can see the placement of the directional prints.
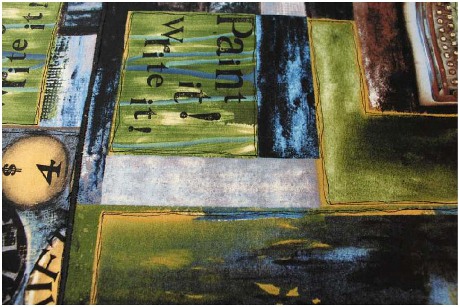
photo 15(a)

Quilt the piece by stitching as desired. I simply outlined some of the images
using an organic free motion stitch.
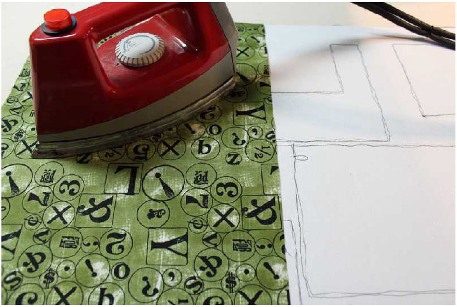
photo 16(a)

If desired, use Misty Fuse to fuse fabrics to the back of the Multi-Purpose Cloth.
You can cover the entire back (lining of the bag) or just the flap area.
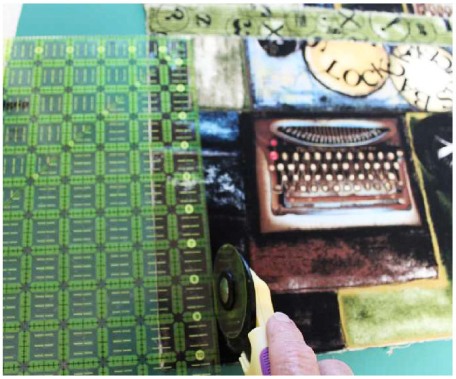
photo 17(a)

Trim the front flap by cutting a 10 1/4″ x 1 1/2″ strip off of both sides of the flap section.
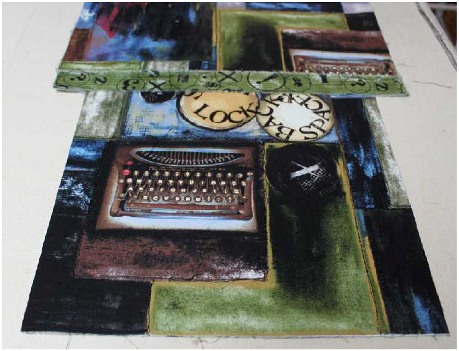
photo 18(a)

photo 19(a)

Finish the flap edges and the other edge with a satin stitch.
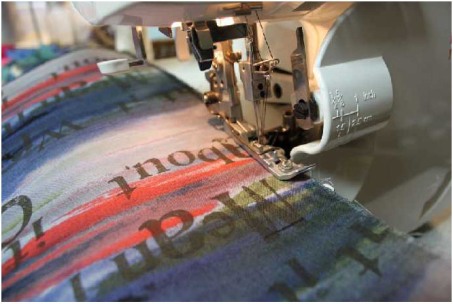
photo 20(a)

With right sides facing, fold the bottom half of the bag up 13″. The end of the bag should be right at the edge of the flap cut outs. Pin the edges. Stitch a 1/4″ seam along each edge. I used a serger for a strong seam. If you don’t have a serger simply stitch a straight stitch and then finish the
inside edge with a zigzag stitch.
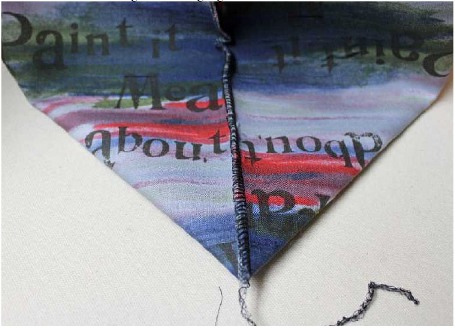
photo 21(a)

To create the bottom base of the bag fold the bag as shown
with the seam in the middle of the triangle.
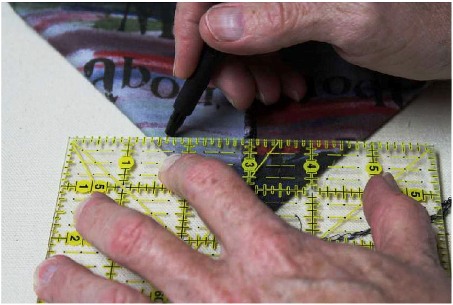
photo 22(a)

Mark a stitch line 1 3/4″ from the point of the triangle.
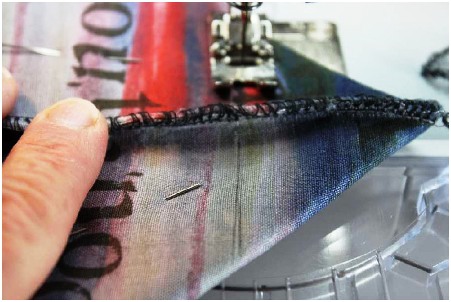
photo 23(a)

Stitch across this line. Then trim off the remaining triangle leaving a 1/4″ edge.
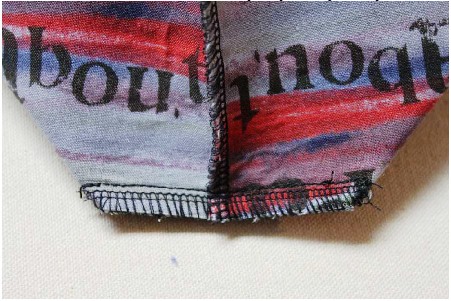
photo 24(a)

Serge the edge or zigzag stitch. Turn your bag right side out and set aside.
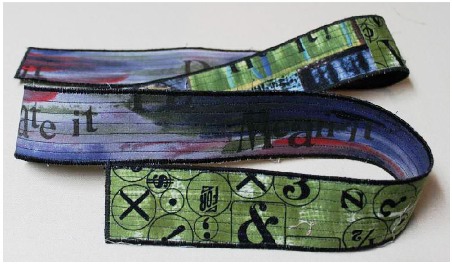
photo 25(a)

To make the strap, fuse fabric to both sides of the Multi-Purpose Cloth. Stitch along the length in straight lines or as desired. Finish the edges with a satin stitch.
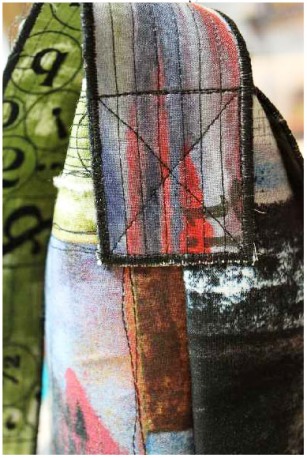
photo 26(a)

Center the strap on the side of the bag 2″ from the top edge of the bag.
Stitch around the edges and across the center as shown.
You can find Multi Purpose Cloth, and Havel’s scissors
and skip blades at these on-line stores:
www.ArtisticArtifacts.com
www.BlueTwigStudio.com
Fabrics used in this project are available at Artistic Artifacts.

Rotary cutter call to action


Liz Kettle

Liz Kettle is a mixed media and textile artist living in Colorado. She is co-author of two books, Fabric Embellishing: The Basics and Beyond, and Threads: The Basics and Beyond. Liz loves teaching and sharing the joy of making the things in her articles, classes and at her fabulous retreat, Textile Evolution. Visit her blog and website, www.TextileEvolution.com

For a printable PDF version of Liz’s Messenger Bag and IPad Case, click here.

Posted in Embroidery, Embroidery Scissors, Fabric, Free Quilt Projects, Fun Stuff, Guest Writers, Liz Kettle, Quilting, School, Tutorials, Uncategorized | Tagged , , , , , , , , , , , , , , | 6 Comments

The Sounds of Sewing: Creating Music with Your Sewing Supplies

By Kathy Mathews

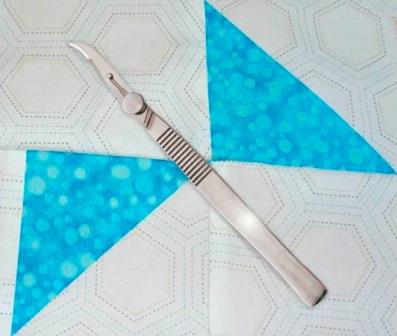
A seam ripper from Havel's SewingImagine seeing your sewing studio with your eyes closed. Yes, that’s right, close your eyes and think about all the sounds of sewing that occur throughout the day in your own personal creative workspace. What sounds do you hear?

A snap as the light switch goes on, followed by more snaps from various machines and gizmos coming to life. A hiss from the iron as it heats up, getting the steam ready. Some studios lack this sound as a dry iron is preferred.

A buzzzzz as bobbins are filled. Different machines mean different bobbins. Some cruise while others are noisy sports cars. A click as the bobbins are snapped into their respective chambers. Sometimes we hear the gentle swish of a machine being cleaned with a brush or the light gurgle of oil cursing into the inner workings.

Scritching and scratching is heard as a pencil sketches on paper. At times, crunching and thuds of paper on the floor reverberate when designs are rejected. And then an awww — it’s the sound of satisfaction, of an idea transferred from a thought to paper and now to fabric.

The room is ready, the molecules of sound have combined to let us know that important and creative work will happen here today.

The slight swish or perhaps a louder thump as fabric is unfurled, smoothed and admired. Too gorgeous to cut? Don’t be crazy — it’s made to be cut! The snipping of scissors and the soft crunch of a blade lets us know that pieces are taking shape to be joined to others. A nearly silent whoosh of pin into fabric — you have to listen carefully for this step. And maybe open those eyes to avoid stepping on one!

Now the best sound of all, the whirring of the machine connecting fabric with thread. Sometimes it’s high-pitched and whining, other times languid and constant. It’s the sound of fabric taking on a shape, of a quilt being born.

Intermixed are pauses, breaks in sound and activity. Feet padding out and coming back. The clink of ice in a glass is the newest sound that allows for thoughts as well as refreshment. The clanging in my head, the clash of ideas, the flashing of inspiration cannot be heard, but my breathing reflects it. Can brain activity be perceived or only the product of it?

Purring, mewing, panting or chewing can occasionally be perceived as well-loved visitors paddle into the room. After much repetition of key sounds there is sometimes a deep sigh of contentment as all the sounds combine to create a pleasing whole. Other times there is the crash of a project rejected, the voice of irritation, the throwing of an innocent tool. Don’t worry, this storm shall pass. It may take the ticking of time or the savoring sound of chocolate being devoured, but it passes.
The ribbit of ripping may fill the studio with a bit of heavy breathing. But soon the soothing whirring of connection is heard again. Smiles and cries of exultation will eventually fill the air. Creation, completion and satisfaction achieved. Crescendo and done.

What are the sounds of sewing? The concert of a quilt? It’s a snapping, hissing, buzzing cacophony of machines and tools. It’s the combination of scritching, scratching, crunching and thudding followed by some snipping, crunching, whooshing and whirring. Then comes the clicking, beeping, whirling and tapping. Clinking and clanking are muffled by purring, mewing, panting or chewing. Sighs! Crash! Tick, tock and rip.

Hurray! The sounds of sewing always culminate into the touchable, visible and enjoyable – a finished quilt. Next time you sew, try for a minute to close your eyes and listen. Just not when you’re near the pins!


Save on the best fabric scissors
from Havel’s Sewing!

Havel's Sewing quilting, applique and embroidery scissors


About Kathy Mathews:

Kathy Mathews headshotKathy Mathews has been sewing for 49 years and quilting for 31, which is odd as she’s so young. She taught Spanish and French full-time for 35 years in Illinois Public Schools and then continued at the college level until 2014. During that time, quilting and sewing allowed her a creative outlet and kept her sane. In addition to needle arts she is an avid reader, swimmer, traveler and yoga newbie. She blogs mainly about quilting at ChicagoNow.com. She lives in the Chicago area with her husband, is the mother of two grown daughters and grandmother to the cutest 2-year-old girl in all the land. You can email her at quiltingsewingcreating@gmail.com.


Posted in Crafting, Guest Writers, Quilting Tools, Sewing Supplies | Tagged , , , , , | Comments Off on The Sounds of Sewing: Creating Music with Your Sewing Supplies

DIY Craft Projects: Patriotic Flags for Your Summer Celebrations

By Jamie Fingal

Easy, fun and whimsical flags —
No batting, no binding, let’s get started!

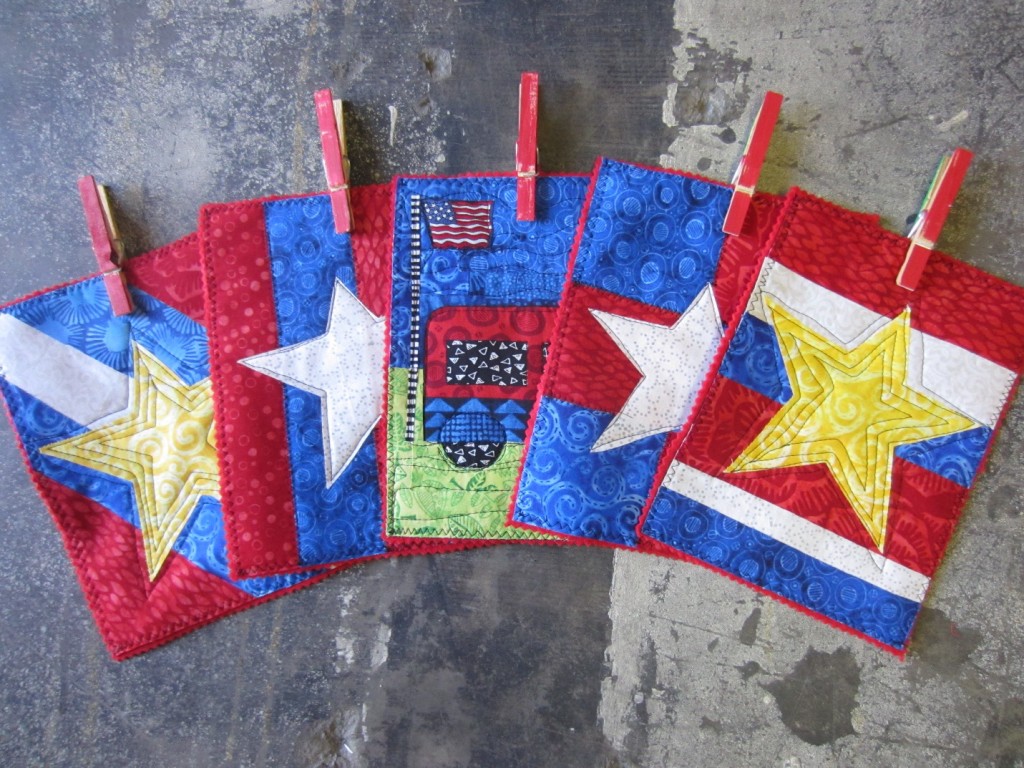
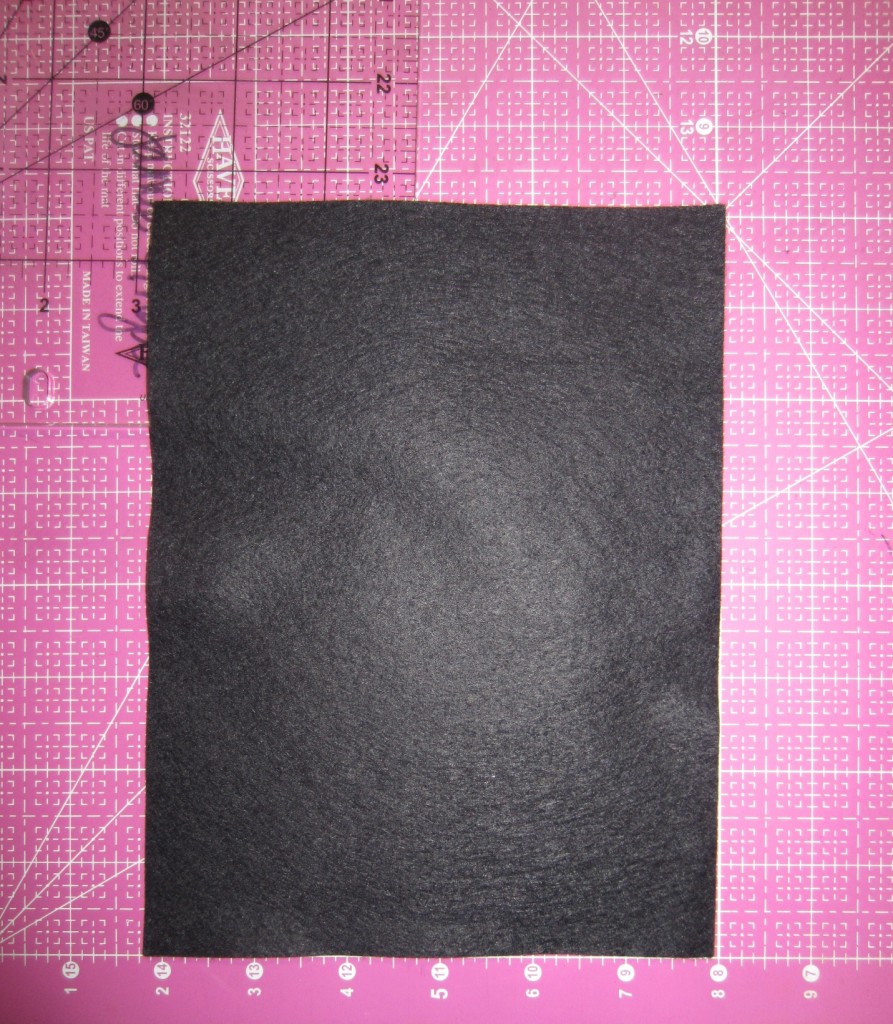
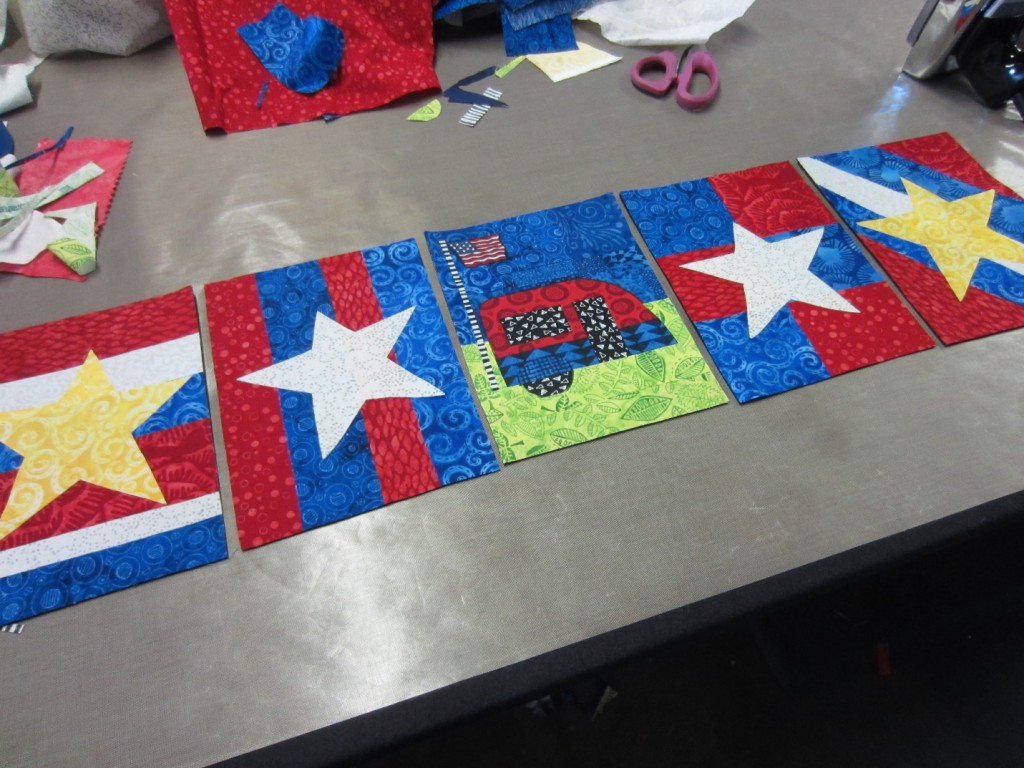
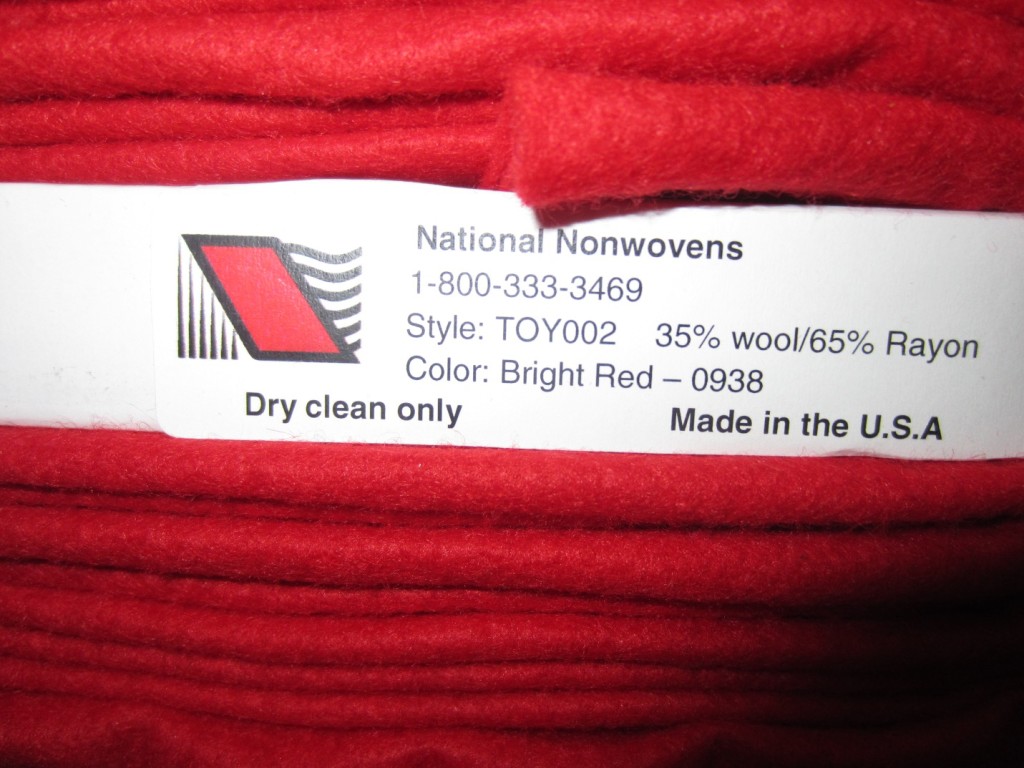
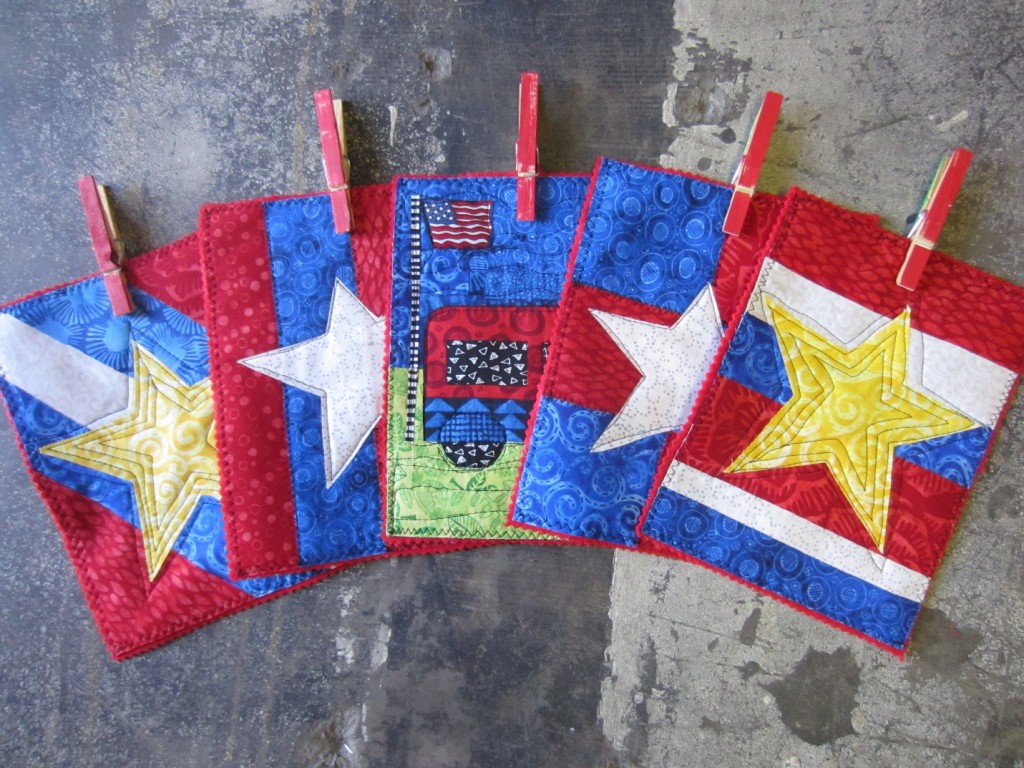
Summer flags for DIY craft projectsFive easy-to-make flags, measuring 6 x 8 inches. Black wool blended felt for the foundation and red wool blended felt for the back. Probably about a 1/4 of a yard of each, making sure that you have at least eight inches of fabric. You can get all five flags in a row with this cut. National Nonwovens brand #TOY002.

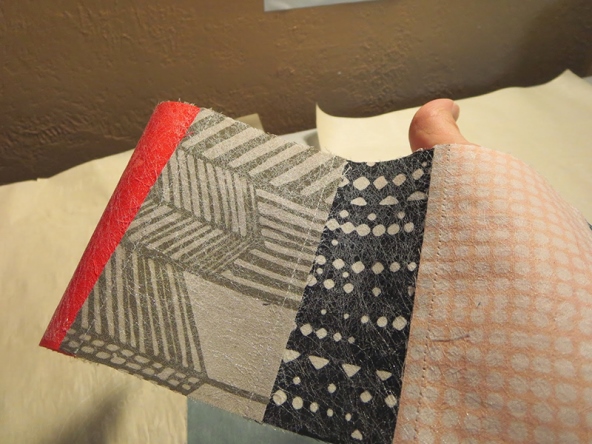
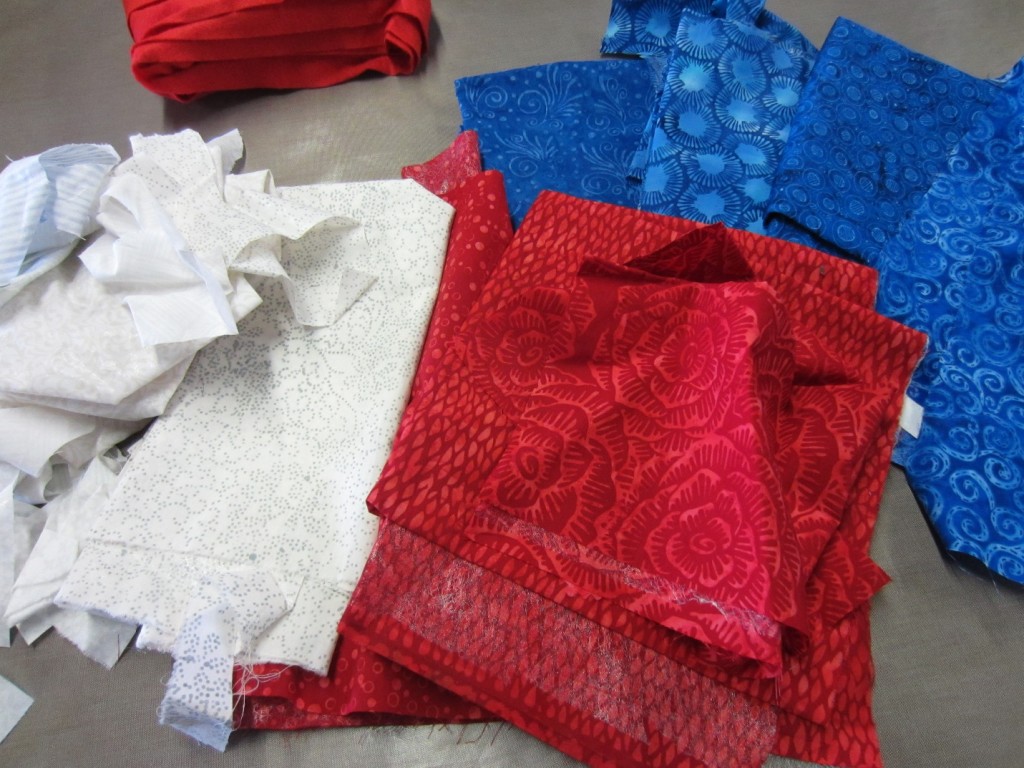
Fabric to be used for summer DIY craft projectsThese are scraps from another project, already fused with Mistyfuse. I added a small amount of yellow for two stars, some green, an American flag and a trailer. If you need to see a tutorial about how to use Mistyfuse, there are several other projects on this blog to help you. Just search my name.

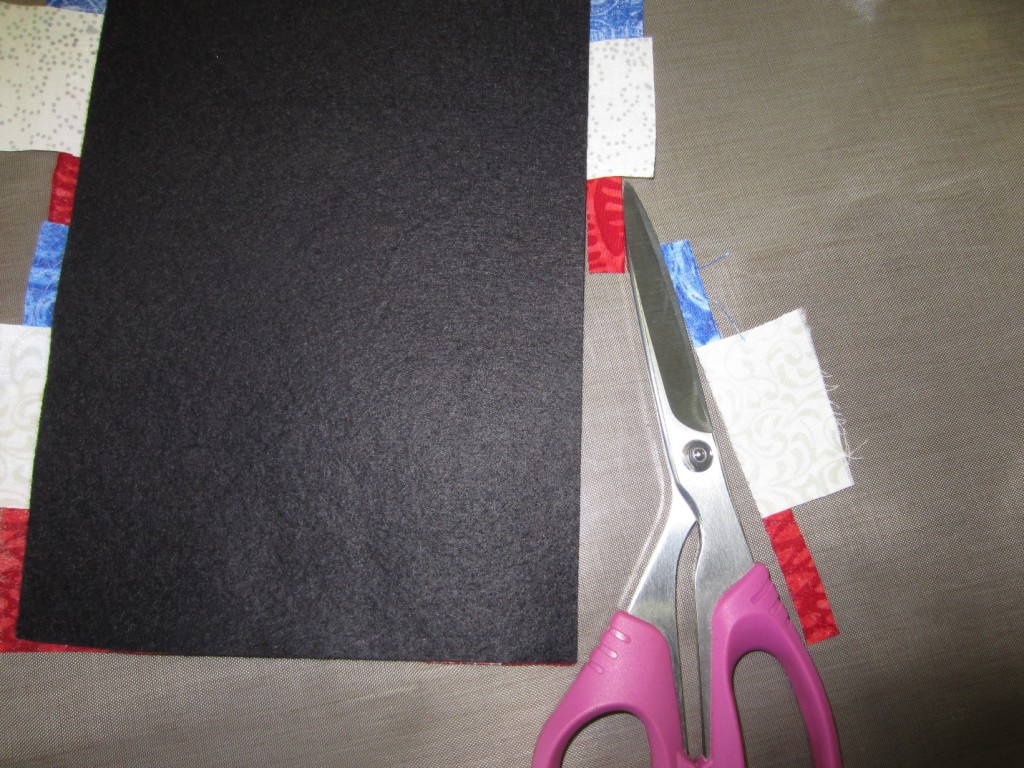
Foundation for summer flagsCut five each 6 x 8 inches of the black wool blended felt. This is what you will use for your foundation.

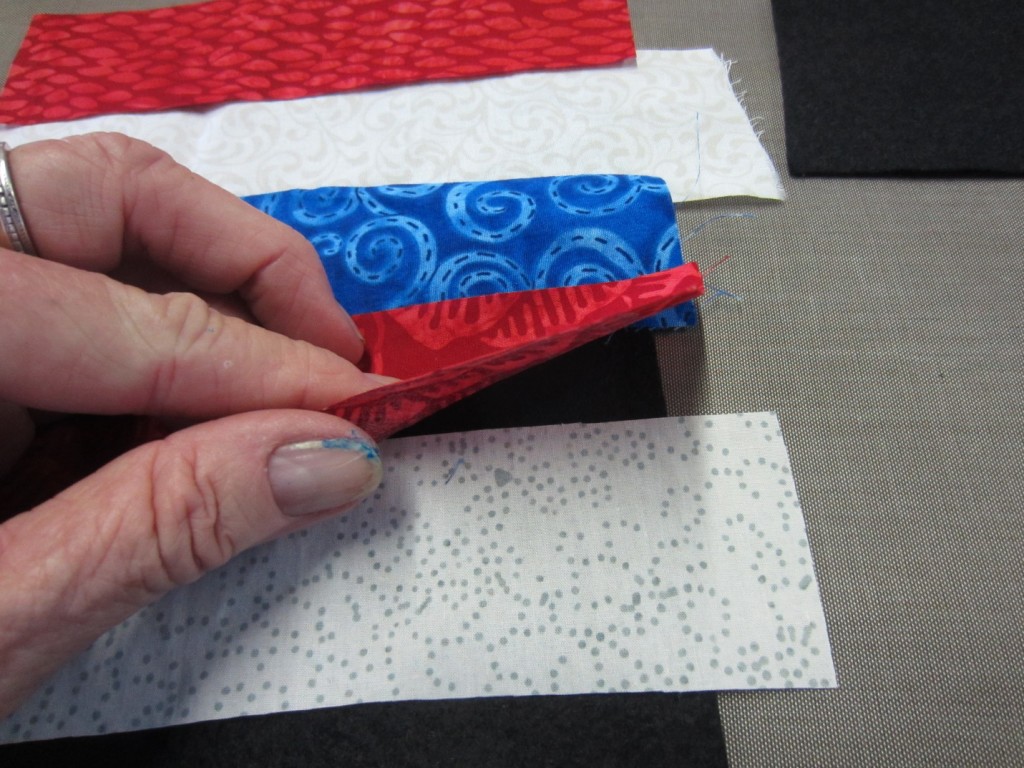
Strips of fabric being layered for summer flag projectI am layering the strips, cut with scissors (you can cut them with a rotary cutter if you prefer). I wanted them to be a bit wonky because I like that look, but you can make them straighter if you want. Each strip overlaps onto the next strip, so you have a really good bond with the Mistyfuse and the foundation.

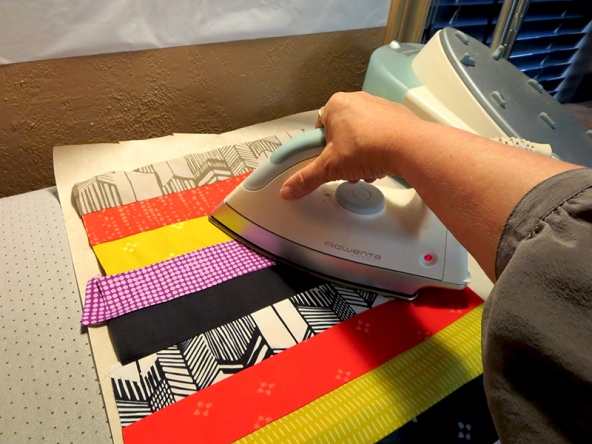
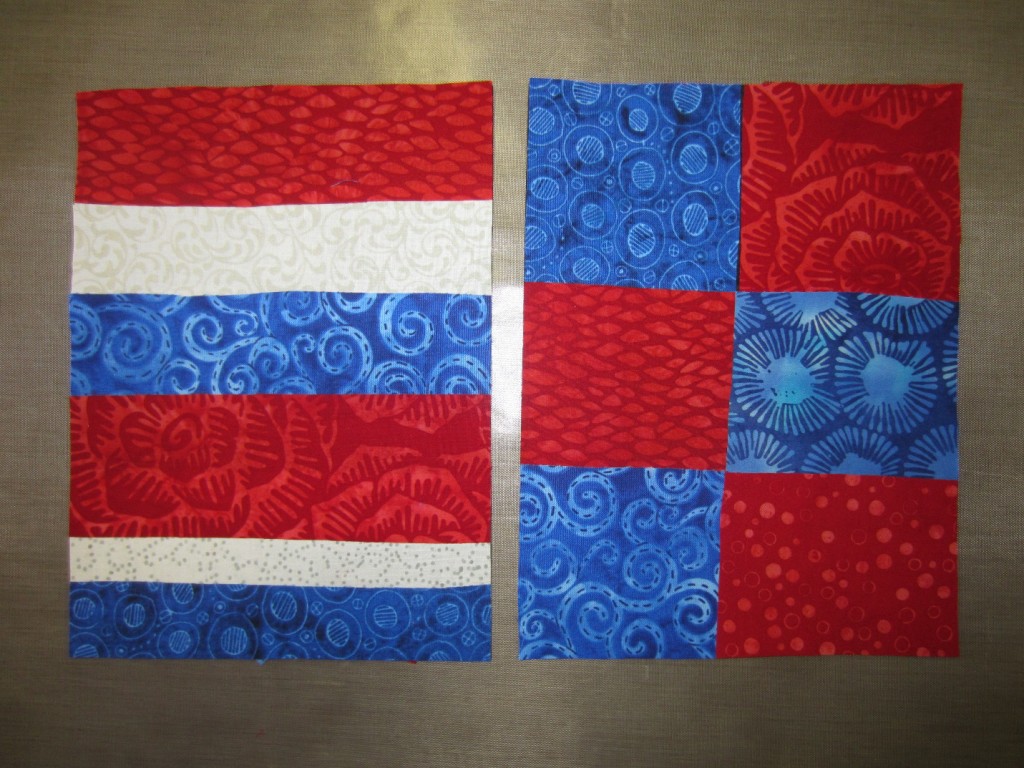
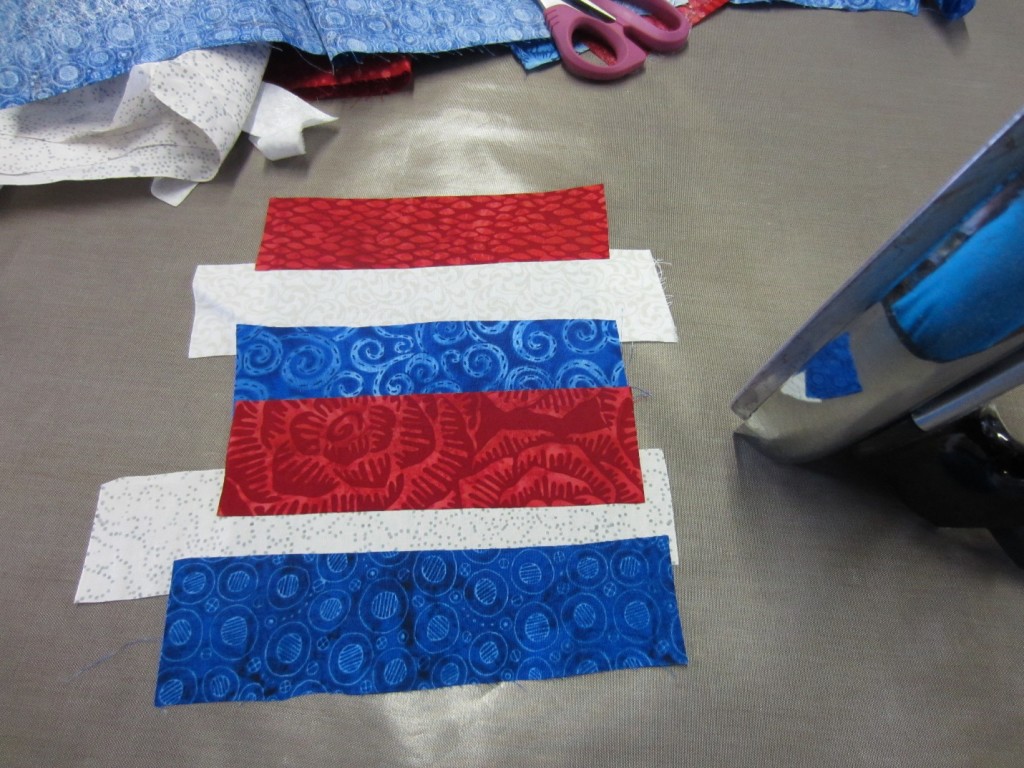
Fabric strips used for a summer flag craft projectJust layer the strips and iron into place with a hot dry iron on the cotton setting. You may want to protect the surface of your table with either parchment paper or a Mistyfuse Goddess Sheet. Then you can just peel it off. Here are my wonky stripes.

Cutting from the back of the flagFlip the flag over and cut from the back, using the felt as your guide with a pair of scissors. You will do this for every flag you make.

Background of squares for summer flag projectWe just made the background for the one on the left, now make a background of squares. You can see that my squares are very wonky, so I am achieving the look that I originally envisioned. Overlap the squares, and iron into place and cut from the back.

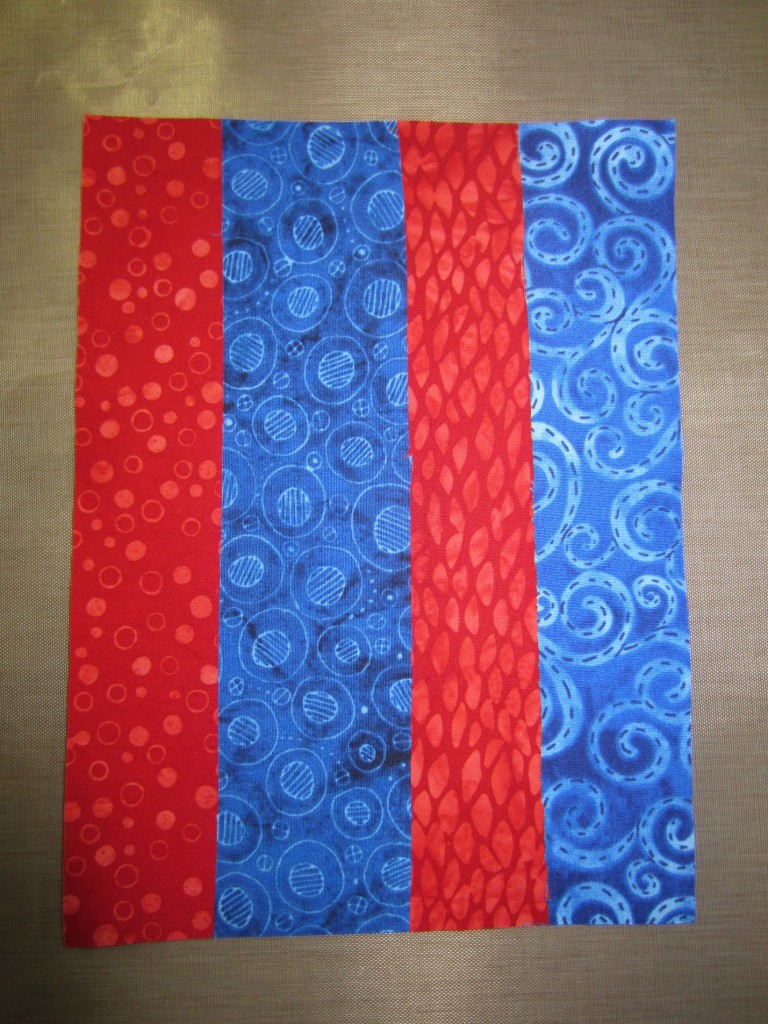
Longer strips for summer DIY craft projectsLong strips. Overlapping, ironed and trimmed.

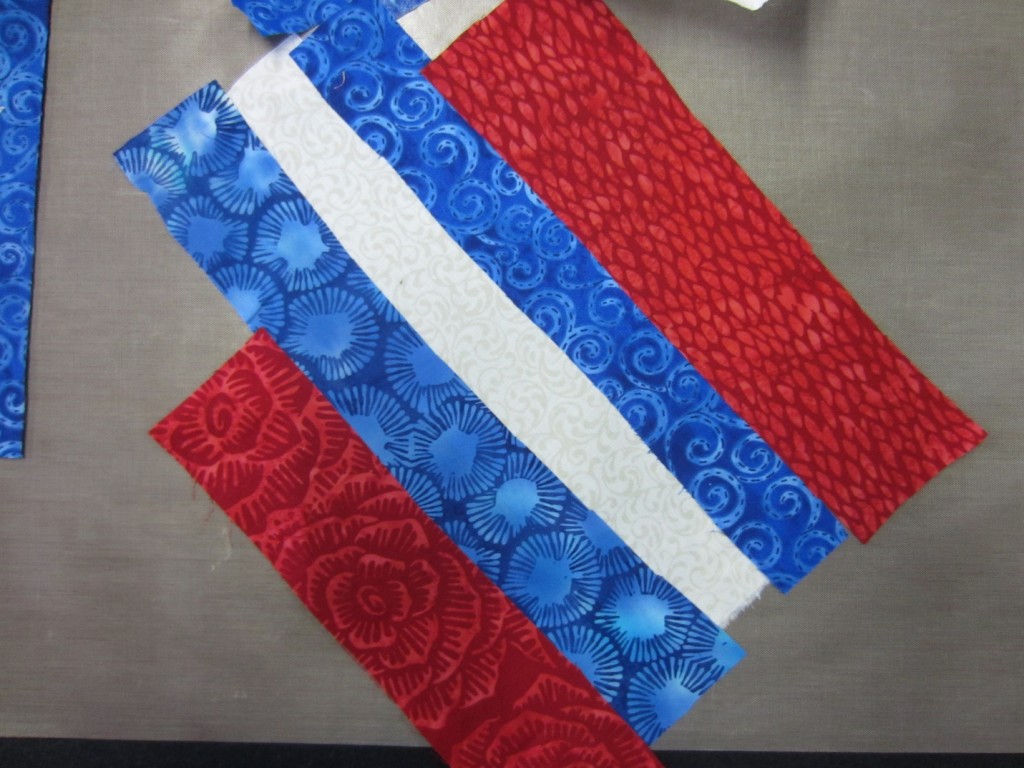
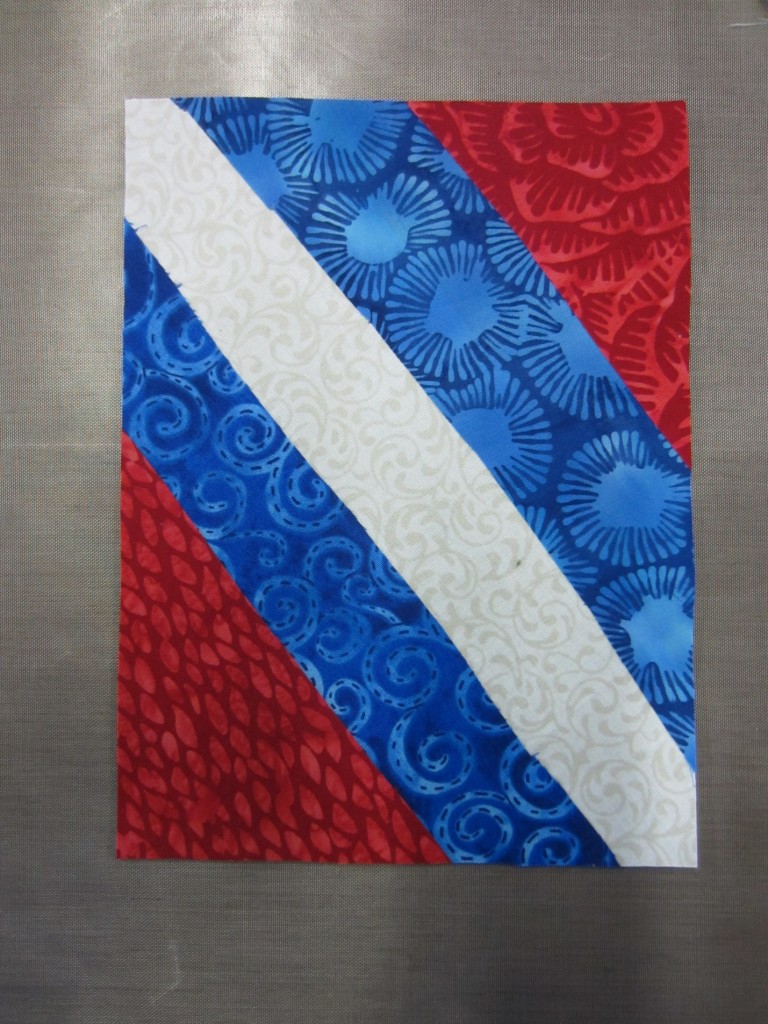
Fabric strips for a summer flagThe next flag has diagonal lines, which is fun. Just lay the strips across the felt at an angle. Press into place and cut from the back.

Summer flag halfway finishedAre we having fun yet?

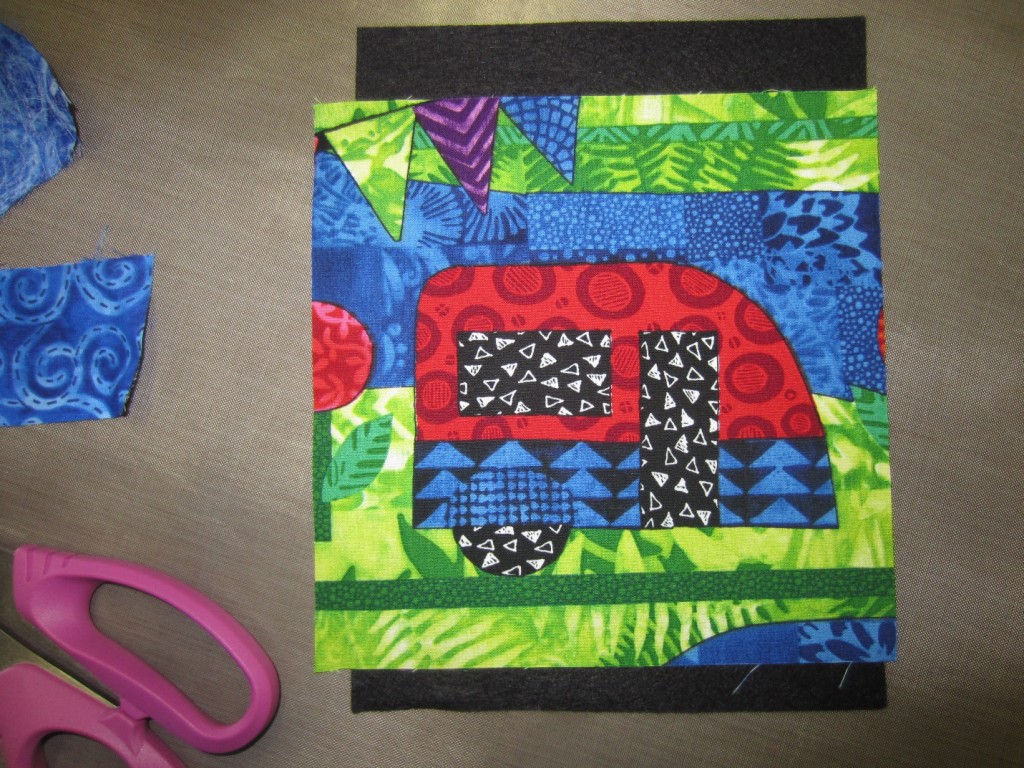
Bonus fabric for a summer flag quiltThe bonus piece. You can use any fabric that has a house on it or a trailer, or a tent — some sort of dwelling. Or you can make it yourself. I am using a trailer from my fabric line “Home is Where Your Story Begins.”

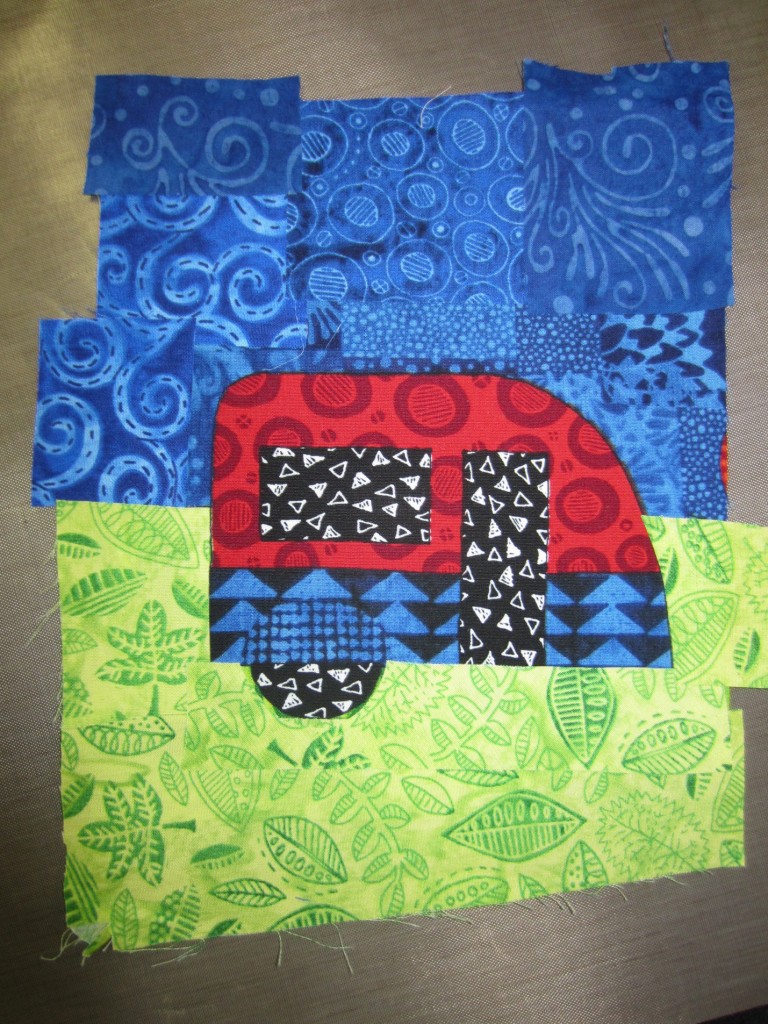
Fabric to cut and incorporate into flagI am going to collage this into the design that I need for this project. I added some blue for the sky and green for a consistent landscape.

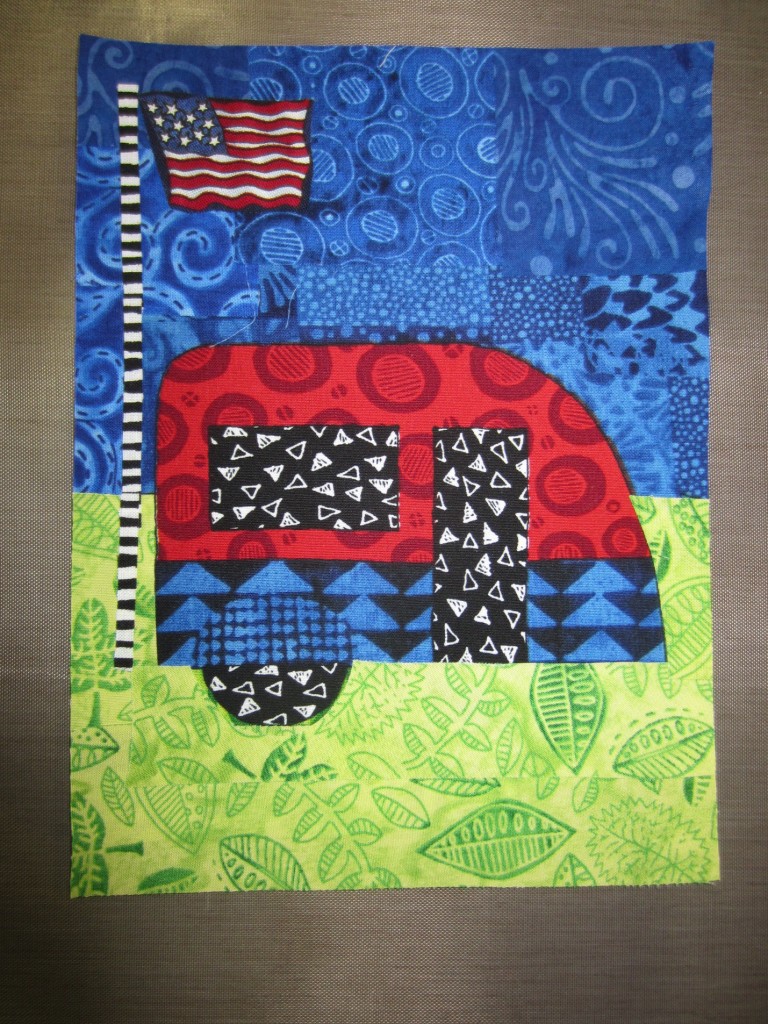
Adding on to summer flagThen I added an American flag on a pole. Trimmed from the back and this one is ready to go!

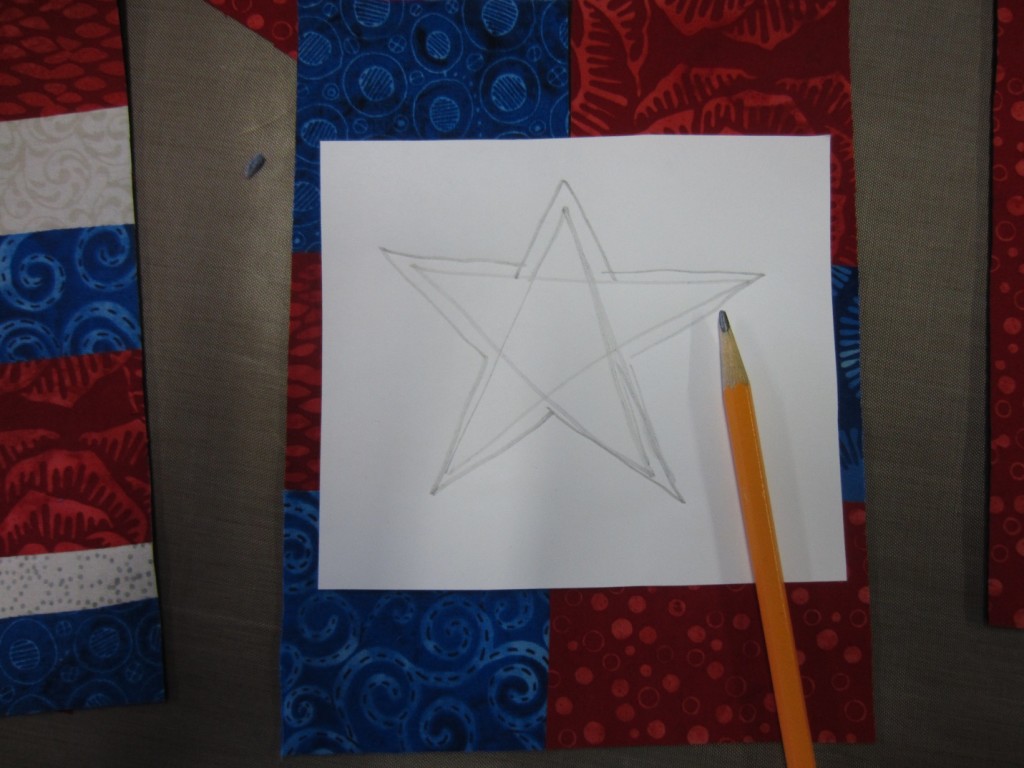
Stars for the flagNow onto making some stars. On a white piece of paper, draw a star — just a basic five point star, you can see how I drew it. I added an outline around it because after laying the paper over the flag I realized that my start was too small.

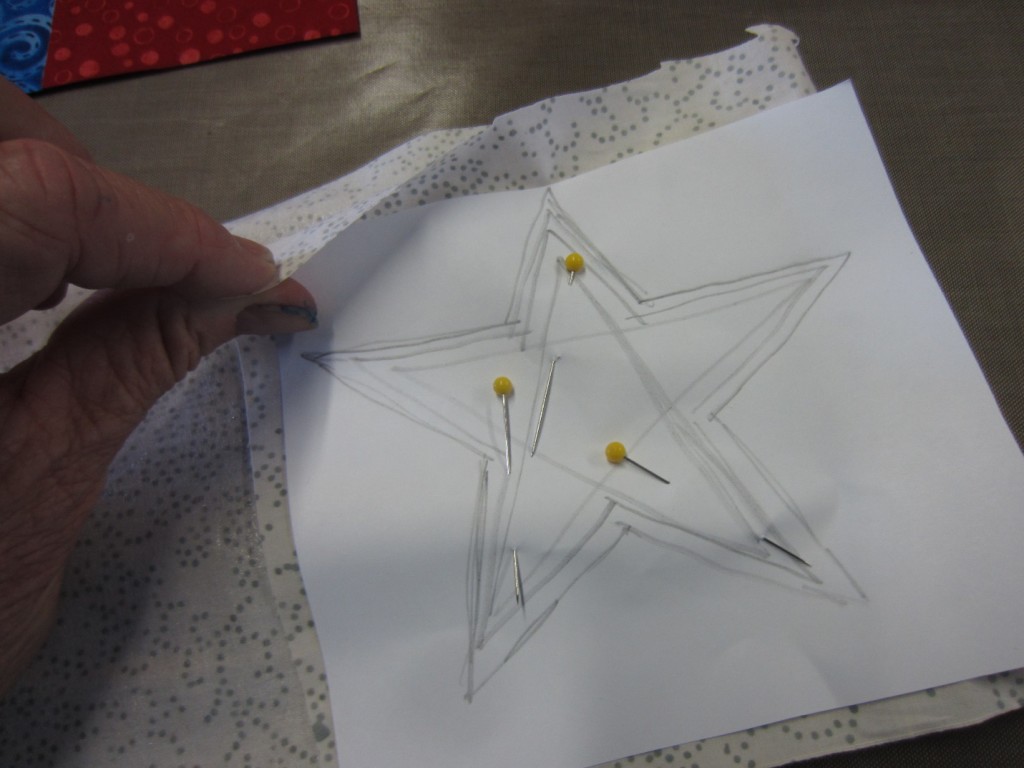
Pinning the star pattern to fabricI put two layers of fabrics together and pinned the pattern to them. Cut them out with a pair of scissors.

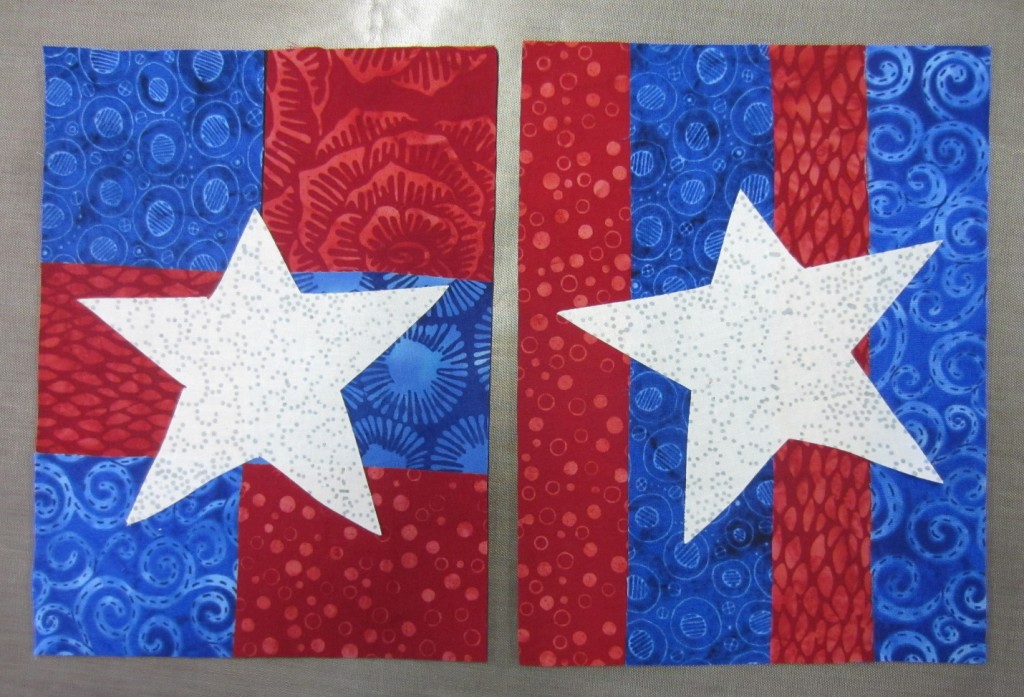
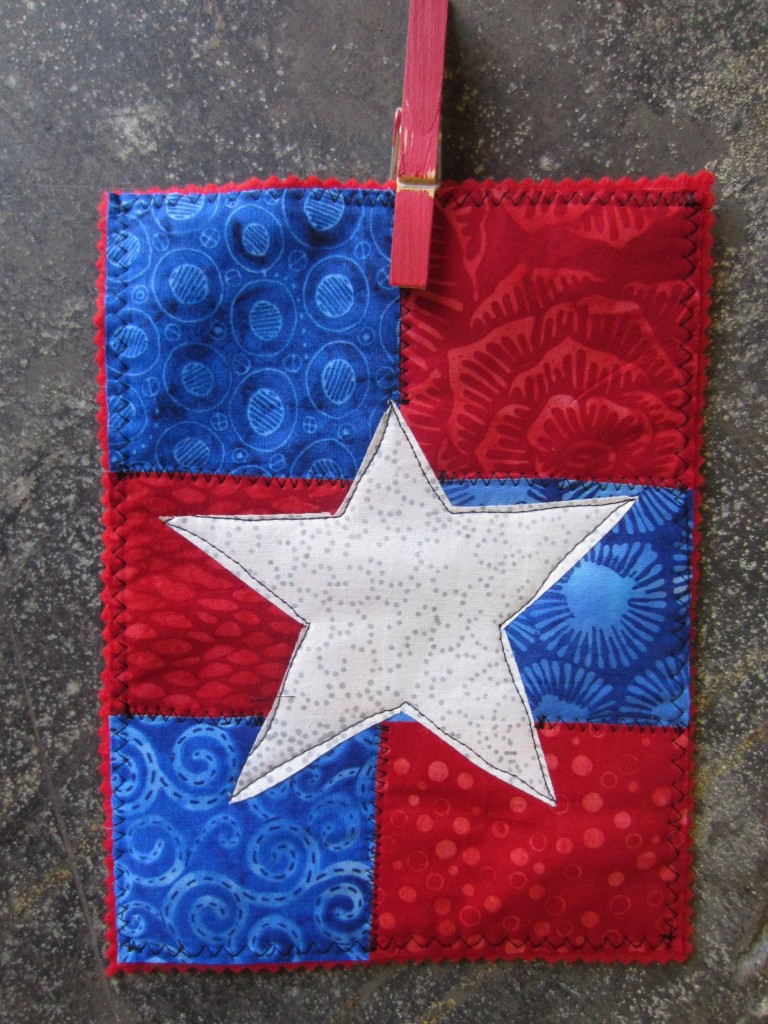
Stars on your flag backgroundsPlace the white stars on the backgrounds of your choice.

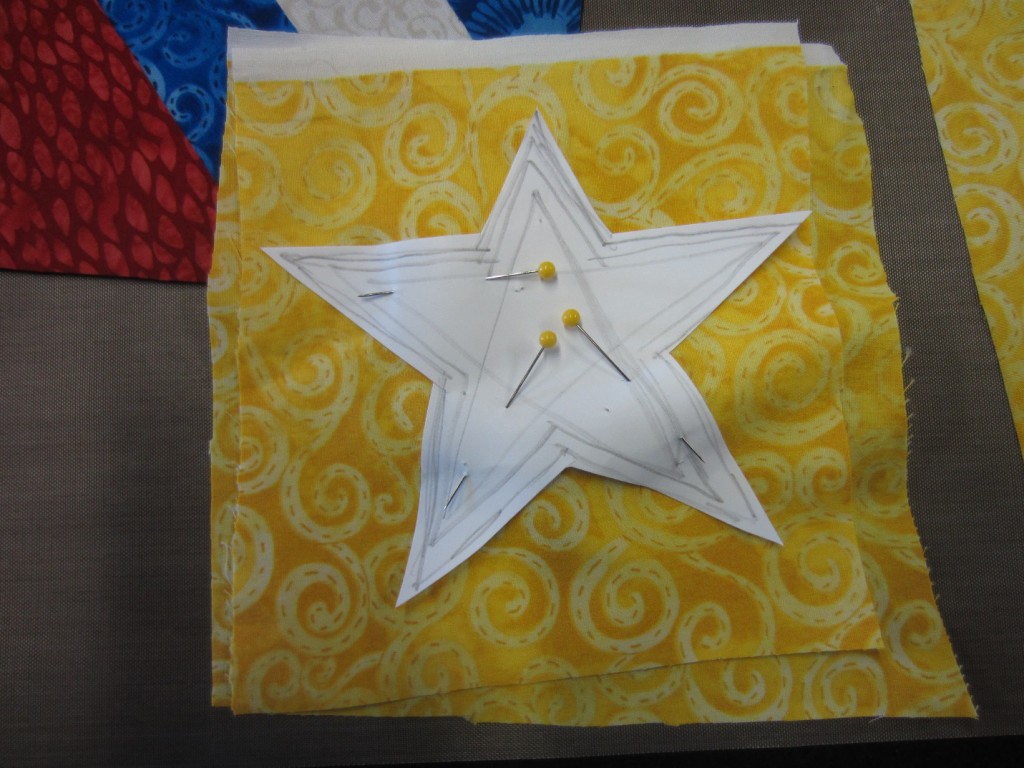
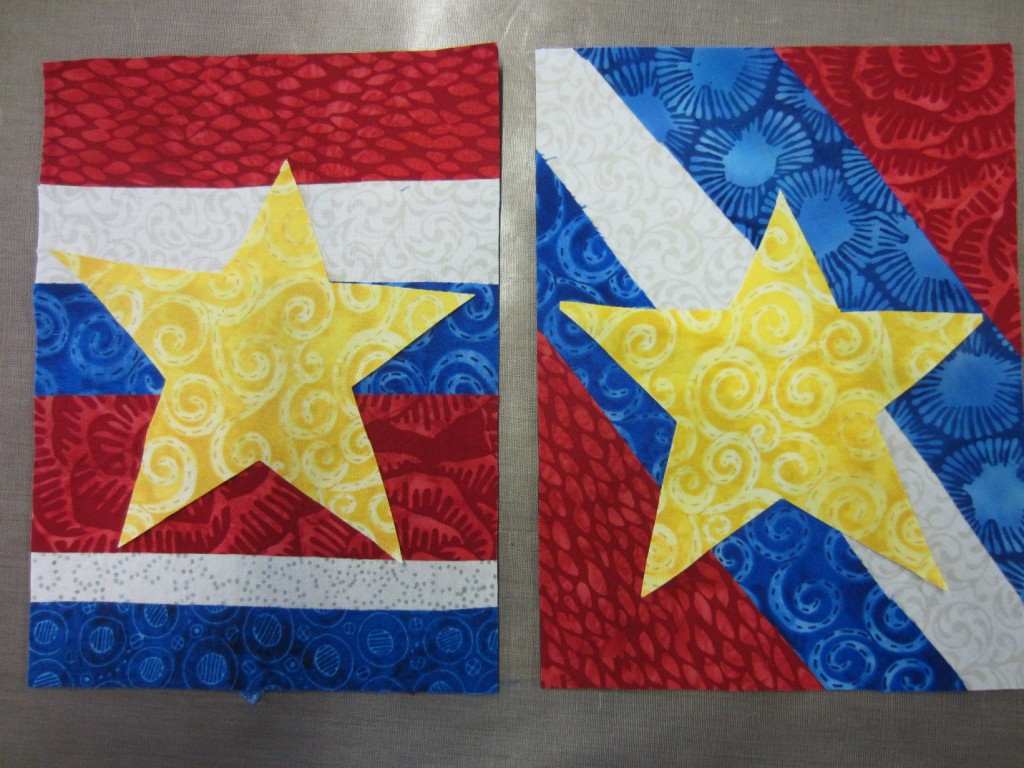
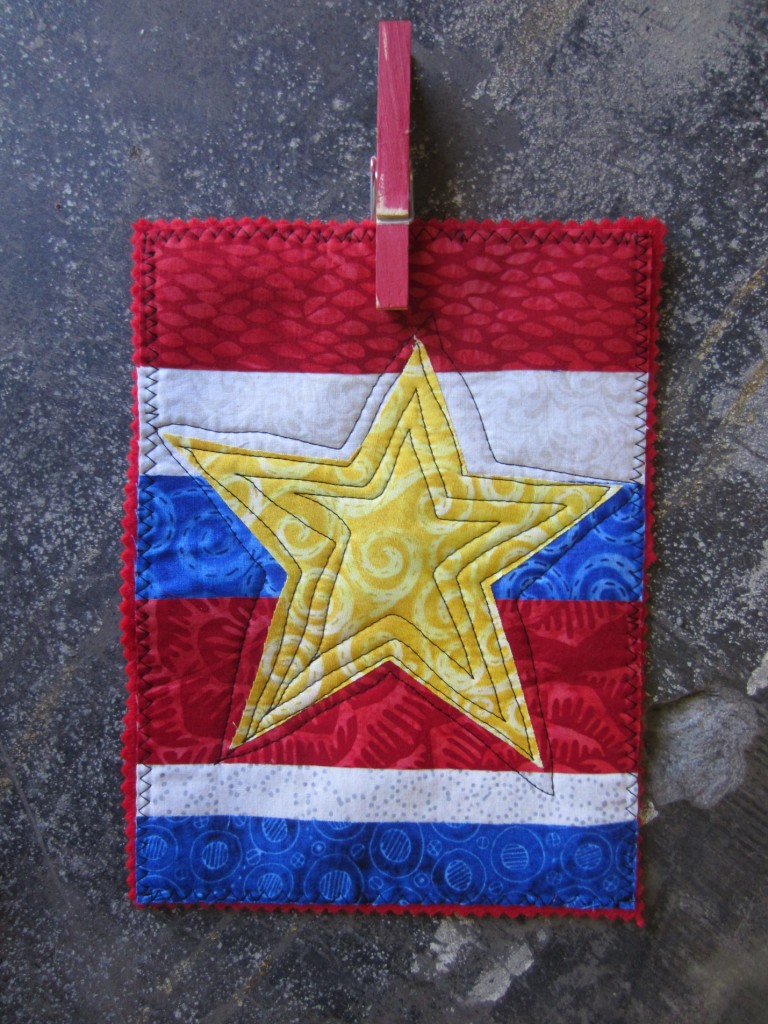
Stars to go on summer flags DIY craft projectsWith your same pattern, pin to two pieces of yellow fabric. Cut with a pair of scissors. You could throw caution to the wind and cut these a little larger if you desire.

Stars pressed onto background of flags Place on the two remaining backgrounds and press into place.

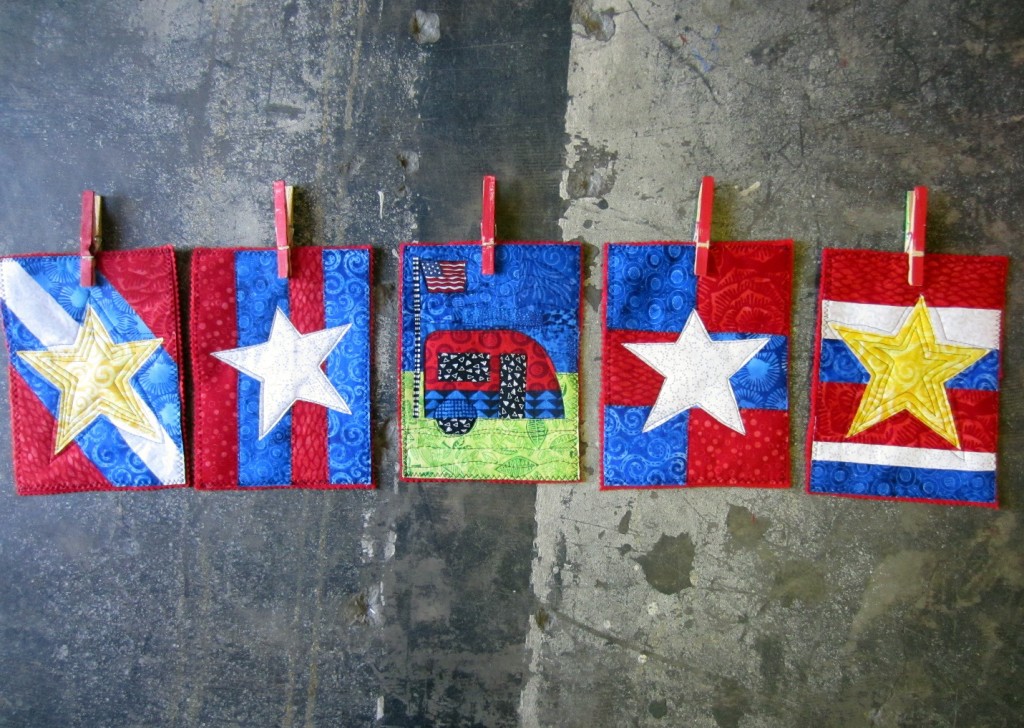
Five summer flags for your next DIY craft projectsNow you have five flags. Next step is the backing, which is the red layer of wool blended felt.

Sewing fabric bolt infoHere is the info on the bolt so you can see what kind of felt I use. This is Bright Red, the perfect backing for this project!

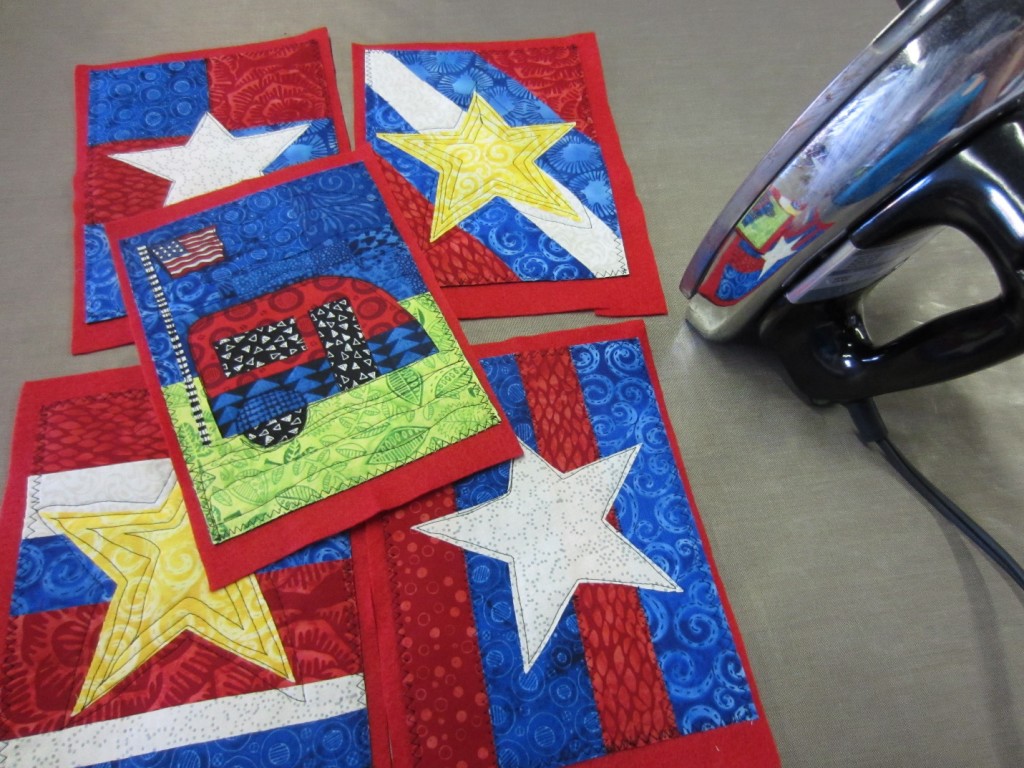
Summer flags ready for the sewing machinePlace each flag on the felt, and make sure it is a little larger than the flag. Now is the time for the sewing machine. I free-motion machine quilted these using a free-motion foot on my machine. The edges are zig-zagged to secure them into place. The quilting is pretty simple. This is a great way to practice free motion quilting. After you are done with the stitching, press each flag with a hot iron.

Five flags made from summer craft ideasUsing a pair of pinking shears, trim the red. It makes a fun edge for each piece. Five patriotic flags. You can paint wooden clothes pins with red paint for an extra touch. I usually hang my flags on laundry line you can buy anywhere. Scroll down to see each flag individually, so you can view it close up.

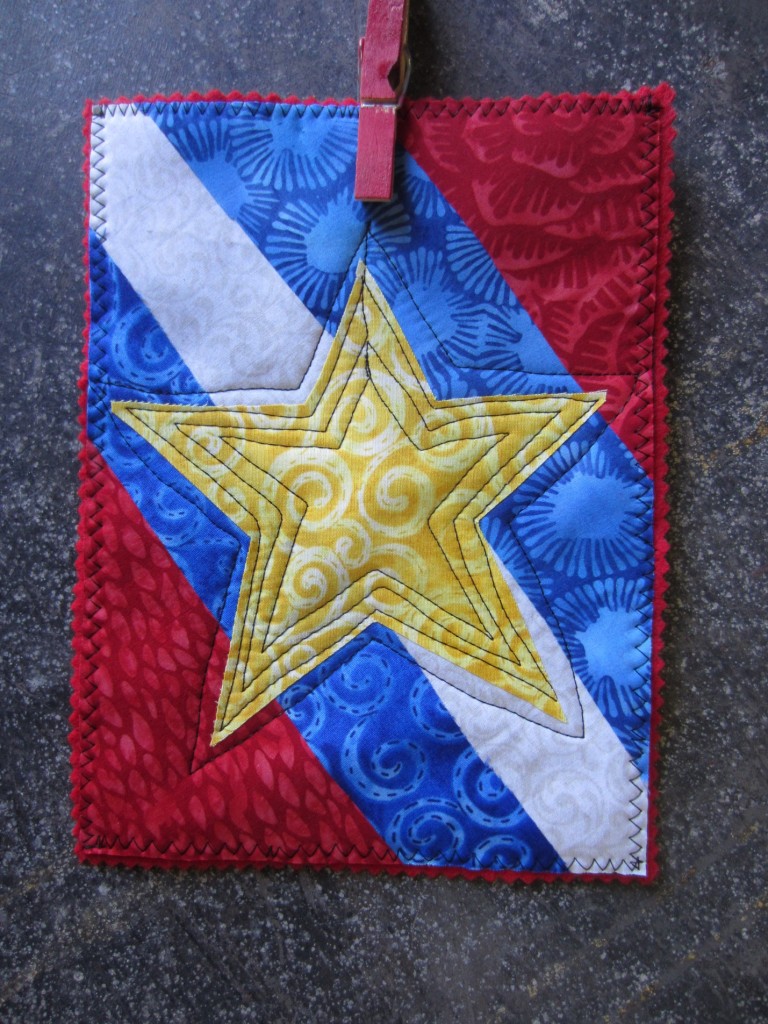
Diagonal stripe yellow star flagDiagonal stripe with yellow star.

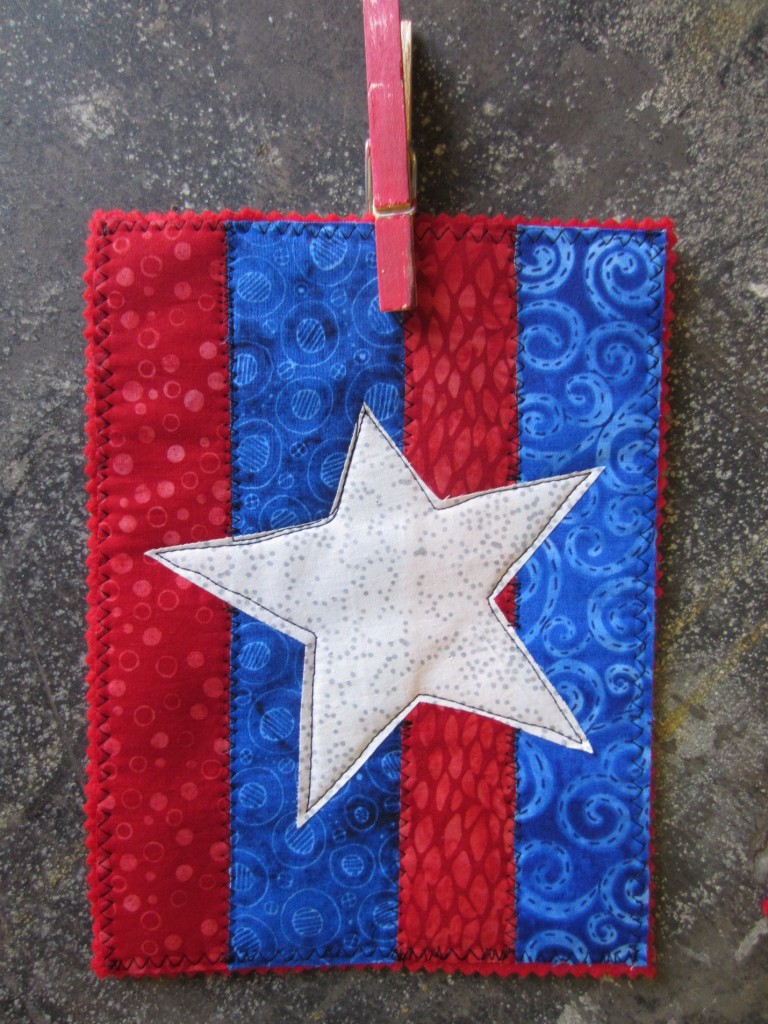
Vertical stripe with white starVertical stripe with white star.

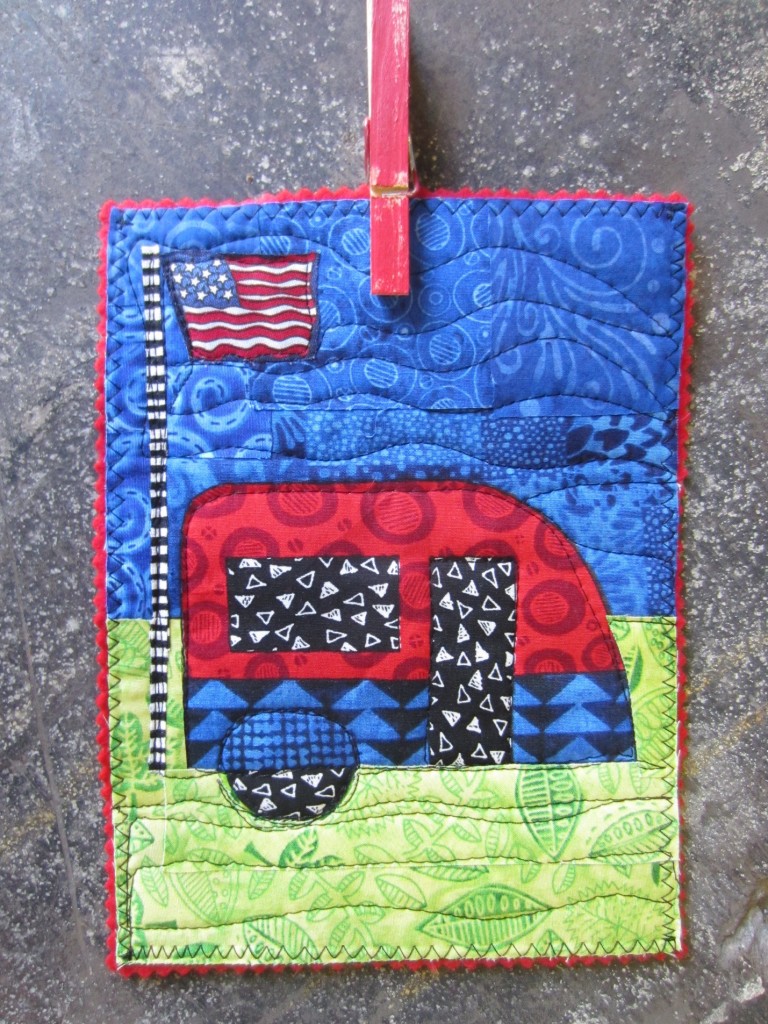
Trailer with flagTrailer with flag.

Checks with white starChecks with white star.

Horizontal stripes with yellow starHorizontal stripes with yellow star.

All five summer flagsThe flags! Thanks for following along! Happy Summer! Visit Jamie’s Twisted Sister blog at http://JamieFingalDesigns.blogspot.com.


Click here for exclusive deals and
savings from Havel’s Sewing!

Havel's Sewing quilting, applique and embroidery scissors


About Jamie Fingal:

Jamie Fingal fabric artistJamie Fingal is an artist, author, teacher, fabric designer and curator who hails from Orange, California. She is an award-winning artist and the author of the book Embellished Mini Quilts. Her whimsical and abstract work has been juried into international quilt exhibitions, featured in numerous books and magazines and has two instructional DVD’s — The Whimsical House Quilt and Rebel Quilting. She has been a guest on “Quilting Arts TV” multiple times in addition to being the other half of the curating team “Dinner at Eight Artists” with Leslie Tucker Jenison. You’ll find her work in private, public, churches and corporate collections. See more at www.jamiefingaldesigns.com.


Posted in Fabric, Free Craft Projects, Free Sewing Project, Guest Writers, Jamie Fingal | Tagged , , , , | Comments Off on DIY Craft Projects: Patriotic Flags for Your Summer Celebrations