Free Project: Quilted Christmas Pillow

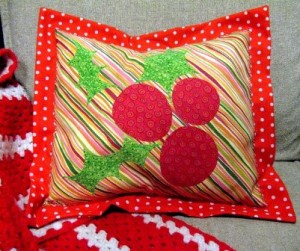
Make This Easy Holly Jolly Christmas Pillow

By Terry White ©2012

01-holly-jolly-pillow-401x336

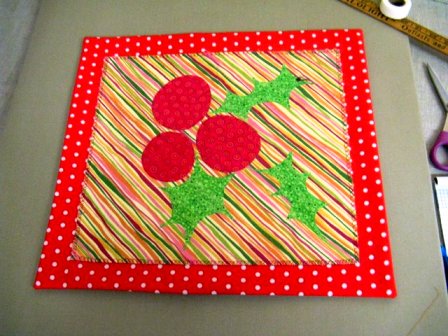
Here is a cheery bright modern holiday pillow pattern. This simple construction includes a flange edge and a sham back…so no fooling with trying to stuff and hand stitch an edge…yay!

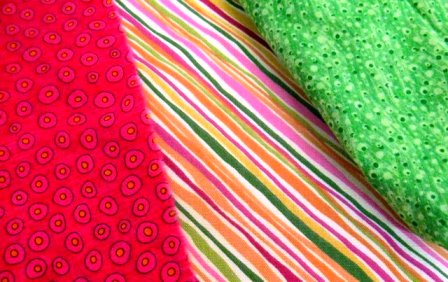
01-fabric-choices-448x282

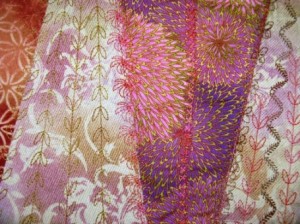
It really is the fabrics that make this a great pillow. For the background of the design, I chose a heavy canvas decorator fabric (it was a remnant). Cut the stripe fabric 15” x 13”. For the holly berries and leaves, I chose single color on color print fabrics that “read” as solids in contrast to the multicolored stripe. After trying out a few fabrics for the flange edge, the red polka dot really seemed to compliment the whimsy of the other fabric choices. The red and green fabrics are sort of polka dotty.

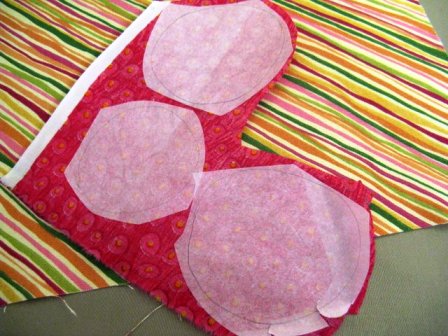
trace-and-fuse-448x336

Trace the berry and leaf shapes onto the fusible web. Rough cut and press them onto the fabrics according to the manufacturer’s directions. Then, I do a little pre-pull of the paper back so that when I cut out the shapes with the fabric it will be easy to take that pre-pulled paper and peel it off.

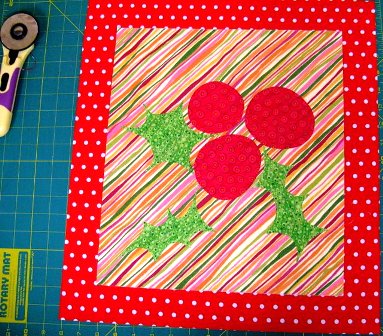
04-fuse-and-layout-383x336

Cut out the shapes and lay them onto the background stripe. You can arrange these shapes in a variety of ways. In fact, I think it would be neat to make three pillows with each arranged in a different manner.

Fuse shapes. If you want, you may stitch around the edges of the shapes – I didn’t.

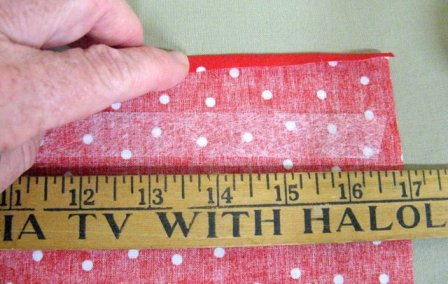
Cut the polka dot fabric 2 inches wider than the striped background on each side. So, I cut my fabric 17” x 19”. This will add body to the pillow and be the border flange.

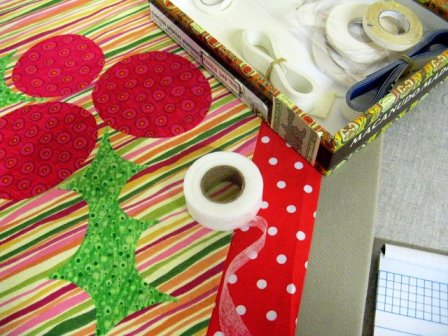
05-measure-border-448x336

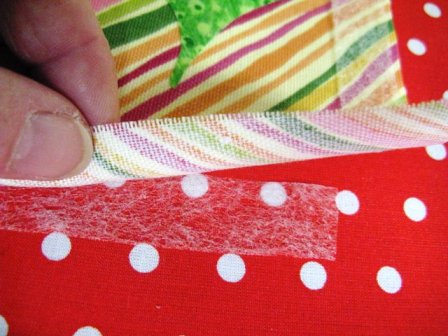
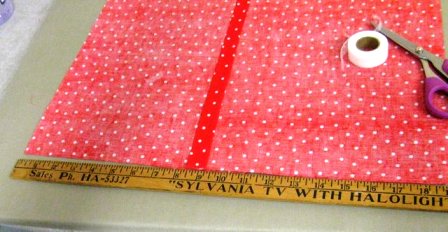
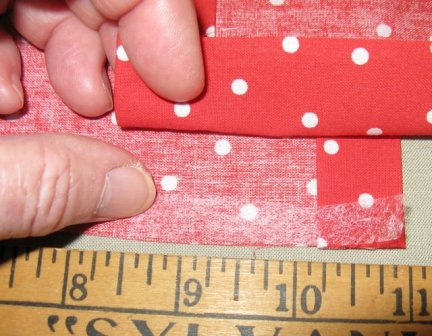
I keep different widths of hem tape. This is fusible web cut in a ribbon with or without paper backing. The one I used here is ¾ inch wide. I used it to fuse baste the
panel onto the polka dot fabric.

06-fuse-baste-448x336

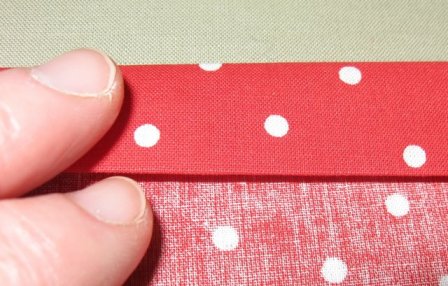
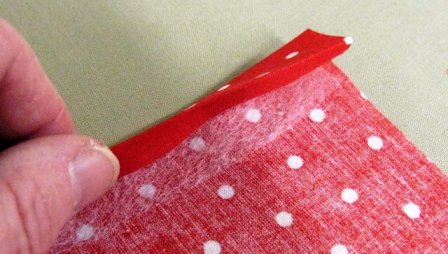
I cut my hem tape shorter than each edge of the fabric, placed it, then fused
the edge of the fabric to the polka dot.

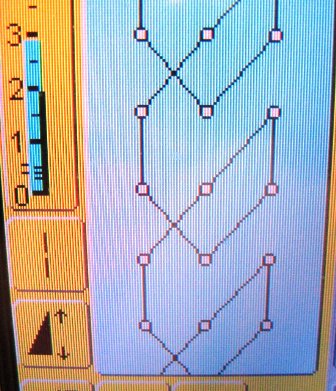
07-stitch-choice-336x391

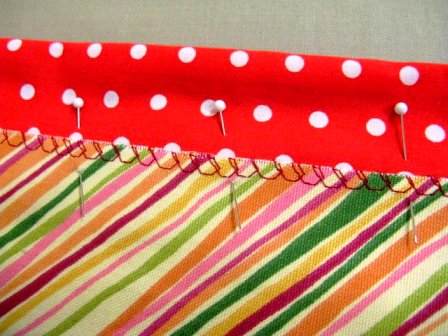
Next – to stitch the top fabric to the polka dot, I chose an edge stitch. The fuse basting helps me to have a nice flat surface on which to stitch…no pins on this step.

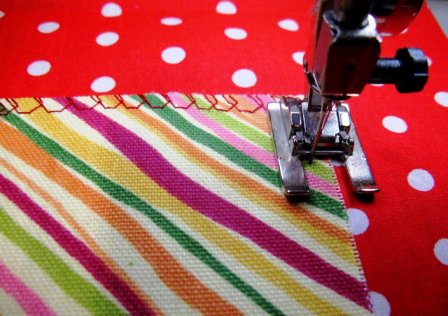
08-edge-stitch-448x316

I used a 30 weight cotton thread to stitch along the edge. Use a 90/14 machine embroidery needle on this step. The needle works with the thread and the heavy combination of fabrics. I also loosened the top tension on the embroidery stitch for a fuller look. I used the open toe appliqué foot so that I could see to stitch right along the edge of the design panel.

This completes the pillow top…give it a press.

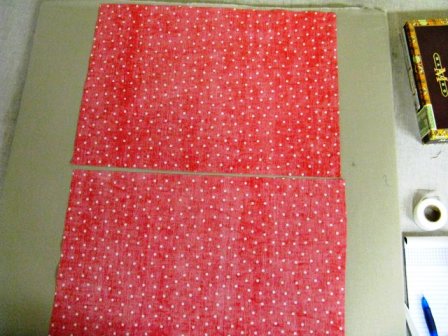
09-prepare-back-448x336

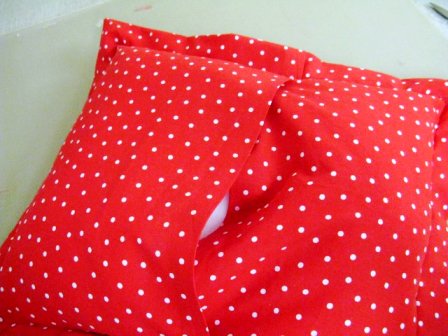
The next step is to make the pillow sham back. Cut two pieces of fabric 13” x 17”, I chose to use a different red polka dot fabric. Why did I do this?…because I used scraps
for the whole project, that’s why.

10-press-hem-448x284

Fold and press ¼ inch along one long side of each fabric piece. Notice that I have
a piece of ¾ inch hem tape which I will use along the edge.

11-press-hem-448x286

Fold and press 3/4 inch hem.

12-fuse-the-hem-448x254

With the hem tape in between, fuse the hem and do the same for the other piece of fabric.

13-overlap-448x232

Overlap the two hemmed pieces of fabric, so that they measure 17” x 19”. I used to stitch baste these pieces together, but now I fuse baste them.

14-fuse-and-baste-432x336

Cut a piece of hem tape the length of the overlap. I also cut it so it would
only be ¼ inch wide. Fuse.

15-prepared-back-448x336

This is what the sham back looks like. It is the same size as the pillow top
with a hemmed overlap.

16-right-sides-together-448x336

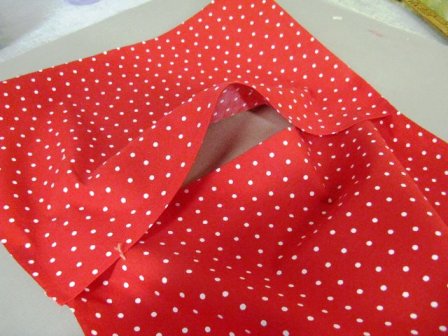
Place pillow top and backing right sides together.

17-give-a-little-press-448x336

Give it a little press.

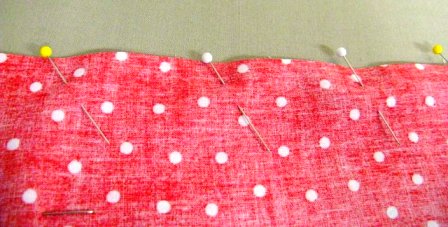
18-pin-pin-pin-448x227

Pin, Pin, Pin.

19-stitch-448x230

Stitch around the whole pillow with a ¼ inch seam allowance.

20-press-381x336

Press the seam.

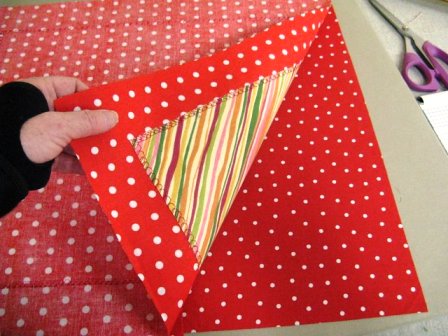
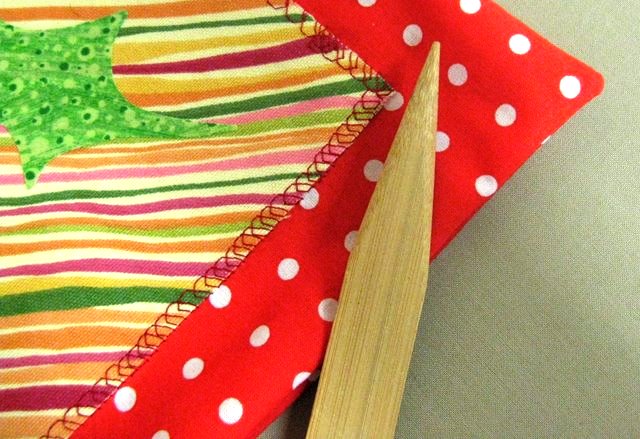
21-turn-right-side-out-poke-corners-out-448x307

Turn right side out. I like to use this little wooden point to poke out the corners
and edges of the pillow.

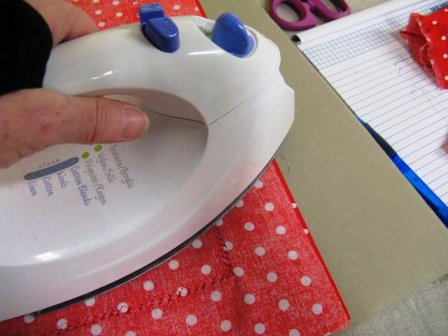
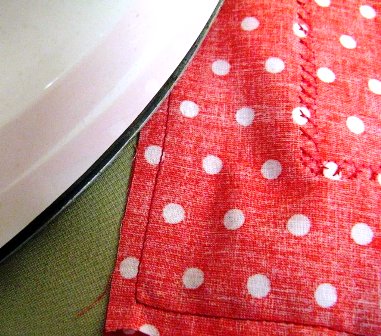
22give-pillow-a-press-448x336

This is the pillow at this point. Give it a press.

23-pin-along-edge-of-design-448x336

Pin along the edge of the design panel, pinning the back and front together.

24-used-lightening-stitch-284x448

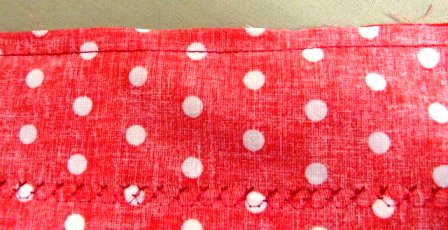
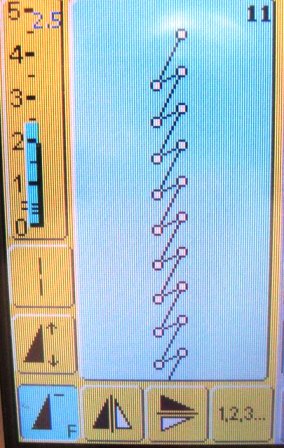
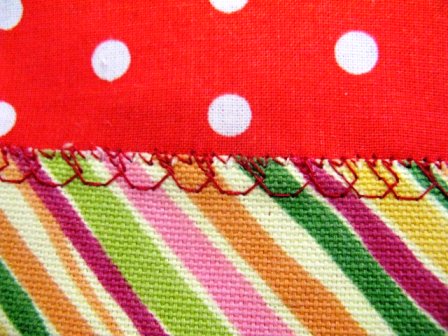
This is a picture of the stitch I chose to stitch the pillow front and back together at the border flange. It is called a lightning stitch. I think it is more fun than a regular zig zag or satin stitch. I used the same machine settings and set up as the first stitching.

25-edge-stitch448x336

Edge stitch the along the design panel. This stitch complements the first stitch.
It is also a sturdy stitch as it is the pillow edge.

26-stuff-the-pillow-448x336

Stuff the pillow or add a pillow insert into the back of the pillow.

27-add-optional-button-319x448

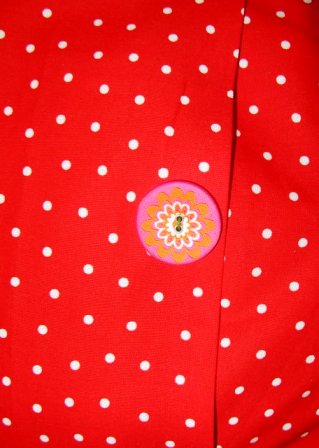
Add a button to the back if you like – and you’re done!

For more free Christmas patterns, click here.
And click here, for the best quilting/embroidery scissors.


TerryWhiteTerry White is a studio fiber artist. She has been doing this work since 1996, and she discovered the techniques she uses (threadpaint, machine appliqué, piece, quilt, embellish with beads, fibers and minutiae with sewing machine techniques) through experimentation and self-study. Terry teaches these techniques through classes and videos. Over the years Terry has been published in over 50 articles in magazines and books, including McCall’s Needlework, Quilter’s Newsletter, Machine Embroidery and Textile Arts, CMA trade magazine, Stitch n Sew Quilts, Quick n Easy Quilts, Quilt World magazine and Calendar, Quilting Arts Calendar 2003, America from the Heart, America’s Best and America Sews. She is a wife, stitcher, artist, sister, mother, friend, nana, gardener, baker, writer, student, teacher and American.  See more of Terry’s work at www.threadpaint.com.


Posted in Christmas, Free Quilt Patterns, Free Quilt Projects, Holiday Projects, Terry White, Uncategorized | Tagged , , , , , | Comments Off on Free Project: Quilted Christmas Pillow

Craft Project: Fan Scissor Wrap

By Terry White

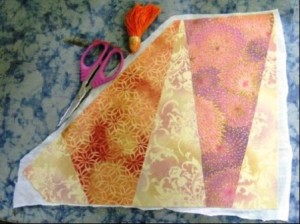
Fan Scissor Wrap #1

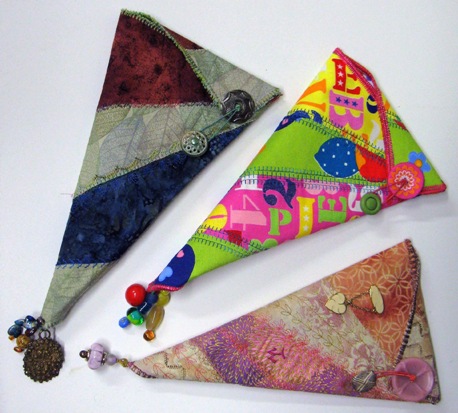
This project was so much fun that I kept making more in different styles. The first one received enough ooohs and ahhhs from friends that I knew this would have to become presents for my girls … all my girls!! AND, each one will suit the personality of the friend.

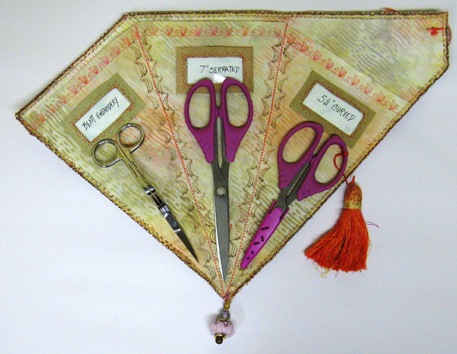
When you open up the wrap, there are three pockets for three different scissors. The pockets will hold scissors eight inches and smaller. This is my personal fan scissors wrap and such a fun craft to make!

The three scissors I use the most are:
1. Havel’s Bent Embroidery Scissors when I thread paint and use the decorative embroidery stitches on my Bernina.
2. Havel’s 7″ Serrated Scissors when I cut most fabrics and slippy trims.
3. Havel’s 5 1/2″ Curved Scissors when I cut appliqué shapes.

Fan Scissor Wrap #2

Supplies:

  • Four fabrics — I used cotton, but you can use anything you want!
  • 6”x12” scraps of three, and 17”x24” piece for the lining and pocket
  • Fusible interfacing — one piece 12”x17”
  • Fusible web — one piece 20”x20”
  • Beautiful threads for embroidery — I used Star Cottons, multi-colors (from the group which I designed). Choose threads and colors which will enhance your fabrics.
  • Shank button
  • Large two hole button
  • Elastic cord — 5” length
  • Beads and baubles for decoration
  • Permanent fabric markers — to color the elastic and (optional) to color the edge before or after edge stitching all around the wrap.
  • Havel’s Jumbo Rotary Cutter
  • Havel’s Bent Embroidery Scissors
  • Havel’s 7” Serrated Scissors
  • Felt or ultrasuede scraps — for labels
  • Clear plastic scraps — for label windows
  • Cardstock for ID’s

There are three main pieces to this project: the decorated cover, lining and scissor pocket.

The Decorated Cover

1. Use pattern piece A: Trace the shape onto fusible interfacing and cut out.

2. Use pattern pieces B, C, D, E, F: Trace each shape onto desired fabric and cut out.

Fan Scissor Wrap #3

Fan Scissor Wrap #4

Fan Scissor Wrap #5

Fan Scissor Wrap #6b

3. Lay the fabric shapes side by side onto the fusible interfacing and press.

Fan Scissor Wrap #7

4. Decorate with decorative stitching and beautiful threads.

*Tip: Because this is a project that will get a lot of use, I don’t add too many delicate
details. This will be different for different styles, but add what you like!

5. Trim the excess interfacing and rough edges of decorative cover. Use this as a pattern and cut out your lining piece and a piece of fusible web. Set aside.

Scissor Pocket

6.Use pattern piece G: Trace shape onto lining fabric. This is the scissor pocket.

Fan Scissor Wrap #8

7. Fold the top edge of the pocket piece 1/2 inch and press. Use a piece of fusible web to tack it down.

Fan Scissor Wrap #9

8. Add fusible web to extra strips of lining fabric. Iron them to the wrong side
of the pocket along the fold lines. This adds stability to the pockets.

9. Decorate the top edge with decorative stitching.

10. Decorate the two sides of each scissor pocket fold with a row of decorative stitches.

Fan Scissor Wrap #10

11. Lay the pocket onto the lining fabric. Stitch the pocket to the lining with a
lightening stitch along the fold lines.

Final Construction

12. Apply fusible web to the back of the decorative cover according to manufacturer’s directions.

13. Press the pocket and liner to the back of the decorative cover.

Fan Scissor Wrap #11

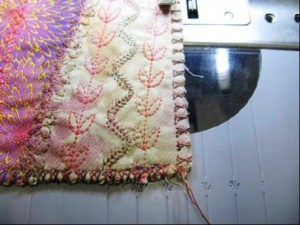
14. Finish edge all around. I used two threads through a 90/14 needle with an overcast stitch. This is a great place to use a serger.

Fan Scissor Wrap #12

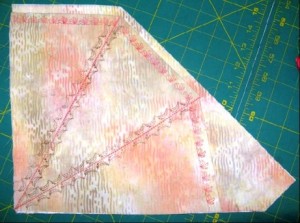
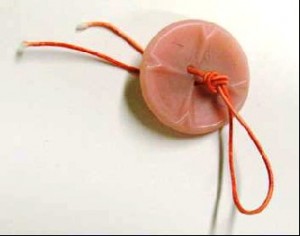
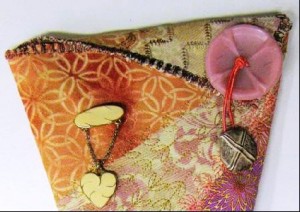
15. Attach a two hole button to the cover with colored elastic cord. Use a permanent marking pen to color the elastic. Make a loop and knot it.

Fan Scissor Wrap #13

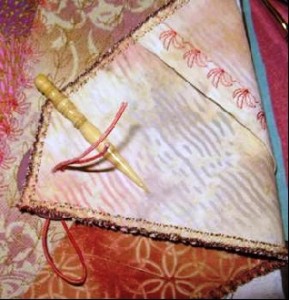
Pull the two ends of the elastic through the back of the button. Use an awl to make two holes large enough for the elastic to go through the cover. Knot the elastic on the back.

16. Sew a shank button on the cover to finish the closure.

Fan Scissor Wrap #14

Fan Scissor Wrap #15

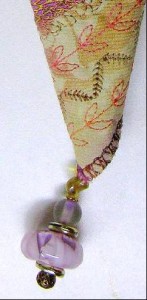
17. Add a bead drop to the bottom.

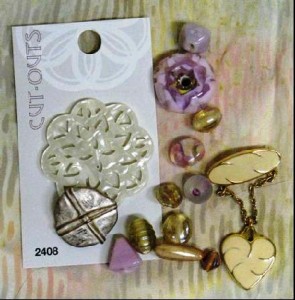
18. The bead drop was made from parts of old jewelry and lovely one-of-a-kind glass beads. The heart pin is from a box of costume jewelry I bought years ago. The big pink button I used is vintage, but one I considered using is from Blumenthal called “Cut Outs” which I picked up in the Green Room at a Quilting Arts TV shoot!

Fan Scissor Wrap #16

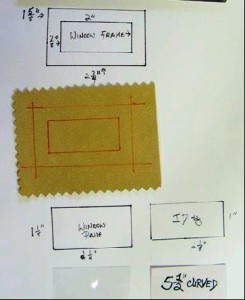
19. Follow the photos to make the label windows and ID’s.

Fan Scissor Wrap #17

Fan Scissor Wrap #18

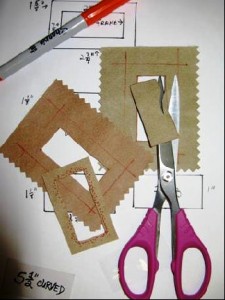
The plastic window is glued to the inside of the suede frame. The frame is glued to the scissor pockets on the sides and the bottom — this way, the cardboard ID label slides right in.

Fan Scissor Wrap Pattern A (A,B,C,D)

Fan Scissors Wrap Pattern A (B, C, D, E, F Combined)

Fan Scissor Wrap D, E, F

Fan Scissors Wrap Pattern D, E, F

Fan Scissor Wrap Pattern G (H Combined Three Times)

Fan Scissors Wrap Pattern G (H Combined Three Times)

Click here for a printable PDF version of Terry’s Fan Scissors Wrap.

Havel's Sewing quilting, applique and embroidery scissors


About Terry White:

TerryWhiteTerry White is a studio fiber artist. She has been doing this work since 1996, and she discovered the techniques she uses (threadpaint, machine appliqué, piece, quilt, embellish with beads, fibers and minutiae with sewing machine techniques) through experimentation and self-study. Terry teaches these techniques through classes and videos. Over the years Terry has been published in over 50 articles in magazines and books, including McCall’s Needlework, Quilter’s Newsletter, Machine Embroidery and Textile Arts, CMA trade magazine, Stitch n Sew Quilts, Quick n Easy Quilts, Quilt World magazine and Calendar, Quilting Arts Calendar 2003, America from the Heart, America’s Best and America Sews. She is a wife, stitcher, artist, sister, mother, friend, nana, gardener, baker, writer, student, teacher and American.  See more of Terry’s work at www.threadpaint.com.
 

Posted in Embroidery Scissors, Fabric, Free Craft Projects, Fun Stuff, Guest Writers, Patterns, Terry White, Tutorials | Tagged , , , , , , , , , | 10 Comments

Retro Applique Linen Scarf Sewing Project

Retro Applique Linen Scarf

By Terry White

Retro Applique Linen Scarf Project

This simple retro scarf is made of linen.

Linen is one of my favorite fabrics on which to stitch and to wear. I love that it is making a comeback in fashion, and I especially love the scarves. The natural way it looks and feels, and the variety of types available make this fabric very versatile. You can wash it and it is very strong and will last a long time.

Linen Fabric

Linen is made of flax and is characterized by its even weave.

Linen is made of flax and is characterized by its even weave. The weave is even, but the threads are uneven and natural slubs occur in the fabric.

The term linen is now used in a broader way to describe any type of fabric that is made to look and feel like linen.

You can find linen at most fabric stores- especially when the spring fabrics come into the stores. There are dress linens and drapery linens. A lot of times, you can find the perfect one in the drapery department. Linen sheers are wonderful fabrics with which to use for scarves.

Cotton threads for Applique details

Cotton threads for the applique details.

I am warning you: Wash and dry your linen as you will wash and dry the finished scarf. It will shrink. Was and dry the fabrics you will use for applique. You want to be sure that when the scarf is finished that appliques won’t shrink everything up.

So, besides using this great linen fabric, you will use some pretty cotton threads for details on the appliques.

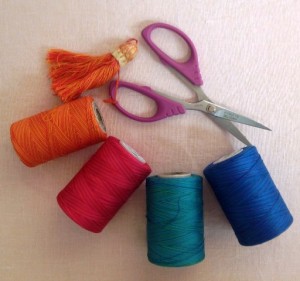
I use Star cotton machine embroidery thread but you can use anything called cotton machine quilting thread.

These threads are most like embroidery floss for hand embroidery because of the cotton content and the colors available.

What You Will Need:

-2 pieces of linen that contrast -I used pink and green – cut at least 14″ wide and then as long as you want for your scarf.

-Small pieces of linen for the appliques. I used bright pink, blue and some of the green leftover from my scarf cut.

-1 yard of medium weight interfacing.

-Cotton threads as described above.

-Spray Starch.

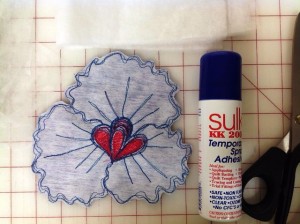
-Spray adhesive, such as Sulky Temporary Spray Adhesive.

-Morgan No-Slip Hoop or a good hand embroidery hoop. My hoop is 9″ in diameter.

Instructions:


Cutting the Linen

Cut linen to size.

1. Press Your Two Linen Pieces:

Cut your linen to the size you want it to be.

How to cut the linen: Snip edge of linen and pull a thread. This will give you a guide so that you will  cut the linen straight.

Press your two linen pieces with spray starch.

Tip: I buy a pillowcase from the thrift store to use as a pressing cloth when using spray starch. I cut two pieces and use one to protect my ironing surface and one to protect the iron. I use these when making fusible applique as well.

Trace Applique Designs

Tracing Applique designs on the linen.

2. Make Appliques: 

Press your small linen pieces with spray starch.

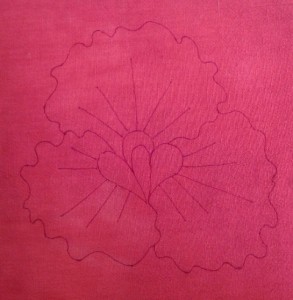
Trace the designs onto the linen pieces. I like to use a Sharpie in a color close to the color of the thread I’ll be using. Press the tracing and will heat set the ink.

Stitch details on your appliques.

Use medium weight interfacing on the back of the applique.


Pic 6 linen scarf 496x480

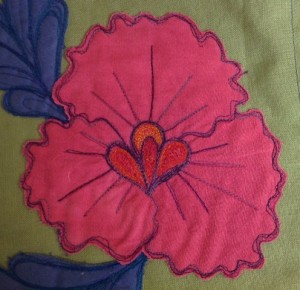
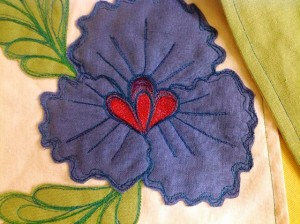
Pansy Applique.

Pic 7 linen scarf 640x478

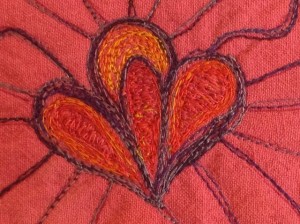
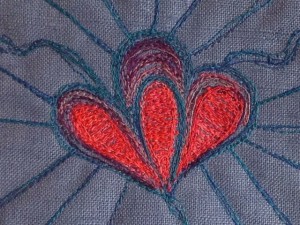
Center of the Pansy Applique Details.

Pic 8 linen scarf 480x610

Free Motion Stitched details.

You can free motion stitch the details or use a straight stitch on your machine.

You can use your favorite applique stitches on your machine or stitch the details on by hand if you prefer.

You can find how-to’s on machine applique in Havel’s Sewing’s Guide to Quilting.

Cut out the appliques close to the stitching.

Pic 9 linen scarf 480x636

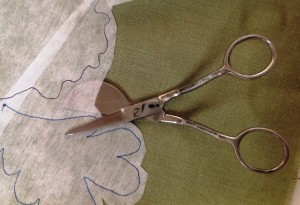
Curved scissors will help with getting close to the stitching.

Pic 10 linen scarf 640x478

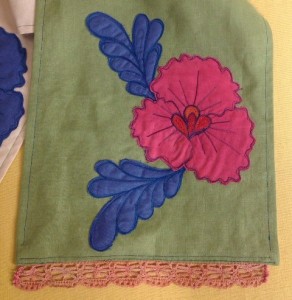
The applique being used on the scarf.

3. Stitch Appliques to Each Side of the Scarf:

Position the appliques on each side of the scarf.

I suggest using spray adhesive to place the pieces.

Use interfacing away from the fabric. This prevents accidental snips into the linen.

Pic 11 linen scarf 480x621

Using Interfacing.

Pic 12 linen scarf 640x438

Duckbill scissors being used to cut out appliques.

4: Stitch Scarf Together: 

Stitch the two pieces together right sides facing in along the long sides.

Turn and press.

Pic 13 linen scarf 640x478

Applique on the scarf.

Topstitch about 1/2 inch to the two sides of the scarf.

Pic 14 linen scarf 640x480

Details of the blue pansy.

Pic 15 linen scarf 640x434

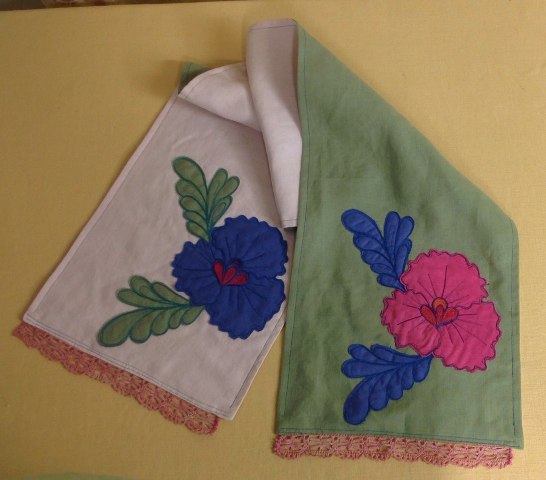
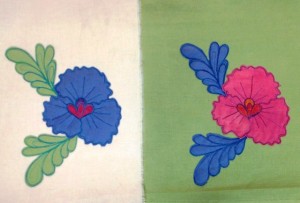
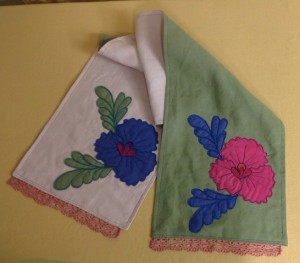
Here are the two sides of the scarf.

Pic 16 linen scarf 640x478

Opening edges to press.


Press the opening edges about 1/2 inch to the inside.

Place trim on the pressed side of the scarf.

Pic 17 linen scarf 640x478

Trim for the scarf.

Stitch.

Pic 18 linen scarf 640x478

Applying the scarf’s trim.

Fold and press.

Topstitch the ends.

Pic 19 linen scarf 640x478

What the trim will look like on your scarf.

Pic 20 linen scarf 480x493

Trim added to the other side.

Press.

The end result will look like this:

Retro Applique Linen Scarf Project

Retro Applique Linen Scarf.

Hopefully you enjoyed making your new retro appliqued linen scarf! This is the perfect scarf for spring and summer so be sure to make scarves for all of your friends and loved ones to add to their wardrobe this season.

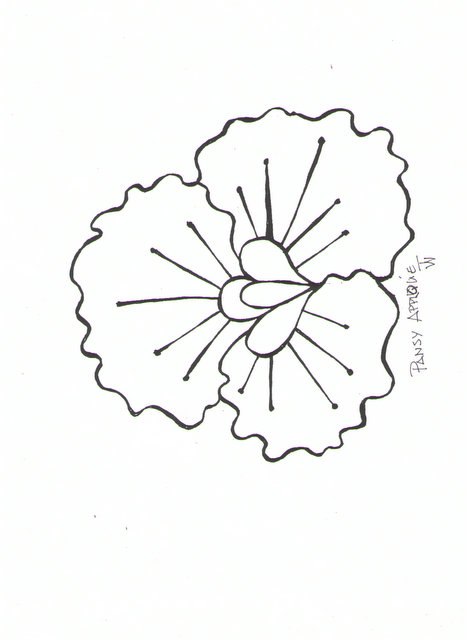
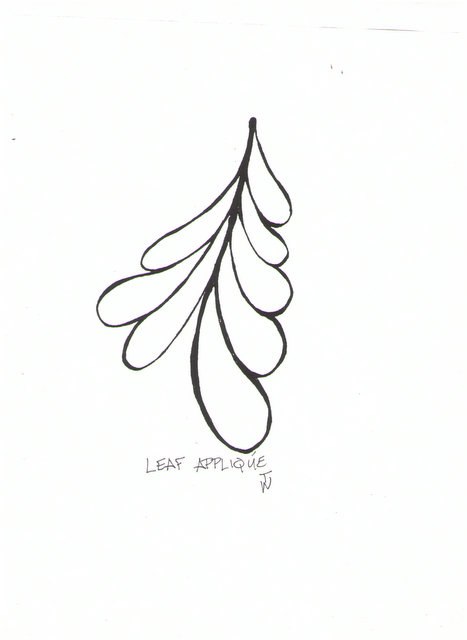
Below are the applique patterns that you can print out and use for making your scarf:

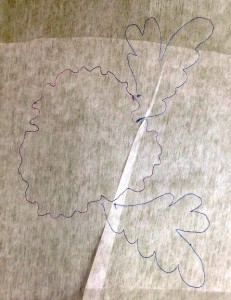
Pansy Applique Pic

Leaf Applique Pic

Check out more of Terry’s fantastic projects here.

***

[hs_action id=”5636″]

Posted in Applique, Applique Scissors, art ideas, craft, Craft to make, Crafting, Fabric, For Beginners in Sewing, Free Craft Projects, Free Quilt Projects, Free Sewing Project, Guest Writers, How To, Terry White, Tutorials, Uncategorized | Tagged , , | Comments Off on Retro Applique Linen Scarf Sewing Project

Rainy Day Tote Bag Sewing Craft Project

By Liz Kettle

I have to confess that I have a pretty severe tote bag habit. I don’t dare count them or put them all in one place because I would surely have to have an intervention! As we head into rainy spring weather, I realized that I only have one that is waterproof. GASP!
How could that be?

Rainy Day Tote

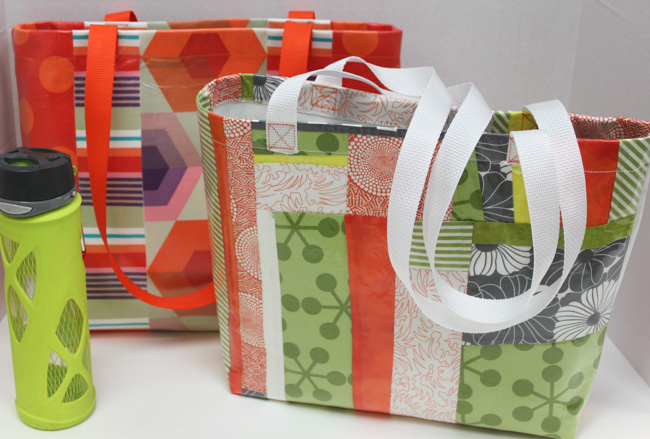
Fortunately I have been playing around with the new DIY vinyl laminates from Pellon and Therm-O-Web. And I love making tote bags as much as buying them so I thought I would share my process with you. I have designed an improvisational pieced bag and one that uses fabric strips with no piecing because if you are going to make one you may as well make two! They are so simple to make you may find yourself with a new addiction.

Rainy Day Tote Bag

Supplies:

  • 17″ x 30″ of Multi-Purpose Cloth (MPC) from Roc-Lon *
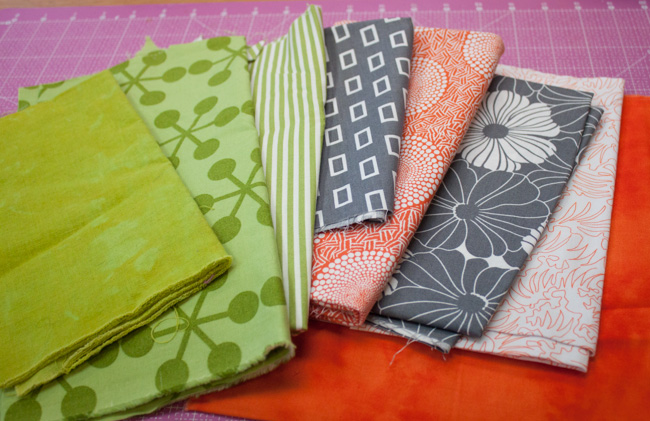
  • Fabric of your choice: use scraps of coordinating fabrics (pre-wash your fabrics so the vinyl adheres properly).
  • Vinyl iron on laminate from Pellon or Therm-O-Web
  • Web handle strap: 60″ for each bag
  • Havel’s rotary cutter, cutting mat and fabric ruler

 Improvisational Pieced Tote Bag:

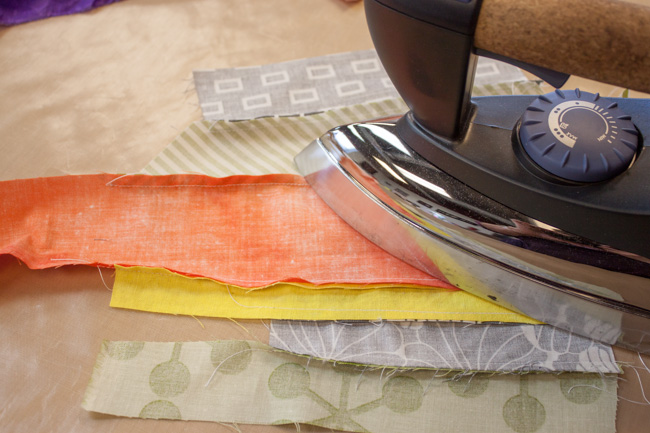
Improvisational piecing takes out the precise measuring of many quilting techniques. I free cut the main pieces and somewhat randomly piece them together. Once I have a fairly large section I trim them up and add them to other sections. Here’s how…

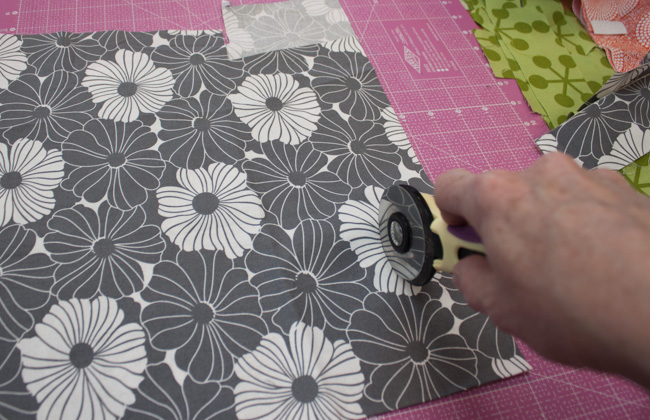
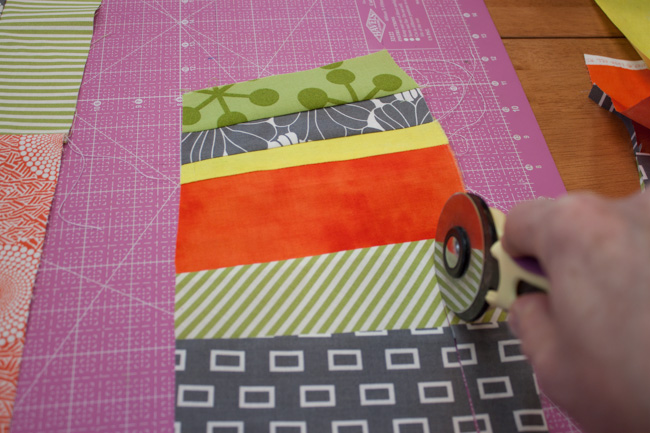
Step 1: Cut fabric using your Havel’s rotary cutter and mat. Cut straightish lines. We aren’t using a ruler so be careful to keep your free hand off the mat. Make a big pile of strips using all your chosen fabrics.

Step 1

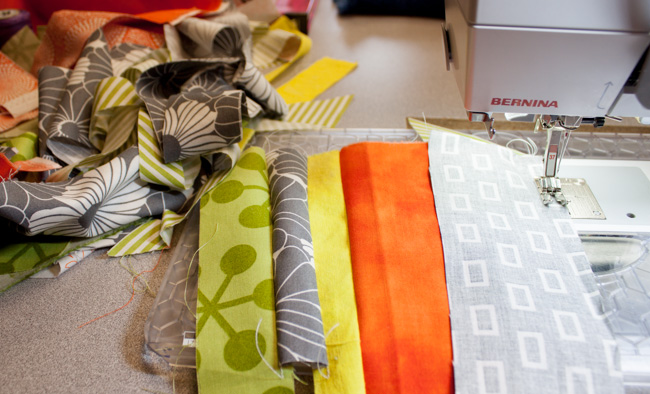
Step 2: Take the strips to your sewing machine and begin piecing them randomly. Piece some along the long edges as shown and piece some along the short edges so you have long lengths.

Strip Piecing

Step 3: After you have stitched a few sections, press seams to one side…

Press the Seams

And trim sections straight-ish.

Trim Sections

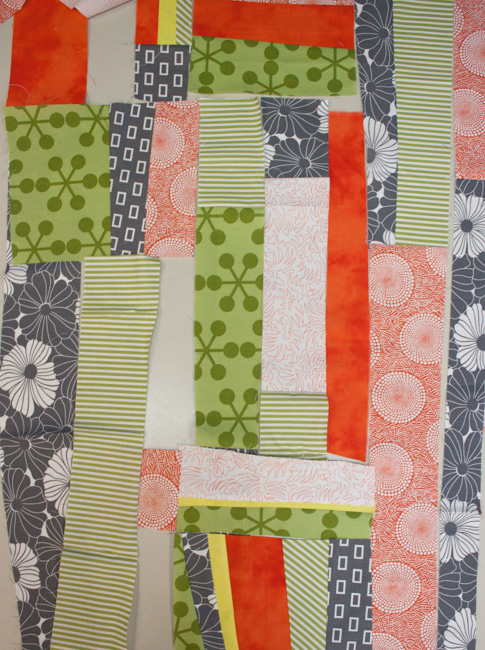
Step 4: Lay out your sections to see what else you need to create to make a piece of fabric large enough for your bag. At this point I decided that I needed to add some white strips.

Lay Out Sections

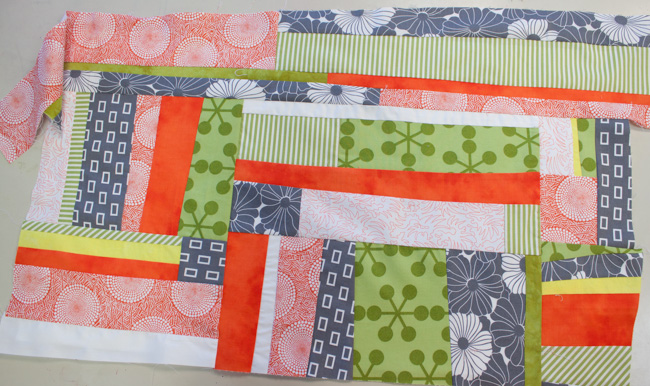
Step 5: Continue piecing until you have a piece larger than the 17″ x 30″ Multi-Purpose Cloth. Following manufacturers’ directions, use Misty Fuse or other fusible web to adhere the pieced fabric to the MPC.

Continue Piecing

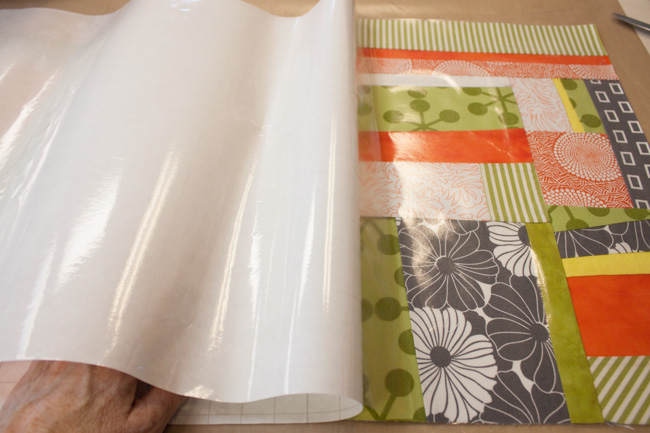
Step 6: Follow manufacturer’s directions to apply the Vinyl Iron-on to the surface of your pieced fabric.

Apply Vinyl

Step 7: Fold the fabric in half along the long sides with right sides together. Stitch up the side seams.

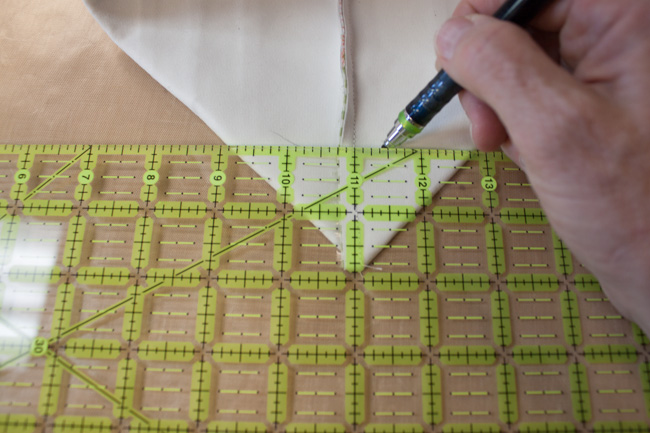
Step 8: To create the bag box bottom fold the bag along the side with the seam running up the middle as shown. Measure up 1 3/4″ from the point. You will have 1 3/4″ from the middle seam to each edge as well. Draw a line.

Create the Bag Box Bottom

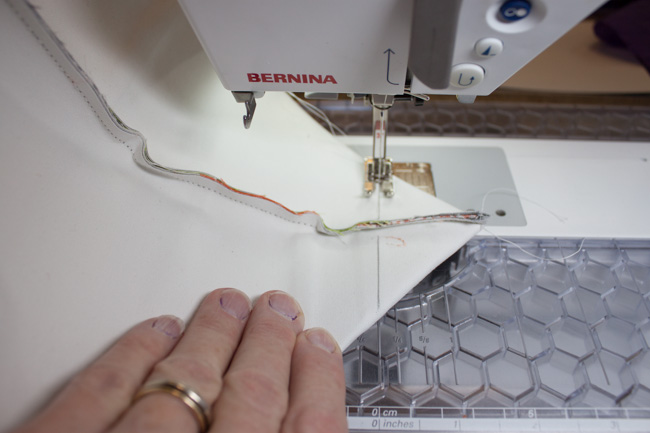
Step 9: Stitch along the line.

Stitch the Line

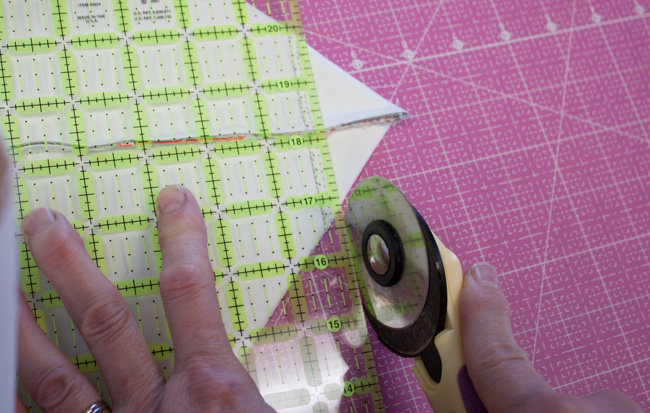
Step 10: Trim the excess point ¼” away from the stitch line.

Trim the Excess

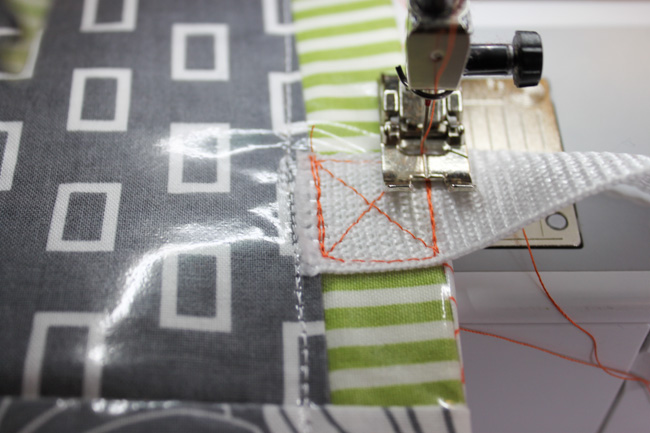
Step 11: Turn bag right side out. Press as needed using the protective sheet that comes with the laminate material. Cut each web strap 30″. Apply the edge of the strap 4″ in from the side seam on each side. I stitch a box with an interior X to make it strong.

X Box Stitch

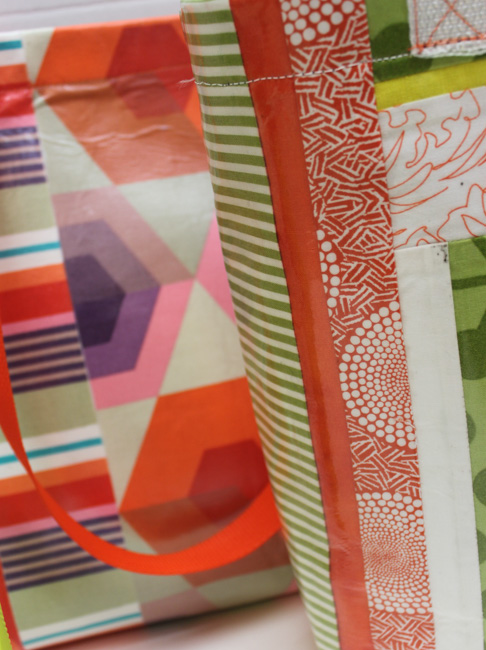
 Now the rain won’t keep you inside and your stuff won’t get wet. You could even apply the vinyl to the inside of the bag to make it completely water resistant for a pool bag!

Low Sew Option:

If you want to stitch less and let the fabrics do all the work try this method.

tote-bag-tutorial-(12-of-19)

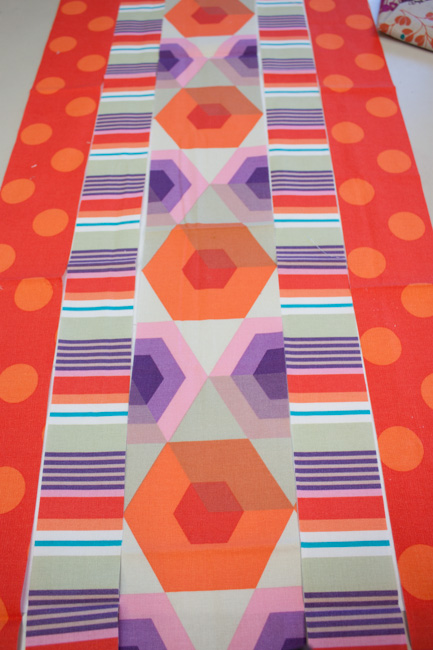
 Use bold prints and cut strips 30″ long. Create a pattern with the strips or simply use one piece of fabric.

tote-bag-tutorial-(13-of-19)

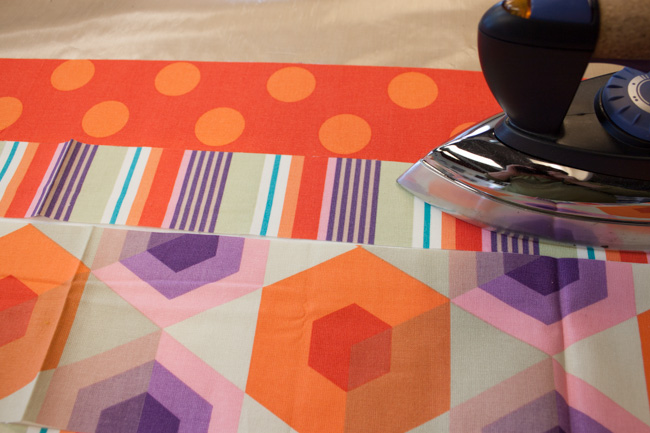
Fuse the fabric to the MPC base, add the Vinyl Iron-on and follow the rest of the steps to complete your bags.

tote-bag-tutorial-(19-of-19)


Liz KettleLiz Kettle is a textile and mixed-media artist who loves sewing and creating with fabric and thread. Sharing sewing joy and thread addiction with others makes her deliriously happy. Liz is co-author of two best selling books: “Fabric Embellishing: The Basics and Beyond” and “Threads: The Basics and Beyond.” Share Liz’s stitch journey on her website and blog at www.TextileEvolution.com.

Shop Havel's Sewing

Posted in Fabric, For Beginners in Sewing, Free Quilt Projects, Fun Stuff, Guest Writers, Liz Kettle, Tutorials, Uncategorized | Tagged , , | 3 Comments

Quilting Travels — From Here to There and Back Again!

By Kathy Mathews

Several pushpins on a road-map of a tourist

Venturing outside of your creative corner is a wonderful thing. All quilters should take to the road!

I make quilts in the comfort of my sewing studio, and I often feel I don’t need to leave that wonderful sanctuary. My quilts fill my senses and satisfy my creative spirit. I tweet and chat with fellow quilters and have my supplies and fabrics all at hand.

I am a very satisfied and productive quilter, especially when the weather is blustery, cold or wet. But venturing outside of my cloistered creative corner is also a wonderful thing. If possible, I think all quilters should take to the road.

I love to travel short distances to see quilt shows. These types of quilts are doable, earnest and filled with love. I like seeing what fabrics other quilters are using and what designs they are making. Plus there are merchant malls. Even if I normally patronize these merchants, sometimes their wares displayed in a new way makes me discover something wonderful. I come home bursting with enthusiasm to quilt.

I also love road trips to major quilt shows. These kinds of shows can be overwhelming at first. Sometimes I have to just sit and breathe while I take it all in. There are all kinds of quilts, some types that I don’t even love. It’s so good to be challenged and see what the most dramatic trends are. New and different can be exciting.

These super big shows also have merchant malls, and many of them are brands or manufacturers who don’t even have a separate store. The gadgets are the most fun — you can hold them in your hand, play with them and see how great they are. And then, naturally, you buy them. (Duh!)

I come home from these shows and scurry up to my sewing loft bursting with ideas. I organize my new fabrics and fun purchases and release my ideas from my head to paper. What a way to recharge your batteries! Oh and did I mention you also spend money?

Road Trip sign with road background

Fabric bought while out on the road can be a great reminder of a wonderful trip and help go towards making something as a permanent reminder.

Another fabulous quilty way to travel is to visit quilt museums. I have had my breath taken away in Kentucky and Wisconsin. I am just about to start a trip which will include a visit a museum in Vermont known for its quilt collection. I can hardly wait to see what I learn.

Sometimes there are places like these that are better than others, but I love seeing a quilt collection or museum whenever I can. It’s important to learn what’s cutting edge at the shows and what came before at the museums.

I have also undertaken many a quilt travel to see quilts incorporated into unusual architecture or nature. I could not love the quilt gardens in Indiana more, plus they gave me a fresh way of thinking about quilts. I’ve also traveled the barn quilt trails in Iowa, Wisconsin and Illinois. Those are worth the trip just for the photographs alone, not to mention the inspiration.

I have even managed to visit a rest area with a quilt theme in Iowa and towns which seem to be centered around quilting in Pennsylvania. I’ve spotted quilts in Presidential historical houses. There are so many fantastic ways to see quilts when you are on the road.

I love all of these quilt trips, but hitting quilt stores on the road is one of my absolute quilty favorites. Whenever we take a road trip we somehow manage to find quilt stores. Once, I woke up from a nap and there was one right next to us. (It’s my superpower, what can I say?)

We have also hit quilt stores I have found using an app on my phone, listings in Yelp or in phone books. I have gotten off the highway to shop at a store which had a billboard. There are so many fun ways to find new shops.

I buy new fabrics they don’t sell near me. I buy fabrics which feature Alaska or western wildlife. I see new trinkets and new ways to use it all. I can touch it, feel it and bring it on home with me. It’s my essential souvenir from every trip.

Sometime in the future I will be ensconced in my sewing room and pull out that fabric. I will remember that wonderful trip and make something as a permanent reminder. It’s a great way to travel and remember the memories you made on the road.

I also remember these long distance shop hops when my Visa bill arrives. Worth every penny!

Happy quilt travels to you!


Save on the best! Shop Havel’s Sewing today!

Havel's sewing call to action


About Kathy Mathews:

Kathy Mathews headshotKathy Mathews has been sewing for 49 years and quilting for 31, which is odd as she’s so young. She taught Spanish and French full time for 35 years in Illinois Public schools and then continued at the college level until 2014. During all that time, quilting and sewing allowed her a creative outlet and kept her sane. In addition to needle arts she is an avid reader, swimmer, traveler and yoga newbie.  She blogs mainly about quilting at www.ChicagoNow.com. She lives in the Chicago area with her husband, is the mother of two grown daughters and grandmother to the cutest two year old girl in all the land. You can email her at quiltingsewingcreating@gmail.com.
 

Posted in Fabric, Guest Writers, Quilting | Tagged , , , , , , | Comments Off on Quilting Travels — From Here to There and Back Again!