Spring Quilting Fever: Rabbit Dance Baby Quilt

By Terry White

Let spring dance its way in with this
seasonal quilt project!

rabbit-dance-baby-quilt-by-terry-white

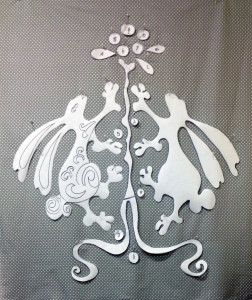
This design is about spring, budding trees and the way our rabbits dance and play across my backyard. I used a color palette in my design that’s popular right now for nurseries, which I love. The silhouette of the rabbits and berry tree on the soft gray polka dot fabric creates a strong graphic quilt, which works well in the current baby nursery decor.

You will need:

Fabrics

  • 1 1/2 yards of 100% cotton white muslin for the appliqués
  • 1 yard of gray small polka dot 100% cotton fabric for the quilt top
  • 1 yard of aqua medium polka dot 100% cotton fabric for the borders and binding
  • 1 yard of medium weight non-woven interfacing
  • Batting, backing and binding to fit quilt dimensions (I used the border fabric for the binding)

*When doing the stitching on the quilt top, the dimensions of the top can change. I always suggest cutting the backing fabric and batting after the quilt top is finished.

Thread

I used a gray Star multi-colored cotton thread called “Graystones”. It’s a light-to-dark gray variegate with 3 to 5 inch random color changes. It’s also one of the threads I designed for the Star line. I think it has a softer effect than a black or solid dark gray would have. Use the same Star thread in the needle and the bobbin for the quilting.

Also:

  • 1 1/2 yards of Wonder-Under paperbacked fusible web
  • 90/14 machine embroidery needle for the whole project

*I suggest you use an open toe embroidery foot for stitching the appliqué. I also suggest you use a darning, free-motion or stippling foot on your machine for the thread drawing and quilting.

Instructions:

Enlarge pattern according to the pattern guide photos located at the end of this article.

Trace the appliqué designs and details onto fusible web. Trace the shapes as they appear in the pattern  – they are already reversed for the fusing technique. In the case of the rabbit, trace a second one in reverse.

I made the appliqué designs large enough so that you can use a color thread to appliqué them with the small buttonhole stitch without cutting off any of the design. I always draw my appliqué shapes a little larger than they need to be so that the stitching doesn’t appear to cut off the shape. You don’t need to cut the shapes any bigger to allow for the stitching.

Fuse (according to manufacturer’s directions) the pattern pieces to the white muslin.

fuse-two-tree-designs

Fuse your two tree design pieces next to each other for a continuous flow.

Two tree design pieces are fused right next to each other for the continuous tree design.

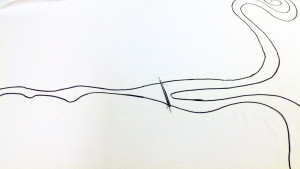
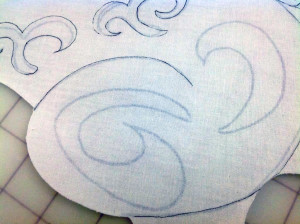
trace-details-with-dark-marker

Trace the details with a dark marker at the same time you trace the rabbits onto the fusible web.

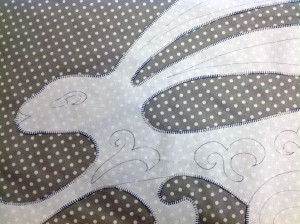
When tracing the rabbits onto the fusible web, trace the details with a dark marker at the same time. After fusing the web to the fabric, turn the appliqué over and trace the details with a light marking pen onto the fabric.

rabbit-applique-shapes

These are what your dancing rabbit applique shapes will
look like.

Cut the shapes out. My suggestion is to arrange the appliqués onto the quilt top first. Reference the first photo at the beginning of this article for placement of the appliqué pieces. You can make some marks on the top with a light or disappearing marker. Take the pieces off and lay them aside.

Then, only fuse the center tree shape to the top.

Back the quilt top with the interfacing before doing the appliqué work. I always use a stabilizer when doing any kind of machine embroidery, and this part is embroidery. It adds body to the quilt top fabric which helps to prevent puckering and distortion.

adjust-machines-settings

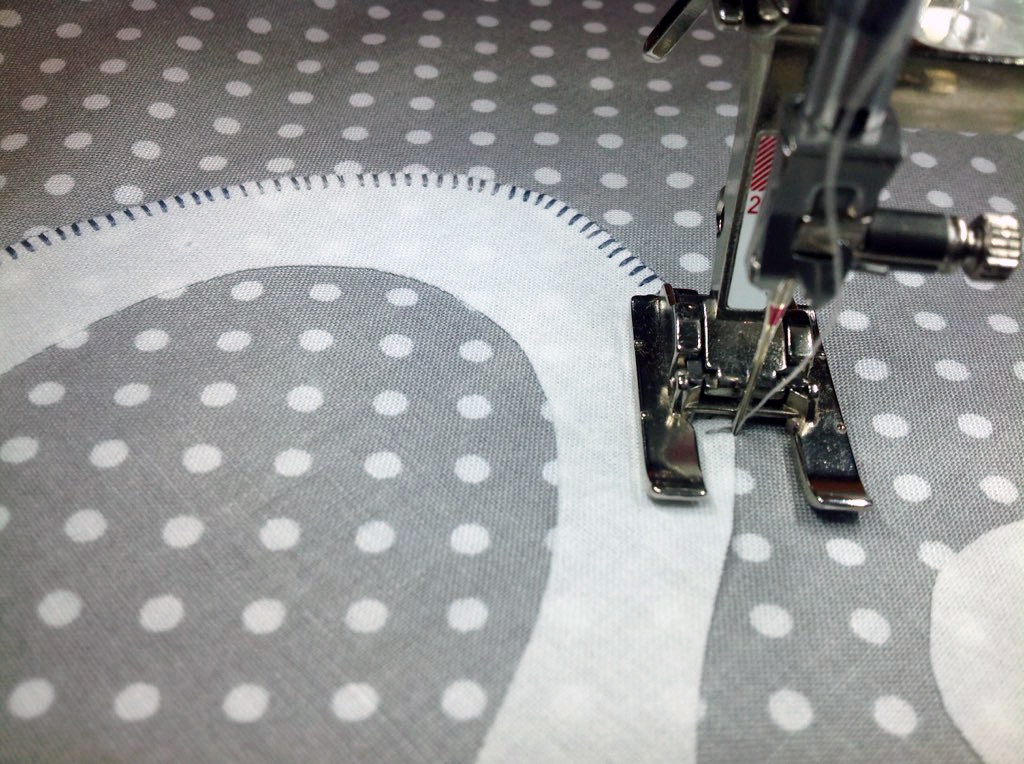
Adjust your machine’s settings for a small buttonhole stitch.

Set your machine for a small blanket (or buttonhole) stitch. The stitch should also be adjusted to a lower tension so that the stitches are not too tight. This is a good time to do some experimenting with the same materials you’re using in this quilt to make sure the tension settings work for a beautiful stitch. Make a note of the stitch settings that work for you.


Next, fuse a rabbit and stitch.

fuse-rabbit-stitch-together

Fuse your rabbit and stitch together.

Fuse the other rabbit and stitch. Fuse the circles along the tree and stitch. Then, fuse the blossoming pieces and stitch. This helps to keep each appliqué shape in pristine condition until you are ready to stitch it.

Layer the quilt top with batting and backing.

Baste the quilt, and quilt with free-motion stitching.

use-variegated-gray-thread

Using the same variegated gray thread will give this piece a softer finish.

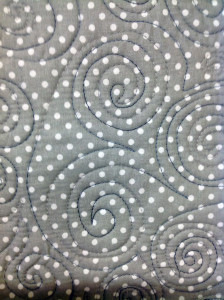
I love the effect of using the same variegated gray thread for quilting. The scrolls don’t have a harsh solid appearance, as the color fades in and out on the gray background.

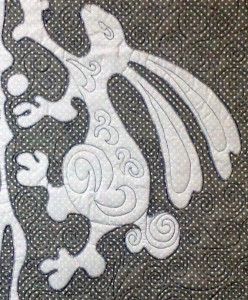
The two photos show my quilting design. I used the rabbit’s tail as my quilt pattern for the allover.

close-up-of-quilt-design

A close-up of the quilt design.

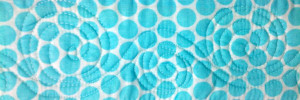
For the border, I made two scrolls — I quilted one, completing it all around the border, then I quilted the other scroll.

close-up-of-quilt-outer-border

A close-up of the quilt’s outer border.


Pattern Guide Photos:

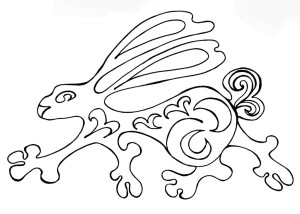
make-two-rabbit-one-reversed

Rabbit — make two, one reversed.

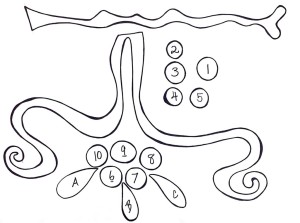
berry-tree-outline

Berry tree — berries are numbered for placement.

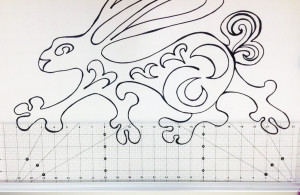
enlargement-guide-for-rabbit-pattern

Guide for enlargement of rabbit pattern.

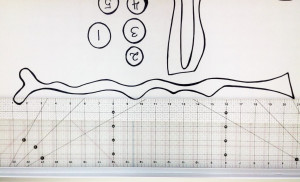
enlargement-guide-for-berry-tree

Guide for enlargement of berry tree pattern.

Bind the quilt, love the quilt and give the quilt to a special baby.

If you don’t thread paint or do any kind of free-motion work, you can use a light gray fabric marker for the details on the rabbit, and then quilt as you know how.

If would like to learn free-motion embroidery, I have 2 Craftsy classes online where I teach free-motion machine embroidery techniques.

Click here for a printable PDF version of Terry’s Rabbit Dance Baby Quilt.


TerryWhite

Terry White is a studio fiber artist who has been doing this kind of work since 1996. She discovered the techniques she uses, including threadpaint, machine appliqué, piece, quilt, embellish with beads, fibers and minutiae with sewing machine techniques, through experimentation and self-study. She is a wife, stitcher, artist, sister, mother, friend, nana, gardener, baker, writer, student, teacher and American.  See more of Terry’s work at www.threadpaint.com.


CTA-with-9-inch-non-stick-scissors-_fusible-web-400x325


Posted in Baby Quilt, Fabric, Free Quilt Projects, Guest Writers, How To, How To Make A Baby Quilt, Terry White | Tagged , , , , , | Comments Off on Spring Quilting Fever: Rabbit Dance Baby Quilt

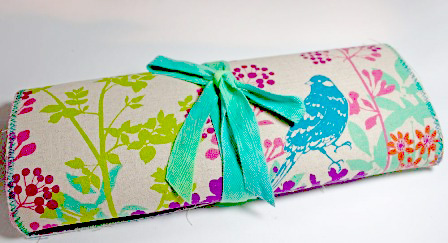
Craft Project: Fully Charged Organizer

By Liz Kettle

Do you ever get to your vacation spot or business conference and realize you left a critical charger cord at home? Ugh! This has happened to me too many times. There are a few charger organizers on the market but they weren’t perfect and they were just a tad too boring in design. So, I did what any creative maker of stuff would do and designed a charger organizer that fit my unique charger needs! Best of all, it is a quick project and I had it ready to go for my next trip.

Before I got to work on the organizer I decided that cord wraps would be a great idea too. They would keep my cords neat and give the added benefit of clearly marking these as mine. There were a few times when my cords were picked up by someone else because they all look so similar.

Multi-Purpose Cloth (aka MPC) is a white non-woven canvas that is perfect for this project because it doesn’t fray, is sturdy and just heavy enough to give the organizer body. I use it for all sorts of bags, totes, placemats etc. You can purchase MPC from these on-line retailers www.artisticartifacts.com or www.bluetwigstudio.com. Heavy canvas or felt may be substituted but will give a different look and feel. Canvas will ravel so all the edges will need to be stitched tightly.
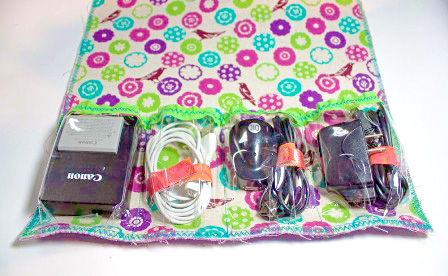
Cord Wraps

Supplies:

  • Small pieces of MPC (Multi-Purpose Cloth)
  • ½” hook and loop tape ~ sew in type
  • Sewing machine

I use MPC so often that I usually have some scraps around. I gathered painted scraps but if you don’t have scraps laying around you can easily paint MPC with just about any coloring media or you could simply write your name on it or doodle with a marker.

1. Cut the MPC into strips ½” x 7”~ You need one for each cord. An extra large cord may need a longer strip.
2. Cut hook and loop tape into ½” pieces~ One set for each cord.

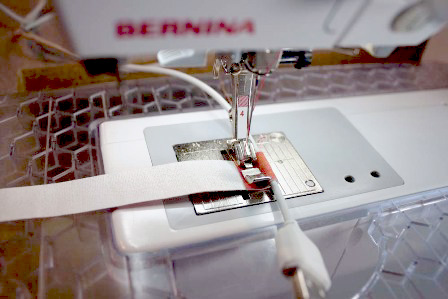
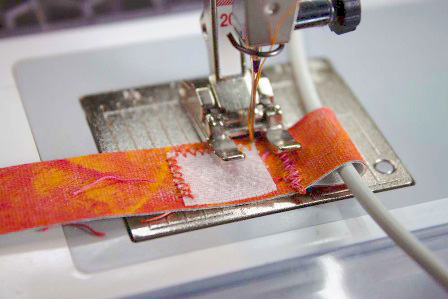
3. To attach the wrap to the cord, fold one end of the wrap around the cord and leave a little over ¼” overlap. Using your zipper foot, stitch along the edge of the MPC.

4. Use your open toe embroidery or #1 foot to reinforce the edge with a zigzag stitch.

5. Turn the wrap over and stitch the hook part of the hook and loop tape at the end of the zigzag stitch.

6. Determine the final length of the cord wrap by wrapping your cord and marking where the end needs to be to overlap the Velcro.

  • Stitch the loop part of hook and loop tape on the back side of the strap.
  • Wrap around the cord, secure with the hook and loop tape and your cords are neat
    and tidy!

Cord Organizer

Supplies:

  • Multi-Purpose Cloth* 16″x12 ½”
  • Decorative fabrics ~ 2 pieces 16″ x 12 1/2″ I used a Japanese linen fabric
  • 4 feet of 1″wide ribbon or twill tape for closure
  • 14″ of double folded seam tape
  • Plastic for pockets (medium thickness)
  • ¼” wide elastic ~ 14″
  • Fusible web such as Misty Fuse
  • Rotary Cutter and Cutting Mat
  • Havel’s Non-Stick Scissors
  • Sewing Machine

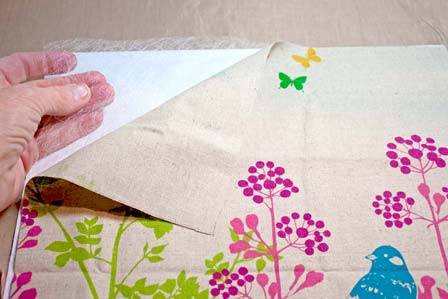
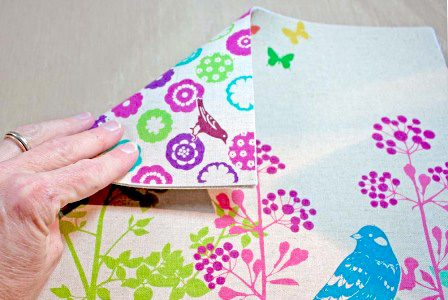
1. Using your rotary cutter and mat, cut the MPC, Misty Fuse and fabrics 16″ x 12 ½”. Layer the MPC, the Misty Fuse and the outer decorative fabric. Follow manufacturer’s directions to fuse together.

2. Repeat with the inner decorative fabric layer to cover both sides of the MPC. Set this aside for now.
3. Cut a piece of Misty Fuse ½” wide x 14″. Place this inside the folds of the unfolded seam tape. Use a Teflon pressing sheet and iron the tape to fuse the inner folds flat.

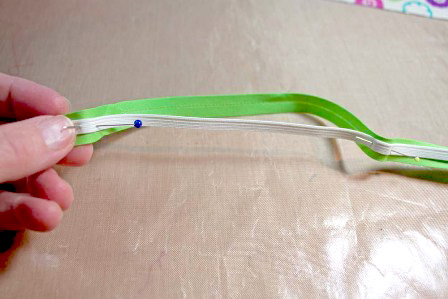
4. Pin in the 14″ of ¼” wide elastic to the back side of the seam tape.

5. Pin the elastic evenly around the tape while stretching to fit. When finished it will look like this.

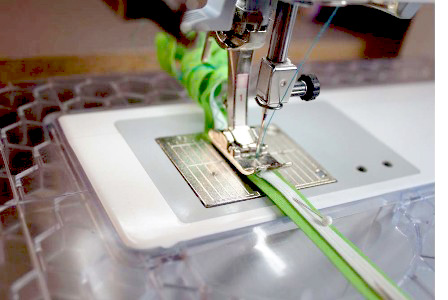
6. Use a zigzag stitch to stitch the elastic to the seam tape.

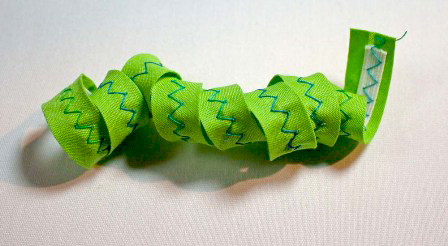
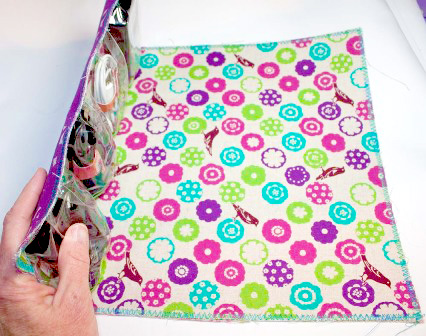
7. When finished it will curl up like this.

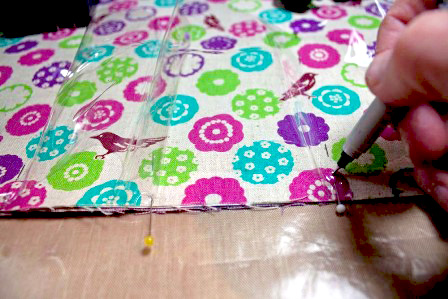
8. Use a permanent marker and a ruler to mark the plastic.

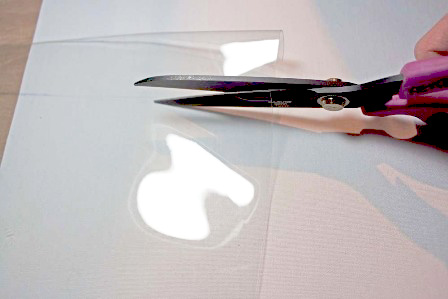
9. Use non-stick scissors to cut a piece 20″ x 5″.

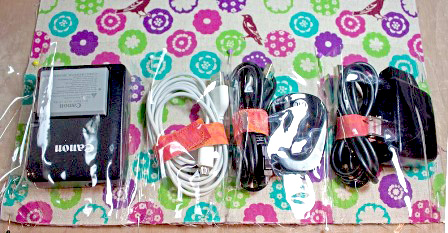
10. To personalize your organizer, place the specific charging cords and devices on the base of your organizer. Place the plastic over these. Begin on one end and pin the plastic to the edge. Then smooth the plastic between the cords to allow for the depth of the pocket and pin the bottom and top of the plastic onto the base fabric. Trim off the extra plastic with your non-stick scissors.

11. Remove the charging devices and mark the pin placement on the plastic on the bottom edge so you can realign it later. Mark the fabric as well or measure and record on a piece of paper. Remove the pins and plastic.

12. Place the seam tape along the top edge of the plastic, stretching to fit and stitch in place with a zigzag stitch.

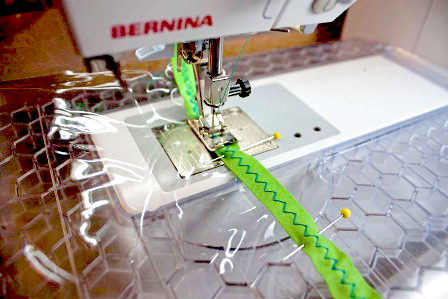
13. Place the plastic back on the fabric and re-pin the plastic in place along the sides and bottom. Create small pleats or folds along the bottom edge of the plastic to make the pocket depth needed for the cords. Pin these in place. Stitch along the side and bottom edges with a straight stitch.

14. If stitching on the plastic is difficult, use a Teflon foot or simply stick a piece of tape on the bottom of your foot. This will help reduce drag from the plastic.

15. Stitch the pockets from the bottom of the plastic up to the seam tape covered edge using a straight stitch. Stitch back and forth a couple times at the top to reinforce the top edge.

16. Stitch around all the sides with a zigzag stitch. I like to use a multicolored thread and stitch around the edge multiple times to blend the thread colors. You can also use a satin stitch around the edge for a more finished edge.

17. Fold the wrapping ribbon or twill tape in half and place the fold on the middle of the top edge of the organizer on the outside. Stitch the ribbon securely with a zigzag stitch. I usually stitch it 2-4 times.

18. Place your charging devices and cords back in the plastic pockets.

19. Roll the organizer up from the bottom edge and wrap the ribbon around to tie. Trim ribbon as necessary. You are ready to travel anywhere fully charged!


Liz KettleLiz Kettle is a mixed media and textile artist living in Colorado. Liz is author of First Time Beading on Fabric and she is co-author of 2 books, Fabric Embellishing: The Basics and Beyond and Threads: The Basics and Beyond. Liz loves teaching and sharing the joy of making stuff in her articles, classes and workshops. Visit her blog and website where you can join the fun in her free on-line book studies @ www.TextileEvolution.com.


CTA-with-9-inch-non-stick-scissors-400x325


Posted in craft, Craft to make, Fabric, Free Craft Projects, Free Quilt Projects, How To, Liz Kettle, Tutorials | Tagged , , , | 6 Comments

Free Craft: Magnetic Bookmarks

By Beth Novak

We now live in an age of e-readers, whether it be a Kindle, a Nook, an iPad, or some other device, but I still find nothing more relaxing than an old-fashion page turner at the beach! As you’re reading this I’m soaking up the sun on my favorite island in North Carolina (okay, really I’m hiding under an umbrella, but you get the idea). I have a stack of library books to work through – and the only thing I have to worry about is losing my bookmark to the stiff ocean breeze.

magnetic bookmarks

Even if you’re not outside, it’s handy to have a bookmark that stays put. Little fingers love to pull my bookmarks out of my books, and as long as I make one of these for my son as well, I get to keep my page marked.

Magnetic Bookmark Supplies:

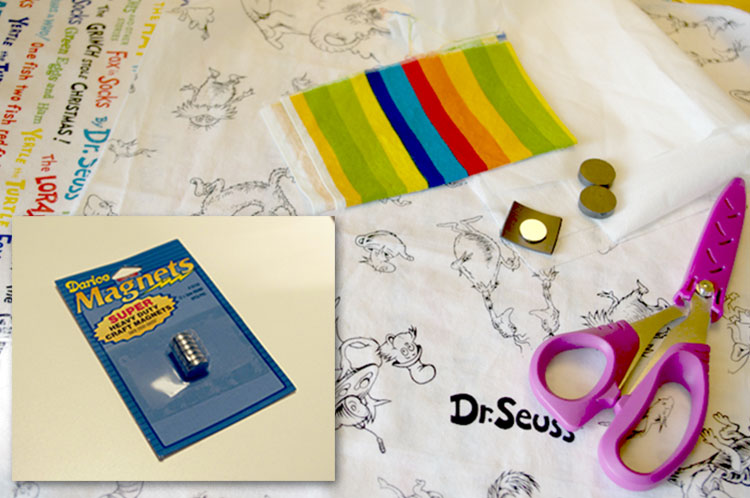
*A note about the magnets: They need to be strong enough to hold through two layers of fabric and two layers of interfacing, as well as your book’s page. The black ones you see in the photo below ended up being too thick, and two pieces of adhesive magnet strip were too weak. I ended up using smaller “super strong” magnets (inset) I found at the local craft shop. They were perfect.

use strong magnets

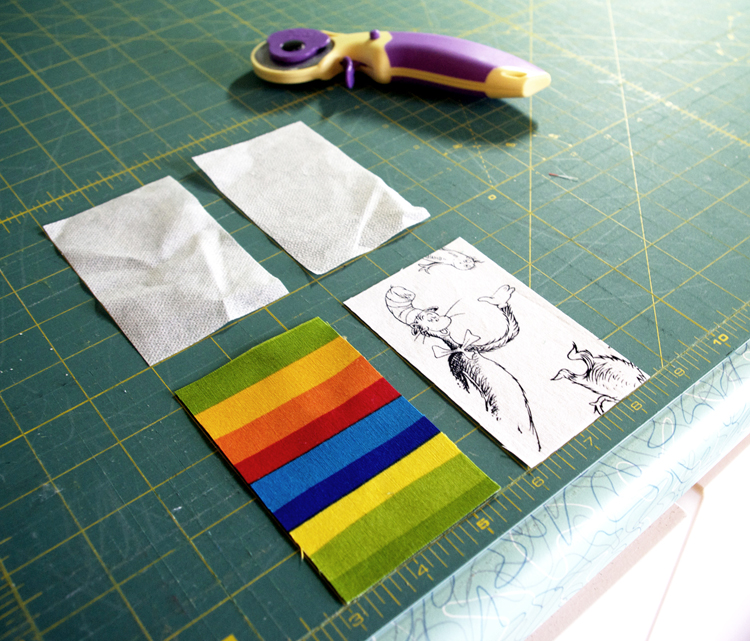
  1. Cut two pieces of fabric 4.25” x 2.5”. Repeat with interfacing.

cut fabric and interfacing

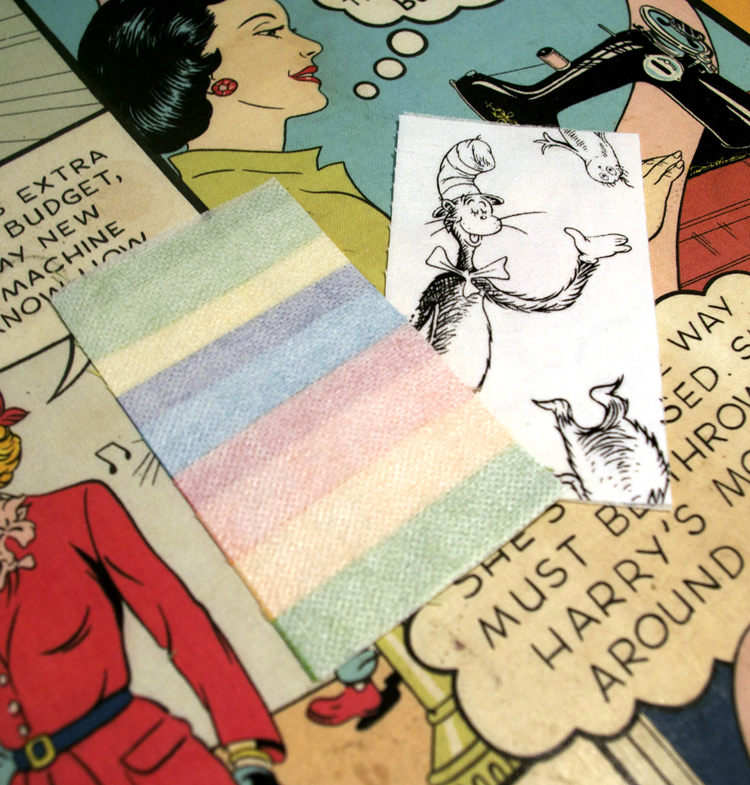
  1. Iron the interfacing to the wrong sides of the fabric. If you haven’t used fusible interfacing before, the most important thing to remember is that the shiny side of the interfacing has the glue on it. Simply line it up with your fabric and iron. If the shiny side is up, you will get a mess stuck to your iron!

iron interfacing to fabric

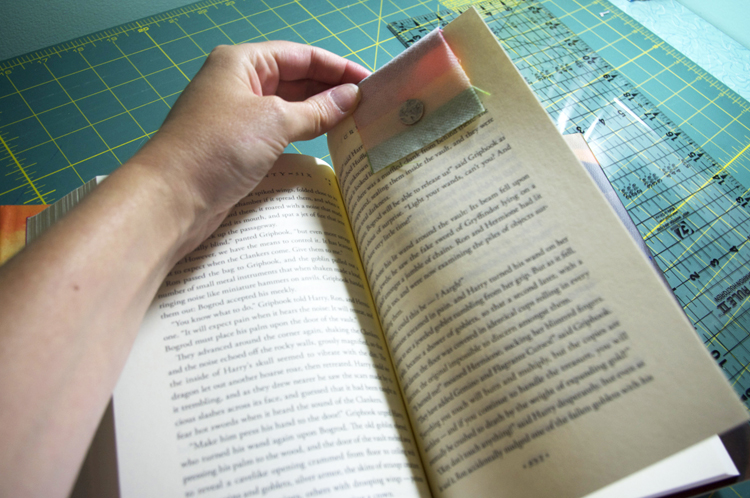
  1. Now is a good time to check the strength of your magnets. Take one of your fabric/interfacing pieces and fold it over a page of a book. Put a magnet on either side. If they hold you’re set. If they slide off, you’ll need stronger magnets.

check magnet strength

  1. Place fabric right sides together (you should see your interfacing) and sew 1/4” seam around the edges, leaving a turning hole. Backstitch or lock stitch at your starting and stopping points.

place fabric right sides together

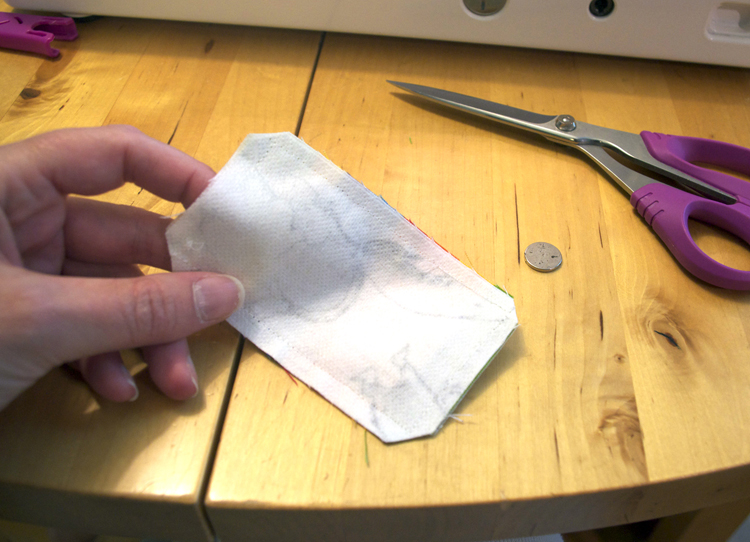
  1. Clip the corners, being careful not to cut into the thread.

clip the corners

  1. Turn your bookmark right side out. Gently poke out the corners either with scissors (this can be dangerous so be careful not to poke through your seams!), or a laying tool.
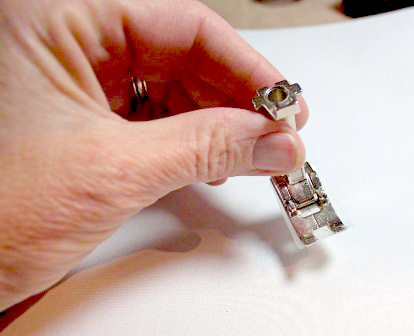
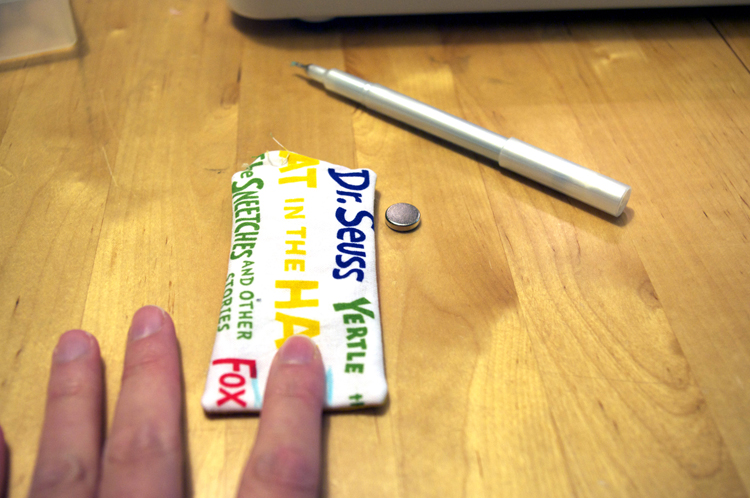
  2. Now it’s time to add those magnets. You want to create “pockets” to keep the magnets in place, and you want to make sure that the polarity of each magnet is correct so they attract each other rather than repulse.

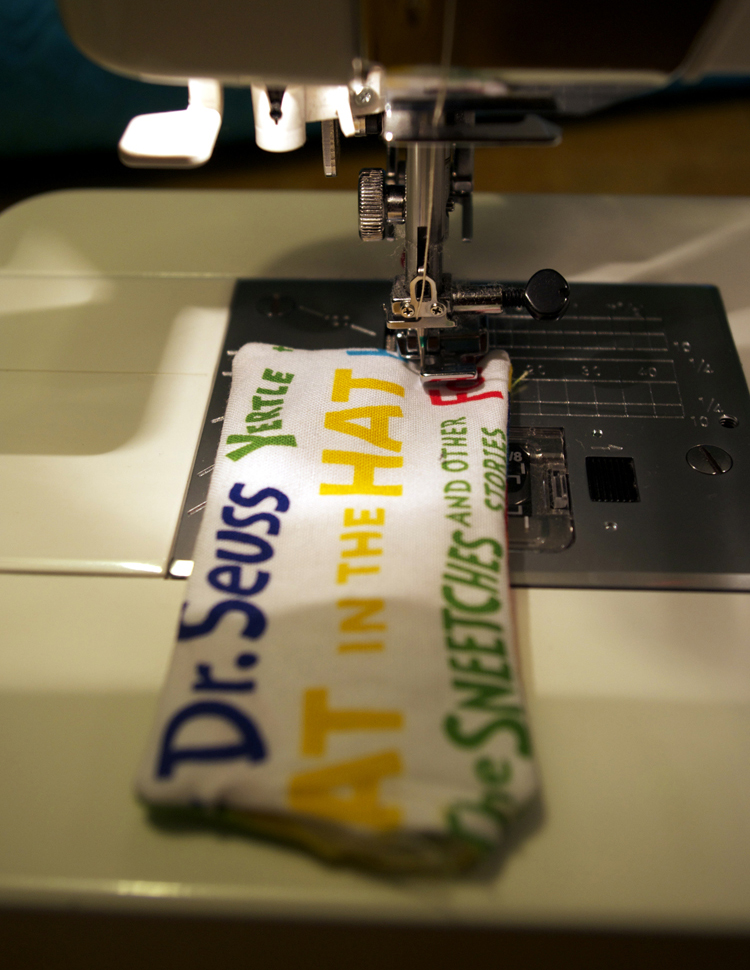
Start by sliding one of your magnets through the hole in your bookmark to the bottom. With a zipper foot on your machine, hold the magnet in place with your finger and sew a square around it so it stays in place.

turn bookmark right side out

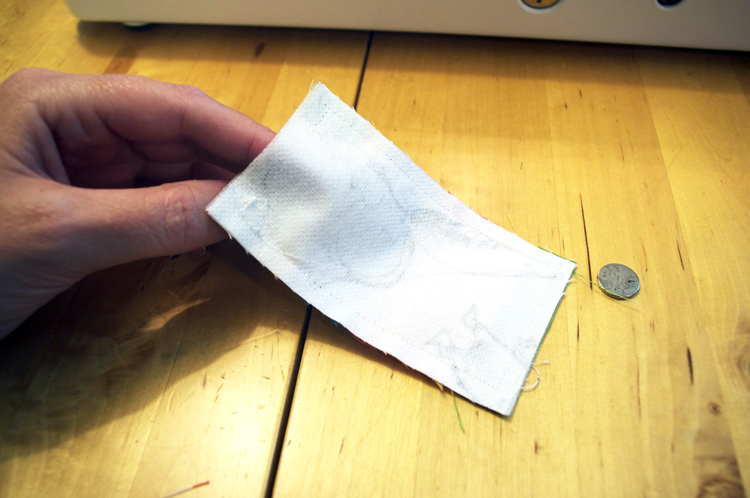
If, like me, your sewing machine is made of metal, this might be difficult. That magnet is strong! What I did instead, while holding the magnet in place, draw (with a water soluble pen or chalk) on either edge of the magnet.

draw around magnet with water soluble pen

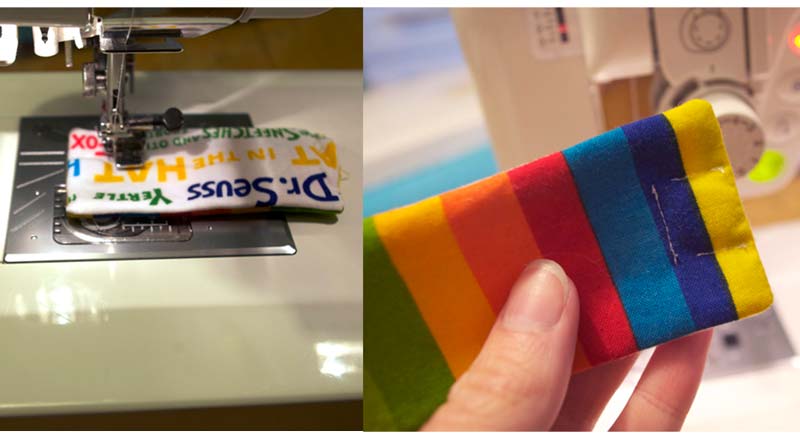
Slide the magnet back out and sew on either line. Slide the magnet back in and then sew a seam across the “top,” locking the magnet in place.

sew around magnet

Repeat with the other magnet at the other end, making sure you leave enough room to close the seam, and when the bookmark is folded in half, the magnets attract each other.

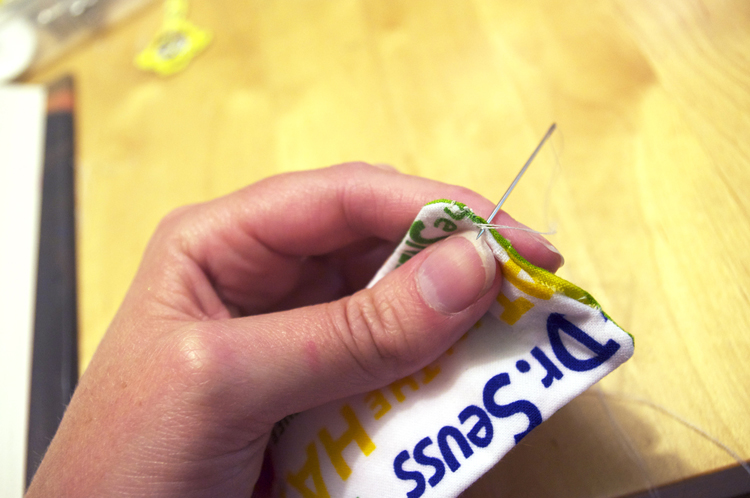
  1. Sew the hole closed, either by edge stitching around all four sides of the bookmark, or by whip stitching with a needle and thread.

sew the hole closed

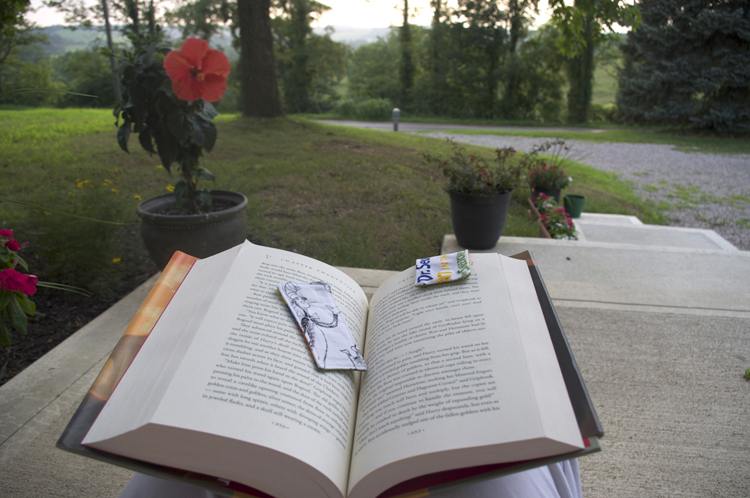
Relax and enjoy!

enjoy book with bookmark


beth novak headshot


Beth Novak is a mother, wife, sewist, blogger, and comedienne (in her own mind) living in southeast Ohio. She also finds time to work full time as a professor of digital media. Contact her at modernJax@gmail.com, or find her on FlickrTwitter, and Pinterest, too!


60mm-rotary-and-cutting-mat-set_cta

Posted in Fabric, For Beginners in Sewing, Free Quilt Patterns, Fun Stuff, Guest Writers, School, Tutorials, Uncategorized | Tagged , , , , , , | Comments Off on Free Craft: Magnetic Bookmarks

Quilts Have Improved My Life

By Kathy Mathews

The wonderful thing about being a quilter is that the impact on my life is so deep and varied. Being a quilter and making quilts has ripples in my life that are fun and immediate as well and profound and long term. In fact, before I wrote this I had really fully realized how much better my life is because I make quilts.
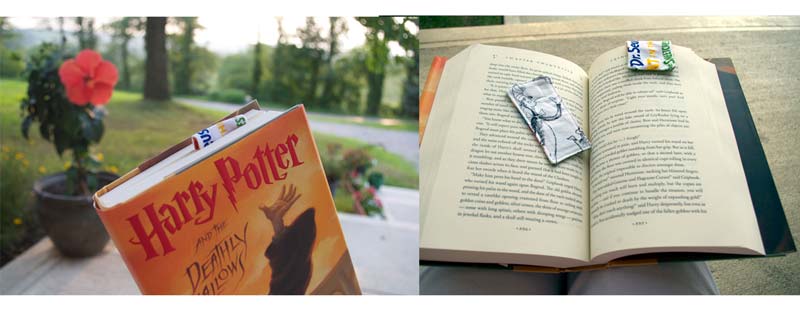
quilting has improved my life image 01

First and foremost, the very action of planning a quilt is positive. It activates the creative recesses of my brain as well as sequential and logical thinking. I have to measure, be accurate and figure things out. It’s stimulating for my thoughts and keeps my brain lively and awake.

In addition to doing the math of fabric purchasing and placement, color theory is utilized. Does this match? Will this stand out? Are these colors complementary or clashing? Do I want a soothing palette or a bright combination that will jump out and say hello?

My arms, hands and legs all get a work out as I cut, design and cut some more. Hand/eye coordination is essential as I piece my blocks. I have adequate lighting, ergonomic chairs and items just far enough away to keep me moving in the process.

All these physical improvements to my body are terrific and nearly enough to justify quilting. Lucky for me the benefits just keep on coming.

In order to keep up with quilting, I have to learn how to use new tools and techniques. Learning new skills makes me feel pretty darn clever. And when I finish my masterpiece, I have wonderful feelings of worth and self-esteem. It’s a pretty great feeling to have produced a work of art, I am happy and proud.

Learning new ways to communicate is key to being a quilter as well. I am on Twitter just to keep up with my twilter buddies. I joined Instagram so I could see pictures of modern quilts. I learned how to write a blog so I would be able to spread my love of quilting.

Mastering different aspects of Facebook is part of my sewing life also. I have a page for my blog, a secret group of blogger buddies and another of quilting friends. I look up YouTube videos to learn new techniques. I text pictures of my quilts to guild friends.

If I was not a quilter, I would not be proficient in half the technology advancements which I have mastered. This allows me to communicate better with family members and know what is going on in the world. I love knowing about antique quilts and cutting edge technology.

quilting has improved my life image 02

My body and brain are kept sharp with quilting. I am more creative, have good feelings about myself and keep up with technology. But these fabulous attributes are perhaps not what I love most about quilting in my life.

For quite some time, I was a solitary quilter, blooming in the desert in a way. Now with all the ways to communicate, my quilting community has mushroomed in size. I exchange messages and comments with quilters all over the world.

I see quilts from many countries, read blogs from various locations and meet up with friends I know only digitally at large quilt shows. All of these quilters have added to my life in so many ways. Not only do they provide tips and ideas but love and support.

When I was grieving my stillborn granddaughter, quilters I had never met in person were there for me. I received books, messages and gifts. These quilters helped me get back up on my feet and flourishing again.

I have talked with quilters in shows, shops and guild meetings. We have the love of quilts in common and know that the rest really doesn’t matter.

Quilters help each other out without regard for borders, ethnicity or religion. I have been part of quilts for quilters who needed a quilt and no one cared about their politics, race or language. Quilts transcend the superficial and address the basic human needs of love and compassion.

People in nations across the world should follow the example of quilters. Their physical and mental would improve as well as their tech skills. Love, compassion and understanding would prevail instead of hatred and violence.

And everyone would sleep better, ensconced in a handmade quilt.


head-shot-2-134x200Kathy Mathews has been sewing for 49 years and quilting for 31, which is odd as she’s so young. She taught Spanish and French full time for 35 years in Illinois Public schools and then continued at the college level until 2014. During all that time, quilting and sewing allowed her a creative outlet and kept her sane. In addition to needle arts she is an avid reader, swimmer, traveler and yoga newbie.  She blogs mainly about quilting at www.ChicagoNow.com. She lives in the Chicago area with her husband, is the mother of two grown daughters and grandmother to the cutest two year old girl in all the land. You can email her at quiltingsewingcreating@gmail.com.


Posted in Fabric, Guest Writers, Quilting, Uncategorized | Tagged , , , | Comments Off on Quilts Have Improved My Life

Quilting Through Life

Making a Quilt is Just Like Living Your Life

By Kathy Mathews

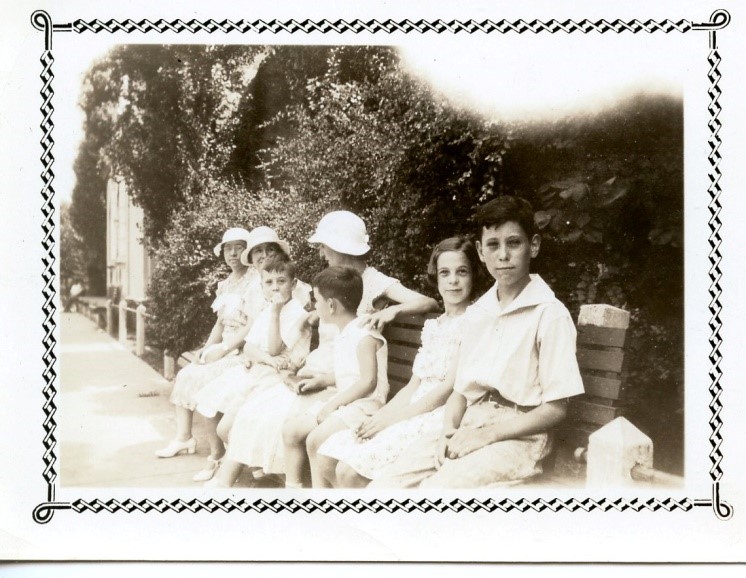
I was lucky enough to do a tiny bit of quilting and sewing at a young age. I was visiting my Aunts who never sat without doing something with their hands. They let me pick out some orange scraps and taught me how to make a simple nine patch, by hand. I admired all their quilts and the fact that in their basement there was always a quilt on a frame. I was a child so my sewing was simple, non-accurate and full of delight.

kathy mathews with family

As I got a bit older, I no longer could just sew whatever, I needed to learn skills. I was lucky enough to take Home Ec in Jr. High and have a drama director’s wife who was my stitch mentor. I was encouraged and slowly learned how to sew with accuracy. I could actually create what I wanted to create and it was intoxicating. By honing my abilities and learning boundaries, it became way more fun.

But into each life some criticism must come and mine did in my twenties. I took a tailoring class in college and a quilting class in my late 20’s. Sewing was no longer, YAY for you, it was rip it out and do that again. To fascination and satisfaction, I was adding discipline. I liked being really accurate and knowing the exact way to do something even if I have changed things up since then. Precision and discipline added to the enjoyment.

As I added family, jobs and duties to my plate, my sewing became something of an outlet for me. I began to learn how to quilt for pleasure and it was my therapy in those busy years. I was repeating what I had learned, I was adding muscle memory and understanding why I was doing what I was doing in my 30’s and 40’s. In life and in quilting, I made mistakes. I had to redo and decide if it was good enough.

In those days my life as a whole was like a scrap quilt – a pleasing look but boy oh boy, there were some really ugly fabrics and even blocks in there. I quilted my way through sadness, disappointment and even resentment. I used my sewing to celebrate my children and their triumphs in life. I learned that there was good and bad in life and quilts.

kathy mathews' quilt

As my life got easier in my 40’s and 50’s, I didn’t need the structure and rigidity of traditional quilting to help keep me stitched together. First I began to experiment with color and make more difficult quilts. I learned to love again and to expand my quilting skills. When life was happier my quilting started to become more risky. I didn’t need a guaranteed sure fire success; I could hope rather than know that something would
turn out.

Now I am in my early 60’s and my quilting reflects my life, as always. I am retired and have more free time. I have made many of the quilts I had wanted to make, the obligatory sewing. Now I can fly free, try wild combinations or the most traditional. I can use bright colors or just black and white. I am a modern traditional quilter, a combination.

But more than that, I am an unfettered quilter. I have time to do challenges. I have the confidence to attempt whatever piques my interest and the skills to pull it off. And even if I don’t, that’s okay also. I have had enough success that now I can deal with failure. Doesn’t look exactly like I wanted, let’s try it again.

At this age, peer pressure is gone. I can wear funky clothes and shoes or very comfortable utilitarian duds. I can have short greyish hair or put in some highlights. I can quilt with solids, imported cottons or a super bargain I have in my stash.

Freedom in life, freedom in quilting they are both magnificent to achieve.


Kathy Mathews has been sewing for 49 years and quilting for 31, which is odd as she’s so young. She taught Spanish and French full time for 35 years in Illinois Public schools and then continued at the college level until 2014. During all that time, quilting and sewing allowed her a creative outlet and kept her sane. In addition to needle arts she is an avid reader, swimmer, traveler and yoga newbie.  She blogs mainly about quilting at www.ChicagoNow.com. She lives in the Chicago area with her husband, is the mother of two grown daughters and grandmother to the cutest two year old girl in all the land. You can email her at quiltingsewingcreating@gmail.com.


Need some craft ideas? Download our Free eBook by Jamie Fingal…

[hs_action id=”8213″]

Posted in craft, Crafting, Fabric, Guest Writers, Quilting, Quilting, Uncategorized | Tagged , , , | Comments Off on Quilting Through Life