THE QUILT MAKER’S TOOLKIT – HAVEL’S SNIP-A-STITCH SEAM RIPPER ( VIDEO TUTORIAL ) + HOW TO USE A SEAM RIPPER
by Melanie Traylor of Southern Charm Quilts
Hello, lovelies!
I hope you are having a wonderful day. We’ve got sunny skies and warmer weather here, so I’ve been doing lots of porch sitting and slow stitching. It’s been nice.
Today I’m talking to you about seam ripping. Ugh. Yes, I know. Seam ripping was always going to be doomed to be something you hate doing. I mean if you are doing it, it means you have made a mistake or done something you don’t like.
I can’t tell you how many times I have grumbled, cursed and lashed out at myself as I use my seam ripper. AND to top it all off, the actual act of seam ripping is about as annoying a task could possibly be.
I stumbled upon a tool that has at least changed the “annoying” part of this ordeal.
Let’s have a chat about it.
Today’s post is a sponsored post. My opinions are honest and are my own. I will never review a product I wouldn’t purchase for myself.
Product Spotlight
The easier, more effortless way to rip, I mean snip your unwanted stitches.
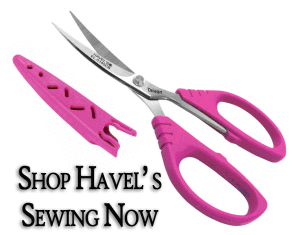
This seam ripper from Havel’s acts like a pair of scissors. It literally snips your stitches. Here’s what Havel’s has to say about it on their website…..
Get closer to your stitches, seams and threads than ever before with the most versatile, long-lasting snips you’ll ever need! Our 4 1/2” Snip-a-Stitch Scissors are small, lightweight and cut quickly and easily. The notched blade grabs single stitches removes them effortlessly, and the easy squeeze action is ideal for tired or arthritic hands.
● Removes individual stitches, seams and threads
● Sharp, curved blade slides easily underneath
single stiches
● Comfortable, easy to use
● No more troublesome stitching errors!
This item has dozens of outstanding reviews because it WILL actually make the seam ripping snipping SO. MUCH. EASIER.
But let me show you….
Using the traditional seam ripper can sometimes result in pulls or tears in your fabric. I can’t tell you how many times I’ve slipped up and ripped right through my fabric. Now, all I have to do is simply slip the hook of the snips into my stitch and cut. Done.
Even more than having to remove the stitches from your patchwork pieces, this tool is great for removing quilting stitches. YES! Those stitches are the absolute worst to have to take out and with this tool you can really make the job much more simpler.
Chain piecing! That’s what we are talking about today.
If you have been quilting for awhile, do you remember that moment when you first discovered chain piecing or heard of it? Did you palm your face in exasperation? Did you ask yourself why you didn’t think about this VERY obvious method before all those hours you spent sewing square after square after square?
That’s exactly how I discovered chain piecing. I was getting my sewing on everyday, happily, music playing in the background, thinking everything was so great! Then, I bought a pattern that asked me to chain piece and I was all, “Whaaaaaaaat?” Then my furrowed brow turned into an eye roll. Yeah. Obviously. Chain piecing. Duh! How many hours have I wasted slow sewing. I could have been petting fabrics!
I think it probably happens to all of us. If you are new to quilt making, this post is for you. If you have made many quilts, stick around, I’ve got a product that is going to make you go ga-ga at it’s ease of use. I feel like it should be marketed specifically for chain piecing. Let’s get to it!
Product Spotlight
AGF Color Master fat Quarter Bundle includes 10 fat quarters.
Every box is unique and includes randomly selected fat quarter cuts from a mix of Art Gallery collections in a printed designer box.
So let’s say that you are piecing…..ANYTHING. Literally, it is for pretty much every single task of sewing. But let’s give you an example: You are piecing a basic simple patchwork quilt with squares. All of these squares have to be sewn together. Stack in order all of your squares in your first column, then stack all of the squares in the second column. Sew all the first column to all the second column, one after the other, NO cutting the threads that connect them. Just sew and sew and sew!
Don’t like the column method? Prefer row by row? Me too!! Stack a single row. Sew the first square to the second square, sew the third square to the fourth square, and so on and so on. Just keep sewing and don’t cut those threads.
Why am I describing this to you when I can show you??
Need to make half square triangles? Chain piece them.
Sewing corners onto a larger square? Chain piece them.
Making flying geese? Chain piece them.
Yep. It works for everything. Now go sew, sew, sew.
The Dura Snips
The Dura Snips on a Neck Strap have extra sharp and durable high carbon forged steel blades. Easy squeeze action and unbeatable long-lasting sharpness for precise thread snipping. Fits into a safety storage cap on a convenient neck strap. Fun to use; fun to wear. Keep your thread snips close at hand.
The above description is from the Havel’s Sewing website. When I got the snips I was thinking that it would be great to wear them on my neck and always have scissors when I need them. They quickly became so much more than that. They are THE. PERFECT. THREAD. CUTTERS. It’s like they were made for chain piecing. As you can see in my demonstration video, they make chain piecing a breeze. I’ll never chain piece without them again.
THE QUILT MAKER’S TOOLKIT – by Melanie Traylor of Southern Charm Quilts
HAVEL’S ROTARY CUTTER AND CUTTING MAT
I was planning on writing a post about the cutting mats I use since I feel they are so very important to the exactness of cutting fabric.
I was going to tell you that I have two cutting mats: a huge one that measures 36×59″ and sits across our old dining room table that I claimed years ago and moved down to my studio for the sole purpose of a cutting table, plus a very small one that measures 12×18″ that I use at my sewing table by my machine for many different things.
My tiny mat by Olfa was purchased when I first started quilting. It’s extremely wore out and after nine years of use the self healing has started to give a bit. I only use it for small work like cutting half square triangles on the sofa instead of the studio. I bought it only for portability. It’s a pain to use it for cutting anything bigger than a fat quarter, and even then I have to fold the fabric.
Still, if you are just starting your journey into quilt making, I say a small mat is just fine getting you started. It won’t be long until you are ready for something bigger though.
Product Spotlight
● Professional quality, double-sided, self-healing
● Five layers thick to protect rotary blades and
workspace
● Multi-angled grid lines offer more creative cutting
options
● Fabric and mat won’t slide during use
● Outside dimensions: 36″ x 24″
● Gridded area for measuring: 34″ x 22″
● Measurements in inches on both sides
The larger one I purchase about every 6-7 months is NOT self healing and is something that is extremely expensive to replace. Deep grooves get cut down into it very quickly and I’m probably wasting my rotary blades because I let it go so long before replacing the mat. But it’s so expensive, so can you blame me? The only reason I keep replacing it is because I really like the size.
So though I feel I might be a bit spoiled in the size department, I am not spoiled in the quality. And with those two mats being the only mats I’ve ever used, you can see why I might be a bit behind the trends on cutting mats.
I was a bit tickled to be getting a new cutting mat to begin with and the fact that it was pink was just like the stars had aligned or something, but to be honest when I saw the size, 34×22″, which is Havels’ biggest mat I was thinking that a new mat would be nice, but you know…. it’s not as big as my table mat. I probably wouldn’t use it very often.
Now I know better.
Now I know that bigger is not always better (ha!).
Pros: When I cut my very first piece of fabric on the Havel’s mat, I was surprised by how little I had to bear down. I’m used to bearing down, not just because my old mat is probably ready to be replaced, but also because my mat is not as thick or sturdy as the Havel’s mat or as smooth. It has 5 levels of thickness compared to my own mat’s 1 layer. That’s quite a difference when cutting. I measured it and the thickness is 1/8″. This mat doesn’t move or bobble (my old mat sometimes bounced a bit).
Besides being pink and sturdy, the Havel’s mat is also double sided. This means if I eventually wear out one side of the mat, I can flip it over and use the other side as if it was brand new. That’s huge!
Use my coupon code at Havel’s Sewing to receive $7 off any purchase over $25.
The mat comes with increments in inches on both sides too, along with 30, 45, and 60 degree angled lines.
Another thing that I found pretty nifty about this mat, and I say this as a complete newbie to Havel’s Sewing products, is that when you use a Havel’s ruler with this Havel’s mat, the ruler and the mat have these tiny dashed and dotted squares. When I have the ruler and the mat’s dashes and dots lined up, I’m getting better accuracy in my cutting.
Let me detail a little about what I’m talking about. Sometimes quilt blocks come out with these tiny errors in them. We all know this. A flying geese is wonky or a square is off an 1/8 of an inch. This is almost always caused by a cutting error, a pressing error, or you’ve got off of your 1/4″ seam. As quilt maker’s we have found ways of getting better at each of these tasks to insure we get more accurate piecing.
But what if you could be even more accurate with your cutting? I like the tiny dashes and dots feature. I can double check that I’m cutting in the exact spot that I need to be cutting. I feel I’m going to have even less cutting errors and hopefully even less likely to come out with a wonky or short quilt block. I just need to get in the habit of making sure to line everything up.
Cons: I knew the size (for me, only because I have an unusually large cutting mat) was going to deter me from this mat. With it being 22″ tall, I can’t fit a half yard of fabric across it and see the numbers on the very top and bottom, so what I’ve been doing to work around that and still get the smoothness benefits from the mat is to cut my half yards with the mat turned vertically from me, then rotate the mat around to cut whatever strip I’ve just cut. This is working out rather well. In fact, I even like it a little better and here’s why: I lay out my half yard vertically and cut a 3.5″ strip. I then, rotate the mat around, without having to move the strip (that’s the important part) and then cut my strip into 3.5″ squares. The benefit to this is I’m not having to move the fabric once again after the first time. See the video below.
Rotary cutters tend to last forever. I have three rotary cutters before I got the new aqua colored Havel’s cutter.
My very first rotary cutter didn’t have a safety guard, which is why I bought the second one. I lost the second one, which is why I bought the third. Then, I ended up finding the second one which is why I now have three cutters. Ugh, I know.
I really have had no complaints on my old cutters. If I had to nitpick them, they are expensive, plus when my step daughter comes to sew with me, she’ll swap the blade to the opposite side because she’s a lefty. It’s a bit annoying to have to change it back.
Pros: That’s one of the cool things about the Havel’s cutter. It’s ambidextrous, no need to make changes to suit your lefty sewing friends.
Another cool feature about the Havel’s cutter is that I don’t have to hold that lever down to keep my blade out for cutting. With the safety off, when I press my blade onto my fabric for cutting, the blade automatically comes out. This may not seem like the biggest deal at first thought. However, I have spent half a day cutting half square triangles and dresden blades, so not having to constantly be squeezing my hands is going to save me some effort.
Not pressed onto mat
Pressed onto mat
I’ve saved my favorite pro for last, it’s aqua blue. Okay, I know, silly for that to be a pro, but come on! It’s aqua blue. It will look a thousand times better in all my pictures. You know you agree!
Cons: I don’t have any cons to say about this rotary cutter. If I have to nitpick, I’d tell you that 8 layers of fabric seem to be it’s limit, but truth be told that should be my limit anyway since anything more tends to lower my cutting accuracy anyway.
So there you have it, a little trip down into the world of mats and rotary cutters.
This post is not meant to tempt you into thinking you “need” a brand new mat or cutter just because, but IF you are working on a very old mat that the self healing has worn out on, you are looking to upgrade from a very small mat, or if you were in the market for a new mat for your own reasons, go have a look at Havel’s Sewing here. I’m very pleased with mine. Don’t forget to use my coupon code ‘southerncharmquilts7’ and receive a $7 discount on any $25 purchase.
Also, I’d like to know what kind of rotary cutter and mat you are using. What size mats are you using? How do you make them work for you? Leave me some comments below. I’m always interested in your thoughts.
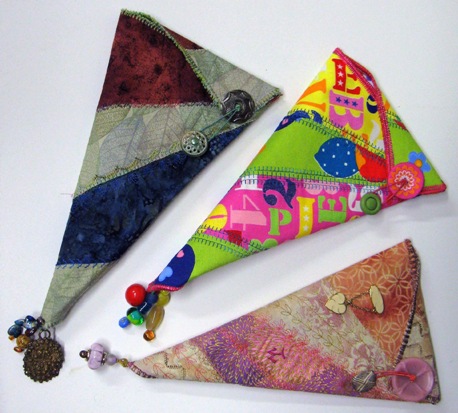
This project was so much fun that I kept making more in different styles. The first one received enough ooohs and ahhhs from friends that I knew this would have to become presents for my girls … all my girls!! AND, each one will suit the personality of the friend.
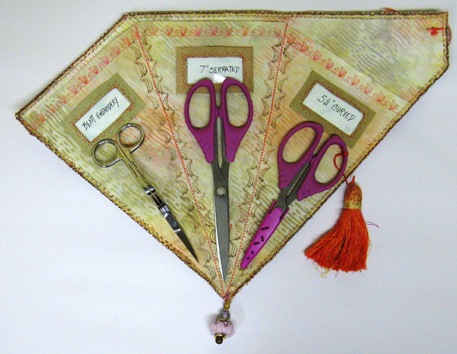
When you open up the wrap, there are three pockets for three different scissors. The pockets will hold scissors eight inches and smaller. This is my personal fan scissors wrap and such a fun craft to make!
Four fabrics — I used cotton, but you can use anything you want!
6”x12” scraps of three, and 17”x24” piece for the lining and pocket
Fusible interfacing — one piece 12”x17”
Fusible web — one piece 20”x20”
Beautiful threads for embroidery — I used Star Cottons, multi-colors (from the group which I designed). Choose threads and colors which will enhance your fabrics.
Shank button
Large two hole button
Elastic cord — 5” length
Beads and baubles for decoration
Permanent fabric markers — to color the elastic and (optional) to color the edge before or after edge stitching all around the wrap.
There are three main pieces to this project: the decorated cover, lining and scissor pocket.
The Decorated Cover
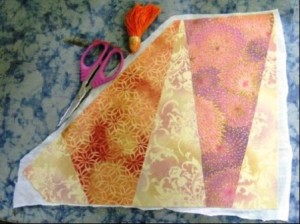
1. Use pattern piece A: Trace the shape onto fusible interfacing and cut out.
2. Use pattern pieces B, C, D, E, F: Trace each shape onto desired fabric and cut out.
3. Lay the fabric shapes side by side onto the fusible interfacing and press.
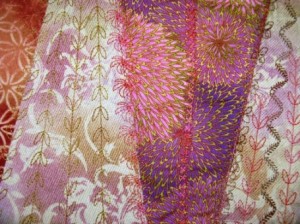
4. Decorate with decorative stitching and beautiful threads.
*Tip: Because this is a project that will get a lot of use, I don’t add too many delicate
details. This will be different for different styles, but add what you like!
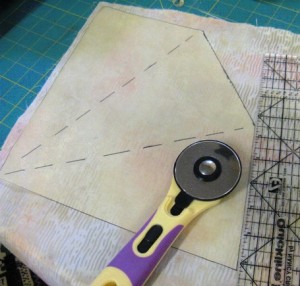
5. Trim the excess interfacing and rough edges of decorative cover. Use this as a pattern and cut out your lining piece and a piece of fusible web. Set aside.
Scissor Pocket
6.Use pattern piece G: Trace shape onto lining fabric. This is the scissor pocket.
7. Fold the top edge of the pocket piece 1/2 inch and press. Use a piece of fusible web to tack it down.
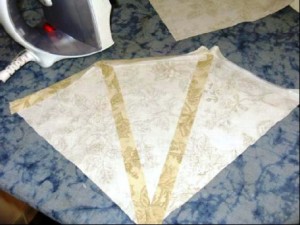
8. Add fusible web to extra strips of lining fabric. Iron them to the wrong side
of the pocket along the fold lines. This adds stability to the pockets.
9. Decorate the top edge with decorative stitching.
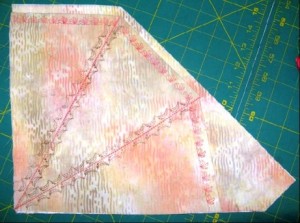
10. Decorate the two sides of each scissor pocket fold with a row of decorative stitches.
11. Lay the pocket onto the lining fabric. Stitch the pocket to the lining with a
lightening stitch along the fold lines.
Final Construction
12. Apply fusible web to the back of the decorative cover according to manufacturer’s directions.
13. Press the pocket and liner to the back of the decorative cover.
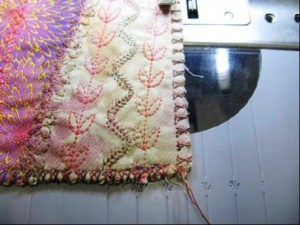
14. Finish edge all around. I used two threads through a 90/14 needle with an overcast stitch. This is a great place to use a serger.
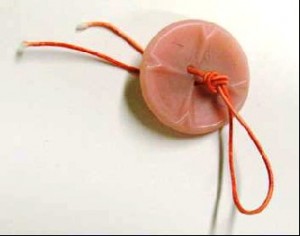
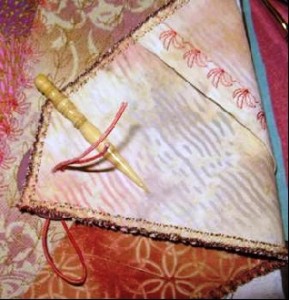
15. Attach a two hole button to the cover with colored elastic cord. Use a permanent marking pen to color the elastic. Make a loop and knot it.
Pull the two ends of the elastic through the back of the button. Use an awl to make two holes large enough for the elastic to go through the cover. Knot the elastic on the back.
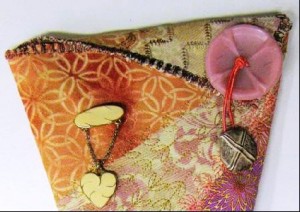
16. Sew a shank button on the cover to finish the closure.
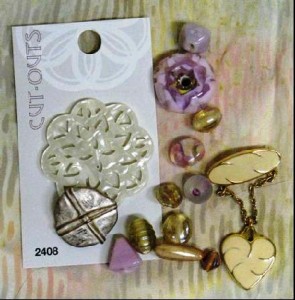
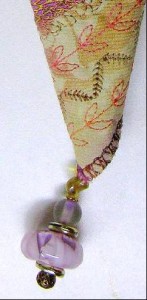
17. Add a bead drop to the bottom.
18. The bead drop was made from parts of old jewelry and lovely one-of-a-kind glass beads. The heart pin is from a box of costume jewelry I bought years ago. The big pink button I used is vintage, but one I considered using is from Blumenthal called “Cut Outs” which I picked up in the Green Room at a Quilting Arts TV shoot!
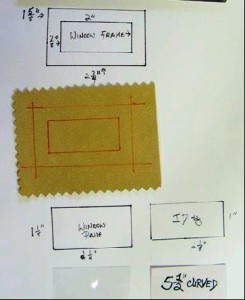
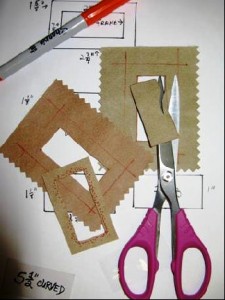
19. Follow the photos to make the label windows and ID’s.
The plastic window is glued to the inside of the suede frame. The frame is glued to the scissor pockets on the sides and the bottom — this way, the cardboard ID label slides right in.
Fan Scissors Wrap Pattern A (B, C, D, E, F Combined)
Fan Scissors Wrap Pattern D, E, F
Fan Scissors Wrap Pattern G (H Combined Three Times)
Terry White is a studio fiber artist. She has been doing this work since 1996, and she discovered the techniques she uses (threadpaint, machine appliqué, piece, quilt, embellish with beads, fibers and minutiae with sewing machine techniques) through experimentation and self-study. Terry teaches these techniques through classes and videos. Over the years Terry has been published in over 50 articles in magazines and books, including McCall’s Needlework, Quilter’s Newsletter, Machine Embroidery and Textile Arts, CMA trade magazine, Stitch n Sew Quilts, Quick n Easy Quilts, Quilt World magazine and Calendar, Quilting Arts Calendar 2003, America from the Heart, America’s Best and America Sews. She is a wife, stitcher, artist, sister, mother, friend, nana, gardener, baker, writer, student, teacher and American. See more of Terry’s work at www.threadpaint.com.
Whip up these delightful collage art cards this Holiday season. They are fun and easy enough to make it a family project. These cards can be adapted to any holiday and if you have a motif cutting machine they would be a snap to make.
Supplies:
Purchased card blanks
Fabric scraps to fit your theme
Mardi Gras Faux Suede (or white fabric) for the snow-women 4″ x 7″
Orange embroidery floss or pearl cotton and chenille needle
Fusible web such as Misty Fuse
Craft weight stabilizer such as Craft Fuse or tear away stabilizer
A circle template in multiple sizes-easily found at office supply stores or use a compass
Sewing machine, assorted threads, and sharp scissors
Wooden printing block and printing mat
Opaque textile paint in white and iridescent paint, glitter paint pen or sparkle gel pen
Small sponge
Resources:
Wooden Printing Blocks, printing mat, and textile paint- artisticartifacts.com
Directions for Sassy Snow Women Cards
1. Cut stabilizer the finished size of your card design. Allow about a ½” border around the edge of the card. If the stabilizer does not have a fusible side, apply Misty Fuse fusible web to one side of the stabilizer.
2. For the stripped background, rip strips of fabric about ½” – 3/4” wide and as long as needed to cover the width of your stabilizer. Place strips on top of the fusible side of the stabilizer. Allow the ripped edges to overlap slightly. Iron to fuse the strips to the stabilizer.
3. Apply fusible web to the wrong side of the faux suede and a small piece of black cotton for the eyes and buttons.
4. Mark and cut three circles from the Mardi Gras faux suede 1 3/8″, 1 ¾”, 2 ¼”. Free hand cut 5 small circles (about ¼” dia) from the black fabric. Rip narrow strips from a scrap of plaid fabric.
5. Fuse the faux suede circles to the background stripped fabric. The faux suede is heavy enough that the background fabrics don’t show through.
6. Using a free motion foot and a metallic thread (my favorite is WonderFil Spotlight) stitch around the body circles of the snow-women.
7. Create a nose for the snow-woman with the orange thread and a single open detached chain stitch.
8. Fuse the artwork to your purchased card base and finish with a zigzag stich around the fabric edge.
Directions for block printed card:
1. Create a fabric background following steps 1 and 2 above2. Place the foam block printing mat on a firm surface. Place the stripped background on top of the mat. Use a sponge to apply the white paint to the wood block.
3. Place wood printing block down on the fabric and press gently to create a clean image. If needed, use a small brush to add more paint to an unpainted area. Let paint dry.
4. Using a free motion foot and metallic or your preferred thread outline the block printed image. Add highlights with iridescent paint, glitter paint pen or sparkle gel pen.
5. Fuse the artwork to your purchased card base and finish with a zigzag stich around the fabric edge.
Embellishing option: Lightly sprinkle BoNash 007 powdered glue on the fabric and cover with foil. Use a warm iron to apply foil following package directions. TIP
Applying paint to wooden printing blocks
Car Wash sponges work perfectly for applying paint to wooden printing blocks. Use scissors to cut the large sponges into smaller squares. Put paint on a palette or paper plate, dab the sponge in the paint and then dab on a clean spot on the plate to reduce any gloppy paint spots on the sponge. Dab the paint on the block using a gentle up and down motion.
Liz Kettle is a fabric and mixed media artist with a passion for teaching others the joy of making art and fascination in the creative process.