Hello Sewing Enthusiasts! Join Havel’s Sewing ambassador, Natalie Santini of Sew Hungry Hippie, in creating this adorable, trendy Leschi top. It’s perfect for those upcoming holiday gatherings with your favorite, stretchy pair of leggings! Part two to follow next week…
Natalie, from Hungry Hippie Sews (or as you know her from instagram @sewhungryhippie) is one of those creatives that just does it all. She makes clothes, quilts, bags, and everything in between. She is always posting pictures of her creations and they always have one thing in common – COLOR. Natalie loves color and she loves to be creative. Click on the links below to discover more of her vibrant projects!
This post is a part of the I am Enough quilt along that starts September 28, 2018 and ends February 1, 2019.
If this is the first time you are learning about this quilt along then please read this post to find out the intentions behind the quilt along and more details.
To view all the posts concerning this quilt along, click here.
To view the email archives of this quilt along, click here.
We are halfway through! How is that possible?
Today we are tackling the Trip Around The World blocks and at first glance these look simple and truthfully they are. BUT! There are so many seams and that means so many places for error. Me and Kathy (my tester) both were groaning with our efforts. 🙂 But we pushed through it!!
And I think we both were quite pleased with the results even if everything isn’t 100% perfect. That’s kind of the thing about making something handmade, isn’t it?
You are Enough
This week I got an email from someone struggling with fear of imperfections so much so that it was just holding her back from even beginning. I feel like maybe we all do this in parts of our life.
When it comes to quilting just jump in and get your hands dirty. Make the mistakes. Groan. Make an ugly quilt. Make a dozen of them. Learn. Get better. You got this!
One thing I love about quilting is every single person can do it. It’s not something like singing or dancing where you have people that are just born with this natural ability (I know they work hard too, but still they are born with something). Quilting is a learnable skill. Piecing is a learnable skill. There will be those who are better at putting colors together (hello, Tara Faughnan), but for the other 80% of this craft it’s putting the time in and getting better. The actual doing of it is for everyone!
Stop scrolling through Pinterest and Instagram and sit down in front of your sewing machine and start making it happen, mistakes and all!
And if you feel that you totally got this and are no longer nervous or scared or have any doubts about your skills when it comes to quilting then say something encouraging to a newbie quilter. Tell them what you wish you knew sooner. Be the quilter that you needed in the beginning. You will make them feel better and in doing so make yourself feel better.
This week while you are working on your very simple, but frustrating Trip blocks think of a tip you might give to a new quilter. Maybe something you’d wish you’d known sooner? When you post your progress this round on Instagram put your tip in the caption.
Product Spotlight
4 3/4″ Dura Snips on a Neck Strap
● Easy squeeze action for precise thread snipping
● Fits into safety storage cap on a convenient
neck strap
● Long lasting sharpness for precise cutting
Read my post about this product here. I don’t really use the neck strap, but these are my go-to for chain piecing. I use them for snipping threads on the daily!
Today’s Lesson
Once more it all comes down to precision. I’ll confess this one is kinda tough. With all those seams there are so many places to make mistakes. Did I make my mistakes cutting or piecing? I’m not sure! Setting yourself up for success in the beginning is my answer to this though.
This is not a fast block. Accept it. It’s a “one at a time” kinda block.
My best advice would be to starch your fabrics before you ever make the first cut. Take your time cutting your squares. What’s the old adage? Measure twice, cut once. When you get to piecing don’t try to rush through it. Instead make sure you are sewing with a 1/4″ seam allowance. Starch every time you press. Fingers crossed you don’t end up with a block where everything was just a smidgen too big.
And if you do……let it be.
Pattern 5 – Trip Blocks
I am ridiculously smitten over this block. I fussy cut my very centers and just had fun with the rest. I cut up way too many squares and played until I liked what I had in front of me. I see more of these in my future.
Tips:
Your block should measure 18.5″ wide. Mine was a half inch more than that. You can see it in the left corner there of my picture. I plan on trimming it down.
Nobody likes to press seams open. We do it for less bulk. Every seam except the borders are instructed to be pressed open for optimal flatness.
Be sure to post your progress on this week’s blocks on Instagram to be eligible for the bi-weekly prize from Havel’s Sewing. Havel’s will announce the winner on Instagram on the Thursday before the next pattern releases.
If your account is set to private, you will not be entered.
Prizes open to US residents only.
I just wanted to take a moment this round and gush about how kind Havel’s Sewing is and what a great company they are and how I feel absolutely honored to be connected to. I absolutely love companies within the quilting world that take the time and connect with their community. These are the kinds of businesses I want to support. I’d like to say thank you to Havel’s for giving us this free quilt along and for all the prizes they are sending out. The fact that the prizes being sent out exceeds what I mention each week has not gone unnoticed!
COTTON + STEEL, FASHION, GIFT IDEAS, INSPIRATION, MACHINE EMBROIDERY, SEWING FOR KIDS, TUTORIALS A Perfect Little Dress – Tips for Making a Dress for 18″ Dolls
November 14, 2018
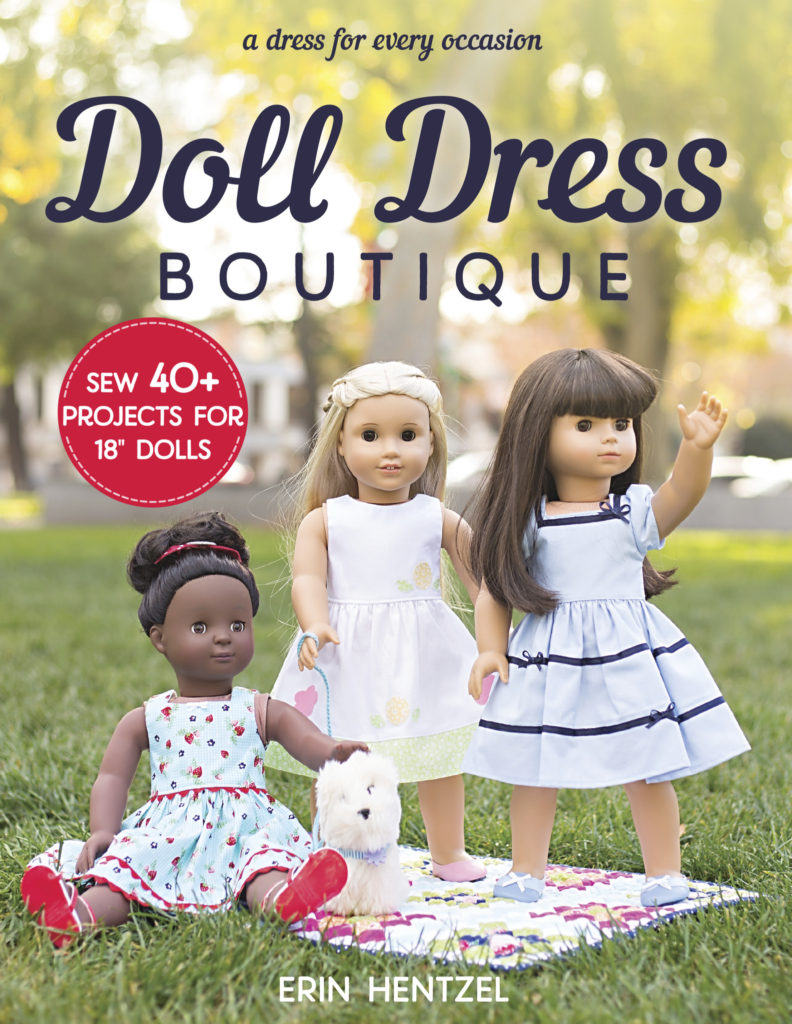
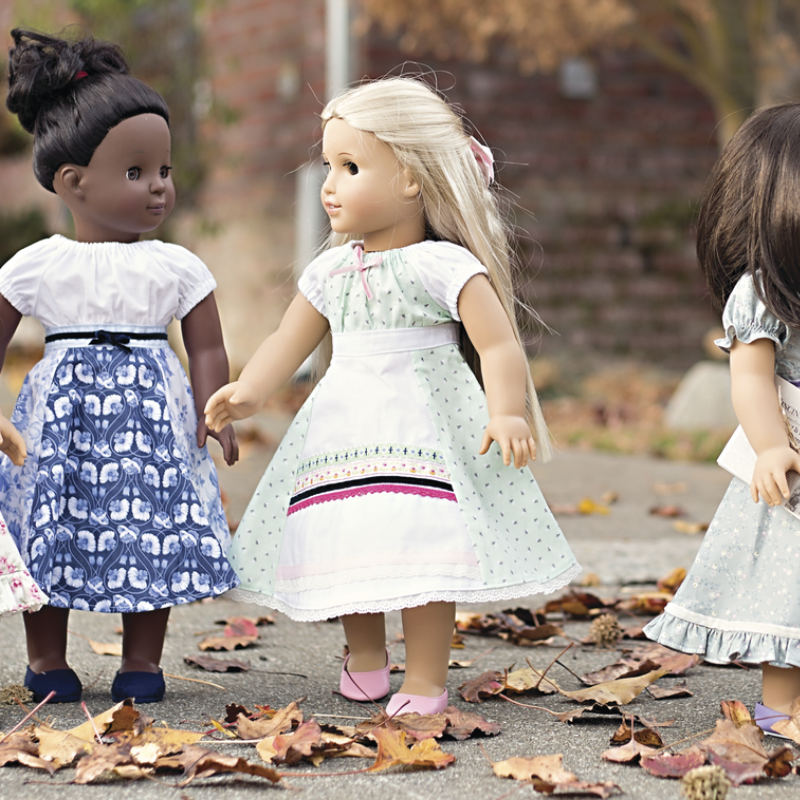
My friend Erin Hentzel just came out with the most adorable book, “Doll Dress Boutique.”It is full of over 40 projects for 18″ dolls. If you have a young girl in your life, she most likely has a doll this size. These dresses make great gifts, but they are also great projects to use to teach the younger generation how to sew!
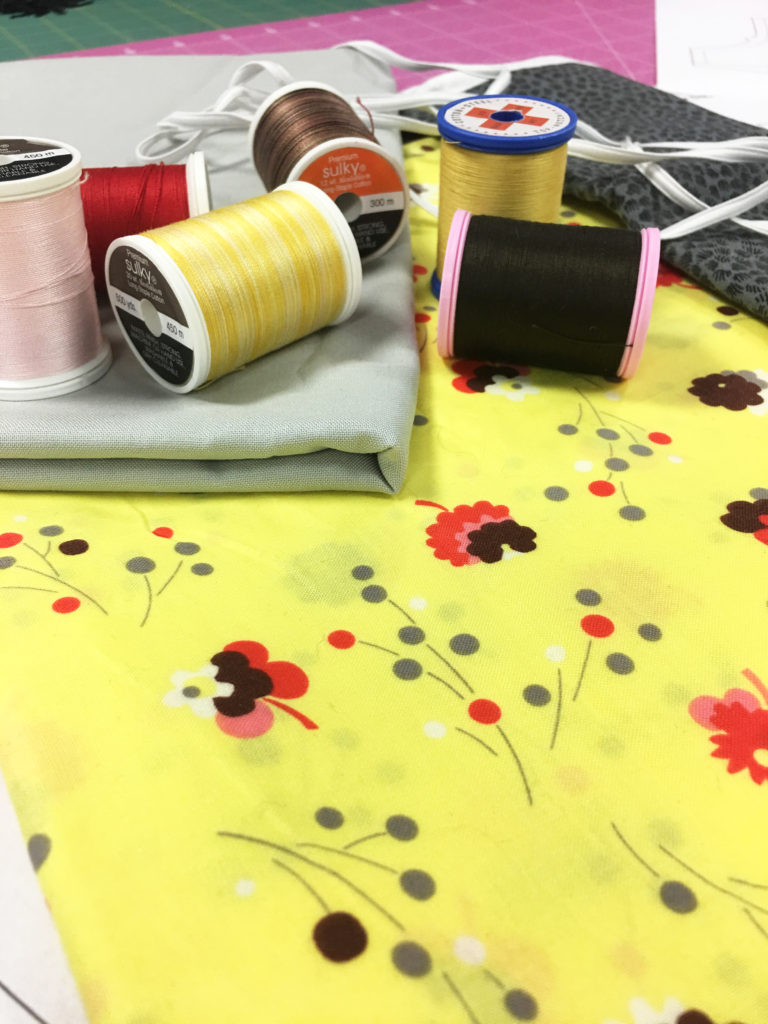
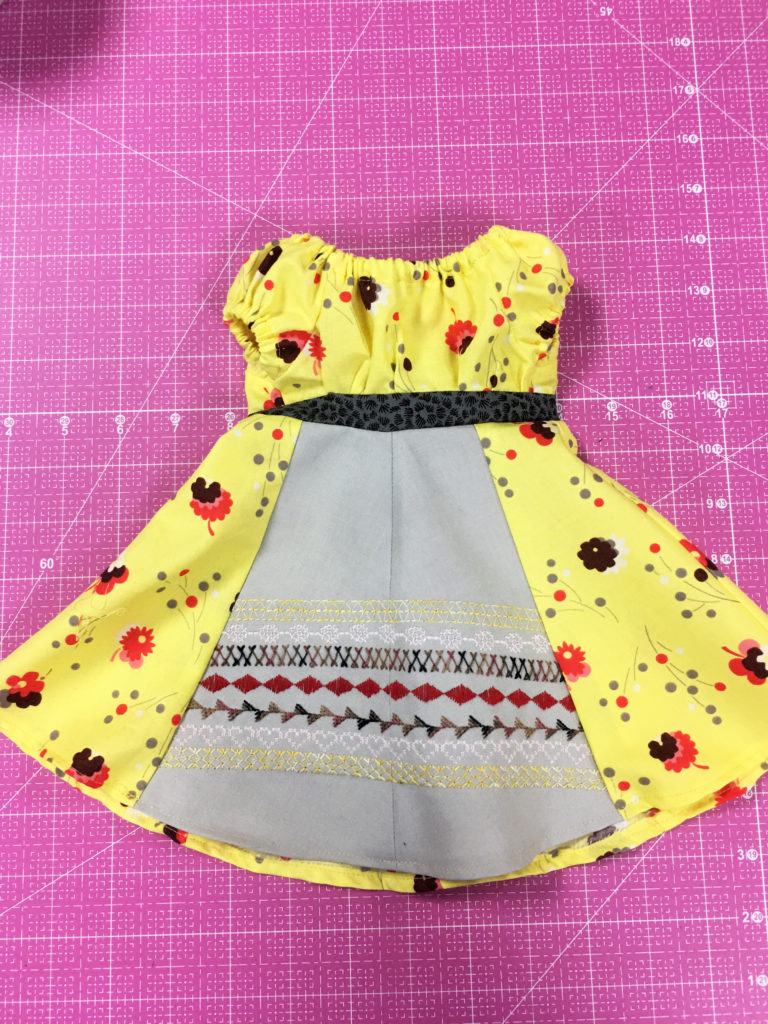
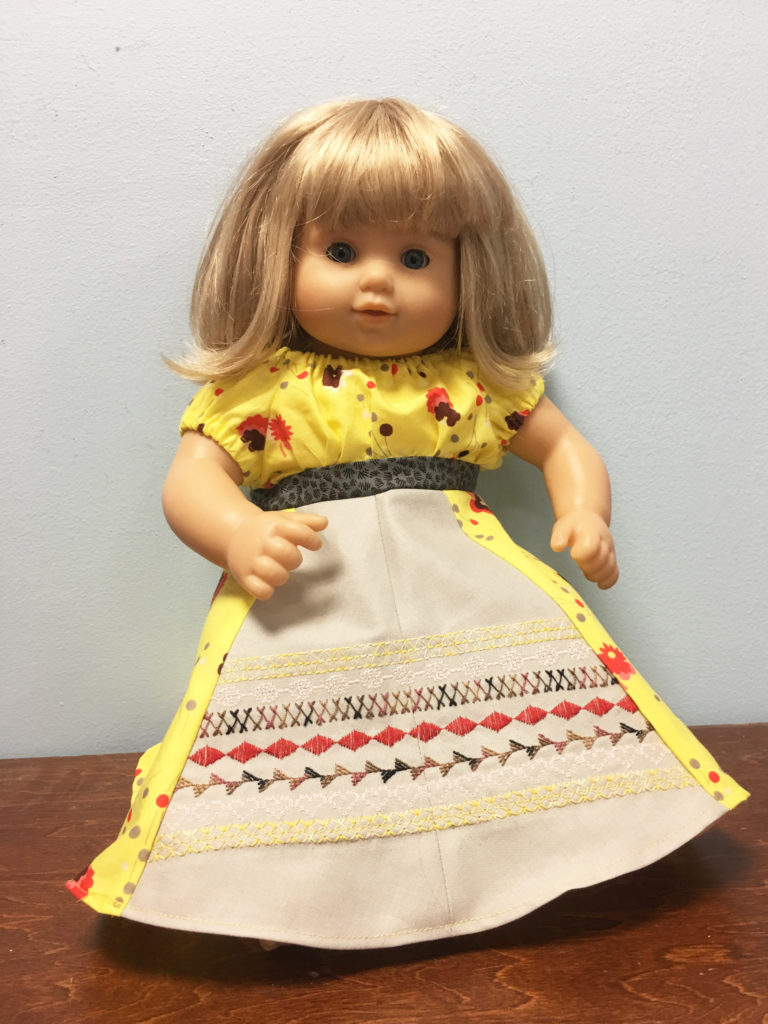
Because of my love for all things 70’s fashion, and because I had a small piece of this awesome 70’s-style fabric, I decided to do a take on this dress from the book. The directions in the book are great, and easy to follow. Here are my tips to make sewing easier, and for ending up with a great final product.
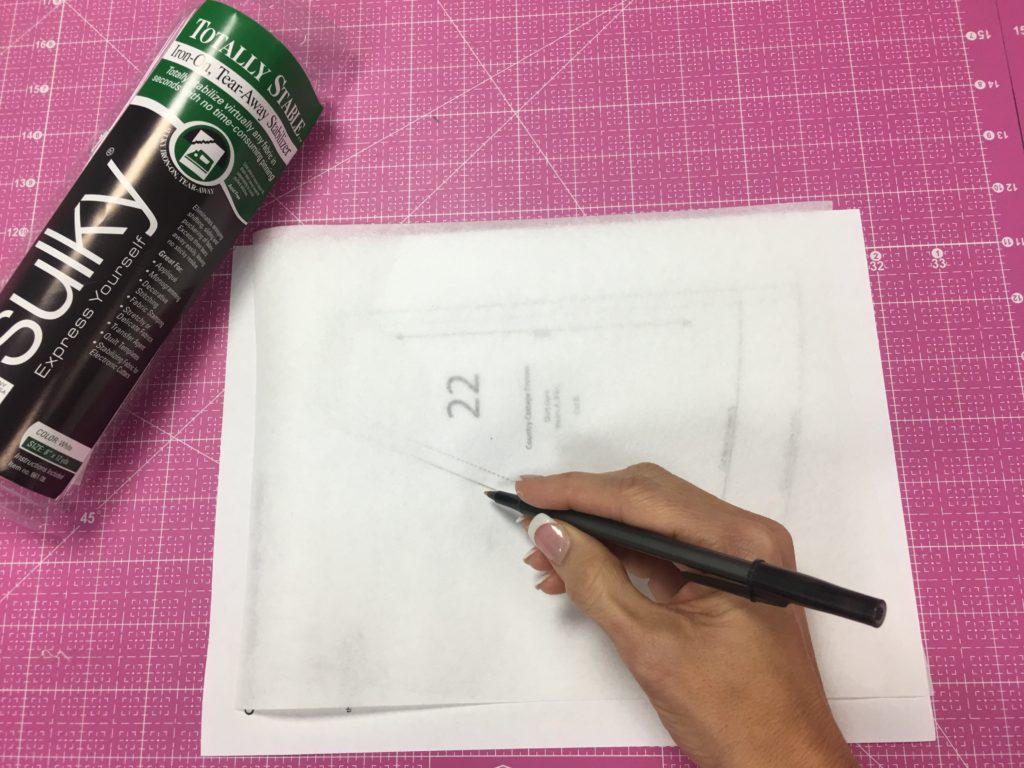
Sulky Totally Stable Stabilizer for Pattern Pieces
BTW – I adore my Havel Cutting Mats
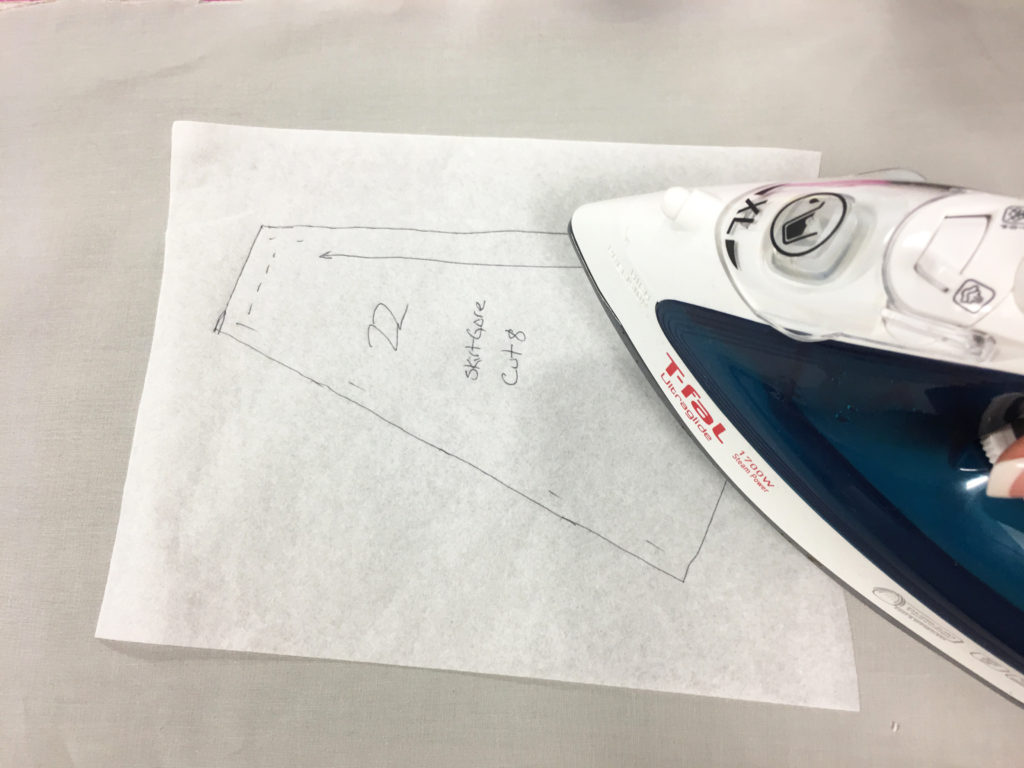
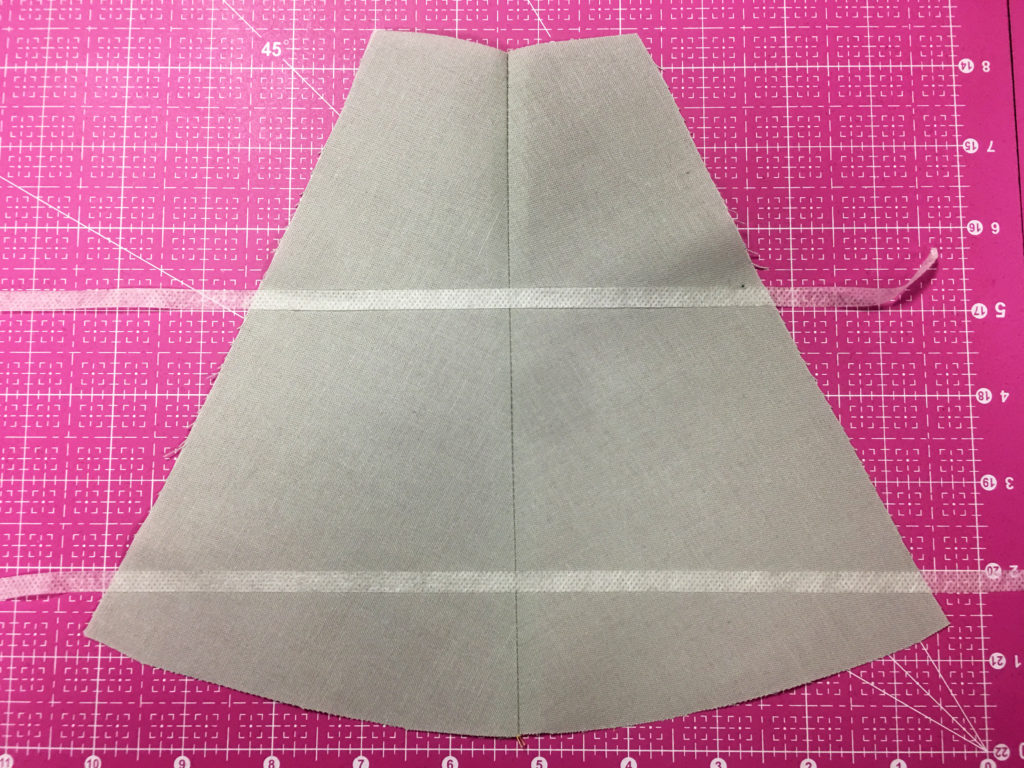
I like to use Sulky Totally Stable when tracing off patterns, because it is easy to see through and it can be ironed to the front of the fabric. Use a medium temperature iron, and just press lightly.
This keeps the fabric from slipping around when you are cutting. One you have cut the piece out, just peel it off and iron it in place for the next piece.
Decorative Stitches
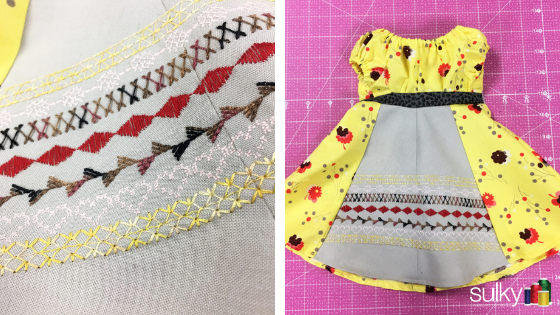
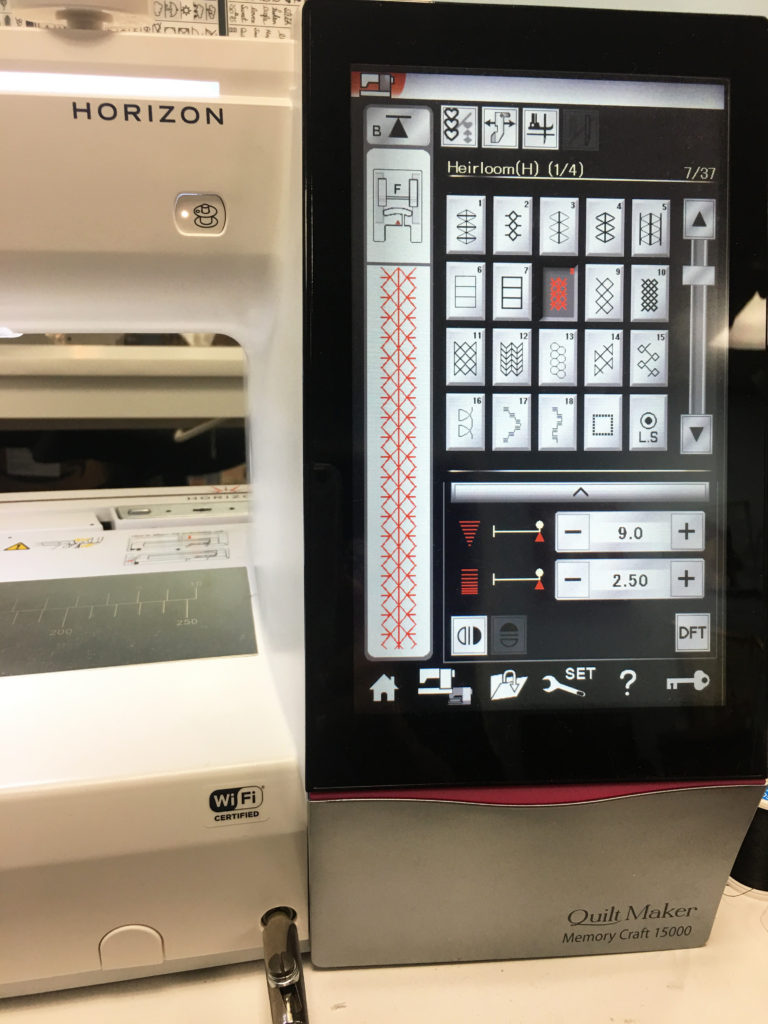
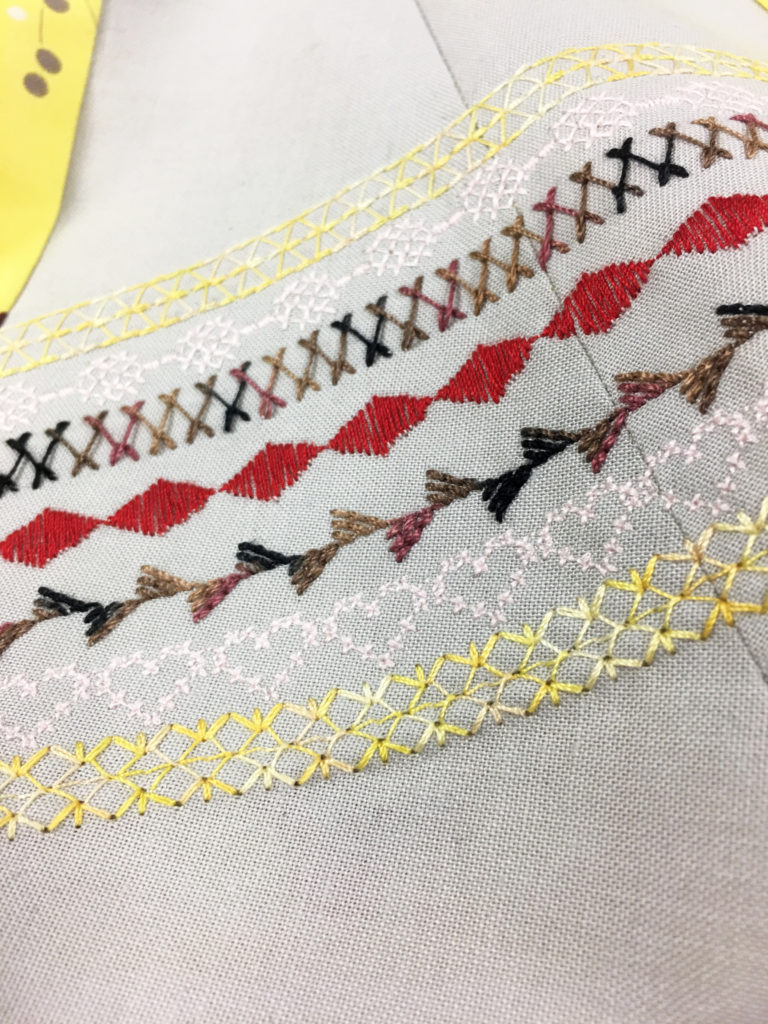
The book said to use decorative ribbons to embellish the front panels, but I really wanted to use some of the cool decorative stitches on my Janome Quilt Maker Memory Craft 15000 and a variety of Sulky threads.
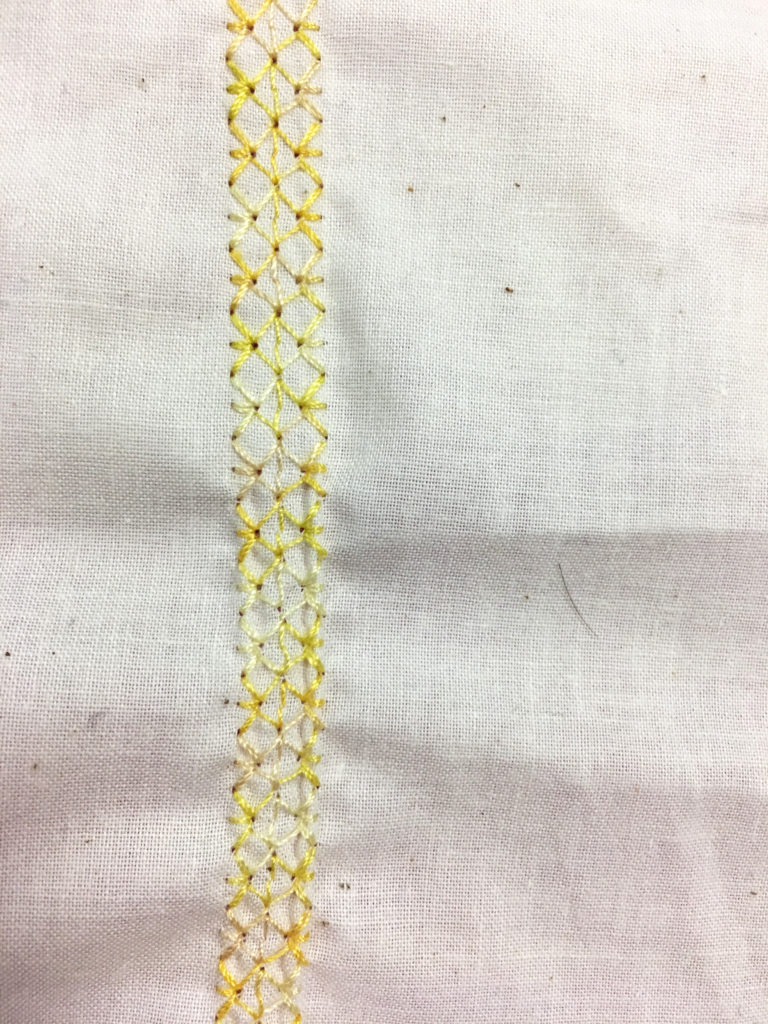
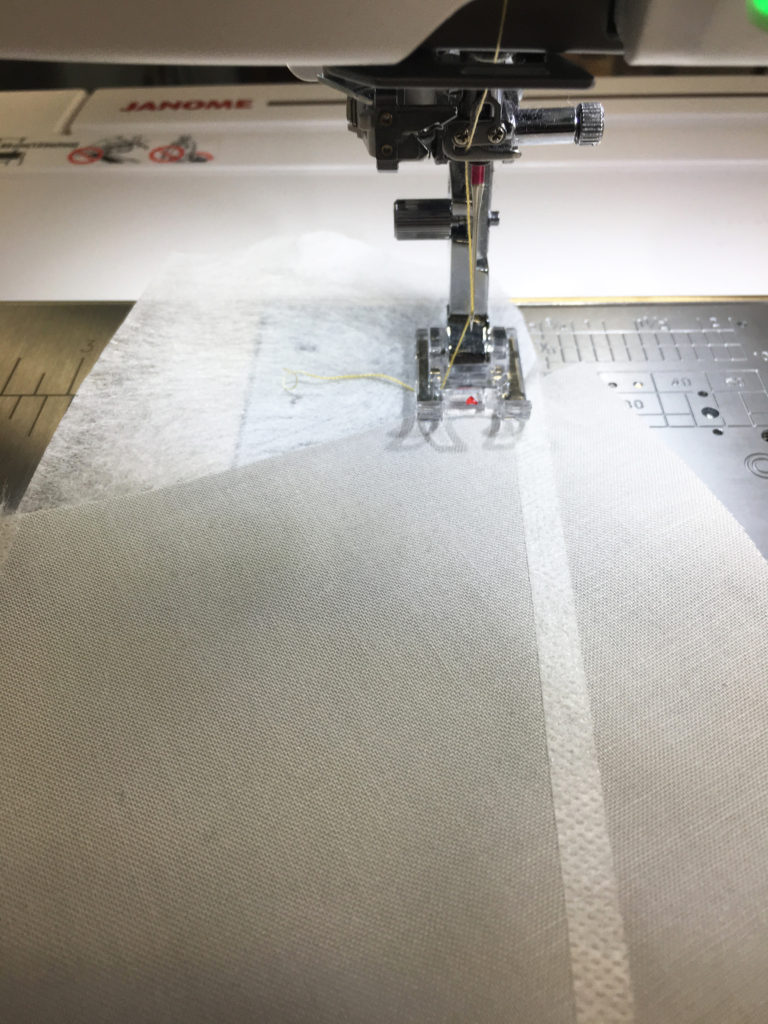
Because I used a variety of thread weights and stitches, I put a piece of Sulky Tear Easy under the fabric.
Just look at the difference in this test stitch with and without the stabilizer! The top half of this picture has Sulky Tear-Easy under the stitching. The bottom half, where the stitches start to pucker and distort is without the stabilizer.
I also cut two 1/4″ strips of Sulky Sticky Fabri-Solvy, and used those as guides so my stitches would be straight.
Since I used both 30 wt. and 12 wt. threads on top, I put 50 wt. Cotton+Steel Thread by Sulky in the bobbin, and used a 90/14 topstitch needle.
The Finished Dress
I just love how it turned out! My perfect little flower child.
Bonus: The dress fit my daughter’s smaller doll, too!
Want more Doll Dress Boutique Inspiration? Check out the entire blog tour! Here is the schedule:
This post is a part of the I am Enough quilt along that starts September 28, 2018 and ends February 1, 2019.
If this is the first time you are learning about this quilt along then please read this post to find out the intentions behind the quilt along and more details.
To view all the posts concerning this quilt along, click here.
To view the email archives of this quilt along, click here.
My how time flies! We are about to begin pattern 4 of the I am Enough Quilt: The Hourglass blocks.
This is such a traditional quilt block and there are a gazillion ways to make this block, but I’ve got a really simple way to show you today. This happens to make two at a time and it’s my favorite way. Hourglass blocks seem so basic and “old” I guess, but I tell you when put together with other hourglass blocks they are quite showstopping or I happen to think so. See this board if you need a visual. If you happen to enjoy your own way of making hourglass blocks, don’t let me hold you back! This quilt has no rules! Feel free to always do as you please. 🙂
We’ve got seven of these scattered about our quilt. Let’s get going!
You are Enough
I wanted to talk about perfection and failure today.
I could sit here and tell you all day that I don’t care if my blocks are perfect, but I really like it when they are. I particularly like it when my points line up just so. Every time there is a point to line up, I give it my all, put the pin into the seam in exactly the right place, and do all that I can to insure that I end up with the best block I can have. I’m all about the precision and I’d be lying if I said I didn’t care. If there is a new trick that I can learn or teach myself to make sewing points better, I’ll adapt my methods and do whatever I need to do to get a better quilt block or points that line up. This is important to me. I can’t change this about myself. If it’s not important to you that is absolutely just fine. Be you!
After almost ten years of quilting, I am still not perfect. I’m never going to be. I’m just a human after all. Sometimes I do all the right steps, take my time, and still get a block where I’m just off the line (proof of this is in the block to the right of my picture). Unlike my beginning years, I no longer curse myself, throw my hands in the air or even get frustrated. I have found that I just need to make a decision: Can I live with the block “off” or do I need to grab a seam ripper and redo? I make this decision based on my mood or how bad my “off” is. If I don’t want to unpick, I don’t. I leave it be and don’t criticise myself at all for it.
It took me a long time to get to this place of peace. And yes, I’m using quilting as my example, but this can translate to many different aspects (hello, motherhood!). You are going to have points off, you are going to have entire blocks the wrong size. You are going to make hundreds of mistakes, especially in the beginning. Expect and accept these facts. These “failures” or “mistakes” or whatever you want to call them, you NEED them. You need to make the mistakes. Without them you don’t learn anything. Without them you don’t grow.
Words of wisdom to say out loud:
Strive for progress, not perfection.
Don’t wait for your quilting to be perfect before you enjoy it.
Forget it enough to get over it, remember it enough so it doesn’t happen again.
And this is the MOST important one: DO NOT point out somebody else’s mistakes. Say something kind instead.
Product Spotlight
4 1/2″ Snip-a-Stitch Scissors
● Removes individual stitches, seams and threads
● Sharp, curved blade slides easily underneath single stitches
● Comfortable, easy to use
● No more troublesome stitching errors!
Today’s lesson is on precision. Not the kind you let yourself get frustrated over and makes you push away from your sewing machine and give up. Never that! Just the effort will do and the effort alone is enough. If you get it great, if you don’t shrug your shoulders and move on. It doesn’t calculate your worth and it’s not the end all of everything. In finished quilts it’s rarely even noticeable. Most of the time only YOU know it’s there. We are making quilts for enjoyment and to explore our creative side, not to harass ourselves. Make the effort and let the result be
The other part of our lesson is contrast. Hourglass blocks are made with two different fabrics. To be able to see the shape you need to have two fabrics that contrast well.
Precision
When it comes to any shape that features a triangle, I like to press my seams open and use starch. These two things help me get my quilt block flatter. If you are working with a crisp, flat quilt block, you’ll find it much easier to align those seams. Here’s a recipe for homemade starch.
Another tip, when working with triangles or even very small pieces of fabric, press and starch your fabric before you even make your first cut. Just like I mentioned before, when working with a crisp piece of fabric every step along the way (cutting, sewing, etc.) will be easier for you to get things just so.
On the Hourglass blocks, align your seams together and place a pin exactly in the seam. Only remove the pin when you are about to sew over it and mind that you don’t move the fabric as you do.
Fabric Choosing
Here’s a few thoughts to mull over:
Set your two fabrics together before you cut them and give them a lookover.
Do they mesh well?
Do each of the fabrics stand out or do they mix together and lose the shape of the hourglass?
Are you using two busy fabrics? One busy fabric and one tonal might be a better choice.
Solids really pop in this block, especially against a print.
Pattern 4 – Hourglass Blocks
These are go pretty quick! Perfect timing if you are still working on your embroidery blocks from pattern 3, but also because we are going to be doing a little section building as well. We are four patterns in and instead of waiting til the very end and putting all our blocks together, we will be doing that bit by bit.
There are some things that need to be thought about though, like fabric placement. Our blocks are all scattered all over and it’s hard to see which fabric should not go where. I made the hourglass blocks above, but when I moved on to the section building part of the Pattern 4 PDF, I found that I had made my big hourglass the same color as my Maker’s Hand and those two are touching in the quilt. I had to remake my big hourglass because of this. Luckily it’s an easy block, so no worries, but I just wanted to remind you to be mindful of this. Placing your blocks on a design wall or even your floor and looking at the overall quilt design can help.
Be sure to post your progress on this week’s blocks on Instagram to be eligible for the bi-weekly prize from Havel’s Sewing. Havel’s will announce the winner on Instagram on the Thursday before the next pattern releases.
To enter to win the Snip-a-Stitch scissors (the BEST seam ripper):
If your account is set to private, you will not be entered.
Prizes open to US residents only.
I am loving getting to know you and connecting with you on Instagram. Isn’t the quilting community over there encouraging and supportive? Be sure to join in the fun by posting pictures of your progress using the #IamEnoughQuiltAlong. Comment on the posts of other participants and spread the love. We all need it sometimes.
This post is a part of the I am Enough quilt along that starts September 28, 2018 and ends February 1, 2019.
If this is the first time you are learning about this quilt along then please read this post to find out the intentions behind the quilt along and more details.
To view all the posts concerning this quilt along, click here.
To view the email archives of this quilt along, click here.
I hope you are ready! We are at pattern 3 and in my mind this is the main event. There are three blocks to do this round and these three blocks were the very beginning for me when I was designing the quilt. They are what started the whole idea of this quilt and the quilt along. I designed a pinterest board when musing for I am Enough. If you scroll all the way to the bottom you can really get a look at the beginning of my inspiration. It all began with that hand.
We will be declaring in thread that we are ENOUGH.
You are Enough
I was reading this article about hobbies recently. It spoke about us worrying too much about how good we are at something instead of just enjoying the hobby itself. I felt that it really was on point for the theme of our quilt along. It doesn’t matter how good you are at quilting or how good you are not. The whole purpose is the doing. It’s nice to have a pretty quilt to gift someone, but the work itself is the best part. At the risk of sounding cliche, it’s the journey. Ugh. Isn’t that overused? Life’s a journey, not a destination. But truly think about it. When we are done with a quilt, we fold it up or put it on a bed or give it away and then we are on to the next quilt. So it really is about the making of the quilt that is the most special part of it. That’s why you are here with me now. You enjoy making quilts. You are looking for a way to unwind, to flex your creative side, to just have something nice to do after all the work you do to take care of yourself and your families. You deserve this time, and should do it without criticizing yourself.
So I invite you now to enjoy this week’s blocks whether you have ever embroidered or not. They are slow and meant to be. I’m hoping that you will embrace the handwork. If you end up with wonky letters and clumsy fingers, so what? Get yourself somewhere comfy, you can embroider anywhere, and enjoy the stitching. Don’t give up, don’t get frustrated, just stay with it, and let whatever you make “be”.
Product Spotlight
7″ Serrated Fabric Scissors
● Blades “grip” the fabric to cut slippery fabrics
and multiple layers
● Silky smooth, precise fabric cutting
● Cuts straight to the tip
● Never go dull
We are making three blocks today: embroidered I am Enough, the Maker’s Hand, and the Monogram.
Embroidery
Yes, embroidery does belong on quilts. It adds lovely details that can embellish your block or quilt. It’s pretty, but it can also make a bold statement, saying something that you need to say. It adds texture and interest and is incredibly satisfying to touch, to gaze at, to complete. It’s historically considered women’s work (that’s changing) and we have been doing it for generations upon generations. You can do this too, and if you want you can even do it with sas.
Are you bored sitting at the doctor’s office? You could be embroidering.
Are you trucking the kids all over the place for their activities and want something for yourself? You could be embroidering.
Are you angry and just want something to stab away at? Well, guess what? Stabbing a needle in and out of thread is exactly what embroidery is.
Fabric Choosing
Think about your fabric choices for these three blocks, audition multiple choices. On the Maker’s Hand and the Monogram, consider a tonal or solid for one of the fabrics used within each of these two blocks. If you put a floral for the monogram and a floral for the background, your monogram could get lost. You want each to pop on the quilt. On the I am Enough embroidery block, consider choosing the same for the background: tonal, solid or low volume, or at the very least something with minimal business. I chose black for my lettering to again make the words pop off my quilt.
Encouragement
If you can work a sewing machine, you can do this. It’s much more simpler and you are in total control. It may feel foreign at first if you’ve never held needle and thread. Here are some tips:
Take a moment and make a plan before just beginning OR jump in head first and see where the thread takes you.
Use a thimble or your fingers will hurt after a while.
Stay at it. Don’t give up on yourself. You will never be good at something the first time you do it, expect that. The more you do, the better you get.
Relax and go slow. This is not a race. You are here to enjoy the making. Savor every one of your stitches.
Pattern 3 – I am Enough + Maker’s Hand + Monogram
Insert the Fleetwood Mac song, “Go Your Own Way” right about here. Just like our last two patterns, there are no rules! Be yourself. If you don’t want to follow the instructions, DON’T. You have permission to completely make this your own and do it your own way. There’s no quilt police here. You can add as much or as little embroidery or even none at all and completely change this up to suit your own tastes.
Onto the pattern!
Click the tab below to download the pattern and get started. I cannot wait to see what you make!
Be sure to post your progress on this week’s blocks on Instagram to be eligible for the bi-weekly prize from Havel’s Sewing. Havel’s will announce the winner on Instagram on the Thursday before the next pattern releases.
To enter to win the fabric scissors (single best scissors I’ve ever used):
If your account is set to private, you will not be entered.
Prizes open to US residents only.
Saying something out loud always helps me not only remember better, but truly feel the power of the words. The above picture is a close up of my thread proclaimed, “I am Enough”. You can really see the mediocrity of my stitches and you know what? I couldn’t be happier with it.