BAD GIRL QUILT ALONG – WEEK 3 – MAKE FIVE MORE STARS

BAD GIRL QUILT ALONG – WEEK 3 – MAKE FIVE MORE STARS

Melanie Traylor @southerncharmquilts

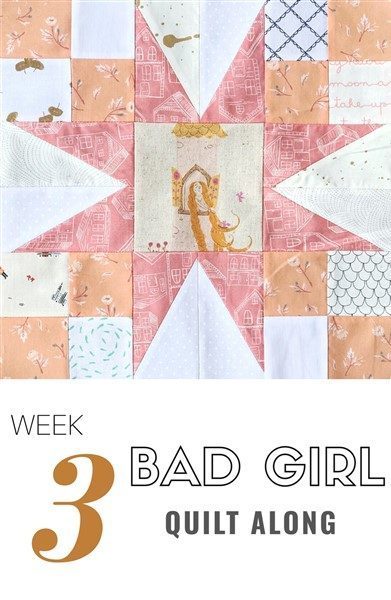
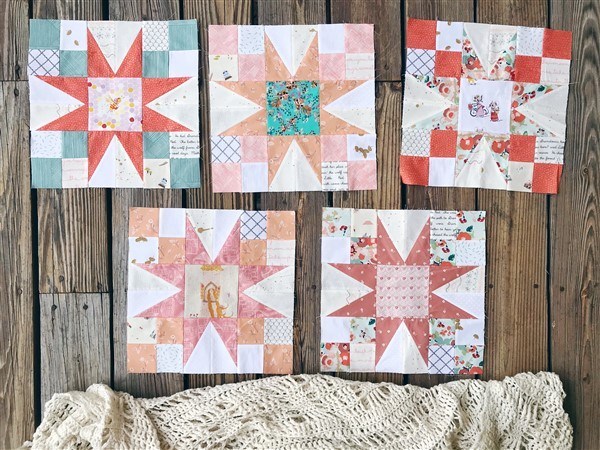
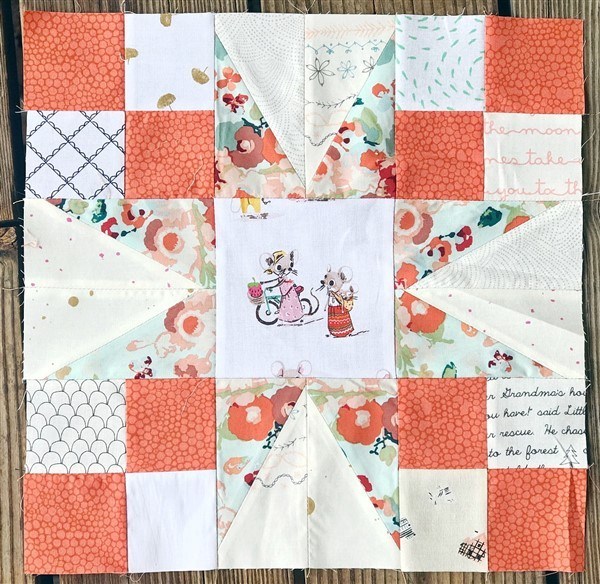
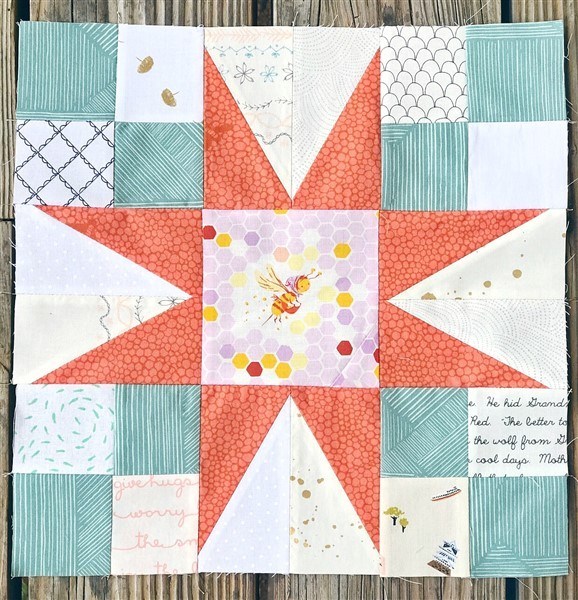
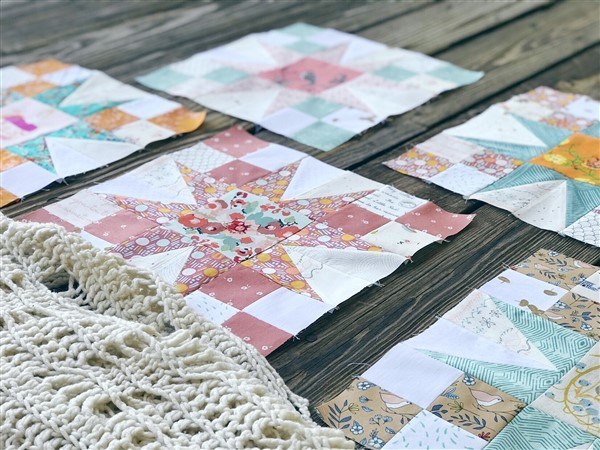
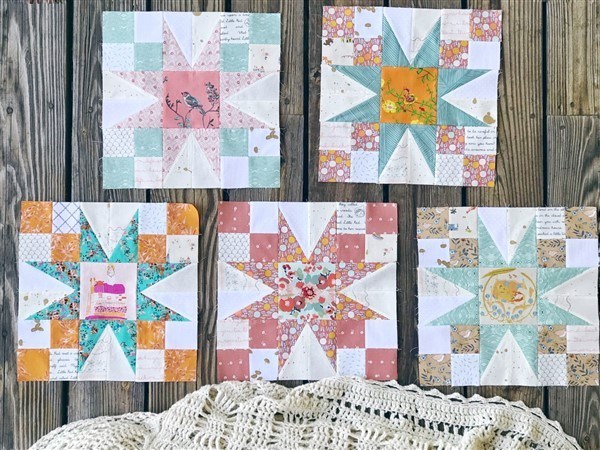
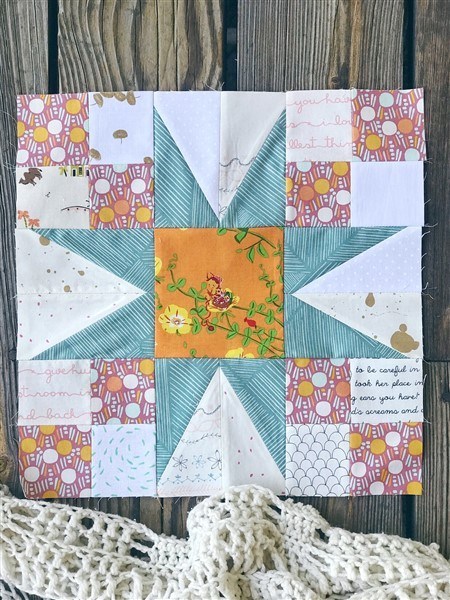
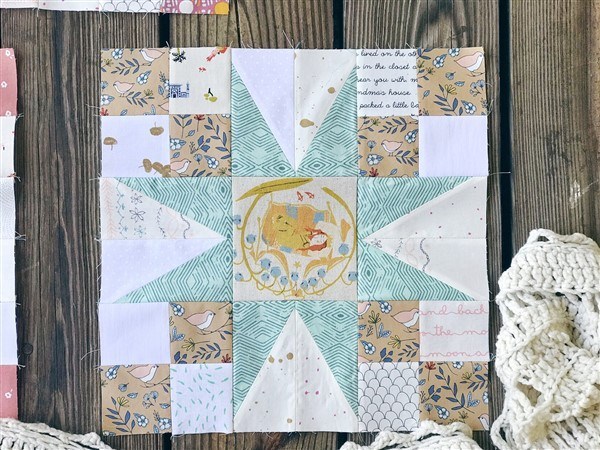
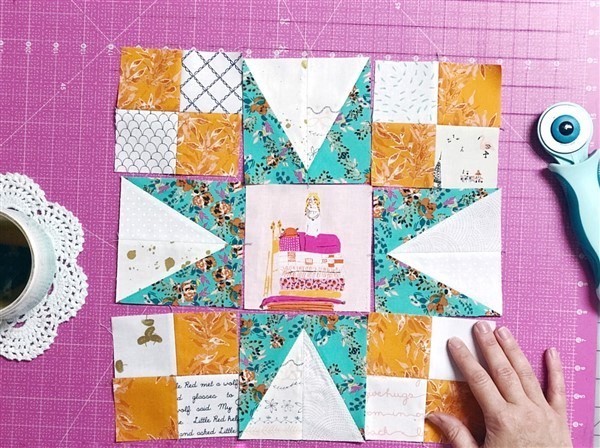
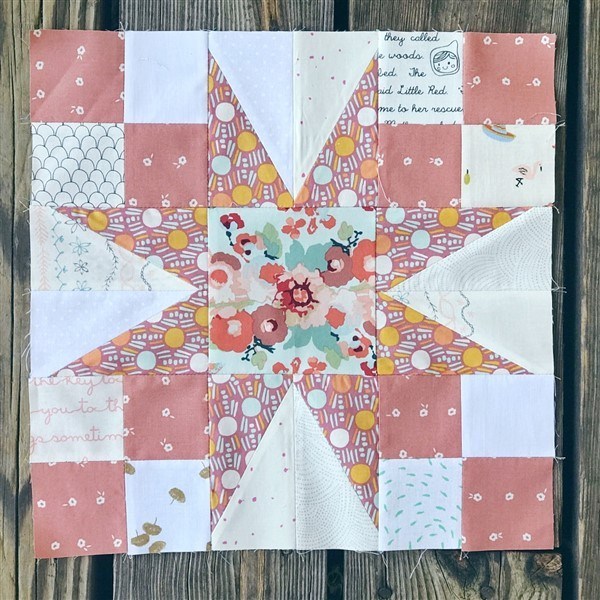
Well, I hope you are enjoying yourself. I certainly am. I’ve also learned a secret that I’m going to share with you (because we all know that I cannot keep secrets). You know that fabric that you have in your stash. You know the ones. The one that you never use because it’s so precious and no quilt you work on could ever be worth that special fabric. I’ve got that fabric too. All of the fussy cuts you are seeing in my blocks are my special fabric, my hoarded fabric, my I’ll just keep saving it fabric. I broke down and cut into them. And guess what? I lived to tell about it. They have put a pep in my step that wasn’t there before, and I am just loving seeing this fabric in the center of my Andromeda Stars.

Now I’m not saying I’m not going to continue hoarding the rest of it, because you and I both know that I am, but still. I’ll be braver next time. Find your own Heather Ross faves here.

So what’s your hoarded fabric? What are you keeping away and only bringing out to pet and sigh lovingly at? Leave me a comment below and let me know.


This Week’s Task
Just like last week we are tackling five more Andromeda Stars. I know these are slowly made blocks, and I’ve been hearing that sentiment from you quite a bit this week. Still worth it to me! That’s an eye popping star if I do say so myself. Don’t try to do all the blocks in one day. Spread them out and enjoy yourself. You GET to make Andromeda Stars, you don’t have to (my friend Nicole taught me that). 🙂

So many of you also emailed to encourage me to design a ruler for the half square triangle. What was weird is that the idea had never crossed my mind before. After all the HRTs I’ve made this year too. Anyway, I did design one and I’m working on finding somebody to manufacturer it for me. If I do end up getting this adventure to work out, I intend to put out a serious amount of HRT quilts. Fingers crossed.

Back to the stars…. I mentioned last week that if you needed help to ask and you did! Lots of you! I was so pleased to find this community so welcoming and encouraging. One of the main issues some were having trouble with is getting the points lined up. I listed several tips in last week’s post. My number one tip though is the starch. It’s always a game changer for me. My second tip would be if that point not lining up bothers you, seam rip it out (or cut it out with these fancy stitch snippers), and if you can live with it, then live with it and let it go. Those are the exact words I live by. Check out my points, not many are perfectly perfect in every way.

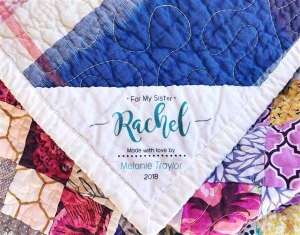
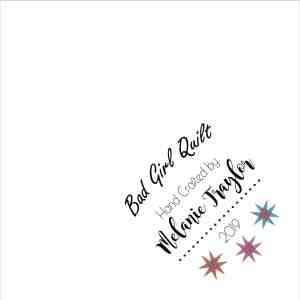
Get a personalized Bad Girl quilt along label for your quilt.

GET THE LABEL 

Helpful Links


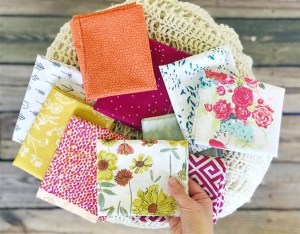
Mystery Low Volume Fabric Bundle

  • 10 pieces
  • Fat quarters
  • Extra yummy
Get your bundle here.


Quilt making is the process of thoughtful stitching, design, care, heart, mindfulness and time to create a practical, warm piece of usable art.

My name is Melanie and I’m happy you are here.

Posted in Craft to make, Crafting, Cutting Mat, Fabric, Fabric Cutter, How to Quilt, Melanie Traylor, Patterns, Quilting, Quilting, Quilting & Embroidery, Tutorials | Comments Off on BAD GIRL QUILT ALONG – WEEK 3 – MAKE FIVE MORE STARS

MAKE BLUE SKY QUILTER’S CHARMING GEESE PILLOW!

Charming Geese Pillow Tutorial
by Jessica Schunke of A Blue Sky Kind of Life

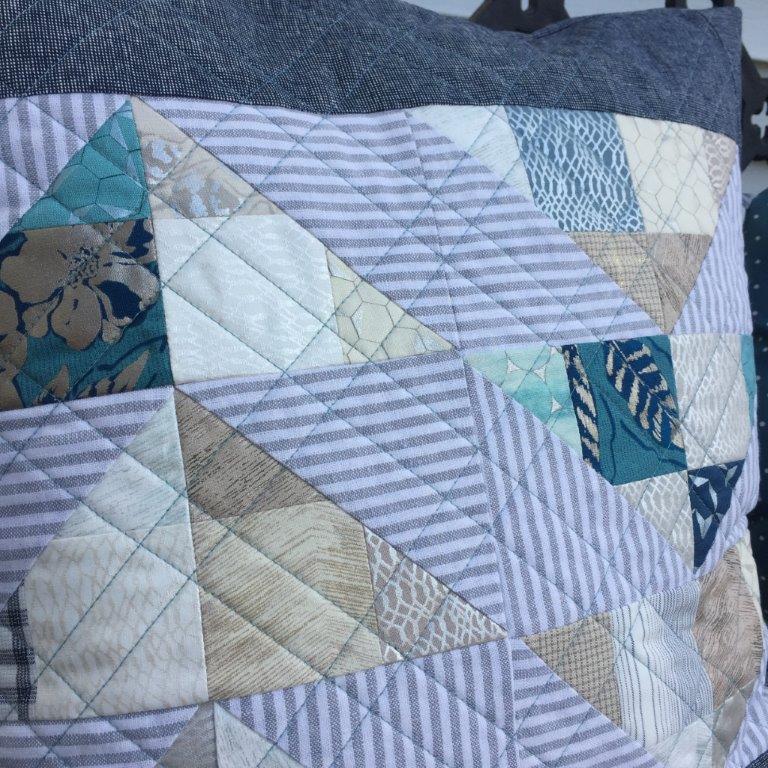
Do you, like me, have a million mini charm packs lying around, just waiting for the chance to be put into service? Sometimes they just seem too cute to pop open, but let’s face it, they’re not doing anyone any good just sitting in a bin. So let’s put them to use, shall we? This fun flying geese pillow uses about half of a standard mini charm pack, but you can easily expand on this idea to transform it into a wall hanging, table runner, baby quilt, or even larger project if you’re really trying to make a dent in your stash. Don’t have any mini charm packs? No worries; this pattern is super scrap friendly.
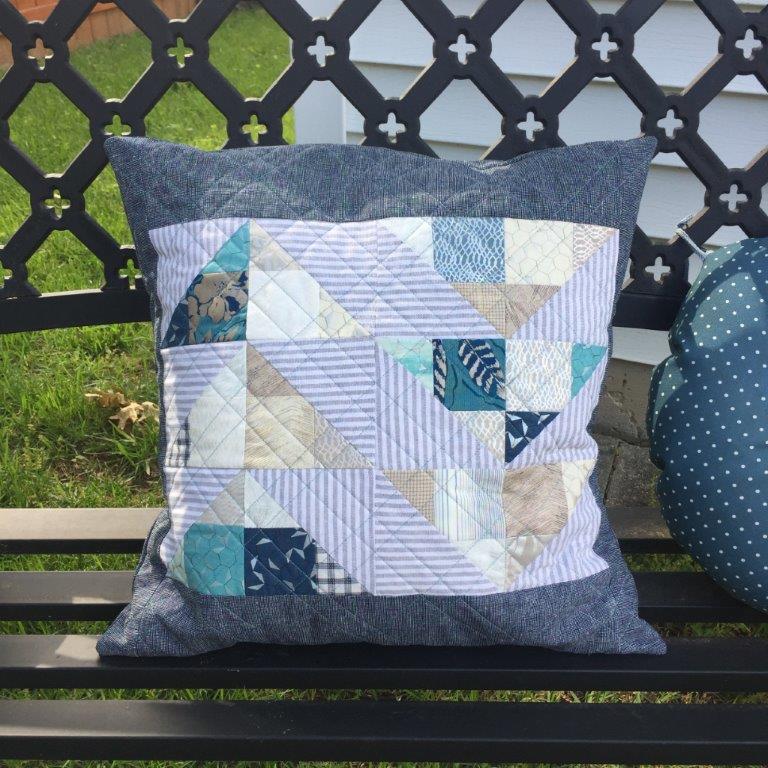
Here’s what you need to make an 18″ pillow:
(1) 24 – 2.5″ squares in a variety of fabrics (pull from a mini charm pack or cut from your stash or scraps)
(2) 1/4 yd. or FQ secondary fabric (for outside part of flying geese and binding on pillow back); sub-cut the following:
• 6 – 4.5″ squares
• 2 – 2.25″ x 18″
(3) 1/2 yd. border and backing fabric; sub-cut the following:
• 2 – 3.75″ x 15″
• 2 – 2″ x 18″
• 2 – 12″ x 18″
(4) 20″ square of batting
(5) Pillow form (I like to use the 20″ Ikea Inner pillow forms; they’re inexpensive and squish down nicely into the 18″ pillow cover)
(6) Standard sewing supplies: Havel’s rotary cutter and cutting mat, coordinating thread, ruler, marking pen

This tutorial uses a 1/4″ seam allowance throughout.

Note: If you want to add on additional geese, you will need 4 – 2.5″ squares (mini charms) and 1 – 4.5″ square of secondary fabric for each finished goose. Adjust your borders as needed to reach your desired finished size.

Instructions:
(1) Group your mini charms into sets of four. Sew each set into a four-patch block.
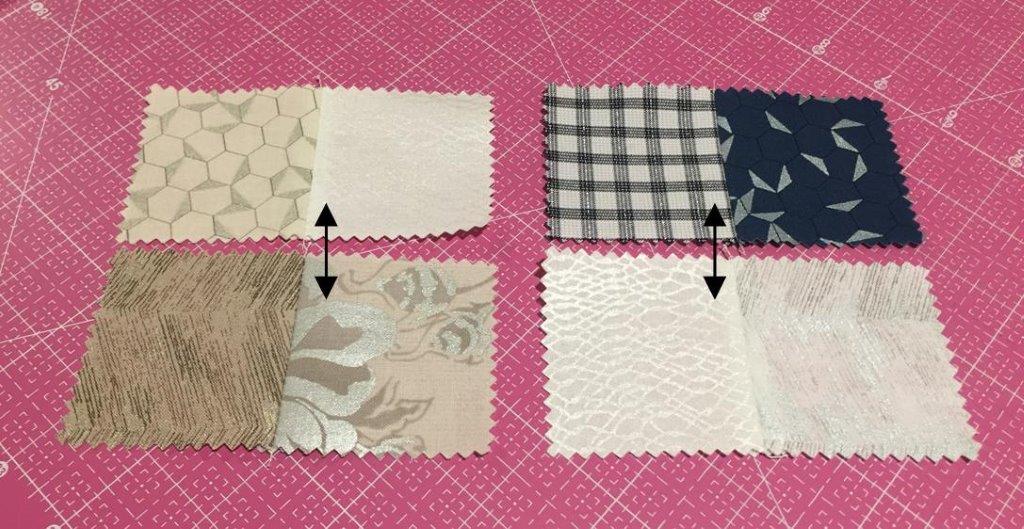
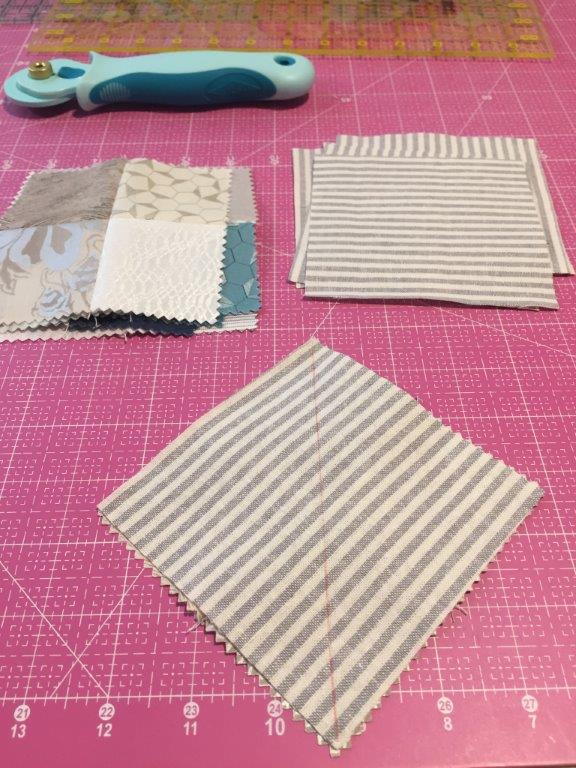
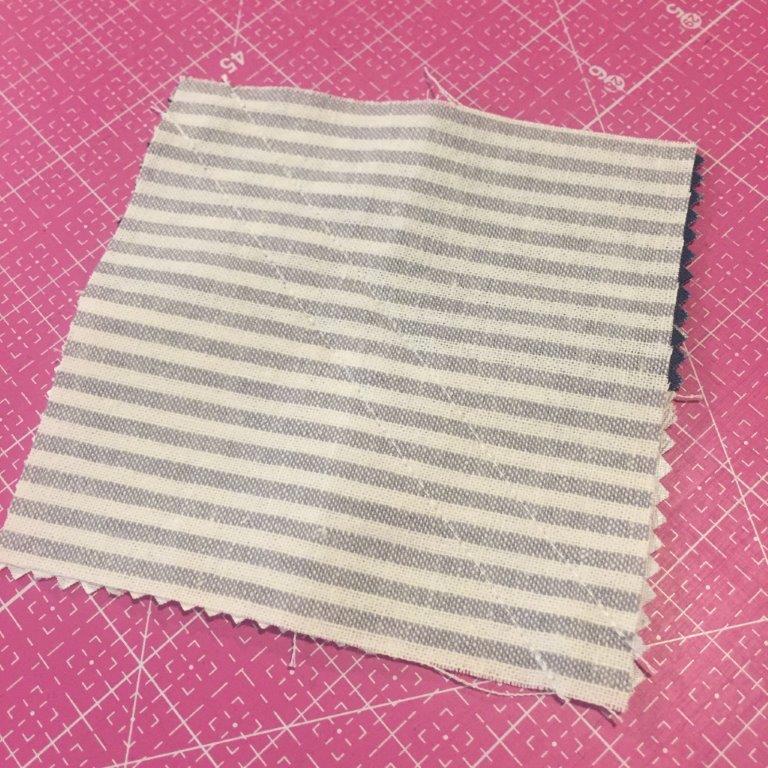
(2) Draw a line diagonally on the wrong side of each square of secondary fabric. Pair each four-patch block with a 4.5″ square of secondary fabric and place right sides together. Sew 1/4″ away from the line on each side. (Note: In the second picture, my marked line has disappeared, but you can see the sewn lines are 1/4″ to each side of the square’s diagonal.)
(3) Using your rotary cutter, cut each set along the marked line. Press seams open.
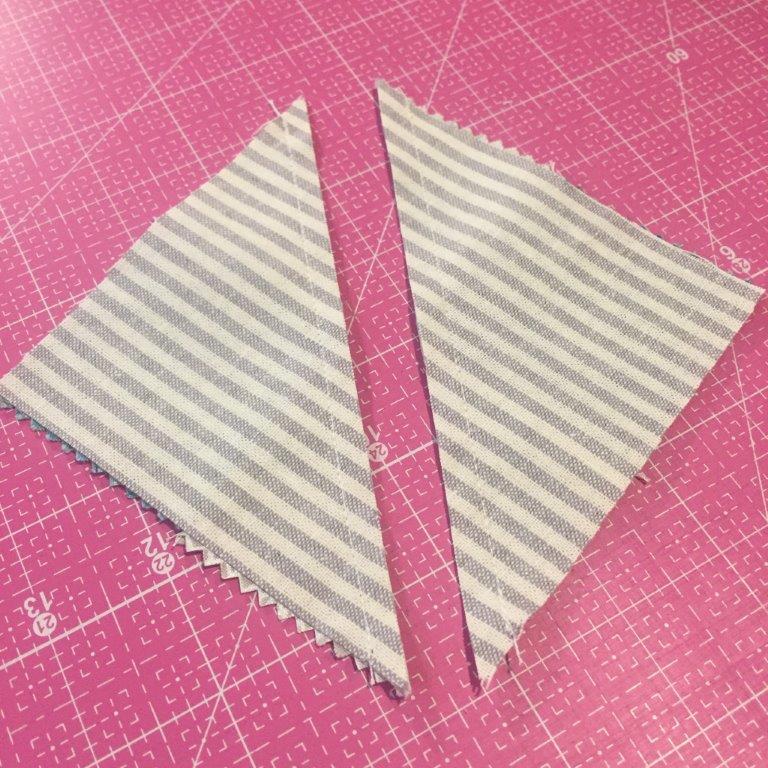
(4) Match up the new half-square triangle units in sets of two as shown. I chose to mix up my blocks for a scrappy look.
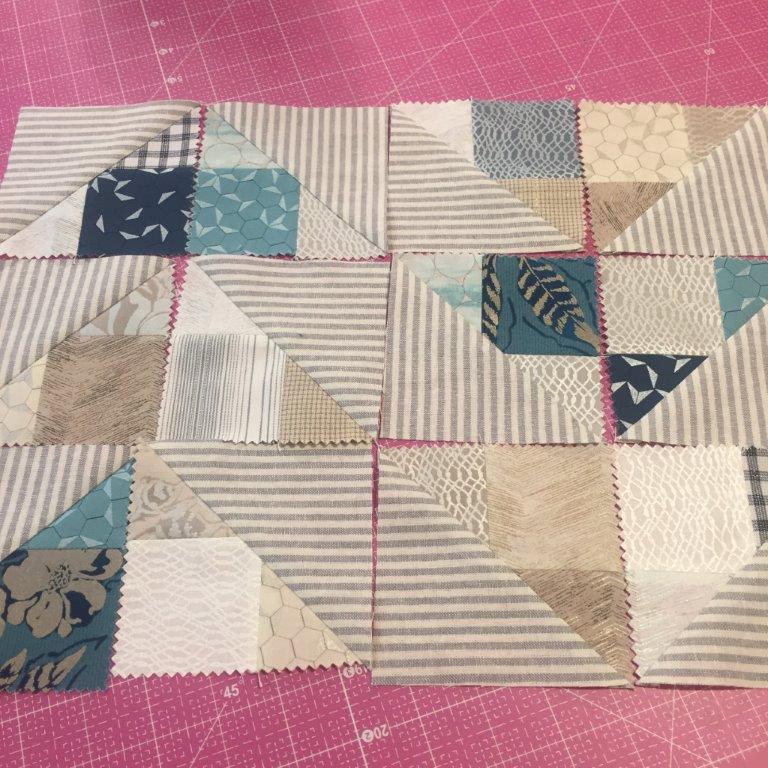
(5) Sew sets of two half-square triangle units together to form flying geese. Press seams open.

(6) Sew flying geese together into two columns and then sew the columns together. Make sure your geese are facing the direction you want (I made my columns go in opposite directions). Press seams open.

(7) Attach the two 3.75″ x 15″ border strips to the top and bottom of the geese unit. Press seams toward border strips.

(8) Attach the two 2″ x 18″ border strips to the sides of the geese unit. Press seams toward border strips.

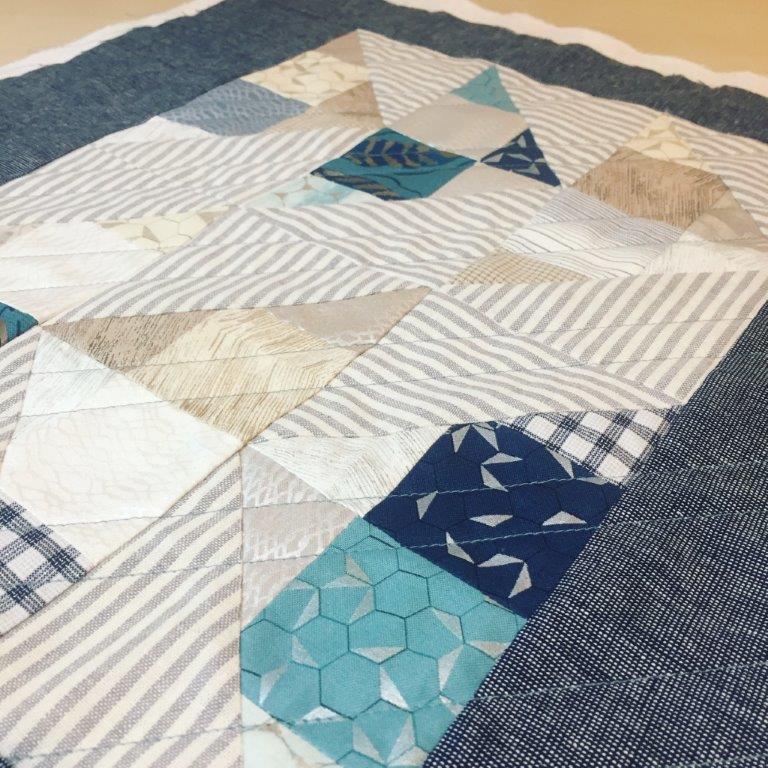
(9) Center pillow top on top of batting and baste using your preferred method. Quilt as desired. Square up your pillow top to 18″ (don’t worry if it’s a bit smaller). Set aside.
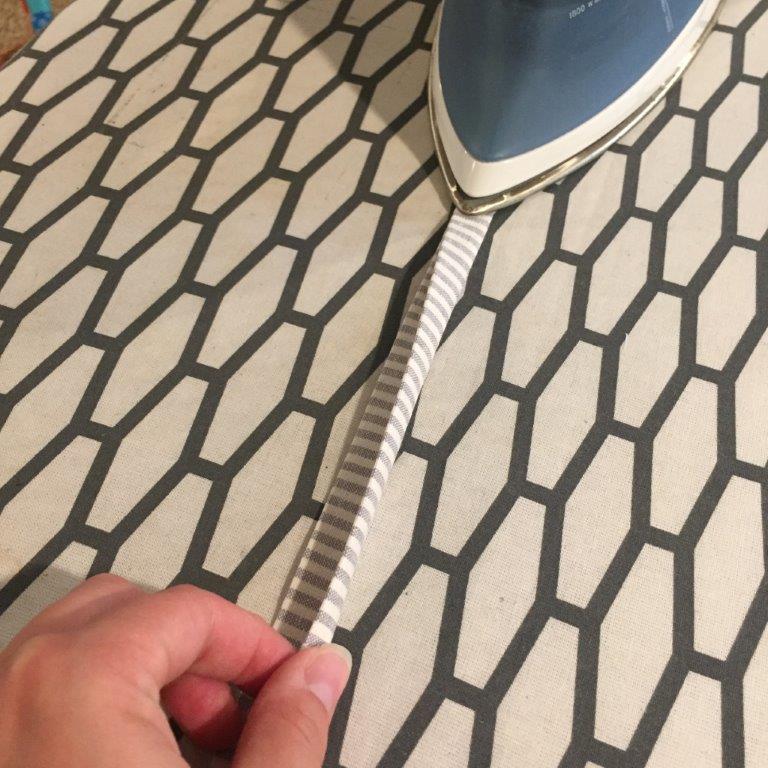
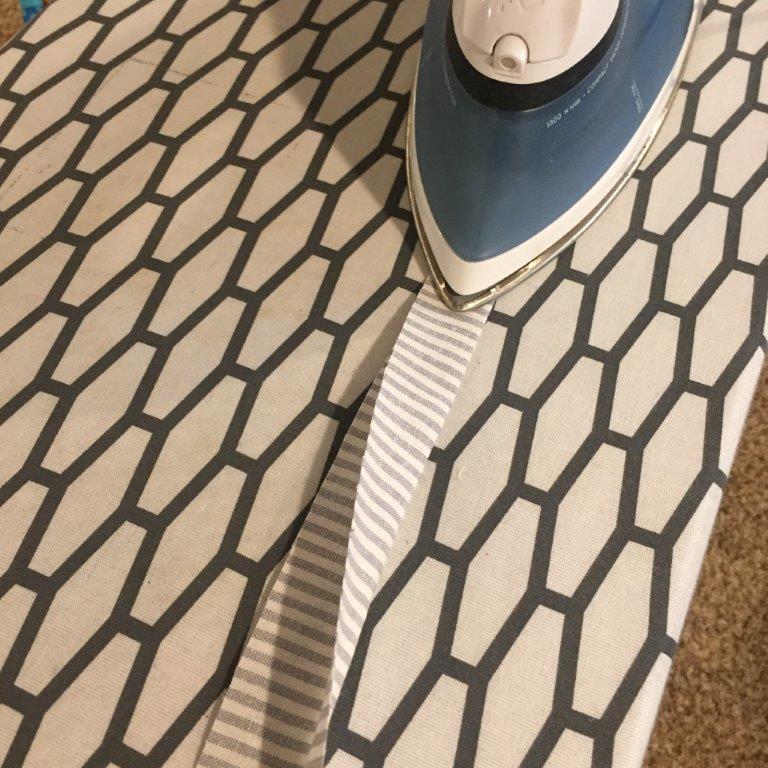
(10) To make the binding strips for the pillow back, press the two 2.25″ x 18″ binding strips in half lengthwise. Open the strips and press each side in toward the middle crease, then press the strip in half again.
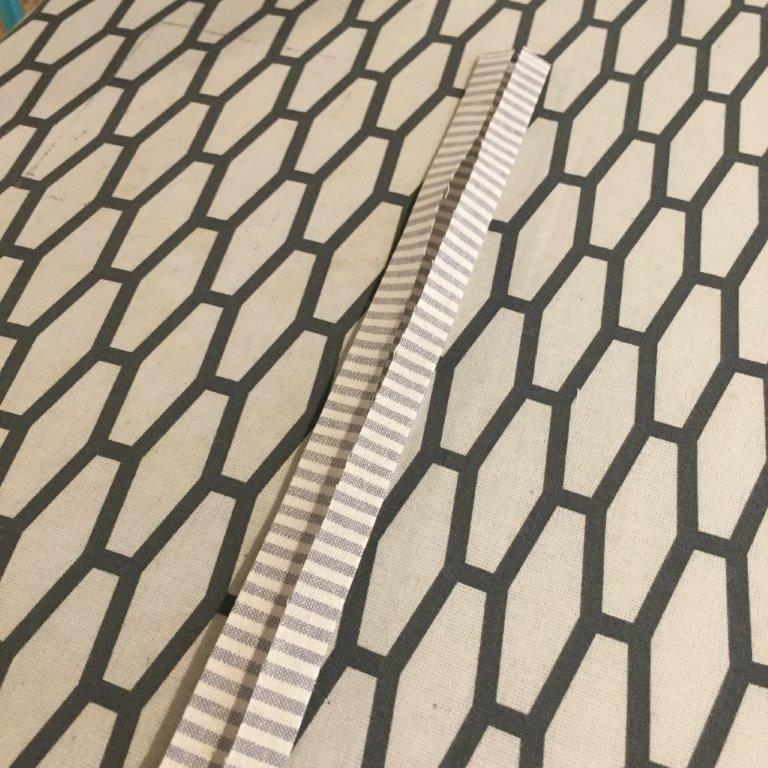
(11) Sandwich each backing piece inside one of the binding strips. Clip or pin in place. Topstitch binding 1/8″ from the edge.
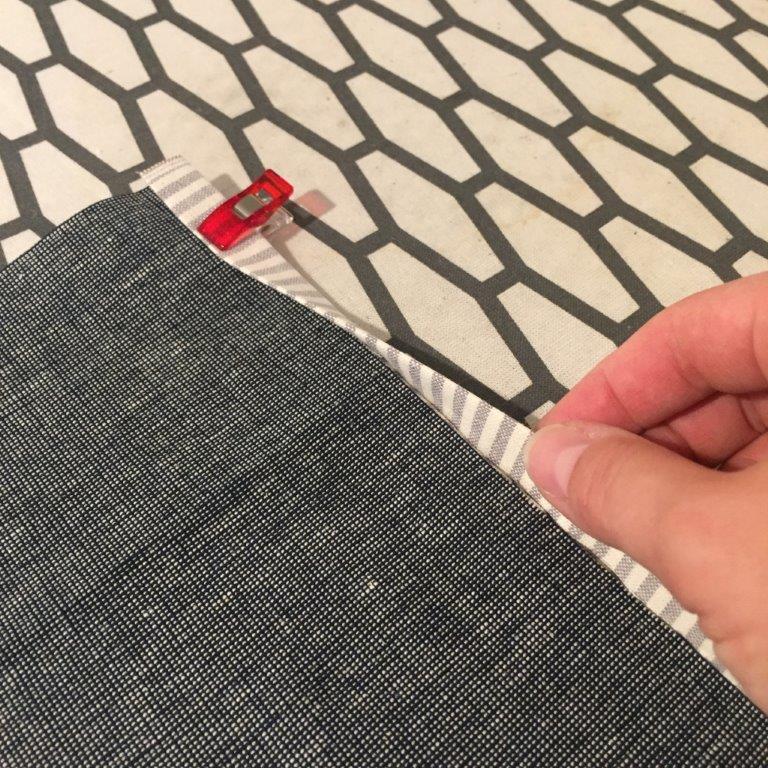
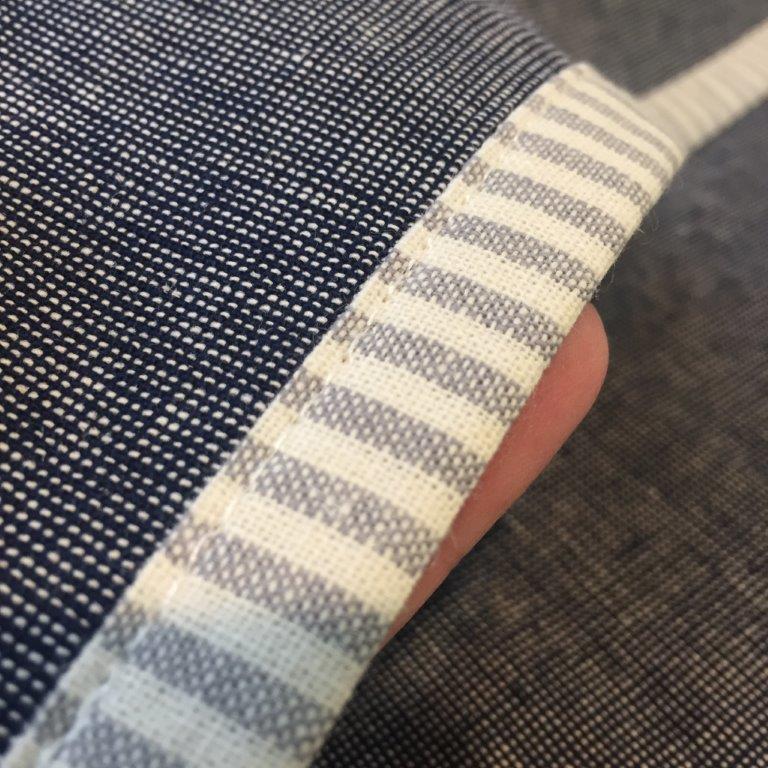
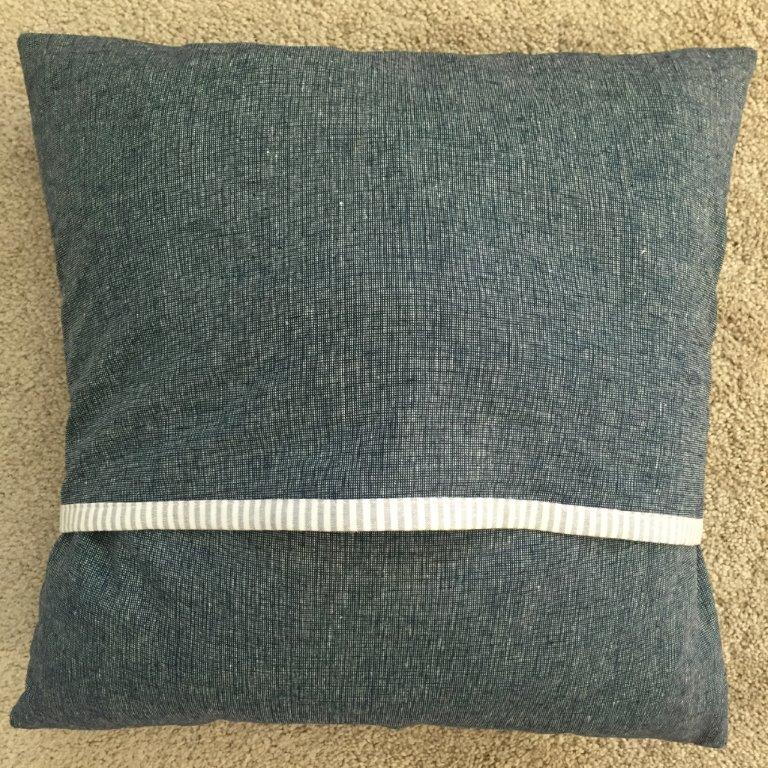
(12) Layer your pillow sandwich in the following order: (1) quilted pillow top right side up; (2) top of pillow backing, right side down (the raw edge should be at the top, aligned with the top raw edge of the pillow top; the bound side should be at the bottom); and (3) bottom of pillow backing, right side down (the raw edge should be at the bottom, aligned with the bottom raw edge of the pillow top; the bound side should be at the top). The two parts of the pillow backing will partially overlap. Clip or pin in place.
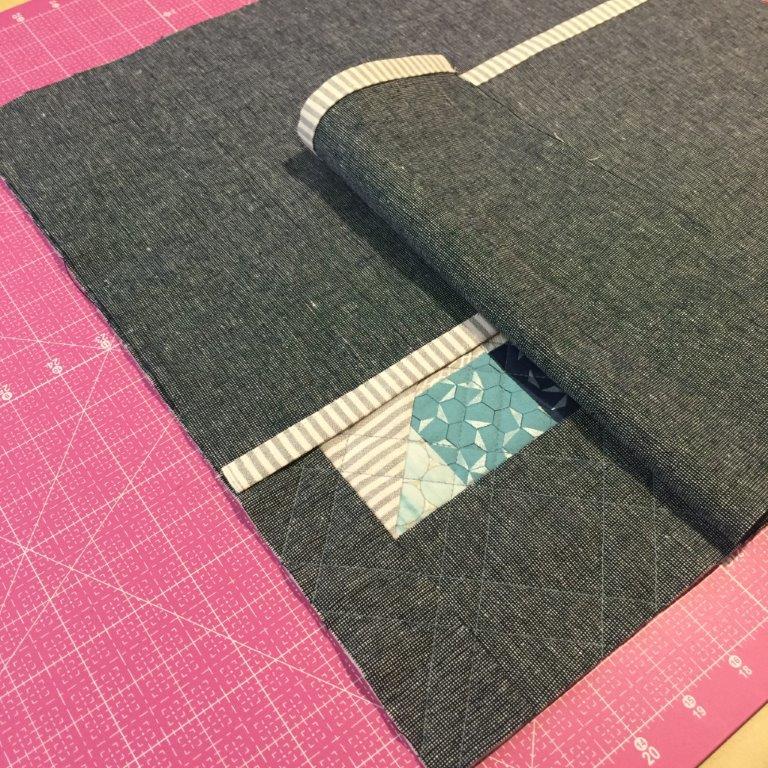
(13) Sew all around the outside edge with a 1/4″ seam allowance.

(14) Turn the pillow top inside out, push out the corners, and insert the pillow form. Enjoy your pillow!
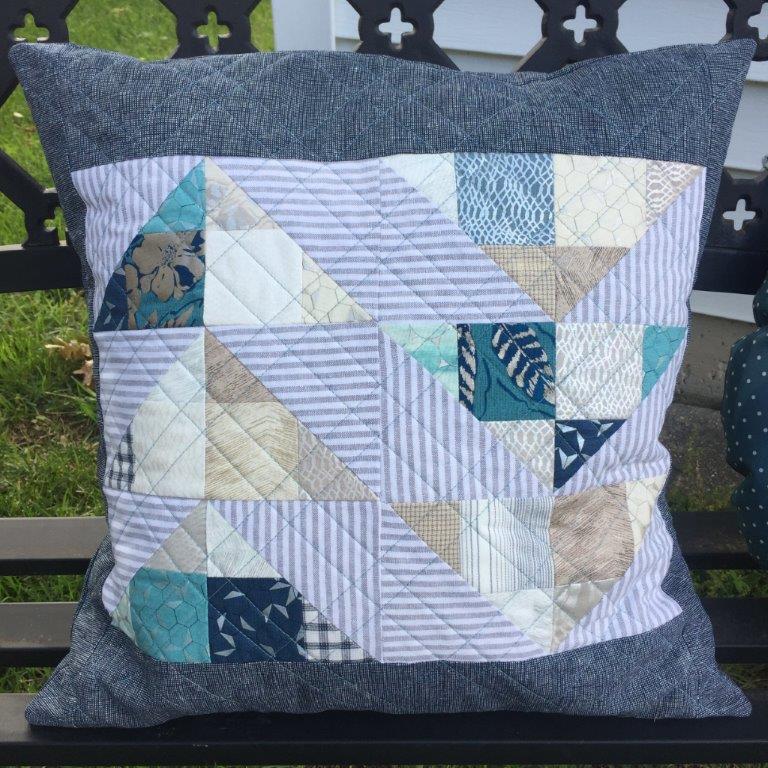
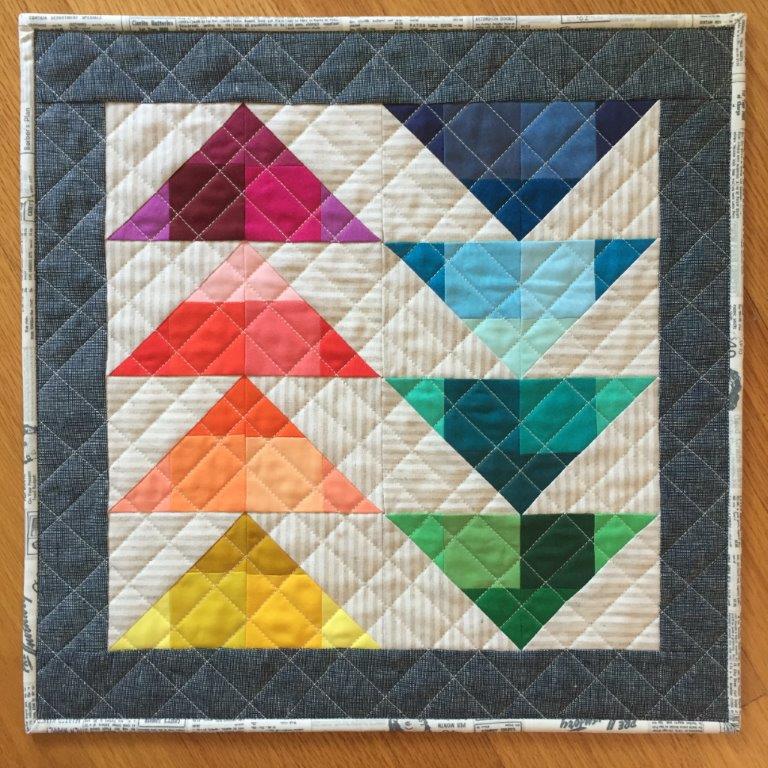
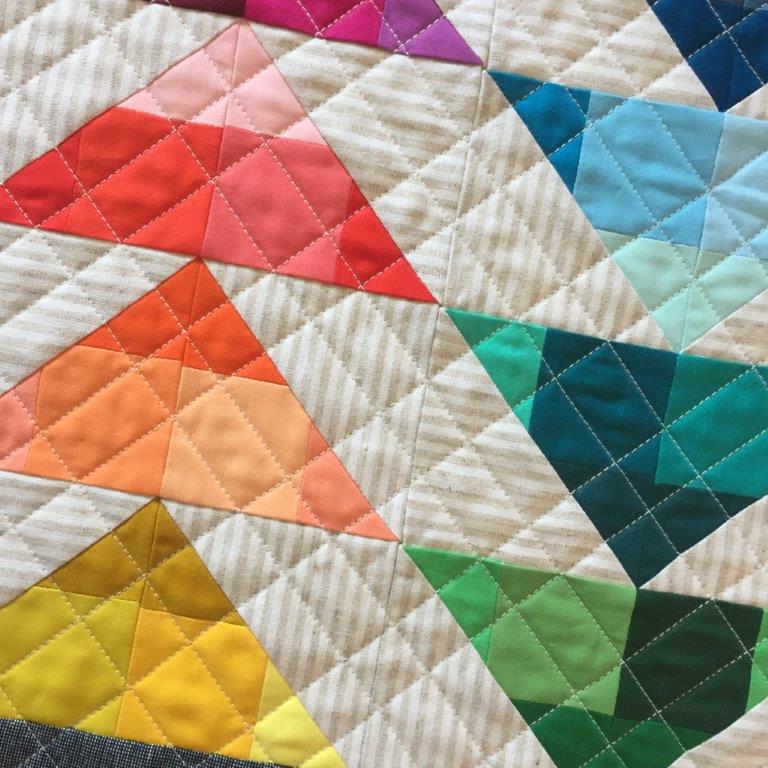
Here’s another example of a wall hanging I made using eight geese. Once you’ve made the additional geese, just adjust the size of your borders to reach your desired size. The possibilities are endless, so pop open those mini charm packs and get to work!
[Bio: Hi! I’m Jessica, a sewing, baking, editing, mommying Texan transplanted to the Midwest. I’m a proud Havel’s brand ambassador and the president of the St. Louis Modern Quilt Guild. I’m most active on Instagram, where you can find me as @blueskycrafter.]
Posted in art ideas, craft, Craft to make, Crafting, Cutting Mat, Fabric Cutter, Fabric Rotary Cutters, Free Craft Projects, Free Sewing Project, Jessica Schunke, Pillows | Comments Off on MAKE BLUE SKY QUILTER’S CHARMING GEESE PILLOW!

BAD GIRL QUILT ALONG – WEEK 2 – MAKE FIVE STARS

BAD GIRL QUILT ALONG – WEEK 2 – MAKE FIVE STARS
May 24, 2019


If you peeked into my sewing room, you might be thinking I’m some kind of crazy. I’ve been clapping my hands together, squealing, a little jumping up and down and petting my fabrics. To the non-quilter, this is not normal, but to you…. well, I know you understand. In fact, you are probably doing this too or we’ll be sometime this coming week.

It’s time to make stars!!!!!


This Week’s Sponsor

This week we are giving away a set of 9 quilt labels (a value of $35) to one lucky ducky.
To enter to win, post your progress on Instagram using the #badgirlqa and tagging me. You must be following me and @meanderandmake. You can enter as many times as you like.

I’ll be announcing the winner this evening.

Visit Meander + Make here.


This Week’s Task
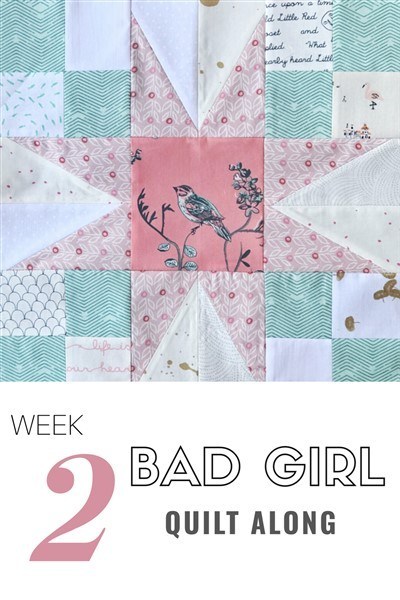
This week we are making 5 of our 15 stars. So this is where the real fun begins. You get to sort through your cut fabrics and pair them up how you want. This is by no means a quick block, but it is worth it, I think. I’m absolutely obsessed with it and had a blast. I turned up the music, made me a cup of my favorite cinnamon tea and pretty much played.

Tips:

  • Notice my 4-patches. I used the “alternate” version in the pattern. You’ll need to decide for yourself what you want. The first time I make this block I kept forgetting that two are different from the other two. Be mindful of the position that you place your background and your prints in. You just want consistency.
  • I have a tutorial for the half rectangle triangles here. They are not the devil, but just a bit tedious. The most loveliest of shapes usually are. Take your time and don’t try to do all blocks at once, break it up and pace yourself. You got this!
  • Starch is your number one bestie! I starched the heck out of every unit and then I sewed the block altogether and starched again. Here’s my fave recipe for my starch.
  • If you need help, ask for it. Many of the quilters and me and myself participating are here for YOU. Reach out to them or me on Instagram. I’ve been getting quite of bit of questions about this or that and I promise you I don’t mind at all.


Get a personalized Bad Girl quilt along label for your quilt.

Get the Label


A Bit of Extra Help

I didn’t make a video tutorial for this block when I wrote the pattern, only the video tutorial for the HRTs.  There are quite a bit of new-ish quilters participating in this quilt along and I don’t want them frustrated.  I remember frustration in my early days of quilting and it really just sucks joy out of quilt making.  For that reason, I am going to share a video tutorial for the whole block.  I do have a few things that I need to say first though.

  1. This video was made for a new sampler quilt pattern tailored for beginners that releases next month. So if you are wondering what all the “Evening Walk Quilt” business is about, that should explain it. Andromeda Star is a block within that sampler.
  2. When writing that pattern, I did a change up some of the pressing techniques from what I used in the Bad Girl quilt. So there are a few discrepancies. Also, in the video tutorial I have the 4-patches turned a specific way, but in the Bad Girl quilt pattern, you have the option of turning them how you want them.
  3. The video is for a beginner, so I may give a bit of extra help within it.


Product Spotlight

Gimme The Sun Fabric Bundle

  • 10 pieces
  • Fat quarters
  • Bright and happy
Get your bundle here.


Helpful Links


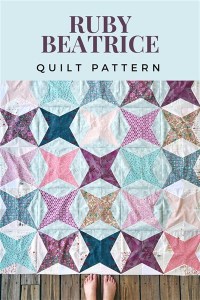
The Ruby Beatrice Quilt

Get the Pattern


Posted in craft, Craft to make, Cutting Mat, Fabric, Fabric Selection, Fun Stuff, Melanie Traylor, Patterns, Quilting, Quilting, Quilting & Embroidery, Select Fabric, Tutorials | Comments Off on BAD GIRL QUILT ALONG – WEEK 2 – MAKE FIVE STARS

Bad Girl Quilt Along


BAD GIRL QUILT ALONG – WEEK 1 – CUT FABRICS
May 17, 2019

It feels like I’ve waited for ages for us to begin. In truth, it’s been about a month. Well, I hope you’ve got your bad girl hat on. It’s time and here we go!!!

If you are lost, you can read about the Bad Girl quilt along and sign up in this post.

This Week’s Sponsor – Yellow Rose Jenny

This Week’s Task

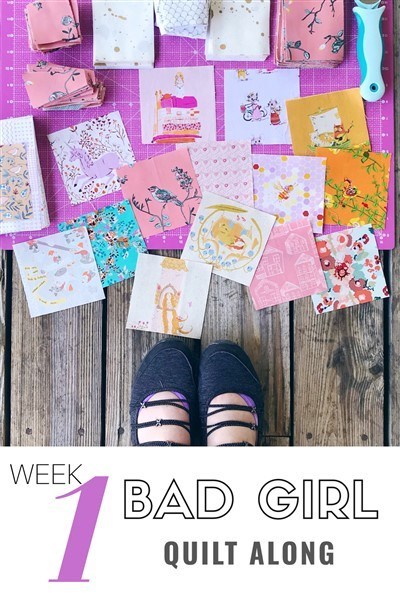
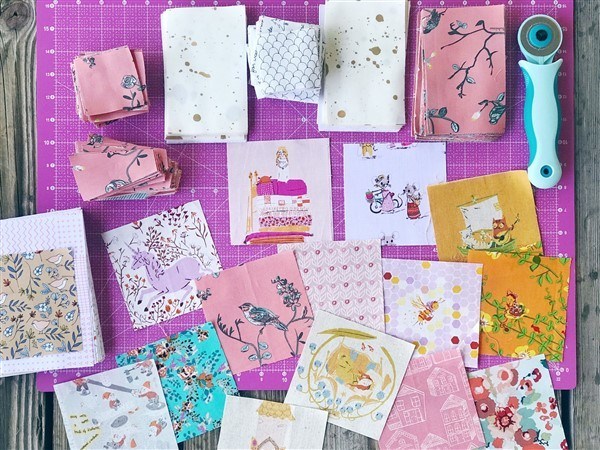
All there is to do this week is cut our fabrics. Easy peasy! One of the main things I like about Bad Girl is the cutting diagrams for fat quarters or half yards. I like to get mine starched and pressed first and stack them into two sets and cut all of them the same.

Don’t forget to cut your background fabrics as well. If you are interested in how I make mine scrappy and low volume, you can find that info here.

Tips

  • There are three strips to cut from each fat quarter and half yard. Cut the strips first and then subcut them into the shapes needed.

  • If you need help cutting the Dresden blades, I’ve a tutorial for that here. Save time by flipping your ruler/template vertically with each cut.

  • The center square is cut from the same shape as the rectangles for star points. Cut the rectangles first and then from the piece leftover, cut the center square/s.

  • I always starch my fabrics before ever making the first cut. I have a homemade starch recipe here that I use religiously.


Get a personalized Bad Girl quilt along label for your quilt.

Get the Label Here!


Let’s talk Fabrics

I’ve said this a few times, but I think Bad Girl looks best in saturated fabrics. The small pieces get a bit lost when done using fabrics that feature too much white (or whatever your background fabric is).

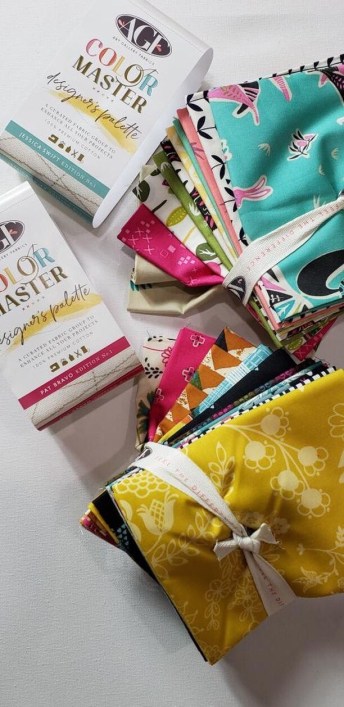
You might notice on the two fabric bundles I created for this quilt, I chose very saturated prints for this very reason.

I’ll be using the Orange Grove bundle for my own quilt. I’ve decided to change up the centers of my stars though, and am incorporating a few Heather Ross fussy cuts.

I was really wanting to use them and I think their colors will lend nicely to the other fabrics. Fingers crossed because most of them are not so saturated. It’s the center of the start though, so I’m thinking this will be okay.

My main worry with not using saturated prints is the stars beams and the Dresdens. I did a bit of this in my first Bad Girl quilt and didn’t like how I lost the shape on lighter fabrics.

This is all food for thought. You do you when making your quilt, and make your own rules!


Product Spotlight

The Orange Grove Bundle

  • 15 pieces
  • Fat quarters
  • Made especially for the Bad Girl quilt

Get your bundle here.


Helpful Links

If you need help, ask. Leave a comment here or message me on Instagram. I’m always happy to help! We are making this quilt together. That’s the beauty of quilt alongs. Share your thoughts, your struggles or your joy. Make friends by liking and commenting on others progress posts. Let’s be here for each other.

There is no “behind”. The timetable is to help keep those of you who want to stay on track do so. It’s not a deadline. If you like to work slower, do it. Savor your creative time in your own way.

I’ll see you next week when we start our stars, until then have a good week, lovelies!

Posted in Craft to make, Fabric, Fabric Cutter, How to Make a Quilt, How to Quilt, Melanie Traylor, Patterns, Quilting, Quilting, Select Fabric, Uncategorized | Comments Off on Bad Girl Quilt Along

THE BAD GIRL QUILT ALONG

By Melanie Traylor of Southern Charm Quilts

Giveaway Rules

April 17, 2019ShareShareTweetPinShareShare

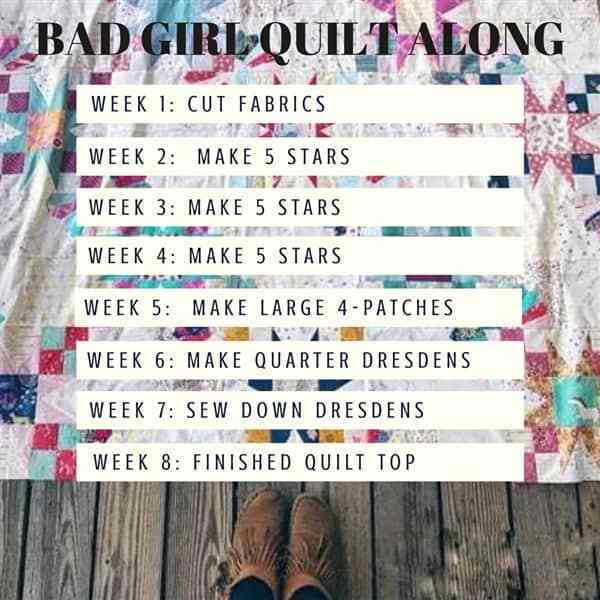
I am excited to be announcing the next quilt along today!  It’s the Bad Girl quilt!  I’m breaking this one up into 8 weeks, so you can do this slowly!  I love quilt alongs for their community, but it also helps me stay on track and get things done.  I’ve got some great sponsors for this one and I cannot wait to tell you more.  Let’s get this going!


Custom Quilt Labels
Photo Feb 22, 3 03 08 PM
quilt-24-X2
quilt-16 (715 x 477)
old bowtie quilt's label

Shop Custom Quilt Labels


When:

The quilt along starts on May 17, 2019.  That’s exactly one month from today!

Where:

The quilt along will take place right here at the Quilt Making blog.

What you need to do:

You can RSVP to the quilt along here.  RSVPing will sign you up to a newsletter where you will receive an email each week during the quilt along and get reminders and nudges before the quilt along begins (you can also opt out if life gets in the way).  After signing up you will receive an email immediately with a coupon code for a discounted pattern.

Purchase the pattern here to participate.

Make sure you are following me on Instagram here as that is where all giveaways will happen.

Who can join:

YOU can!  Yes, you.  No matter who you are, where you’re from, what you do, or what you think, YOU are welcome here just as you are.

Are there prizes?

Yes!  Every week I’ll will be giving away one awesome prize to one lucky winner that posts a picture of their progress on Instagram.  Here is a quick look at the prizes (photos of them coming soon):

Giveaway Rules

Prizes will be given away and announced only on Instagram.  To enter you need only post photos of progress for your Bad Girl quilt using the #BadGirlQA.  The more times you use the hashtag the better your chances.  To be eligible for prizes you must have a “public” account.  If you have a private account, consider turning it to public for the length of the quilt along or just create an account with only your quilting and sewing and make that public.  I will be choosing a winner the same day of each post (Fridays).  To claim your prize, you can DM me your info.  Prizes are open internationally.  To be eligible for the first week’s prize, take a pic of the fabrics you plan on using or repost any of the pictures within this article.  Don’t forget to use the hashtag when you do.

It’s okay if you are not finished with the step of the week.  Just your progress is enough.  You don’t have to have each step completed to be eligible for the giveaways.  You could be eligible just by posting a photo of the fabrics you are using.  I don’t like the idea of stressing you out, so please don’t feel that way.  You can absolutely still be working on the first week’s work and win the prize in the third week.  So take it easy, go at your own pace, and post!

In the quilt along we will be making the large throw size Bad Girl quilt.  It features 30 blocks, 15 stars and 15 of the Dresden blocks.  It measures 60×72″.  Feel free to make whatever size of the quilt you want to make, but the schedule is specifically made for the large throw size, so change things up as you’d like.

I’m working on getting some fabric bundle kits ready for this quilt at Meander + Make.  I should have these in about two weeks and will make an announcement as soon as they are available.  So if you’d like to wait and see what they look like, great!  If you can’t wait and know exactly what fabrics you want to use. post a picture because I want to see what you are choosing too!

R.S.V.P to the quilt along here.


Get a personalized Bad Girl quilt along label for your quilt.

Get the Label


Helpful Links

All Posts

Posted in Fun Stuff, Melanie Traylor, Patterns, Quilting, Quilting, Quilting & Embroidery, Tutorials, Uncategorized | Comments Off on THE BAD GIRL QUILT ALONG