Tips for sewing patchwork
By Terry White
When I first started to make quilts, the first thing I did was to take a beginner’s quilt class. I am sure glad I did. I was experienced in many needlecrafts, but quilting has its own ways. The class was six weeks long and I loved it! I didn’t obey all the rules, but I learned what the rules were and why they existed. Actually, the “rules” are a compilation of many quilters’ wisdom gained from trial, error and success.
I want to give you some tips on sewing patchwork because there are a lot of things that a new quilter may do that doesn’t work well. These are things that are good to know when learning to quilt.
Seam allowance is ¼ inch. This helps to control the shapes of patchwork. More than ¼ inch is unnecessary and less is not wide enough to keep the seams from fraying.
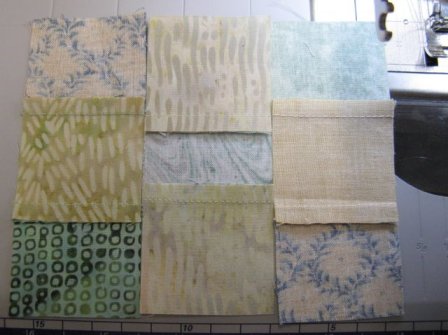
The wrong side of a nine patch showing consistent and straight ¼ inch seams before the three sets are sewn together. Notice the direction in which the seams are pressed.
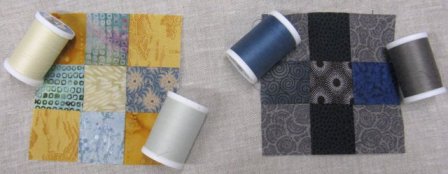
Use the same thread in the bobbin as the top thread. You can choose a neutral color that blends with the colors of your patchwork, instead of changing thread colors all the time. Here are examples of threads that work for these color combinations.
Try to cut and stitch each fabric piece as perfectly as possible… knowing full well that it is hard to make perfect happen. Each cut and each seam that is just “a little bit off” will eventually add up to “a lot off”.
Handle patchwork and fabric pieces gently. It is very easy to pull a small piece of fabric out of shape. As soon as a piece of fabric is cut from the cloth, it begins to fray.
Press, press, press…
(This is different than ironing fabric into submission and distorting the pieces)
Gently pressing your seams as you piece will go along way towards beautiful patchwork. I like to press every set of seams as I piece. The patchwork fabric is easier to manipulate when you press as you go. It is very hard to press an entire quilt if you haven’t been pressing it section by section.
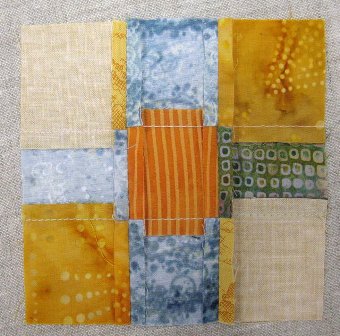
The seams are pressed open to distribute the seam bulk in the corners. This block will stay flat and be easy to quilt.
Use the correct needle size and type for the thread and the fabric. Generally, I like a 75/11 machine embroidery needle. It has a nice sharp point and, most importantly…it lasts a long time, embroidery needles are built to last for a long time …have you ever seen an embroidery machine go? The needle works very hard.
Batik fabrics are very tightly woven and have wax residue from the printing process, so, for batiks I switch to a Microtex needle.
As I said before: the best thing you can do for yourself before you make a quilt is to really get to know your machine. Your machine comes with a book that explains the parts of your machine, how to use and maintain it and what the many functions do. You can learn about tension settings, presser feet, needle positions, needle plate, types of stitches, stitch adjustments, needles to use, threading the machine, spool holder positions…………………..
Know and control your tension settings. When you thread your sewing machine, the thread is guided through a series of guides and tension discs. This puts some friction on the thread so that it doesn’t loosely spool off and make messy stitches. You can adjust these settings. Each machine is different and you have to know how to adjust your tension for the different types of sewing you do with different types of fabric, stitches and threads you use. Most sewing machines have a default tension (about 4) which is produces even stitches and is good for patchwork.
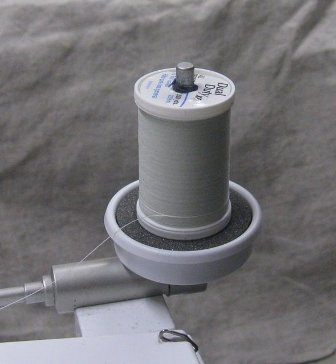
Place spool upright using a spool pad and spool cap to create an even pull (thus, even thread delivery) from the side of the spool.
If your spool is big and heavy, it can cause extra drag on the thread and that can cause the tension to be too tight. Place the spool upright on a spool cap with a felt or foam spool pad in between. The spool cap will act like a “Lazy Susan” and keep the spool moving around. If your spool is lightweight and spins too fast, it can jam up the thread in the tension discs. This will add the friction necessary for the spinning to stop.
If you usually put your spool on one way and you have trouble with it…then change it. I always think that the best way to pull thread off of any spool is the way it was spooled on… from the side of the spool.
What you want is for the spool thread to have smooth delivery from the spool through the tension disks. Usually, you won’t have this problem with patchwork; it usually occurs when quilting or thread painting, i.e. when you are stitching a lot without cutting the thread. Stitching for a long time can twist up a thread and cause it to break.
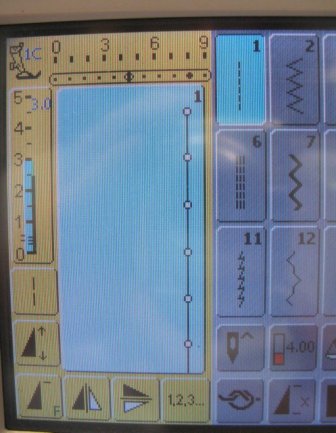
Some machines have the capability to move the needle to the right of center needle position. This way the fabric is moved by both feed teeth which help to keep the line of stitching straight.
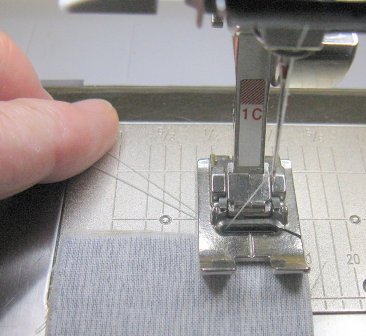
You can guide the fabric along the side of the foot, and/or use the stitch plate guide on the sewing machine table so that you can have a consistent seam width.
Don’t stitch too fast…the machine is already sewing faster than you can. Keep control of the fabric pieces and guide them so that the feed teeth are doing the work of moving the fabric. Keep maintaining an even seam to the end of the patchwork.
Hold top thread, take a stitch, and bring the bobbin thread up. Hold these threads to the side under the presser foot. Now, you can line up your pieces under the needle and begin to stitch. There is no beginning tension until you take that first stitch.
If you have problems making a good stitch on the sewing machine, check the simplest things first:
Is the bobbin threaded correctly?
Is the top thread threaded through all the correct tensions and guides?
Is the thread stuck on the spool or wrapped around a spool pin?
You would be amazed how often these things happen to everyone!
(Okay…me)
Test your stitches before sewing. Do a little stitch sample every time you adjust a setting on the machine…if there is a problem…..you can adjust it before getting too deep into your project.
Finally, when you get fatigued, stop stitching. Go wash your hair or eat some ice cream. It is better to get up and walk away before you make trouble for yourself than to wait and make trouble and have to rip it out….right?
Click here for more tutorials on How to Make a Quilt with Terry White
Talk to us! Tell us about your quilting ideas and experiences.
Click here to learn more about Terry White


Pingback: How to Make a Quilt Fabulous! | Havel's Sewing