6 Tools Necessary for Appliqué
By RaeAnn Rex
If you have even basic sewing tools such as scissors, needle and thread, you can successfully learn how to appliqué designs onto your next project. However, there are some great tools out there, some of which are made with a very specialized purpose, that can make appliquéing a simple process. If you’ve ever run from an appliqué project because you didn’t know how to appliqué more difficult pieces, these tools may just make you change your mind.
Tools for Planning and Stabilizing
1. Clear Plastic – When planning your work, it can be helpful to see the big picture. Some appliqué work may be pieced from several smaller pieces, as in the case of adding people or flowers. Using a marker, trace the design onto clear plastic, so that you can determine the placement of each smaller piece before sewing them into place. While the drawing will not have any seam allowances shown, be sure to leave a small allowance on each smaller piece for sewing.
2. Fusible Web or Stabilizer – When working with stretchable fabrics, it is essential to stabilize them in order to prevent pulling and stretching. Other fabrics can also be easier to work with when using a fusible stabilizer, to keep the item in place while stitching. Fusible web will not need to be removed, but some of the fusible stabilizers will. These can either be placed on the wrong side of the main fabric the appliqué is being applied to, or they can be ironed to the wrong side of the appliqué to stabilize it. Stitch the piece down normally until you have enough of it in place that you don’t need the stabilization, then remove the paper with hemostats or tweezers before finishing it off. Freezer paper can be used as an inexpensive stabilizer in this manner.
Tools that Make Difficult Sections Easy
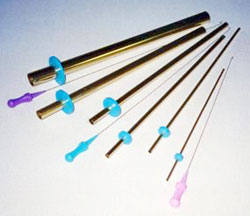
3. Tube Turners – Making a tube with right sides together, you can use a tube turner to pull it back through. These all work on the premise that you push them through the tube and then pull it right side out.
4. Bias Pressing Bars – To avoid turning tubes, try using a pressing bar to make your tubes. Sew the tube wrong sides together, then insert the pressing bar, scoot the seam over to the middle, and press it flat. You can then put the seam side down, and appliqué it to the project easily!
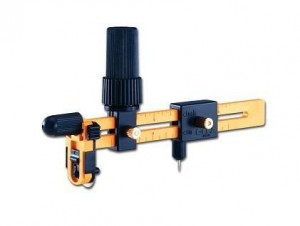
 5. Circle Rotary Cutter – These little cutters are much like a compass. There is a measuring guide to allow you to choose the size of the circle, and the rotary blade makes cutting circles easy. Set the size first, then position the center point in the center of the circle you want to cut. With the blade in, make a quick circle to check that you have enough fabric, then pop the blade out, and with even pressure, cut the circle.
6. Circle Templates – Once you have your circles cut, put in a quick running stitch around the edge of them by hand. Insert a circle template into the middle, and tug the thread gently to gather the edges tight around the mica template. Adjust the gathers to be sure they are even, and press into place. You can then add a liquid stabilizer and let dry, press again, and then remove the template when it is cool. Be sure to keep the running stich thread in place so that you can easily open and close the circle again to remove the template.
Learning how to appliqué while using tools designed specifically for the job at hand can save time, and make more difficult projects open to even the less experienced sewers.
What are some of your favorite tools for qppliqué, sewing, quilting, etc.?


One Response to Appliqué