By Terry White
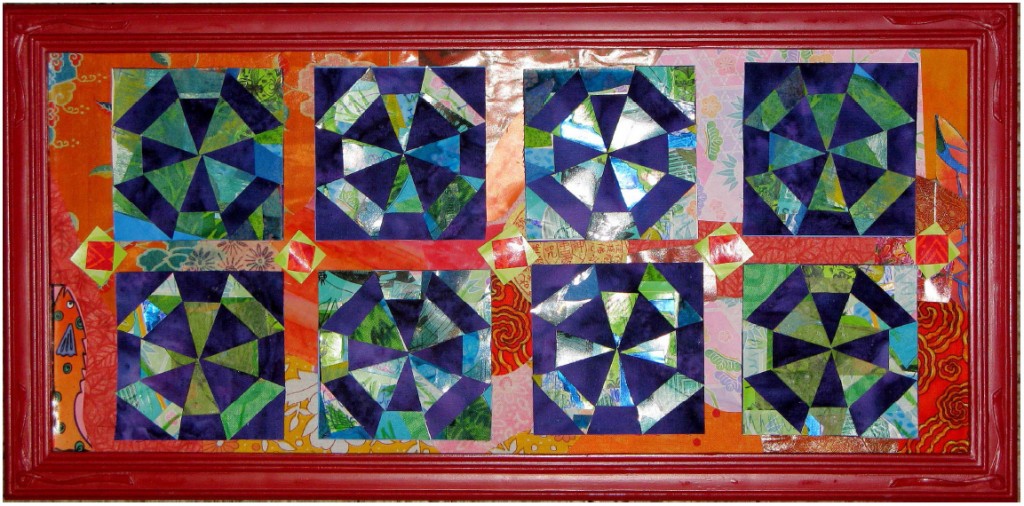
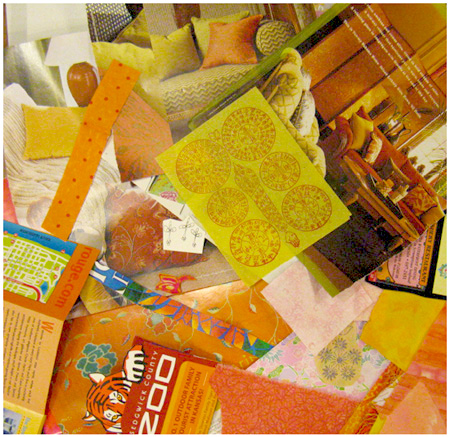
Using bits of tissue paper, packaging, wrapping paper, travel brochures, stickers and sticker waste, magazine rips, junk mail, catalogs, postcards, and a flea market frame, create this truly unique upcycle project.
You Will Need:
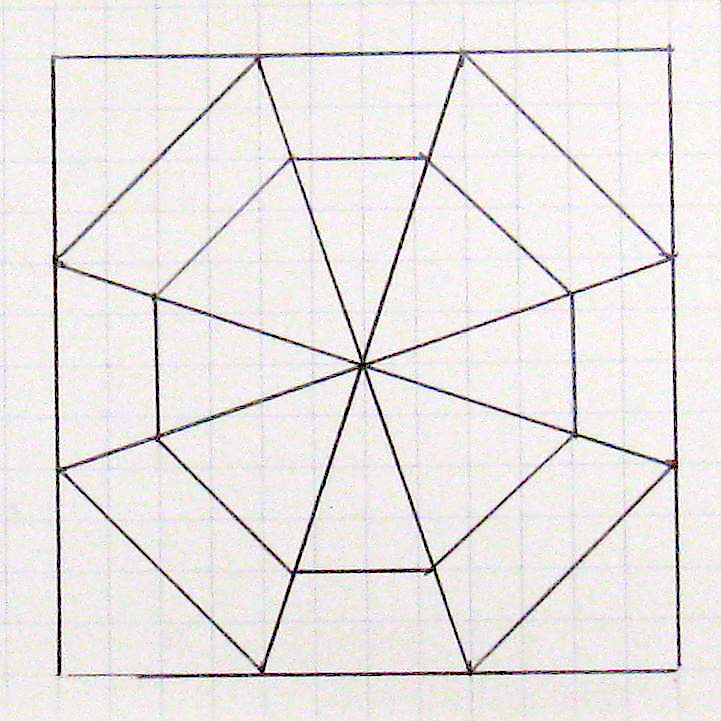
- 1/4″ graph paper to draft the design to complete a 3″ square (or copy and use the pattern provided).
- Cereal box cardboard or cardstock for two scrap sheets, you will be making four 3″ squares out of the blue scrap sheet (each square makes two blocks). The yellow scrap sheet will be the background for the quilt and it should fit in your frame.
- Scraps as described above. Enough to cover the two scrap sheets. Two sets of color were used in this project: blue/green and orange/yellow.
- Fabrick contrasting to the blue/green – I used dark purple
- Several sheets of copy paper
- Glue
- Marking tools – pen or pencil
- Crayons, paints, color pencils and markers to add exra design, color and texture
- Havel’s 60mm Jumbo Rotary Cutter, cutting mat and fabric ruler
- Havel’s Non-Stick 9″ inch scissors
- Flea market frame
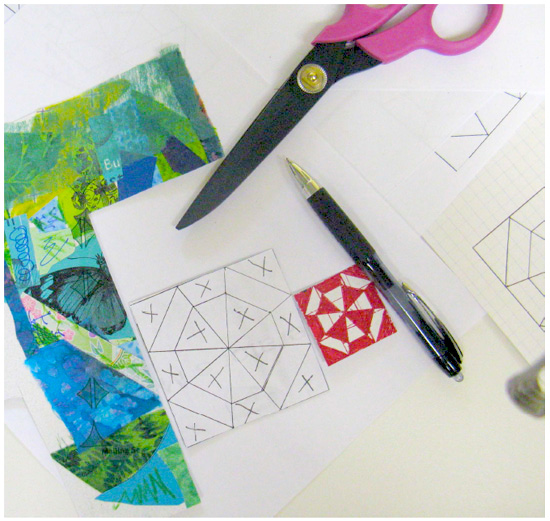
Draft a 3″ Spider Web quilt block using 1/4″ graph paper. Make several copies on regular copy paper.
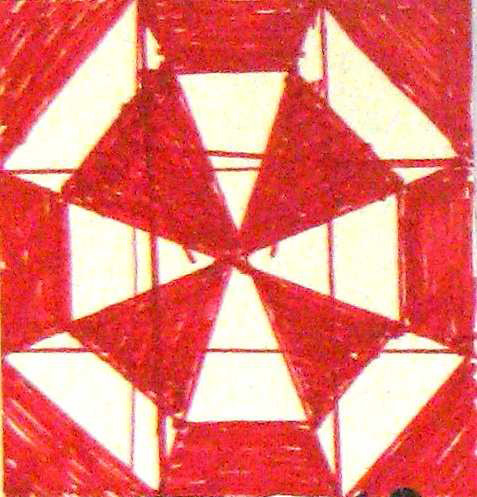
Shade one of the copies to make a two-color block. Use this as your guide for making pieces and the arrangement of blocks.
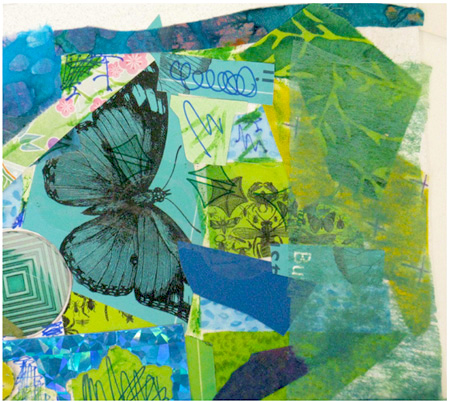
Make blue and green scrap sheet. Use the cardstock as a base. Layer big scrap pieces and glue to sheet. Ad smaller pieces on top and add marks of color if desired. Press with a heavy book and let dry overnight.
Make scrap sheet of yellow and orange pieces. This will be your background.
Glue big scraps down and glue to card stock. Press with a heavy book and let dry overnight.
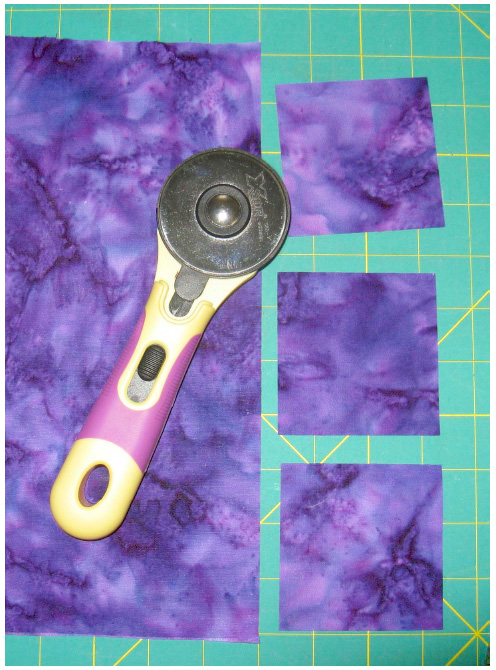
Cut 3″ fabric squares from a highly contrasting fabric. This is a dark purple hand dyed fabric.The hand dye adds extra texture to the design.
I use Havel’s Jumbo Rotary Cutter because it has a long lasting blade of
Japanese steel (I use this a lot!) and the ergonomic soft handle is easy on my hands.
Glue the fabric to a 3″ square of copy paper. This adds stability to the fabric.
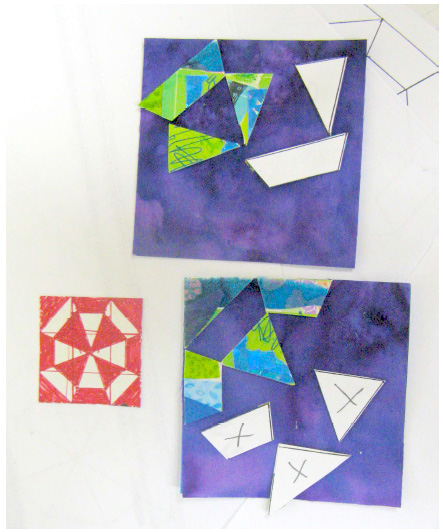
Cut out and glue a copy of the spider web block to the back of blue/green scrap sheet. Cut out square. Make X marks to correspond with shaded pieces of quilt block design.
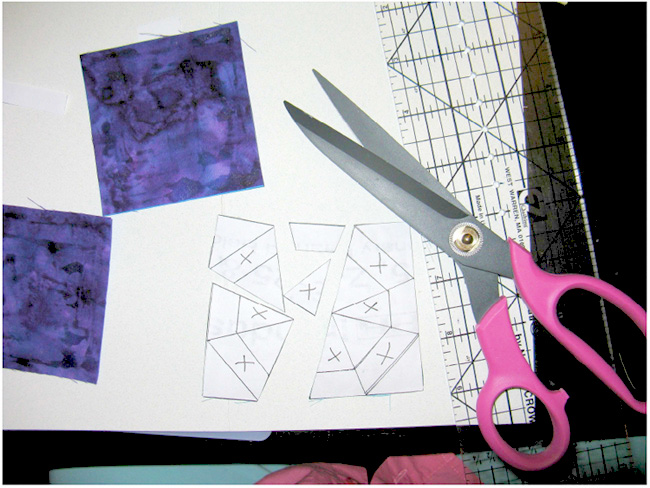
Cut out the pieces with Havel’s Non-Stick Scissors. They are coated stainless steel, and isn’t that smart? The size makes it easy to cut through thick layers. The non-stick coating makes it easy to cut through sticky adhesive, paint, wax from crayons and layers of paper. The blades are serrated for a nice grip on various materials.
Arrange and glue the X marked pieces on one purple square.
Arrange and glue the unmarked pieces on the other purple square.
Arrange and glue the quilt blocks onto the yellow scrap sheet. At this point make additions like corner squares and smaller scraps to add decoration. I cut the fish image from an ad in a travel brochure.
Press with heavy books – frame with flea market frame.
Watch Terry’s instructional video for “Scrappy Spider Web”, below.

Terry White is a studio fiber artist. She has been doing this work since 1996, and she discovered the techniques she uses: threadpaint, machine appliqué, piece, quilt, embellish with beads, fibers and minutiae with sewing machine techniques, through experimentation and self-study. Terry teaches these techniques through classes and videos. Over the years Terry has been published in over 50 articles in magazines and books, including: McCall’s Needlework; Quilter’s Newsletter; Machine Embroidery and Textile Arts; CMA trade magazine; Stitch n Sew Quilts; Quick n Easy Quilts; Quilt World magazine and Calendar; Quilting Arts Calendar 2003; America from the Heart; America’s Best; America Sews. She is a wife, stitcher, artist, sister, mother, friend, nana, gardener, baker, writer, student, teacher and American. See more of Terry’s work at www.threadpaint.com.

