
By Liz Kettle
I have to confess that I have a pretty severe tote bag habit. I don’t dare count them or put them all in one place because I would surely have to have an intervention! As we head into rainy spring weather, I realized that I only have one that is waterproof. GASP!
How could that be?
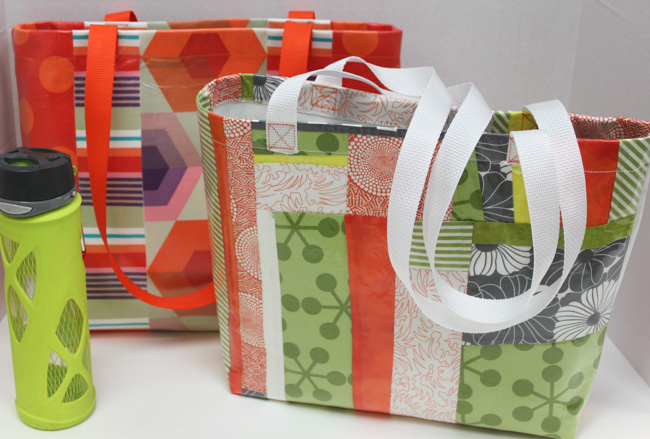
Fortunately I have been playing around with the new DIY vinyl laminates from Pellon and Therm-O-Web. And I love making tote bags as much as buying them so I thought I would share my process with you. I have designed an improvisational pieced bag and one that uses fabric strips with no piecing because if you are going to make one you may as well make two! They are so simple to make you may find yourself with a new addiction.
Supplies:
- 17″ x 30″ of Multi-Purpose Cloth (MPC) from Roc-Lon *
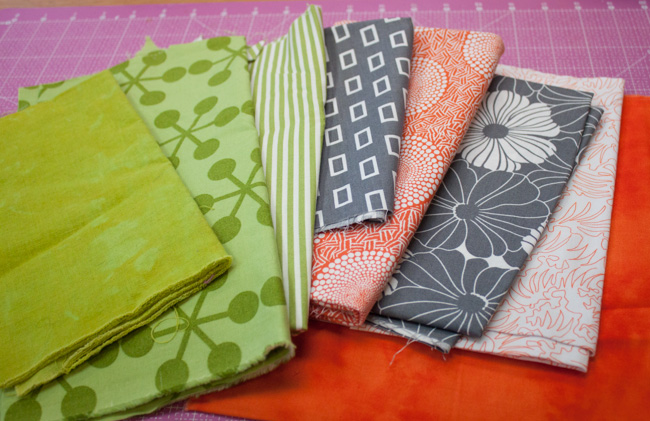
- Fabric of your choice: use scraps of coordinating fabrics (pre-wash your fabrics so the vinyl adheres properly).
- Vinyl iron on laminate from Pellon or Therm-O-Web
- Web handle strap: 60″ for each bag
- Havel’s rotary cutter, cutting mat and fabric ruler
Improvisational Pieced Tote Bag:
Improvisational piecing takes out the precise measuring of many quilting techniques. I free cut the main pieces and somewhat randomly piece them together. Once I have a fairly large section I trim them up and add them to other sections. Here’s how…
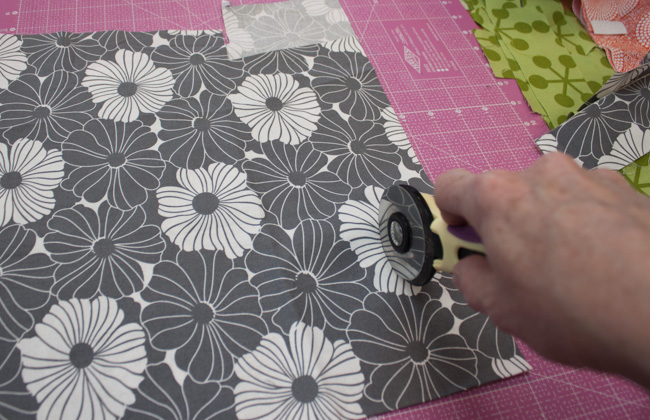
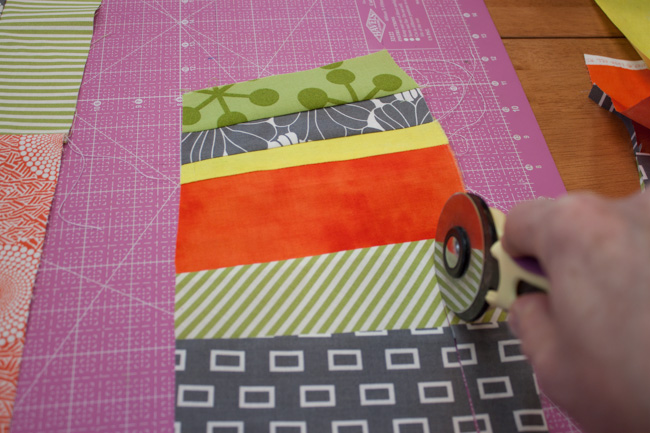
Step 1: Cut fabric using your Havel’s rotary cutter and mat. Cut straightish lines. We aren’t using a ruler so be careful to keep your free hand off the mat. Make a big pile of strips using all your chosen fabrics.
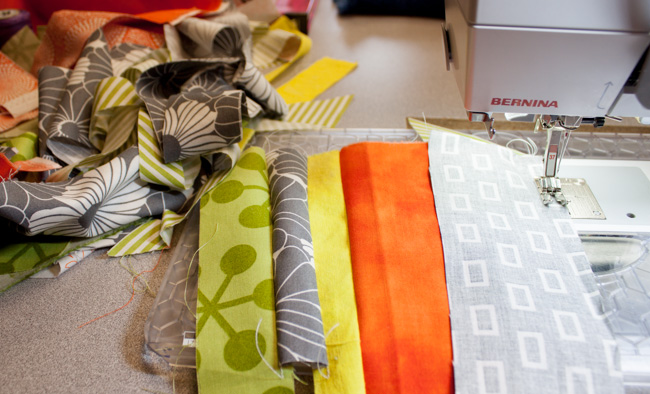
Step 2: Take the strips to your sewing machine and begin piecing them randomly. Piece some along the long edges as shown and piece some along the short edges so you have long lengths.
Step 3: After you have stitched a few sections, press seams to one side…
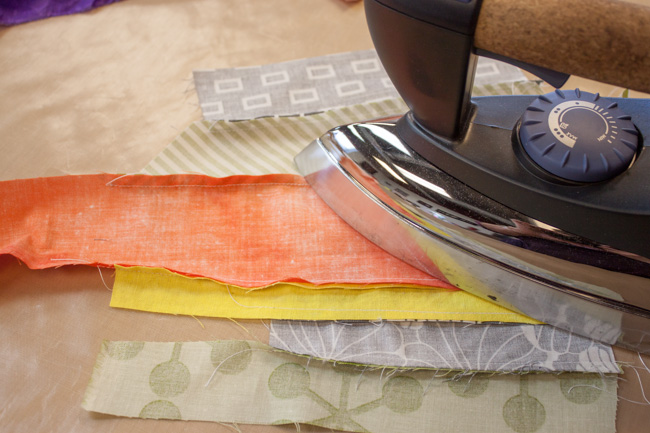
And trim sections straight-ish.
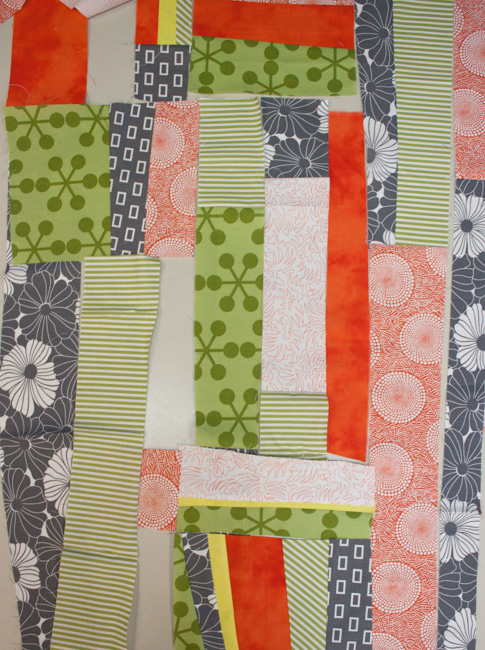
Step 4: Lay out your sections to see what else you need to create to make a piece of fabric large enough for your bag. At this point I decided that I needed to add some white strips.
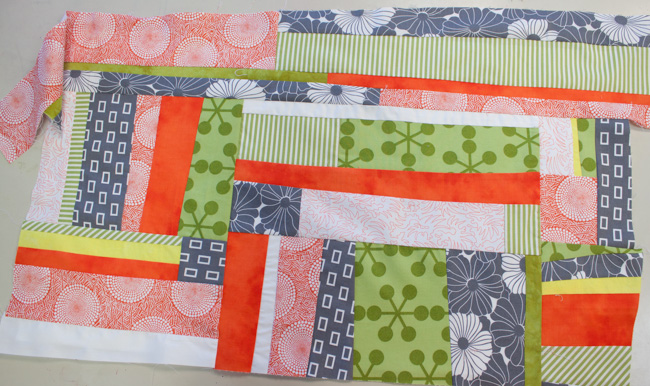
Step 5: Continue piecing until you have a piece larger than the 17″ x 30″ Multi-Purpose Cloth. Following manufacturers’ directions, use Misty Fuse or other fusible web to adhere the pieced fabric to the MPC.
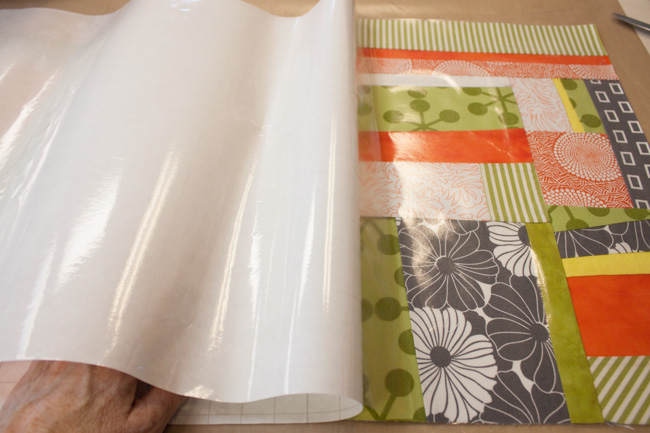
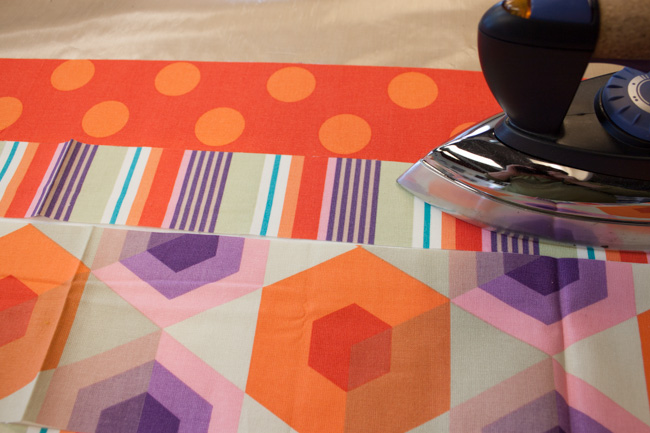
Step 6: Follow manufacturer’s directions to apply the Vinyl Iron-on to the surface of your pieced fabric.
Step 7: Fold the fabric in half along the long sides with right sides together. Stitch up the side seams.
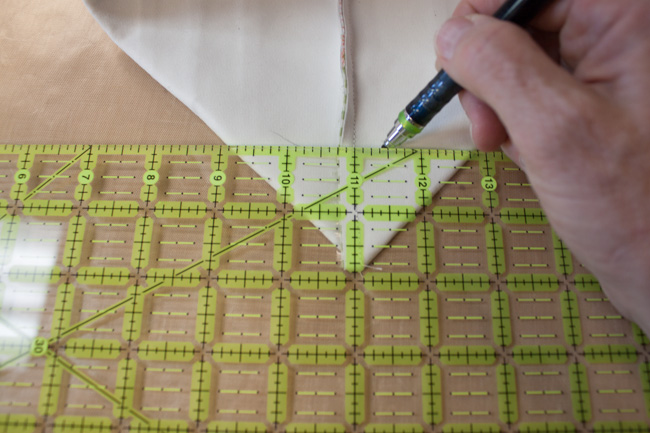
Step 8: To create the bag box bottom fold the bag along the side with the seam running up the middle as shown. Measure up 1 3/4″ from the point. You will have 1 3/4″ from the middle seam to each edge as well. Draw a line.
Step 9: Stitch along the line.

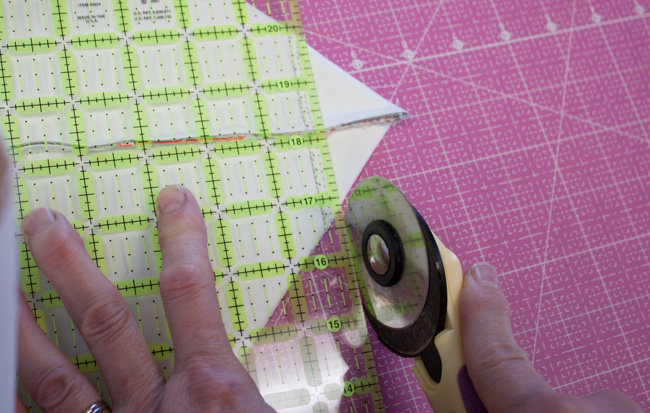
Step 10: Trim the excess point ¼” away from the stitch line.
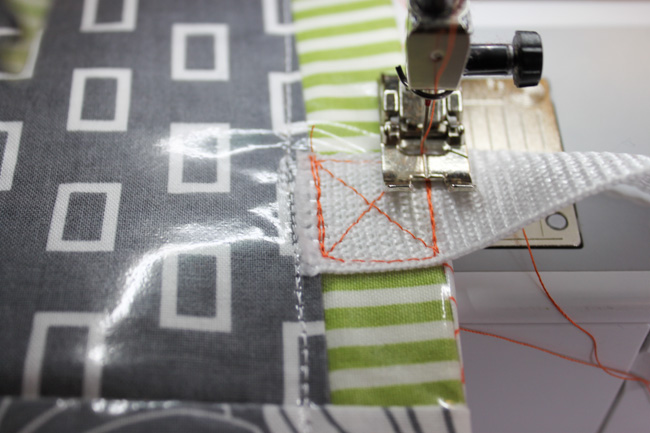
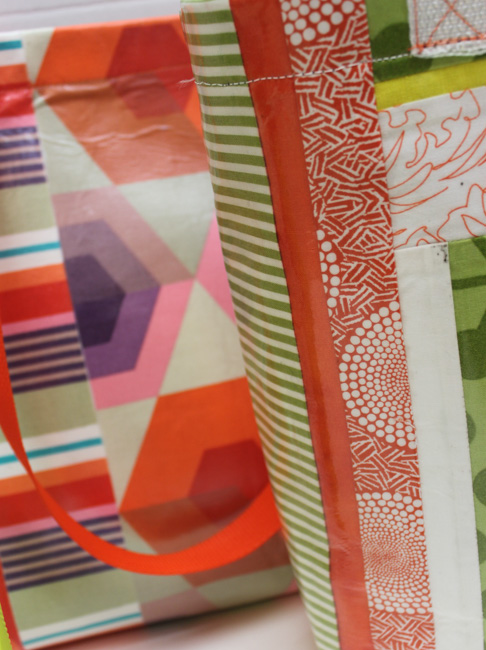
Step 11: Turn bag right side out. Press as needed using the protective sheet that comes with the laminate material. Cut each web strap 30″. Apply the edge of the strap 4″ in from the side seam on each side. I stitch a box with an interior X to make it strong.
Now the rain won’t keep you inside and your stuff won’t get wet. You could even apply the vinyl to the inside of the bag to make it completely water resistant for a pool bag!
Low Sew Option:
If you want to stitch less and let the fabrics do all the work try this method.

Use bold prints and cut strips 30″ long. Create a pattern with the strips or simply use one piece of fabric.
Fuse the fabric to the MPC base, add the Vinyl Iron-on and follow the rest of the steps to complete your bags.
 Liz Kettle is a textile and mixed-media artist who loves sewing and creating with fabric and thread. Sharing sewing joy and thread addiction with others makes her deliriously happy. Liz is co-author of two best selling books: “Fabric Embellishing: The Basics and Beyond” and “Threads: The Basics and Beyond.” Share Liz’s stitch journey on her website and blog at www.TextileEvolution.com.

3 Responses to Rainy Day Tote Bag Sewing Craft Project