
Felt Gift Card Envelope Tutorial
by Jessica Schunke of A Blue Sky Kind of Life
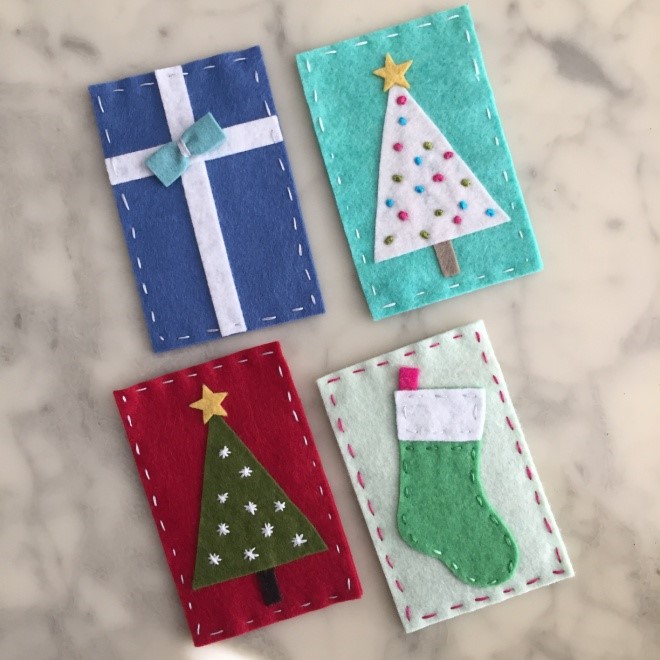
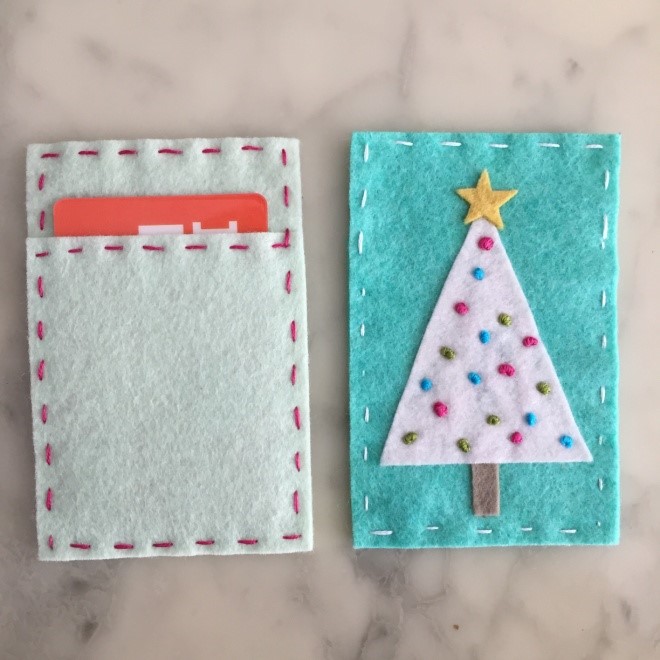
While I always love buying or making special, unique gifts for most of the people on my holiday gift list, sometimes a gift card really is just the ticket, and no one ever minds getting a little extra in their stocking. Still, I can’t resist the opportunity to jazz mine up just a bit by making my own quick, fun little felt envelopes for them. I put together this tutorial to guide you through the very simple steps for making a tree, gift box, or stocking design. Of course, the sky’s the limit on creating other options or even just a random improvisational design, especially if you’re making one for another time of year. Felt stripes or hexies could be really cute. Get creative!

Supplies:
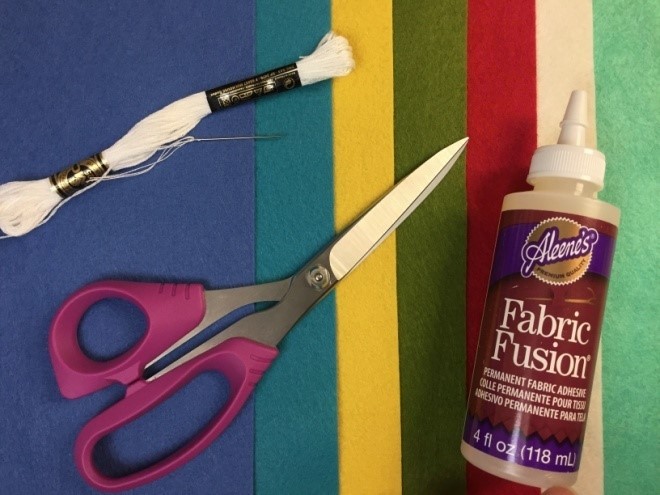
Scraps or sheets of felt in a variety of colors (colors and sizes needed will vary based on the design you’re making; see cutting instructions below)
Embroidery floss
Embroidery needle
Fabric glue
Rotary cutter
Cutting mat
Fabric scissors
Marking pencil
Cutting instructions:
For all designs:
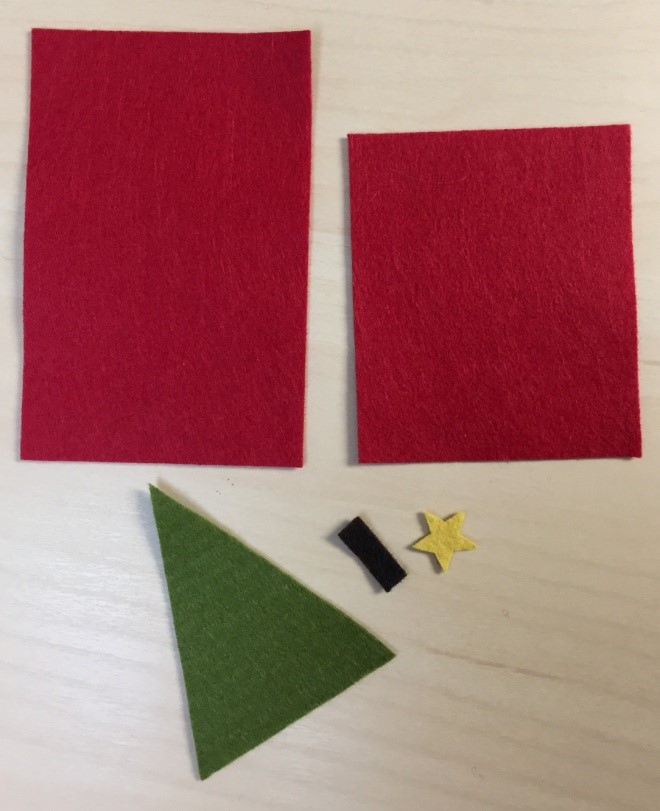
- Envelope backing: 2.75″ x 4.25″
- Envelope front: 2.75″ x 3.25″
For the tree, you also need the following:
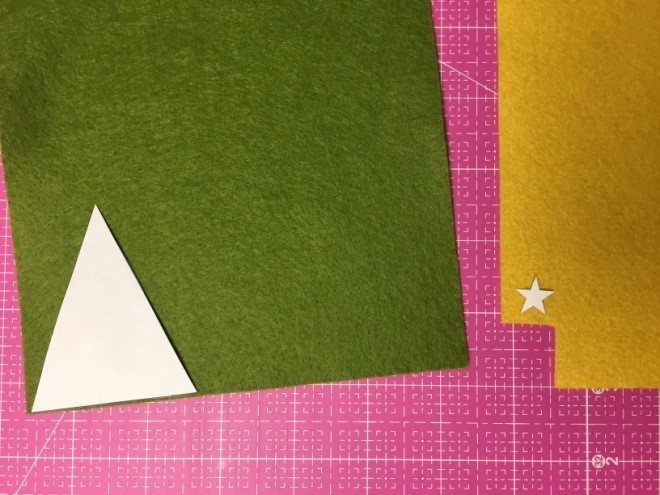
- Tree trunk: ¼” x ¾”
- Tree: cut using template (need felt piece measuring 2.25” x 2.75”)
- Star: cut using template (need felt piece measuring ½” square)
For the stocking, you also need the following:
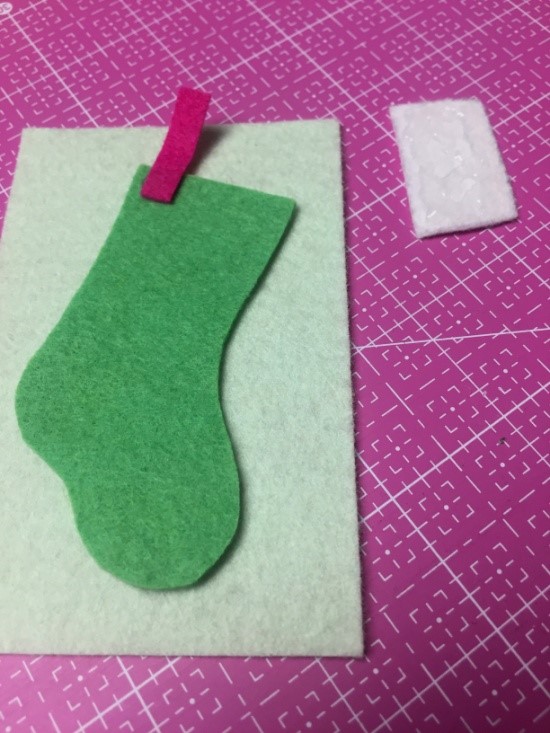
- Stocking: cut using template (need felt piece measuring 2.25” x 3.75”)
- Stocking cuff: cut using template (need felt piece measuring 1.75” x 1.25”)
- Hanging loop: ¼” x 1.25”
For the gift box, you also need the following:
- Ribbon: 3/8” x 4.5” and 3/8” x 3” (I like to cut my pieces a little bigger than the envelope and then trim them after I’ve glued them on, but you can also cut your pieces to size if you prefer, which would be 3/8” x 4.25” and 3/8” x 2.75”.)
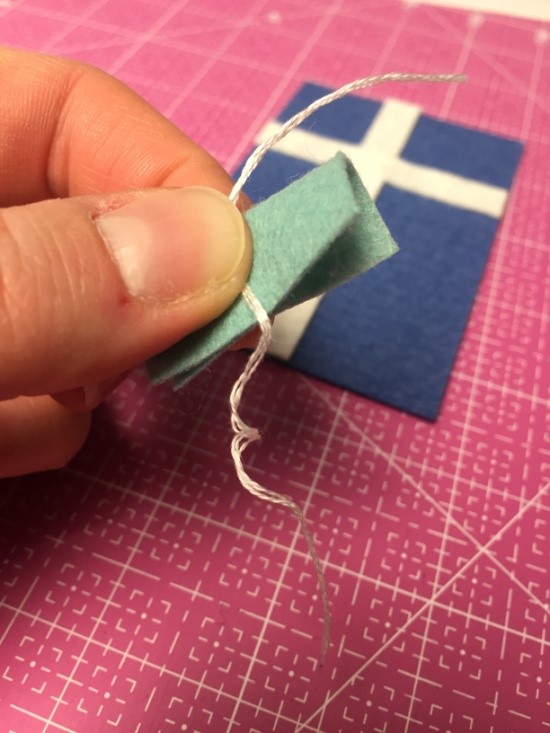
- Bow: 1.25” x 1”
Piecing instructions:
The images in the tutorial were taken while making all four envelopes, so the colors switch around. The basic steps are the same for each envelope, and I’ve specified when a certain step only applies to one of the designs.
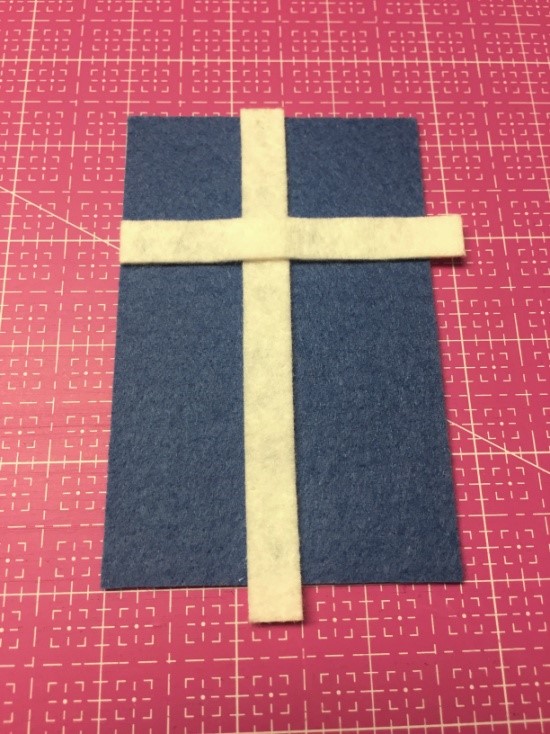
1. Using your rotary cutter and mat, cut out a 2.75″ x 4.25″ rectangle for the back of the envelope (the side that will have the design on it) and a 2.75″ x 3.25″ rectangle for the front of the envelope.
2. For the Christmas tree and stocking designs, use the templates found here to trace the tree, star, stocking, and/or stocking cuff images onto one side of your colored felt pieces using your marking tool. (Be sure to save the template file to your desktop before printing. You may experience printing errors or incorrect sizing if you attempt to print directly from the link.) Then, cut out on the line using your fabric scissors. Cut out all remaining pieces using the cutting instructions above.

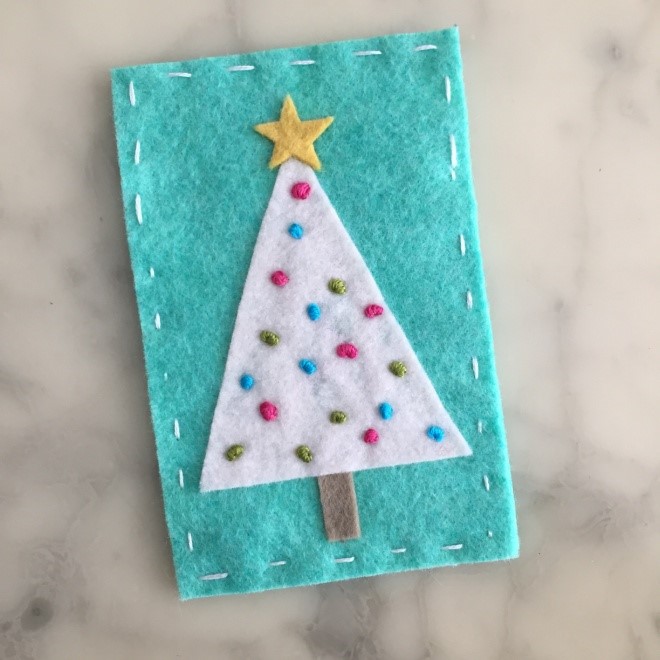
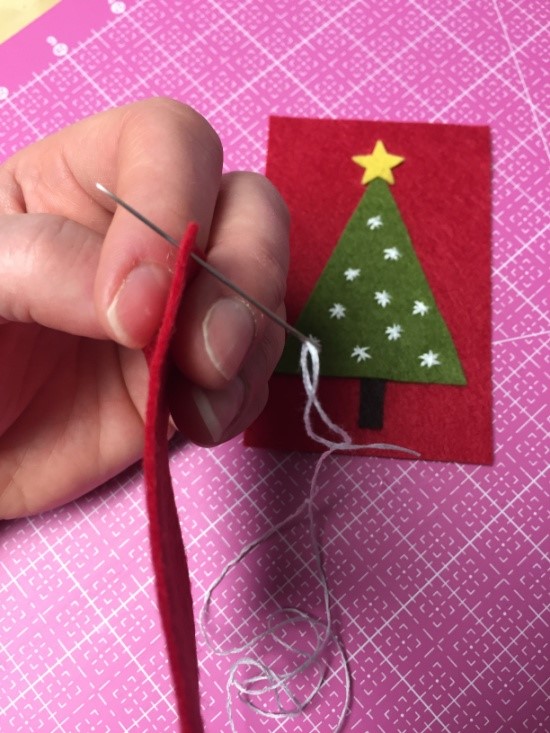
3. For the Christmas tree, you have several options for “decorating” your tree. I chose to add my decorations using embroidery floss, but you could also use sequins, beads, or little felt pieces cut into circles. For one of my trees, I made French knots in a variety of embroidery thread colors. These knots are a little tricky on such a small piece of felt (and without the stability of a hoop), but it gets easier after you do a few.
On the other tree, I made stars out of straight stitches using white embroidery thread. This one’s definitely easier and can be finished in no time.
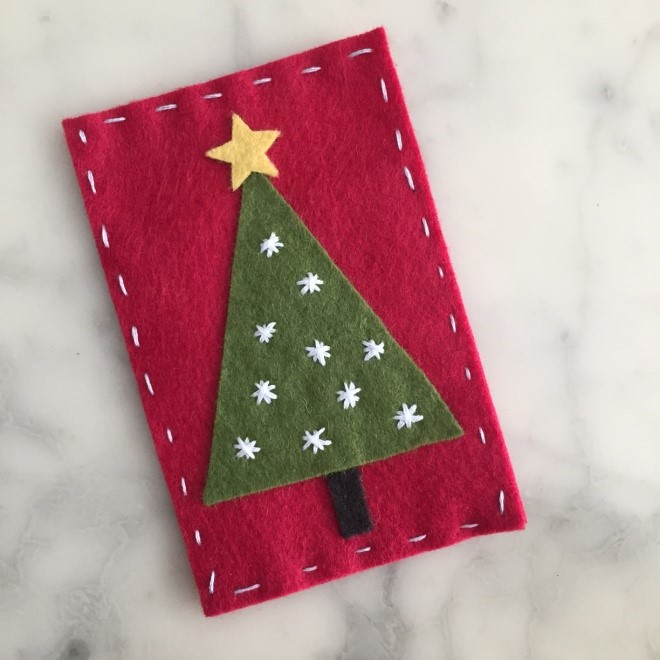
If you choose to decorate your trees with embroidery, I recommend that you do so before you attach the tree to the envelope backing so that your stitches will be hidden once you attach the tree to the backing. If you’re gluing on sequins or felt, the order doesn’t matter.
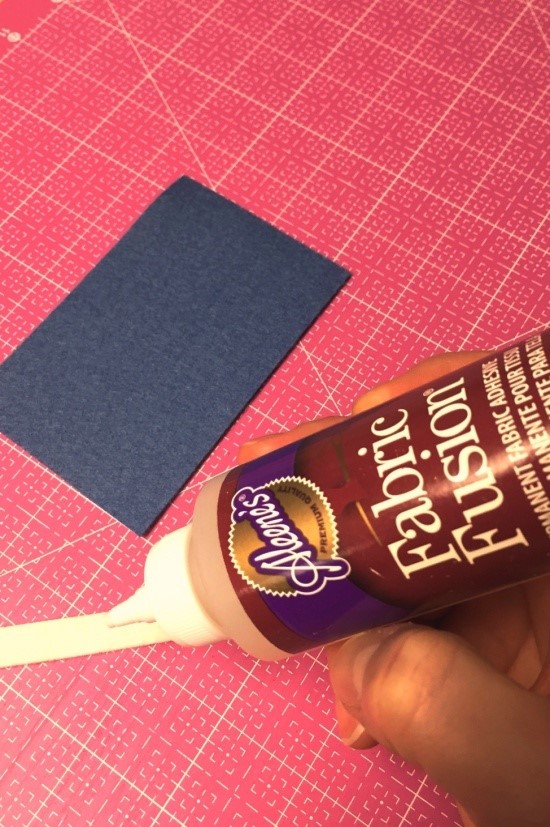
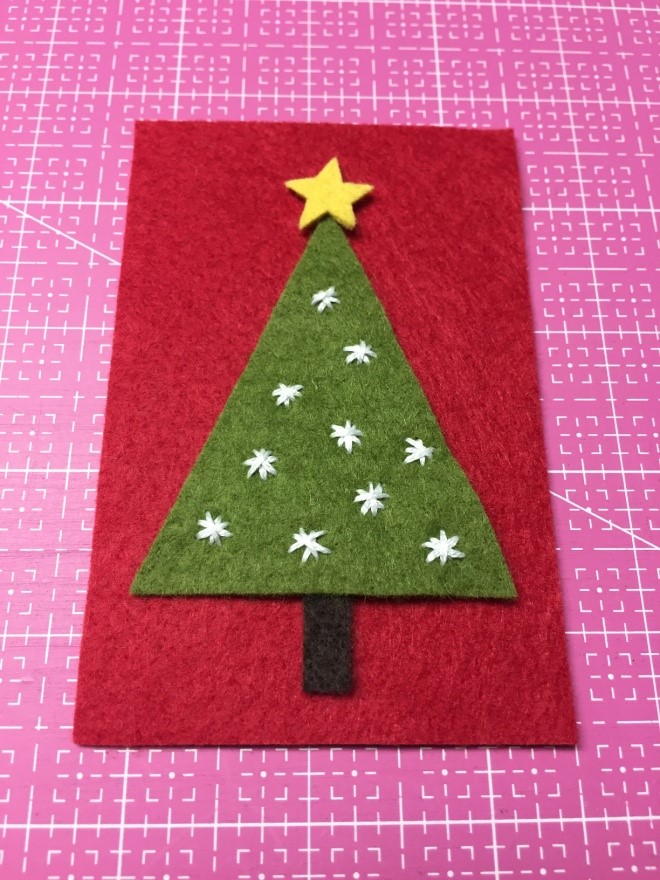
4. Attach your felt design pieces to the envelope backing (the larger rectangle). I find it’s helpful to lay out my pieces first so I can get a sense of how they fit on the backing. Be sure to leave 1/4” border all the way around for your final stitching, then glue down the pieces using your fabric glue. Coat the pieces lightly but thoroughly.
Special instructions for individual designs:
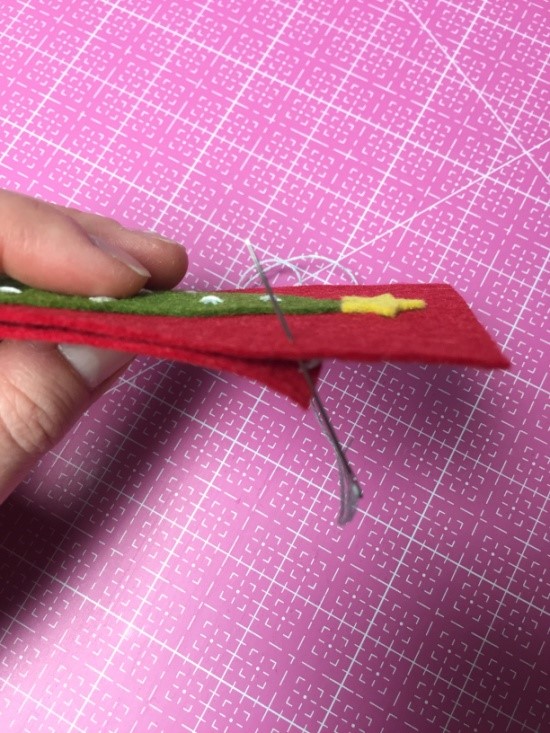
On the Christmas tree, the base of the tree should overlap the trunk slightly, and the star will rest on the top point of the tree.
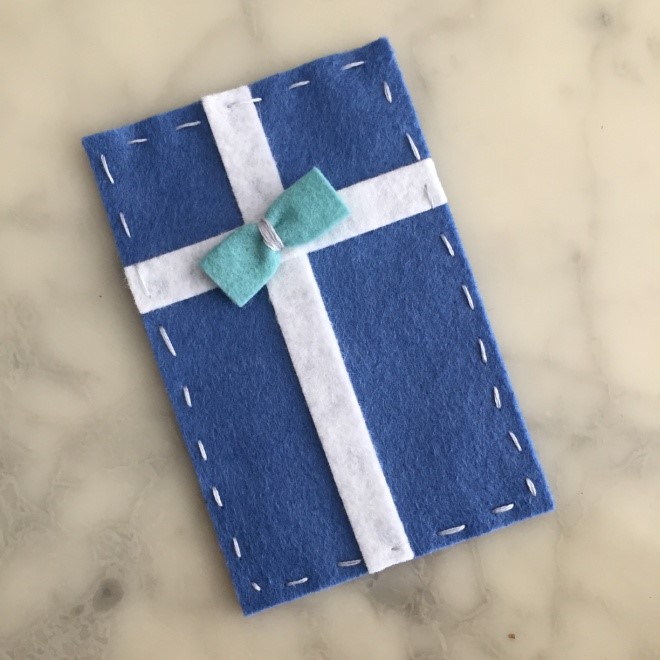
On the gift box, I made the measurements for the “ribbon” pieces longer than the backing piece because I like to cut my pieces a little bigger and then trim them after I’ve glued them on, just to make sure they reach all the way to the edge of the backing piece.
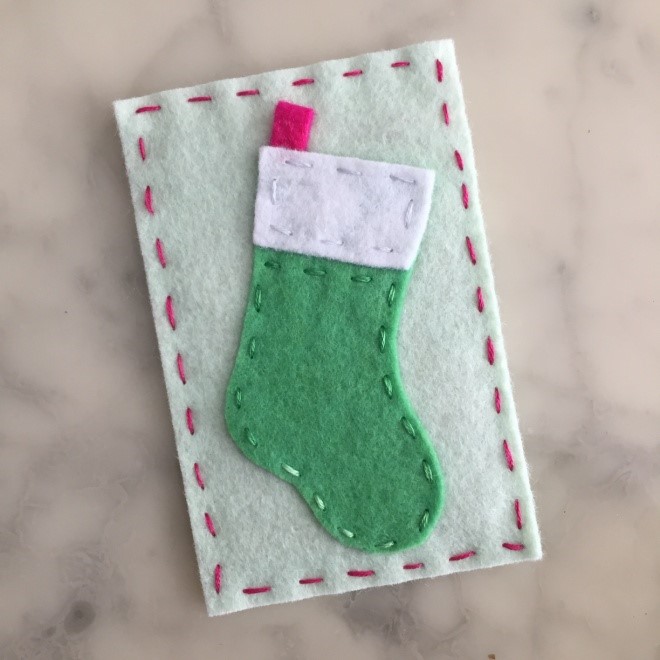
On the stocking, one end of the hanging loop will be sandwiched between the envelope backing piece and the back side of the stocking piece, and the other end will go between the front side of the stocking piece and the back side of the cuff piece, as shown. Glue well.
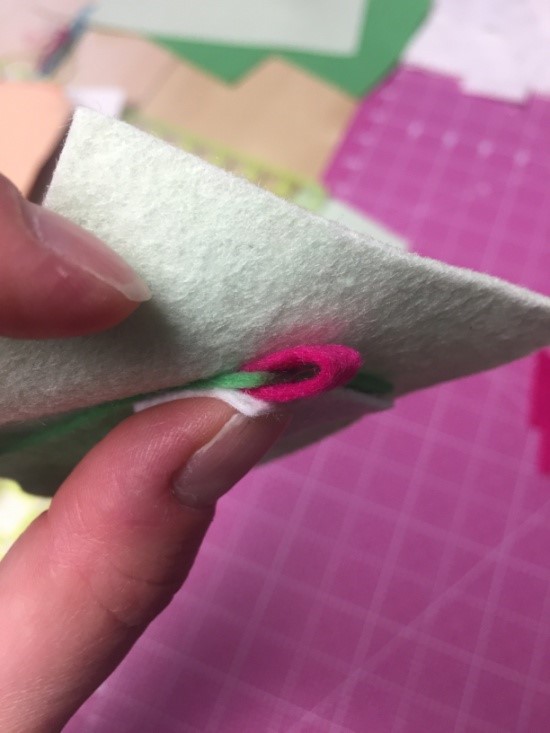
With all of the designs, but especially with the stocking, I recommend stopping at this point and letting the glue dry thoroughly overnight before finishing.
5. Finish embellishing your design, if needed.
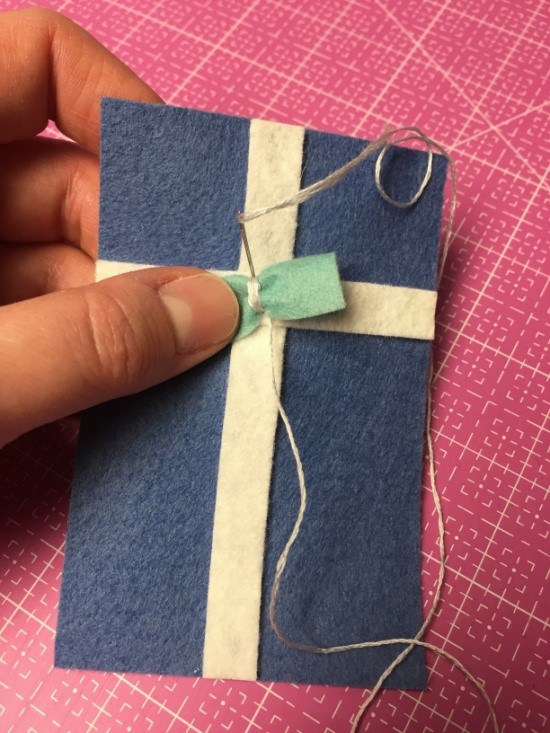
For the gift box, add the bow by folding the bow rectangle in half lengthwise. Secure it by wrapping embroidery thread around the middle several times, leaving both ends of the thread tails free. Thread one of the thread tails onto an embroidery needle and, holding the bow in place, stitch through the “ribbon” and envelope backing on the top side of the bow, pulling the tail thread to the back side of the envelope. Repeat with the other tail thread on the bottom side of the bow, then tie the two thread tails in a knot on the back side and clip the extra thread.
For the stocking, your glue should hold everything in place, but I chose to add additional stitching for security and to add to the design. I added a simple running stitch to the cuff in silver embroidery thread and one in green to the stocking body.
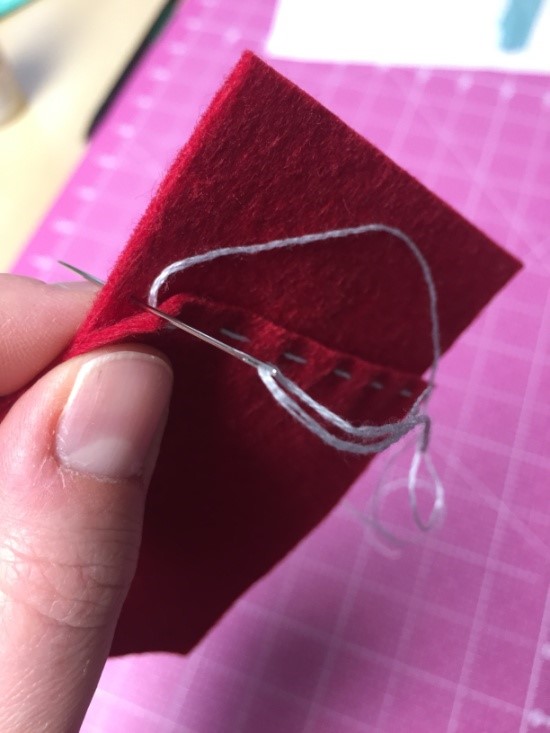
6. To finish the envelope, attach the front piece to the back with a simple running stitch using embroidery thread. First, run a small running stitch along the top of the front envelope piece (the small rectangle, the one without the design embellishment). Your stitch should start from the back side of the front piece and only run along the top of the front piece (you’re not stitching it to the backing piece yet). I work from right to left, but either direction will work.
Once you reach the end of the top side, align your front piece with the backing piece, wrong sides together, then continue your running stitch (without cutting your thread) into the backing piece. Continue stitching all the way around the envelope (on the bottom half, you’ll be stitching through both the front and back pieces; on the top half, you’ll only be stitching through the backing piece) until you return to this point, then tie off your thread with a simple knot sandwiched between the two envelope pieces.
7. Now you’re ready to stuff those envelopes full of gift cards and pass them on to everyone you know. Enjoy!

Hi! I’m Jessica, a sewing, baking, editing, mommying Texan transplanted to the Midwest.
Check out Jessica’s blog A Blue Sky Kind of Life!